My Dropbar Kinetics Brompton
version 5/27/2024 10:54 AM
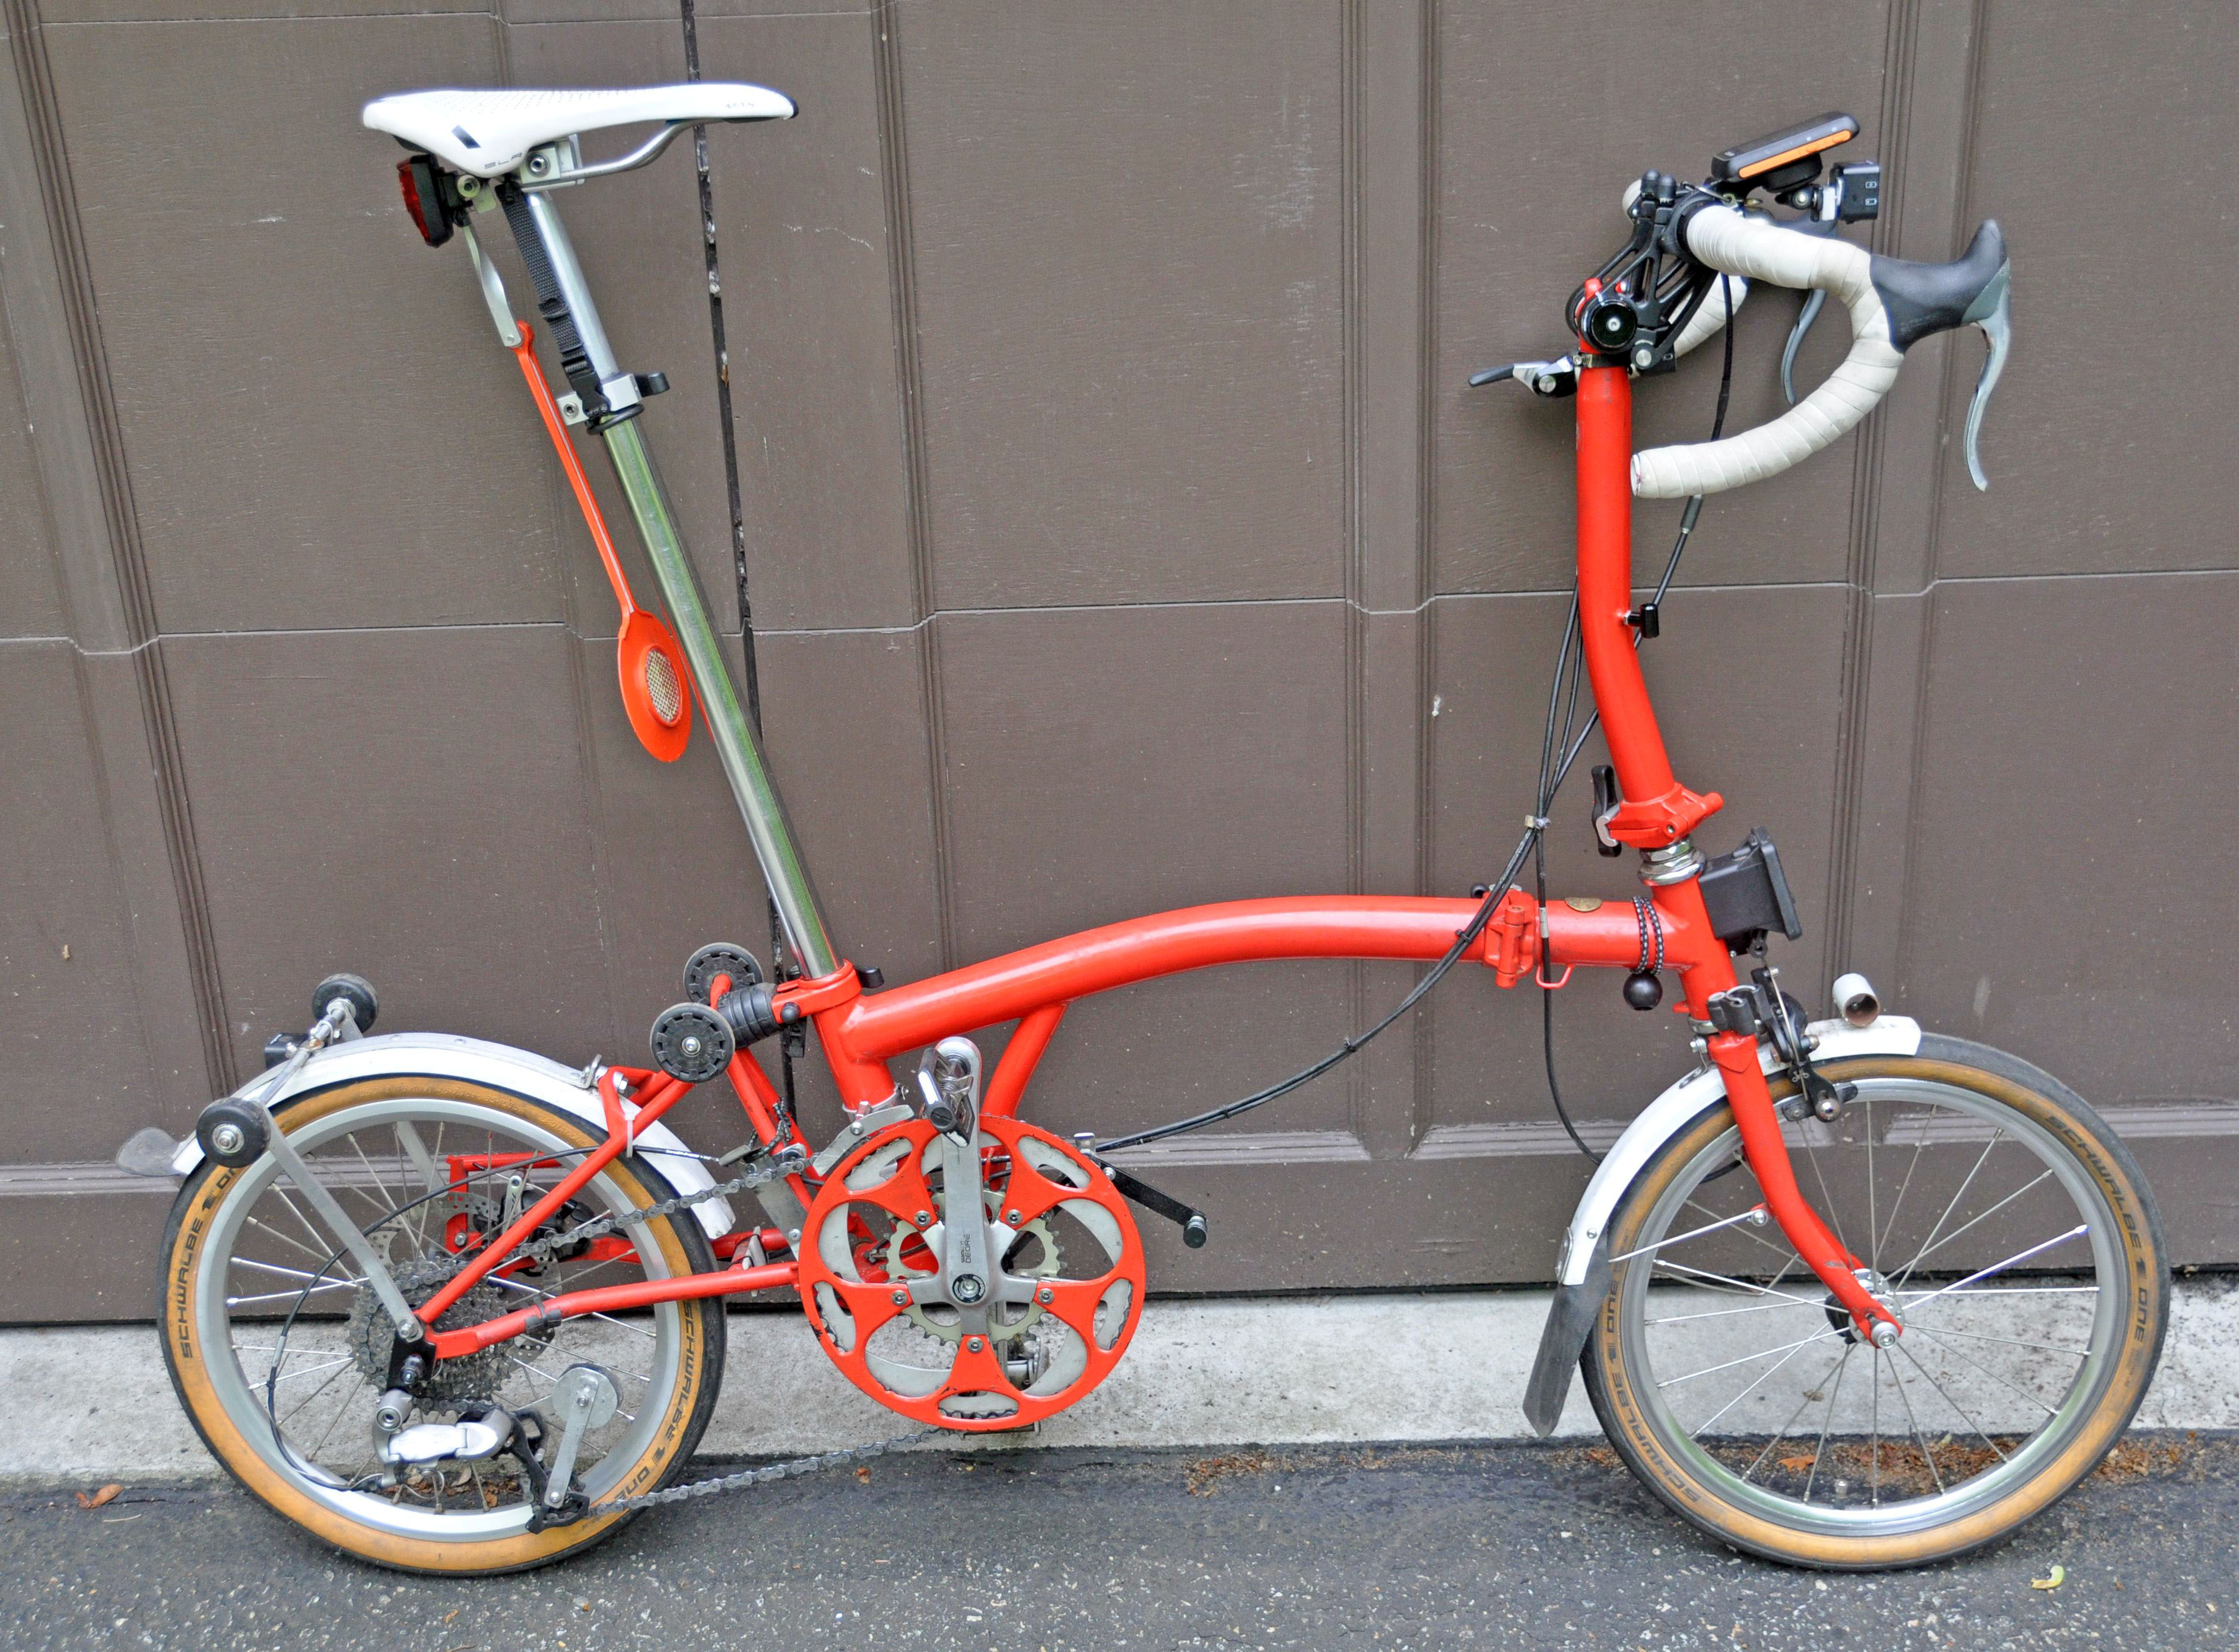
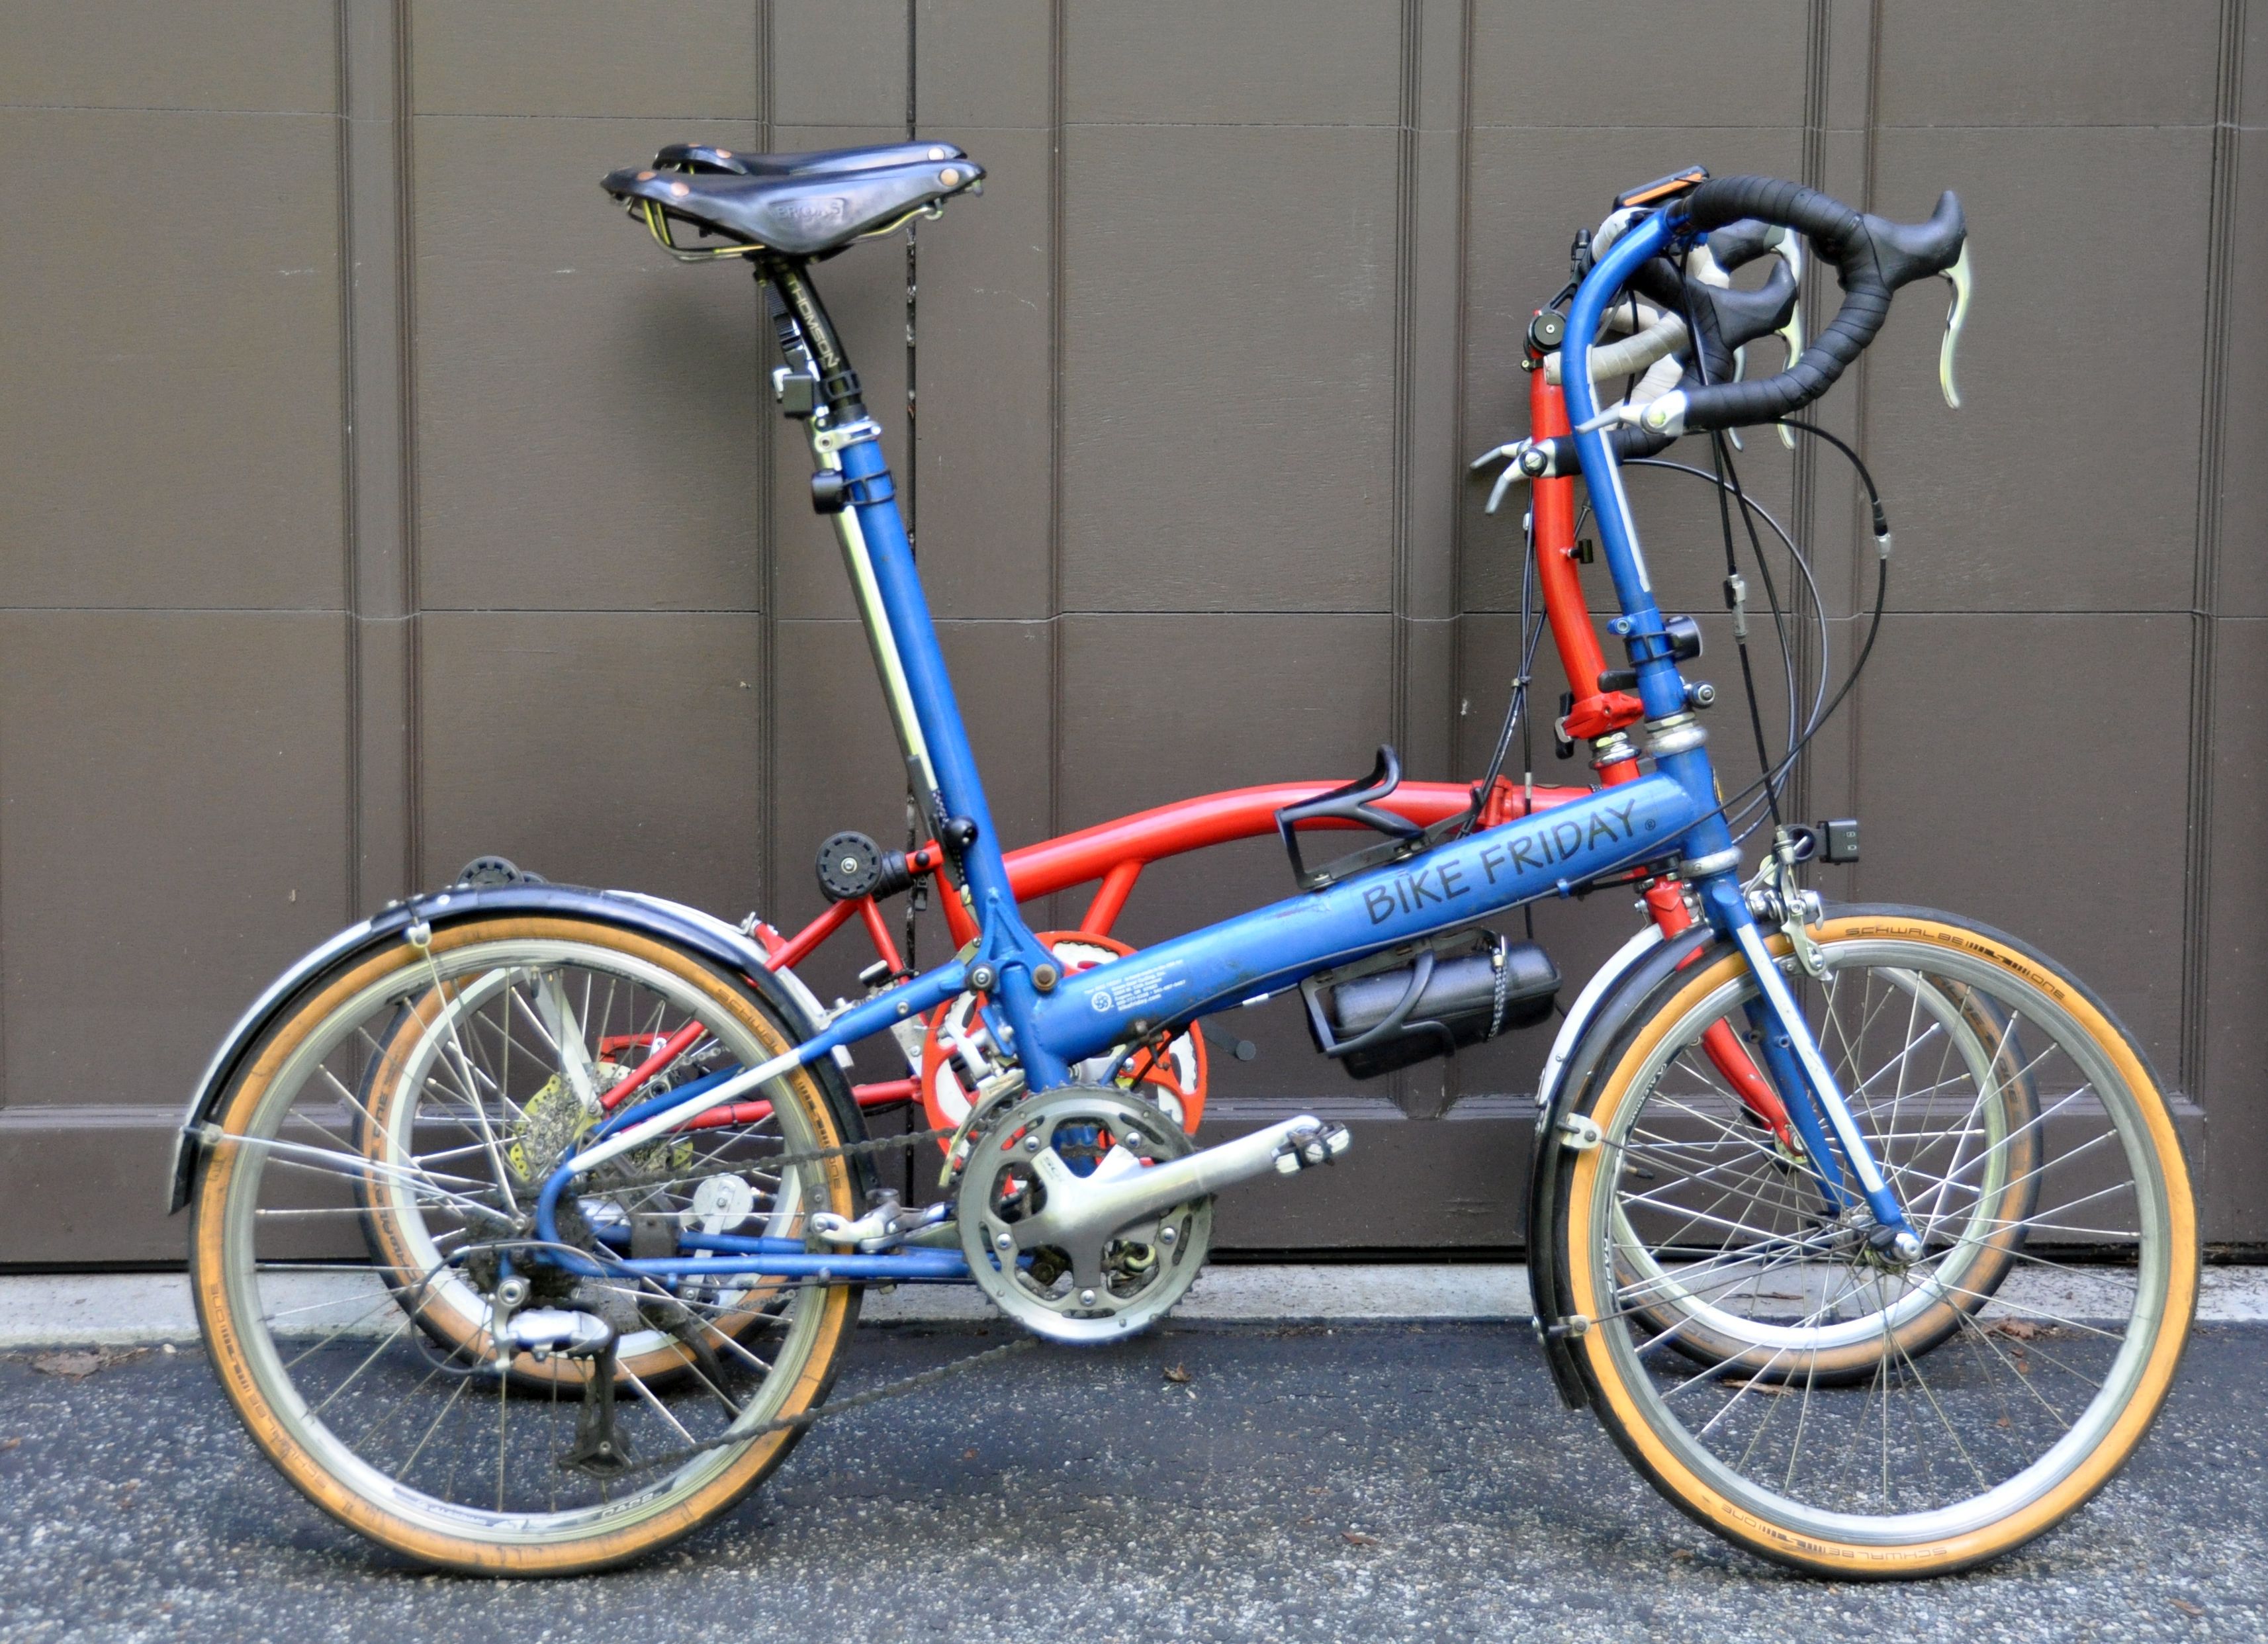
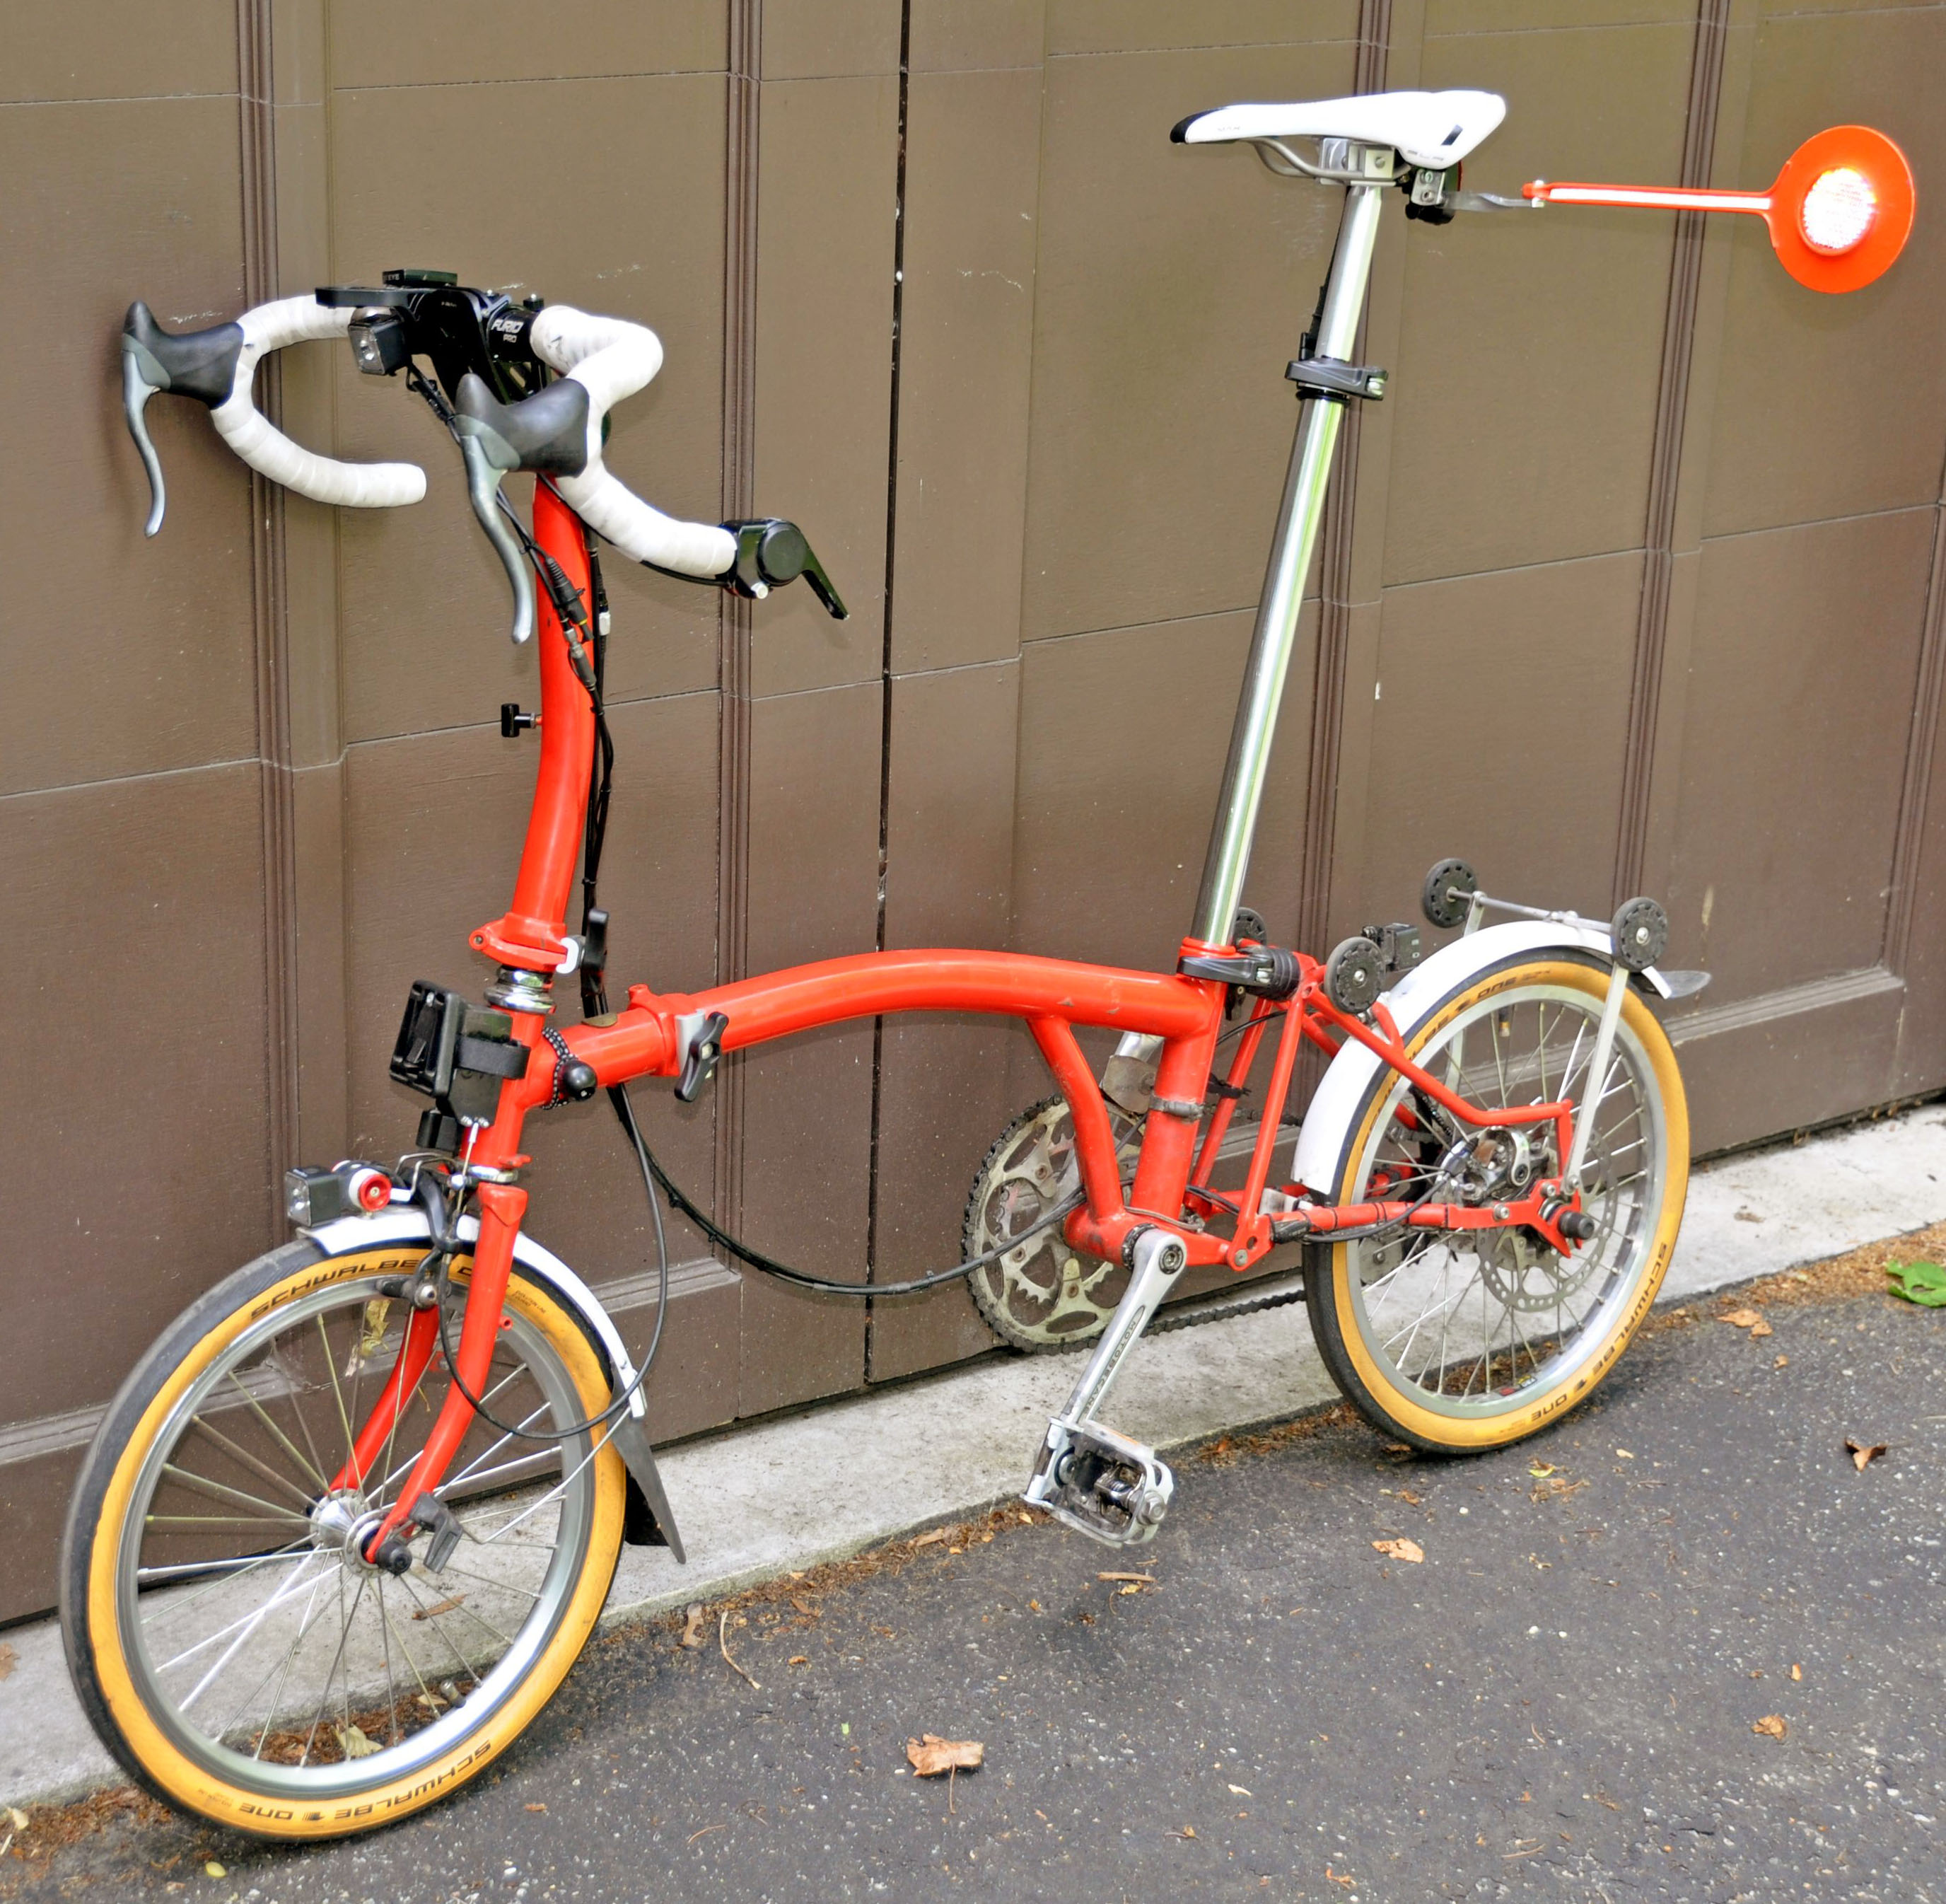
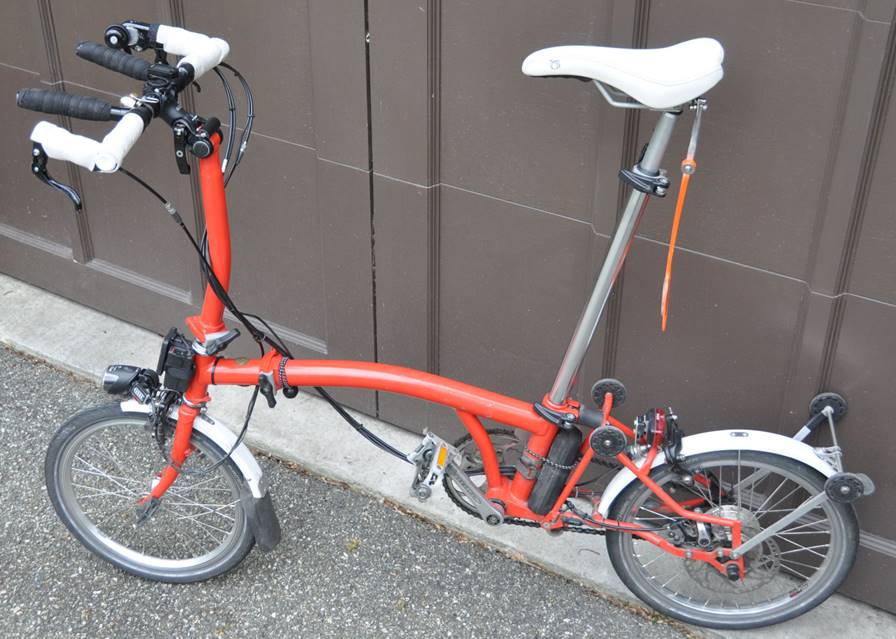
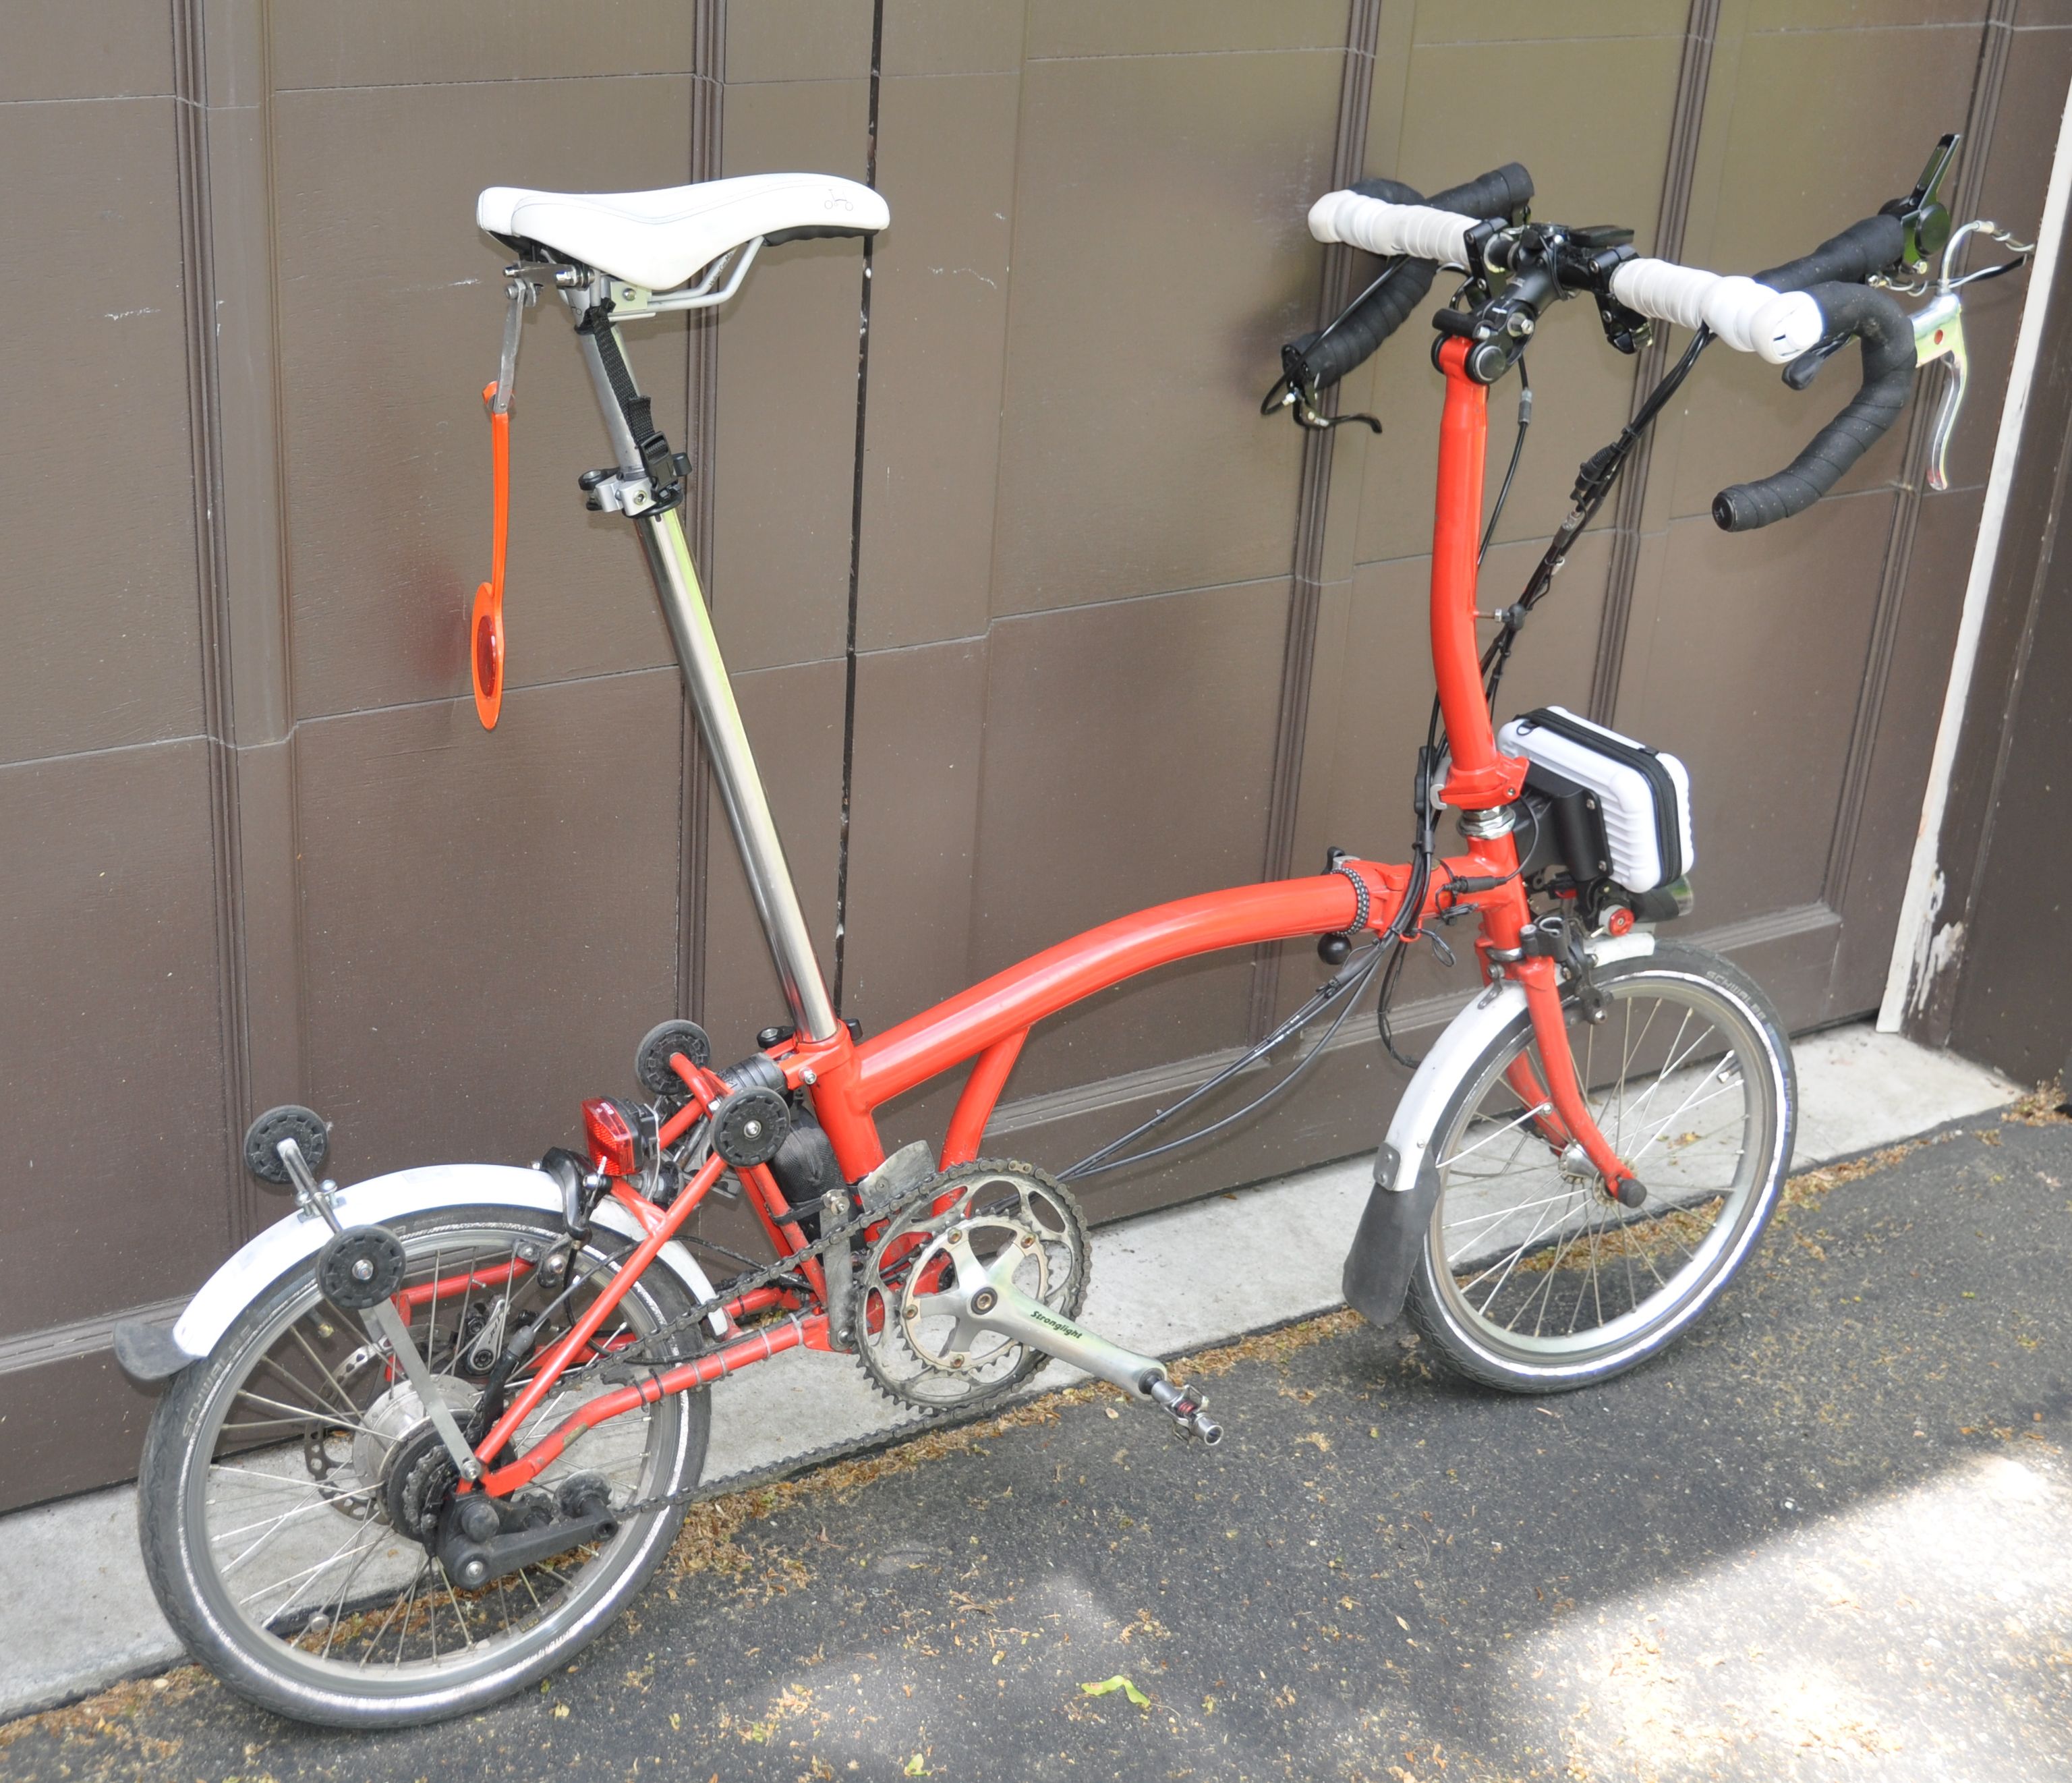
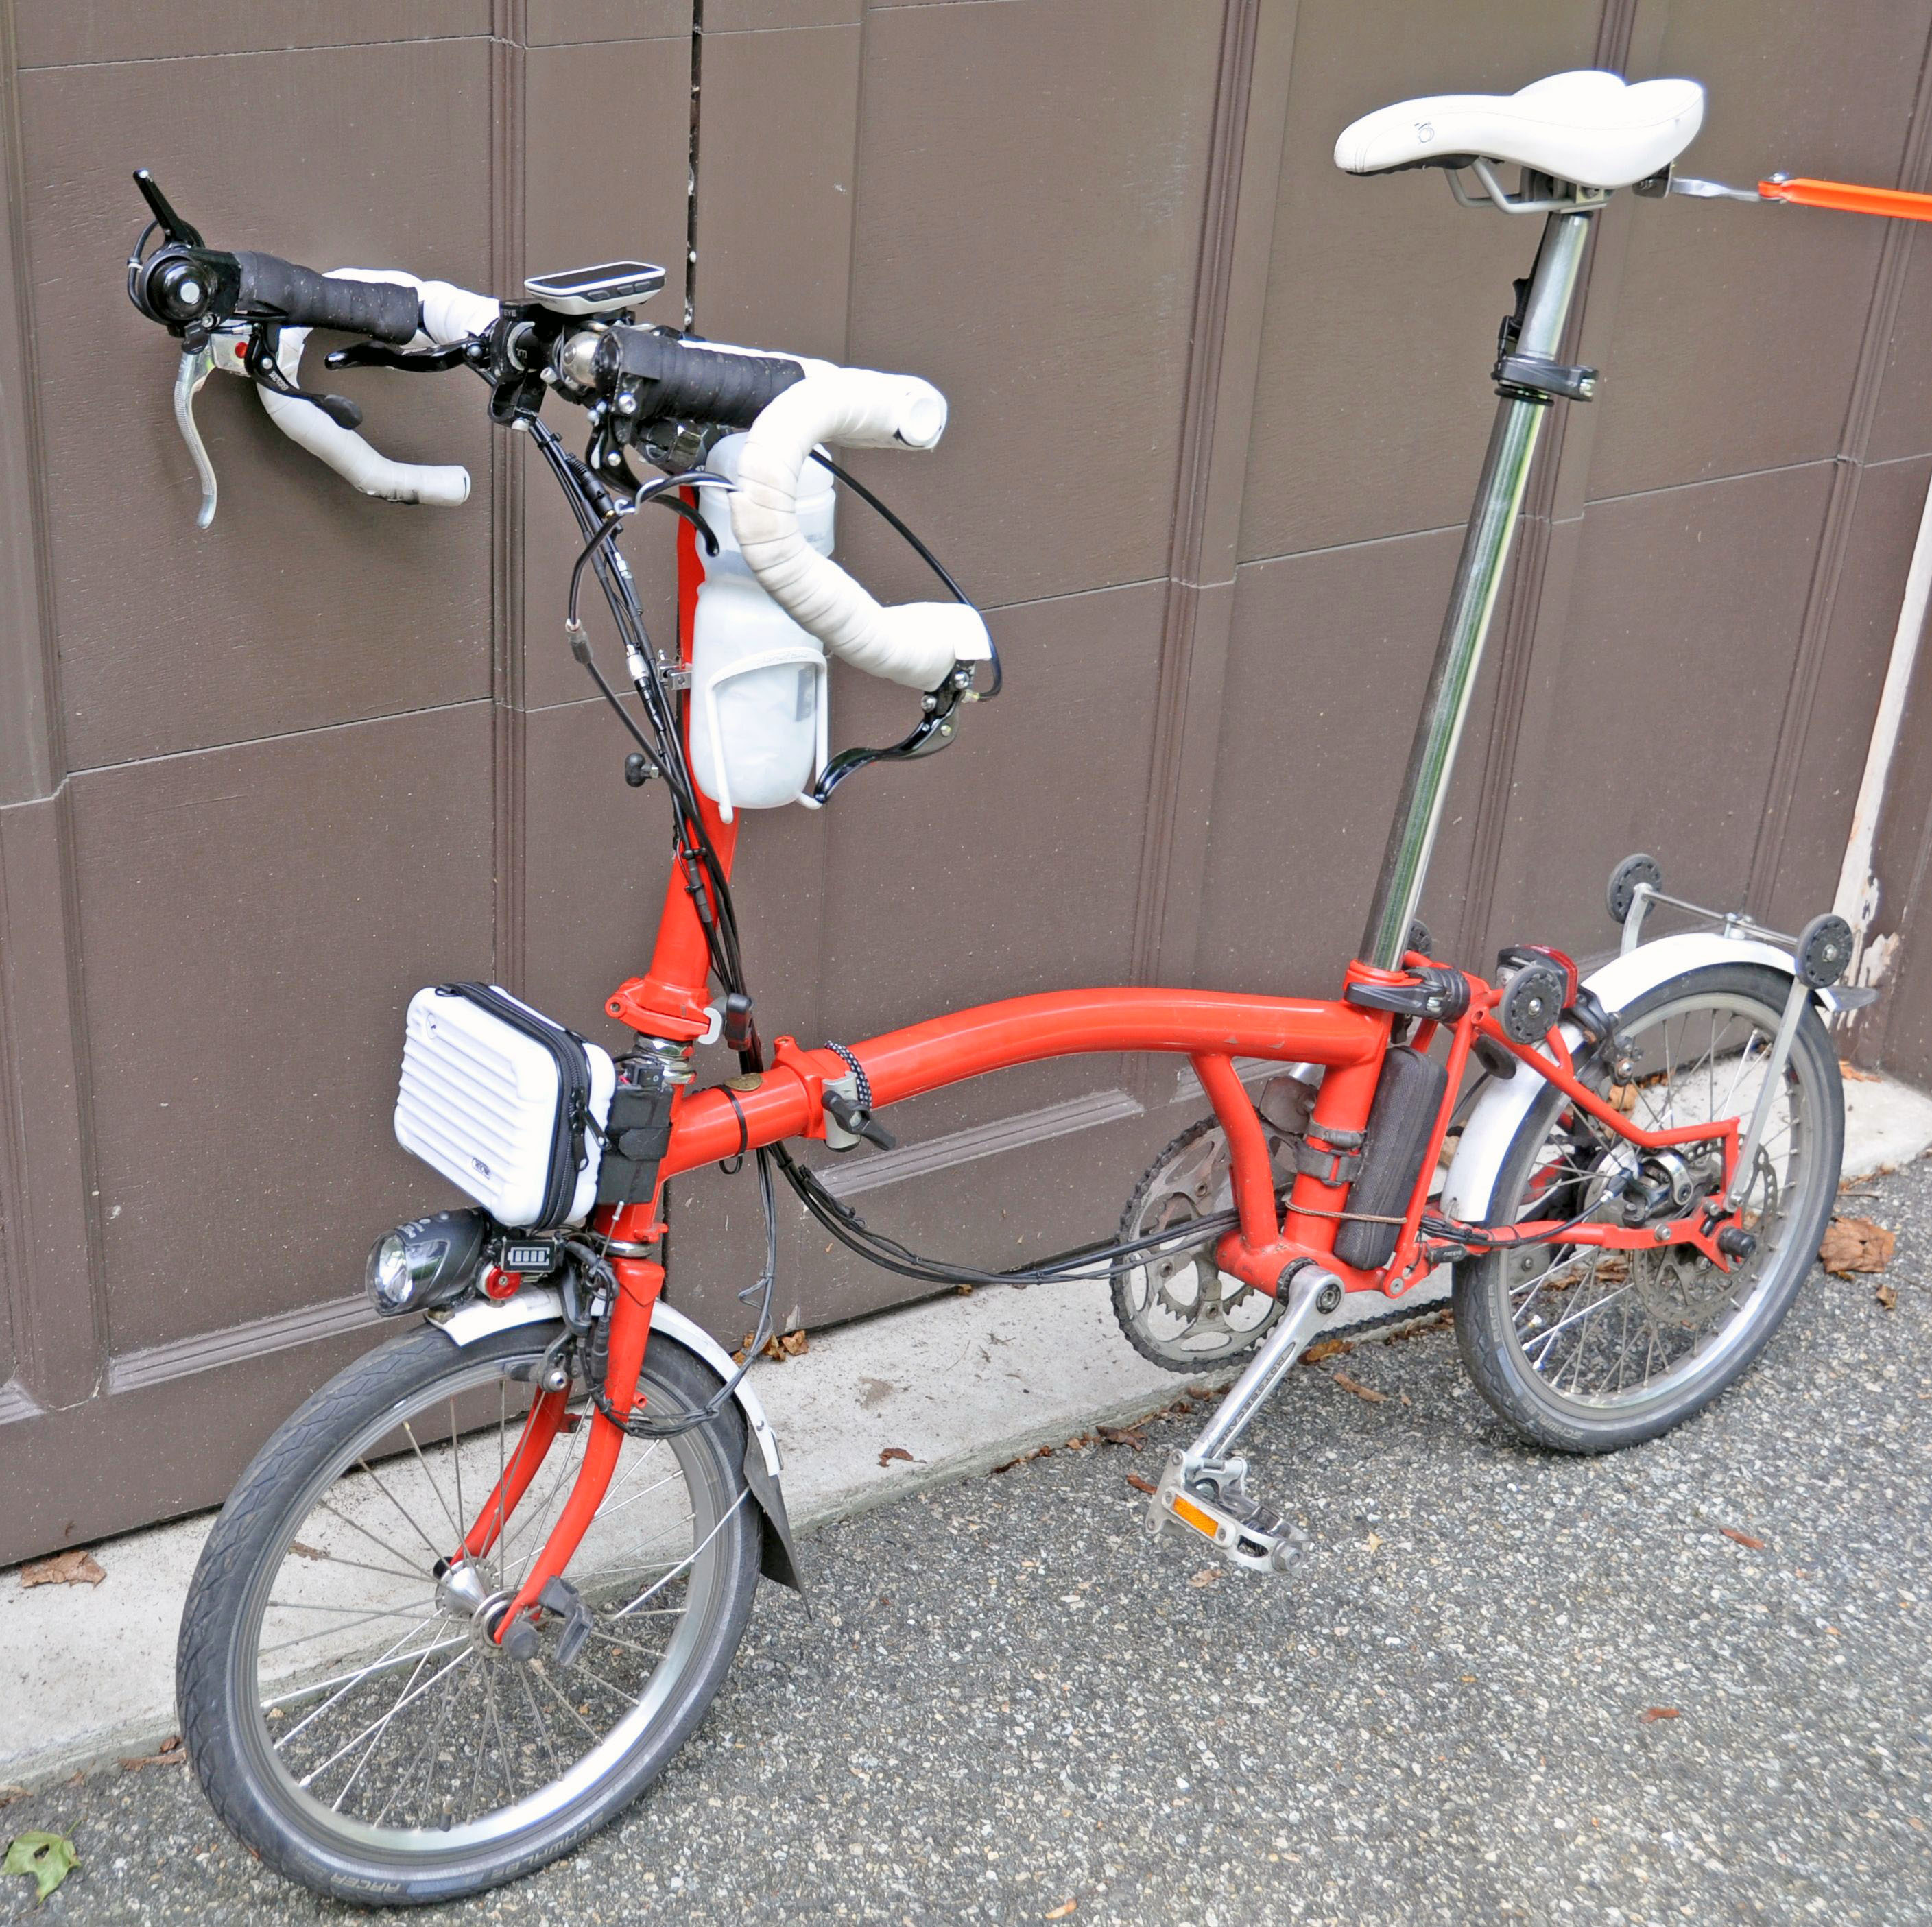
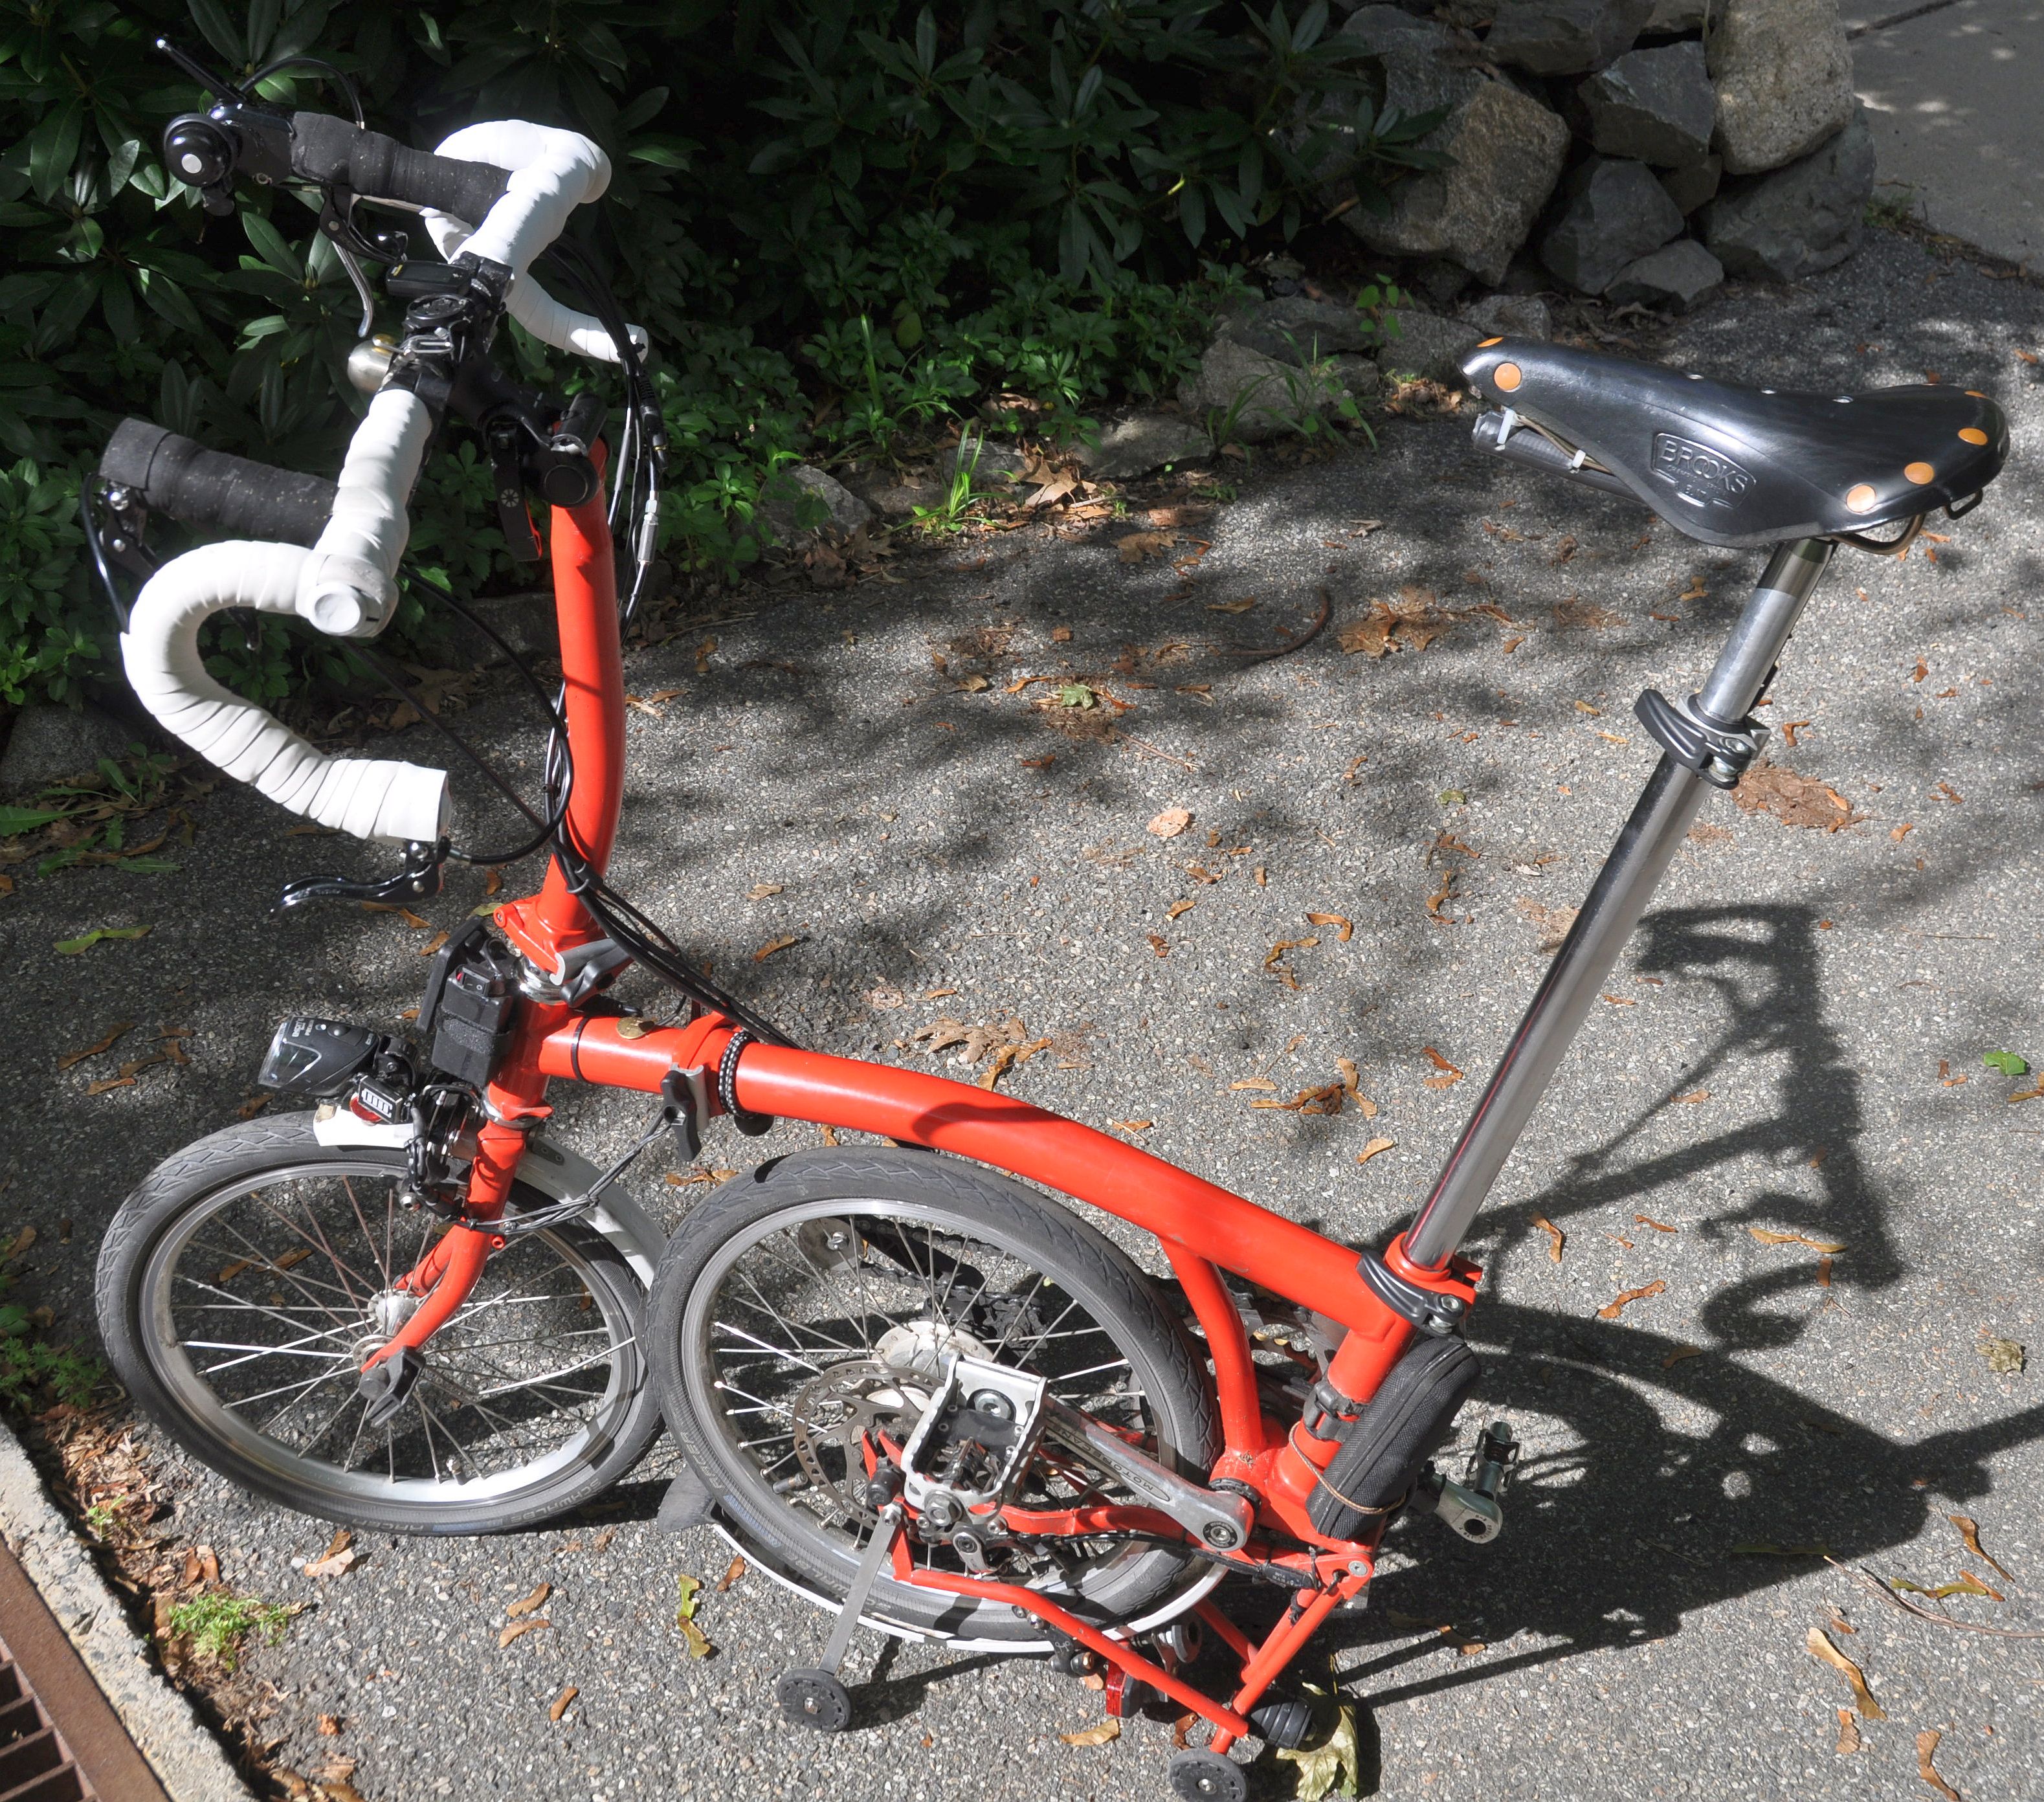
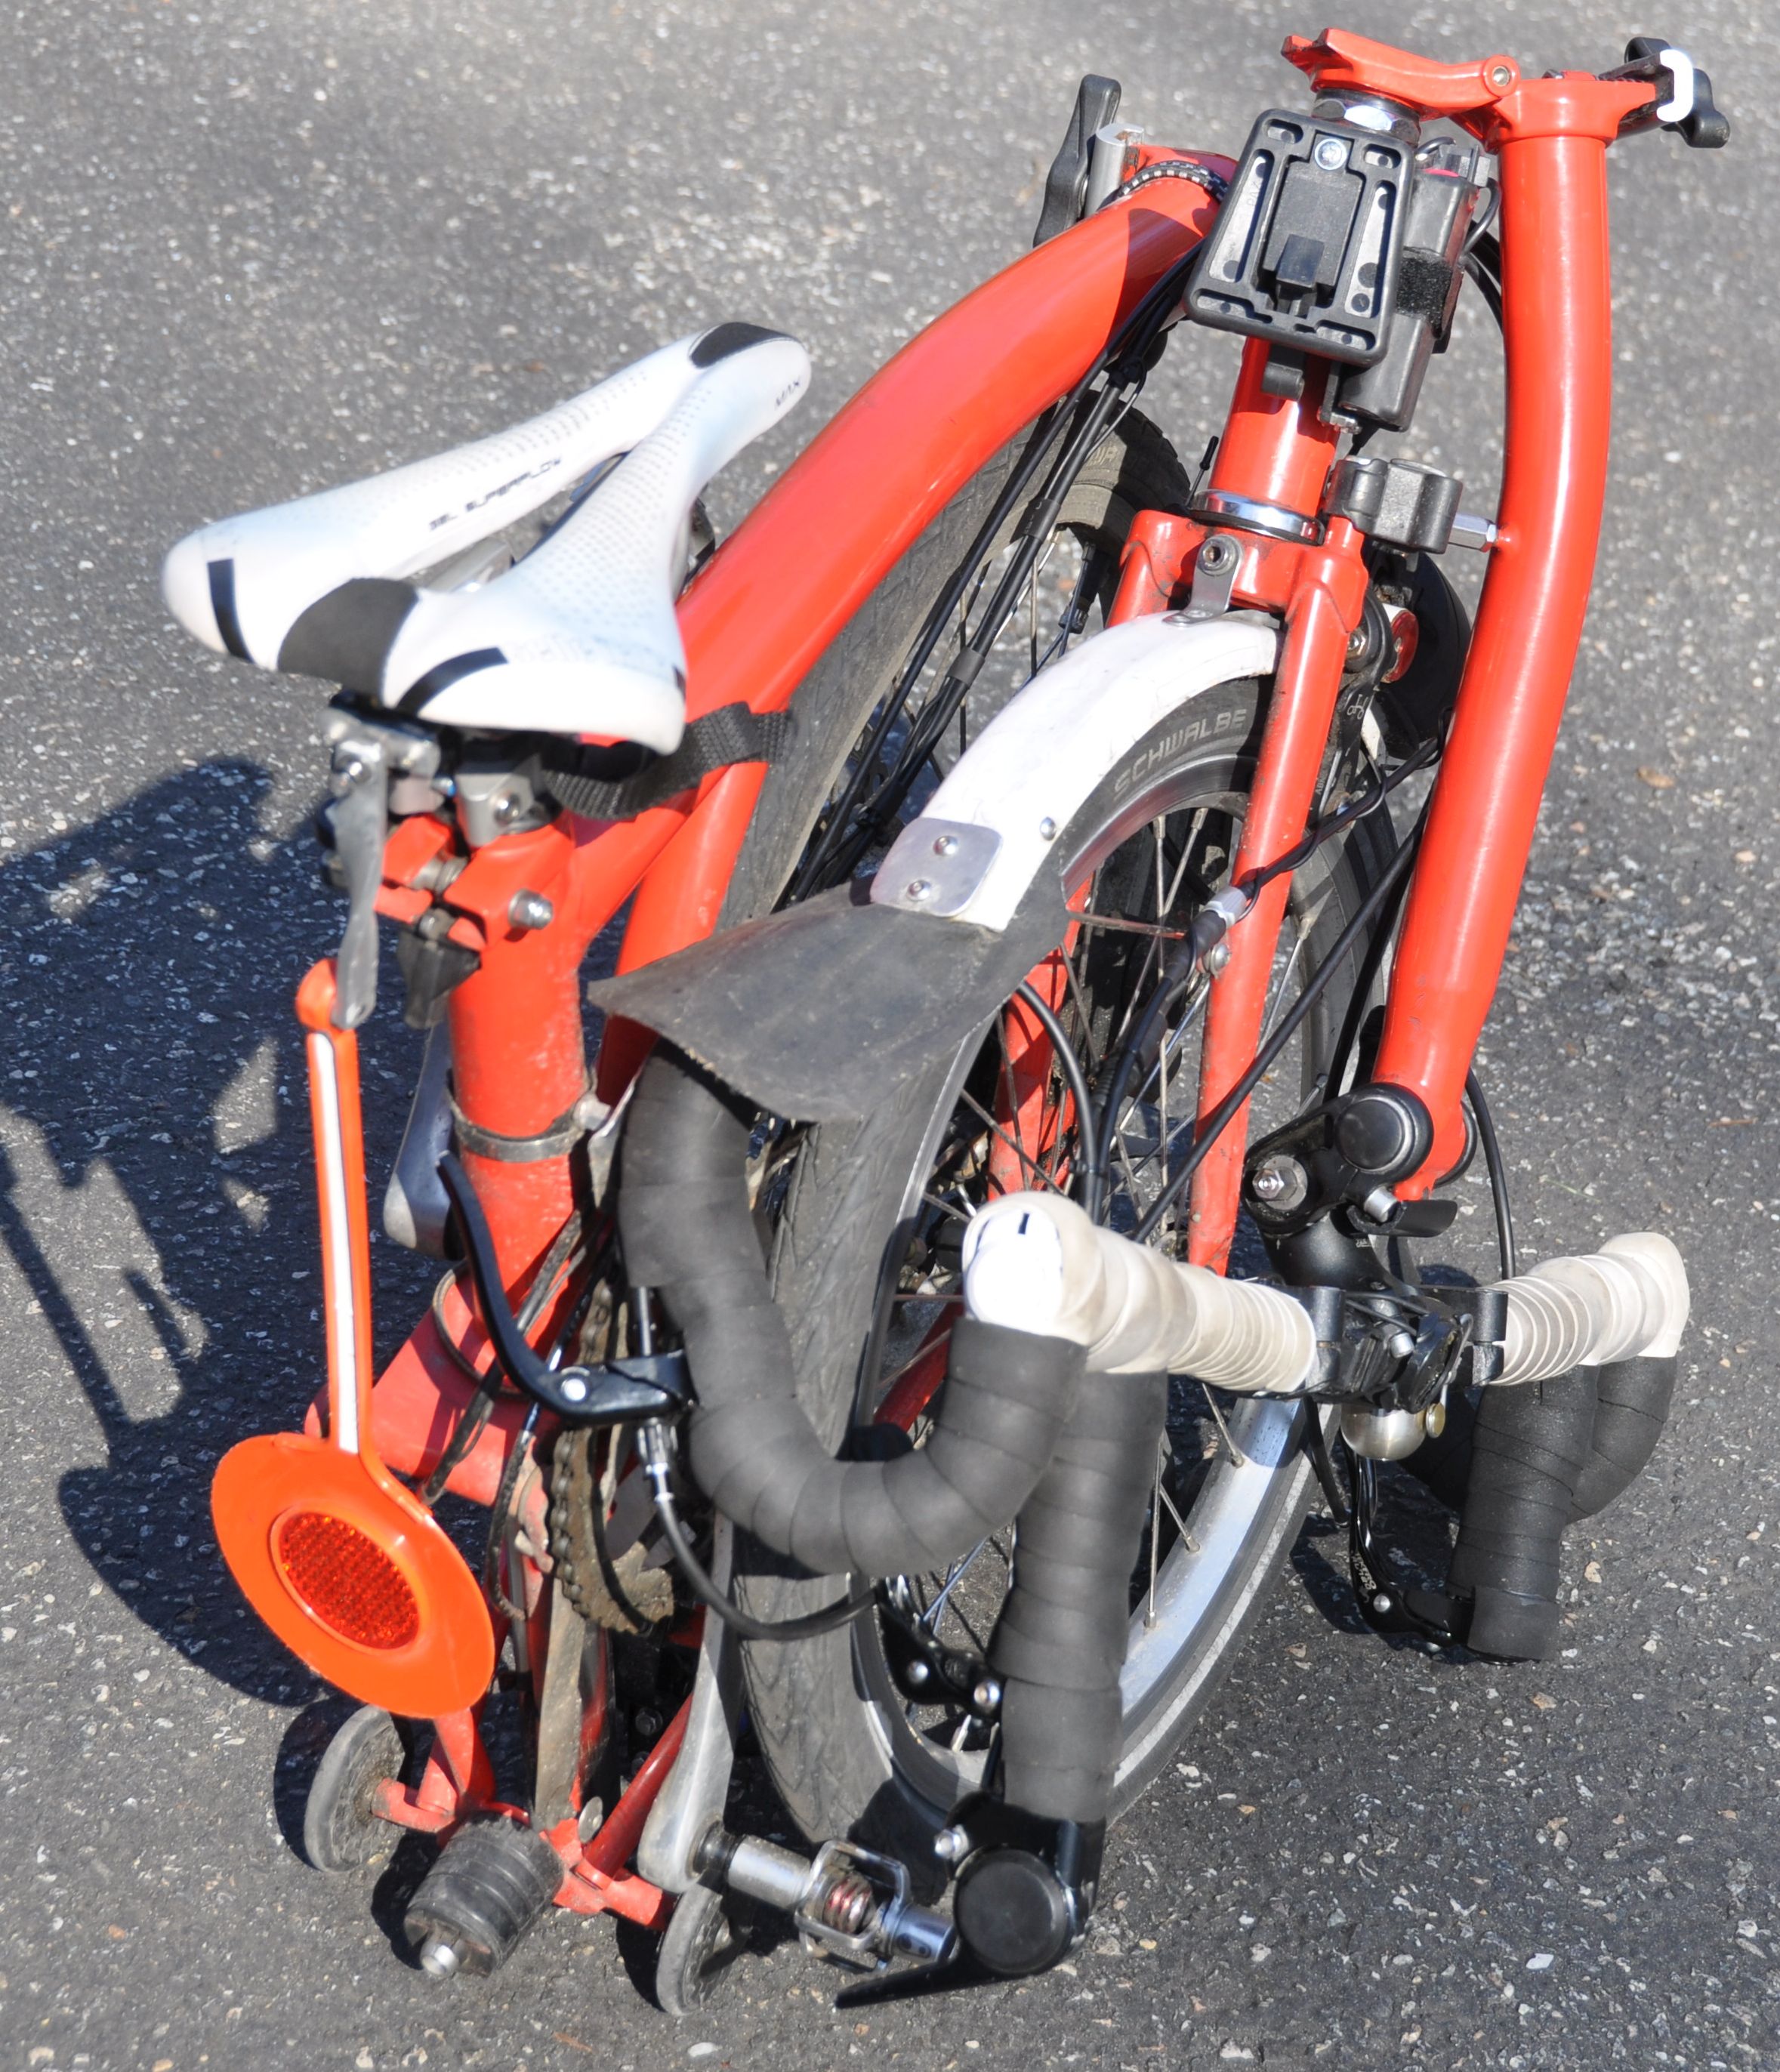
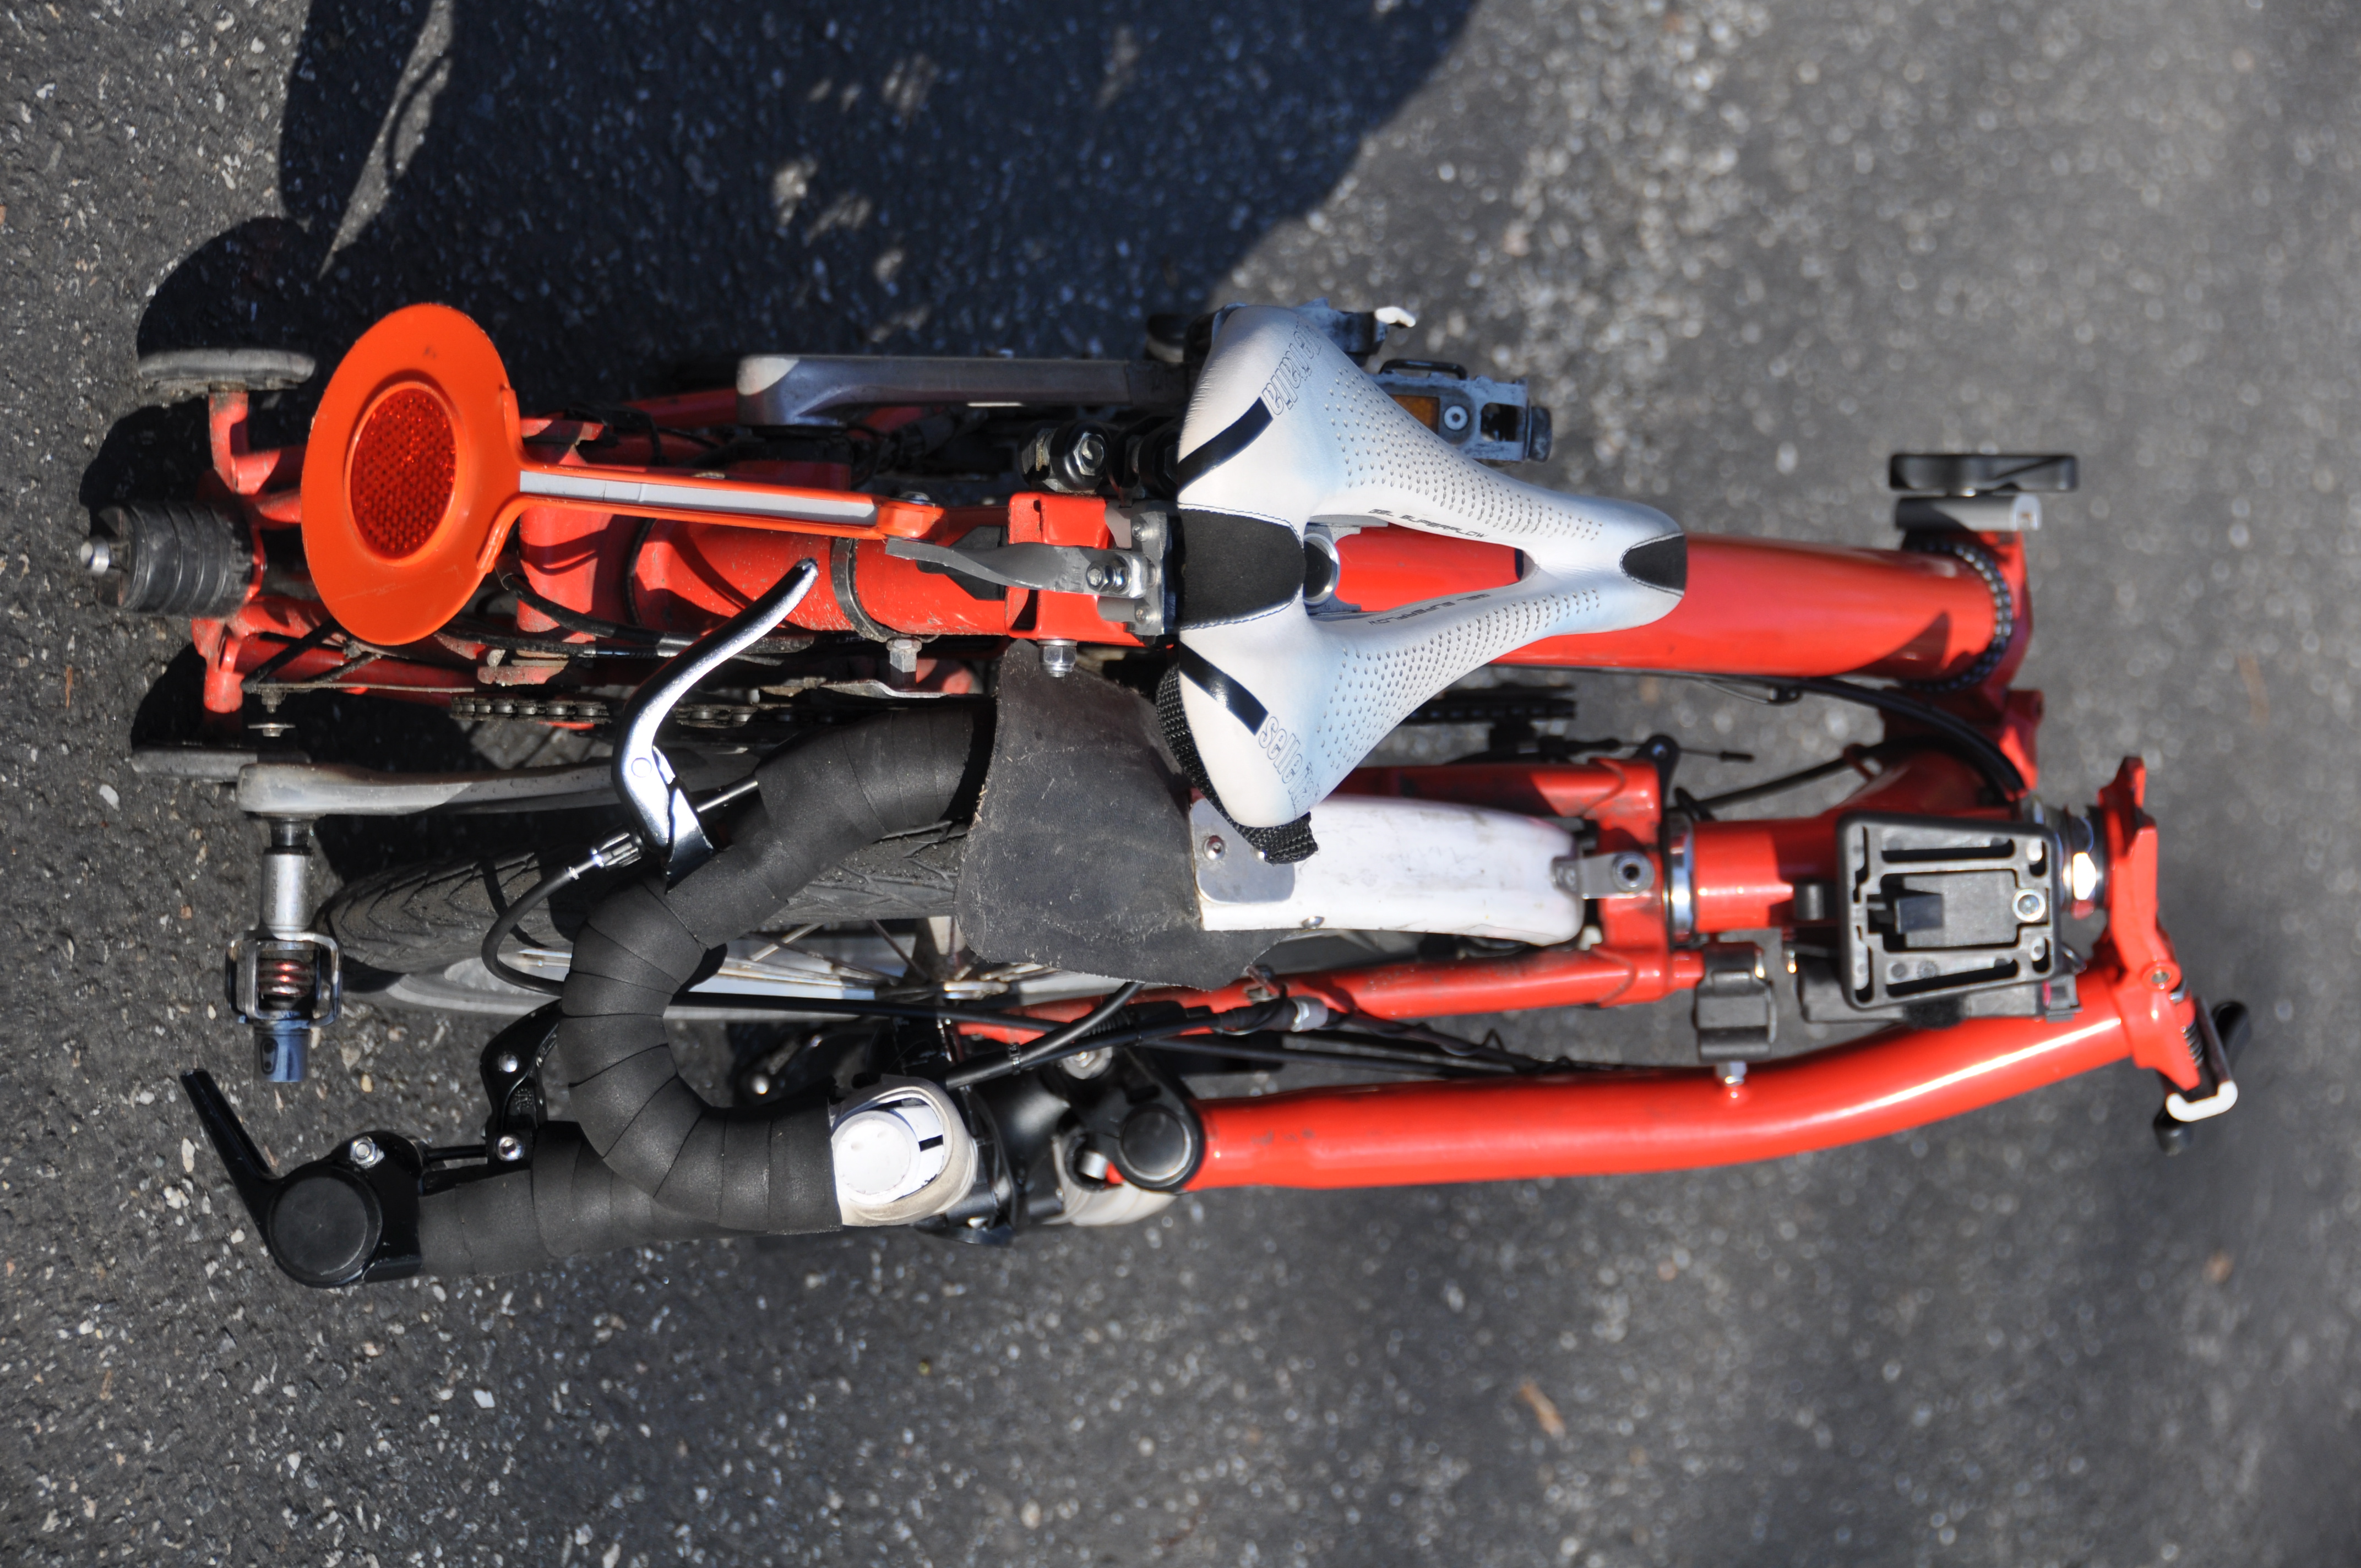
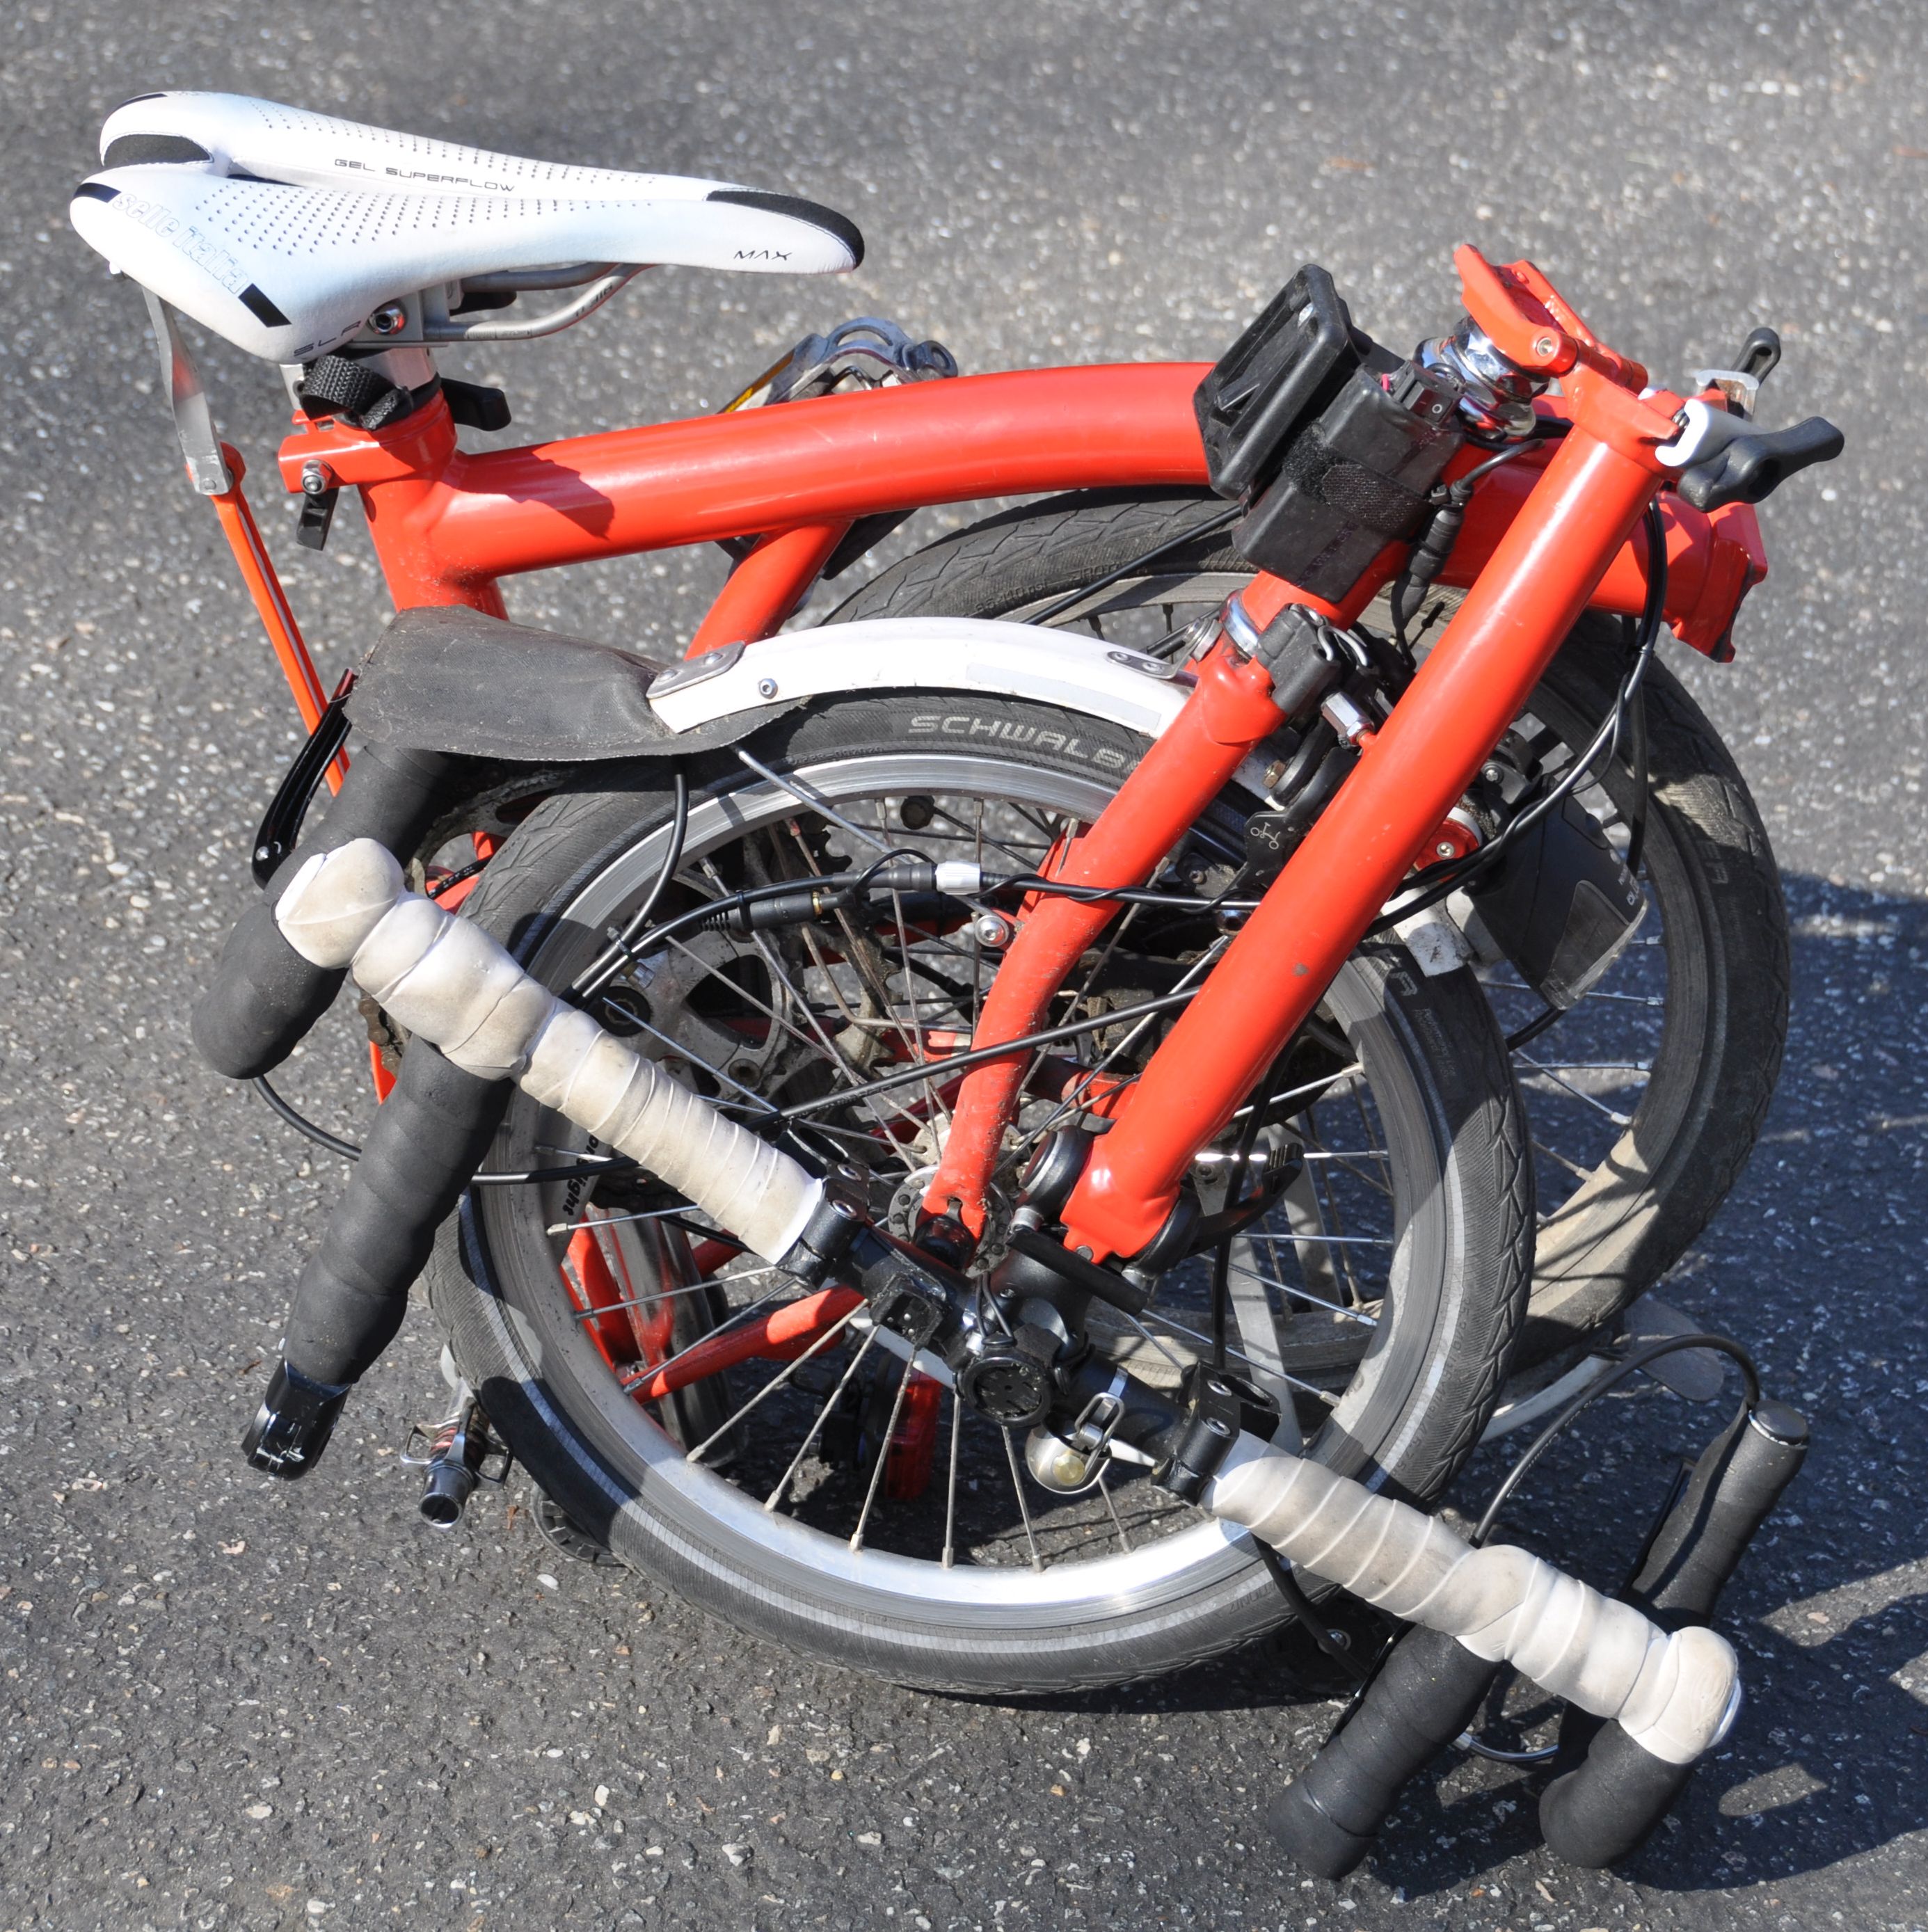
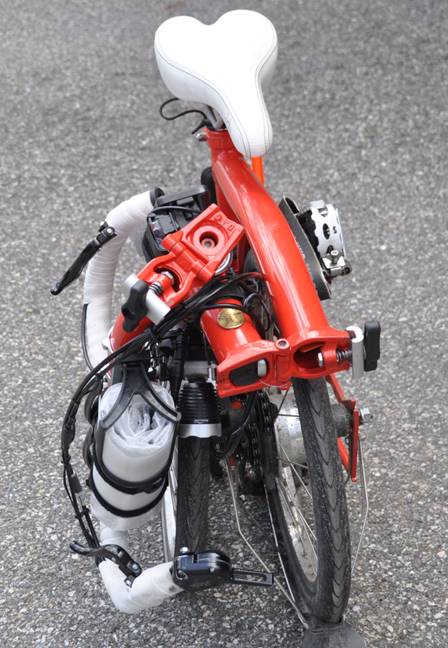
Here is a dream bike – the Drop Bar Kinetics Brompton. There are many different dream bikes. Some people want a lightweight titanium bike, others special editions or paint or stylish accessories. My goal is a combination of functionality and elegance without caring too much about weight. For me, the most essential functional parts are foot retention, gearing and having a bike which fits my body. For the foot retention, I prefer clipless pedals and managed to modify the folding Brompton pedal. The gearing is 2x 9 with a double chainring and derailleur and was possible by using a wider rear triangle provided by Kinetics in Glasgow. Fitting my body was accomplished with a foldable Dahon D4D stem or a Genetic stem.
A folding bike poses some challenges for adding accessories. Many standard mounting options don’t work or interfere with the fold. This is even more challenging with the Brompton than with my Bike Friday due to the more compact fold. However, after some frustration and iterations, I found very good solutions for all accessories – there is no need to move or rotate them for folding, and they don’t interfere with the elegant look of the Brompton.
Many of the modifications have been posted on the Facebook page “Brompton hacks”, URL https://www.facebook.com/groups/796190400521866/ There you will find additional comments by other people. Some recent updates are in this document, but not on Facebook.
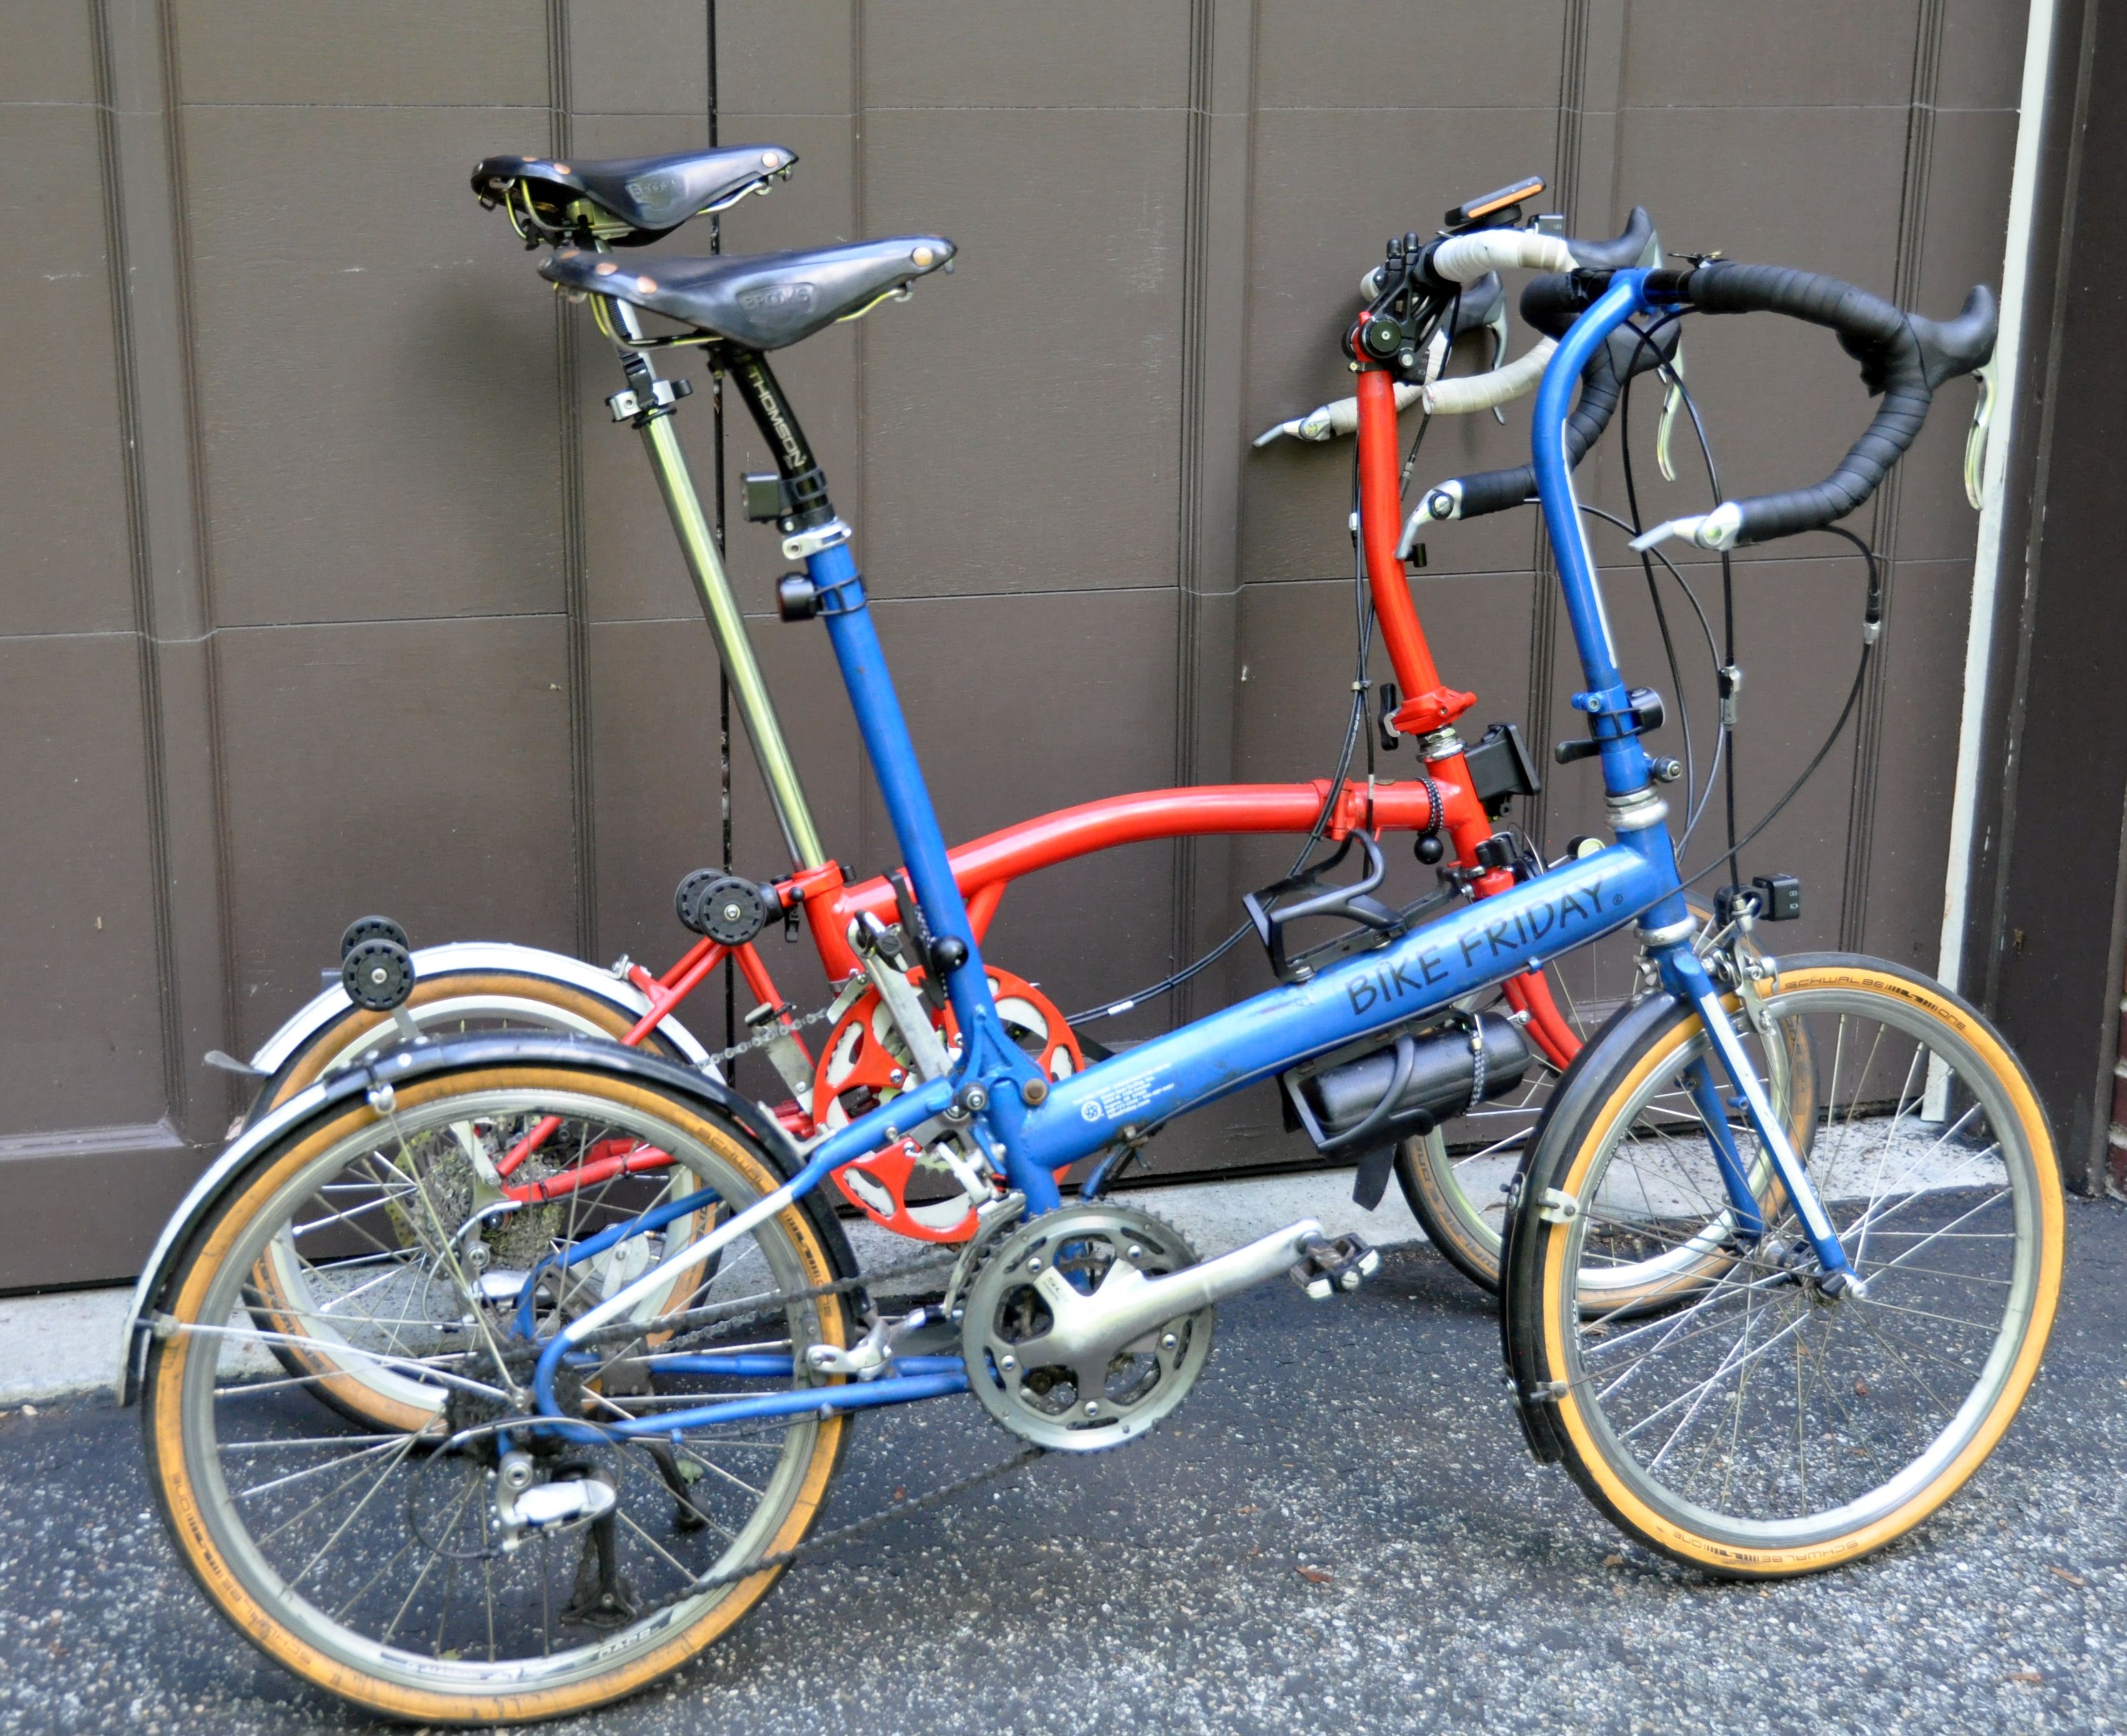
The tale of two bikes ...
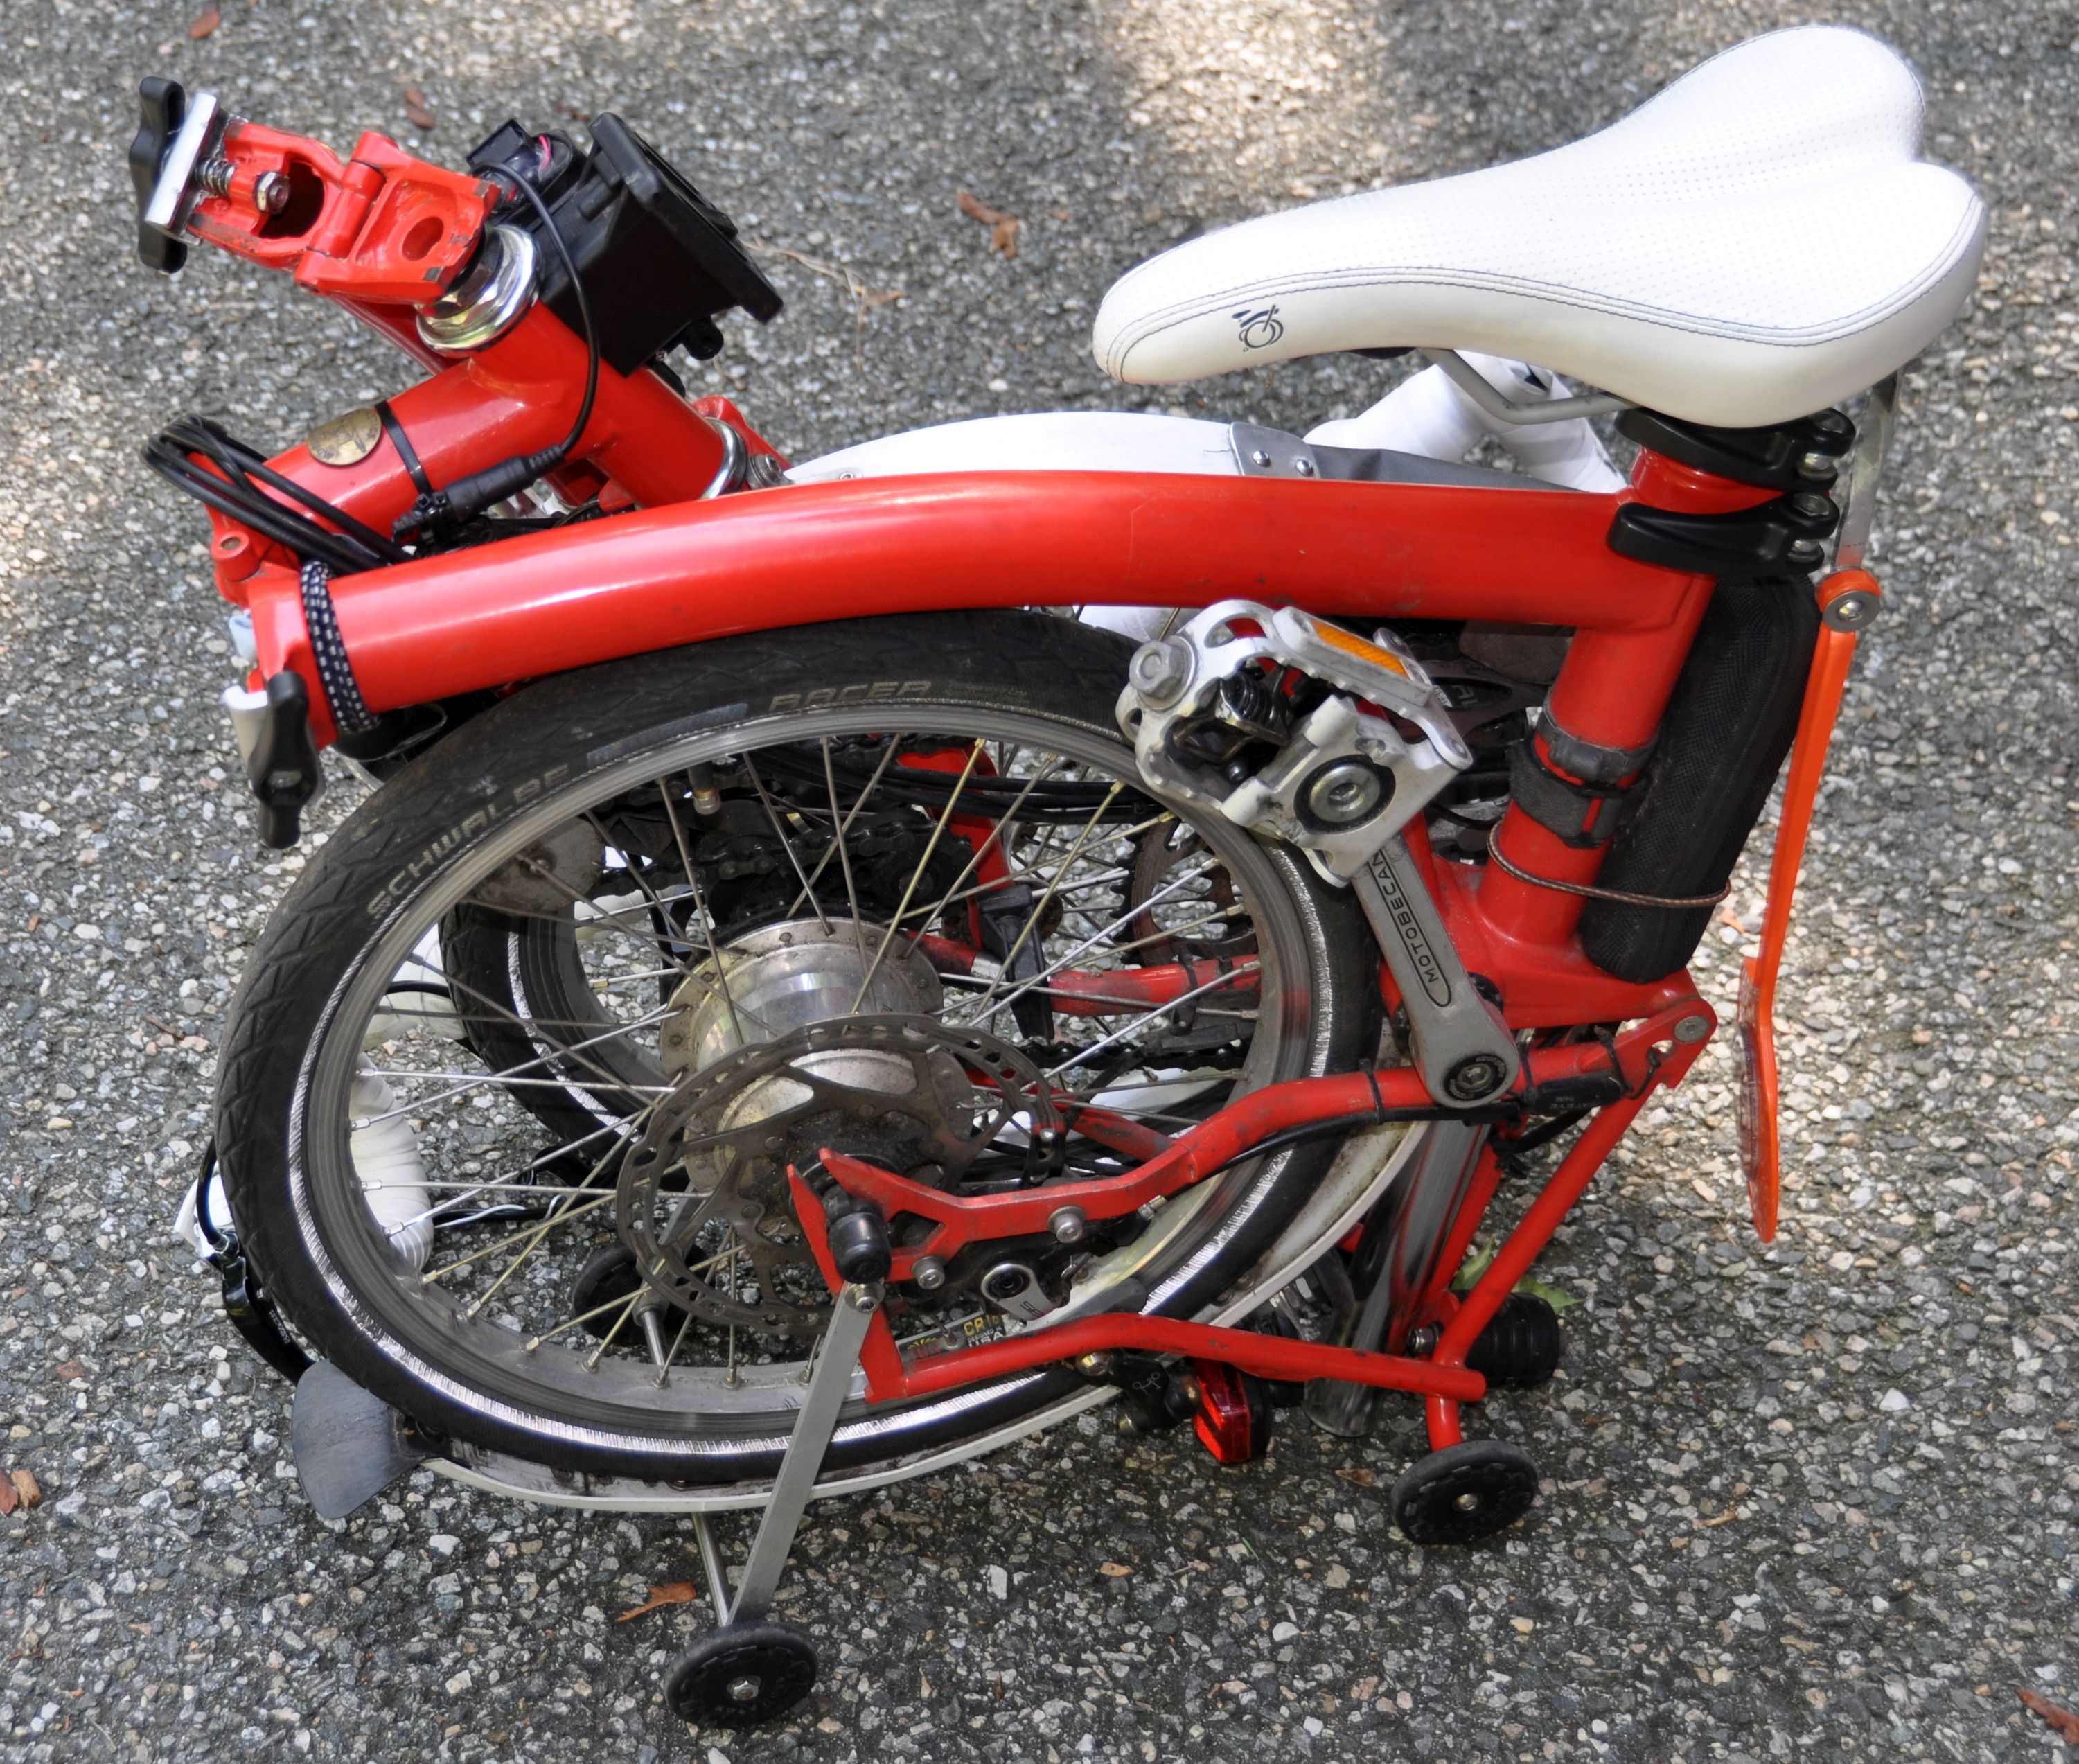
For many years, I have used a Bike Friday Pocket Rocket as my touring bike. It has everything I want for touring: Wide range gearing, drop handlebar, clipless pedals, and it can be easily packed into a suitcase. I bought the Brompton for its easy and compact fold and wanted to use it mainly for commuting and travel. Realizing the advantages of the fold and the portability, I started using it even for longer touring. Over the years, I have now modified the Brompton so that it (almost) matches the geometry and capabilities of the Bike Friday, and I have used it for multi-day touring and climbing high mountain roads. I still prefer the Bike Friday for longer touring, but if major travel or frequent packing is involved, the Brompton is the winner.
The gearing
Kinetics Alfine 11 modification
Genetic Juzzi/Satori Turn Up stem with Ergon Bar Ends
Pedals
Improving the fold and handling
Carrying grip for Brooks saddle
Accessories
Small bags
Using the bottle cage: Bottle cage case Dimpa bag
Larger Bags
Adapter for Ortlieb Handlebar Bag (Klickfix)
Seatpost mount for Brompton carrier block
Carrying bags for the Brompton
Packing the Brompton
Using the Brompton cardboard box
Other
The problems with the Andros stem
Derailleur system for touring Back to top
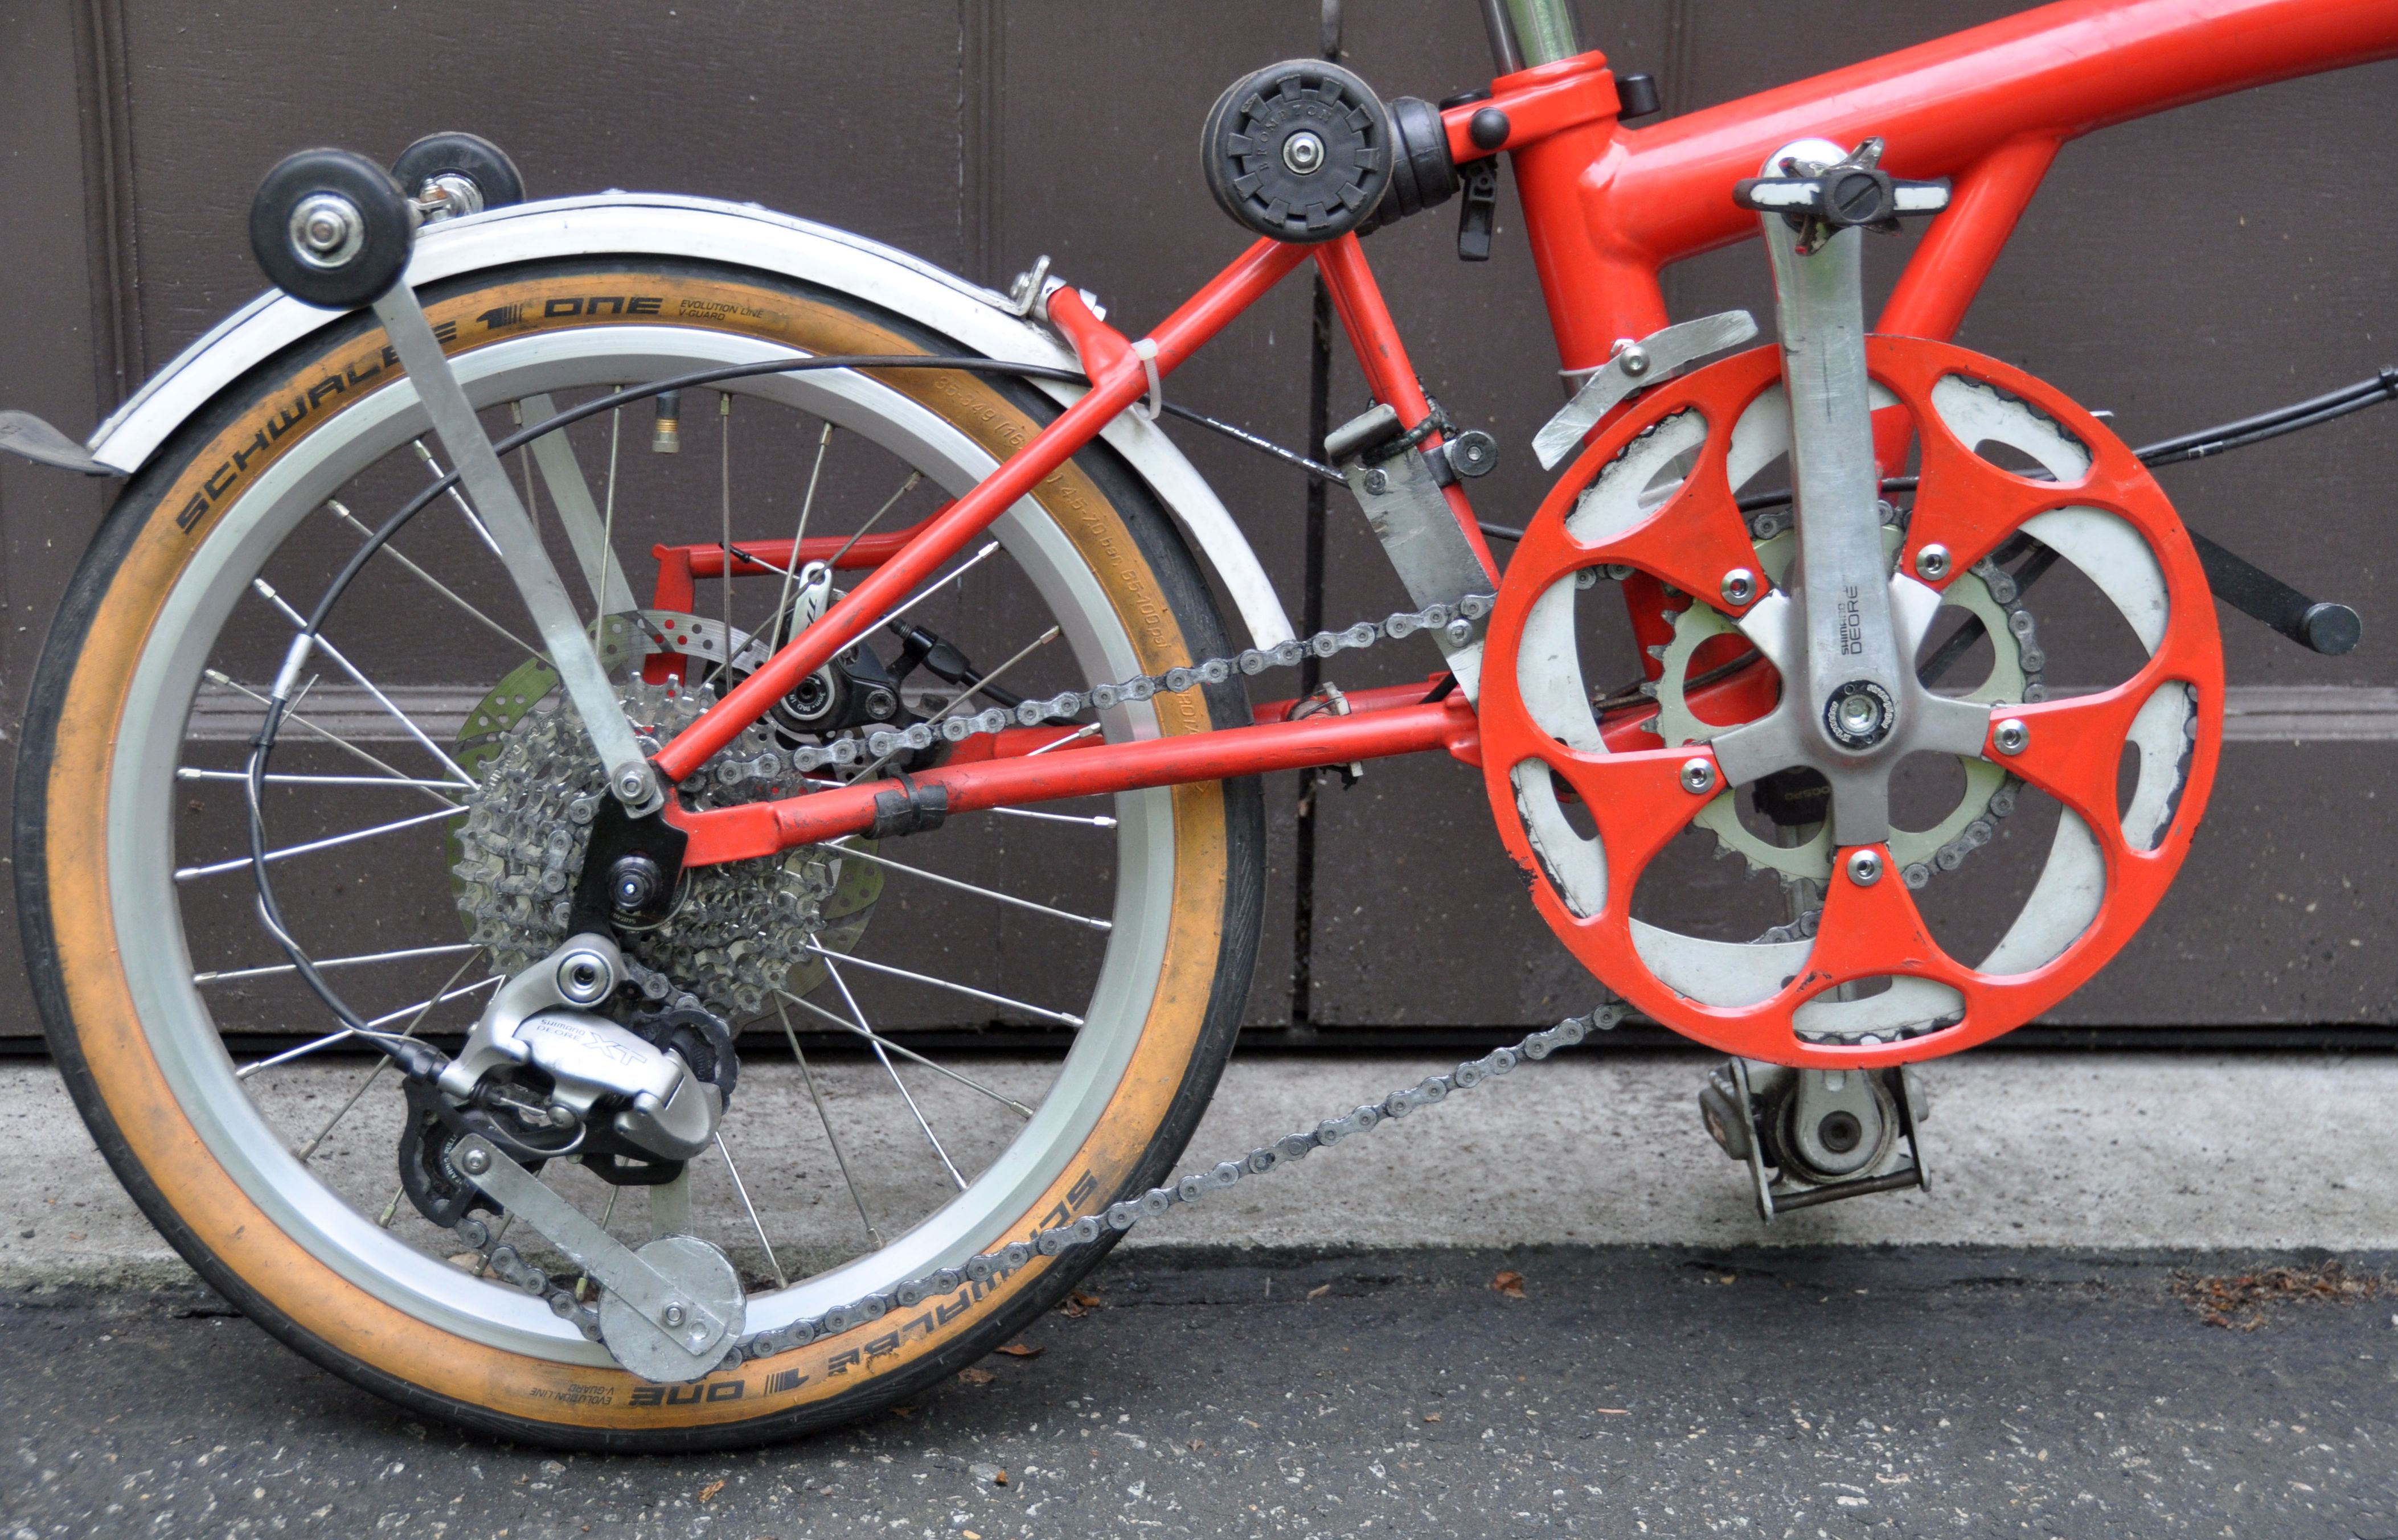
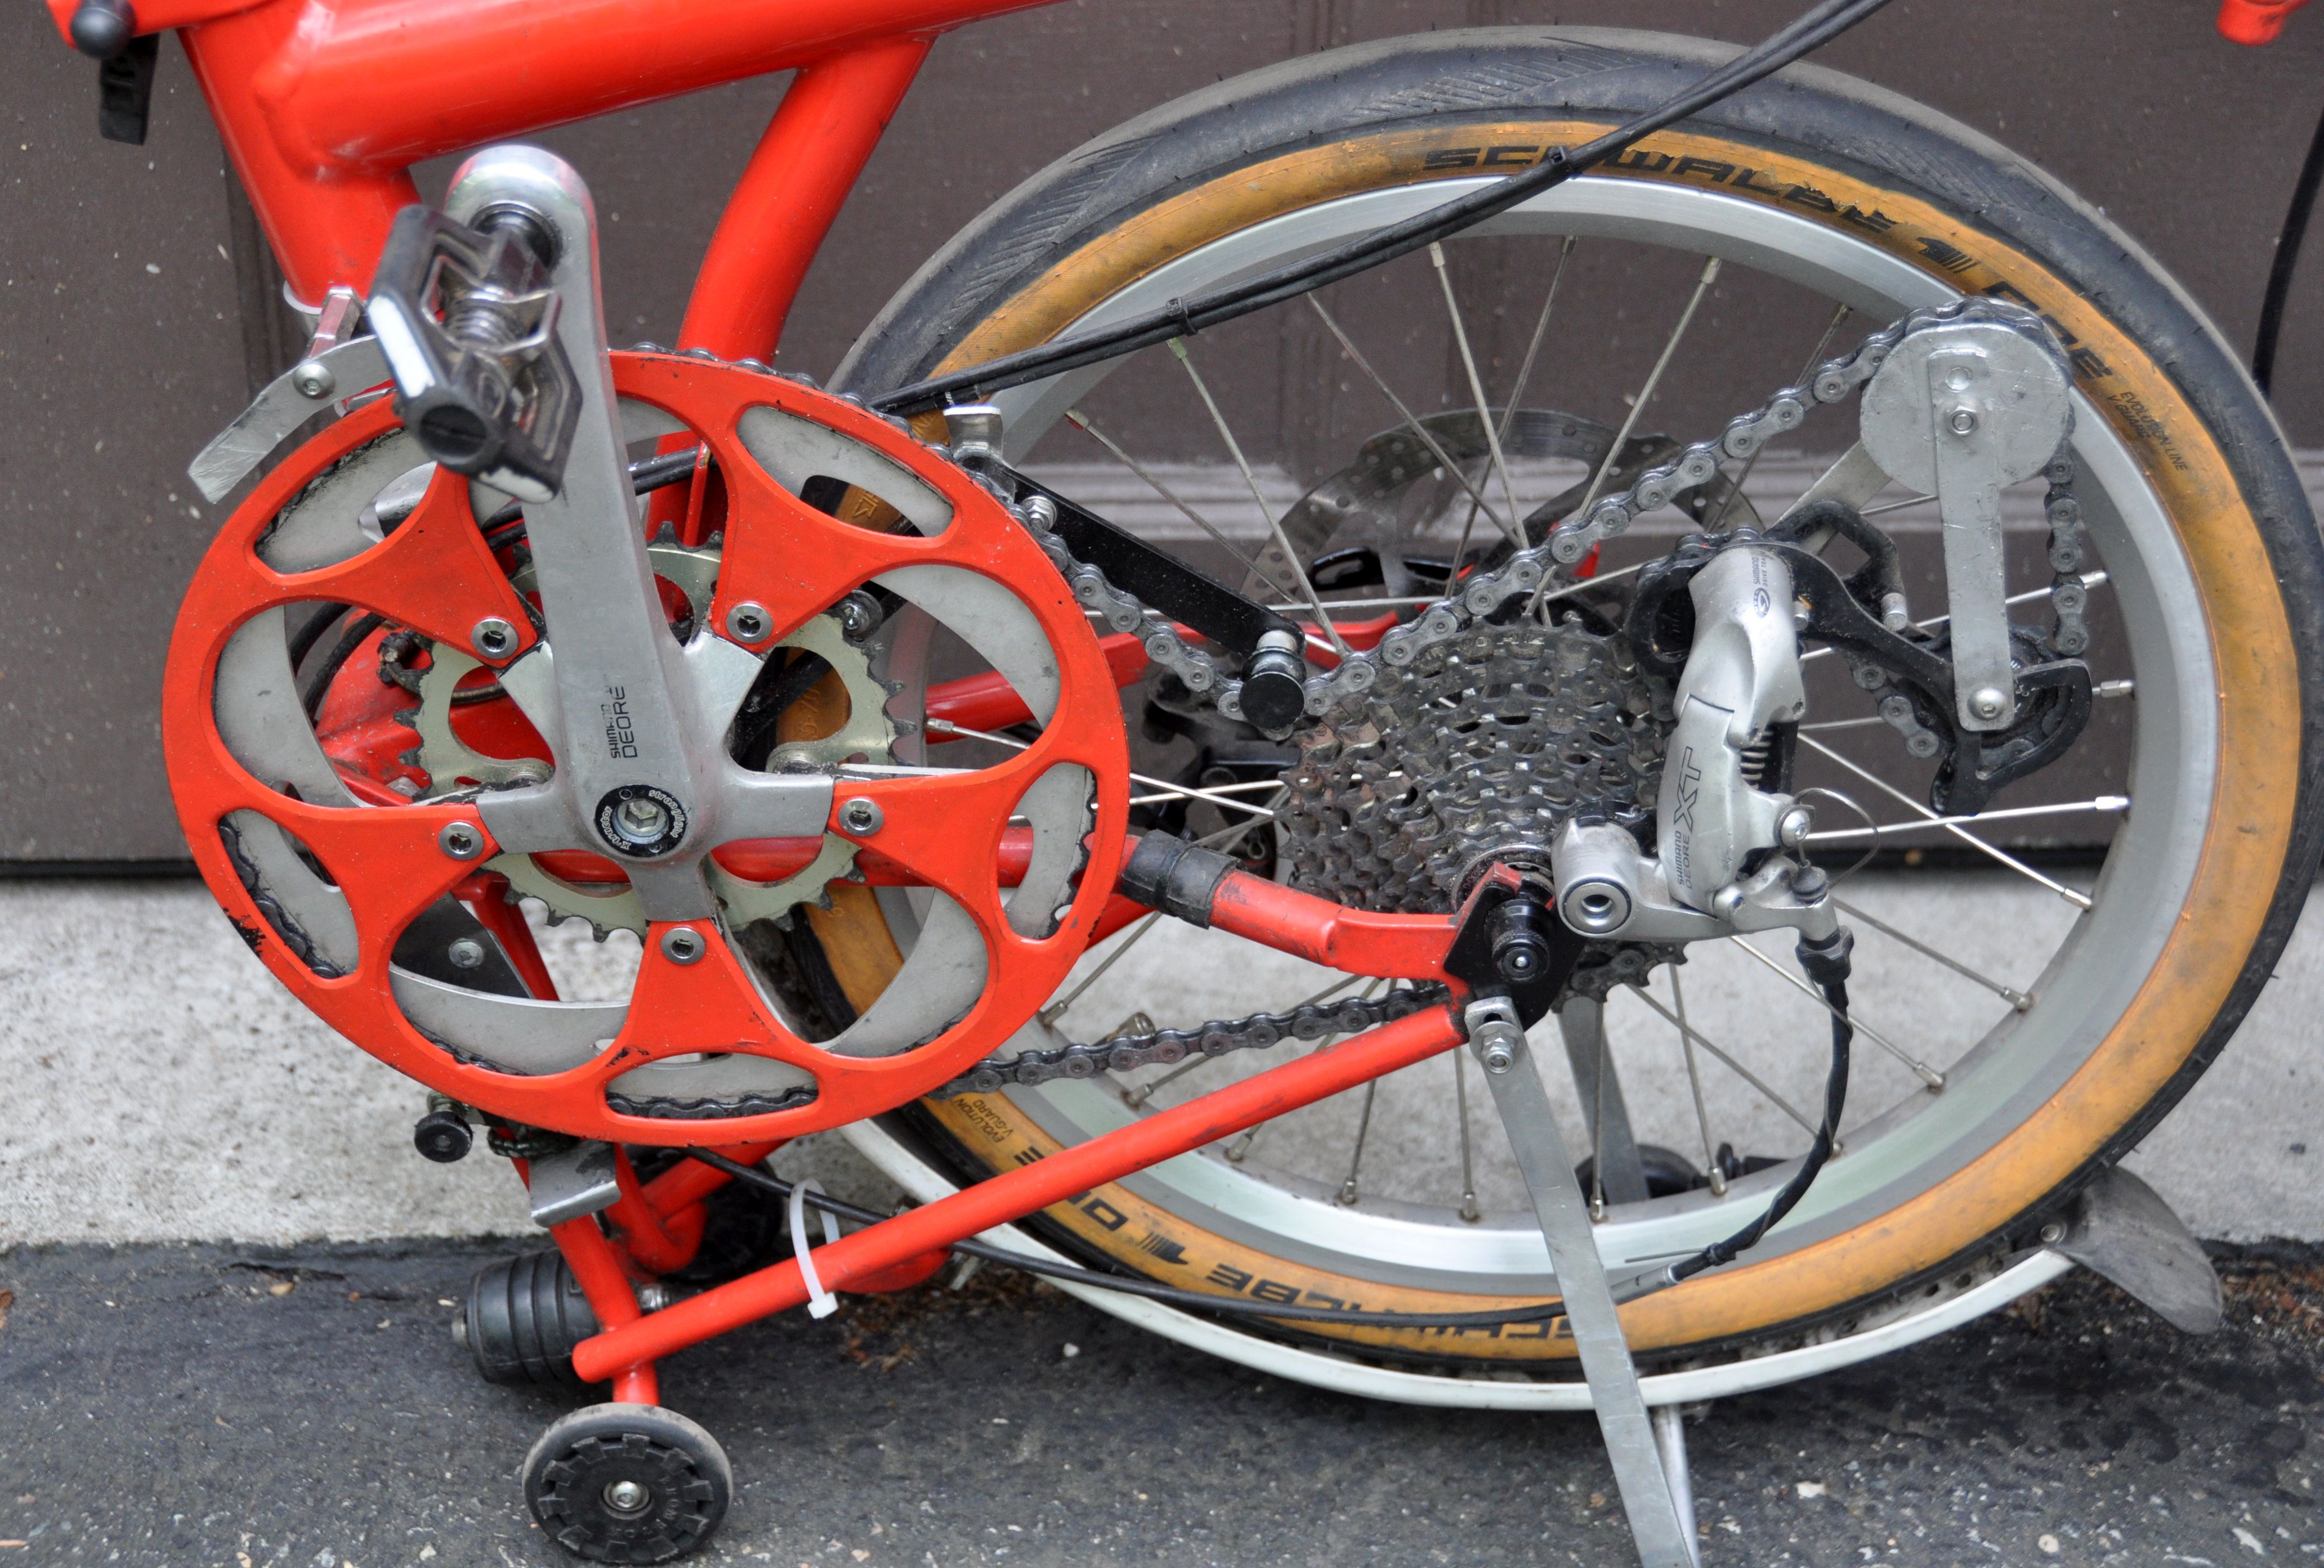
I modified my Brompton by replacing the original Kinetics Alfine-11 hub with a 9-speed cassette and kept a double chainring. I have the Kinetics rear triangle with 135 mm spacing and can use a wide variety of standard hubs. Let me discuss the limitations and considerations.
When touring, I like to pedal even with tailwind and downhill. If you want to reach 50 km/h with 100 rpm, you need a metric development of 8.33 m. On a Brompton with 16 inch wheels, this would require a 60 teeth chainring and 9 teeth cog. Many years ago, the Shimano Capreo cassette had a 9 teeth smallest coq (I have this on an old Bike Friday), but it is no longer available. Now you need a specialty cassette, SRAM XD driver and 11-speed system to realize a 9-tooth coq. Instead, I decided to settle for 58 and 11 which gives me a metric development of around 6.60 m, and you reach 40 km/h at 100 rpm. On the low gear side: For mountains with more than 10 % slope and/or luggage and long tours, I have enjoyed metric developments in the range 1.2 to 1.5 m. On the Brompton, with small wheels, this is easily accomplished, e.g. with a 1:1 transmission.
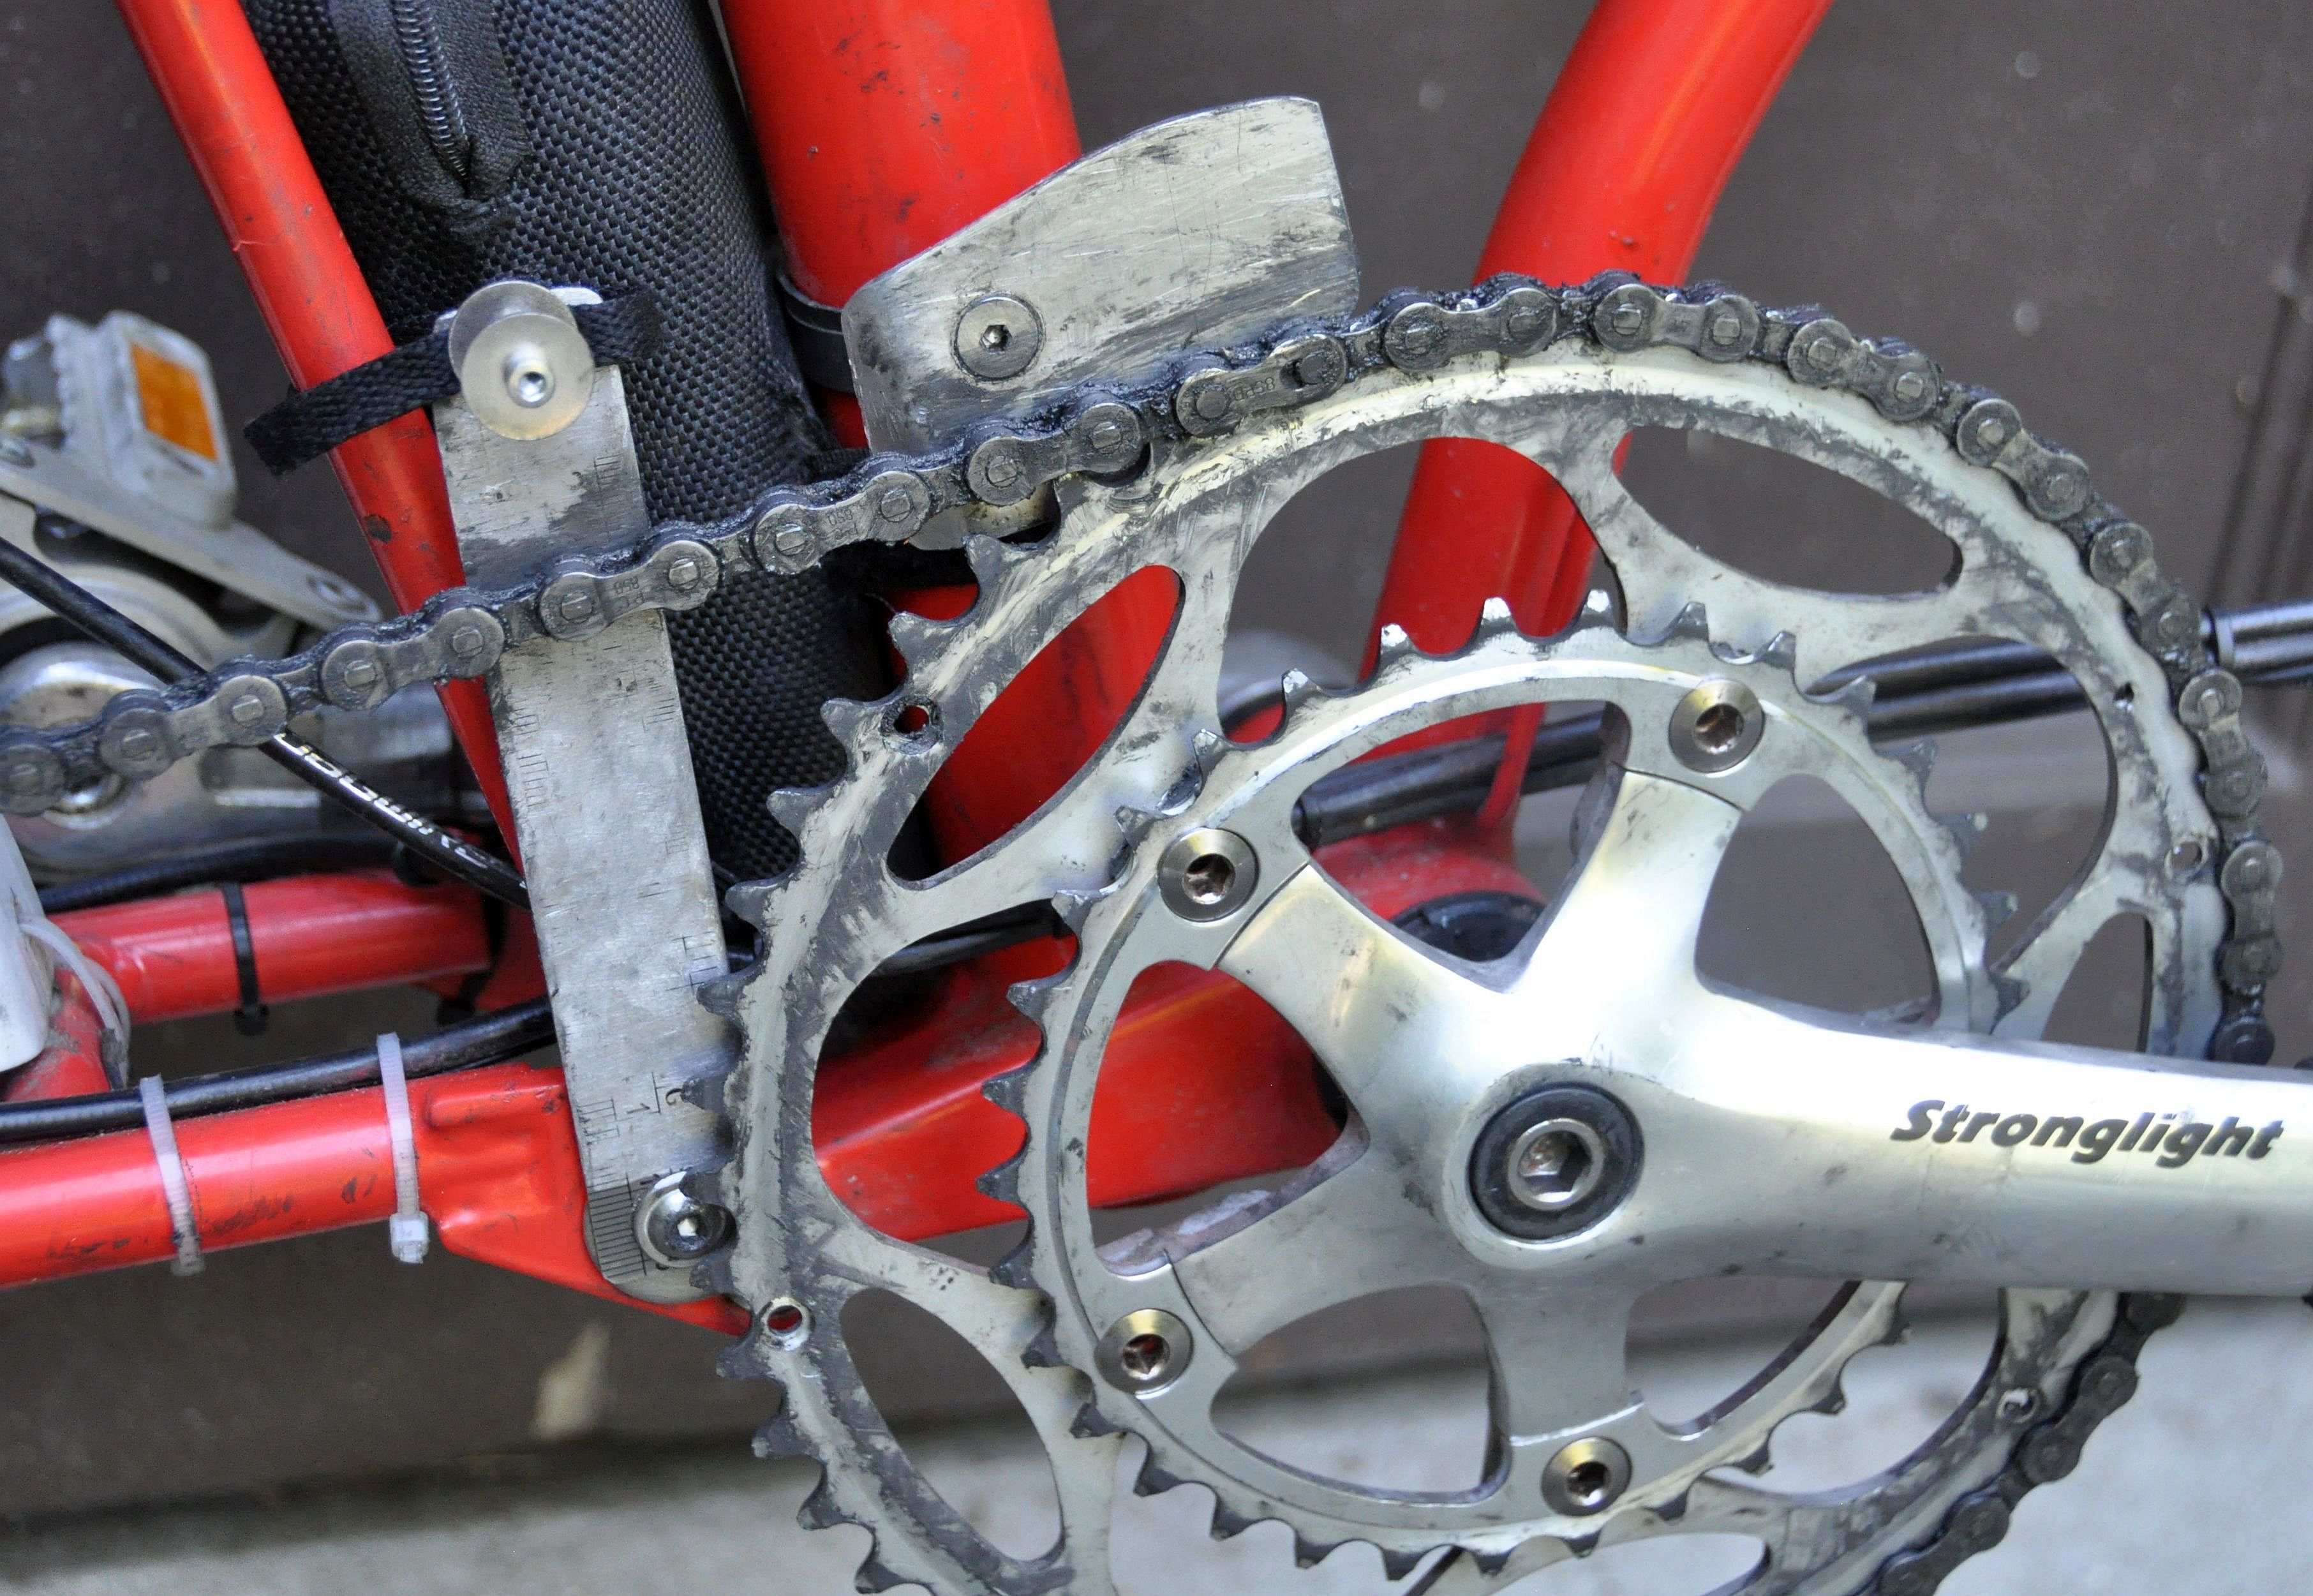
As a result, I identified as a target: 9-speed cassette (could also have been 10 or 11, but I wanted to stay away from thinner chains and different standards) 11-32 and a double chainring 58-32. The total range is 527 %, identical to a Rohloff hub (but with the advantage of much lower weight and more efficiency). With a capacity of 47 teeth, the derailleur swings all around, from forward to backward. It points almost directly down when using the 32-32 combination. I tried the LTWOO special Brompton derailleur, but it touched ground. I got everything t to work with a medium length cage Shimano 105 derailleur which has the same cage length (87 mm) as a vintage Shimano Deore XT RD-M750 Long Cage Derailleur. The ground clearance was only about 2 cm -- probably ok for paved roads, but marginal. So eventually, I changed against a short-cage derailleur Shimano Deore XT RD-M750 Short Cage with a cage length of about 69 mm. Alternatively, I could have used a short cage SHIMANO Sora 9-speed rear derailleur with a similar cage length.
The challenge is the double chain ring. For a single chainring, it is possible to use long cage derailleurs (e.g. the LTWOO), and it will never point down and touch the ground. But for the double chainring, you have to use a short derailleur cage.
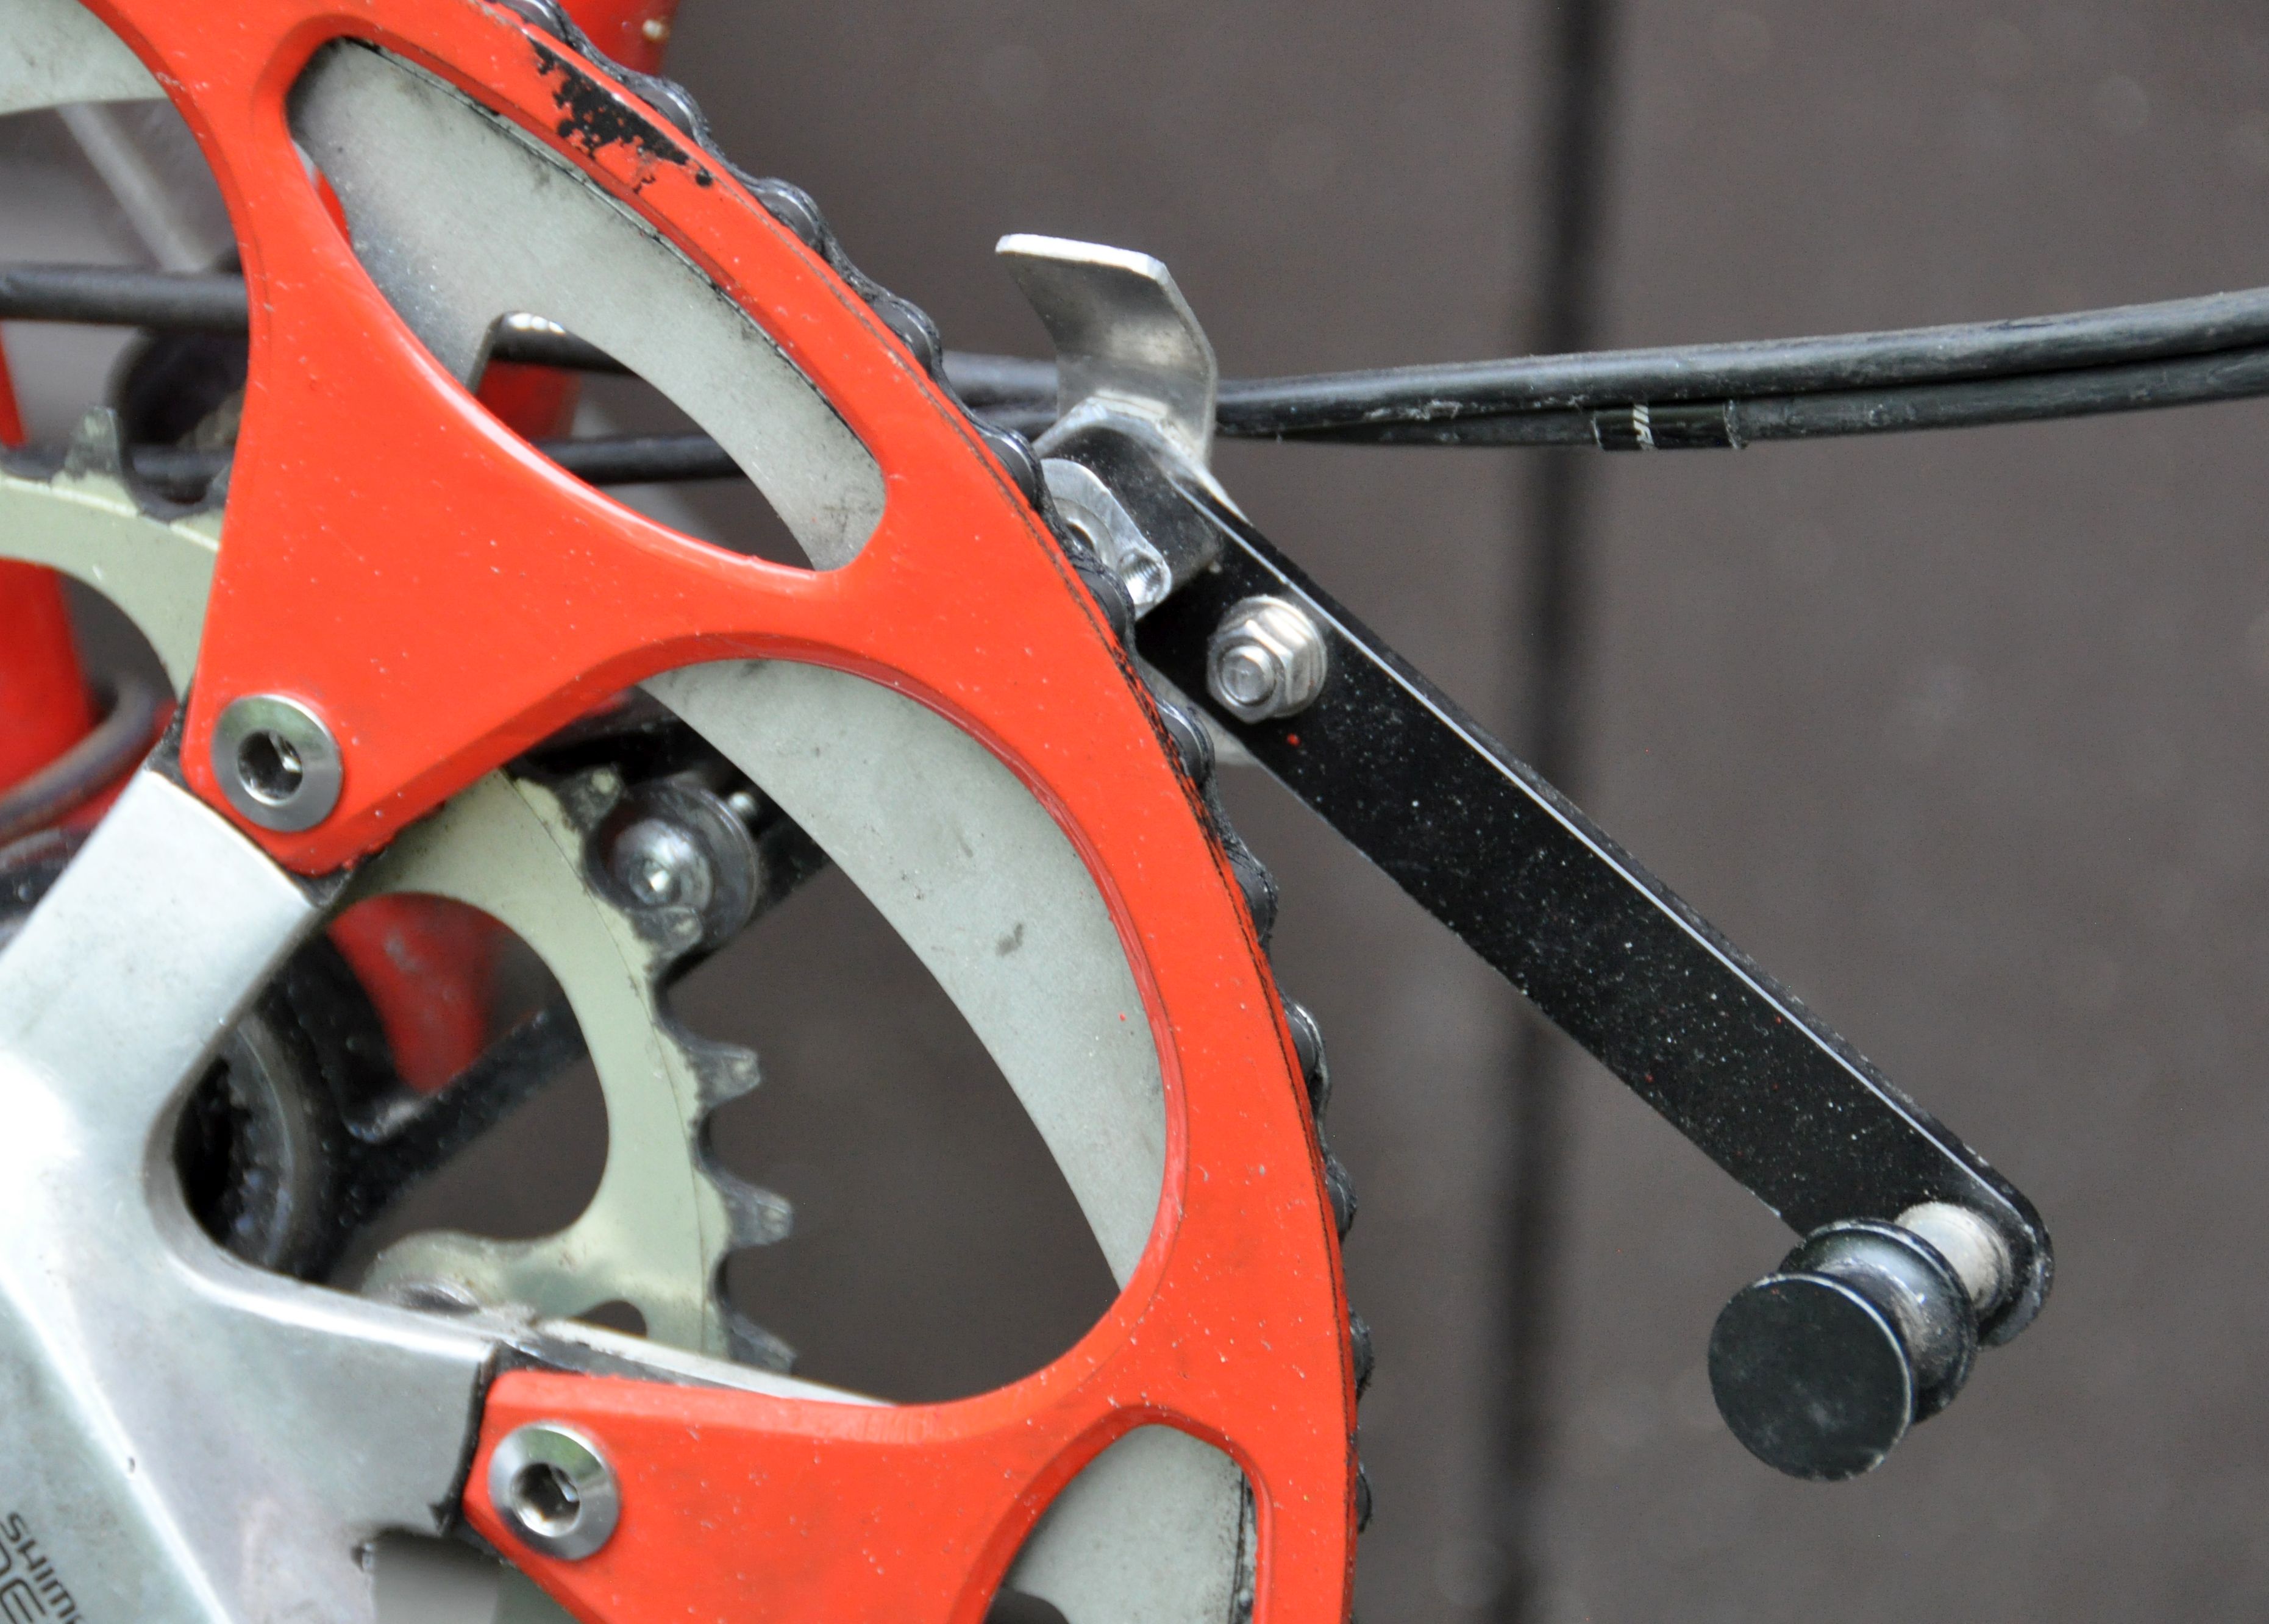
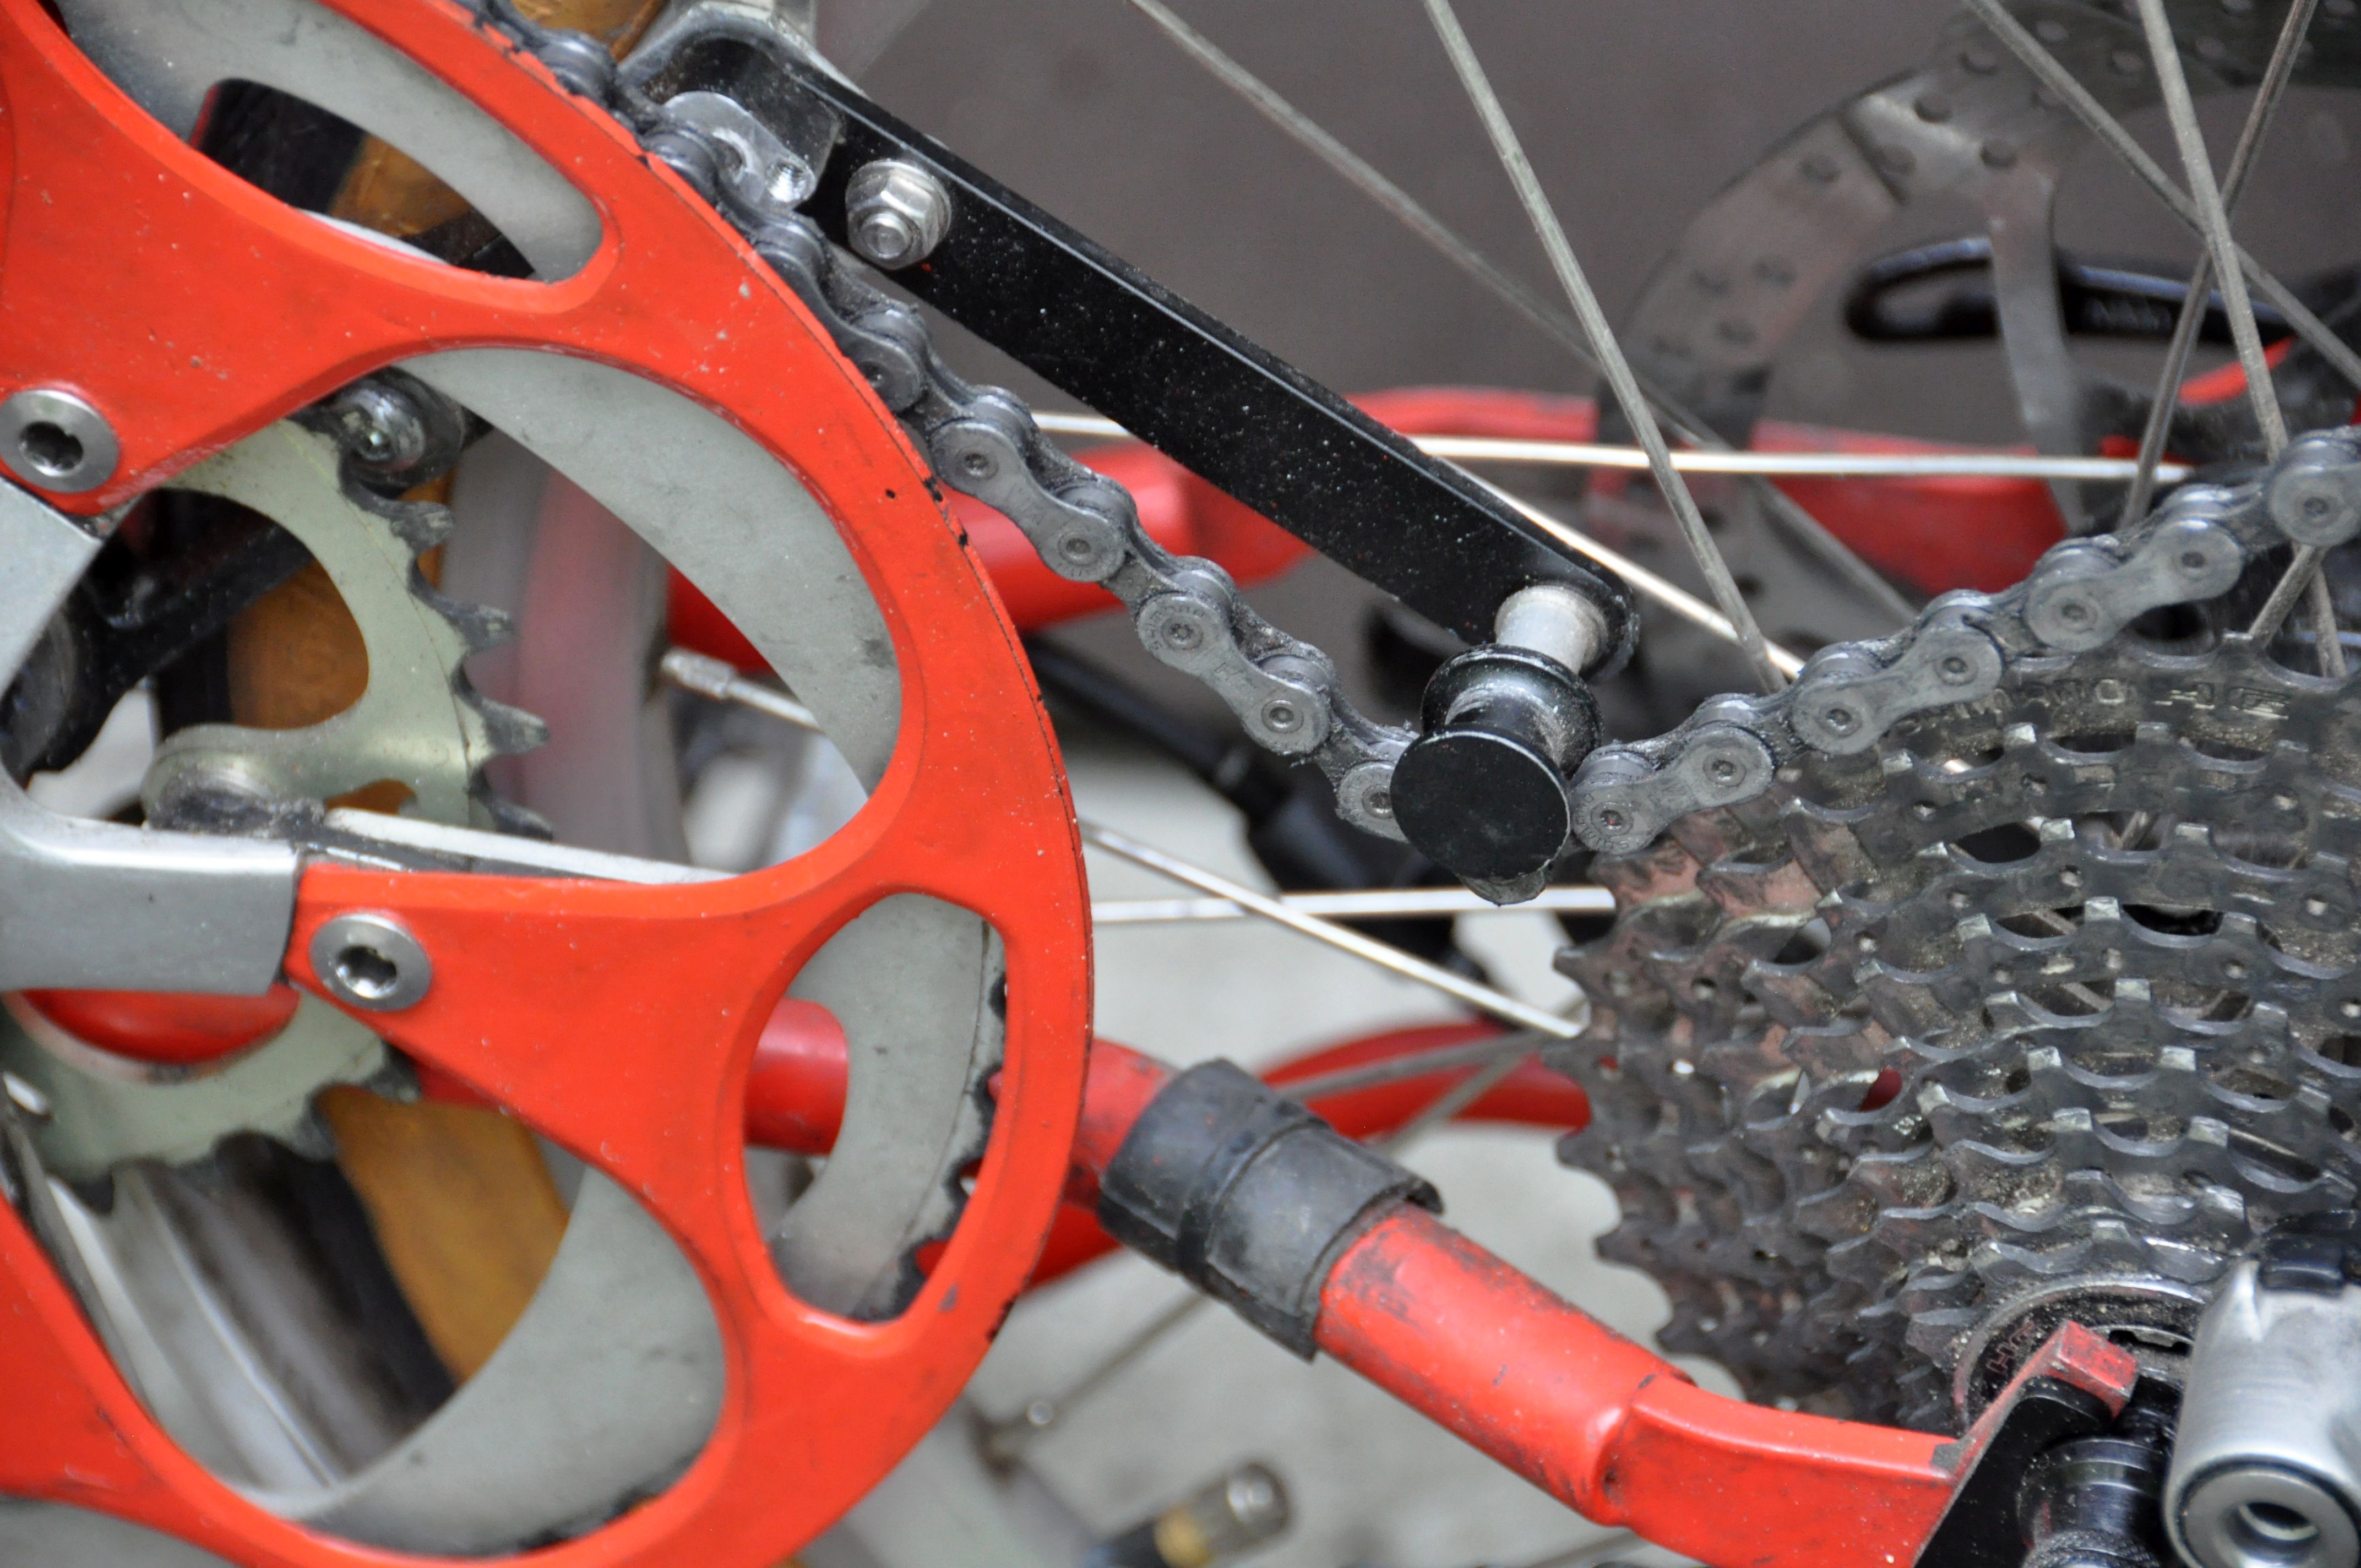
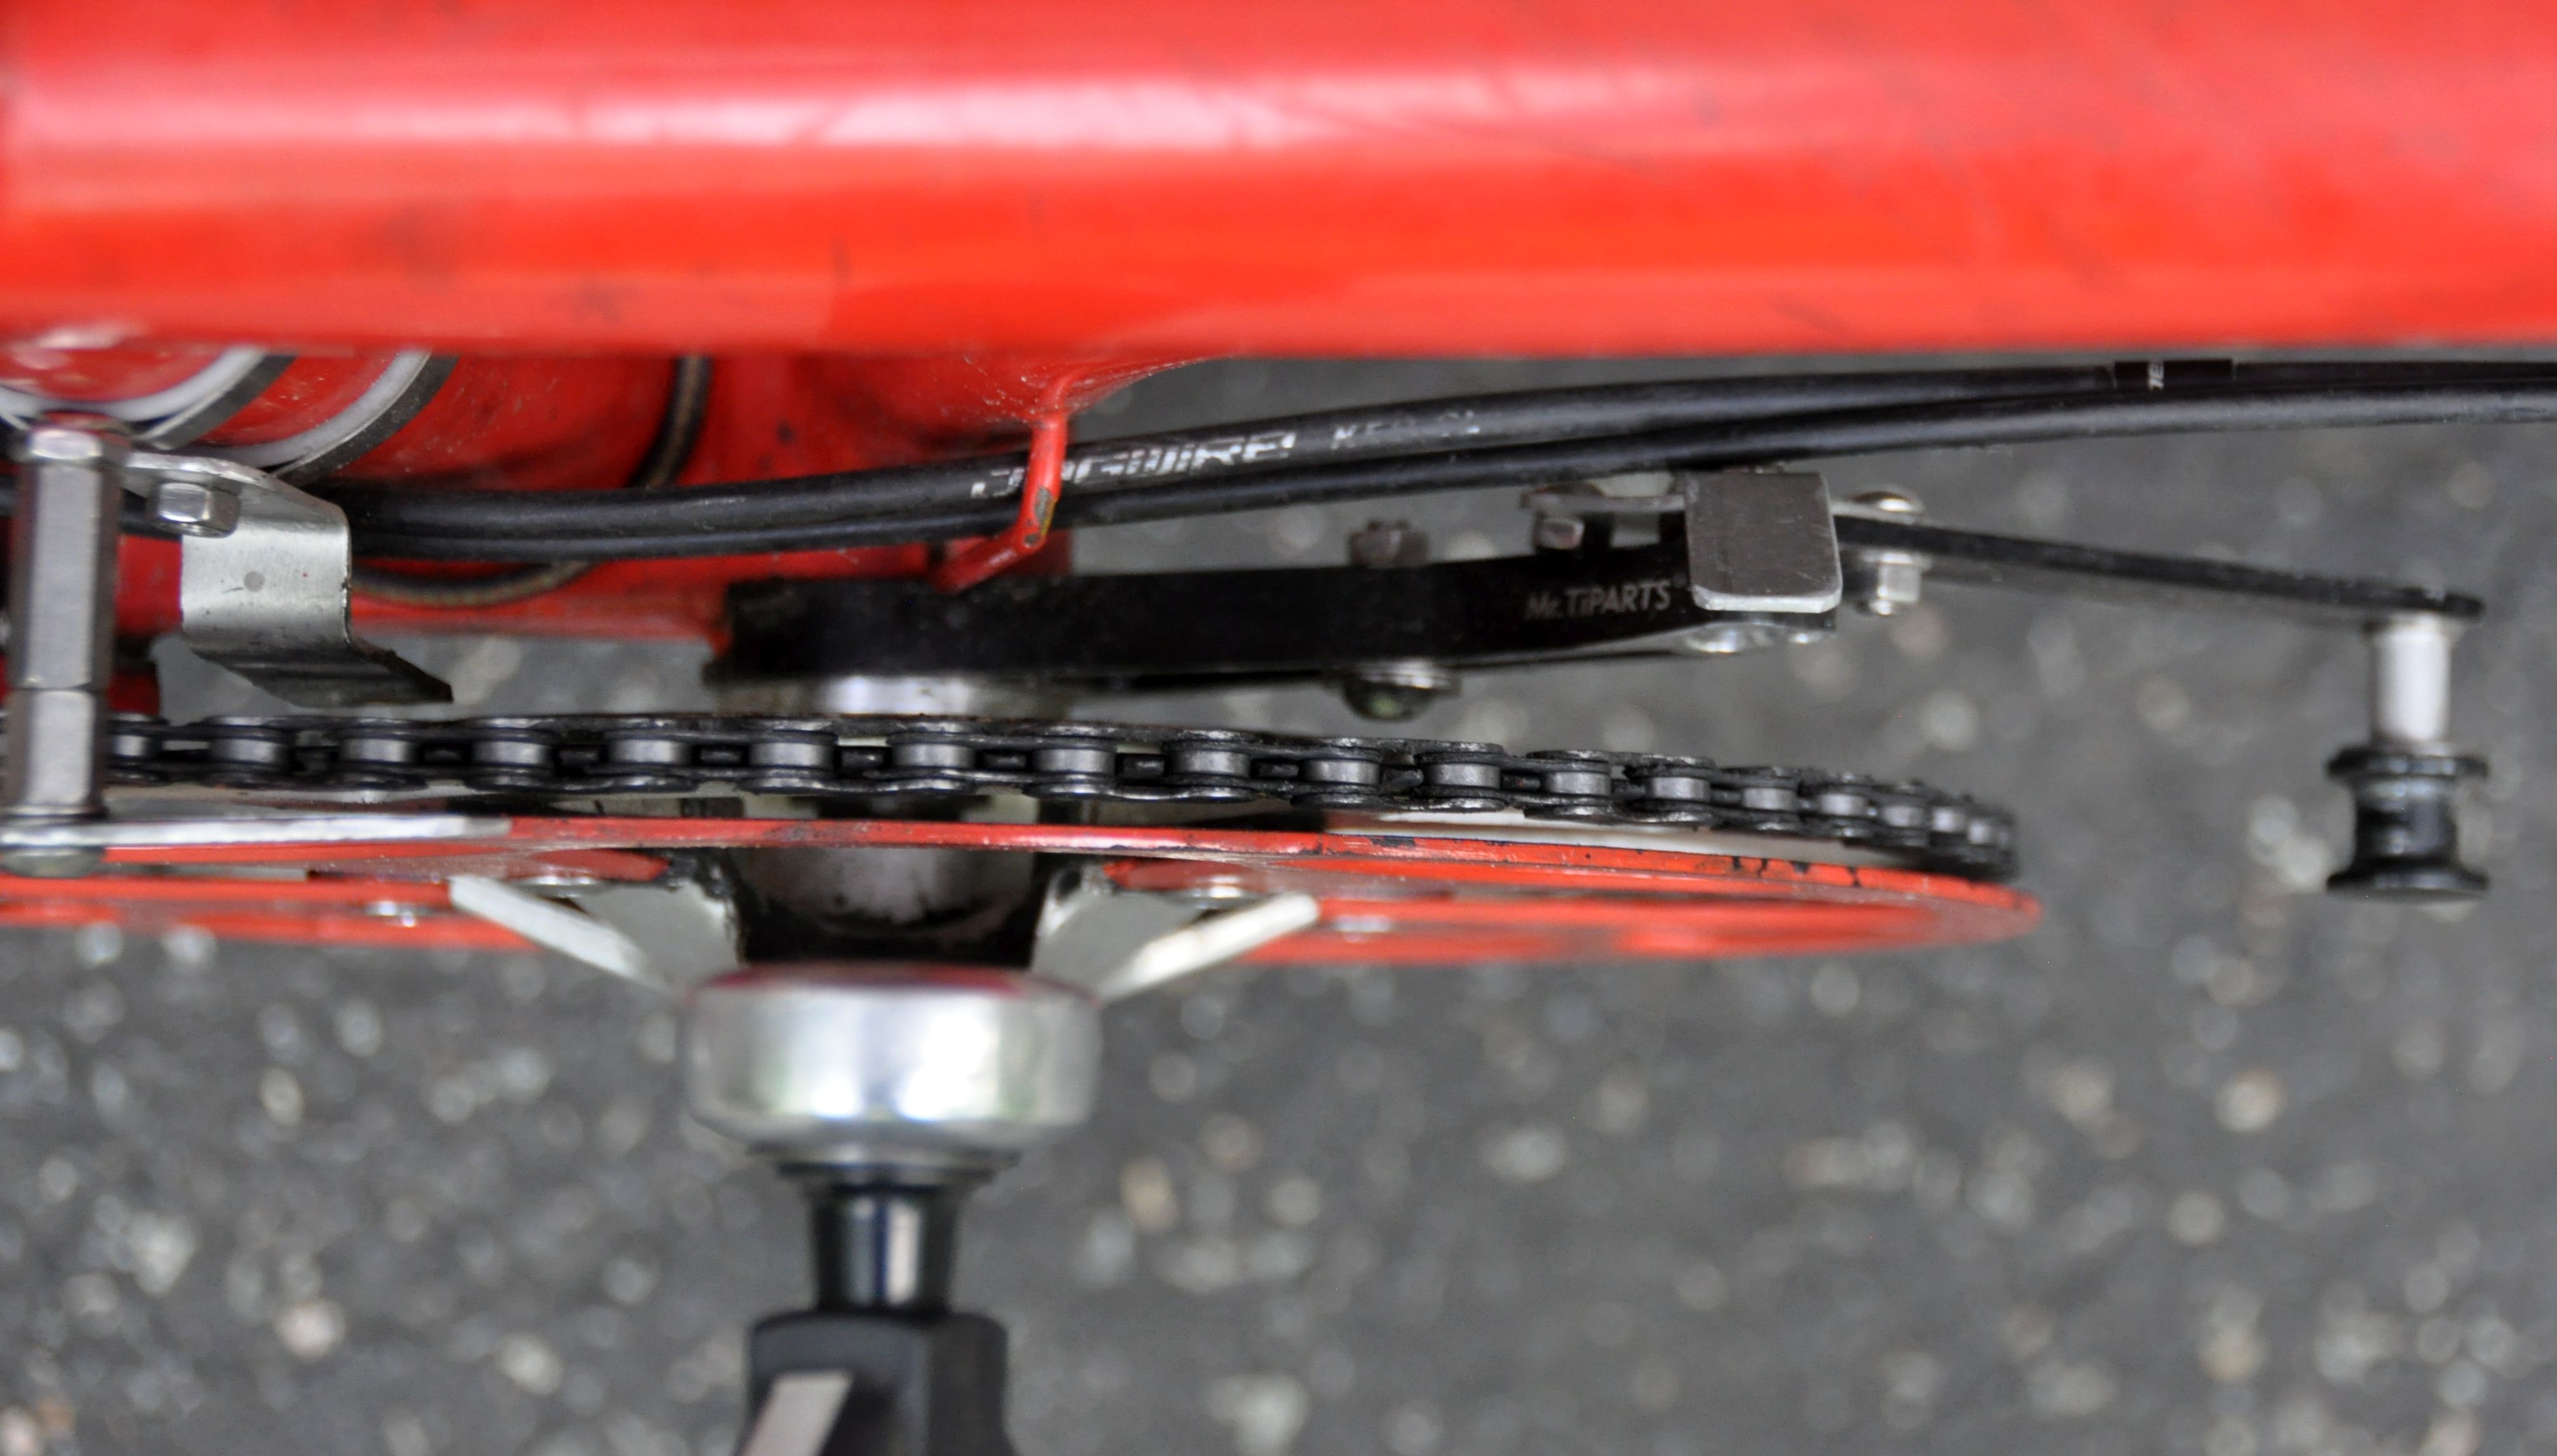
Triangular derailleur cage: To get a high-capacity derailleur (larger than 47 teeth) with a short cage (to avoid getting too close to the ground) I added a third pulley and created a triangular derailleur cage. Shifting works very well.
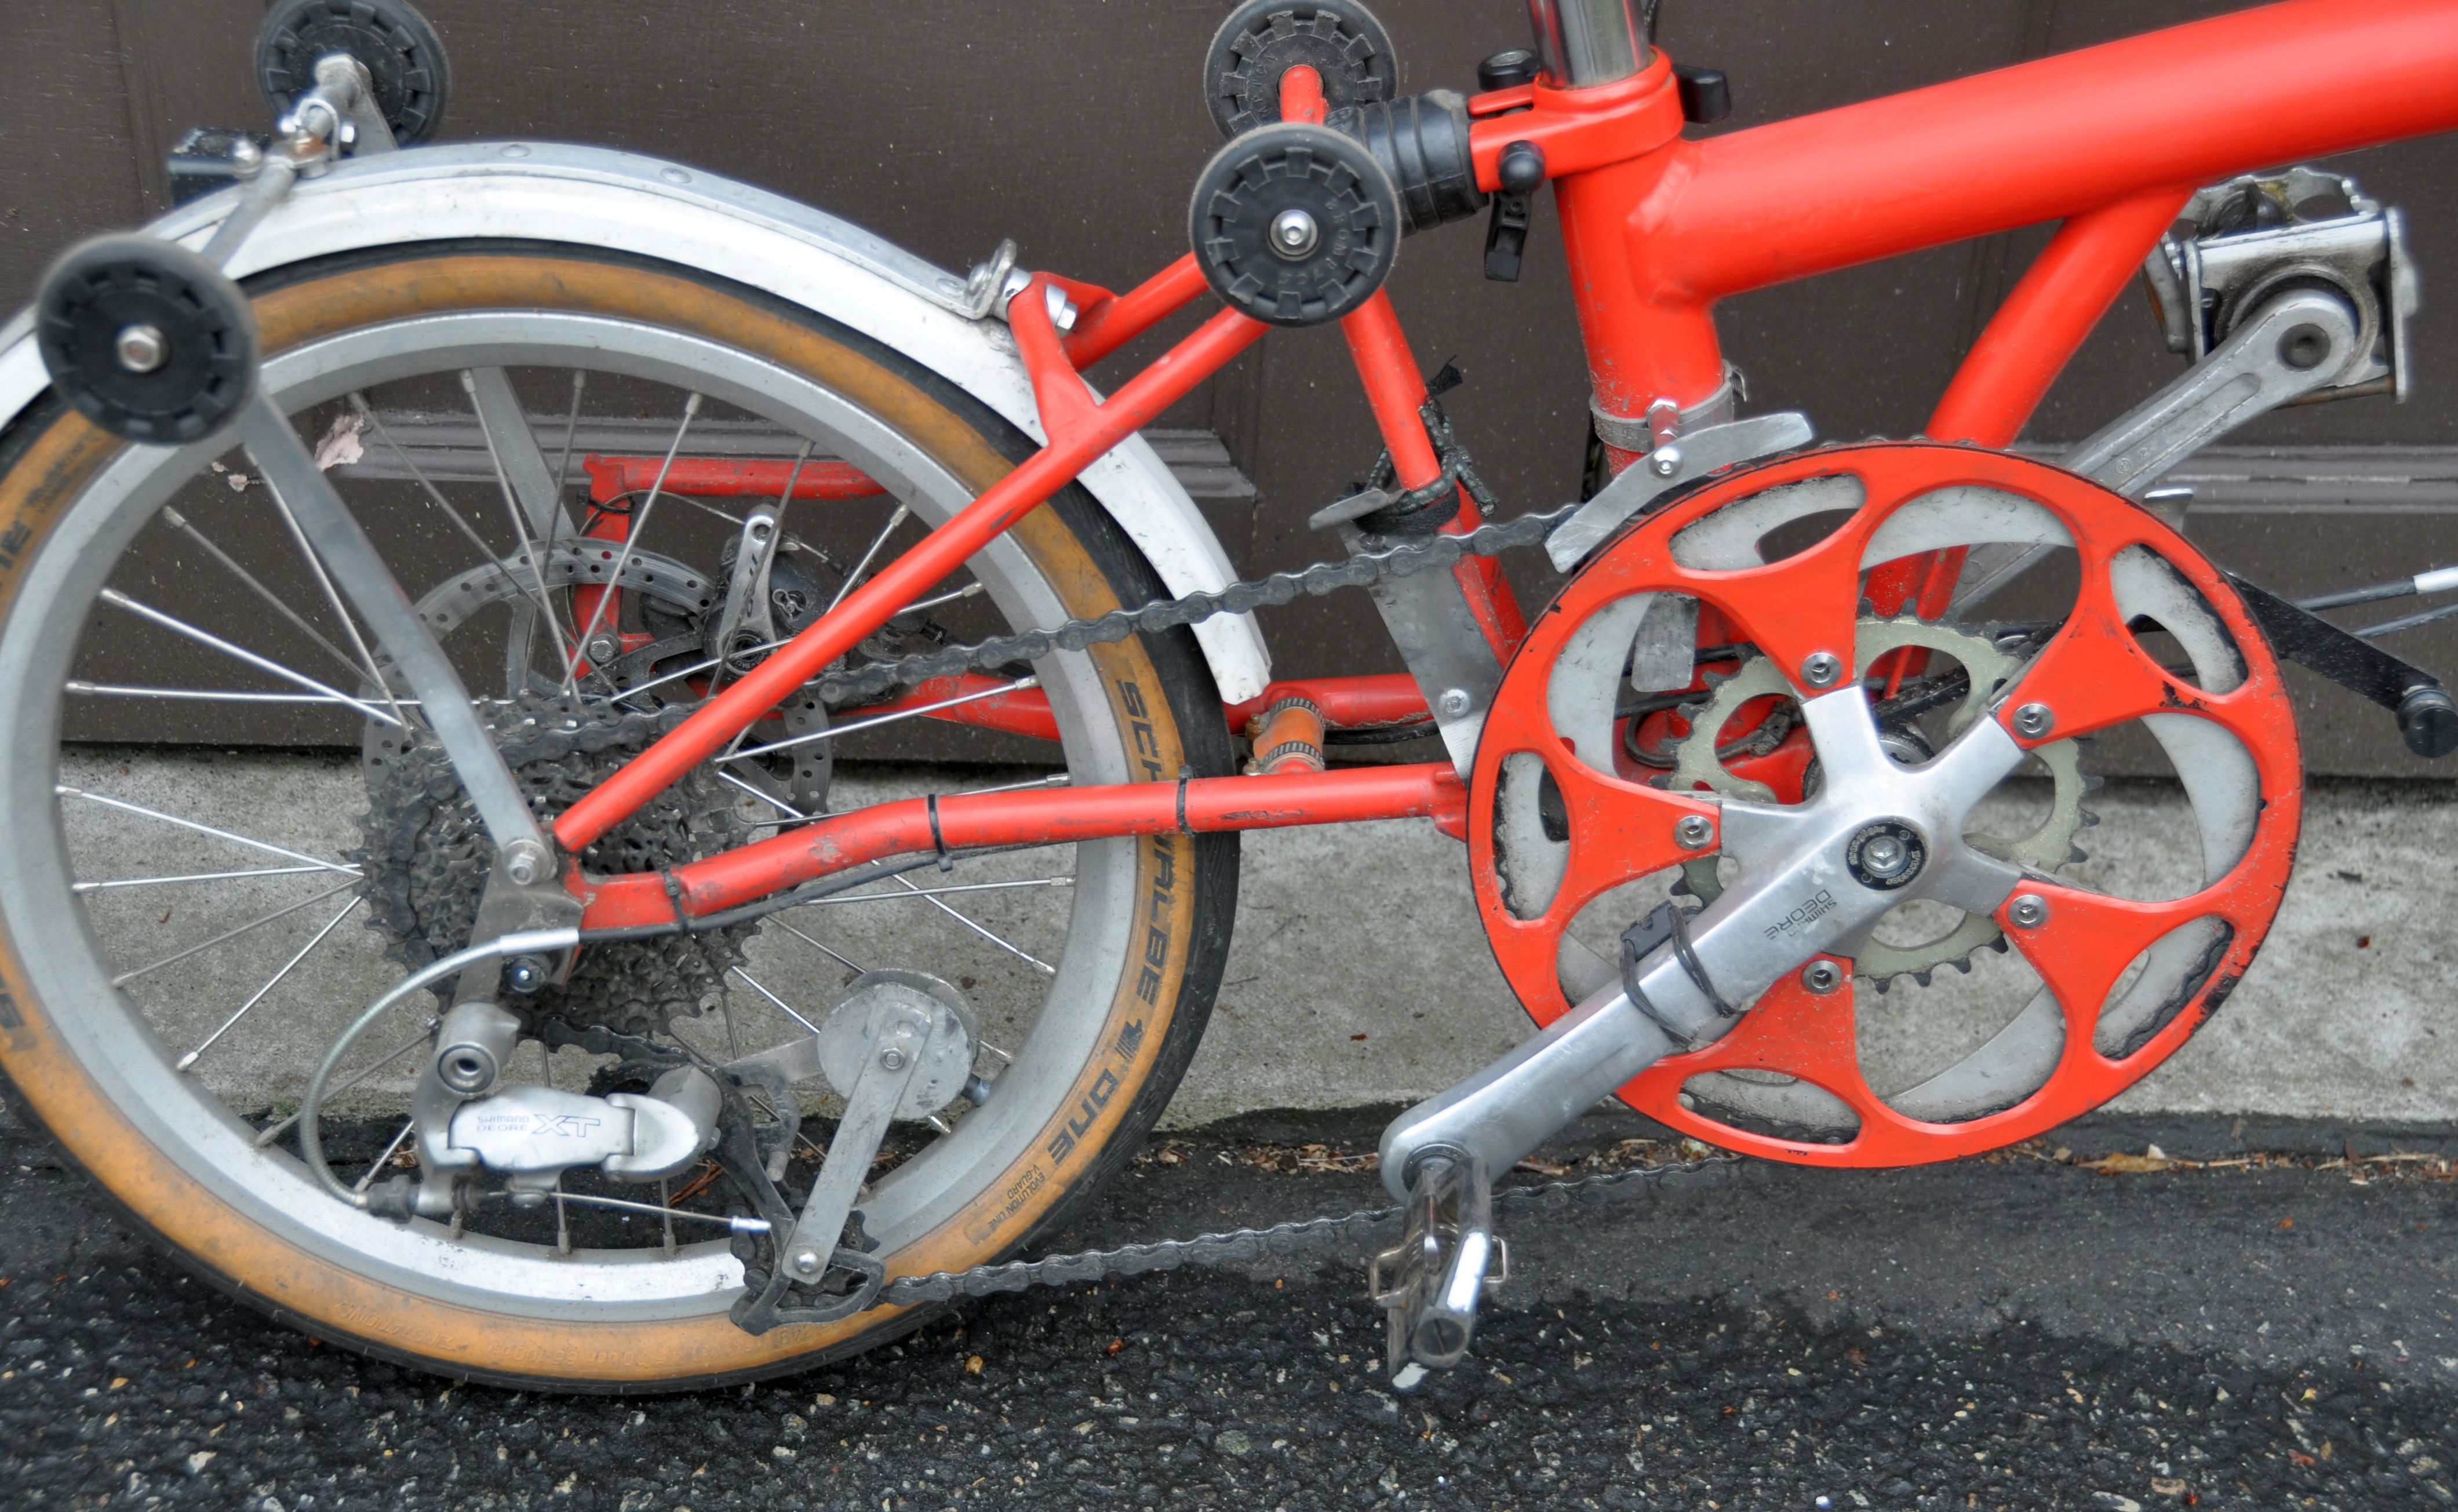
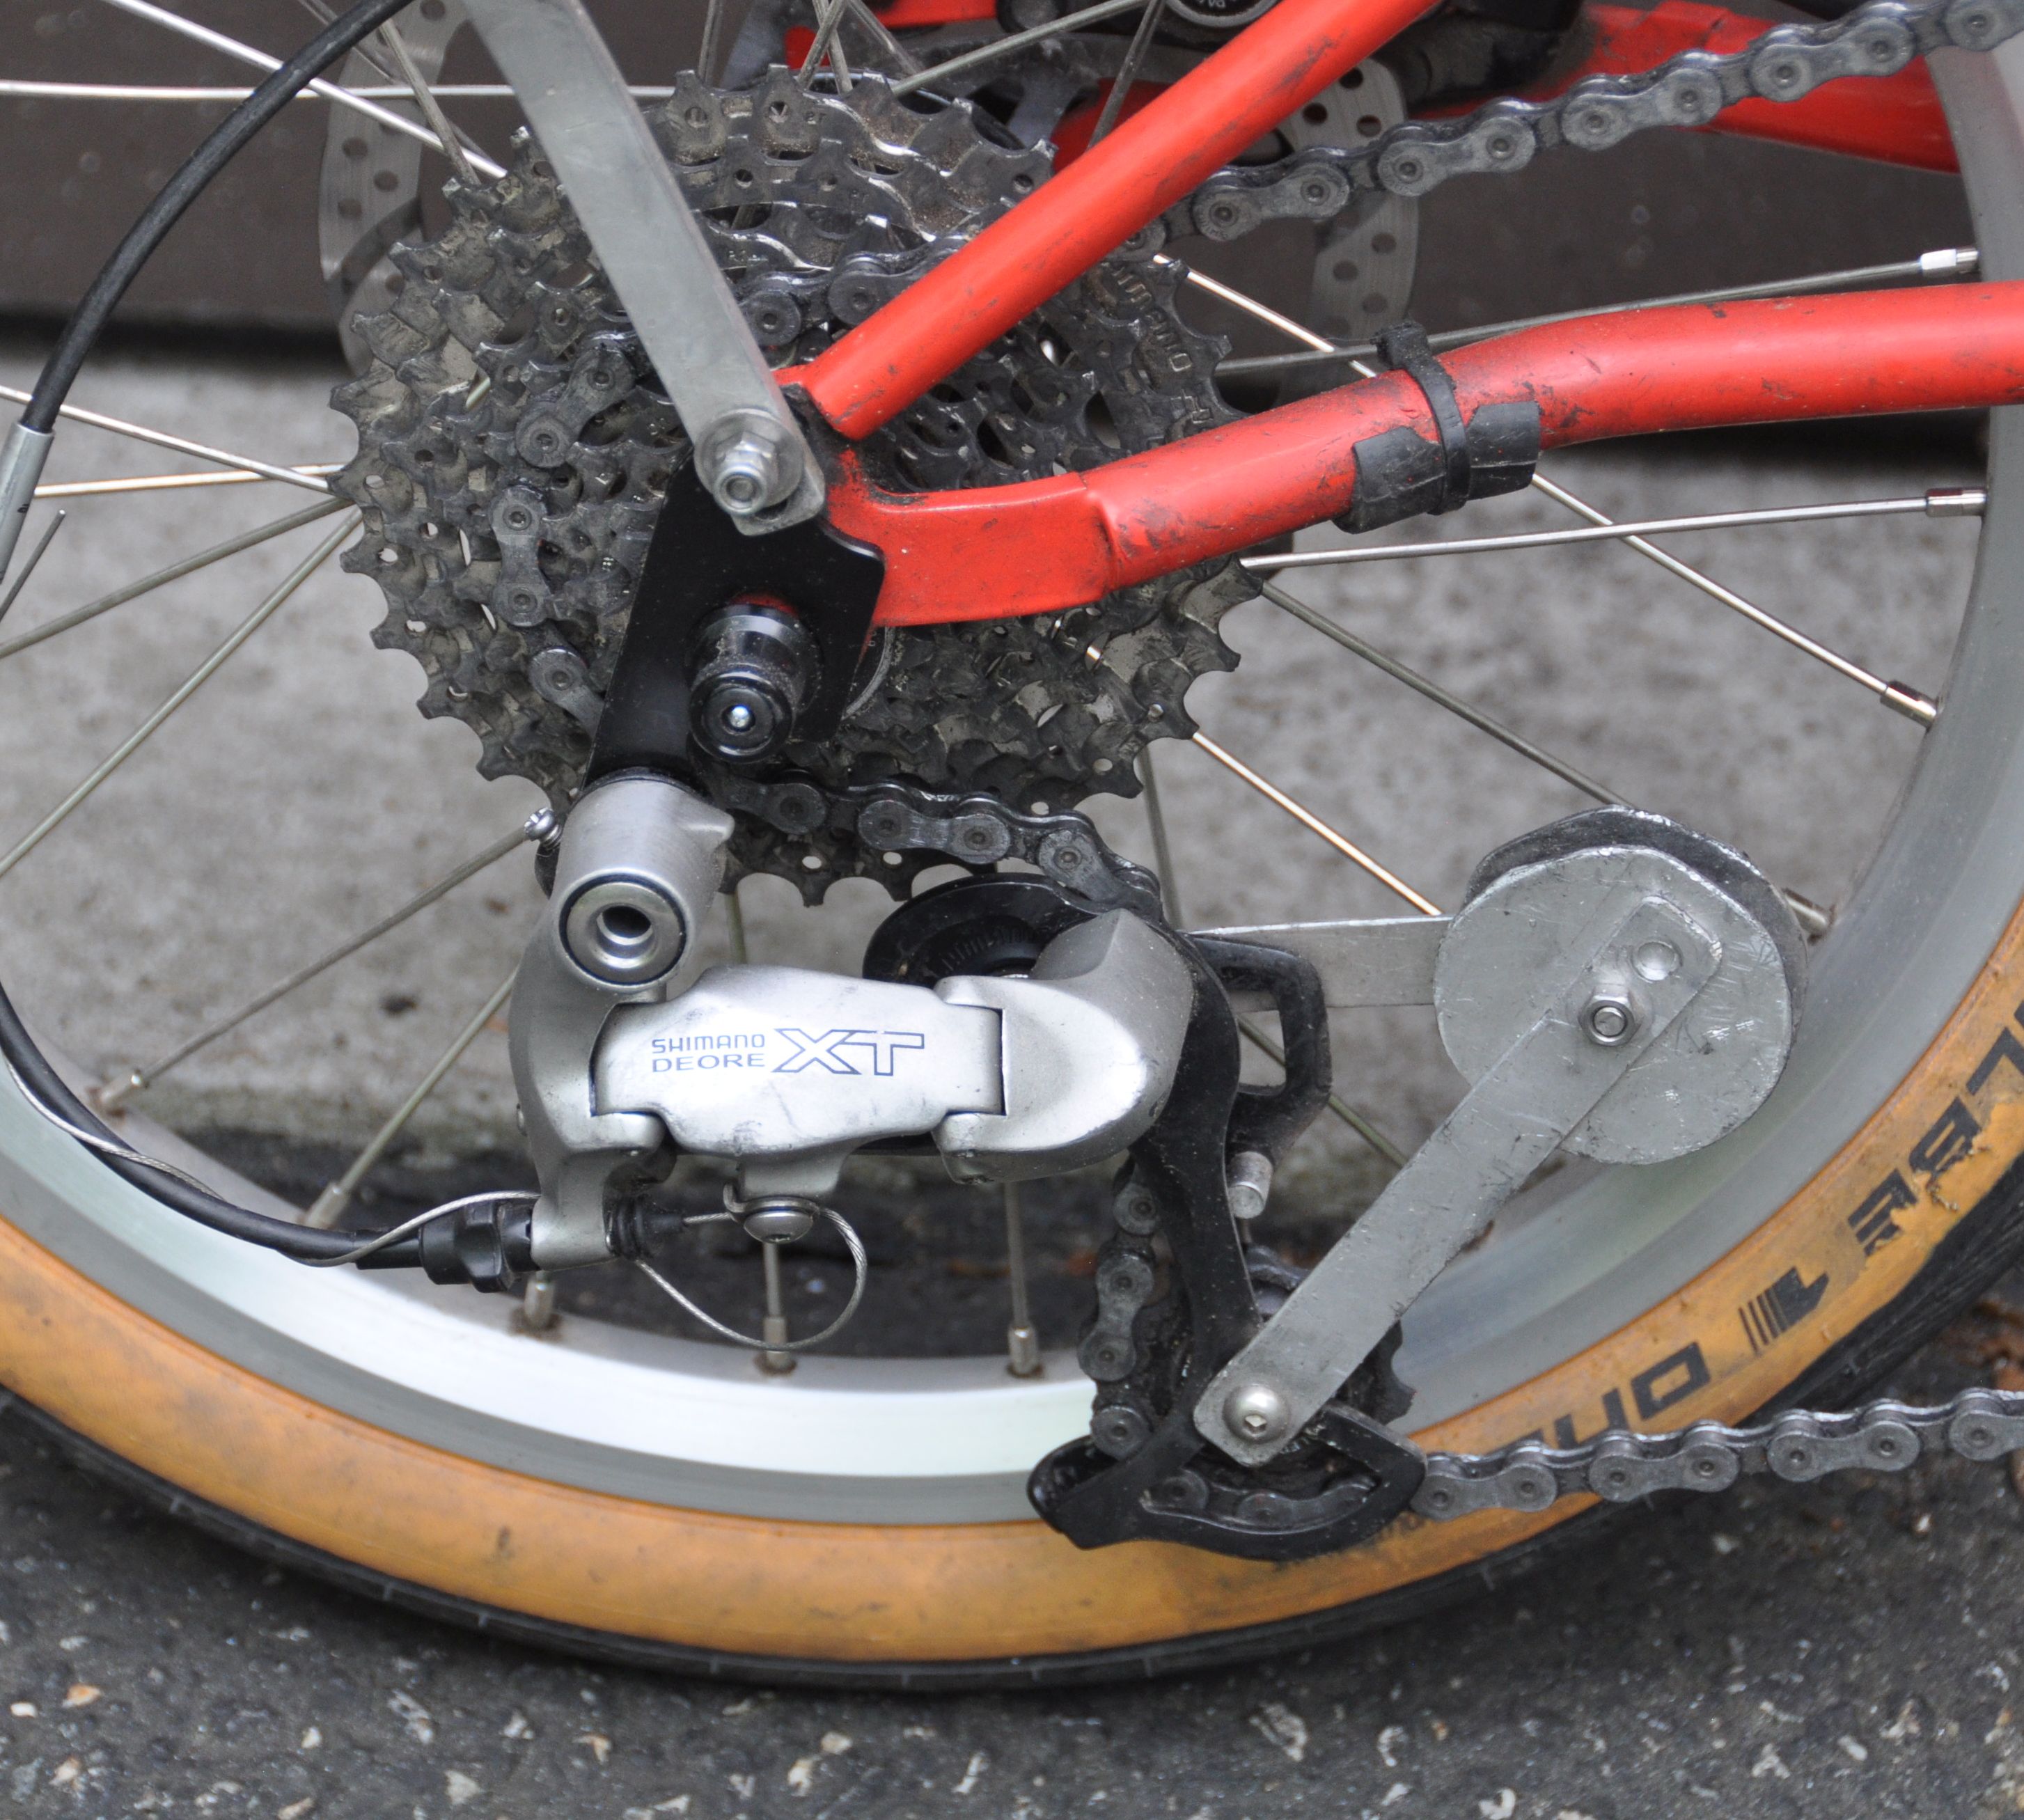
This is the most extreme chain wrap: Small chainwheel and small coq. Ground clearance is still very good.
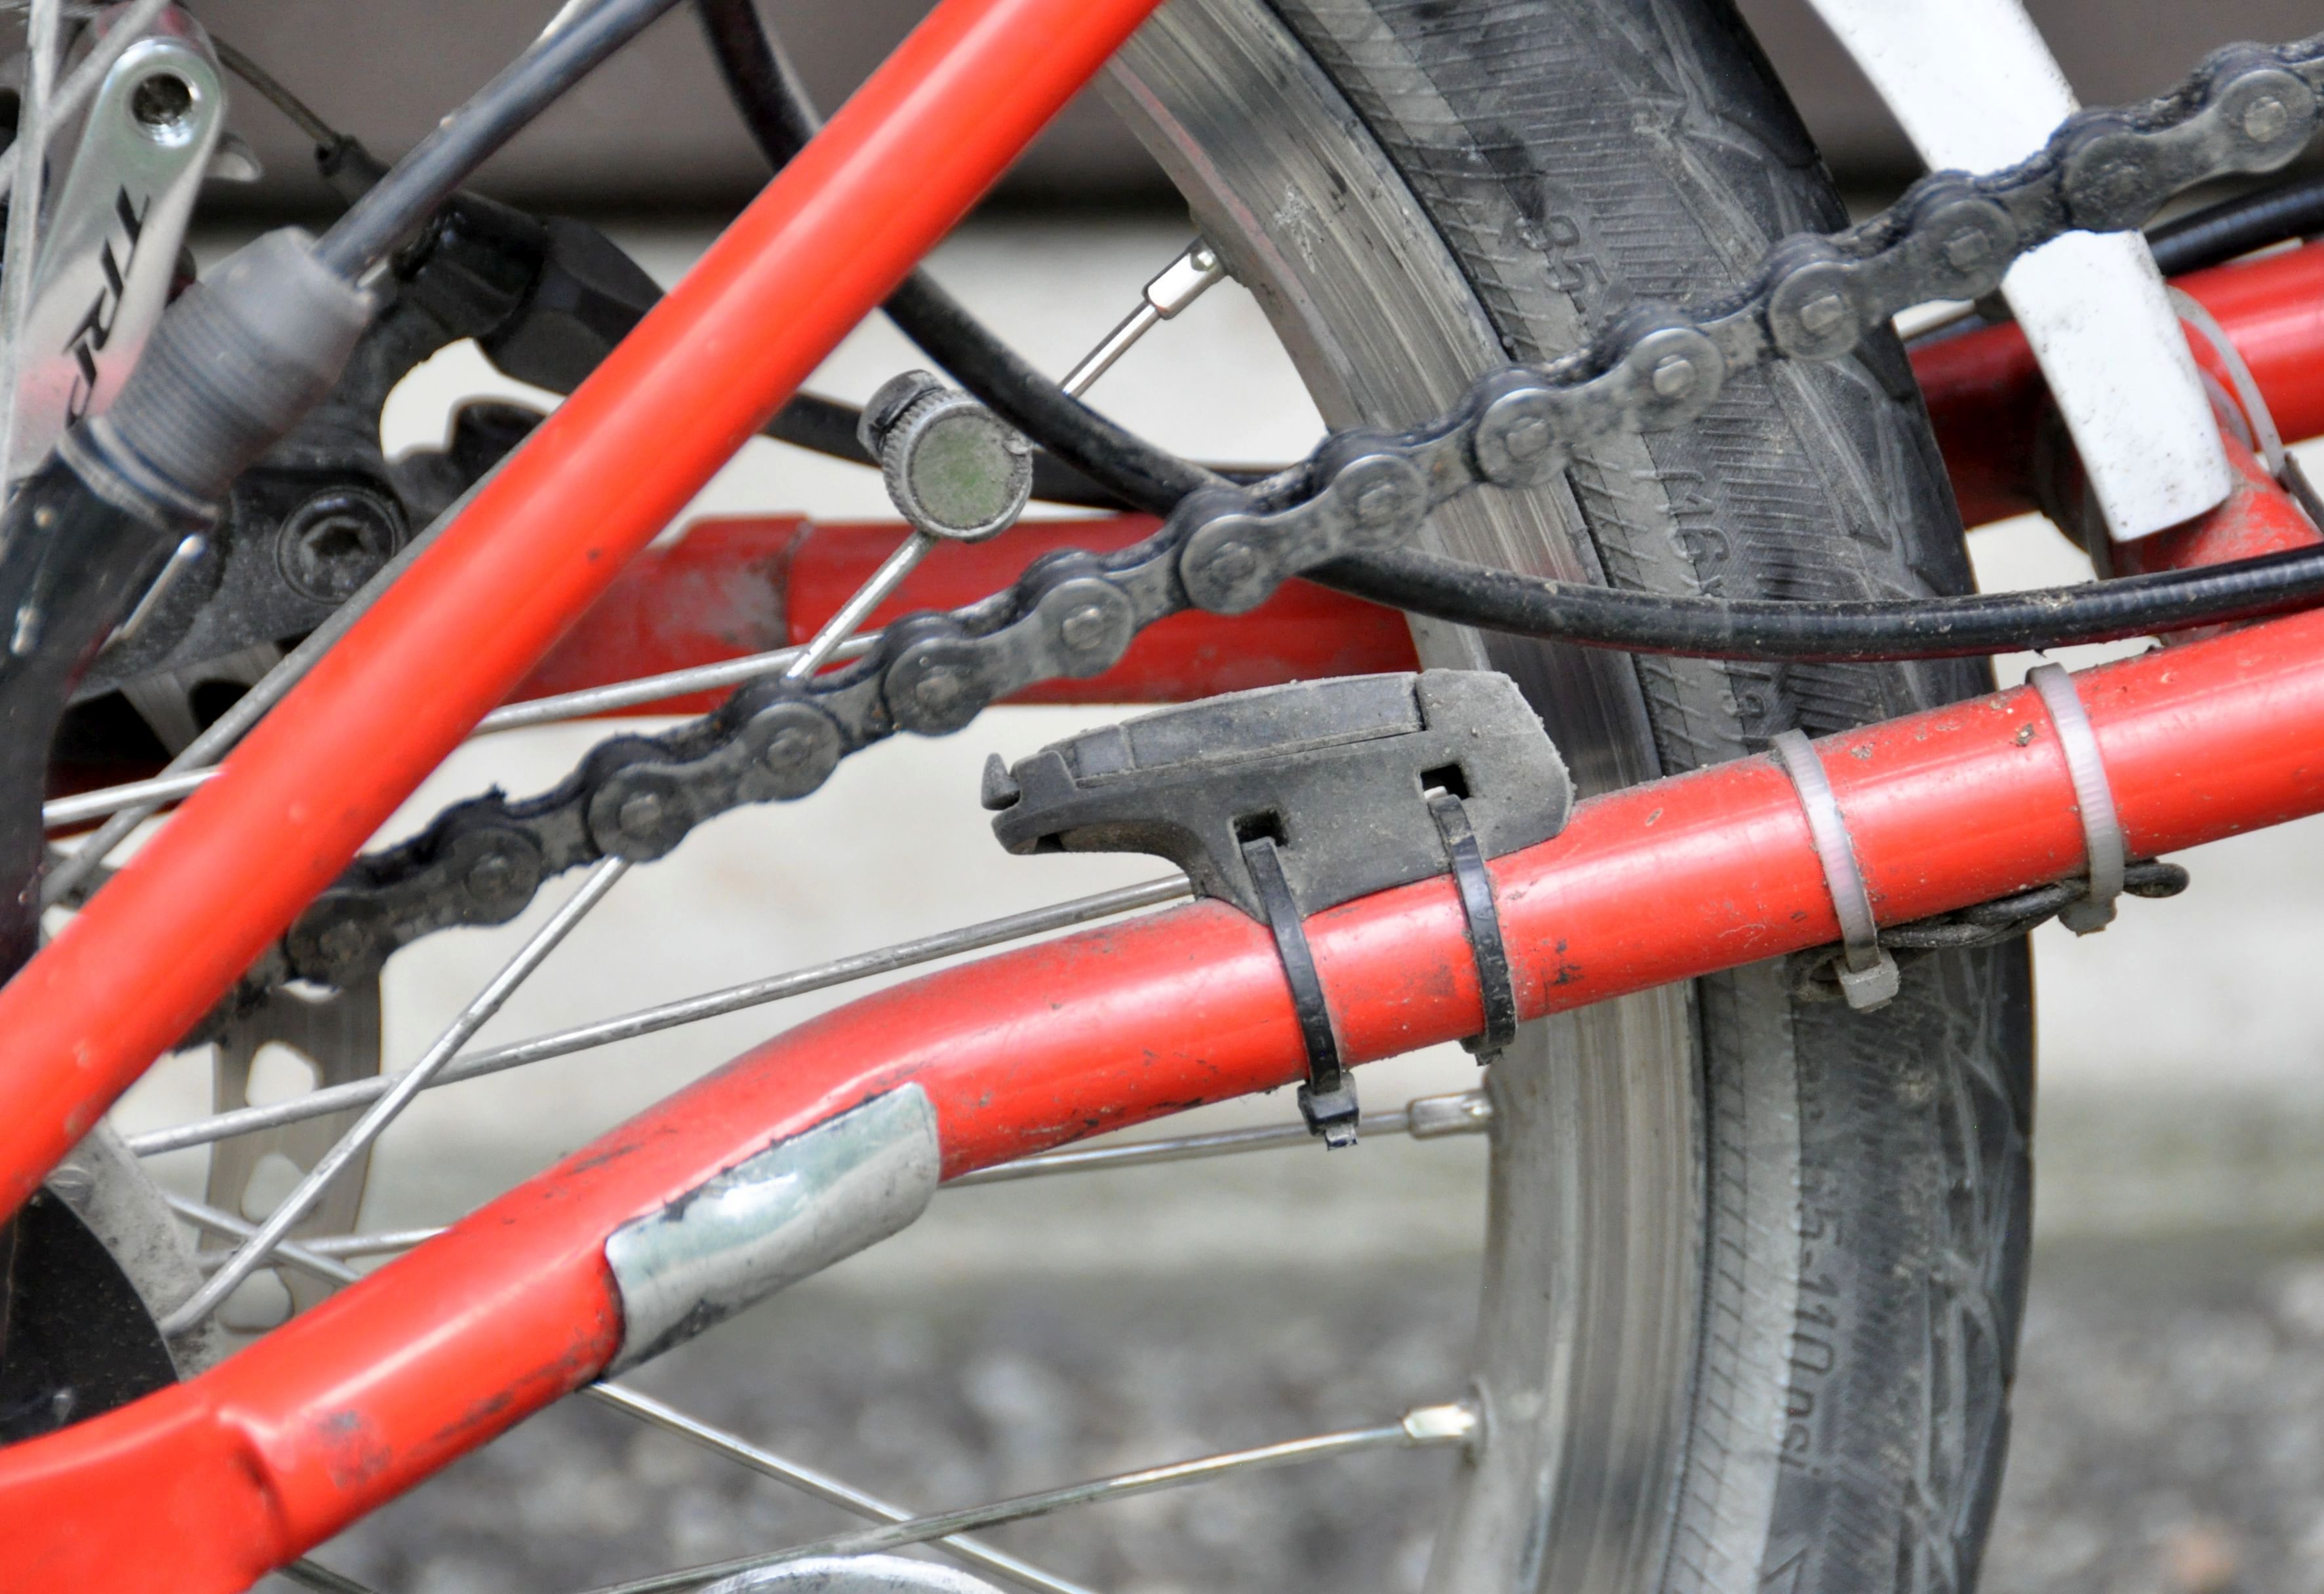
Folding the bike: The triangular short derailleur cage does not have enough capacity to keep the change tight when the bike is folded. So, I added a Birdy-style chainhook near the chainwheel. Folding works very well without dropping or jamming the chain. However, due to the wider chain stay (I have a 135 mm wide rear triangle) and conflict with the front wheel hook, I could not pull down the chain as far as on the Birdy, but the chain wrap turned out to be sufficient to keep the chain tensioned for the folded bike. I had to modify the chain catcher for the large chainwheel (58 teeth) and change the angle between the two parts (which was 90 degrees).
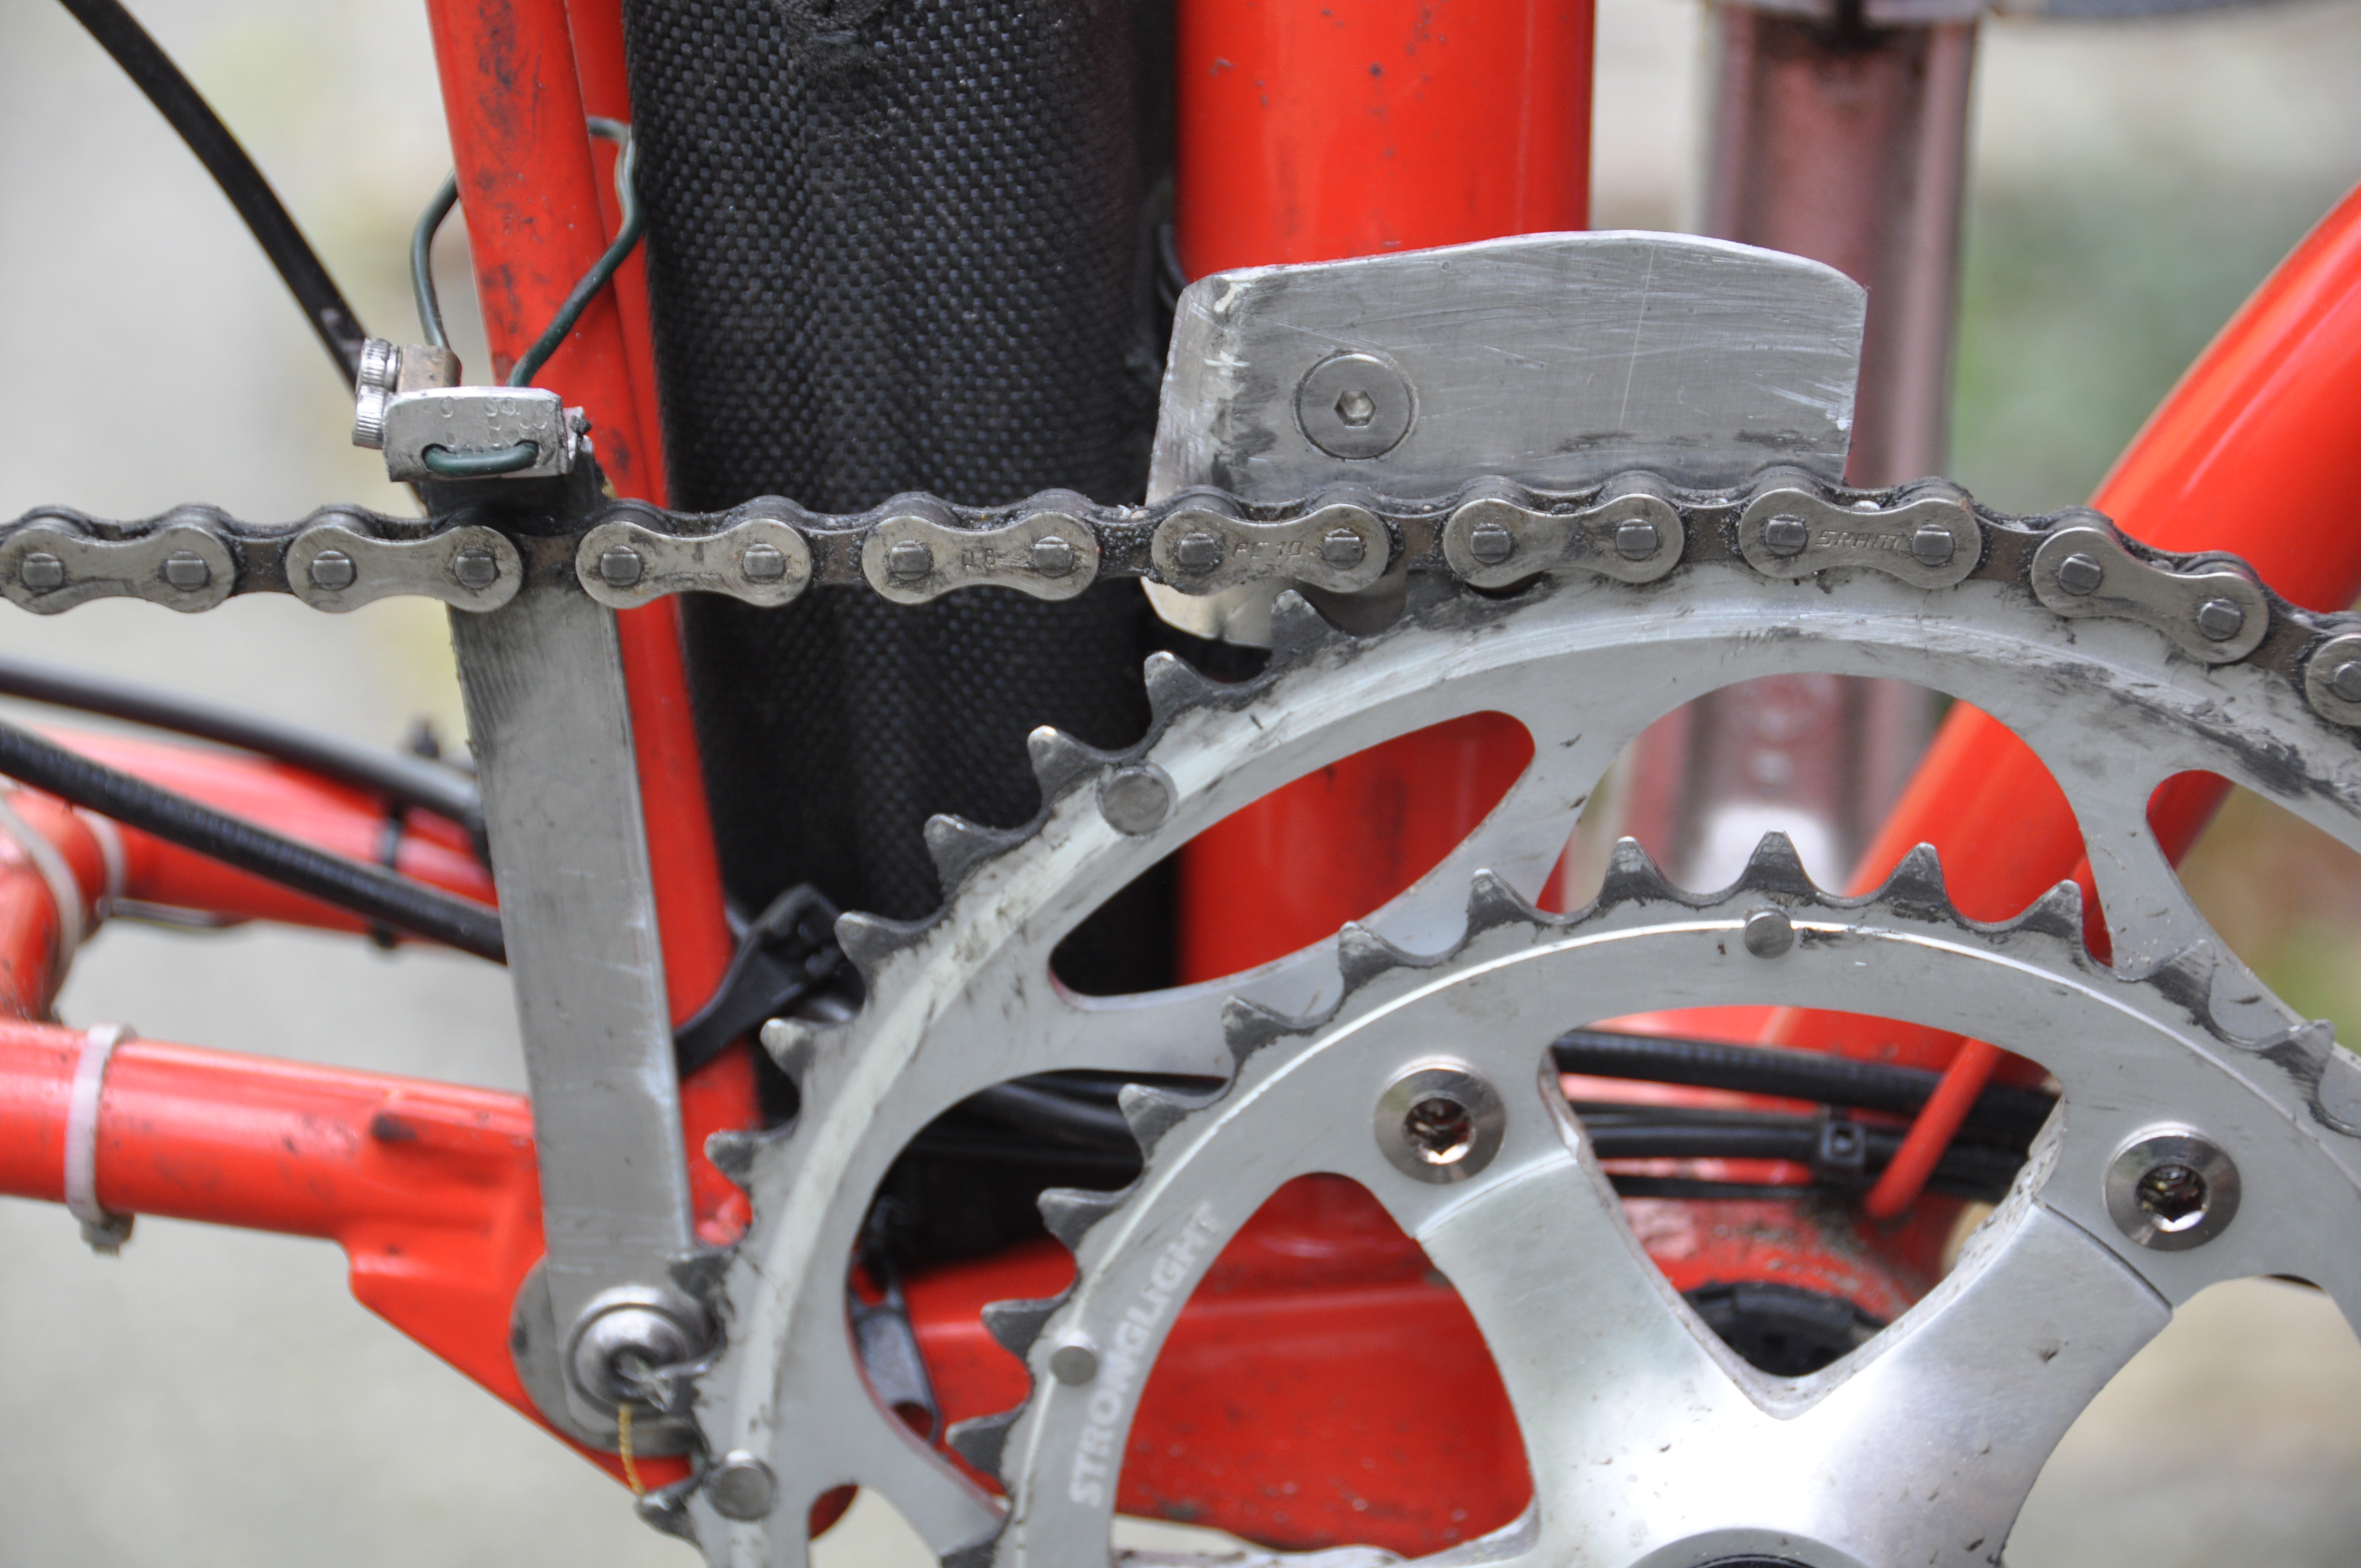
Foot front derailleur:
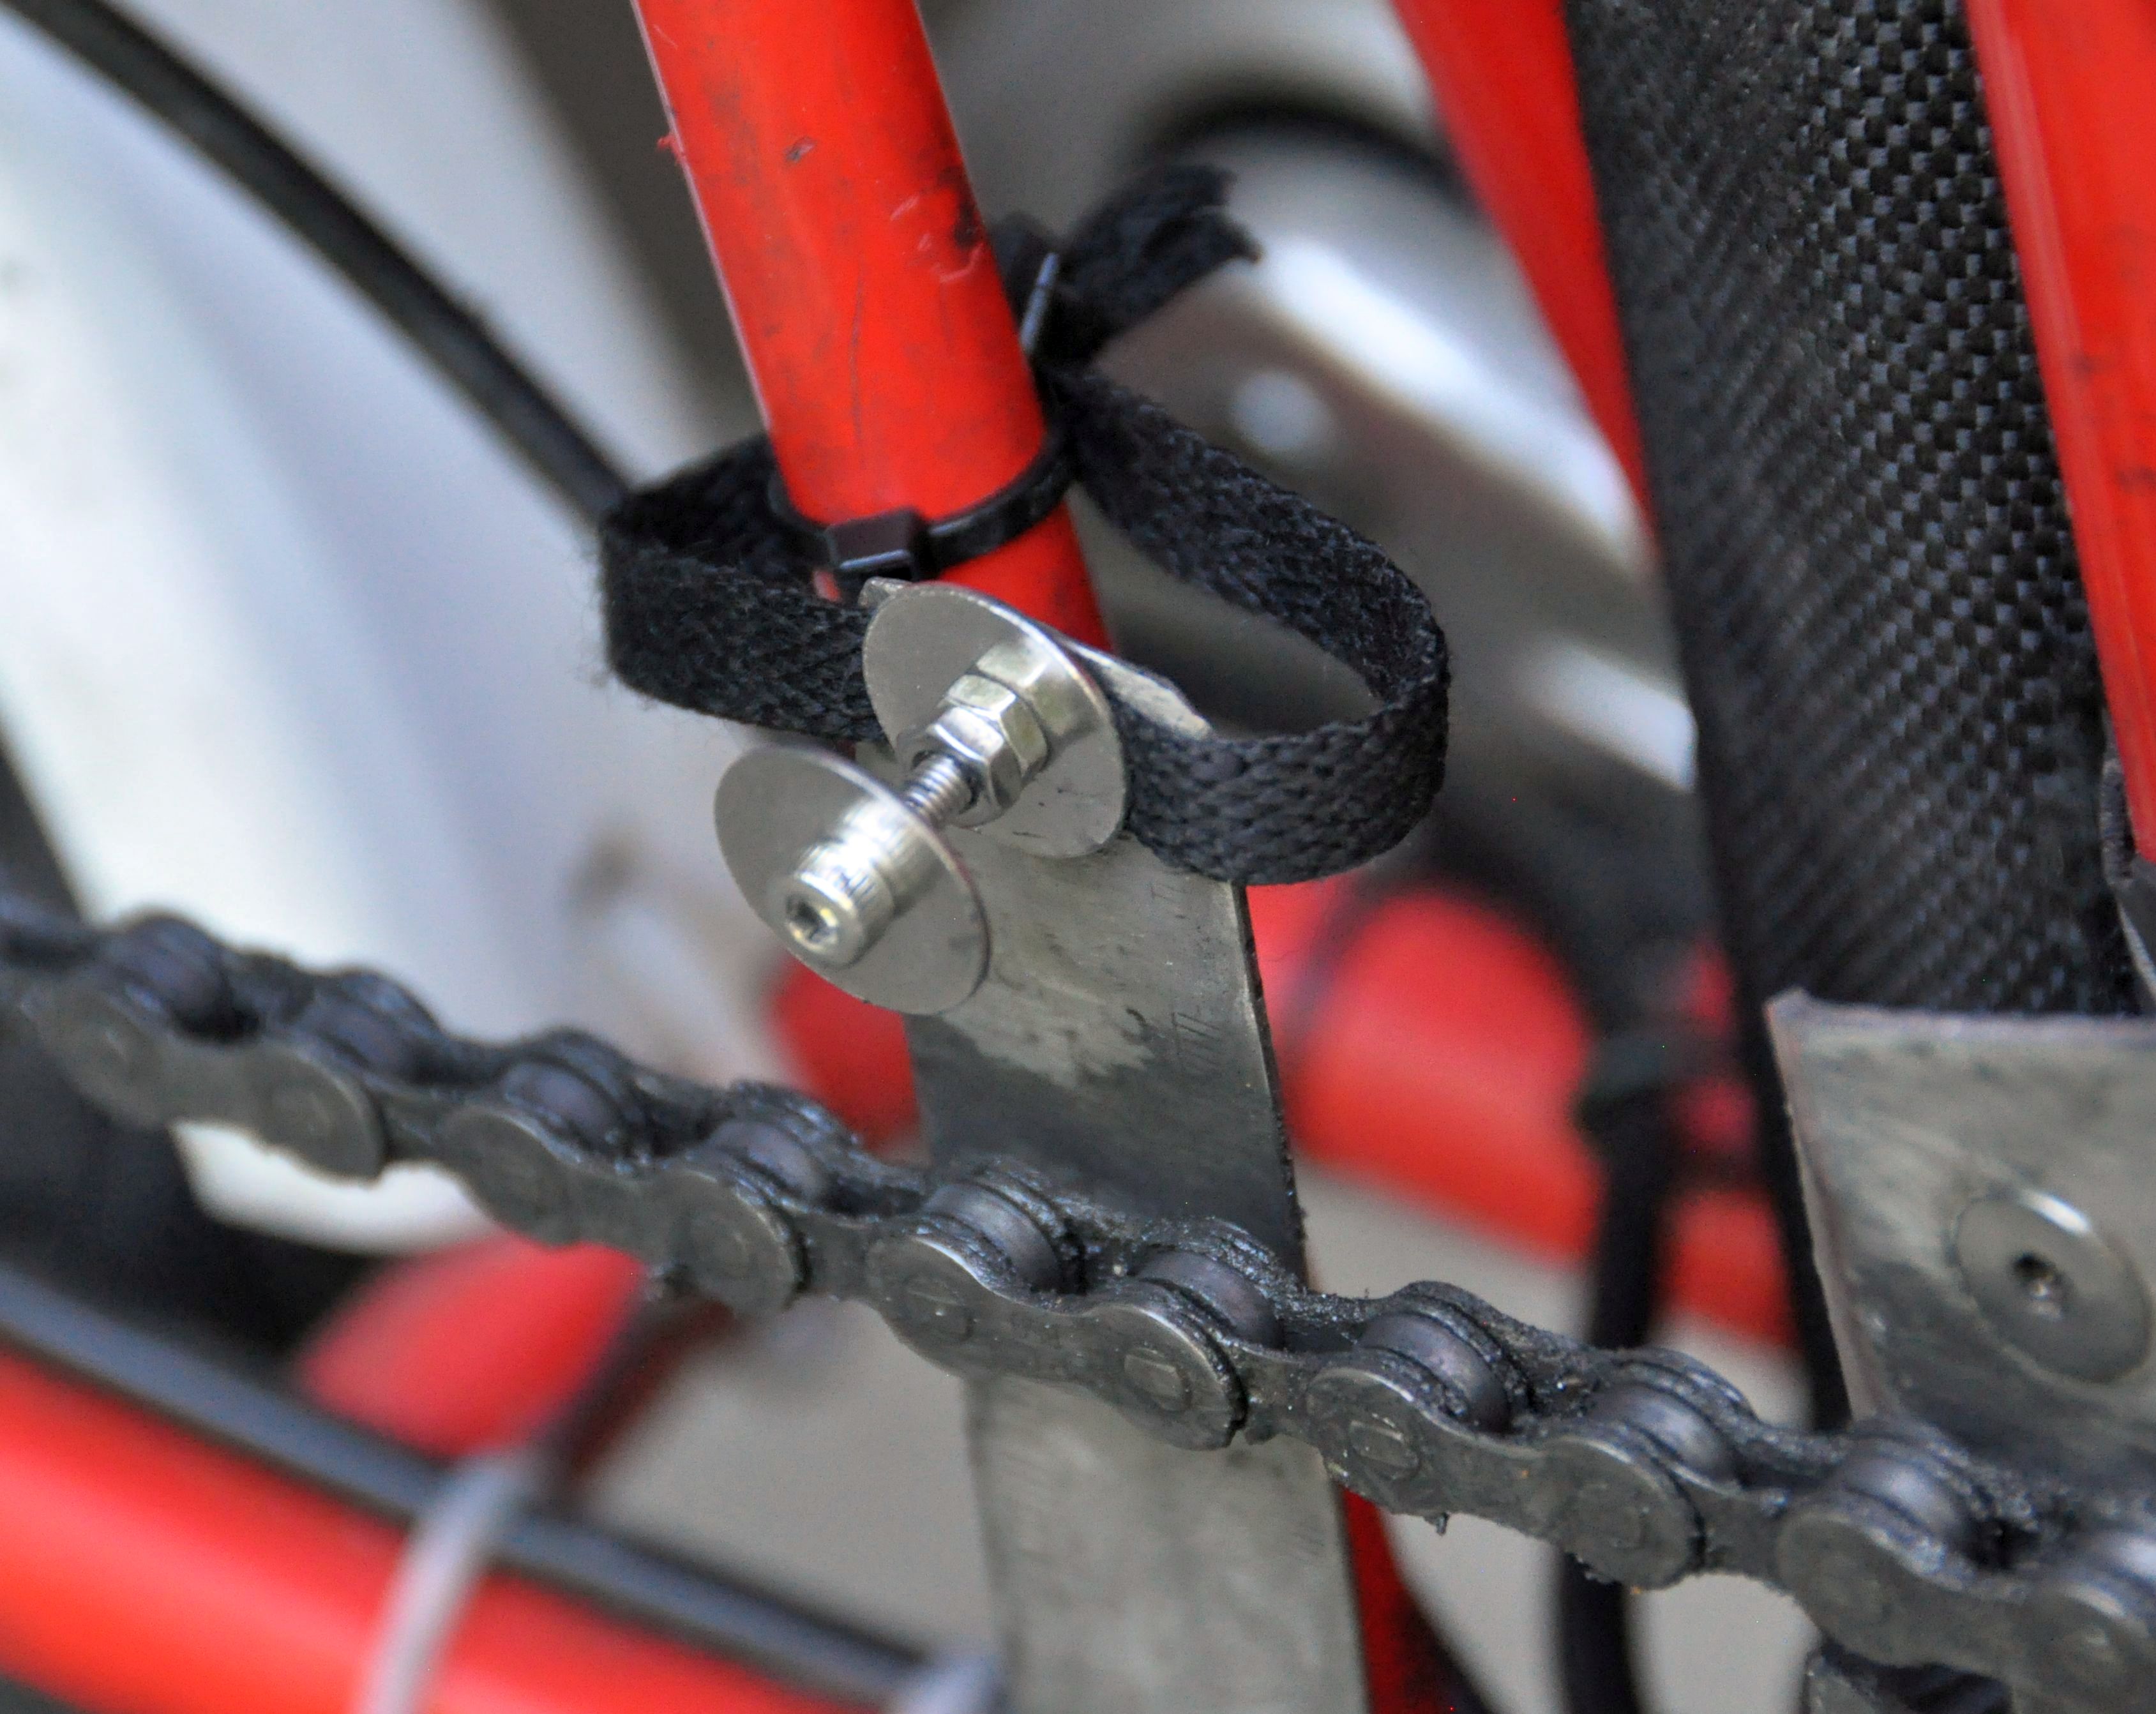
I can switch between the two chainrings with my foot --- to go to the smaller chainring, you push against the chain, to go to the larger chainring, you push against the chain with a metal lever. The jump by 26 teeth is quite demanding. When you push down the chain, it would jump past the small chainring, but I am using a simple guide. Another guide prevents the chain from "overclimbing", when pushed against the 58-tooth chainwheel.
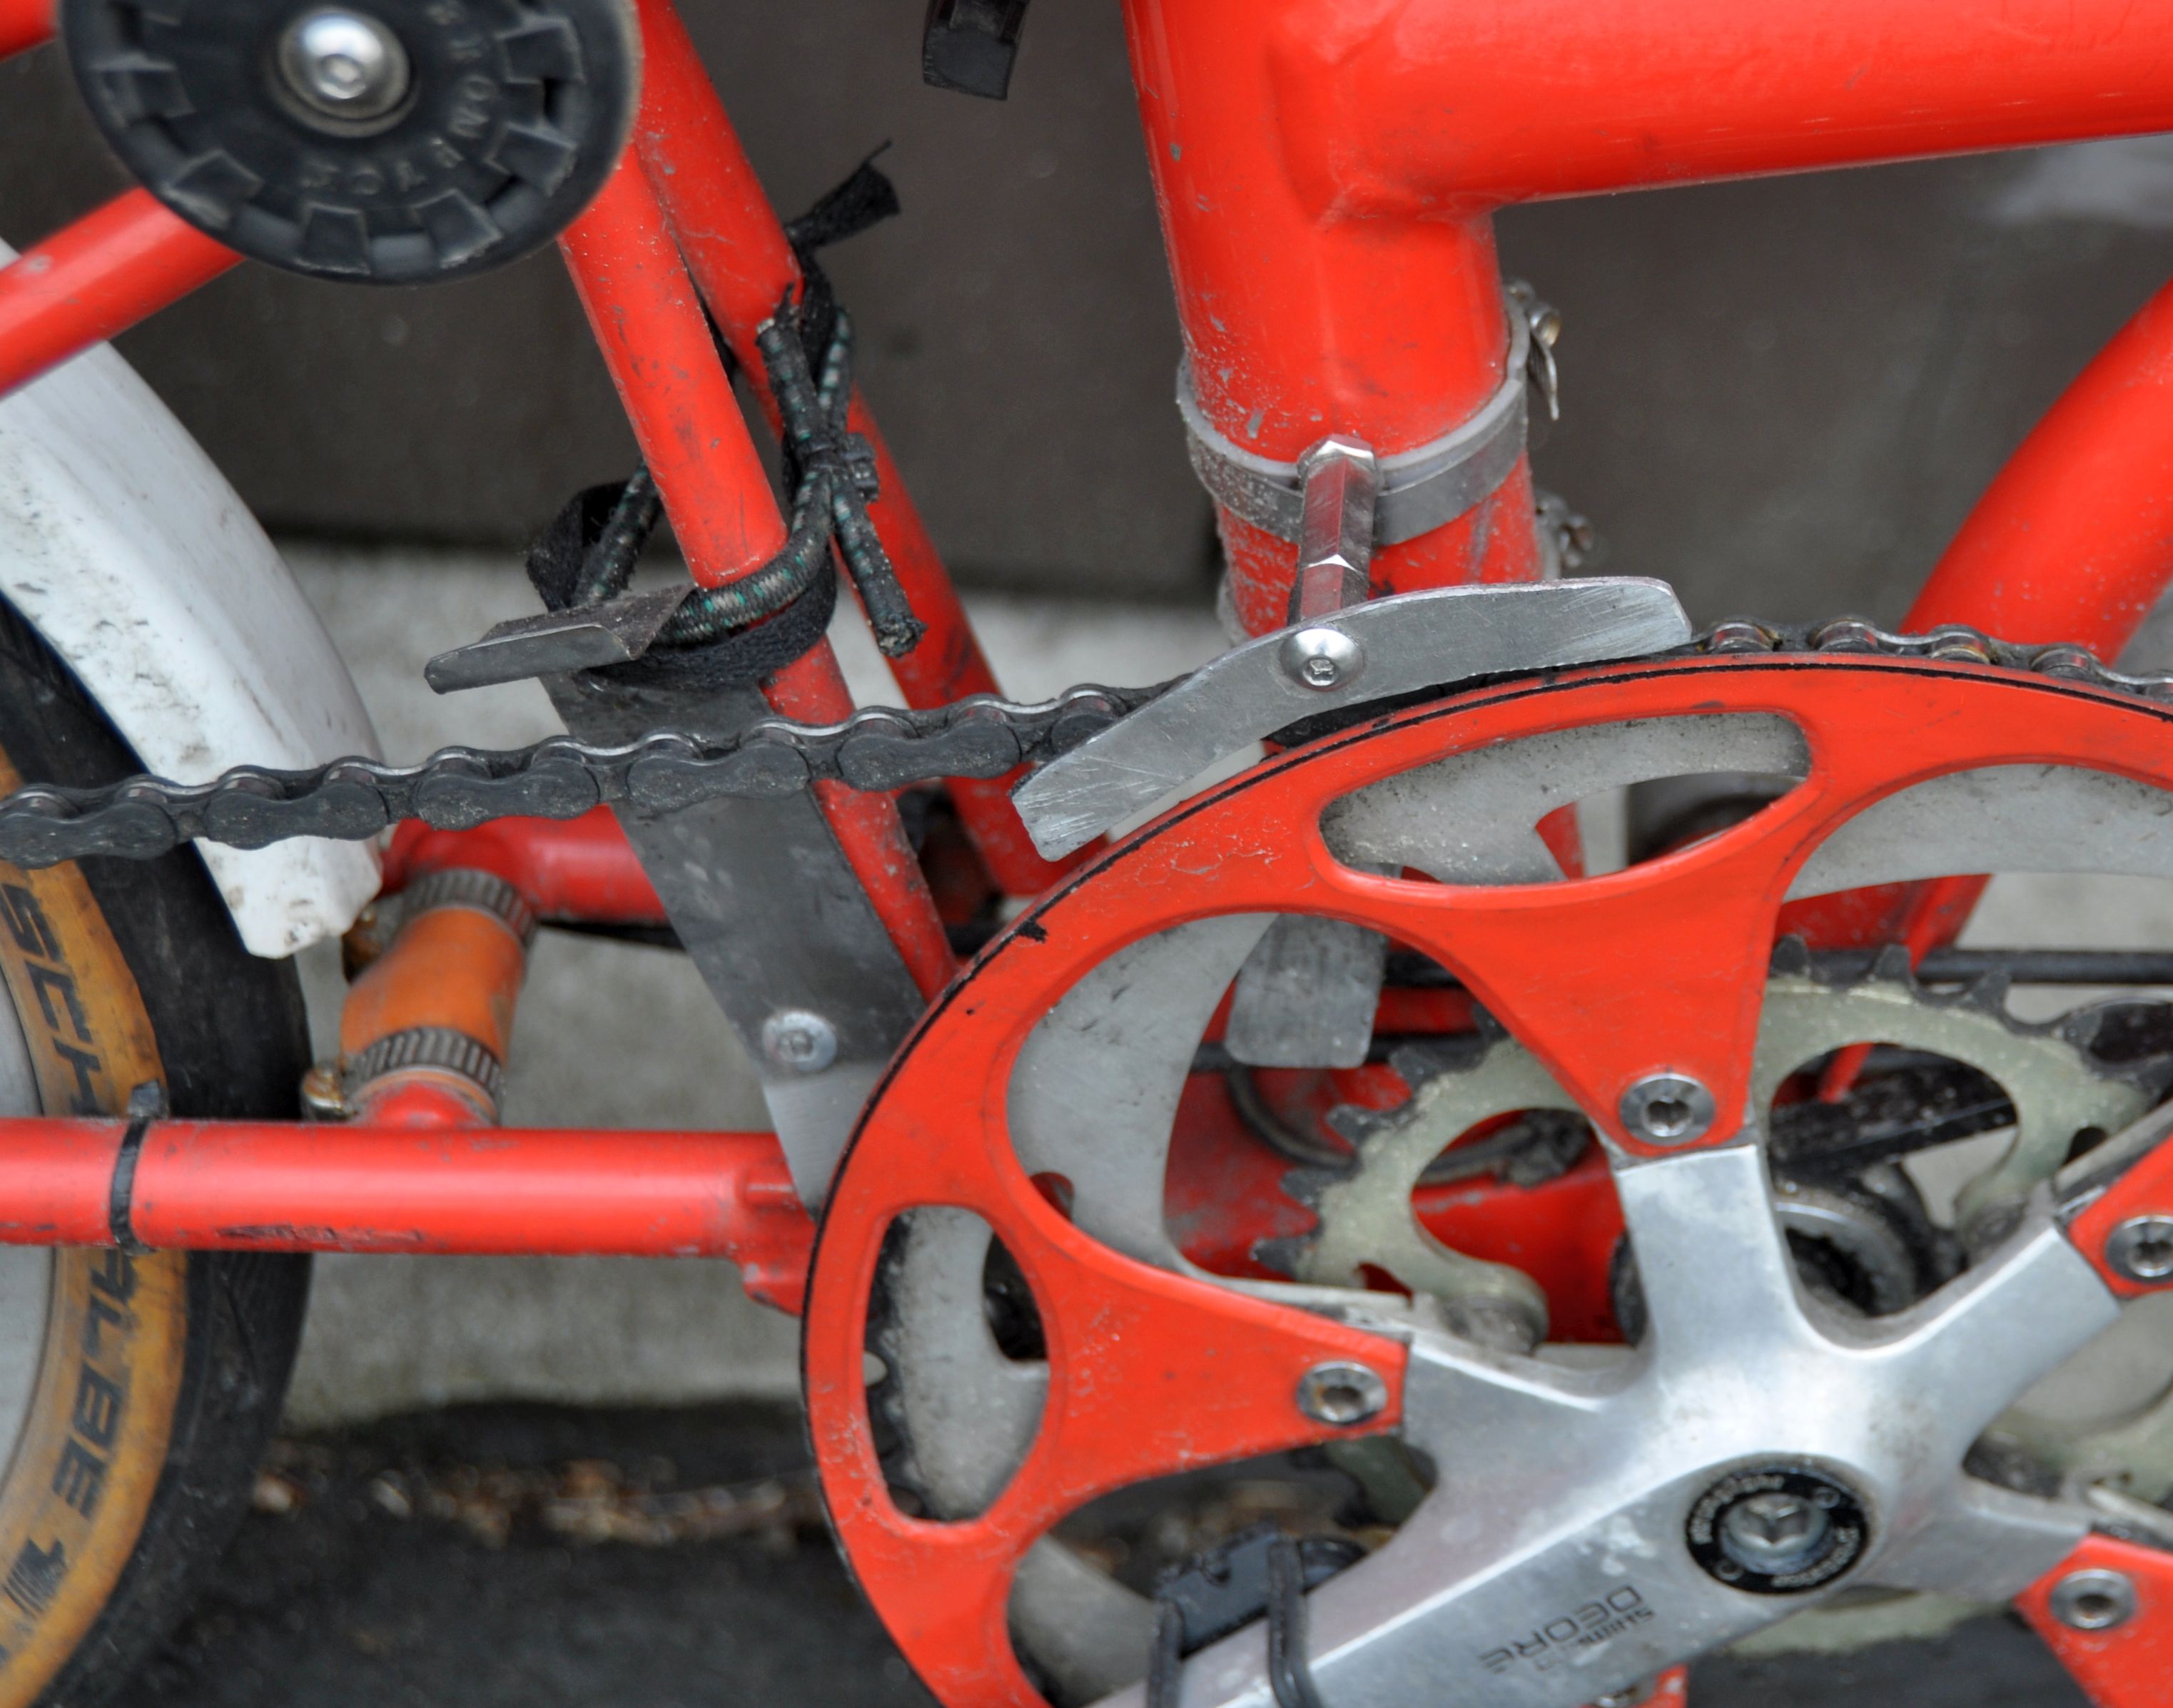
Works reliably!
For a video: http://mybikesite.org/Videos/Foot_Derailleur_58-32_a.mp4
For an older version, see link
Thoughts about derailleurs for small wheels:
I have converted both a Brompton and Bike Friday Tikit with 16" wheels from an internal gear hub to cassettes. For the Tikit, the Shimano Zee derailleur is an excellent choice. It has a very short cage (50 mm) which is good for ground clearance, and a low profile. The capacity is only 25 teeth, but perfectly matched to a 11-36 cassette. However, there is no capacity left for a double chainring or for wrapping up the chain when folding the Brompton.
Eerder Metaal has offered (now discontinued) a modified version of the Zee derailleur for the Brompton. It features a chain hook and a rubber band (which provides B tension to the derailleur). I am not sure if this would work with a double chainring.
https://www.eerdermetaal.nl/brompton_webshop.html
My Brompton modification features a short-cage Shimano Deore XT derailleur (cage length 68 mm) modified for three pulleys. The capacity is at least 50 teeth (I use it for 47 teeth).
BTW, many years ago, Sun Tour had a mountain derailleur with triple pulleys – see
https://www.disraeligears.co.uk/site/suntour_xc_derailleur_3_pulley_system.html
Problems with the LTWOO derailleur:
I have tried to use the LTWOO derailleur for a 9-speed cassette with a double chainring. It didn't work.
Problem 1: The length of the chain tensioner is too long for a double chainring. With a single chainring, the tensioner is almost horizontal when on the largest coq. When on the smallest coq, it points down, but its pivot is now higher (near the small coq). However, when you have a double chainring, the chain tensioner points down when on the small chainring and the largest coq --- and it touches the ground.
Problem 2: Non-standard pull ratio. With a friction shifter, I measured the cable pull and found that the LTWOO derailleur is very close to 1:1.0. This is incompatible with all other so-called 1:1 systems: According to this useful website
https://forum.cyclinguk.org/viewtopic.php?t=133073
Shimano 11 speed mountain is 1:1:1, SRAM 8, 9 speed is also 1:1.1, SRAM 10 speed is 1:1.3 and SRAM 11 speed 1:1.12. If I am correct, the LTWOO derailleur can be used only with the original LTWOO shifters.
Problem 3: Very flimsy. The tensioner and pulleys have some play, and everything looks cheaply made.
This is bad news. I was optimistic that the LTWOO derailleur would provide an easy solution to use 9, 10 or 11-speed cassettes on the Brompton (with a 135 mm triangle). As several people here have shown, it is an OK solution for a single chainring, but not for a double (which I need for the mountains).
Double chainring Back to top
In the past, I combined the Alfine 11 with a double chainring. Here is the info:
For bike touring in the Alps I want even lower gears than the Alfine 11 provides. A simple way to extend the gearing on the Brompton is to use a double chainring.
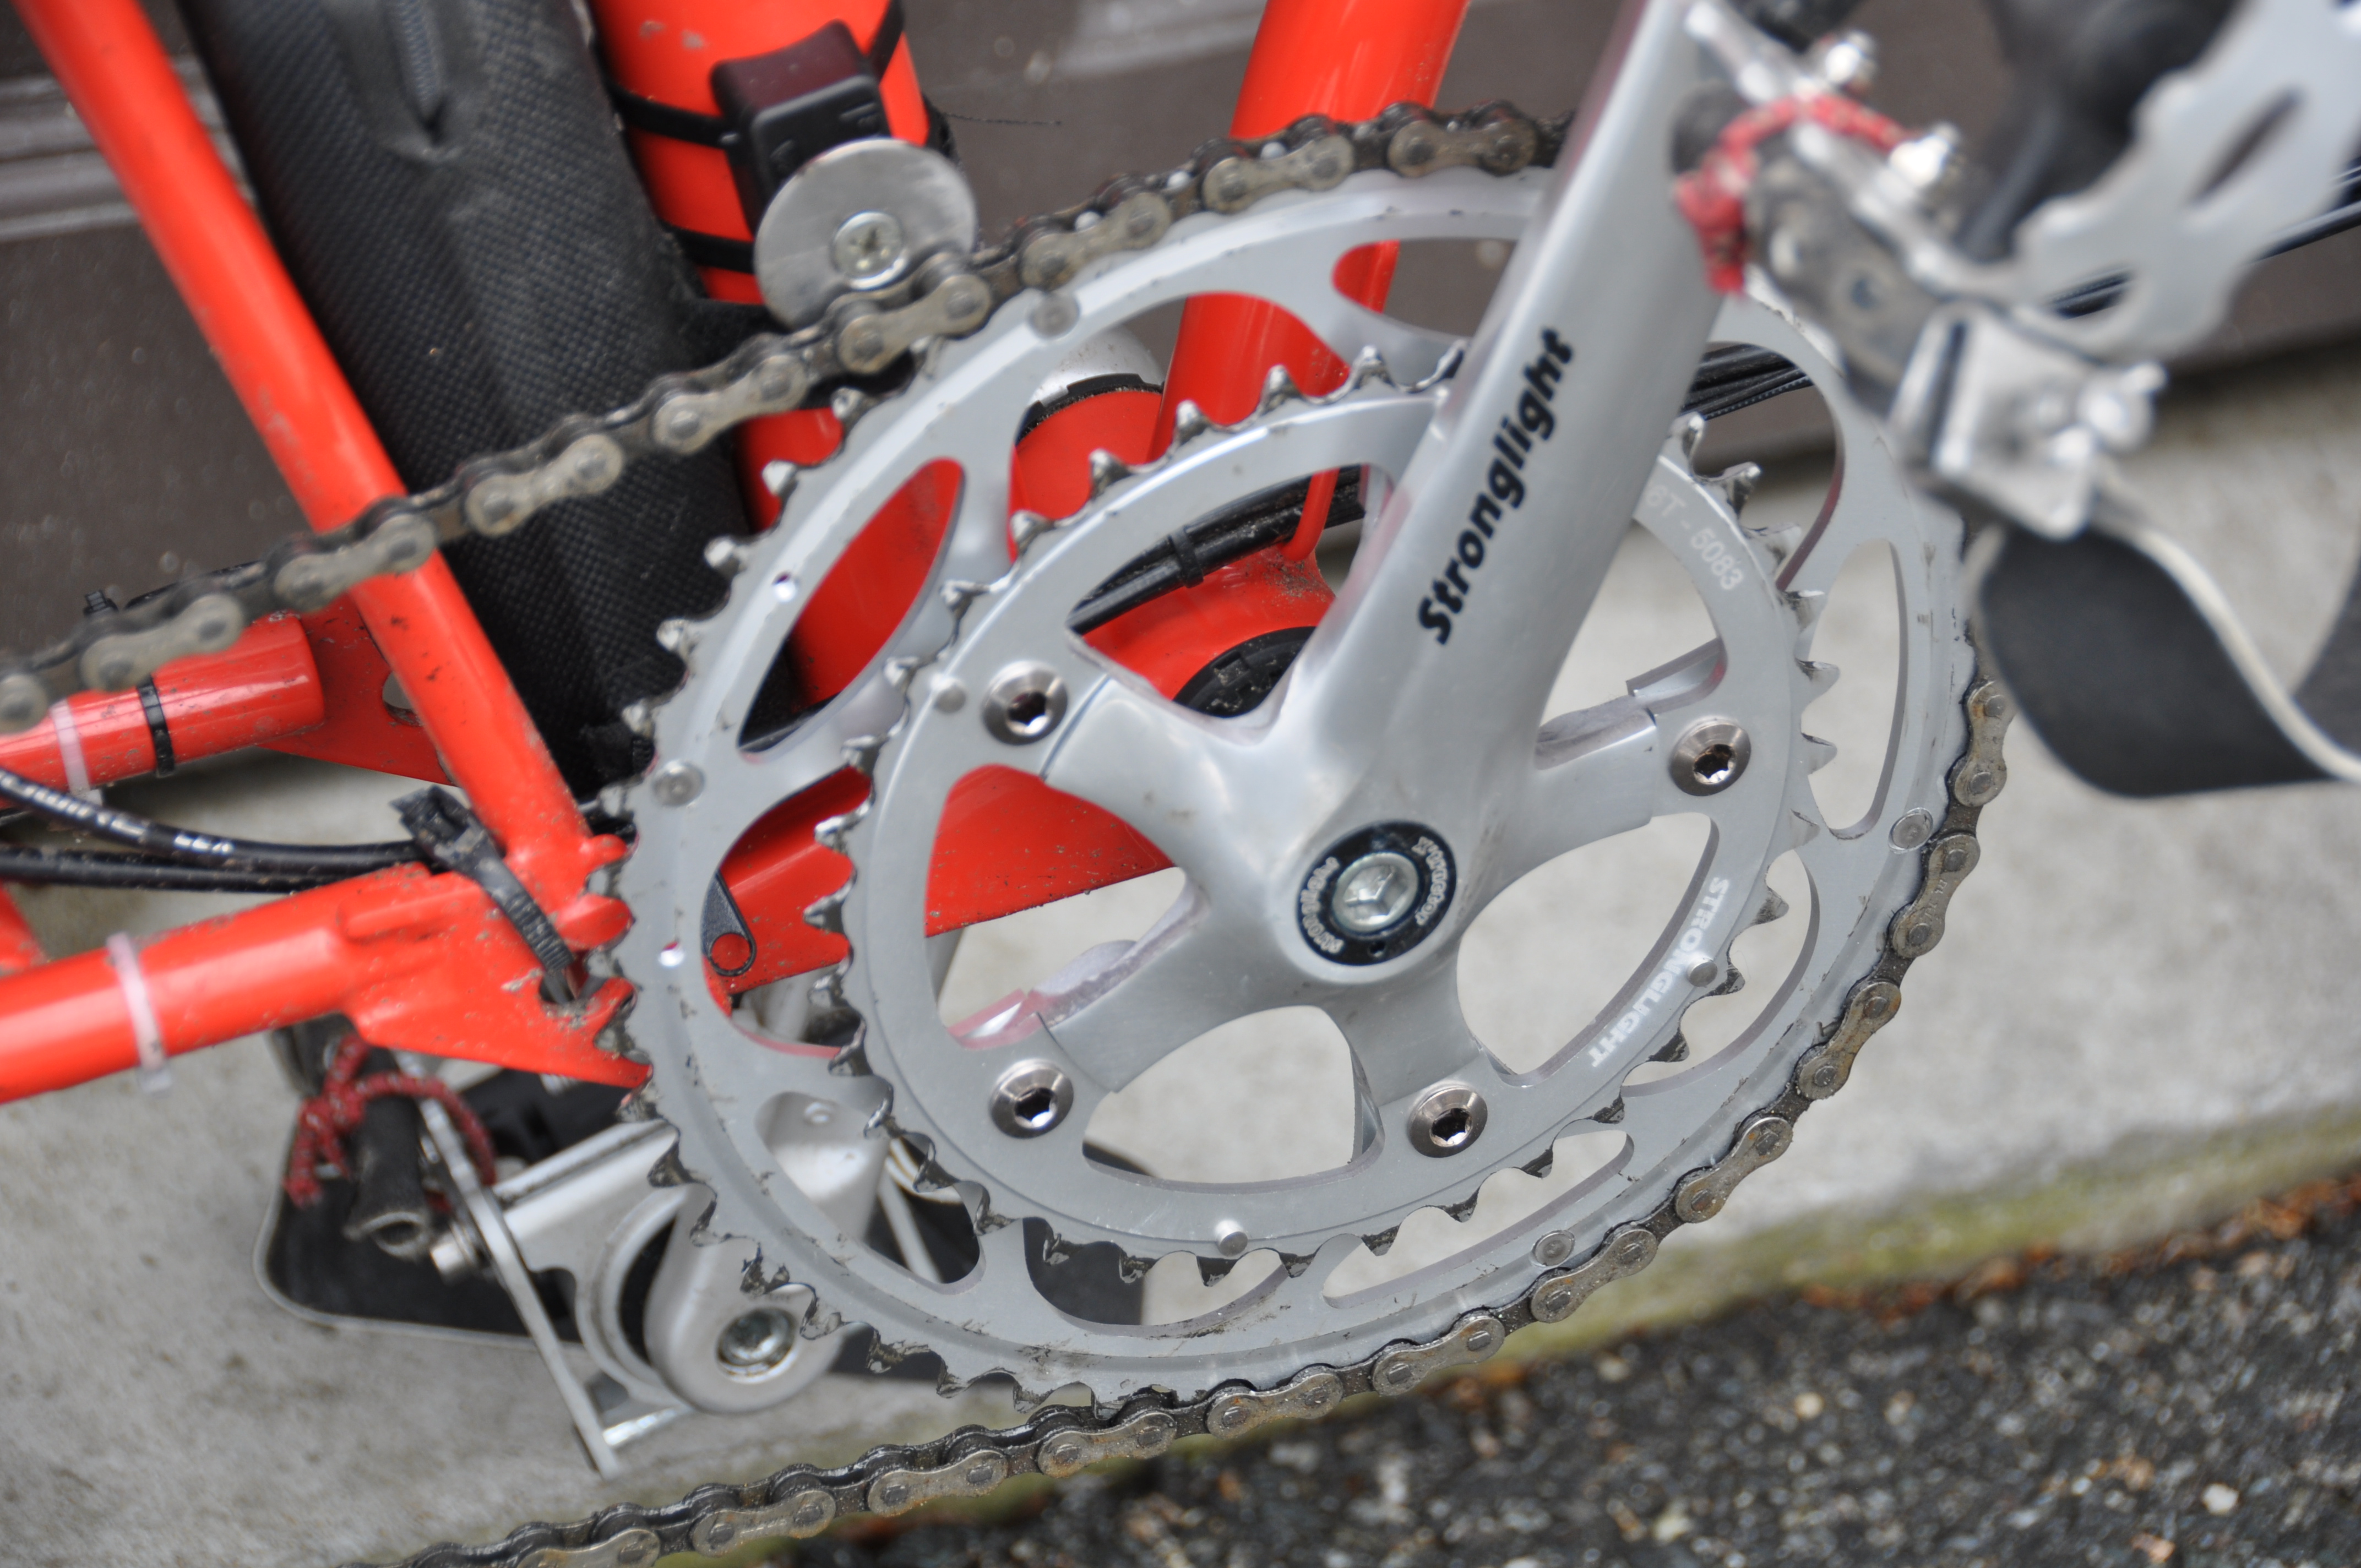
For a double chainring, there is always the question about bottom bracket compatibility and chain line. Here is my experience: I have a 2018 Brompton (Alfine 11), and swapped out the original crank with a 50 teeth chainring against:
Crankset Stronglight Impact Compact Argent 170mm - 50x36, Square JIS Bottom Bracket. The ratio of smallest to largest gear is 409 % for the Alfine 11. With the double chainring, it is now 568 %.
Note added: I replaced the 36 teeth chainring with a 33 teeth: total gear range is now 621 %, highest gear 7.59 m, lowest gear 1.23 m. The small chainring effectively gives me three extra gears. I added 1 mm spacers between the two chainwheels. This was not absolutely necessary, but when the chain is on the small chainwheel, it touched the big one, and the extra spacer gives more room to the chain. Even with the 1 mm space, the chain rubs lightly against the big chainwheel.
The new crank is a perfect fit. After swapping the small and big chainrings, the 50 tooth ring is exactly in the same place as the original 50 tooth ring, and no adjustment of the chainline was necessary. Since I use the small chainring only occasionally, I wanted to keep the best alignment for the large chainring.
I expected that the front fender stays would need some bending to allow folding, but for the compact Stronglight crankset, no bending was needed.
With the small chainwheel, the chain has lower tension. Sometimes, when I pedaled backward, the chain came off. This is solved by increasing the tension of the chain tensioner. For this, you carefully loosen the central screw until you can wind up the spring by one full turn by rotating the tensioner arm over the molding, and then retightening the screw.
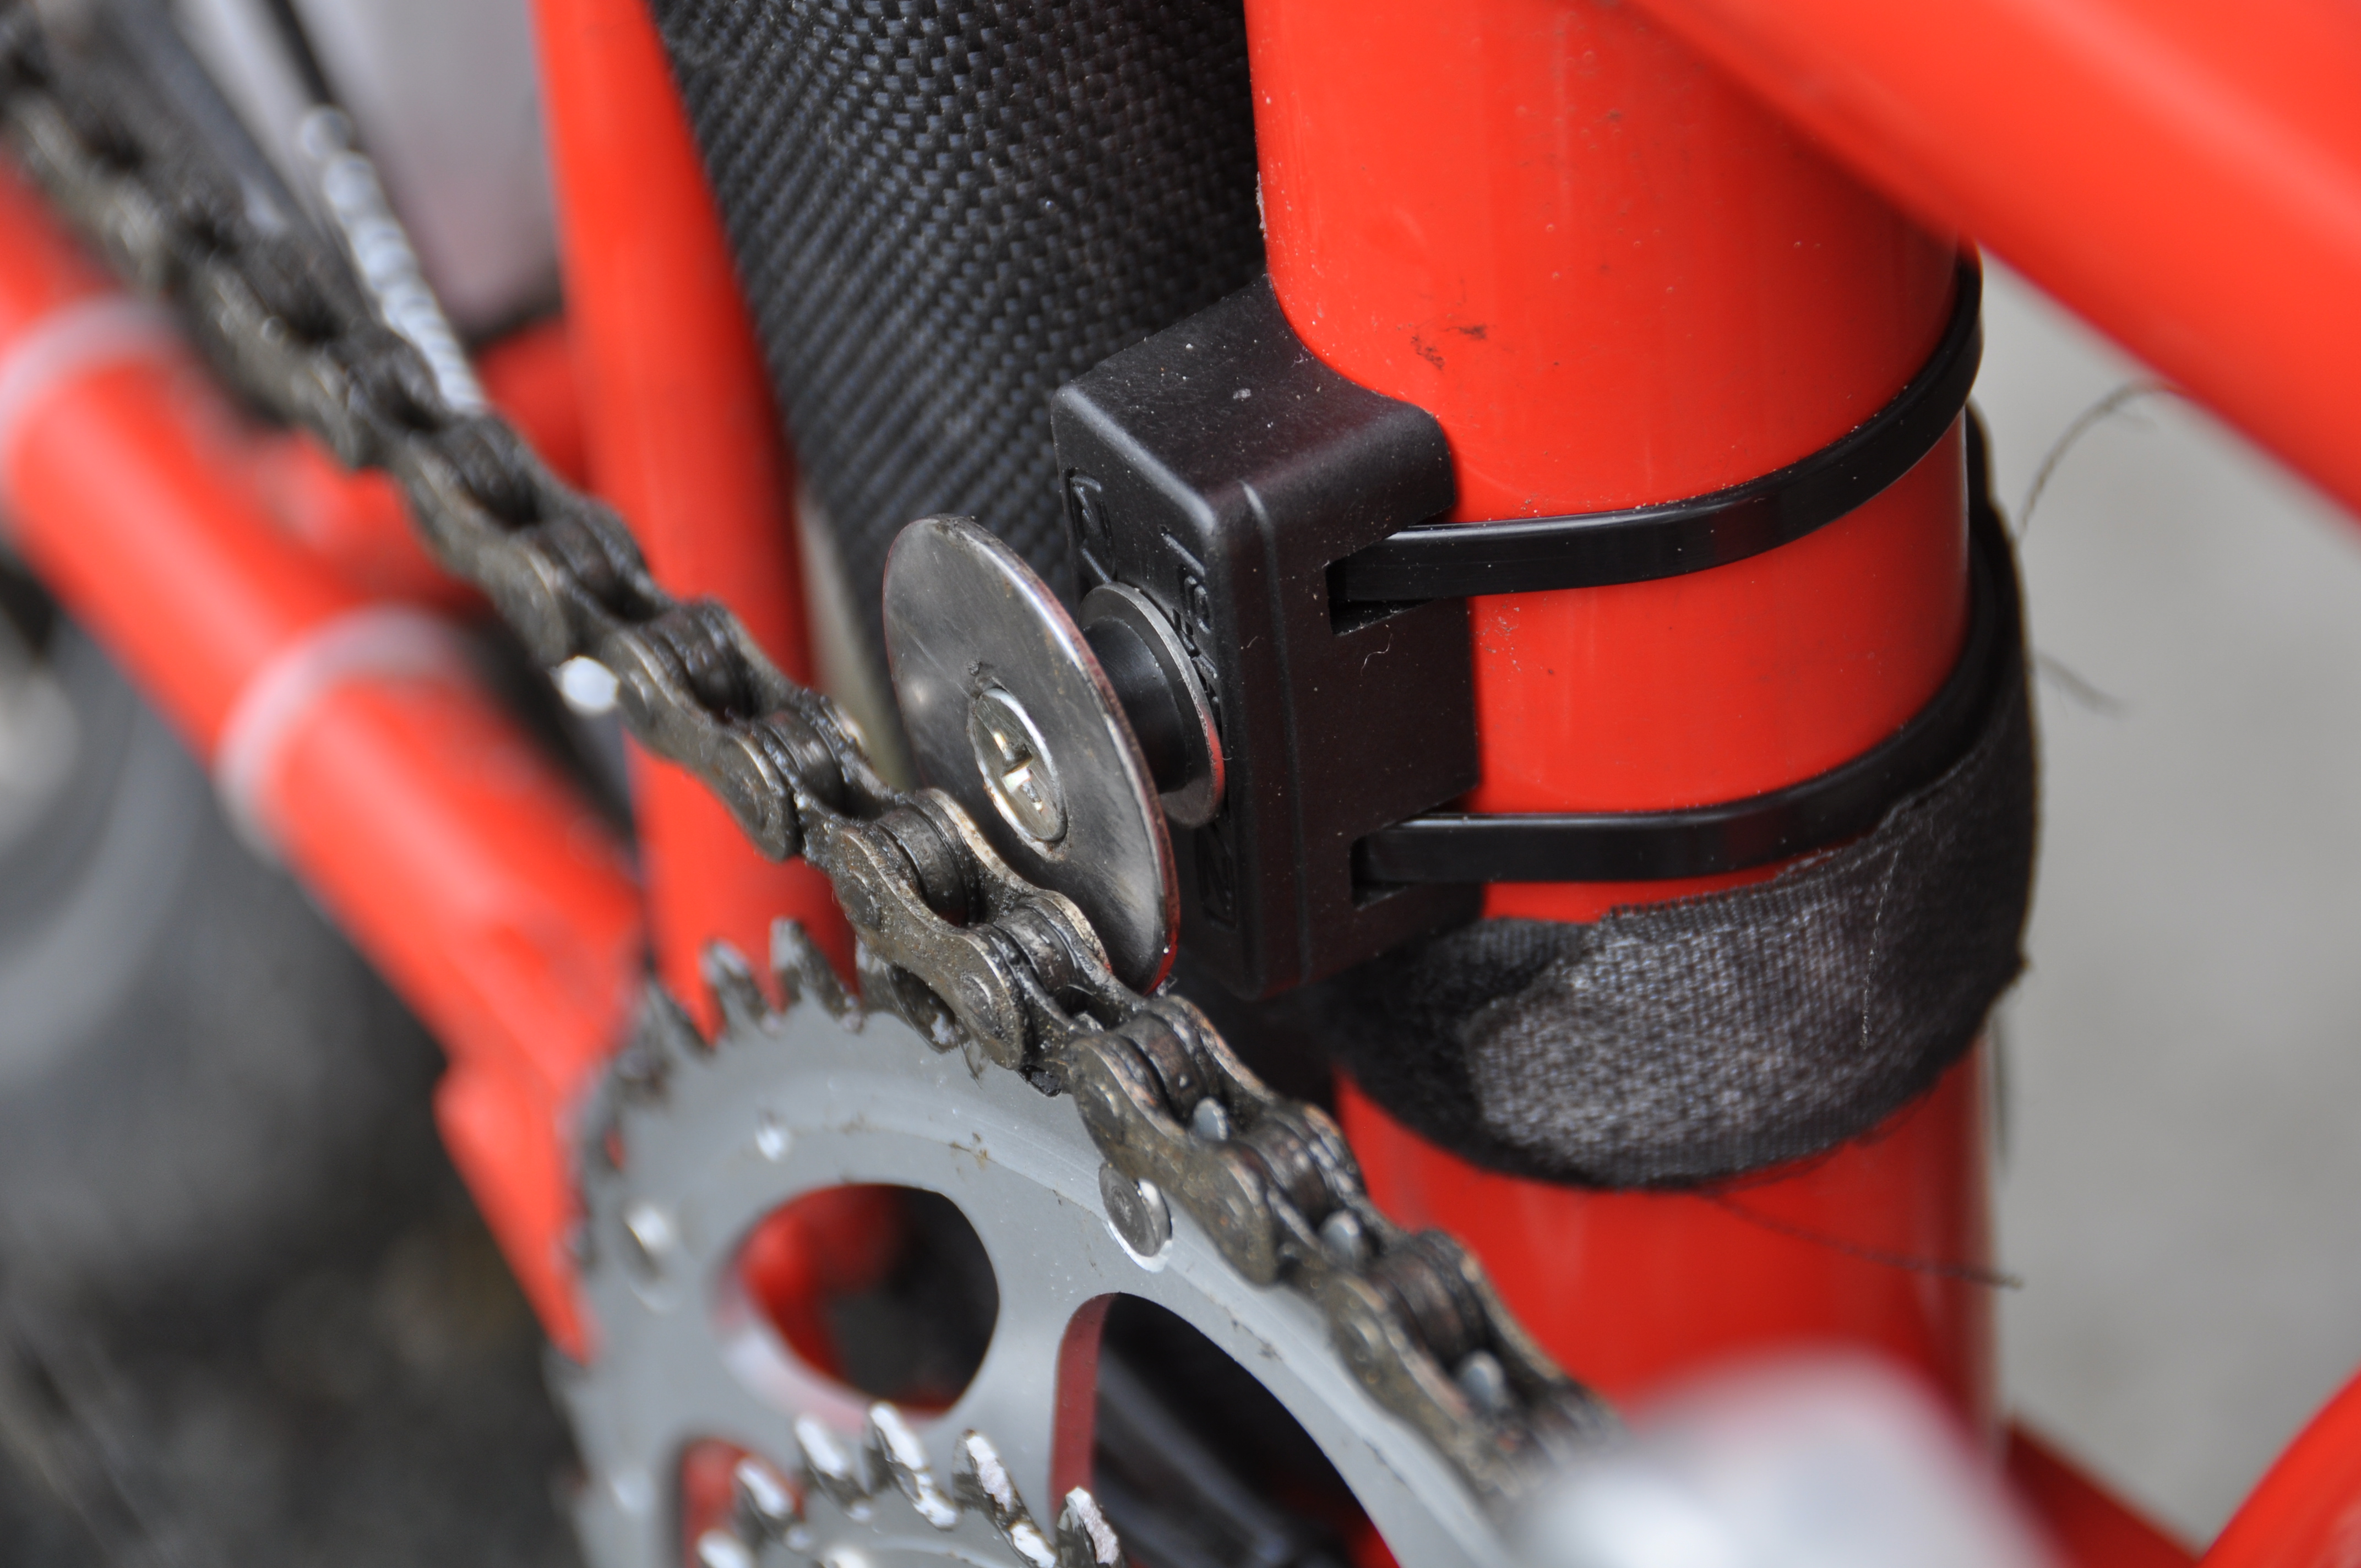
Since I want to kick the chain up with my heel, I installed a big washer to avoid the chain from "over-climbing", using a Zefal GIZMO UNIVERSAL clamp. Works OK. Without a lot of practice, the chain is dropped 5 or 10 % of the times I shift up. The washer could be replaced with a bigger plate (see below).
Foot derailleur Back to top
Here I describe my earlier version of the foot derailleur, which was installed to work with the Alfine 11. The small chainring was mounted outside, which had some advantages. When I swapped out the Alfine 11 against a cassette-derailleur system, I had to use the standard arrangement of the two chainrings where the small chainring is mounted inside. See link.
For switching between the two front chainrings, I added a “foot derailleur”.
See video at https://www.facebook.com/groups/796190400521866/permalink/1547592678714964/
I will use the smaller chainring only infrequently (when I go on a tour in the mountains) and therefore prefer the lighter and more minimal solution without extra cable and shifter for a regular front derailleur. I regard my solution as in between the "greasy finger" and the "front derailleur" solutions.
Shifting the chain up works better after increasing the tension of the chain (see above).
Exchanging the chainwheels made it easier to design the foot derailleur, since you need some guide to prevent the chain from climbing past the largest chainwheel.

Update:
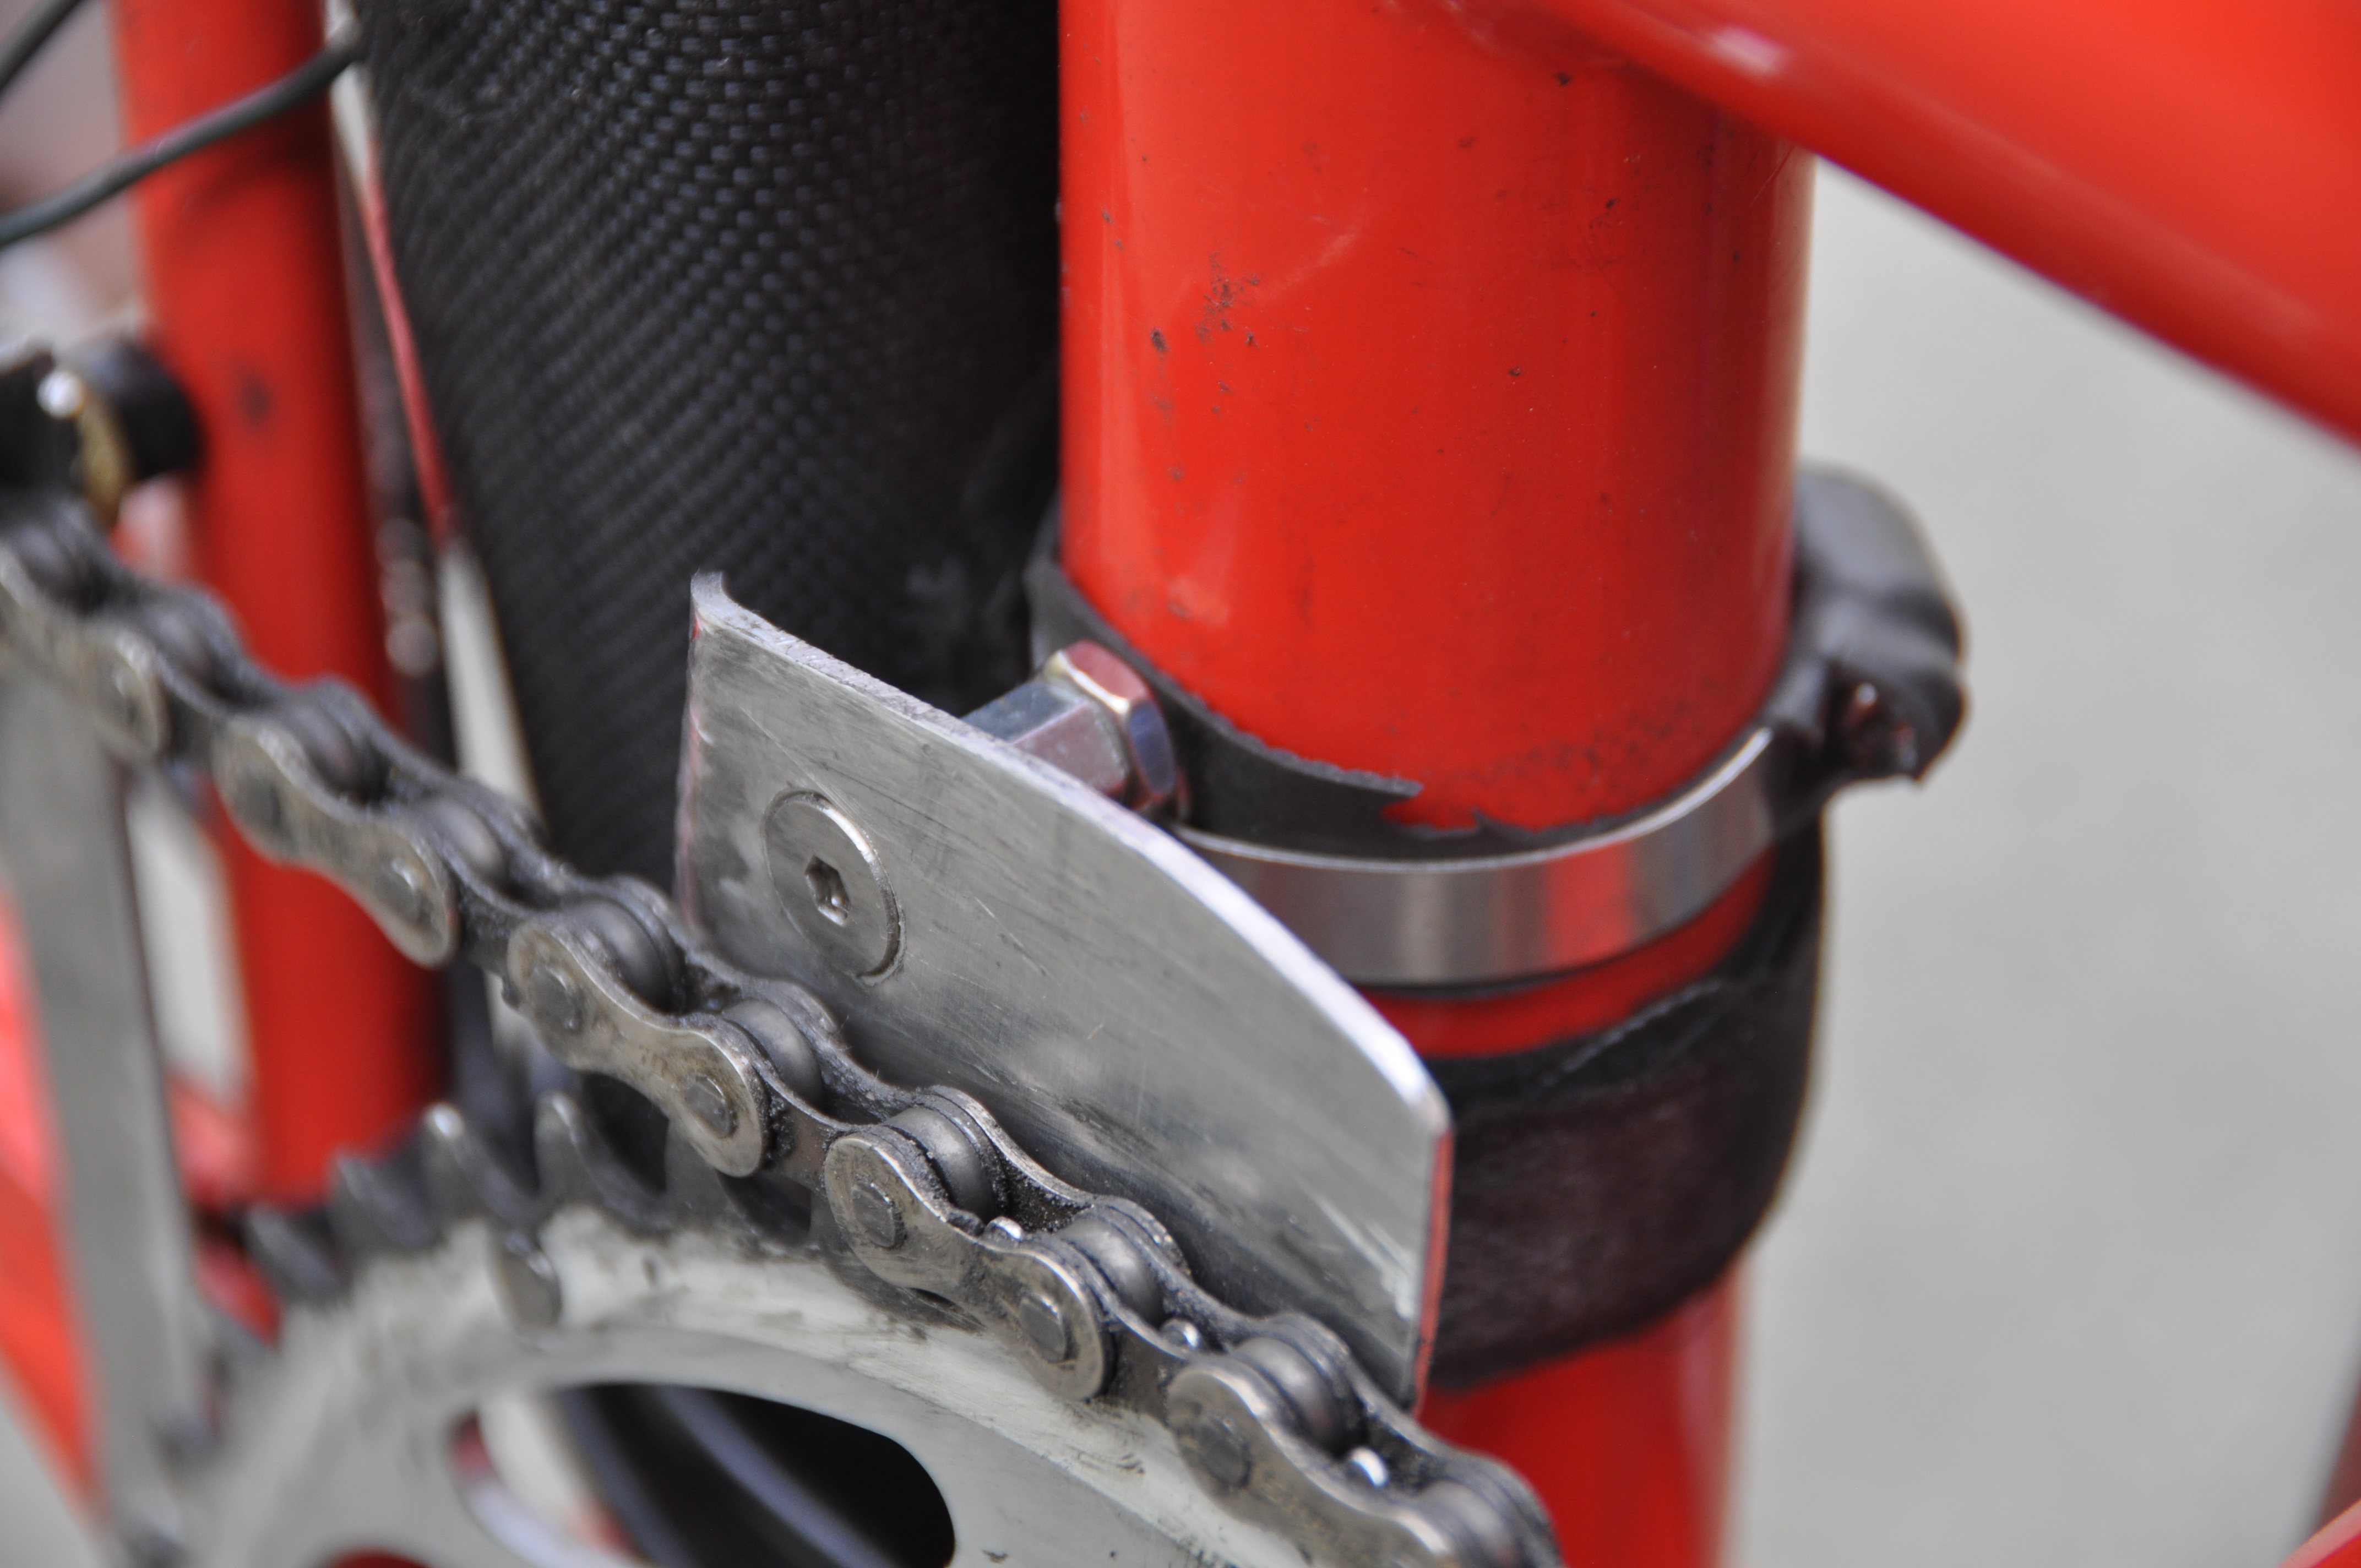
The aluminum piece moving the chain was initially flexible enough, but after some use it got bent. I would say that its elastic range (before it got bent) was marginal. So I decided to replace it by stainless steel which is more “springy”. I found an ideal part: a 6” metal ruler, about 1 mm thick. It even has the mounting hole in the right place, I just cut it off by an inch and slightly bent it for the right distance to the chain. Works much better!
Kinetics Alfine 11 modification Back to top
I ordered the Brompton from Ben Cooper, Kinetics in Glasgow and chose his special rear triangle with the Shimano Alfine 11 hub and the Jtek shifter. Works well! The triangle is well designed.
The only thing I don’t like about the Alfine 11 is the large step in gear ratio between the lowest and the second lowest gear.
Jockey wheels: Ben Cooper installs a modified Brompton chain tensioner. For the Alfine 11, he used the pulleys from the 2- and 6-speed Brompton. They are very noisy. I exchanged them against Tacx pulleys (Tacx Standard Ball Bearing Bicycle Jockey Wheels). They made a big difference and are much quieter. I had to make a round aluminum disk for the lower pulley similar to what Brompton provides with the 1- and 3-speed tensioner (but the disk is not available separately). It was easy to swap out the pulleys, all I needed where some 4 mm and 6 mm washers to adjust the chain line.

Jtek shifter: With a file, I added marks for gears 4 and 7

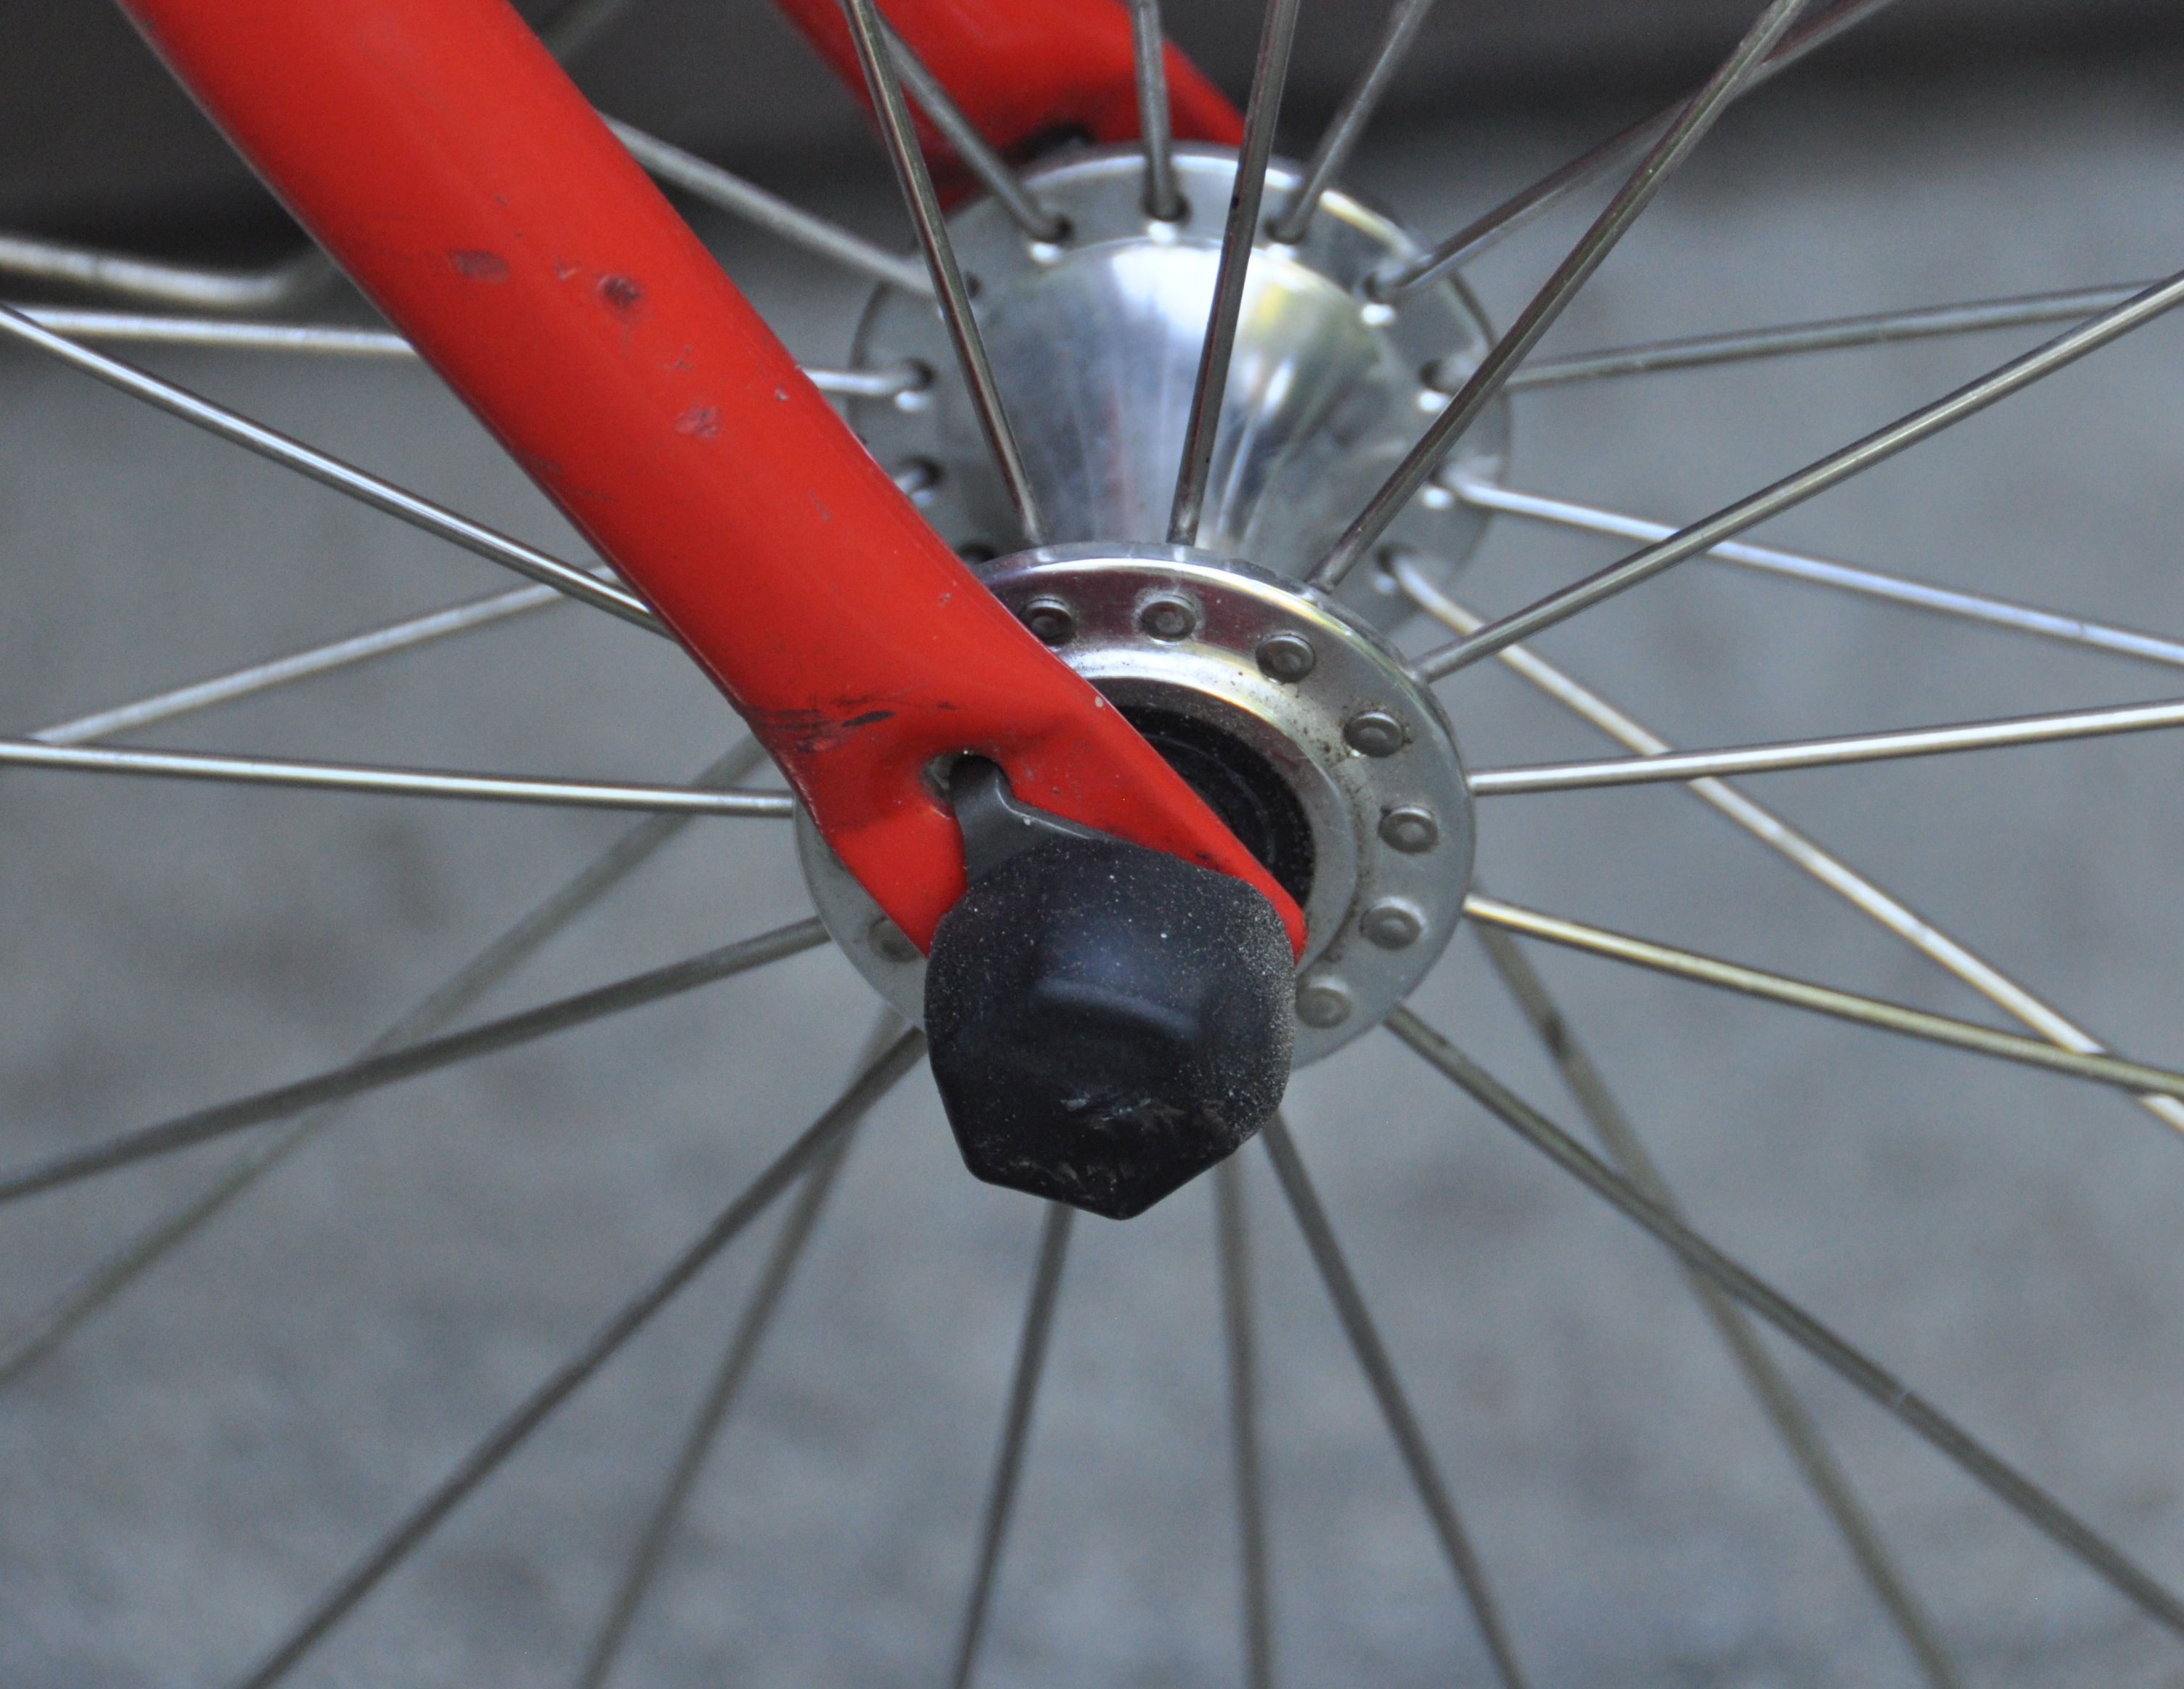
Smaller axle nuts: The Alfine 11 hub came with acorn nuts. They are standing out and can pierce a cardboard box when I pack the bike for air travel. I replaced them by normal nuts. They are still the widest point of the frame on the left side and can scratch furniture or damage the Brompton cardboard box when I package the bike for travelling. Therefore, as protection, I added a 15 mm rubber wheel nut cap.
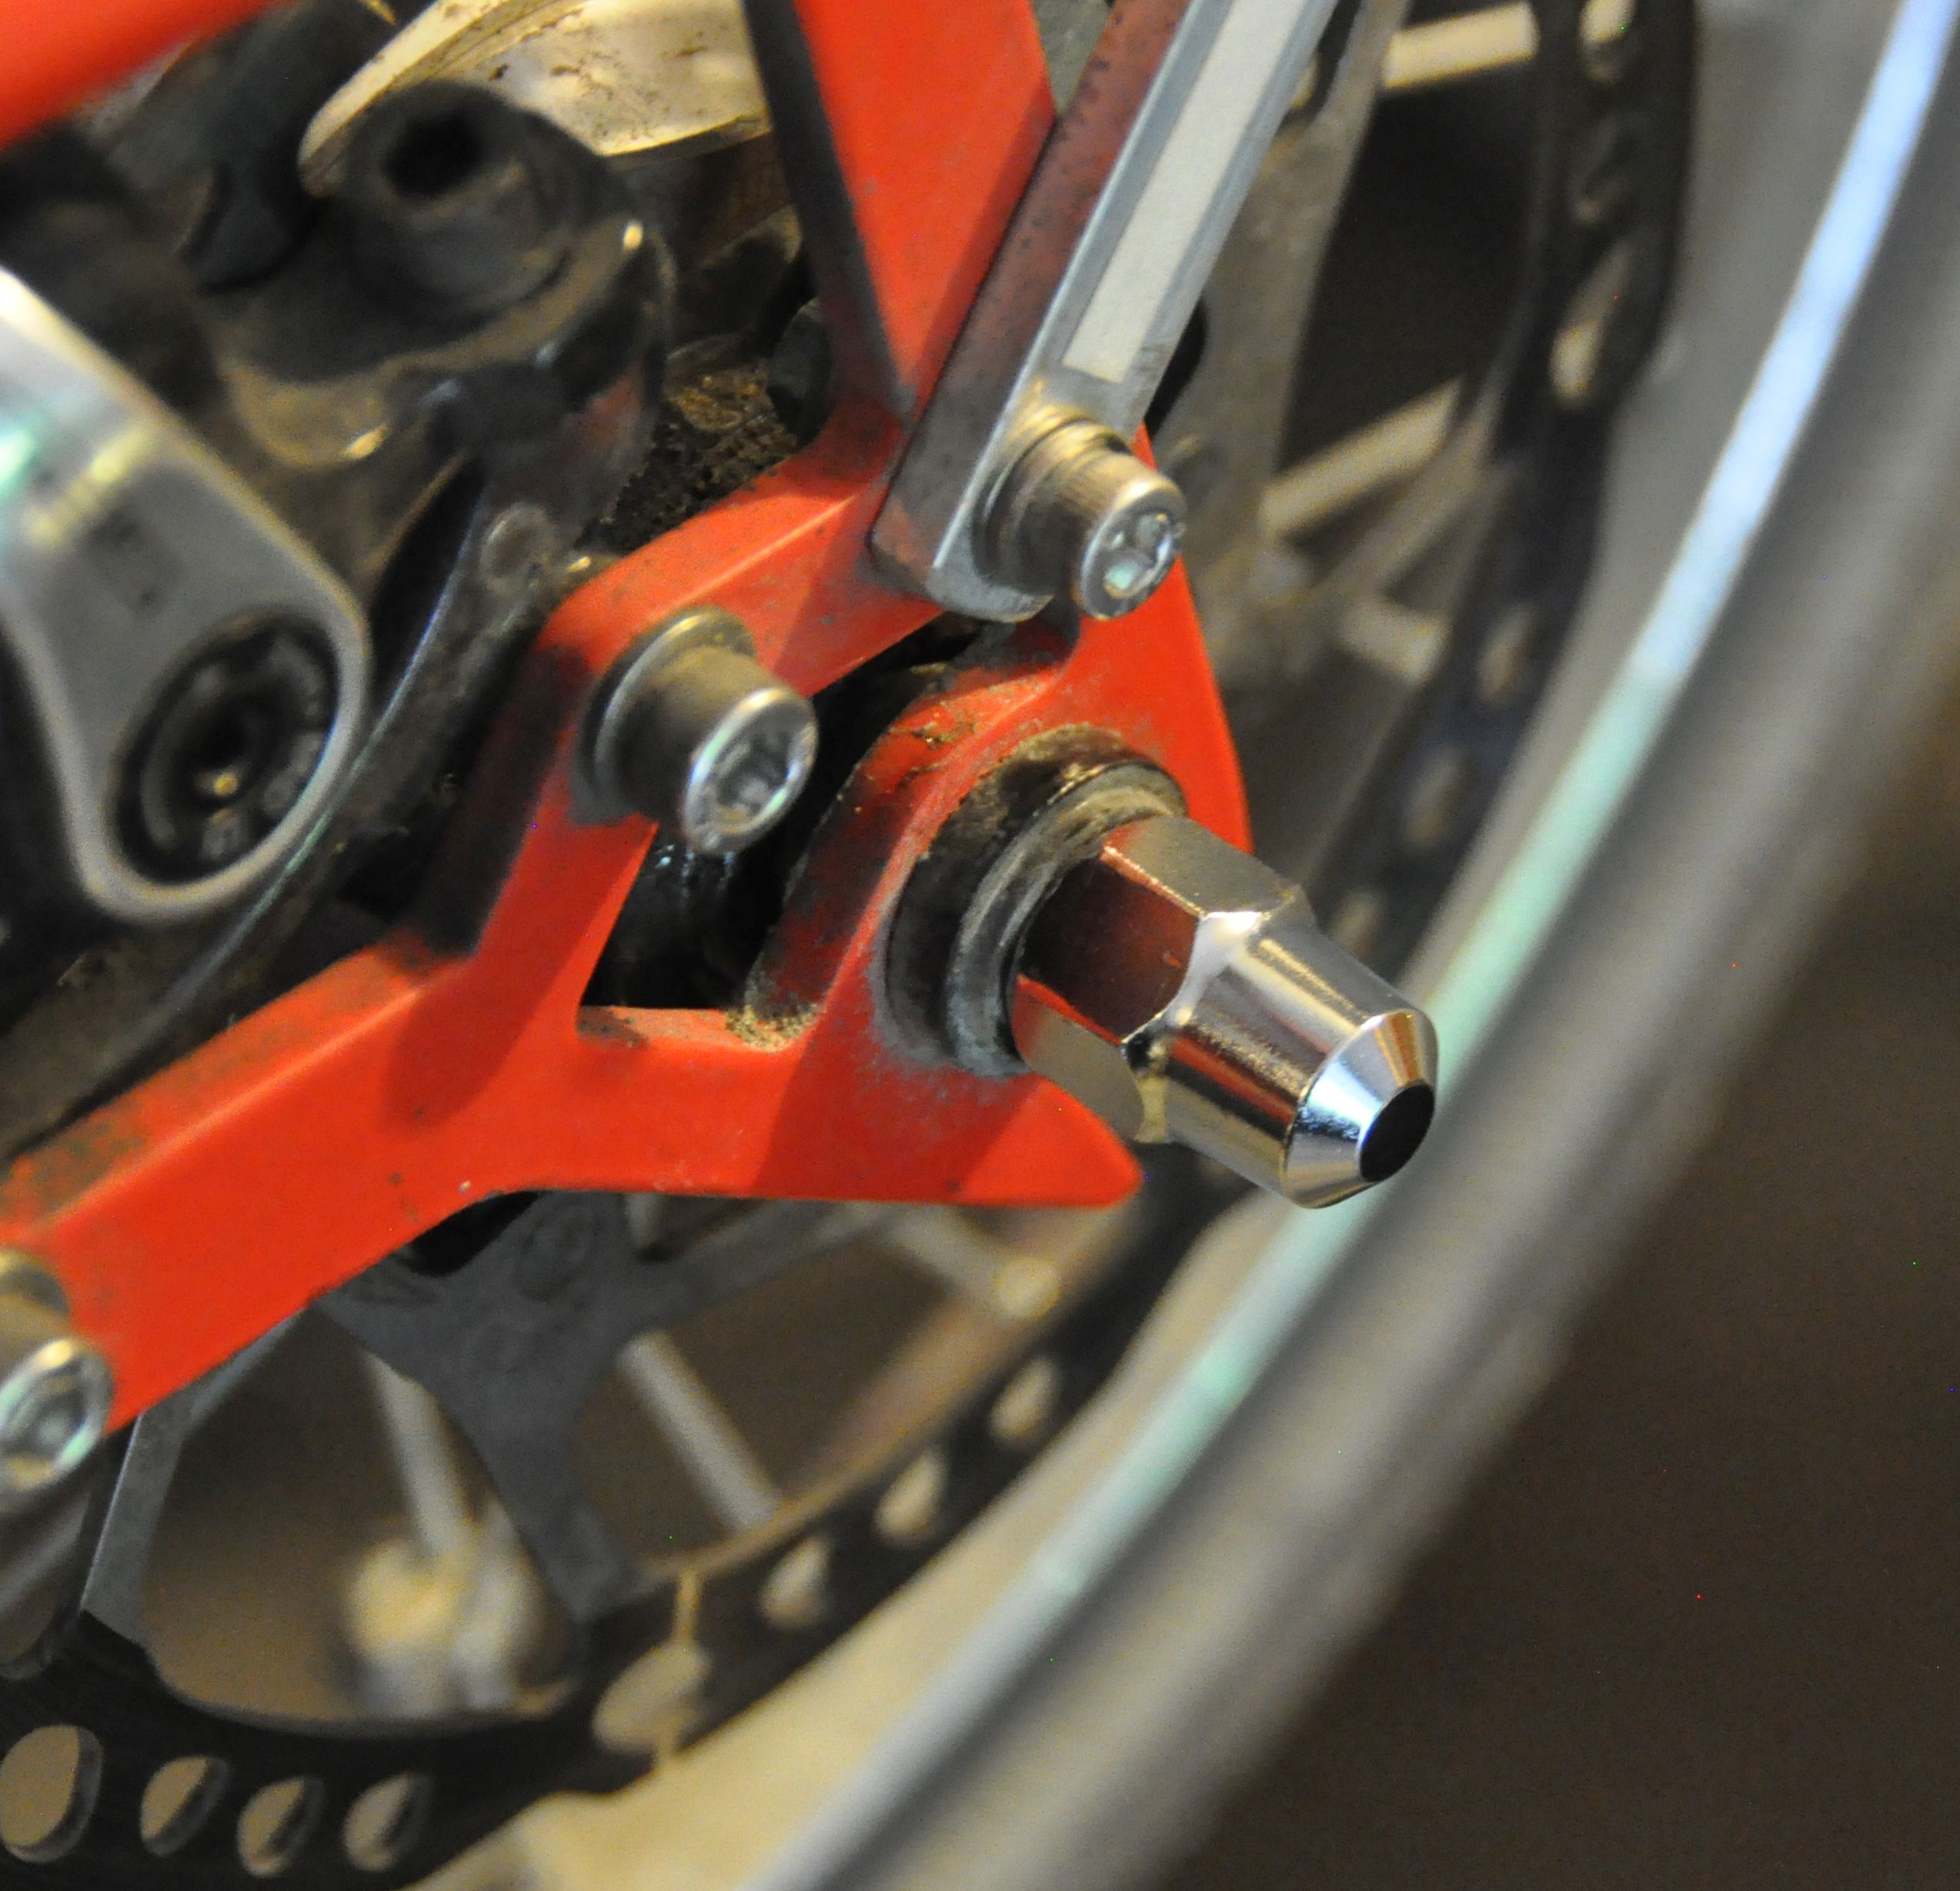
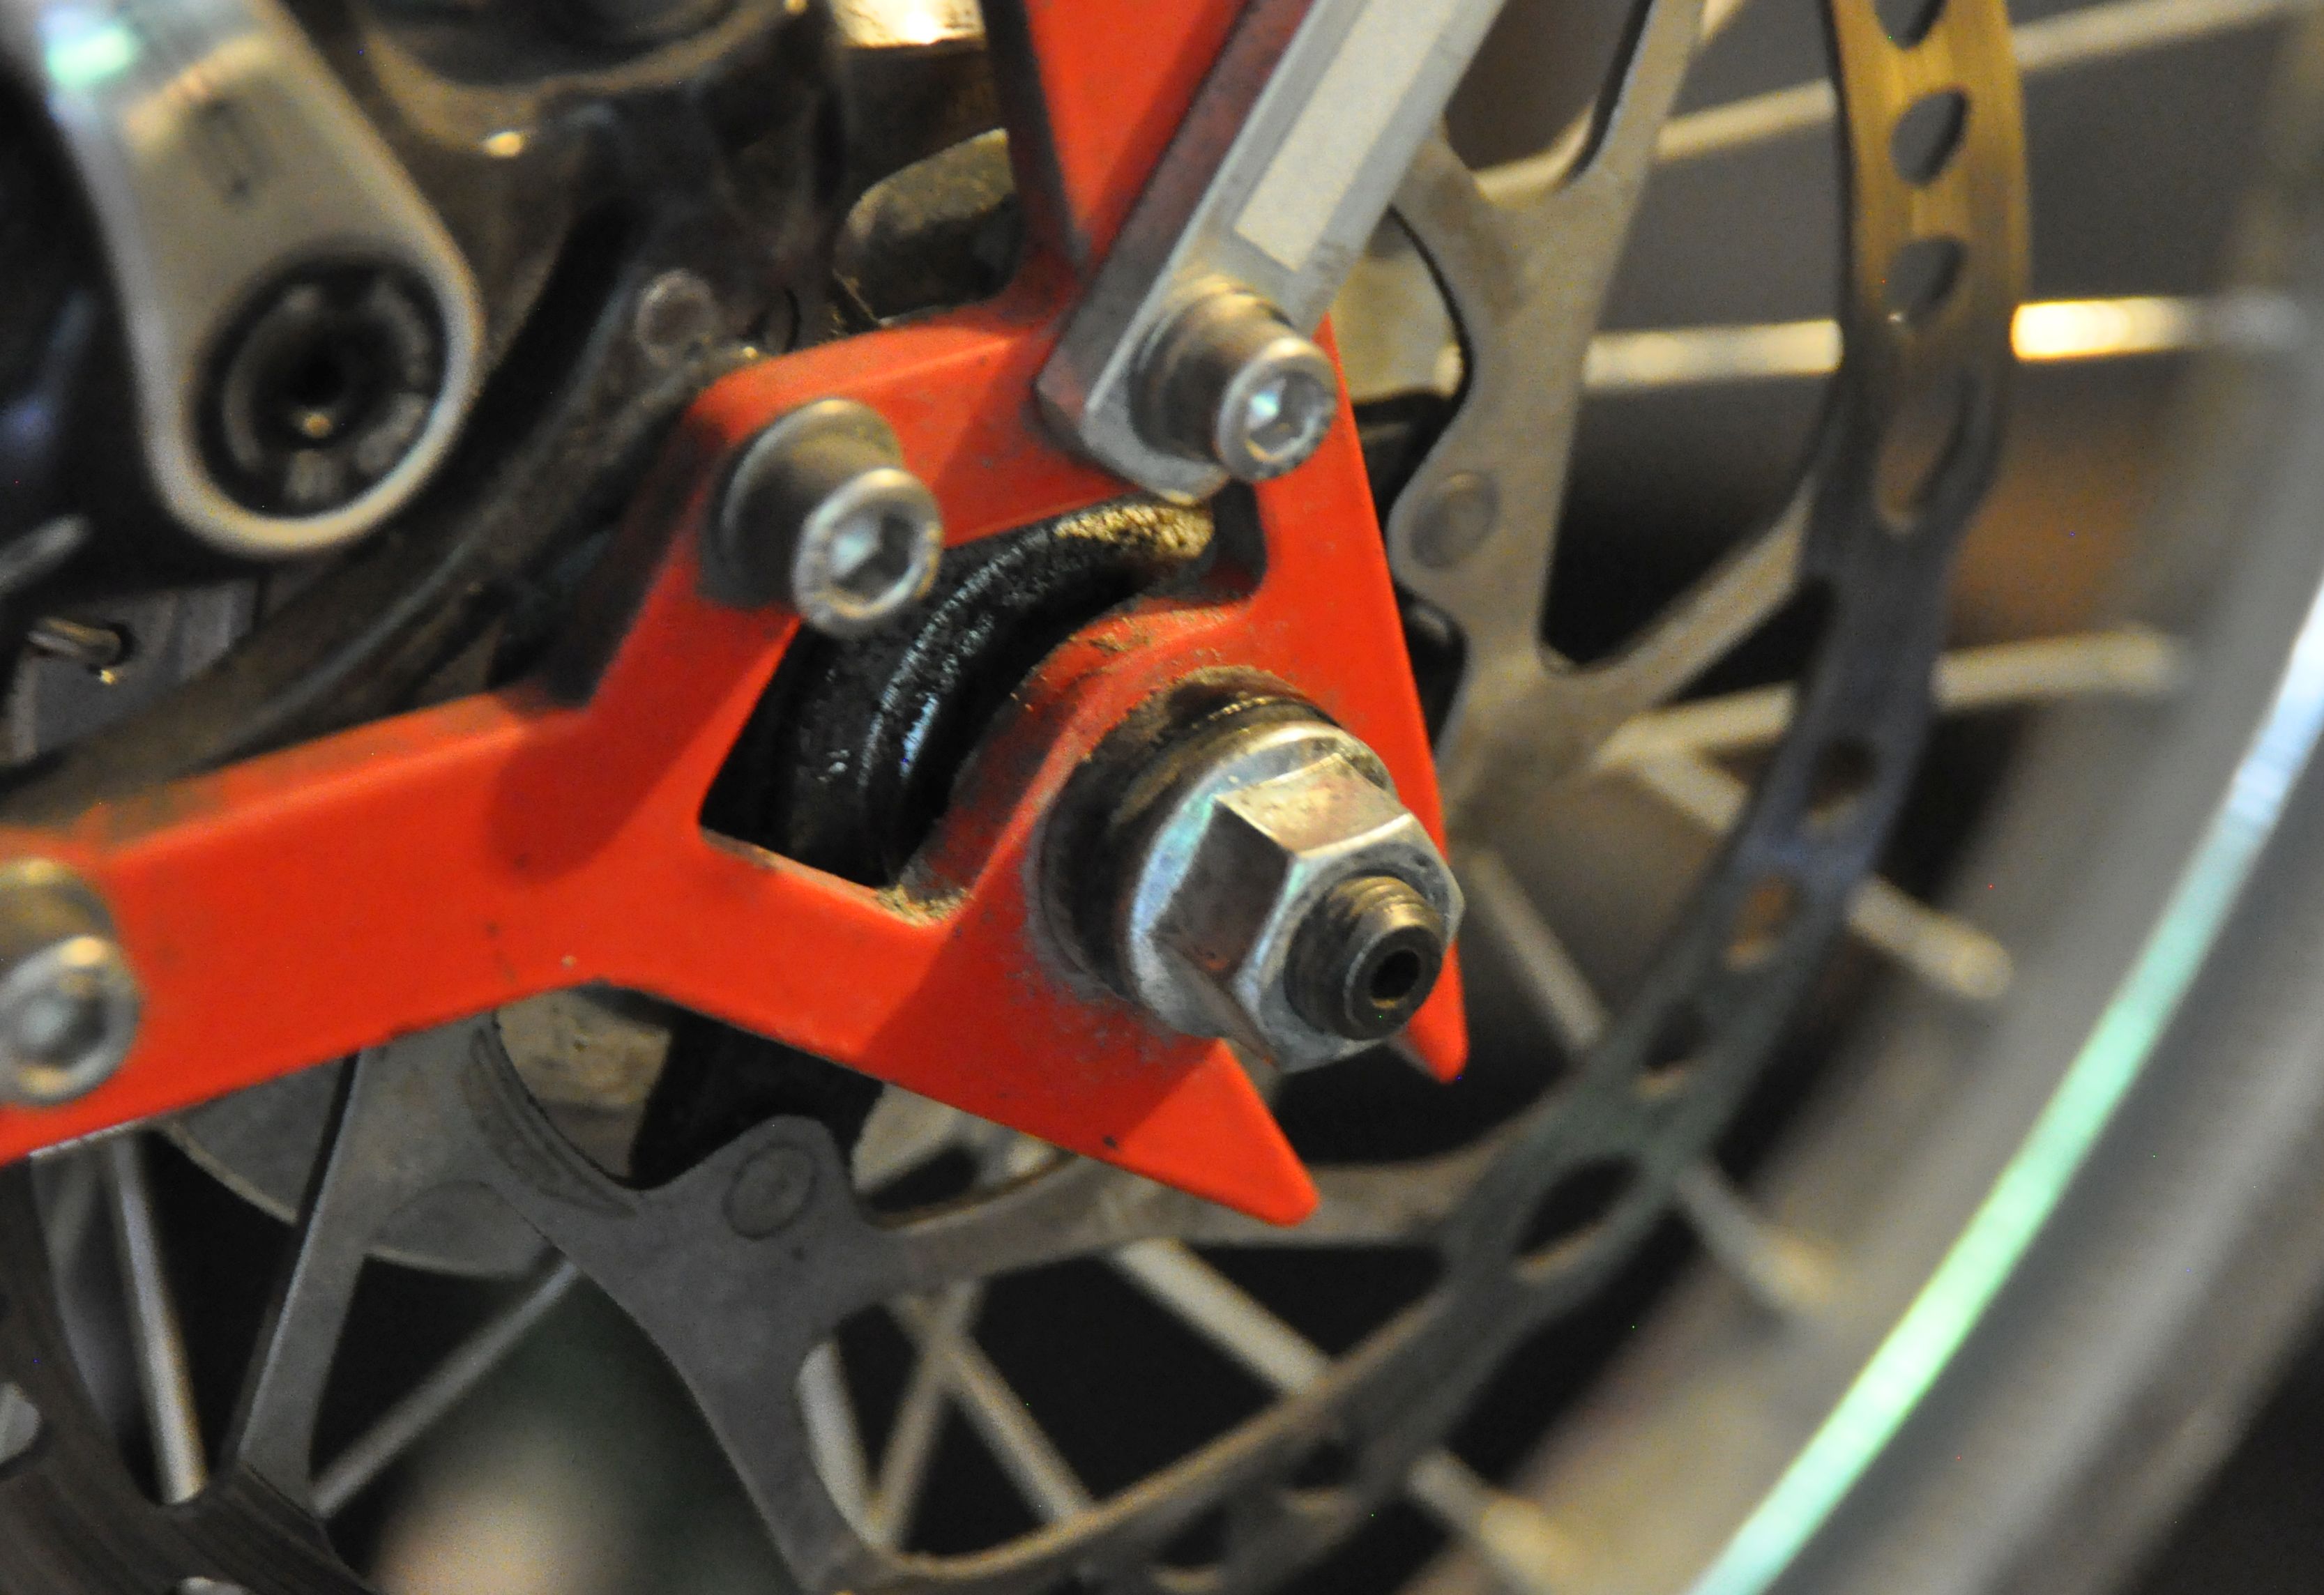

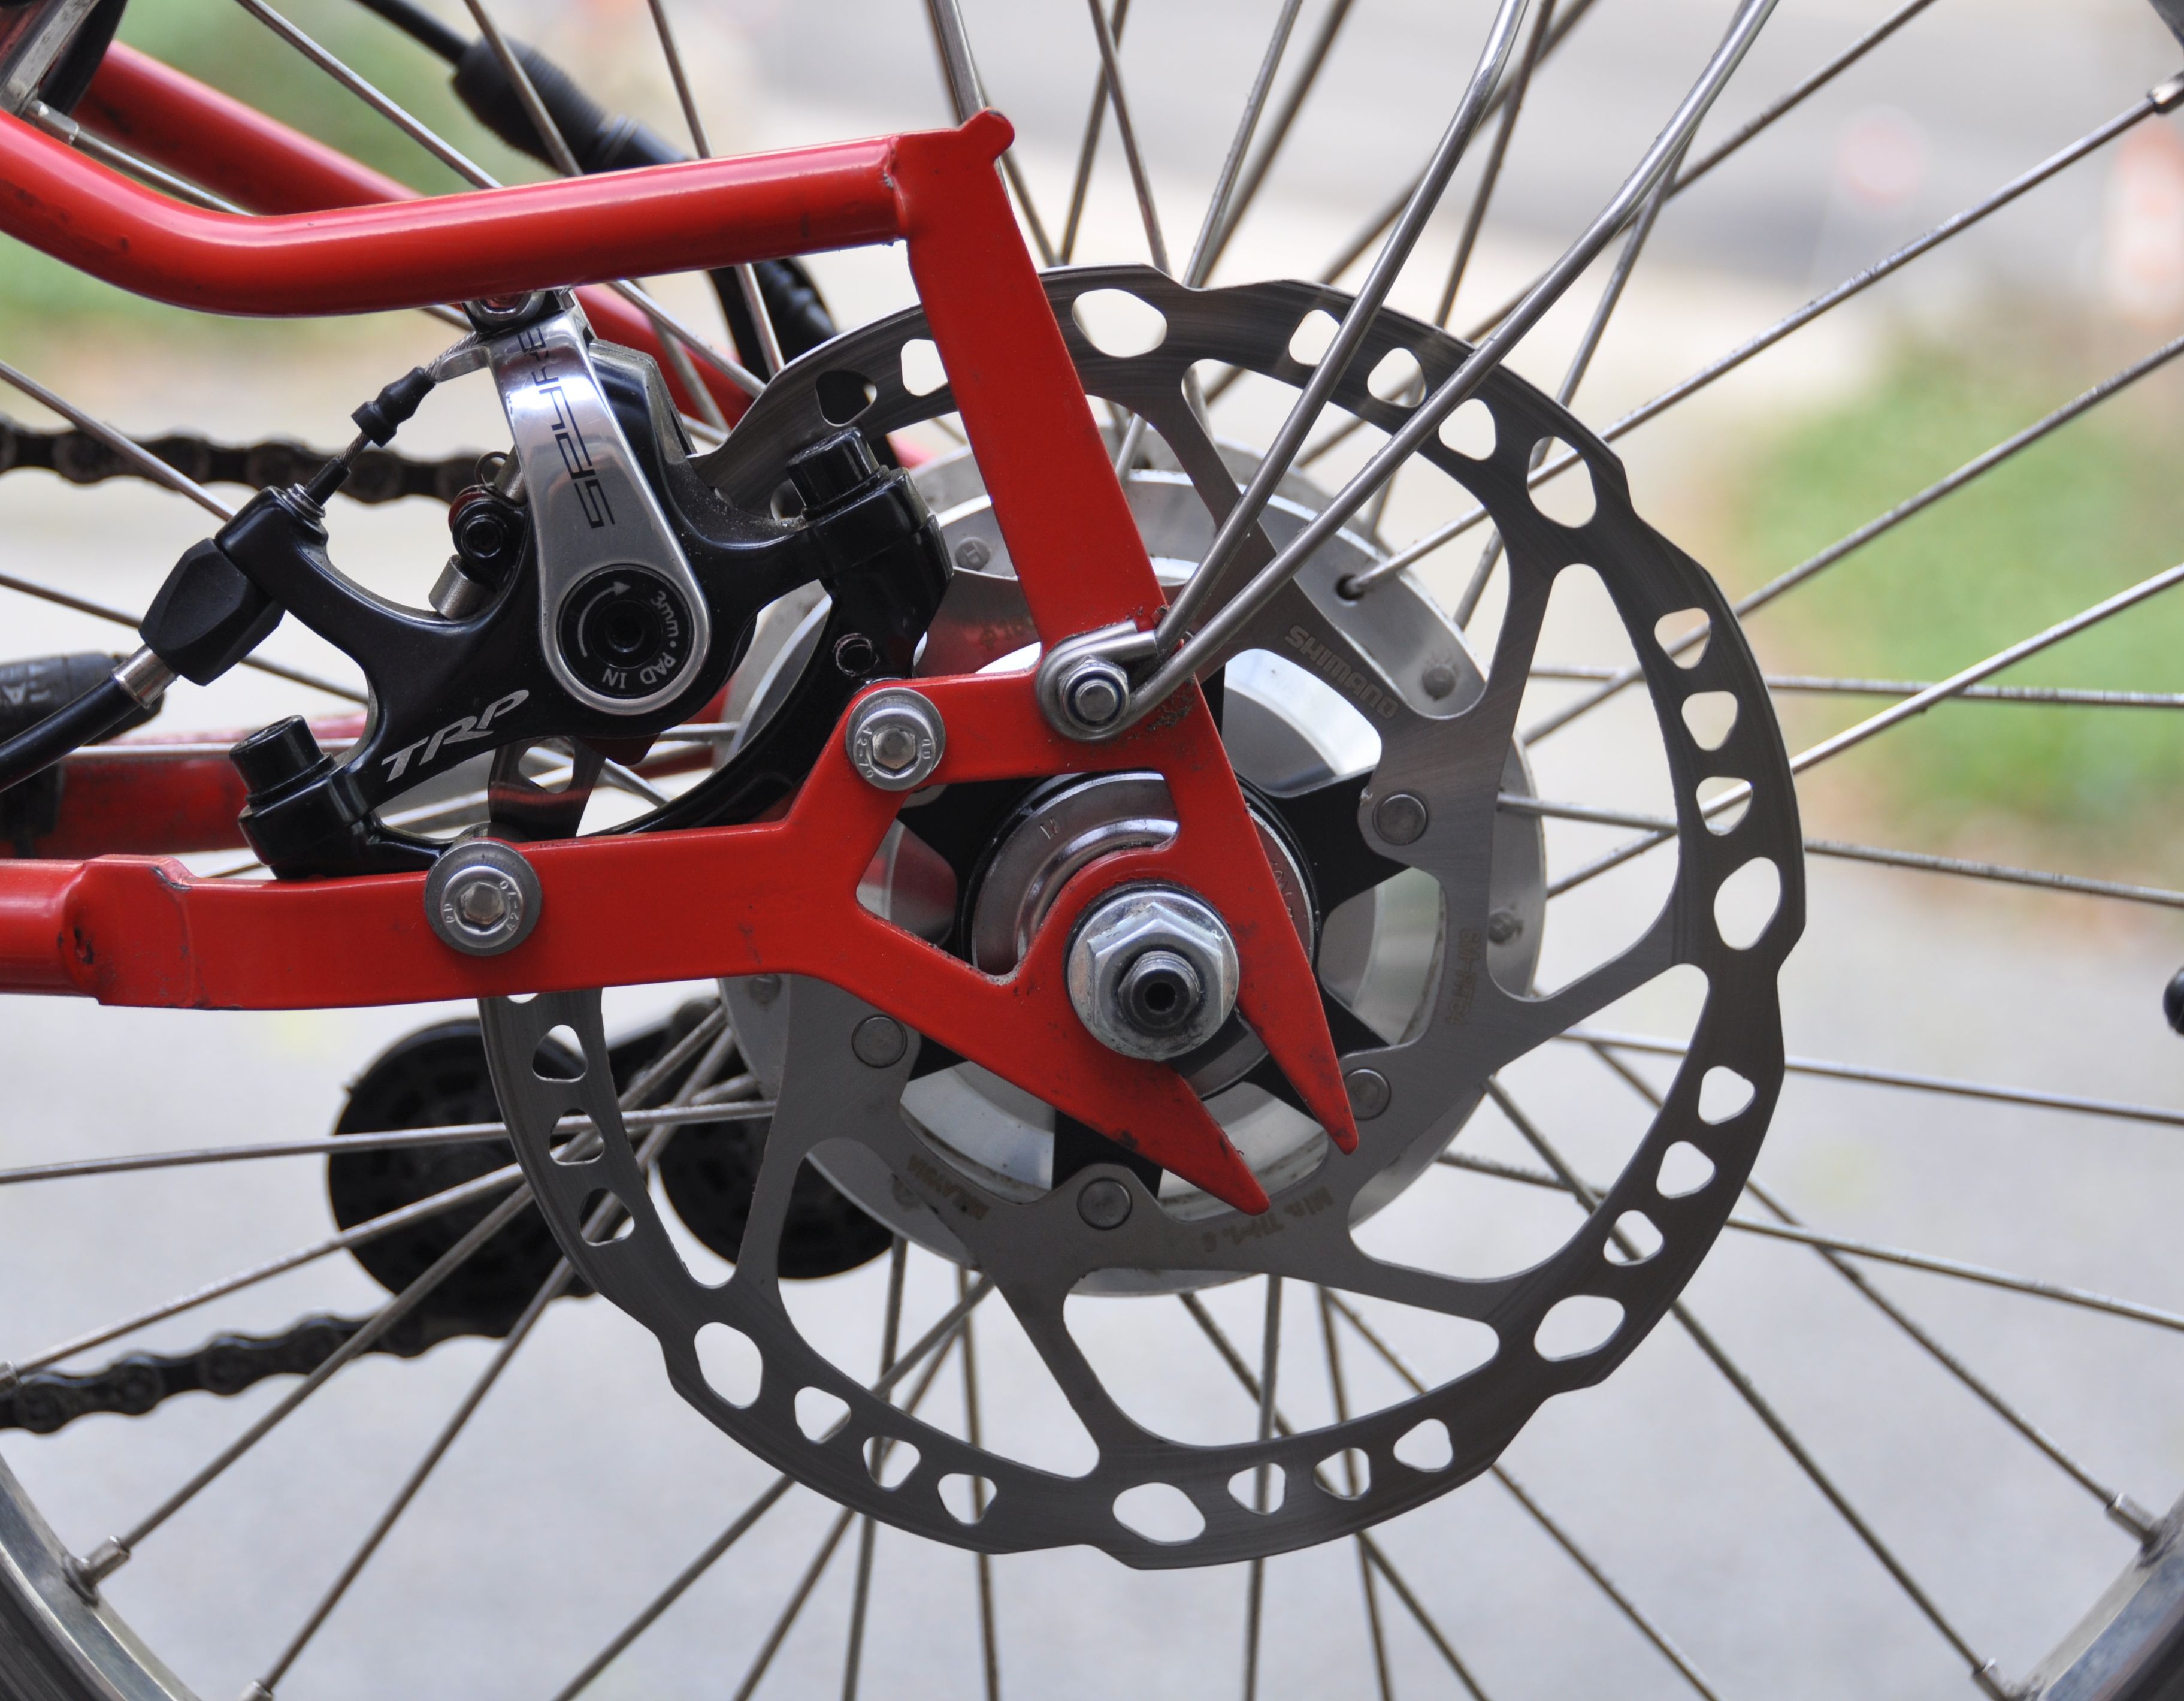
Disc brakes Back to top
I bought the Kinetics Alfine 11 Brompton without disc brakes, but then decided to add them since I want to take the bike to the mountains. I decided to leave both Brompton caliper brakes. So I have now three brakes --- this will give me extra peace of mind on long descents.
Update: I have now removed the rear caliper brake --- saves some weight, and keeps the handlebar less crowded.
PS: I am very happy with the performance of the TRP Spyre disc brakes.

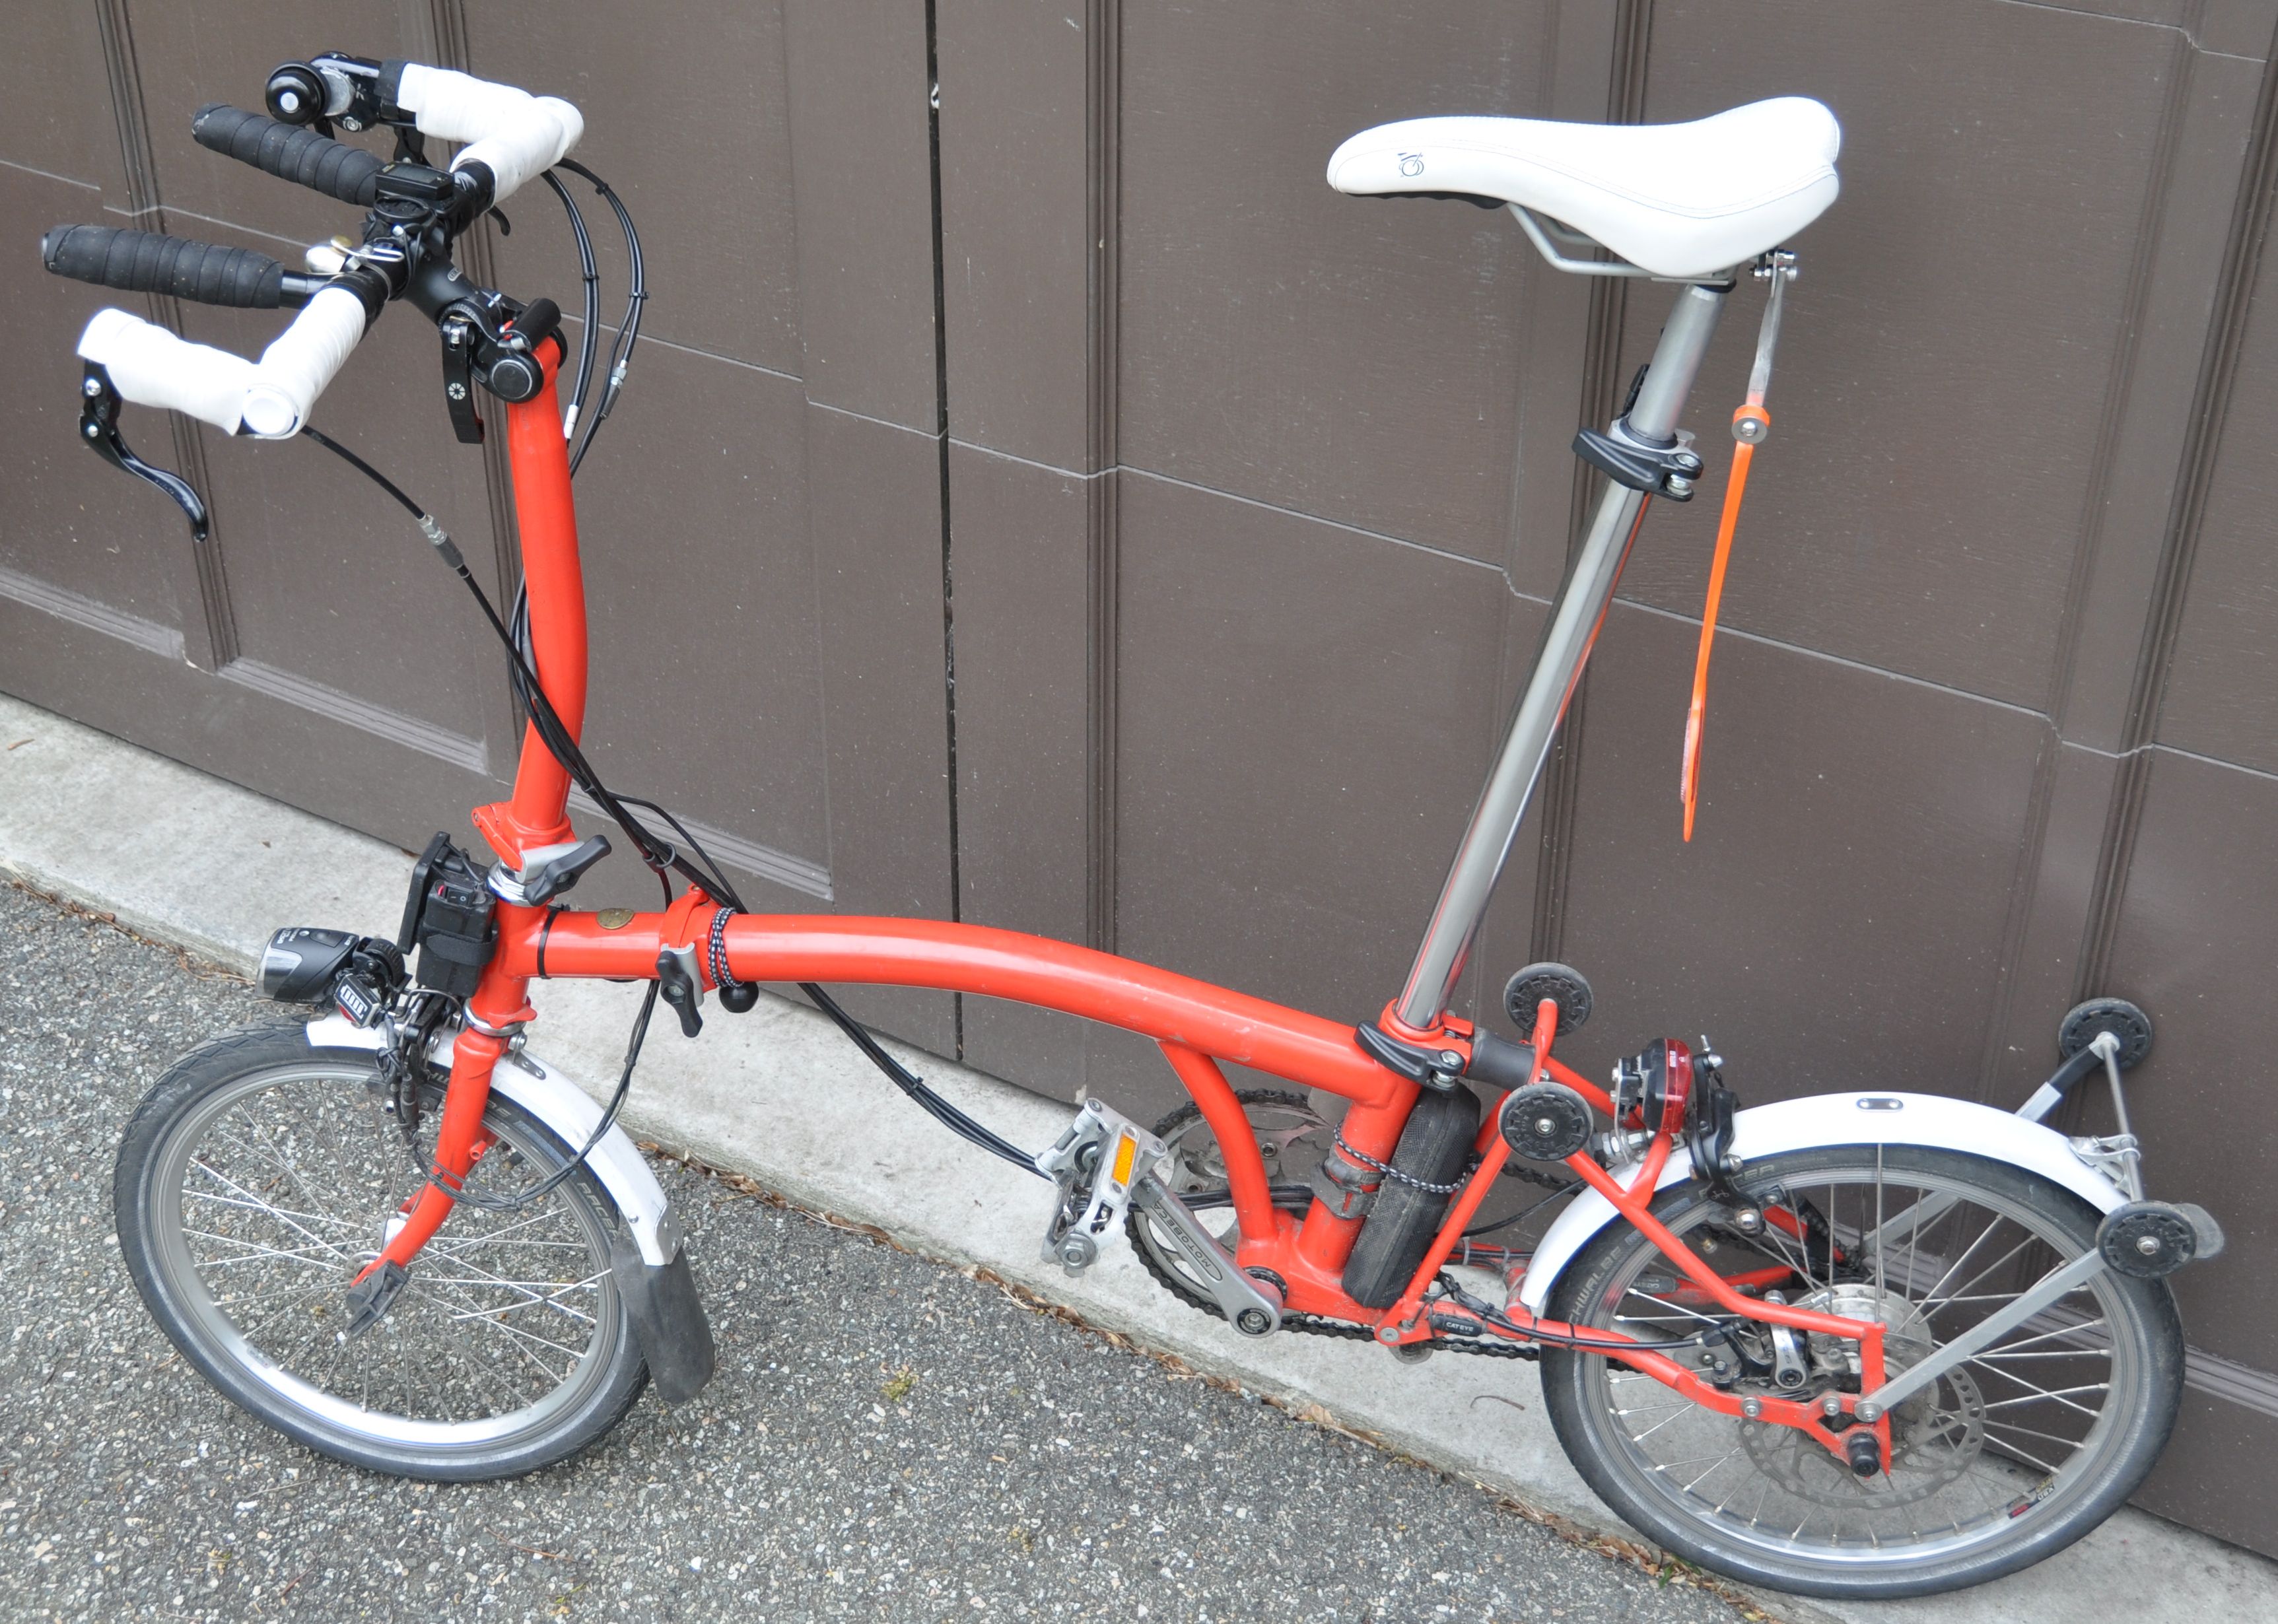
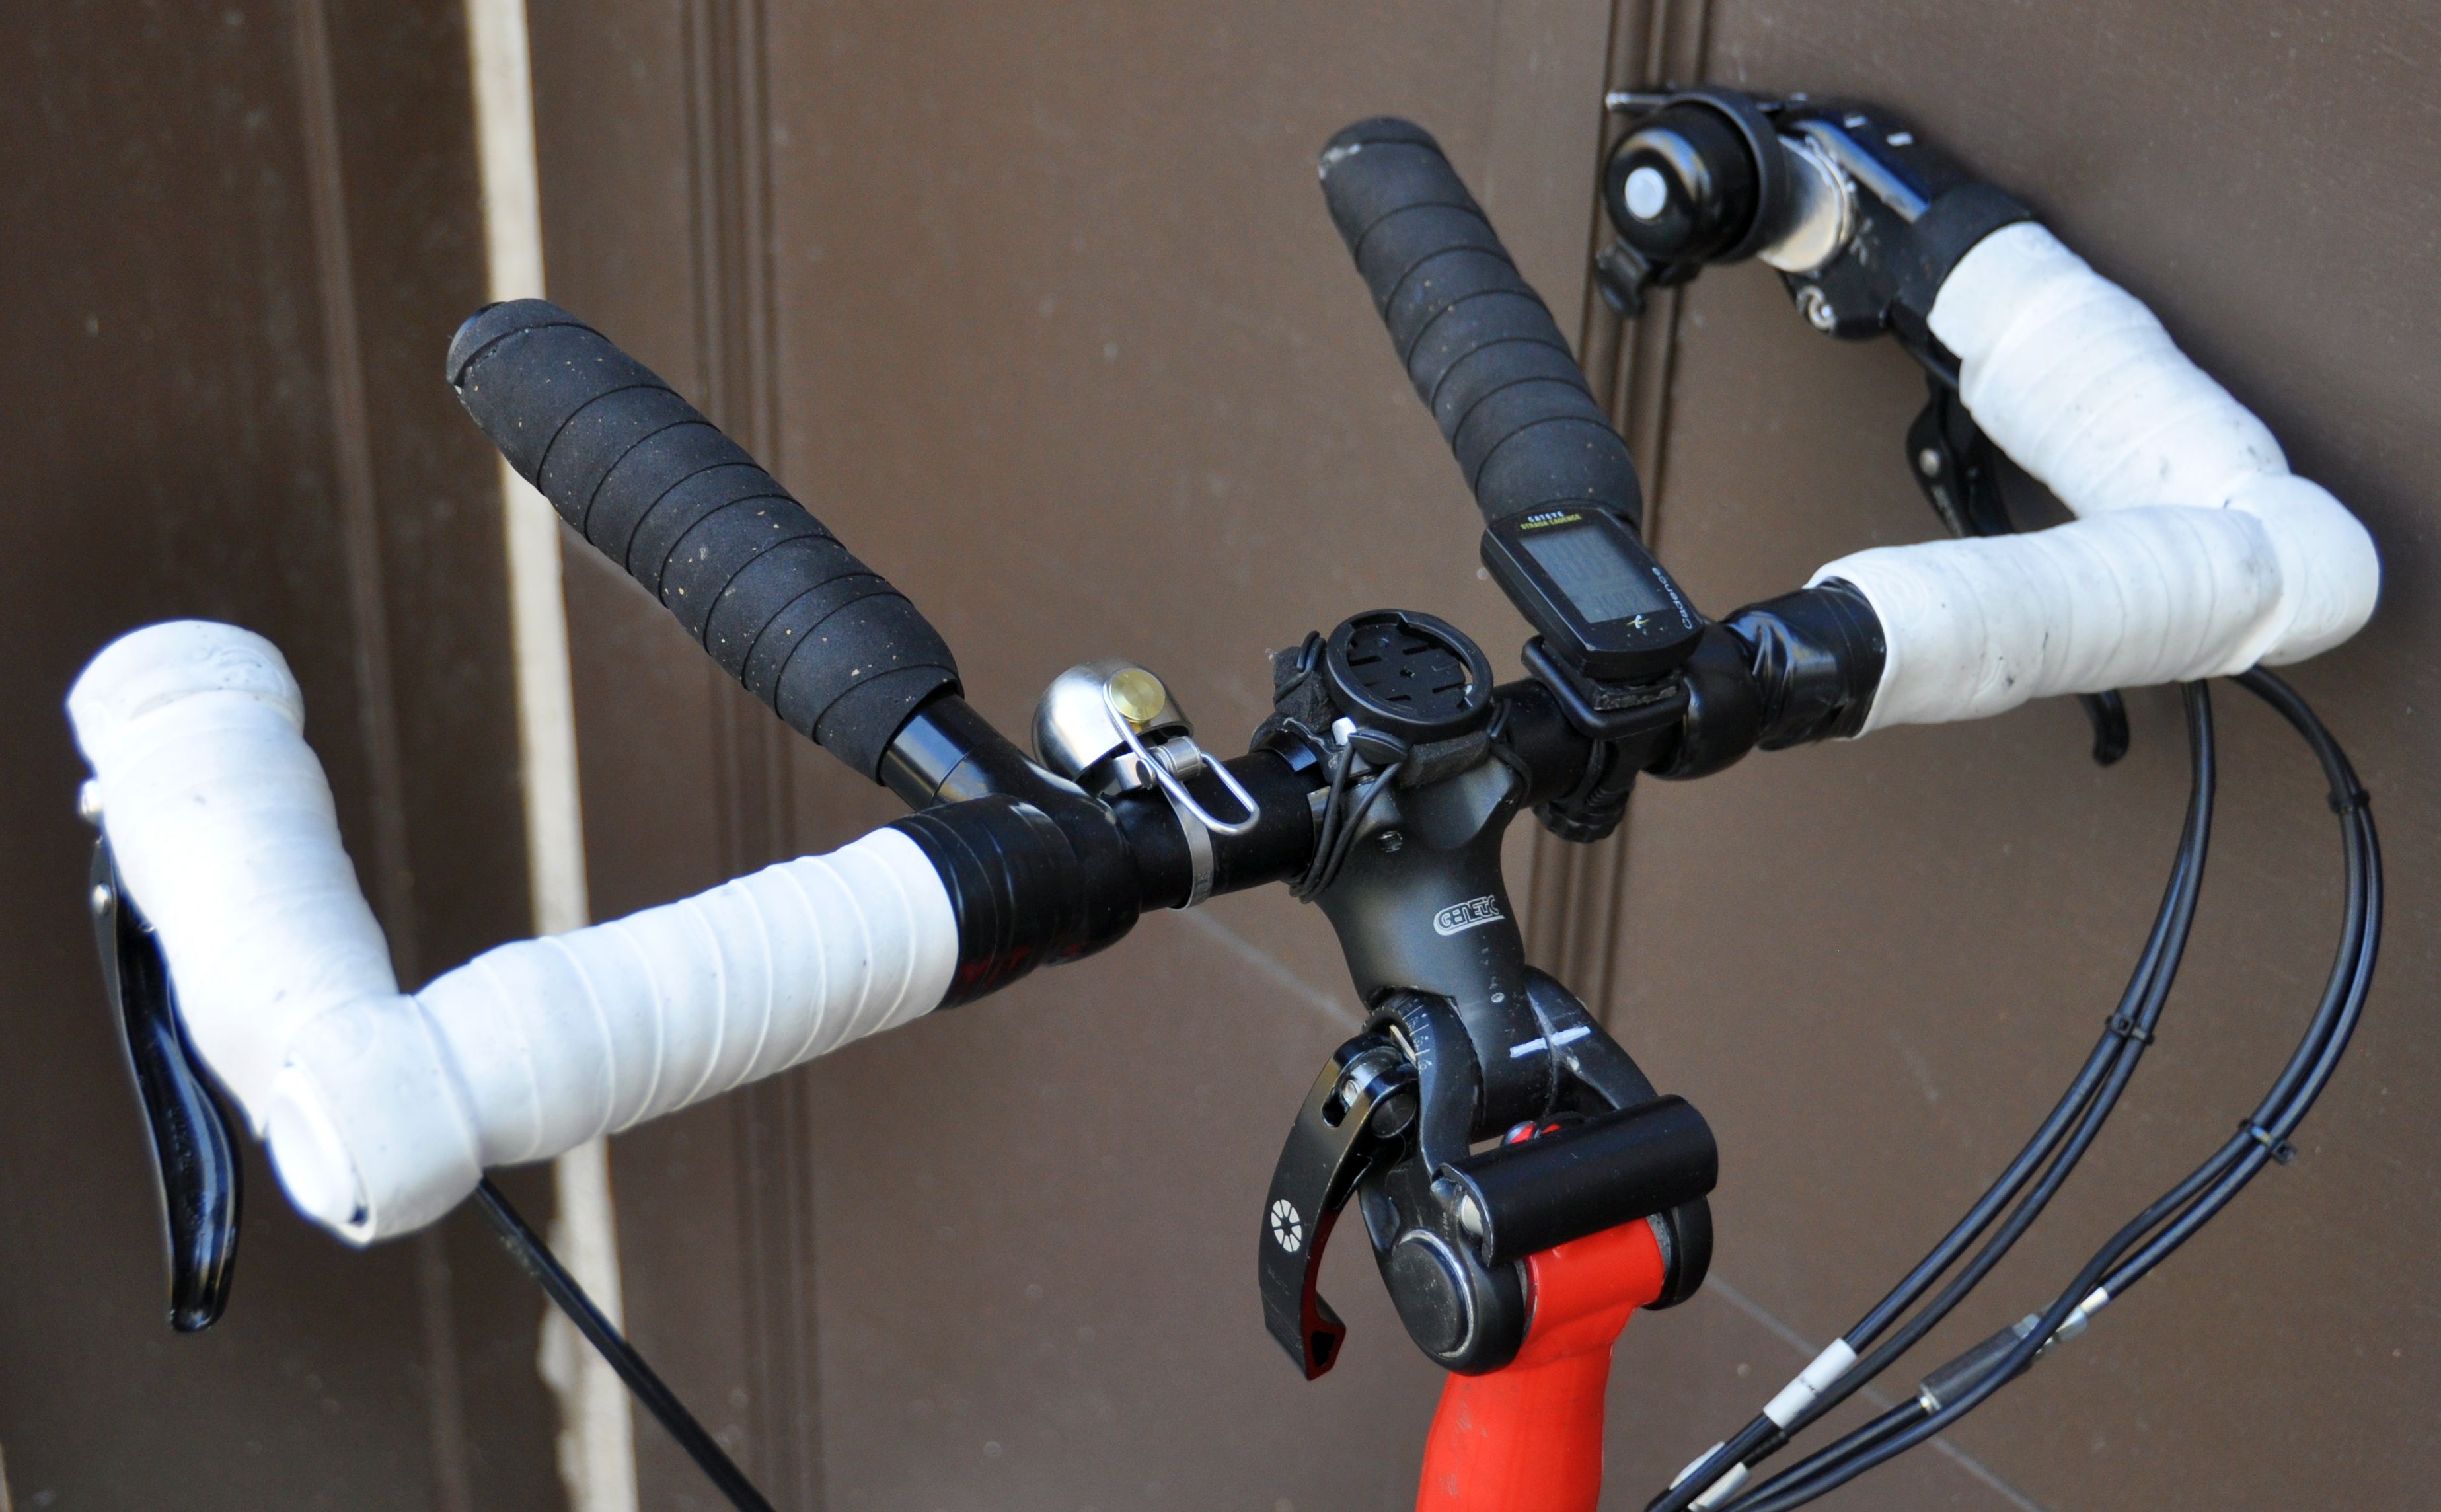
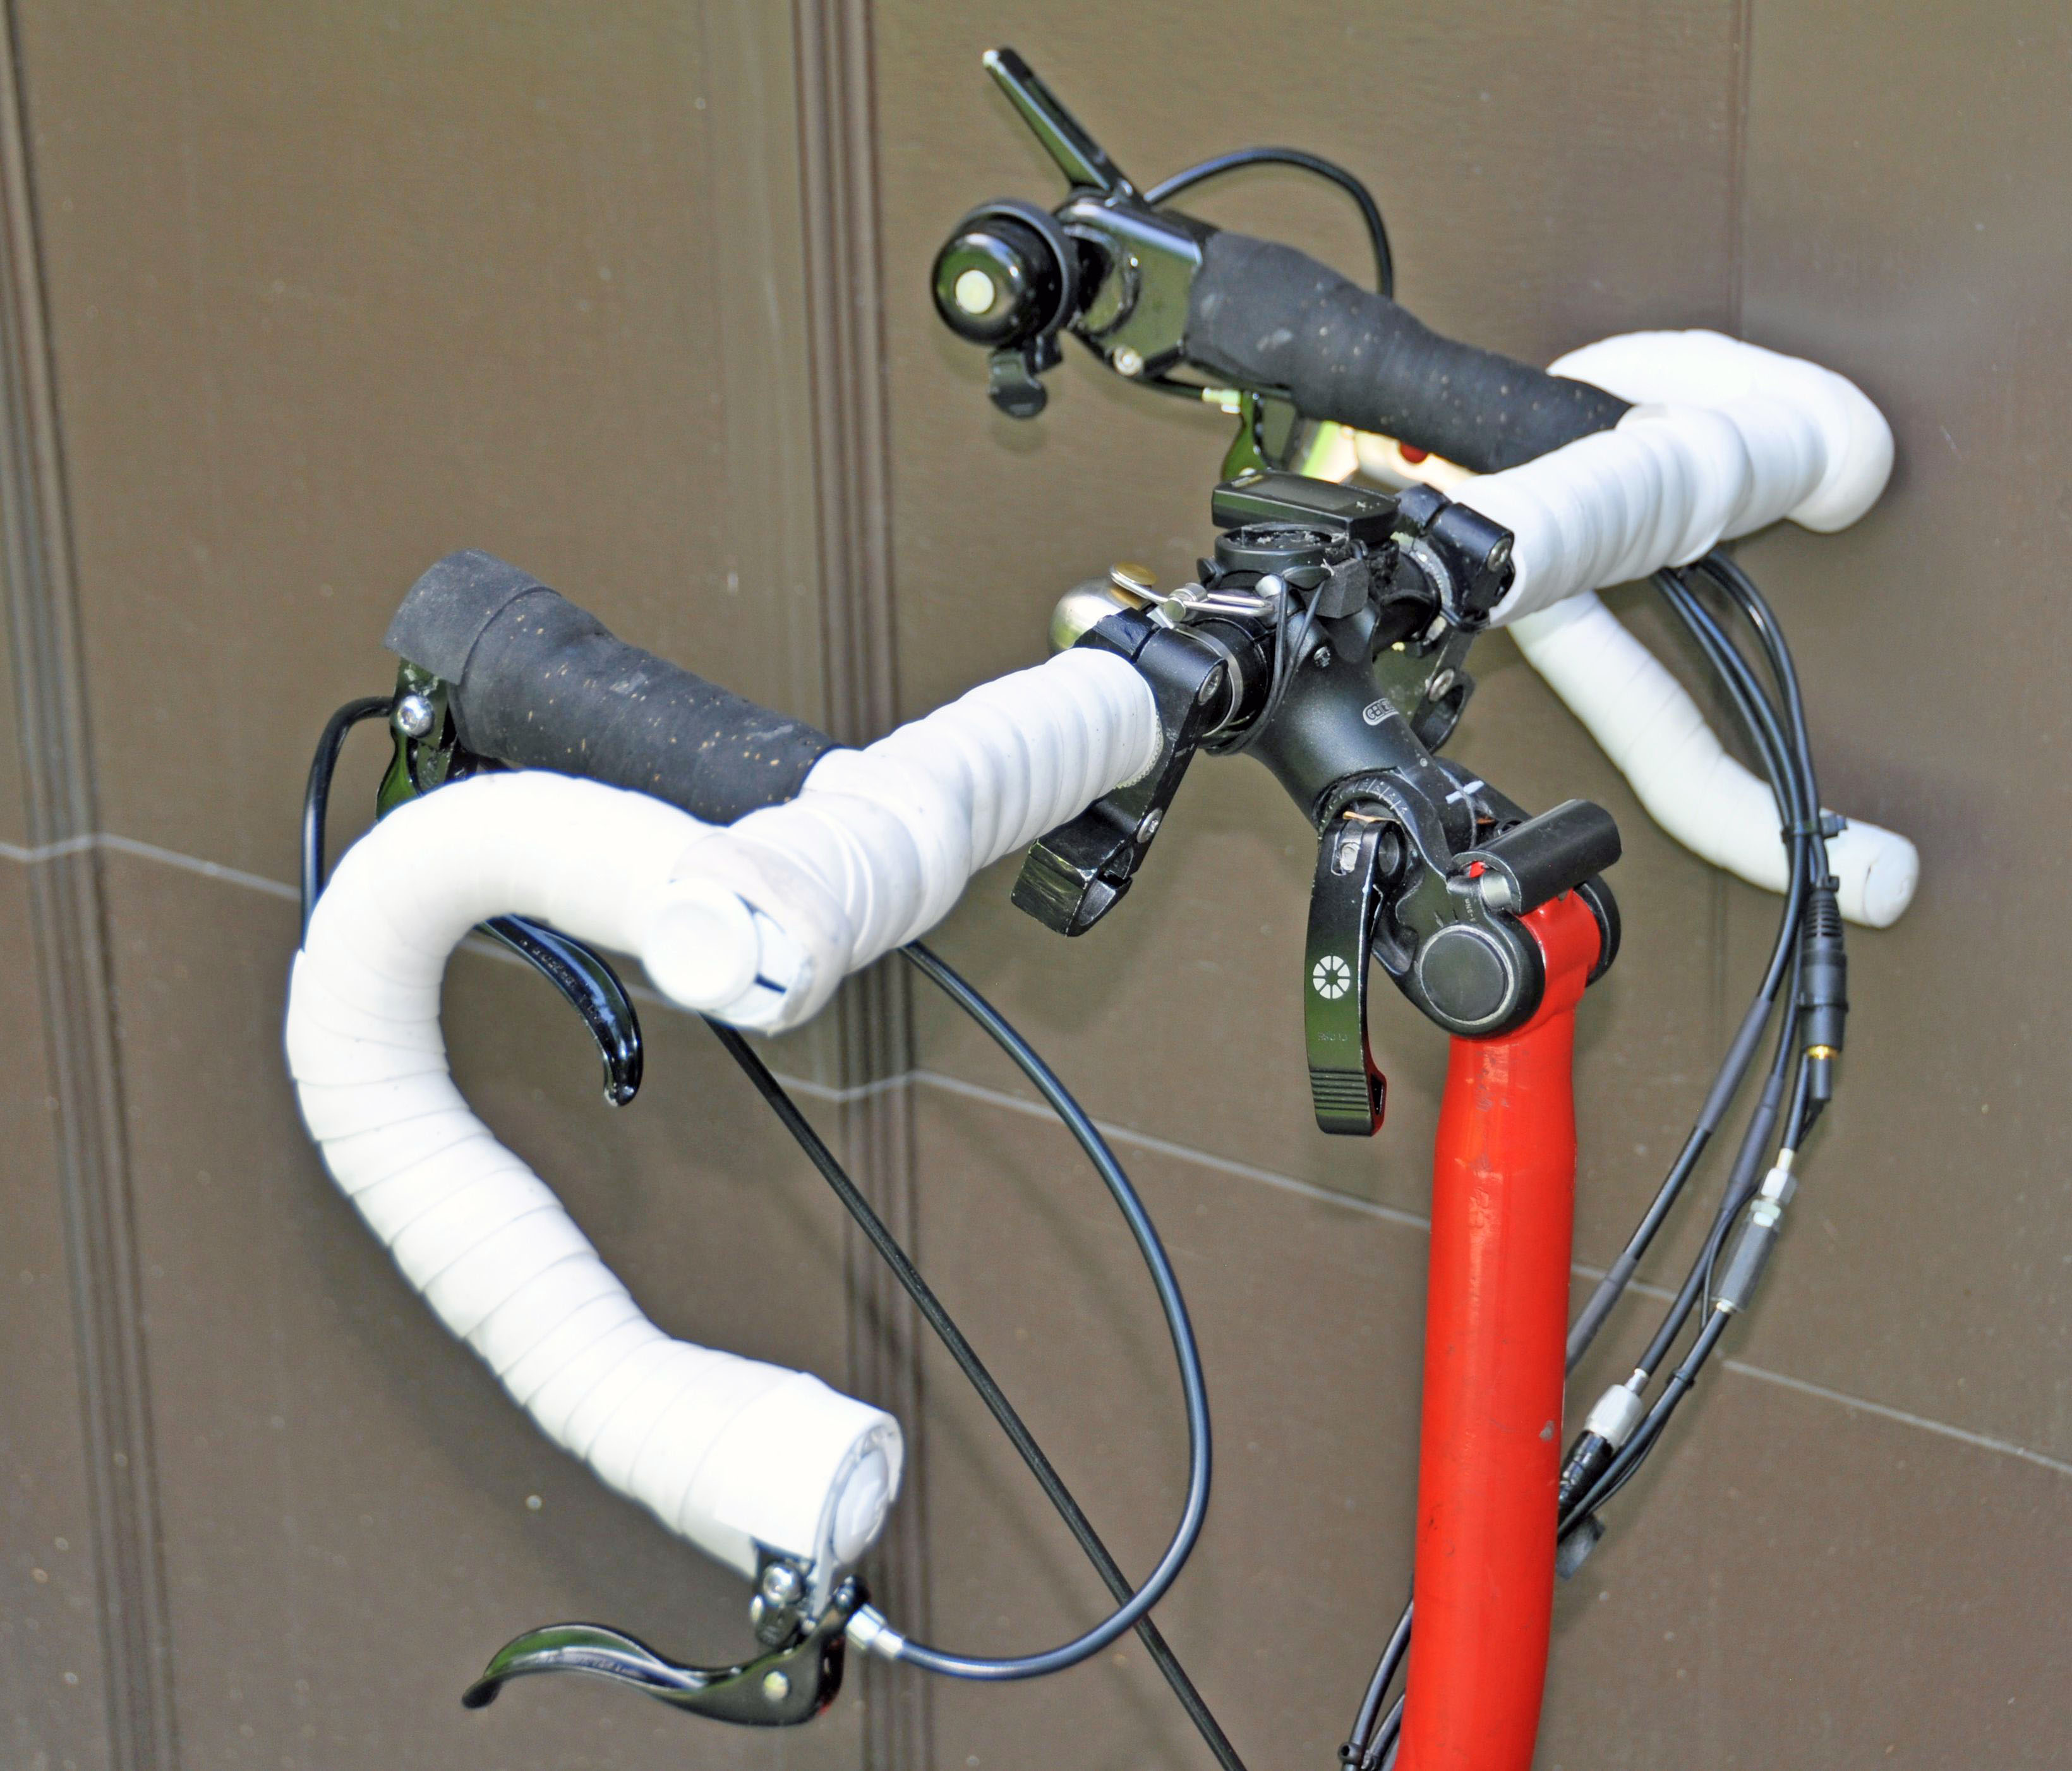
Handlebar with three brake levers
Handlebars overview Back to top
On most of my bikes, I use dropbars. I find those most convenient for riding and enjoy the different positions they offer. For folding bikes, dropbars often interfere with the compactness of the fold. Therefore, I have also used bullhorn bars and barends to get sufficient reach. Either solution requires a folding stem (in adition to the Brompton folding riser stem).
On the Brompton, I found two excellent solutions:
1. Dropbars with the Dahon 4D stem
2. Ergon bar ends with the Genetic Juzzi stem
I like both a lot, the drop bars for longer rides and touring, and the straight bars for commuting and city riding. Fortunately, I can swap between them since I am using split outer cables. Both handlebars fold flat --- the bike still fits into the Brompton cardboard box. And they provide a long reach and a more forward leaning position.
I have used extensively also the Andros stem, but found some weaknesses and cannot recommend it.
A few more notes:
(1) The Dahon D4D is similar in function to the Andros stem. However, it looks more robust to me, and has a stronger clamping force. I hope it avoids all the problems I have encountered in the past with the Andros stem.
(2) The Genetic Juzzi stem (which I have used earlier) has the advantages of intrinsic safety (has indents, and not just friction), it folds faster, and the fold is slightly more compact (2 cm or so thinner package when folded). However, you can't use regular drop bars with it ( I could only fit drop ends with a wide separation (580 mm bar).
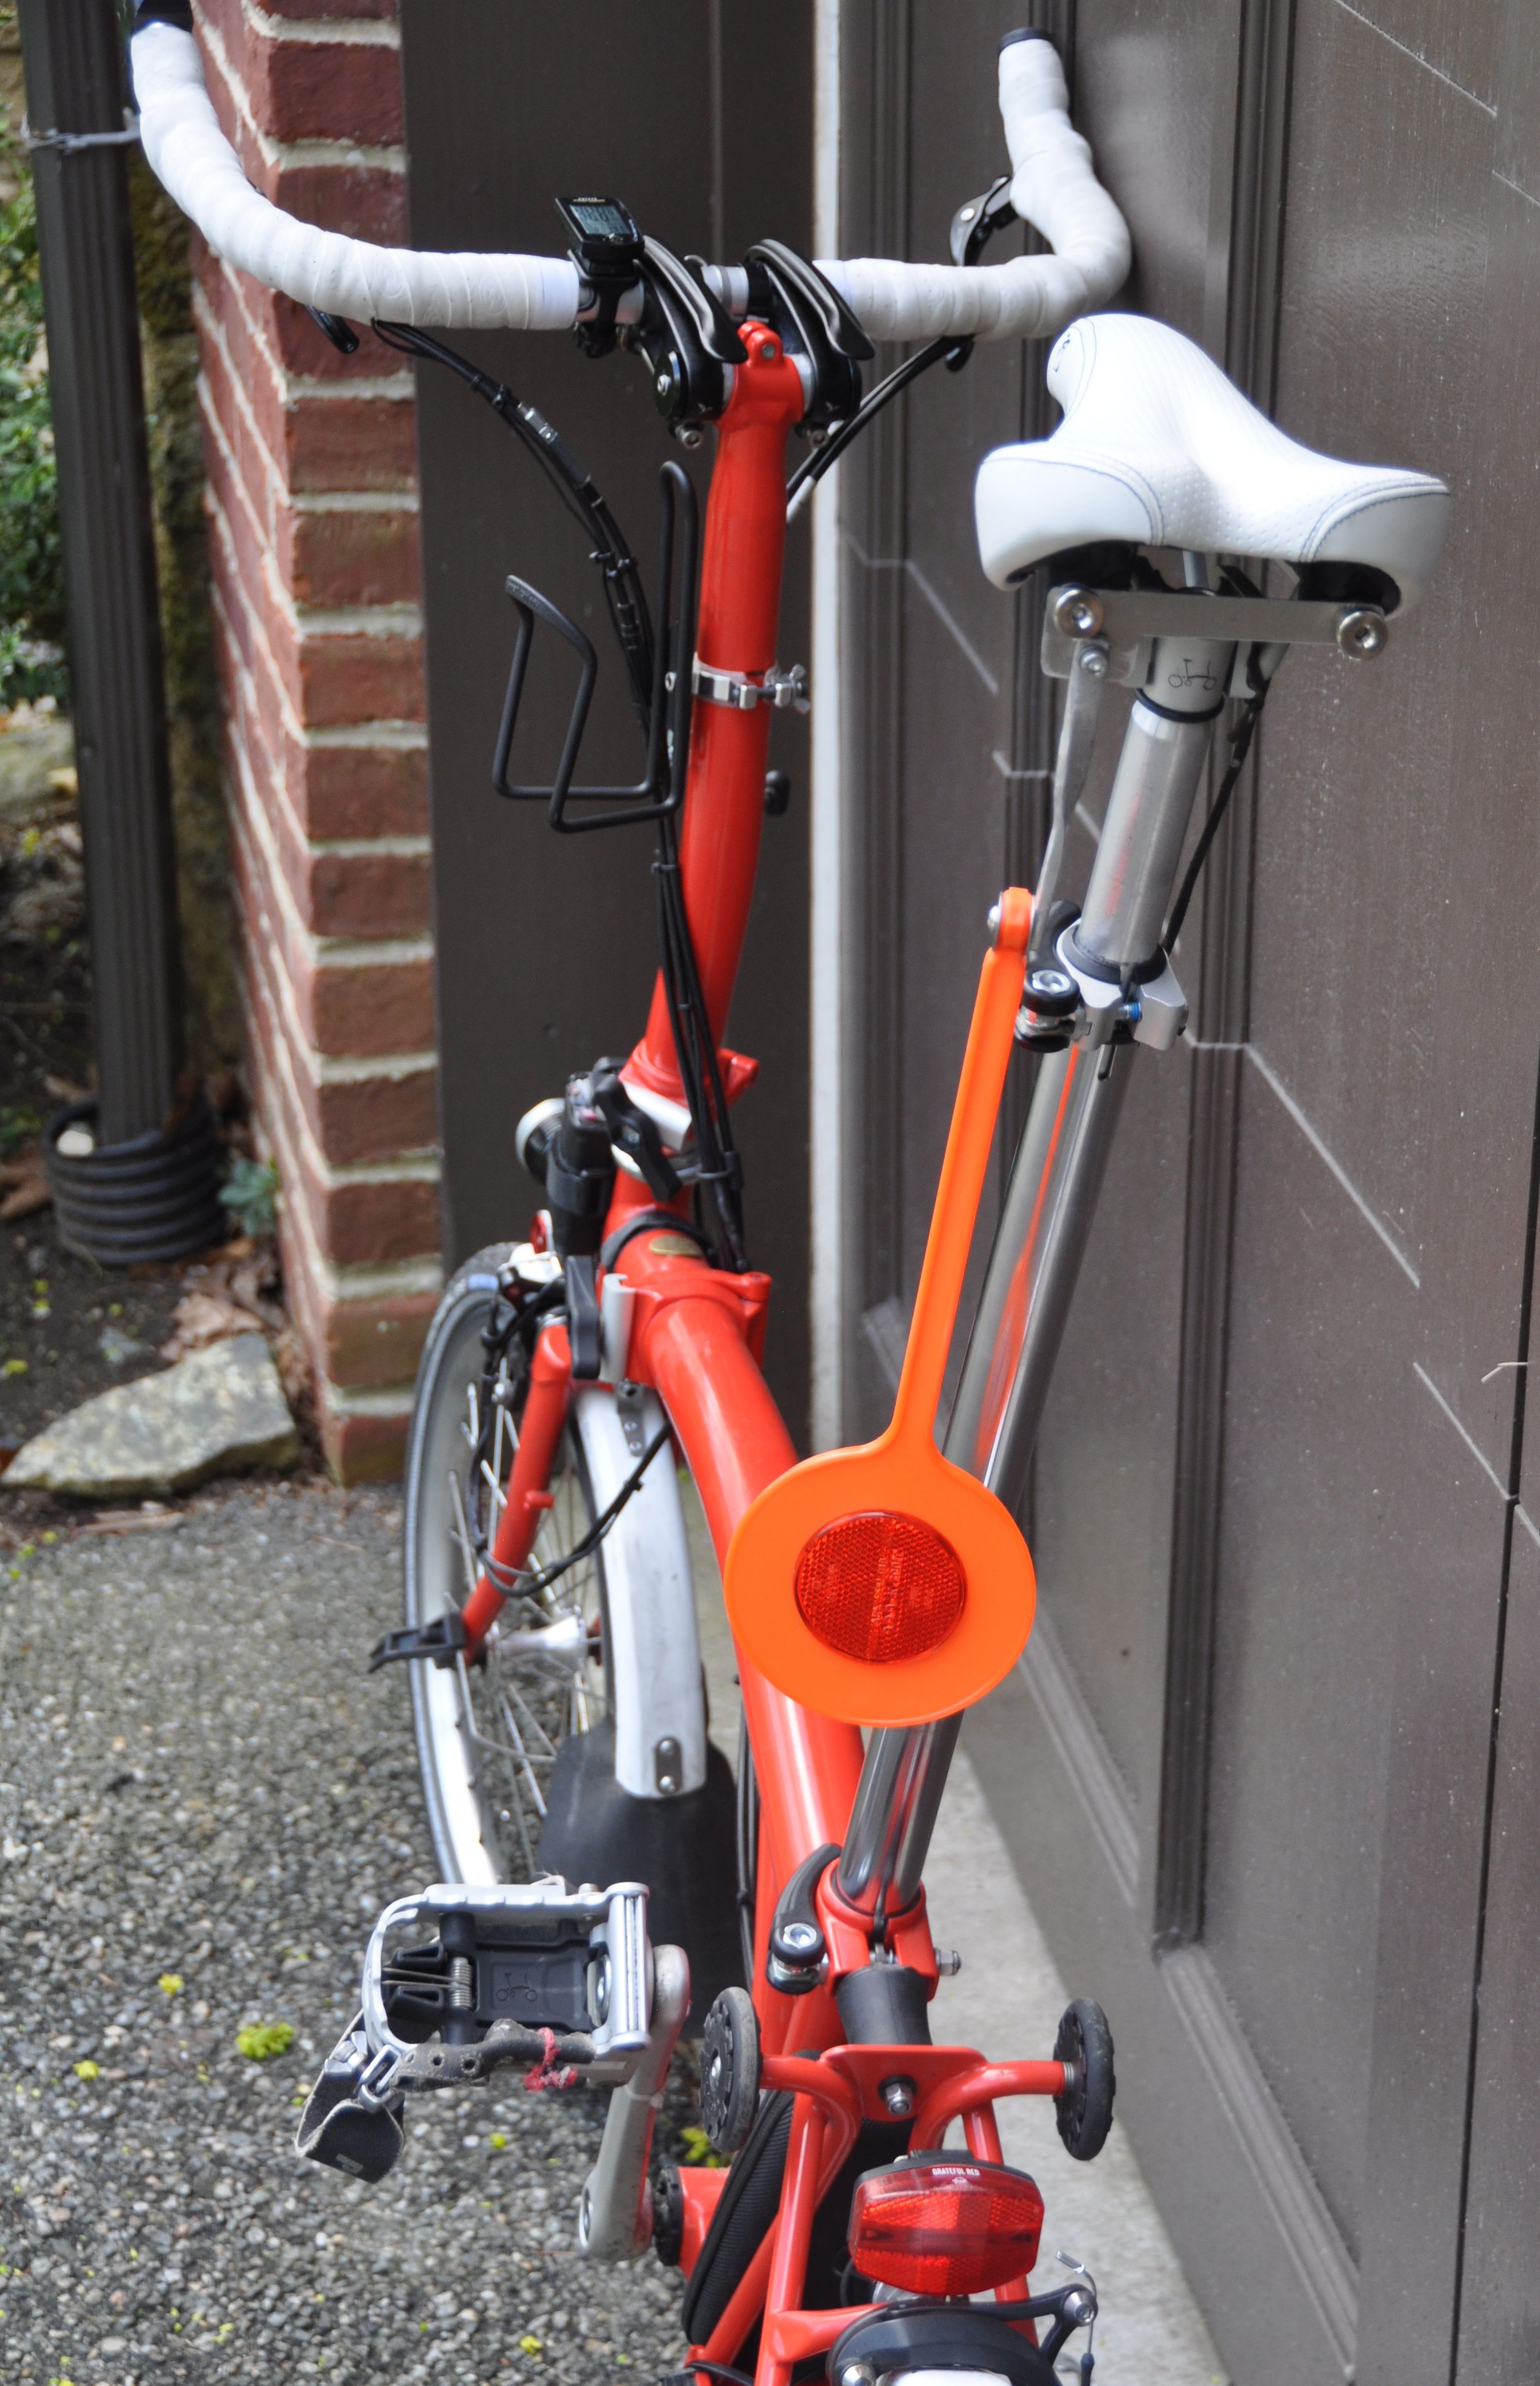
(3) In my view, when you want to get a compact fold, the drop handlebar can go either low (close to the ground) and then has to be wide enough to fold around the wheels (i.e. 580 mm). For my current solution, the handlebar folds upwards and needs the right size to clear the fenders. If it is wider than 440 mm, it would stick out.
(4) With a quick release and free rotation (no indents), safety is an issue. When I installed the D4D stem, I pushed very hard on the drop bars, and they rotated a little bit. Then I tightened the quick release more, and now they don't move. But you have to keep an eye on the adjustment. Right now, it is pretty tight and you have to use quite a bit of force to close the clamp. But this is really necessary.
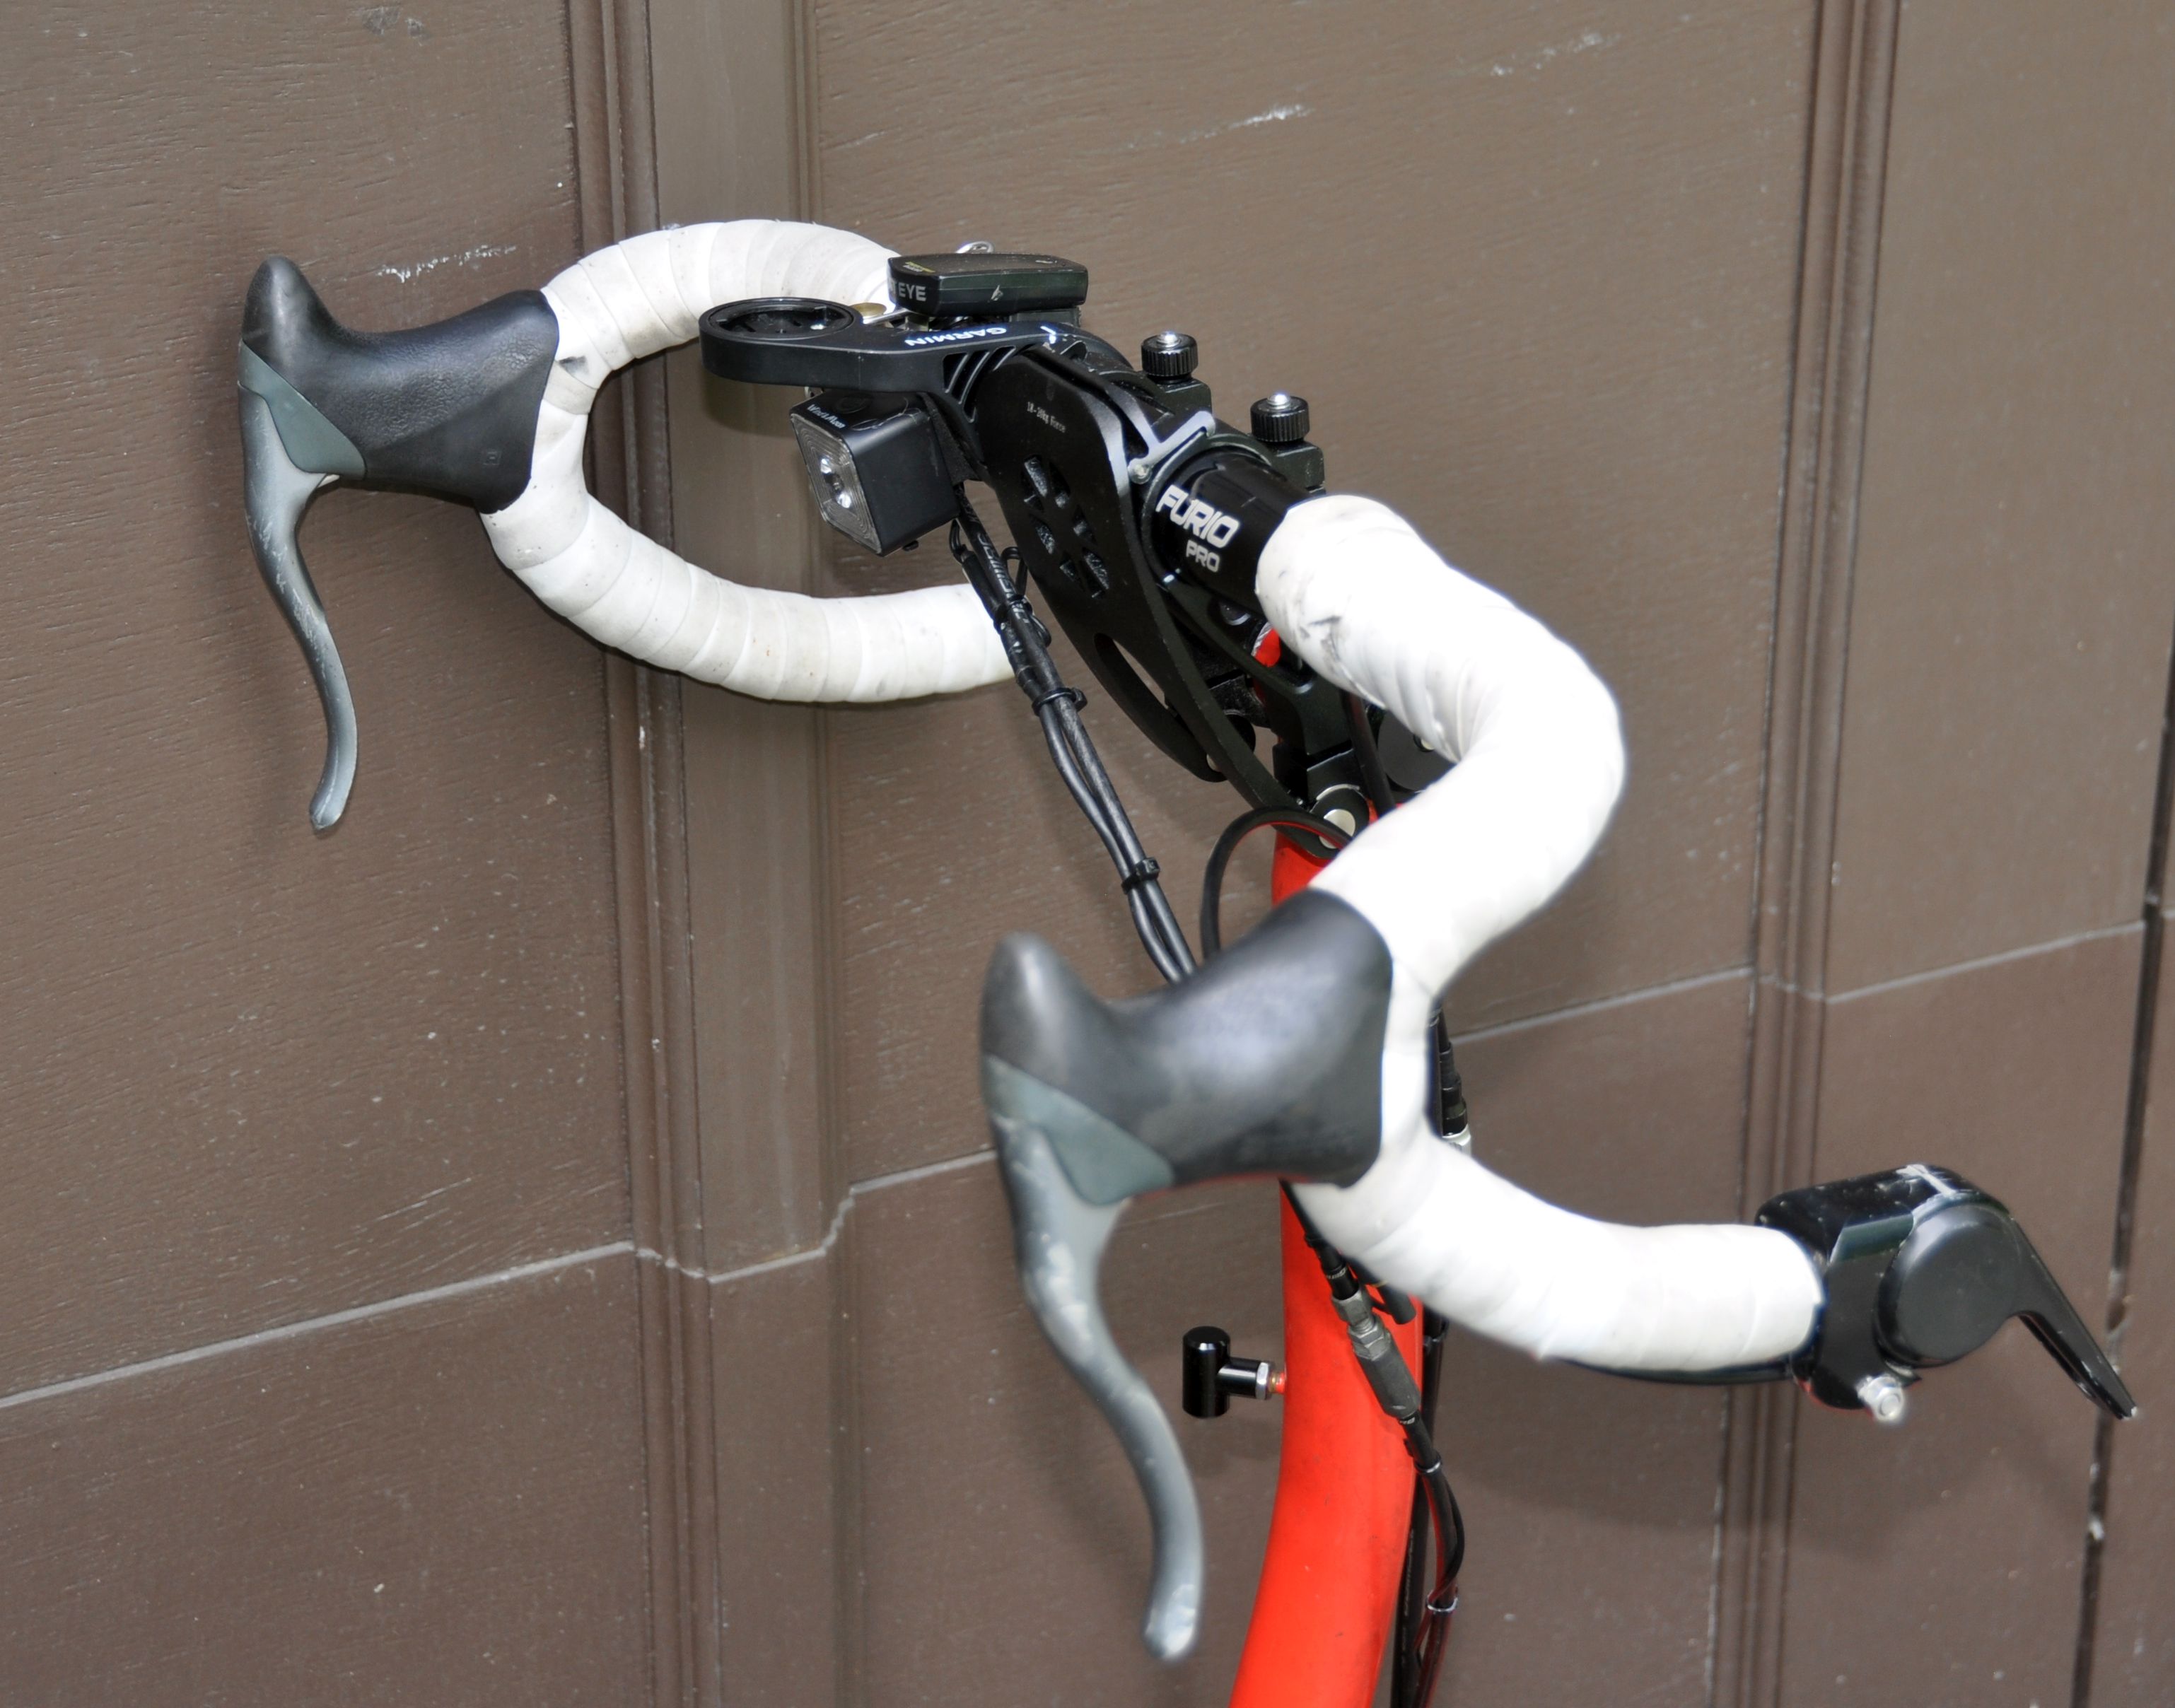
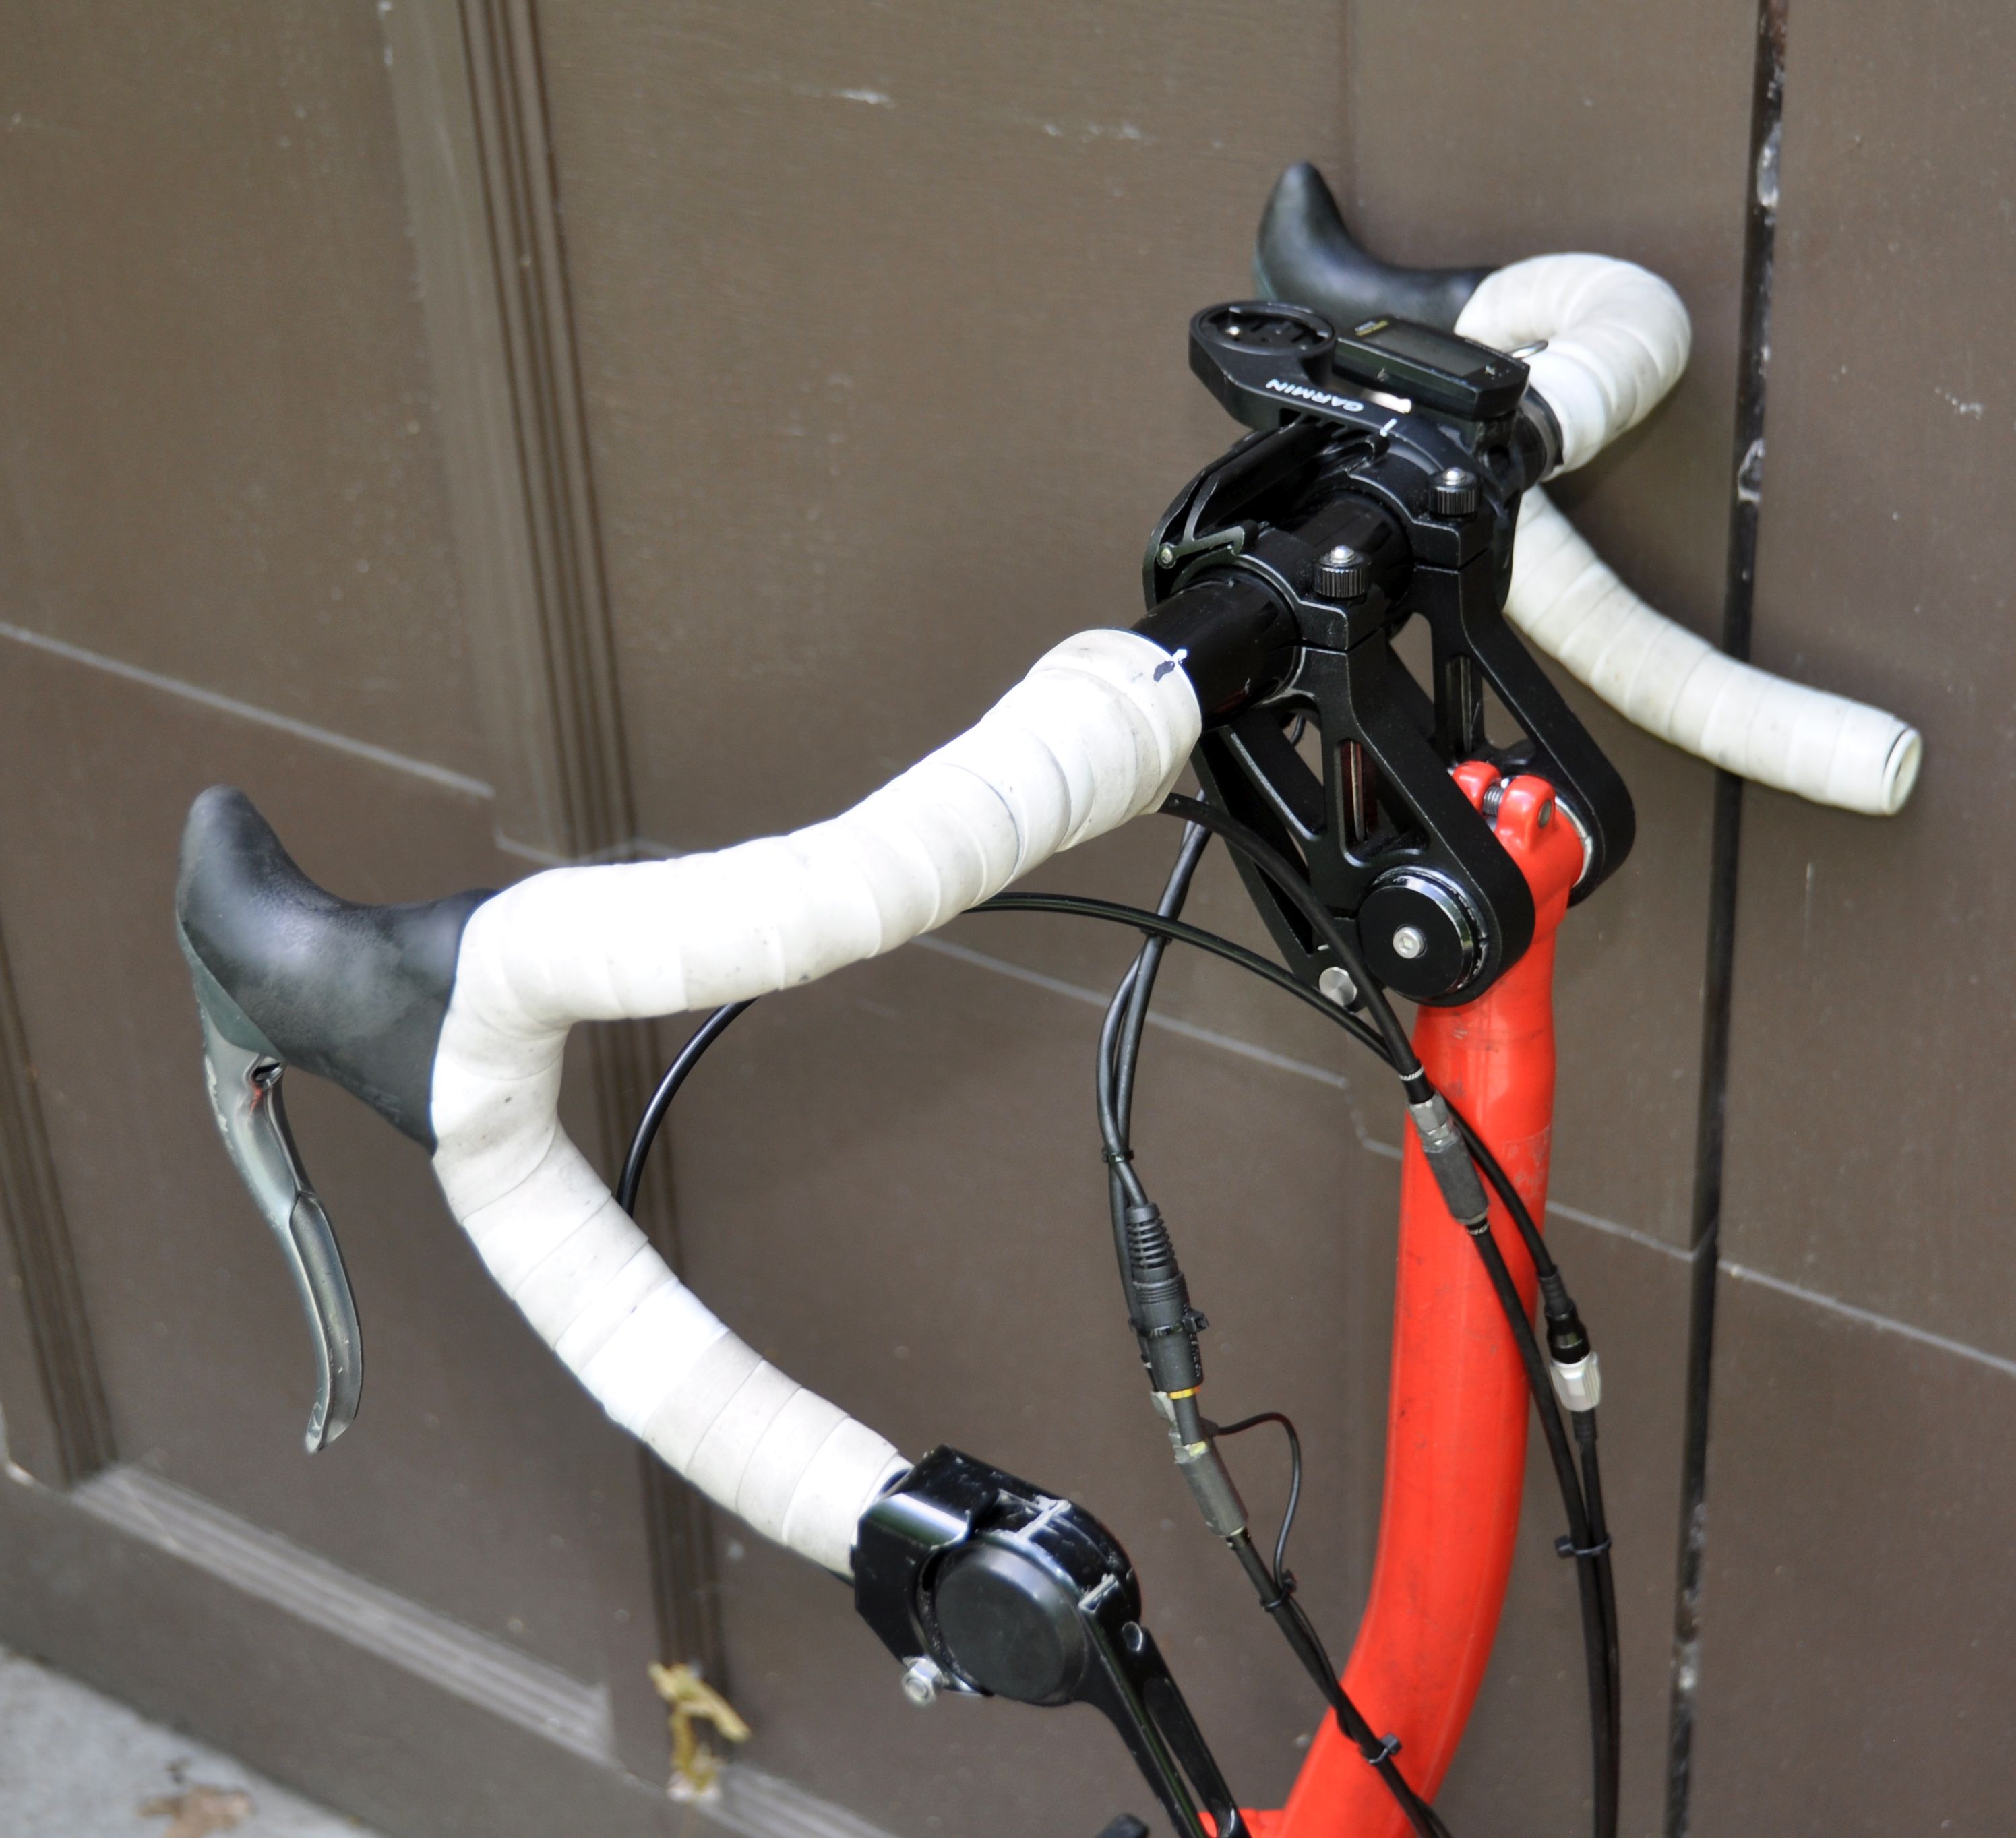
Regular Dropbar and Dahon D4D Back to top
After several iterations, I was finally able to fit a regular drop handlebar on the Brompton which folds perfectly.
The folded bike still fits into the Brompton box. It is a little bit wider than with standard handelbars, since the folded handlebar is on the outside of the stem when folded.
I am using the Dahon D4D stem. This stem requires 31.8 mm bars on both sides. On the Brompton side, I had to use shims to enlarge the diameter from 25.4 mm to 31.8mm. The shims were put around a piece of 25.4 mm tubing (cut off from an old seatpost), and secured with end caps (I also glued the shims on one side to the 25.4 mm tube with superglue).
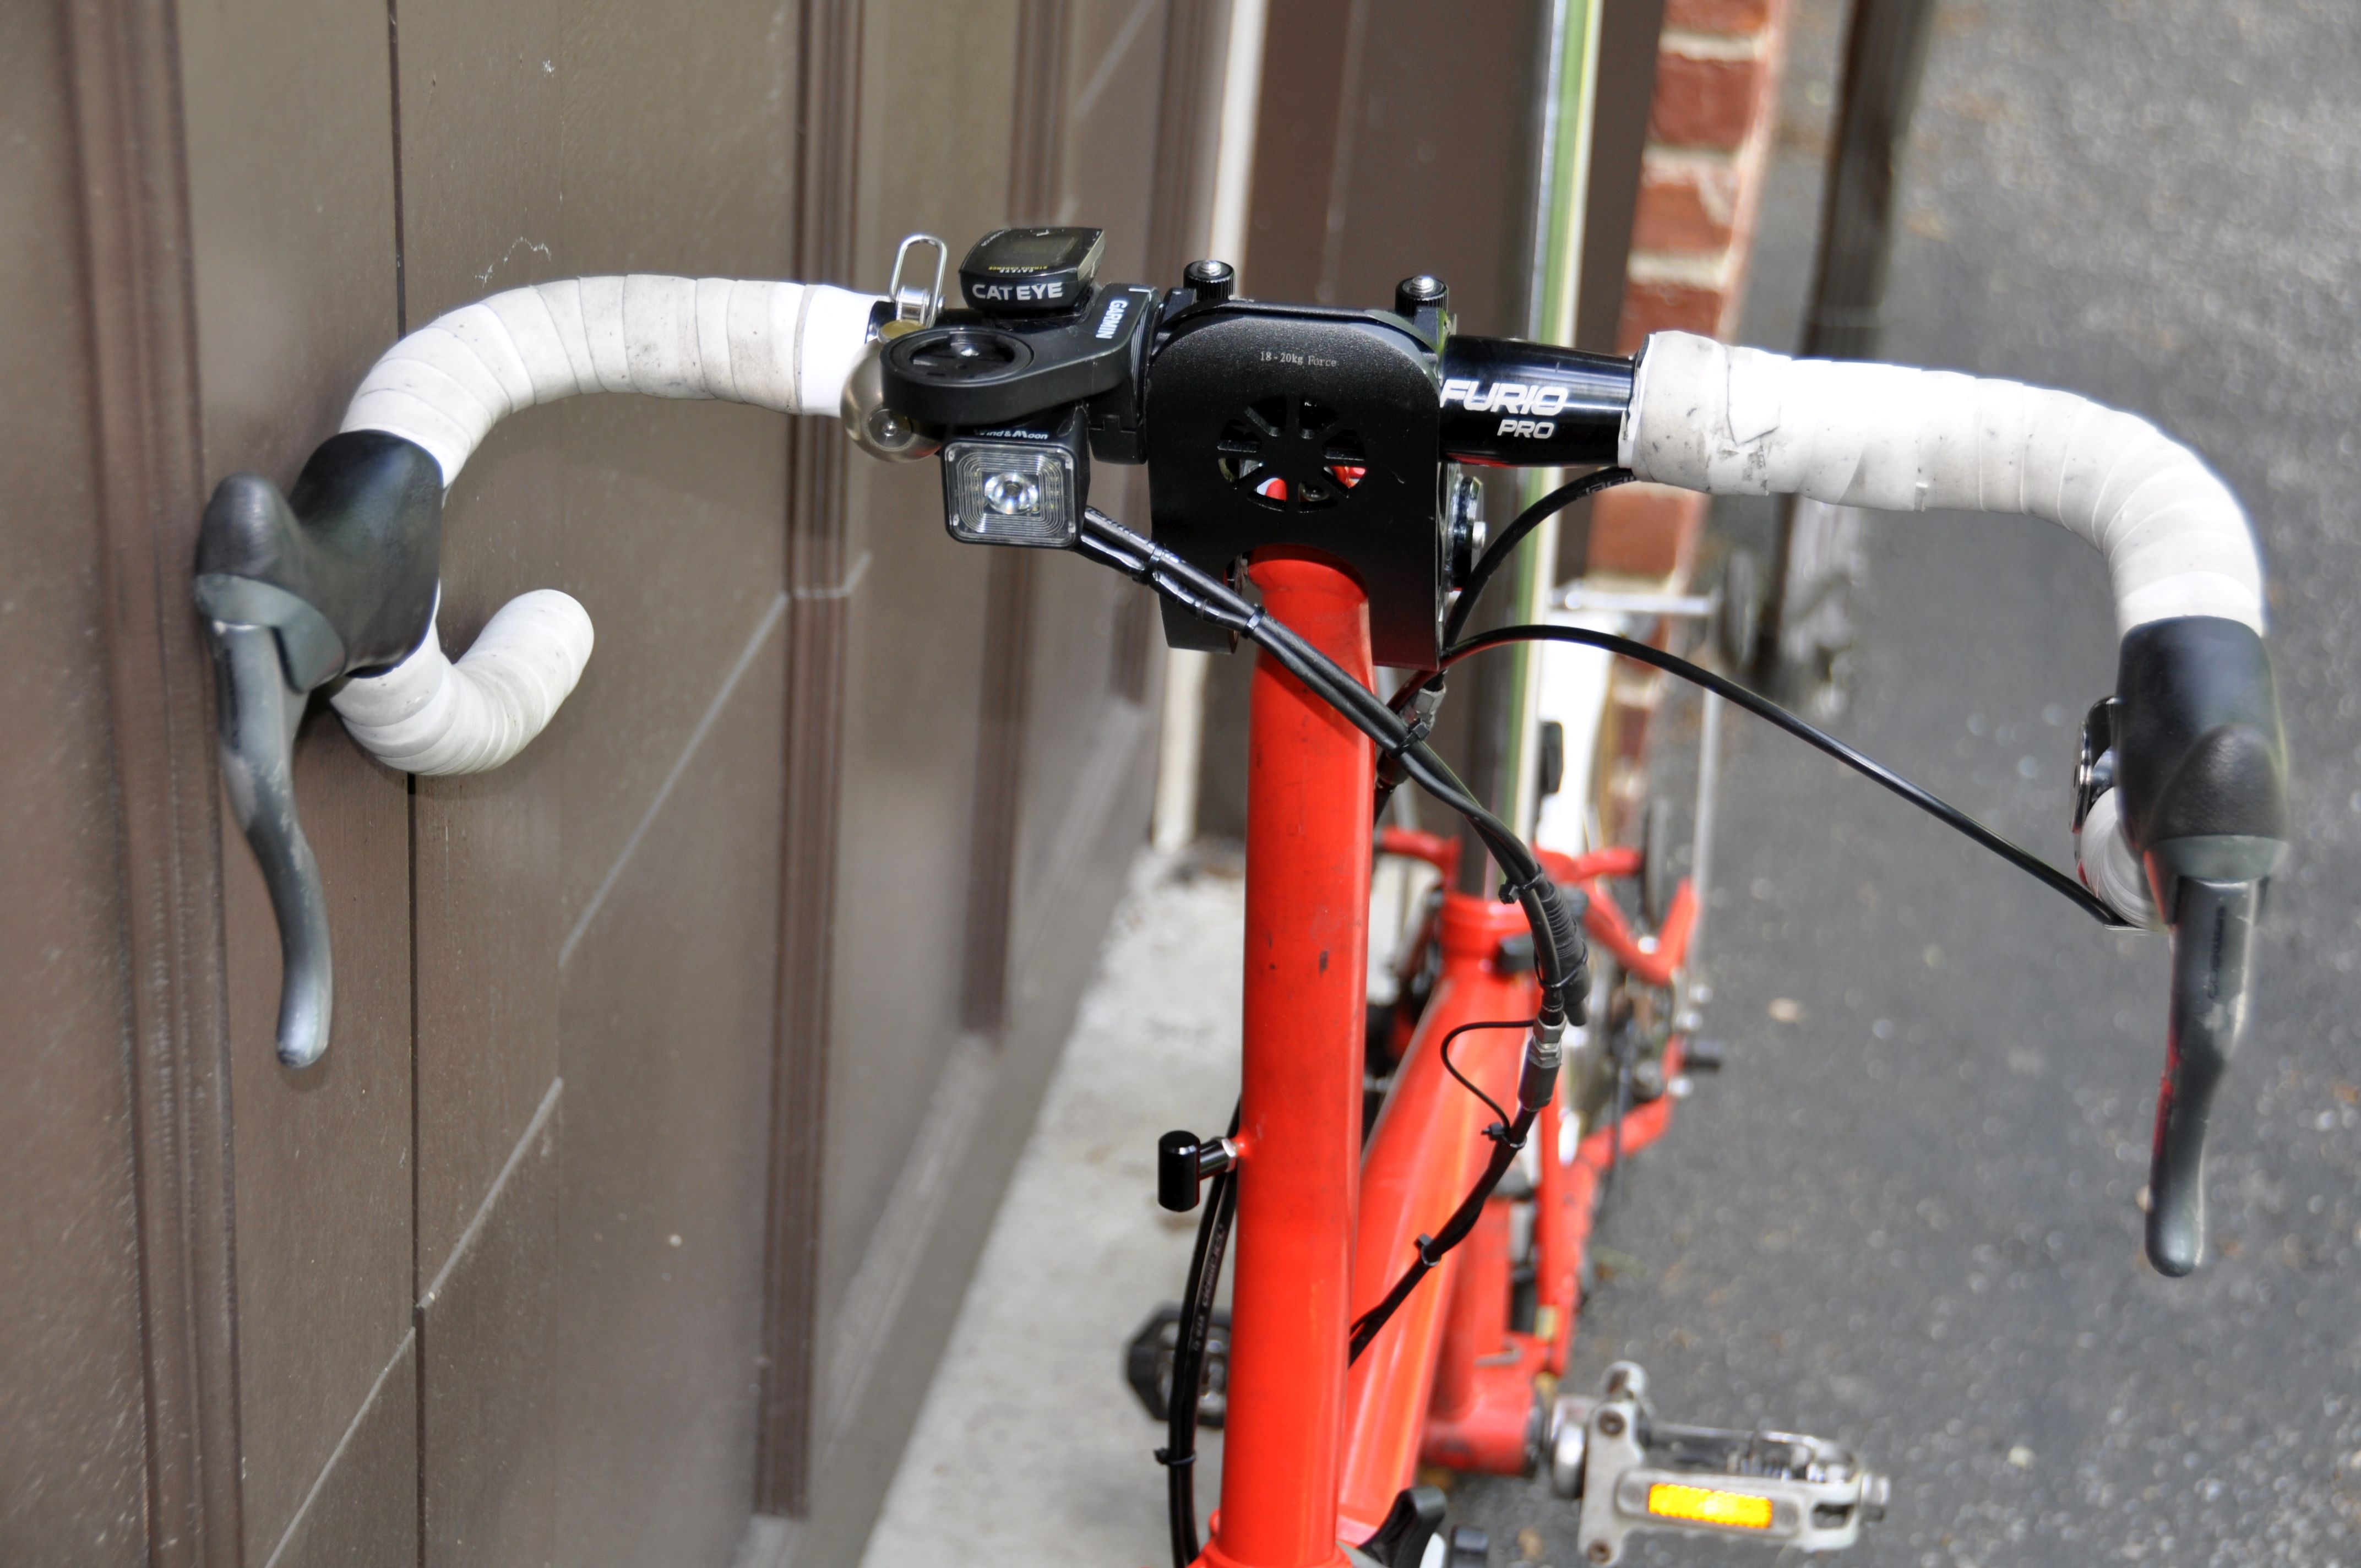
Handlebar is a standard drop bar: Satori Furio PRO Road Bike Handlebar 31.8x440mm. The brake levers are (20 year old) Shimano Ultregra aero levers.
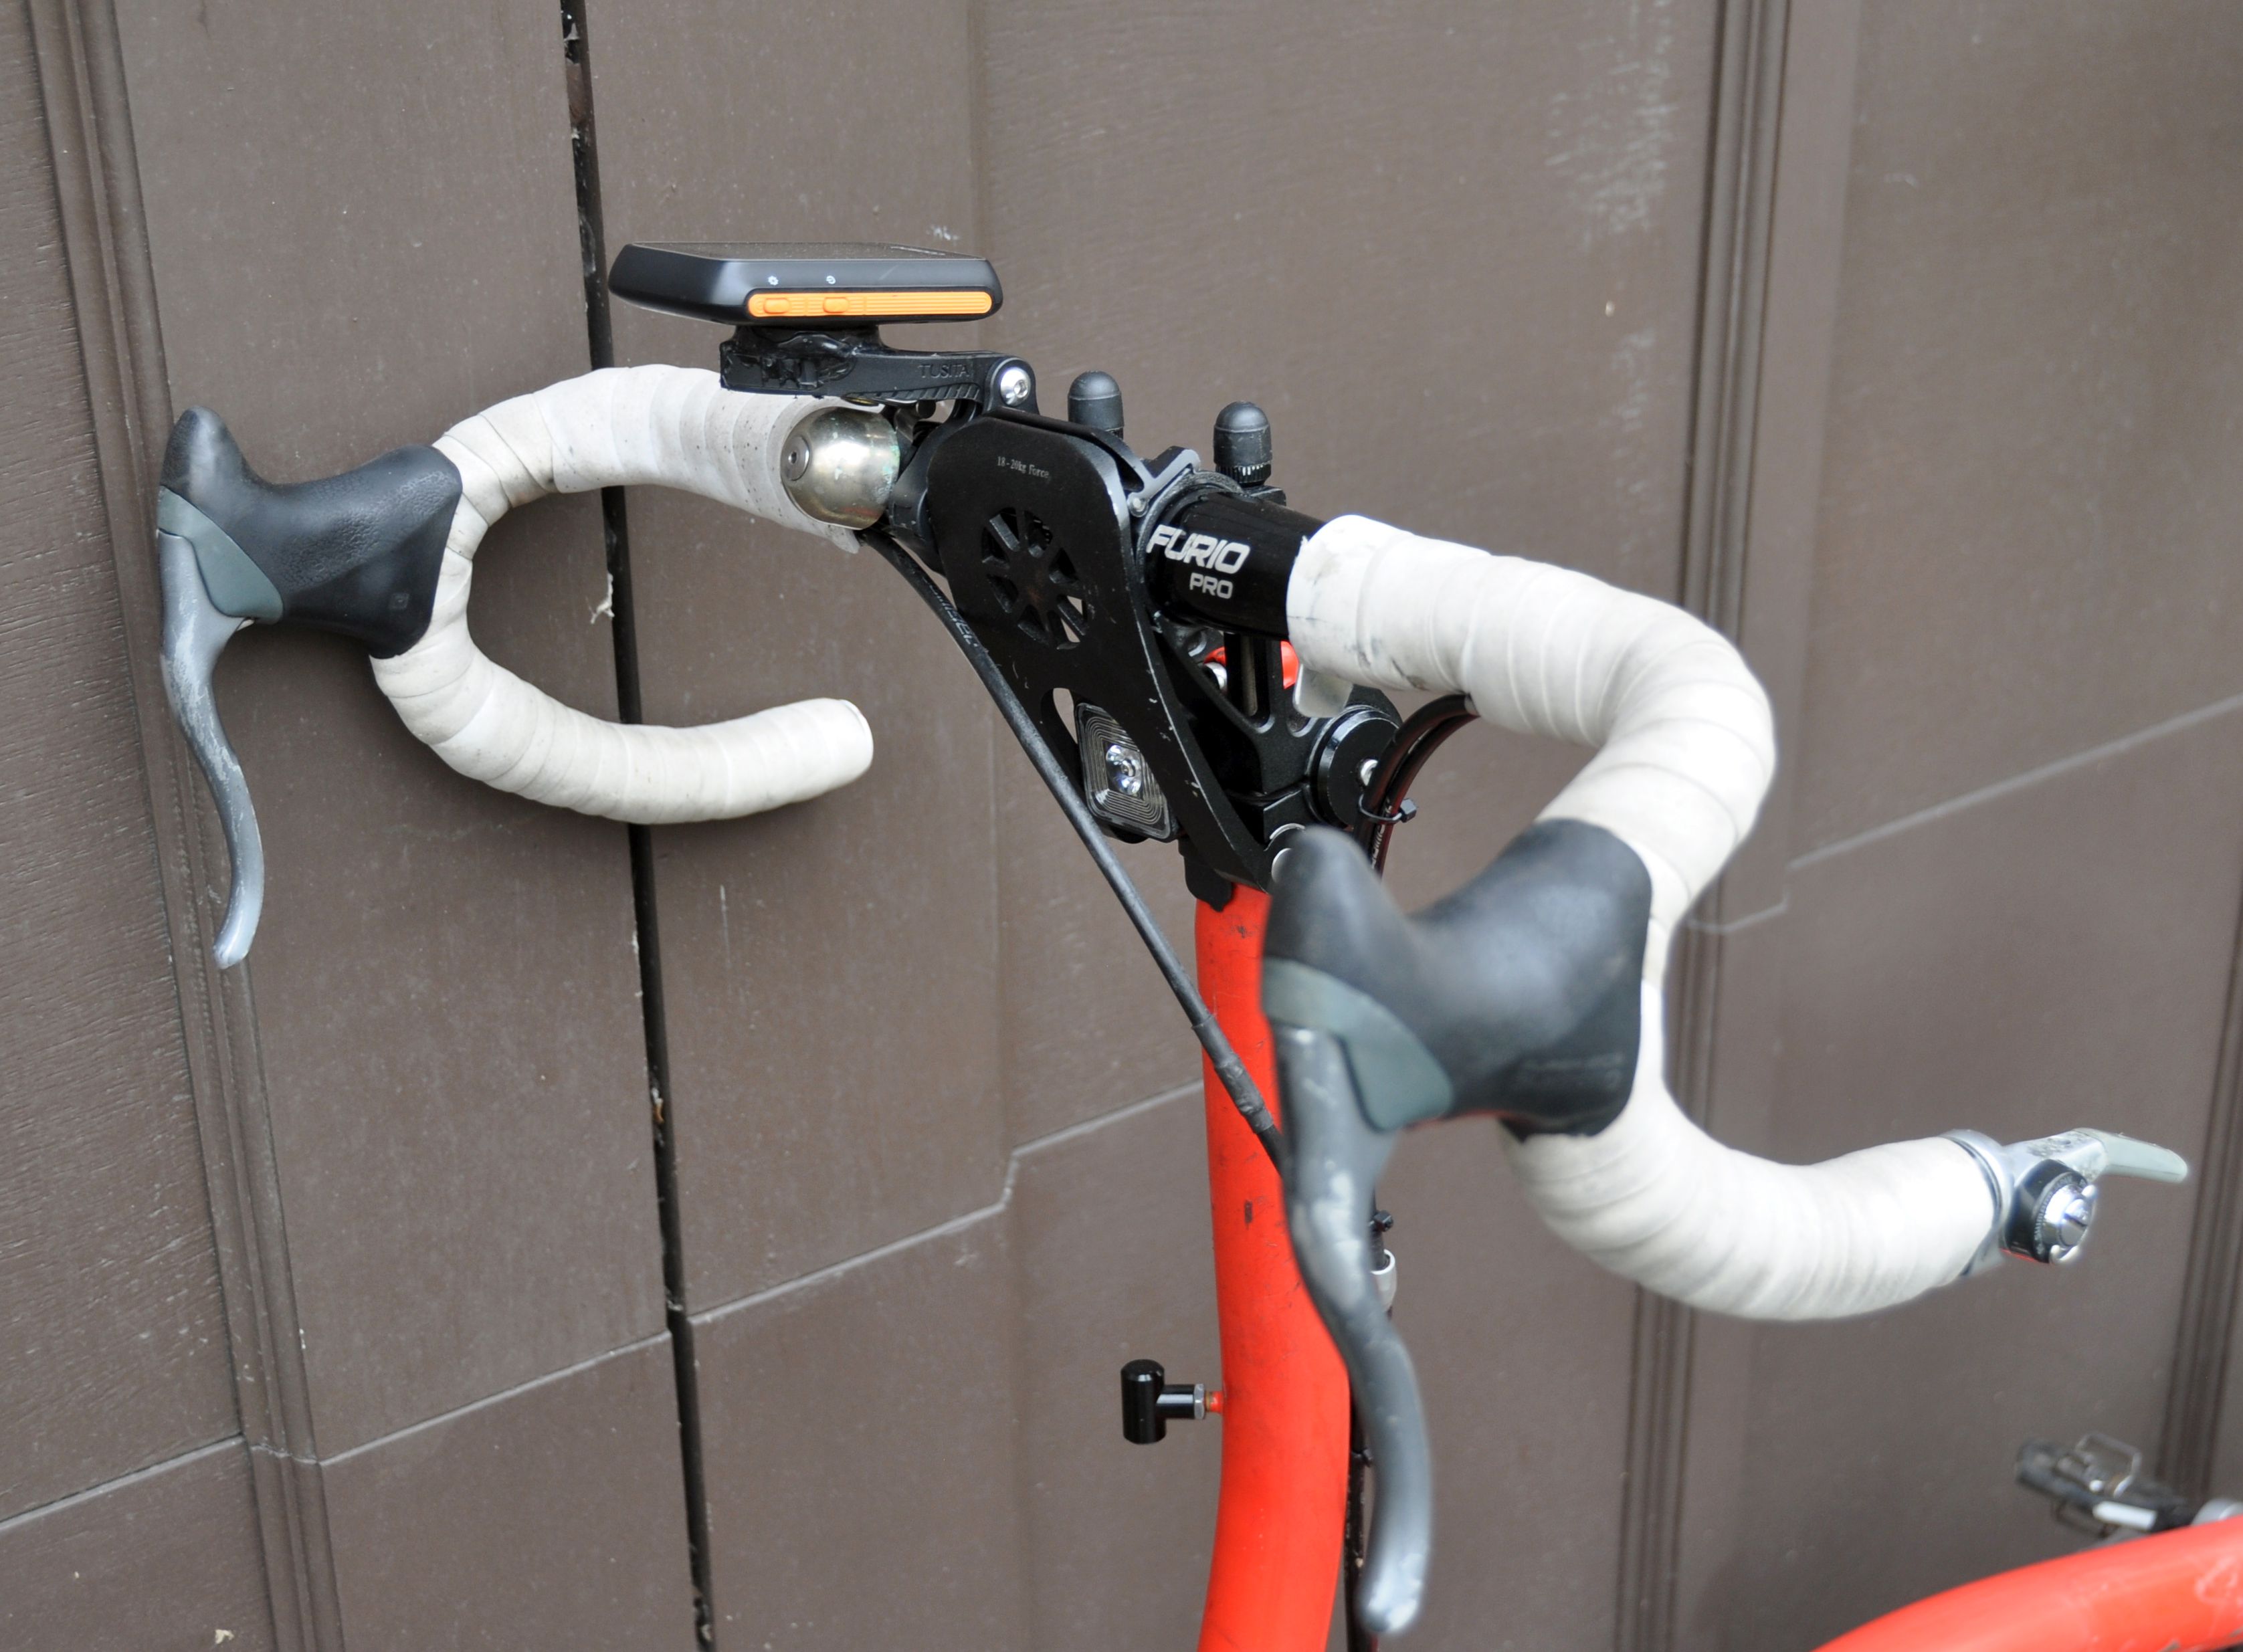
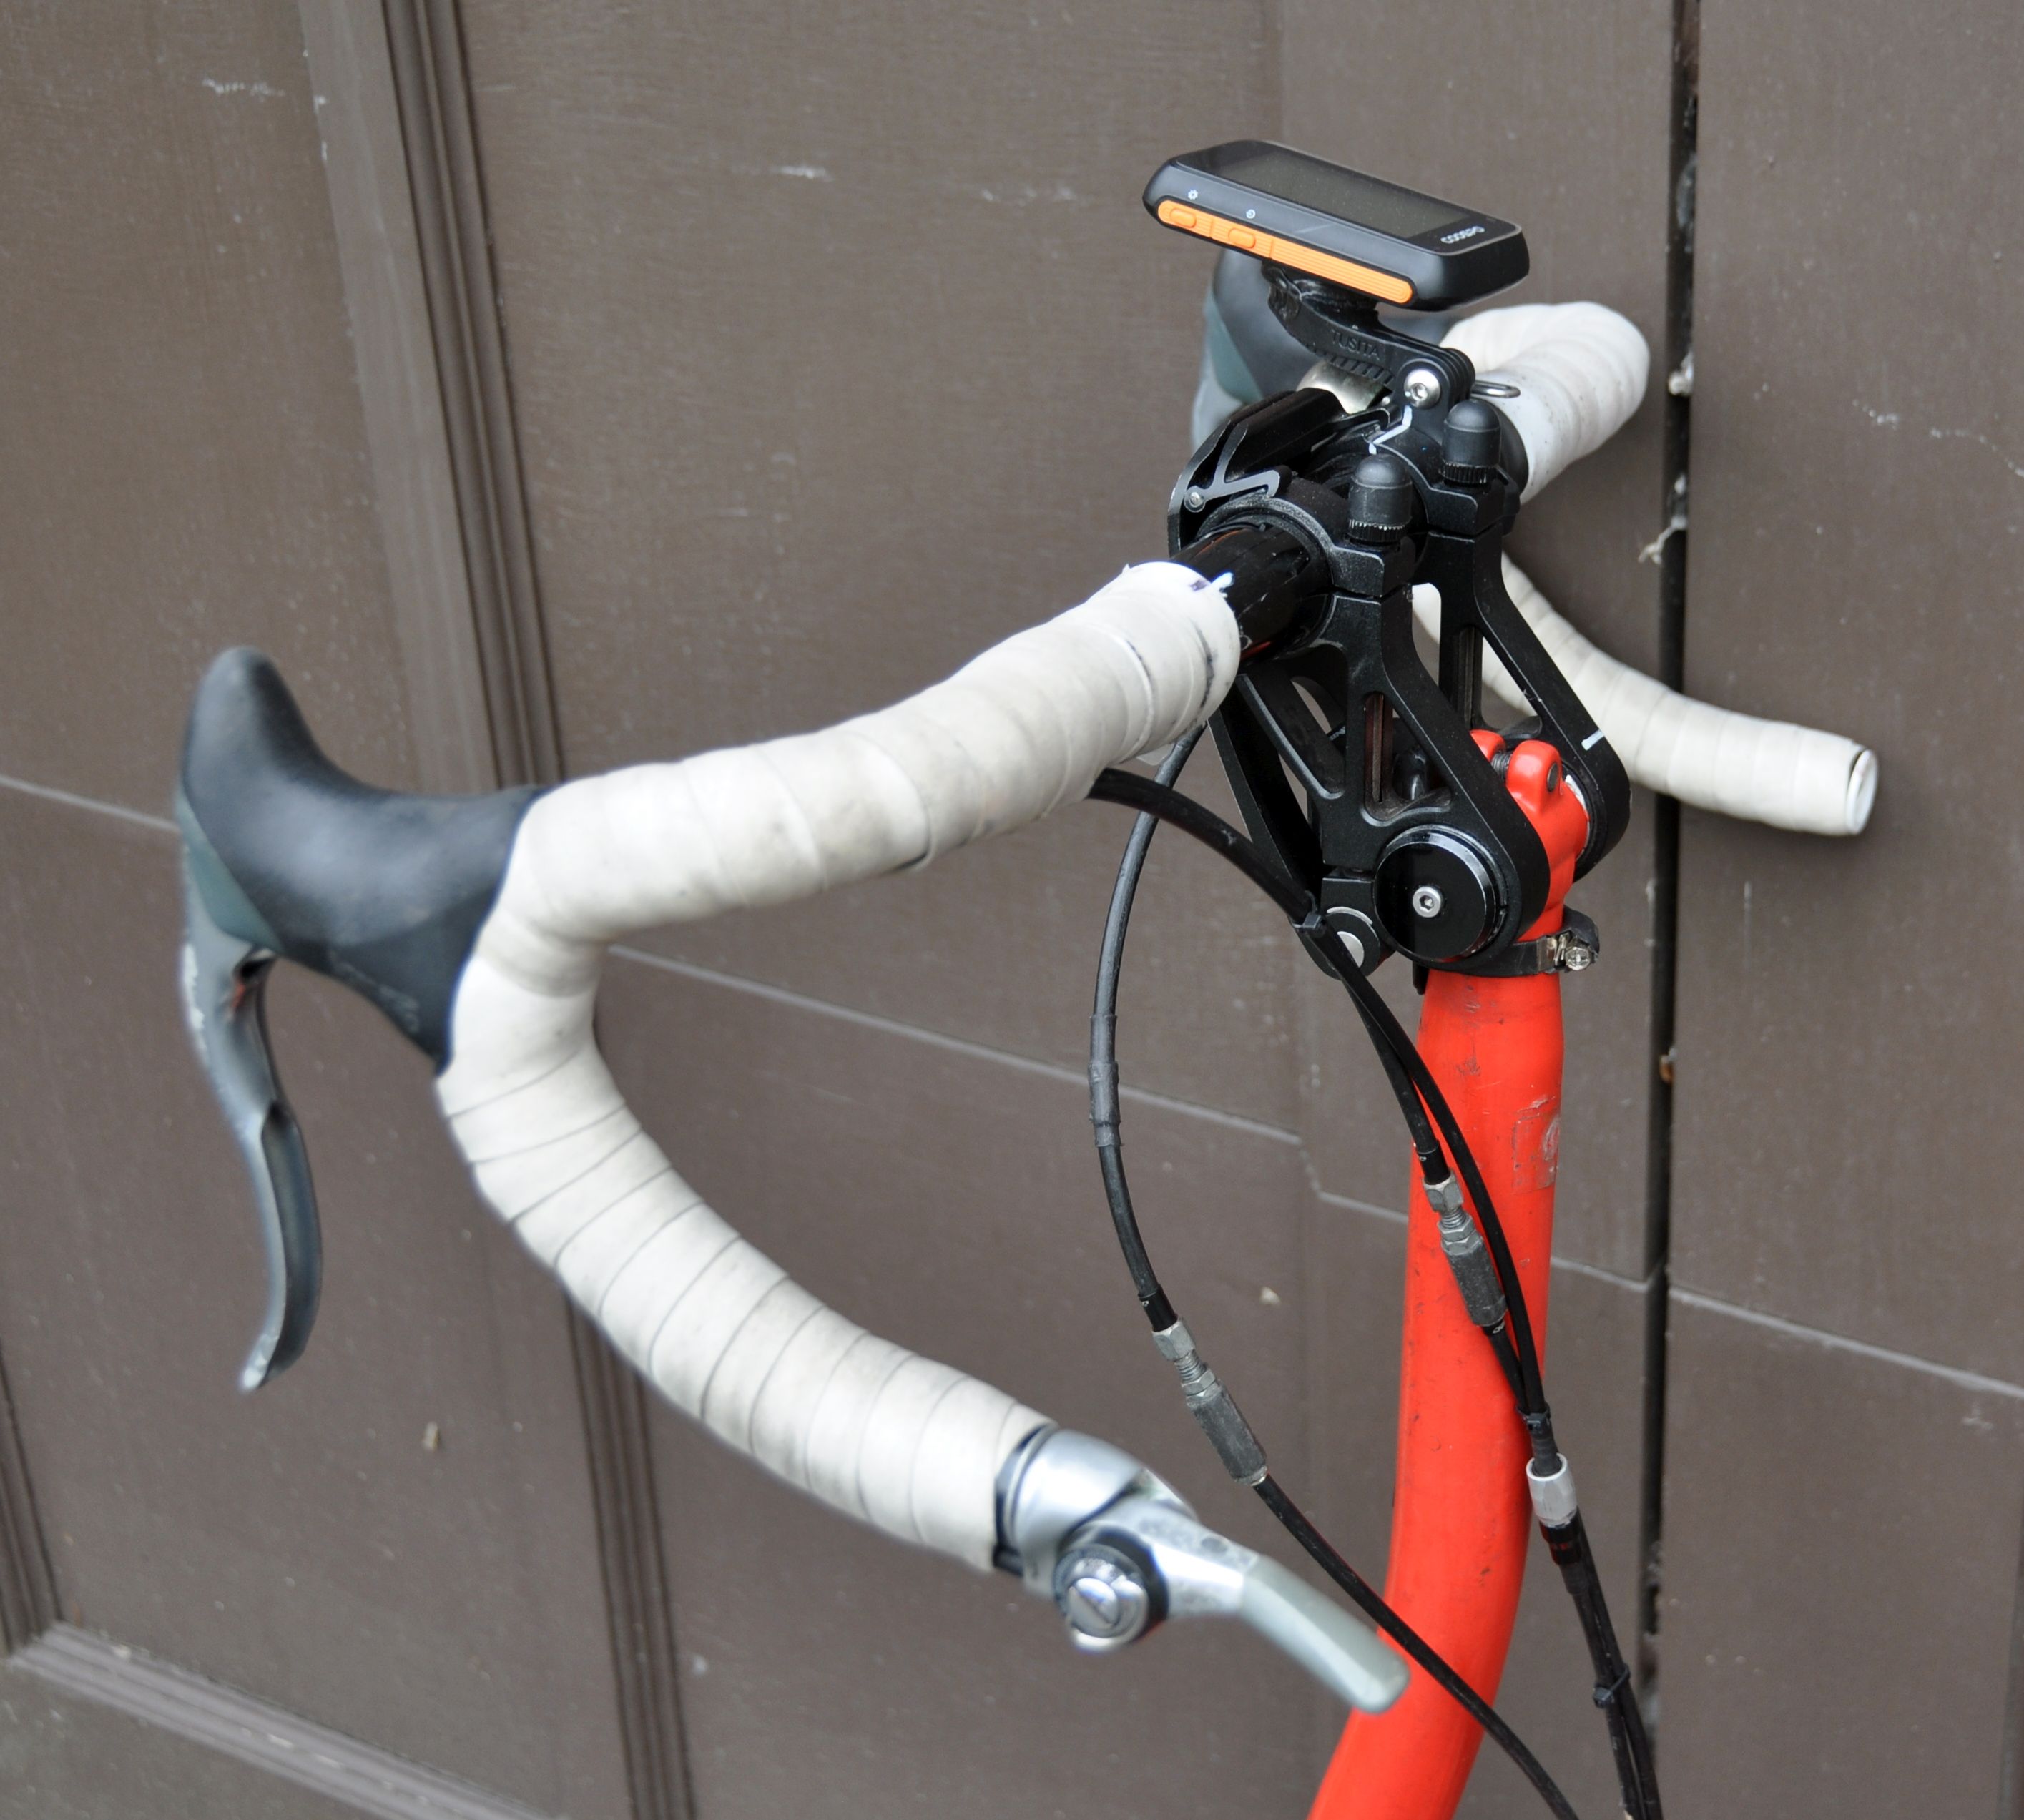

That’s how the handlebar is folded and shifted before folding the rest of the bike.
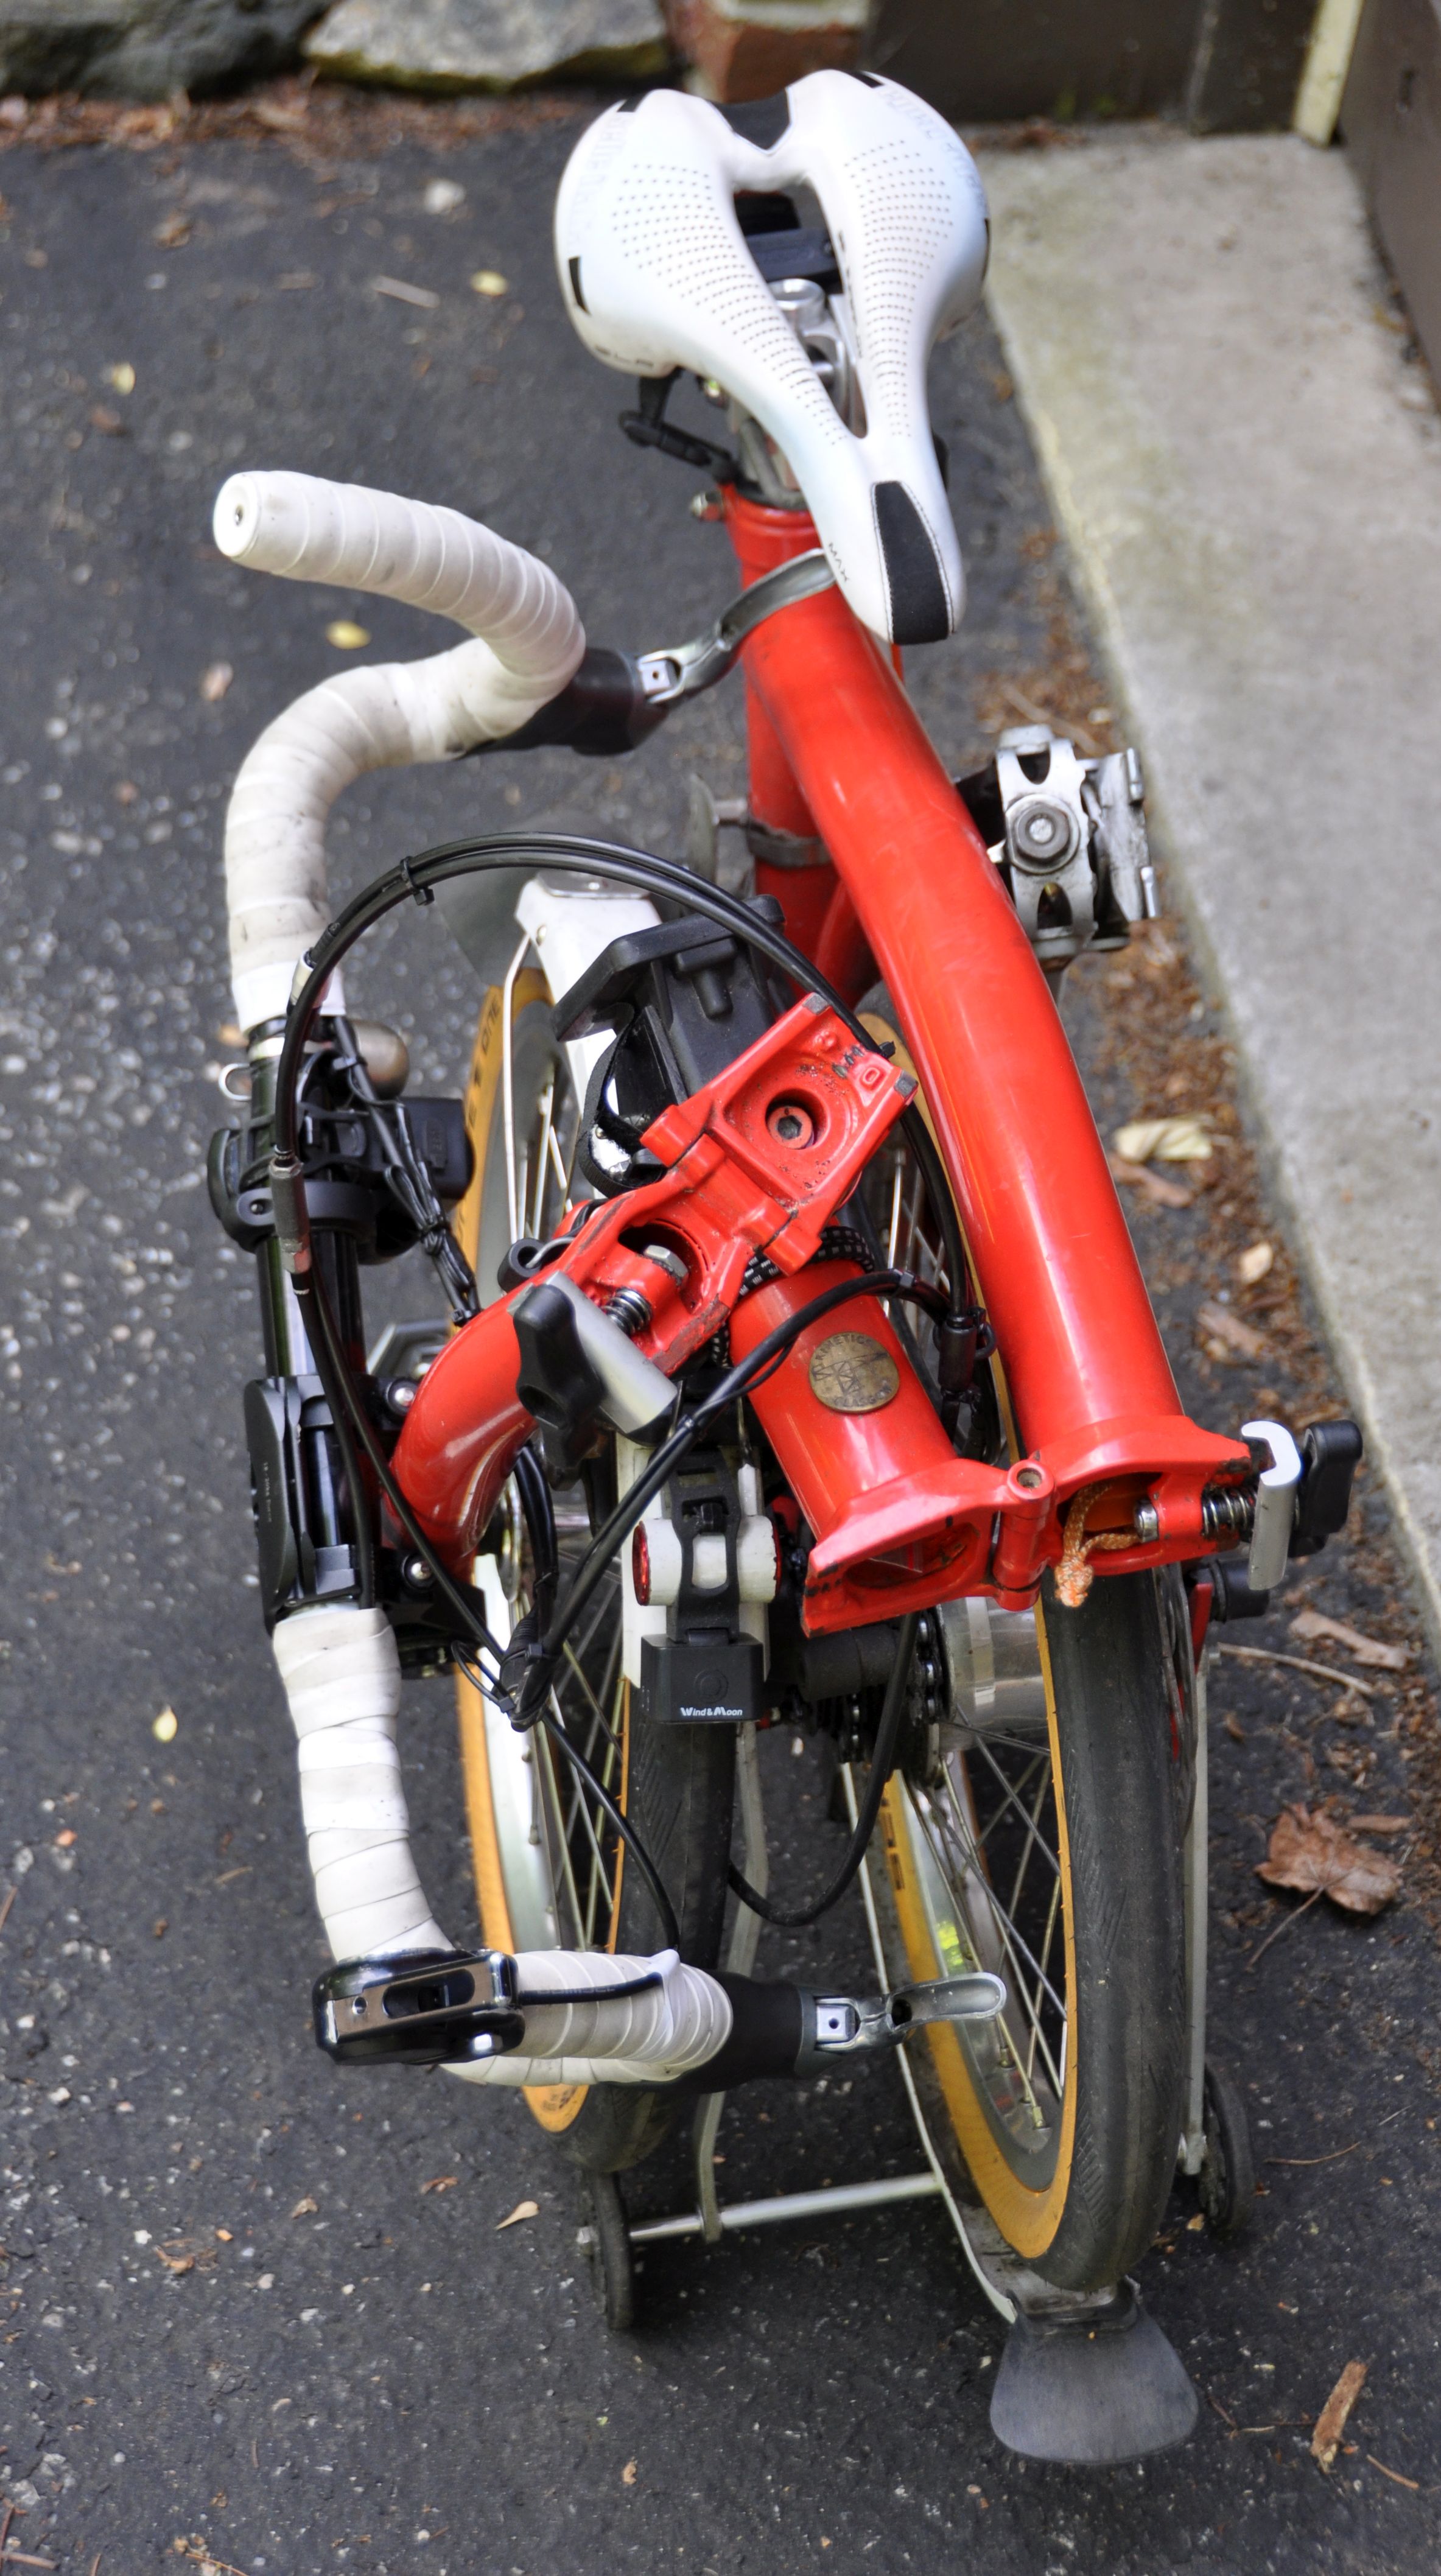
The fold is quite compact. A handlebar wider than 440 mm would stick out on the side or on the top. Note that the handlebar is shifted to the side several cm before folding --- otherwise it would not have fitted. This adds a few seconds to the fold.
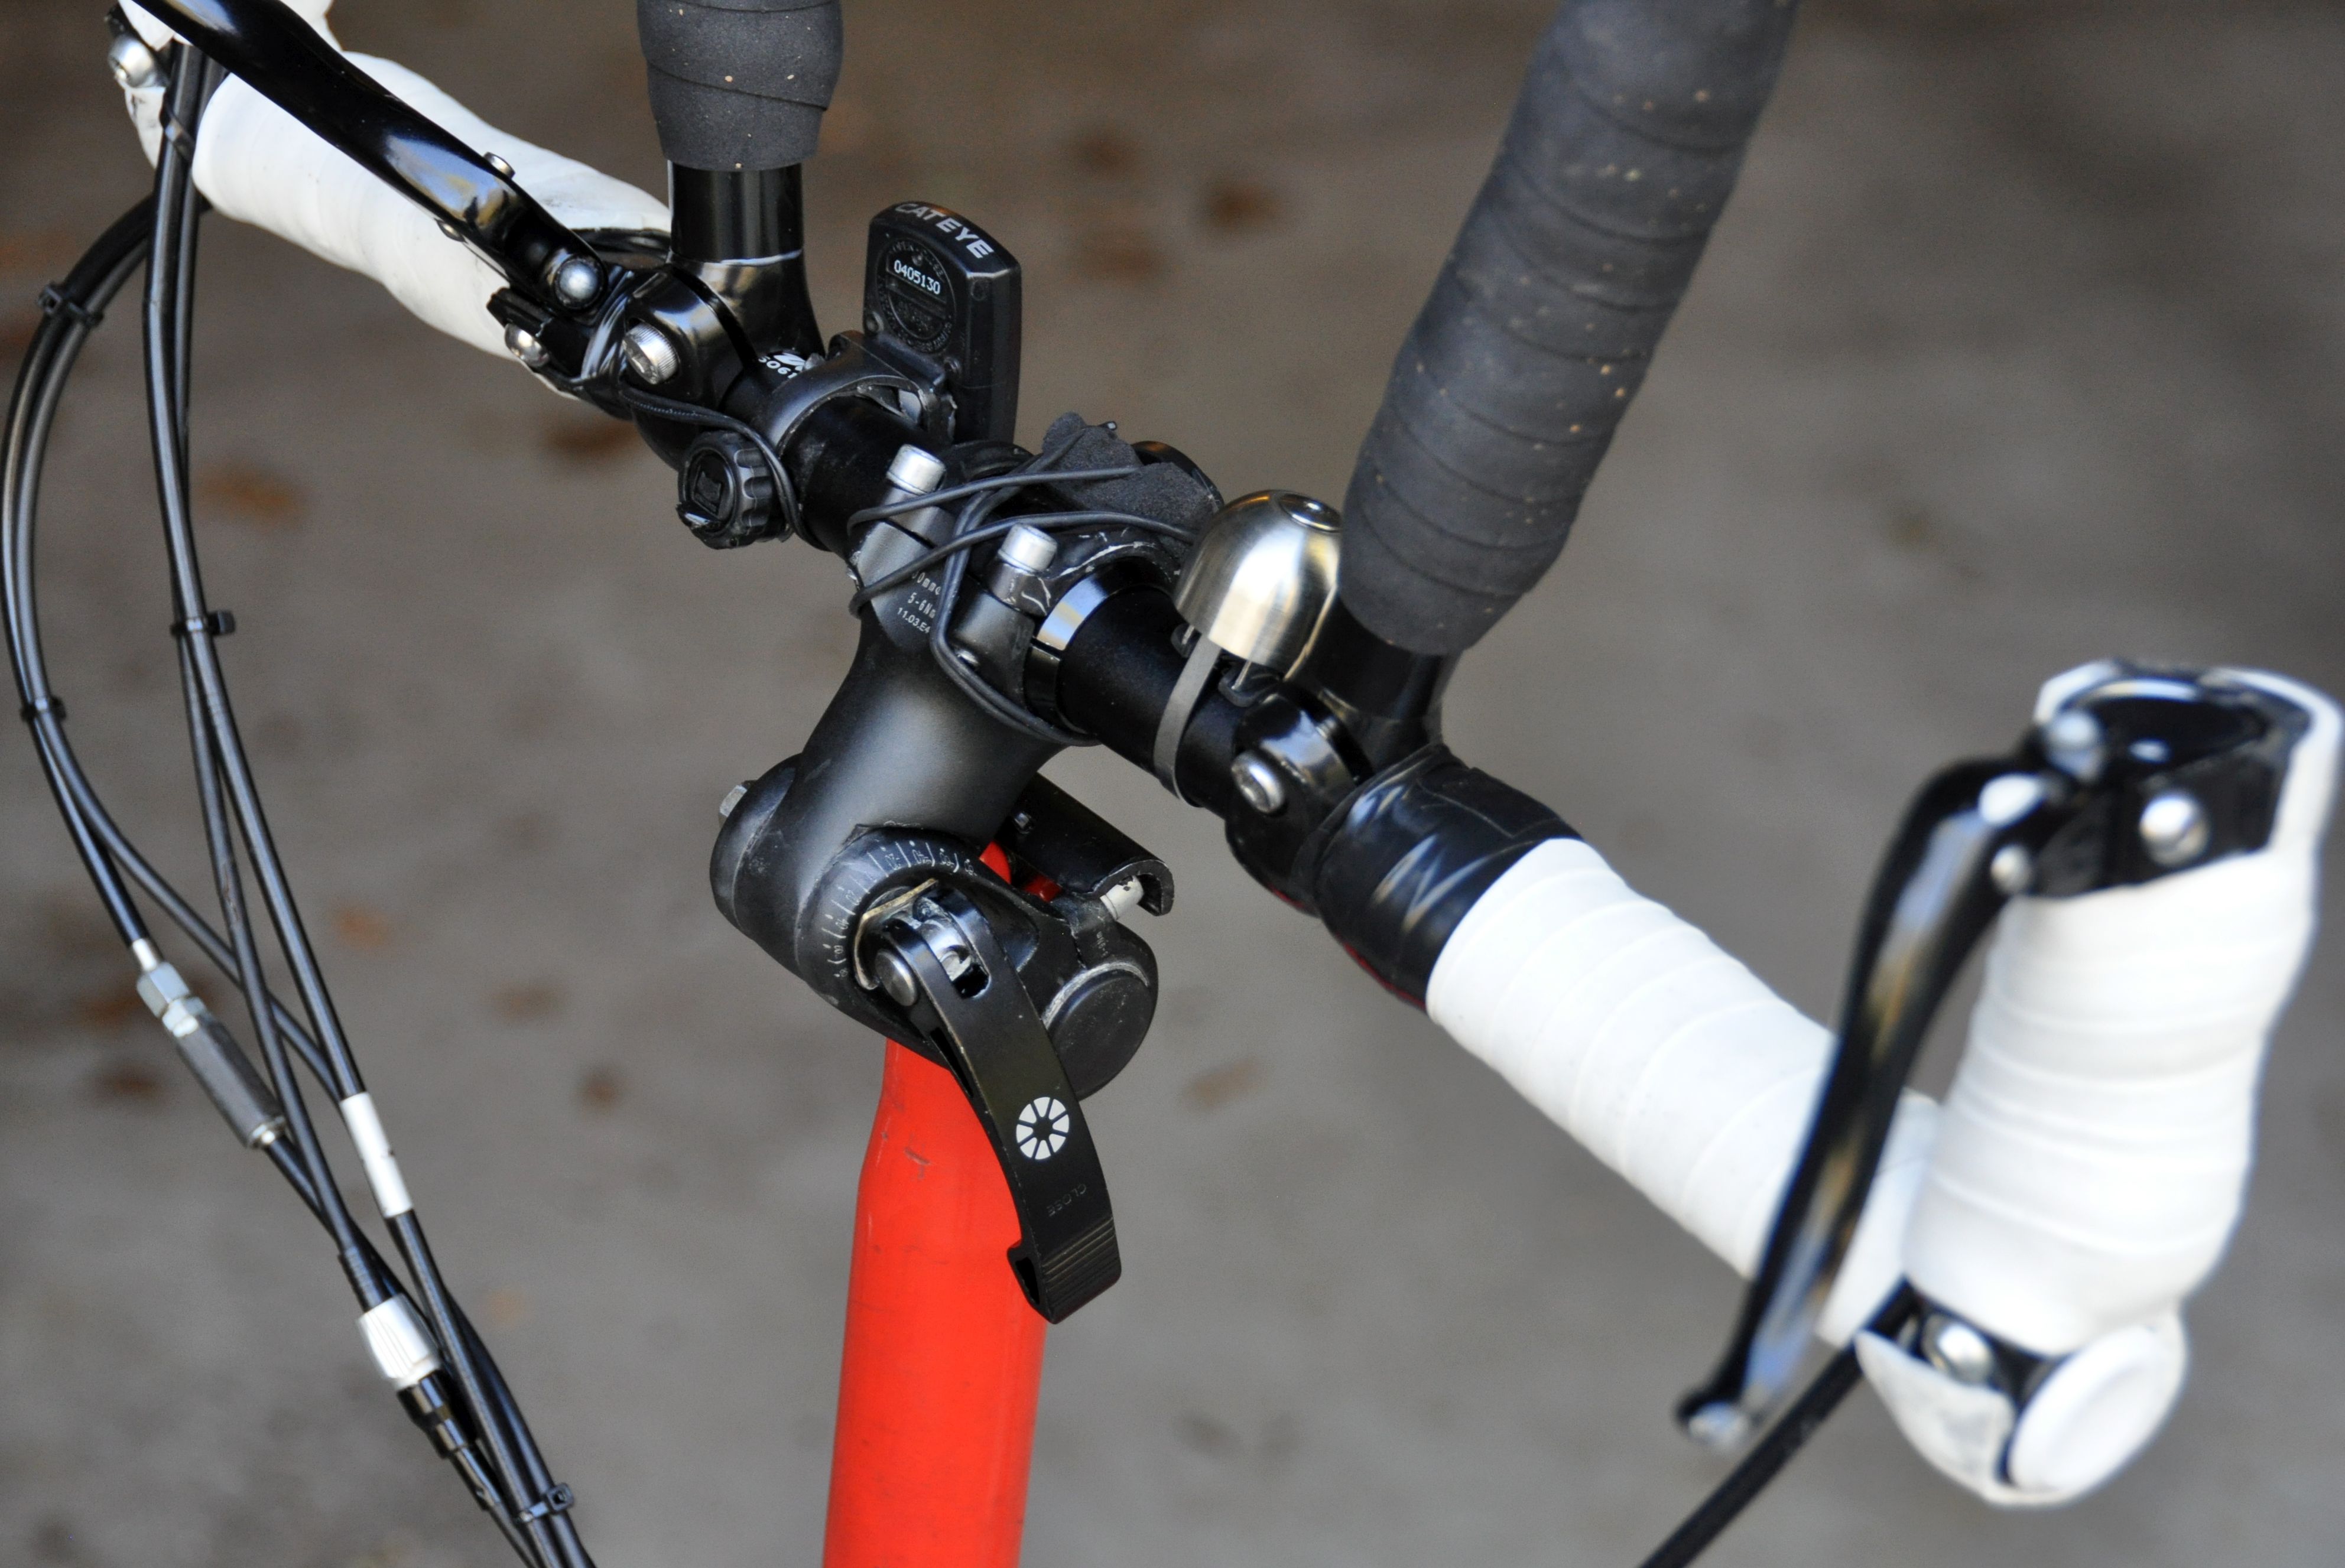
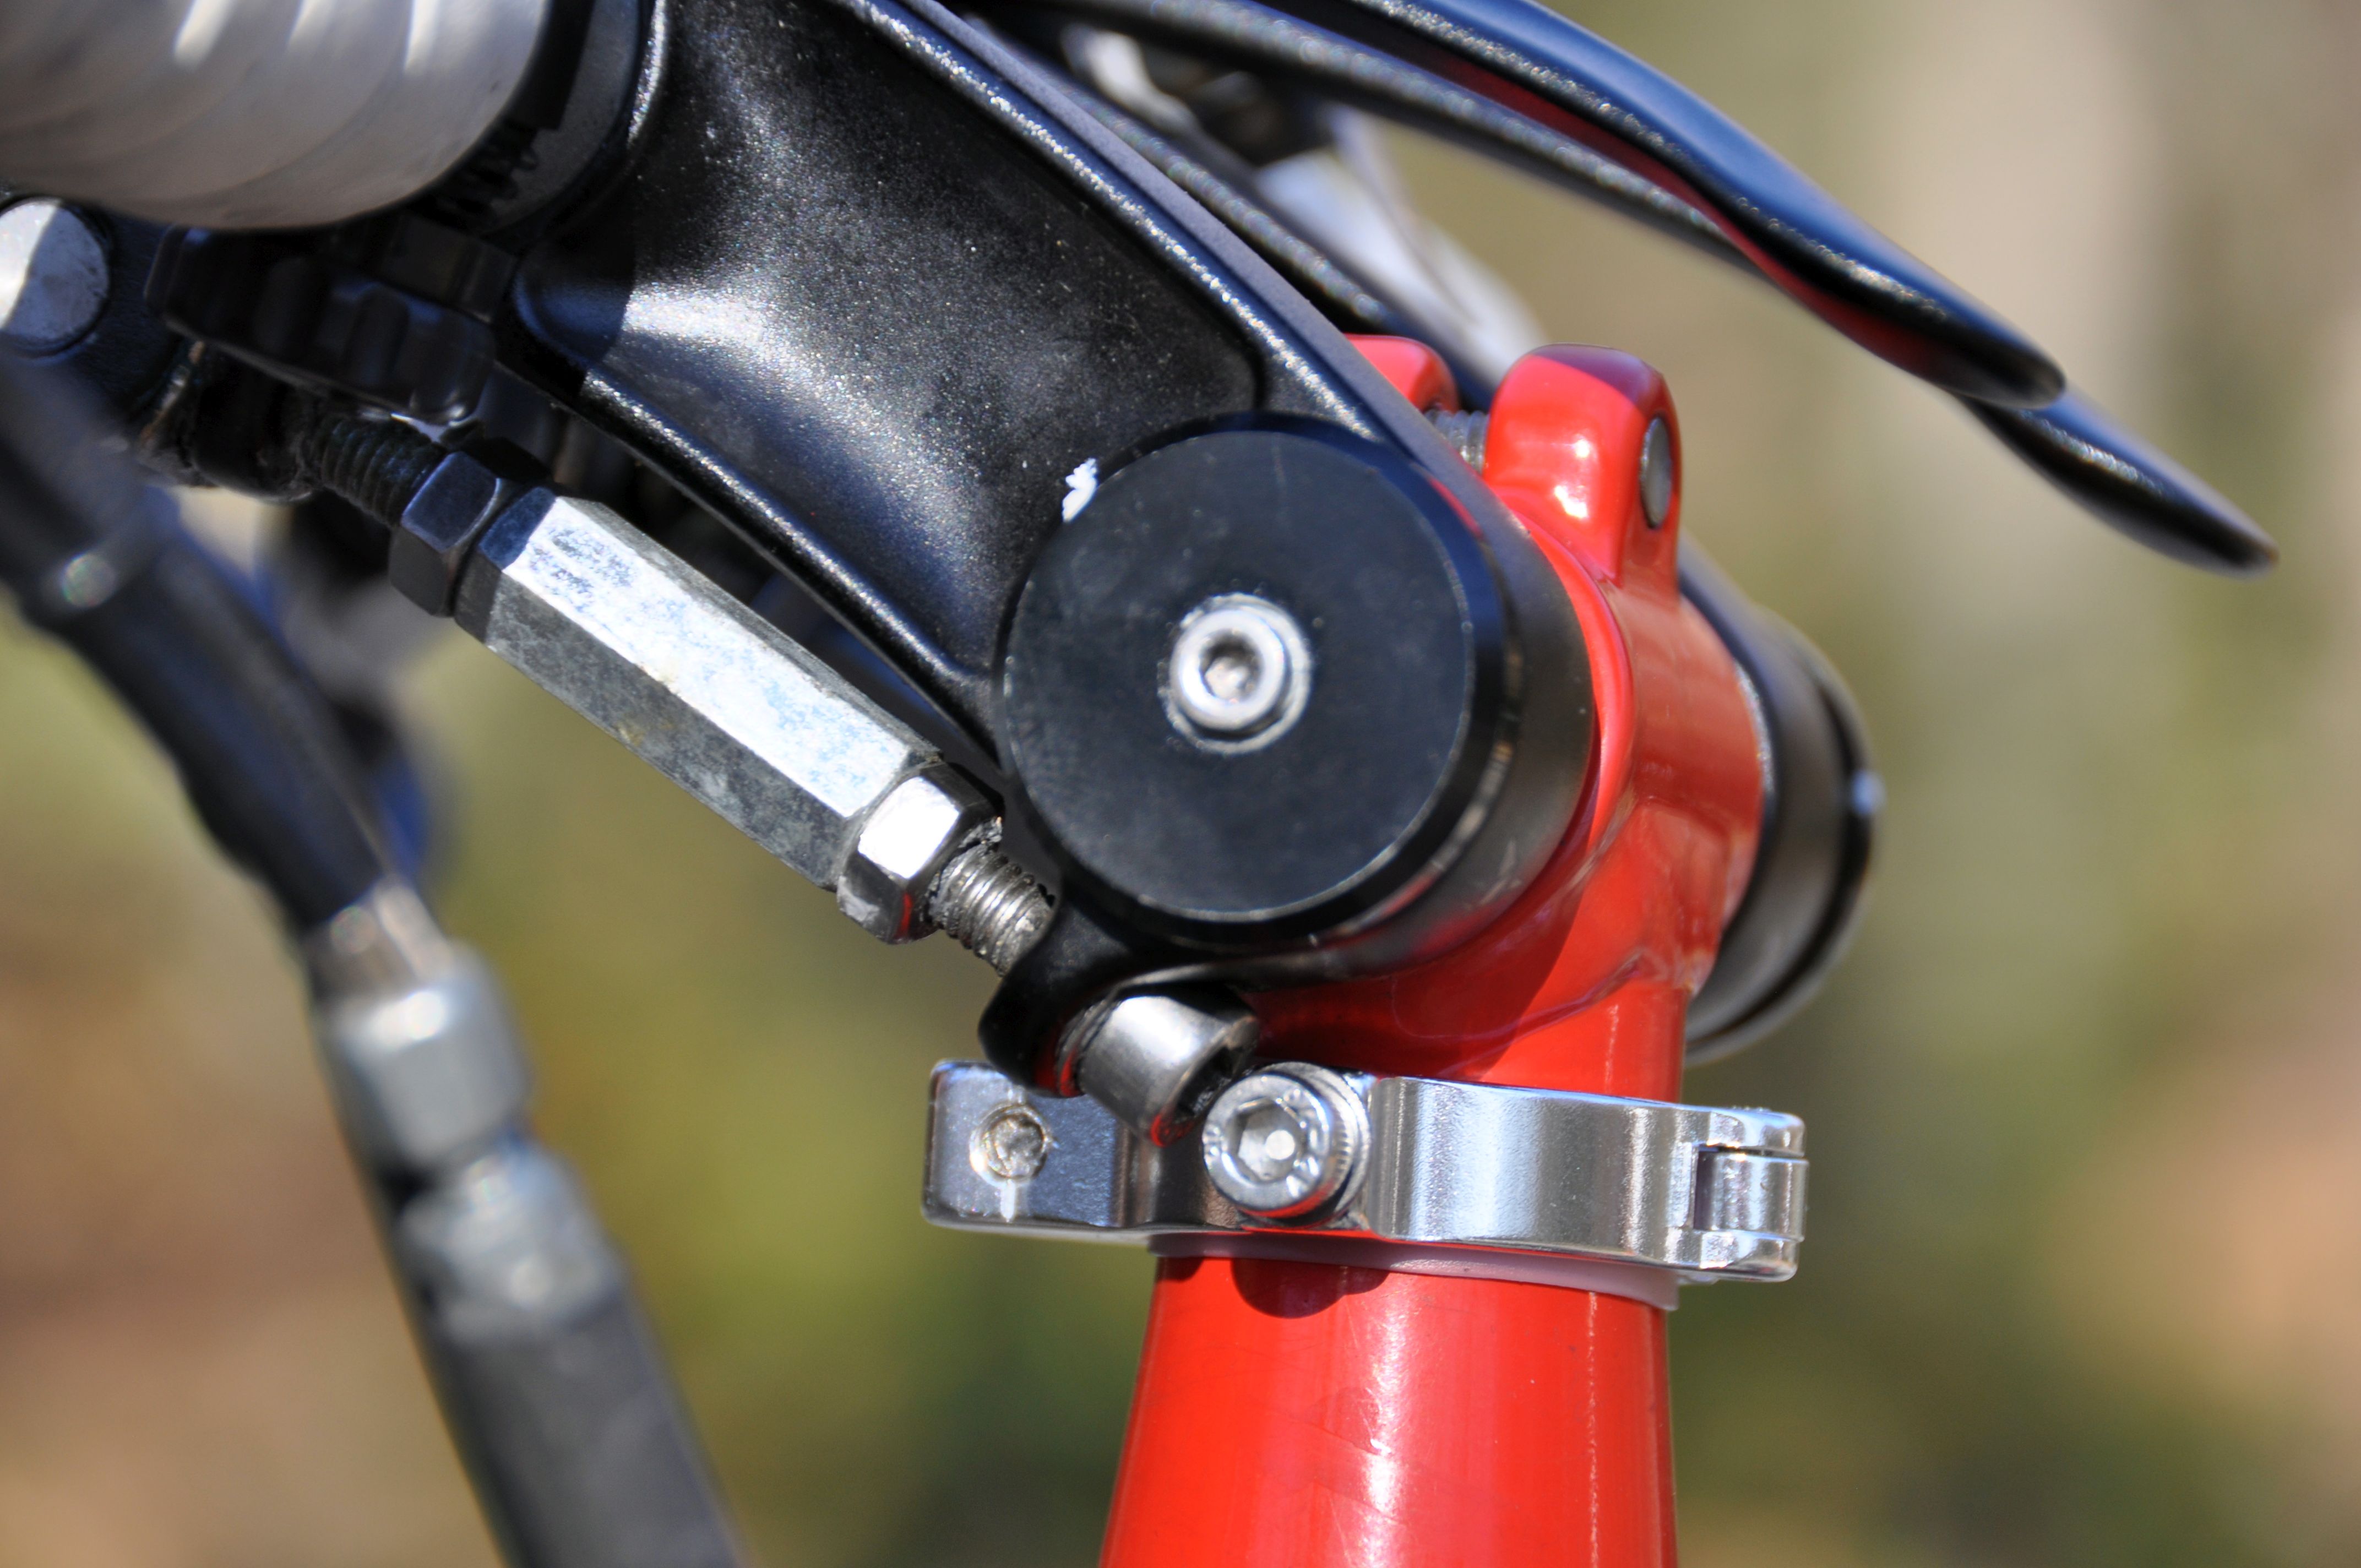
Genetic Juzzi/Satori Turn Up stem and Ergon bar ends Back to top
The Genetic Juzzi/Satori Turn Up stem is a game-changer for the Brompton: It is a safe way to get extra reach and still maintain a small fold. In contrast to friction based quick release levers, the angle adjustment is indexed. If the bolt (thumbscrew or quick release) gets loose, you first notice play long before it can fail. I have used this stem for a bullhorn-type handlebar, and it should work with many other handlebars includig S and M bars. The installation is straightforward, no special parts or modifications are needed (just some filing).
On my Bike Friday Tikit, I have used this stem for almost 10 years, and have been very satisfied with this solution. Its special feature is that it has two axes – so you can adjust the height AND angle of the handlebar, and it has a range of rotation of almost 180 degrees (most folding stems have a much smaller range) which makes it possible to fold the handlebar out of the way for folding the bike. And most importantly, the central rotation is indexed with teeth – so the handelbar can never slip down when the screw gets loose. I use this rotation with a thumbscrew or a quick release for folding the handlebar.
Here are links where to get it:
Genetic Juzzi 2-Axis adjustable Road stem
Satori Turn up Adjust Handlebar Stem Riser
https://www.amazon.com/Satori-Turn-Adjust-Handlebar-Riser/dp/B00XTZS4LU
https://www.satoribike.com/pro.php?m=d&pid=9&cid=10&f=3
Satori list 100 and 120 mm reach, 25.4 mm and 31.8 mm handlebar clamp. I have never seen availability for the 25.4 mm version and have used the 31.8 mm version with shims. The stem is of the threadless (a.k.a. ahead) type and can therefore be easily mounted on the Bike Friday Tikit.
Genetic Juzzi stem on the Bike Friday Tikit. On the right, it is mounted upside-down. This gives a wider range to fold the handlebar down.

Handlebar fully folded down
When I bought a Brompton 1 ½ years ago, I would have liked to use the Genetic stem, but I didn’t see a possibility to fit it. Therefore, I went with the Andros stem (see below about my experience). However, eventually I realzied that with minor modifications, I could fit the Genetic stem to the Brompton.
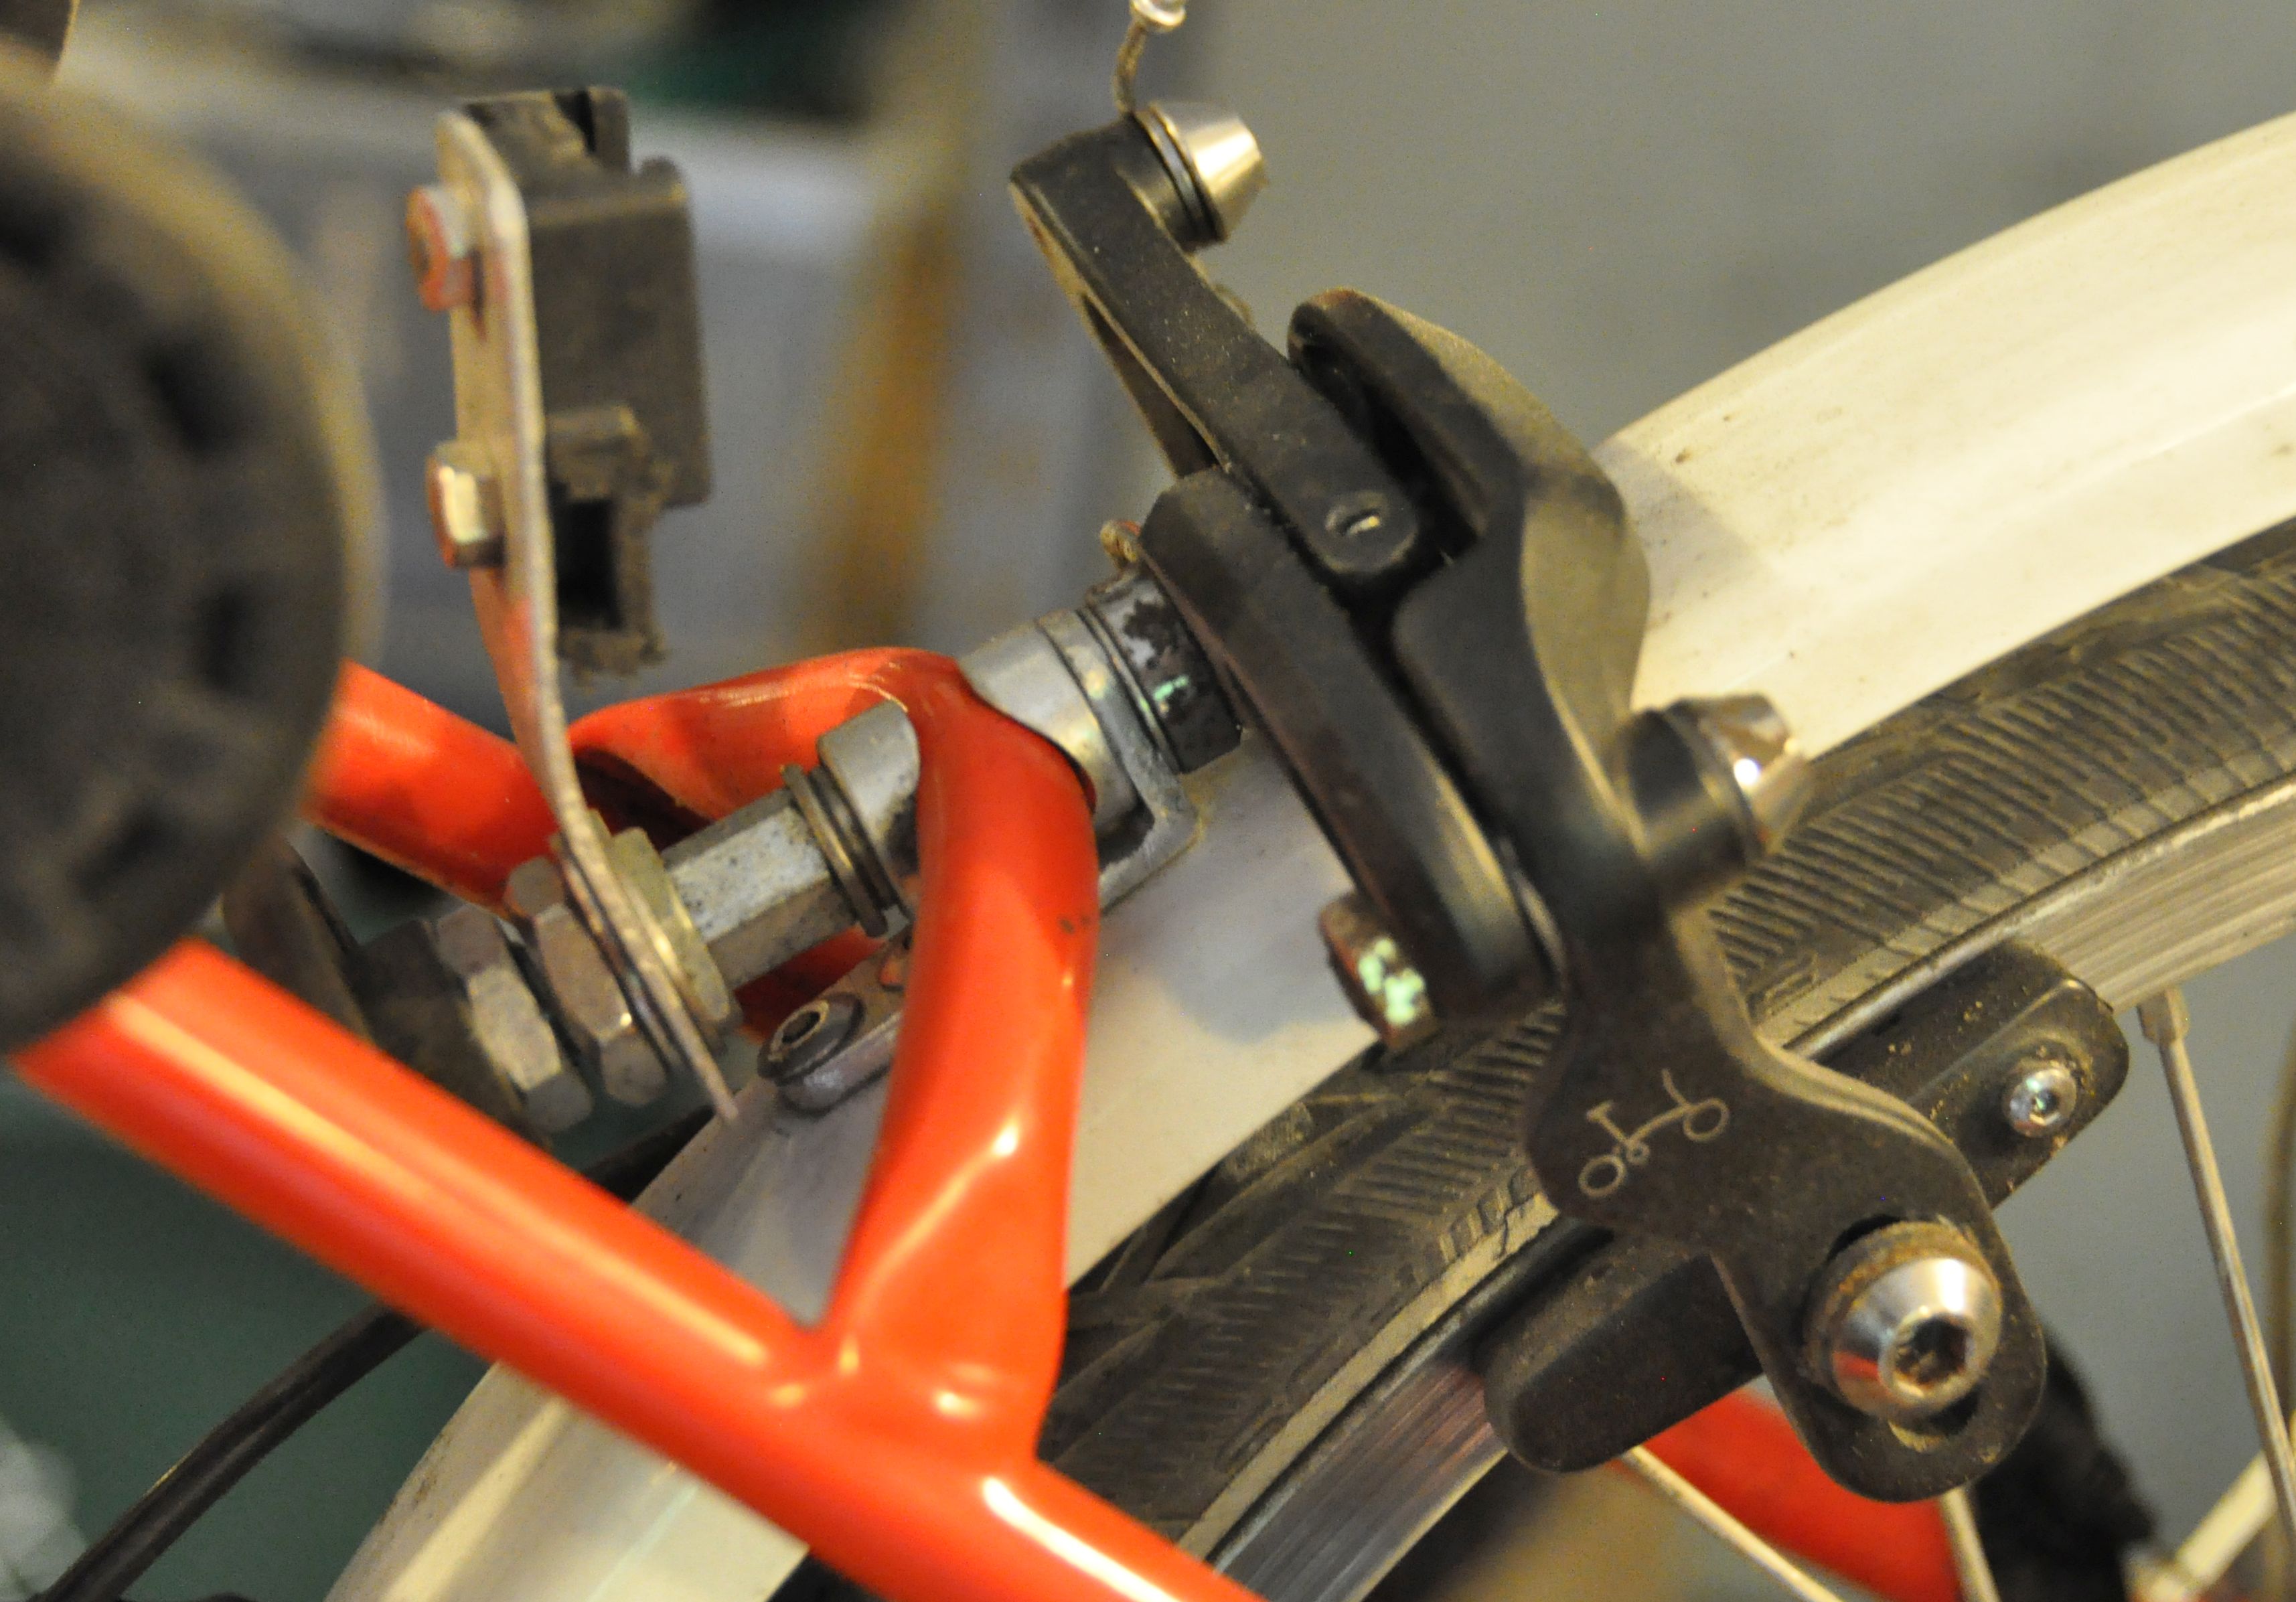
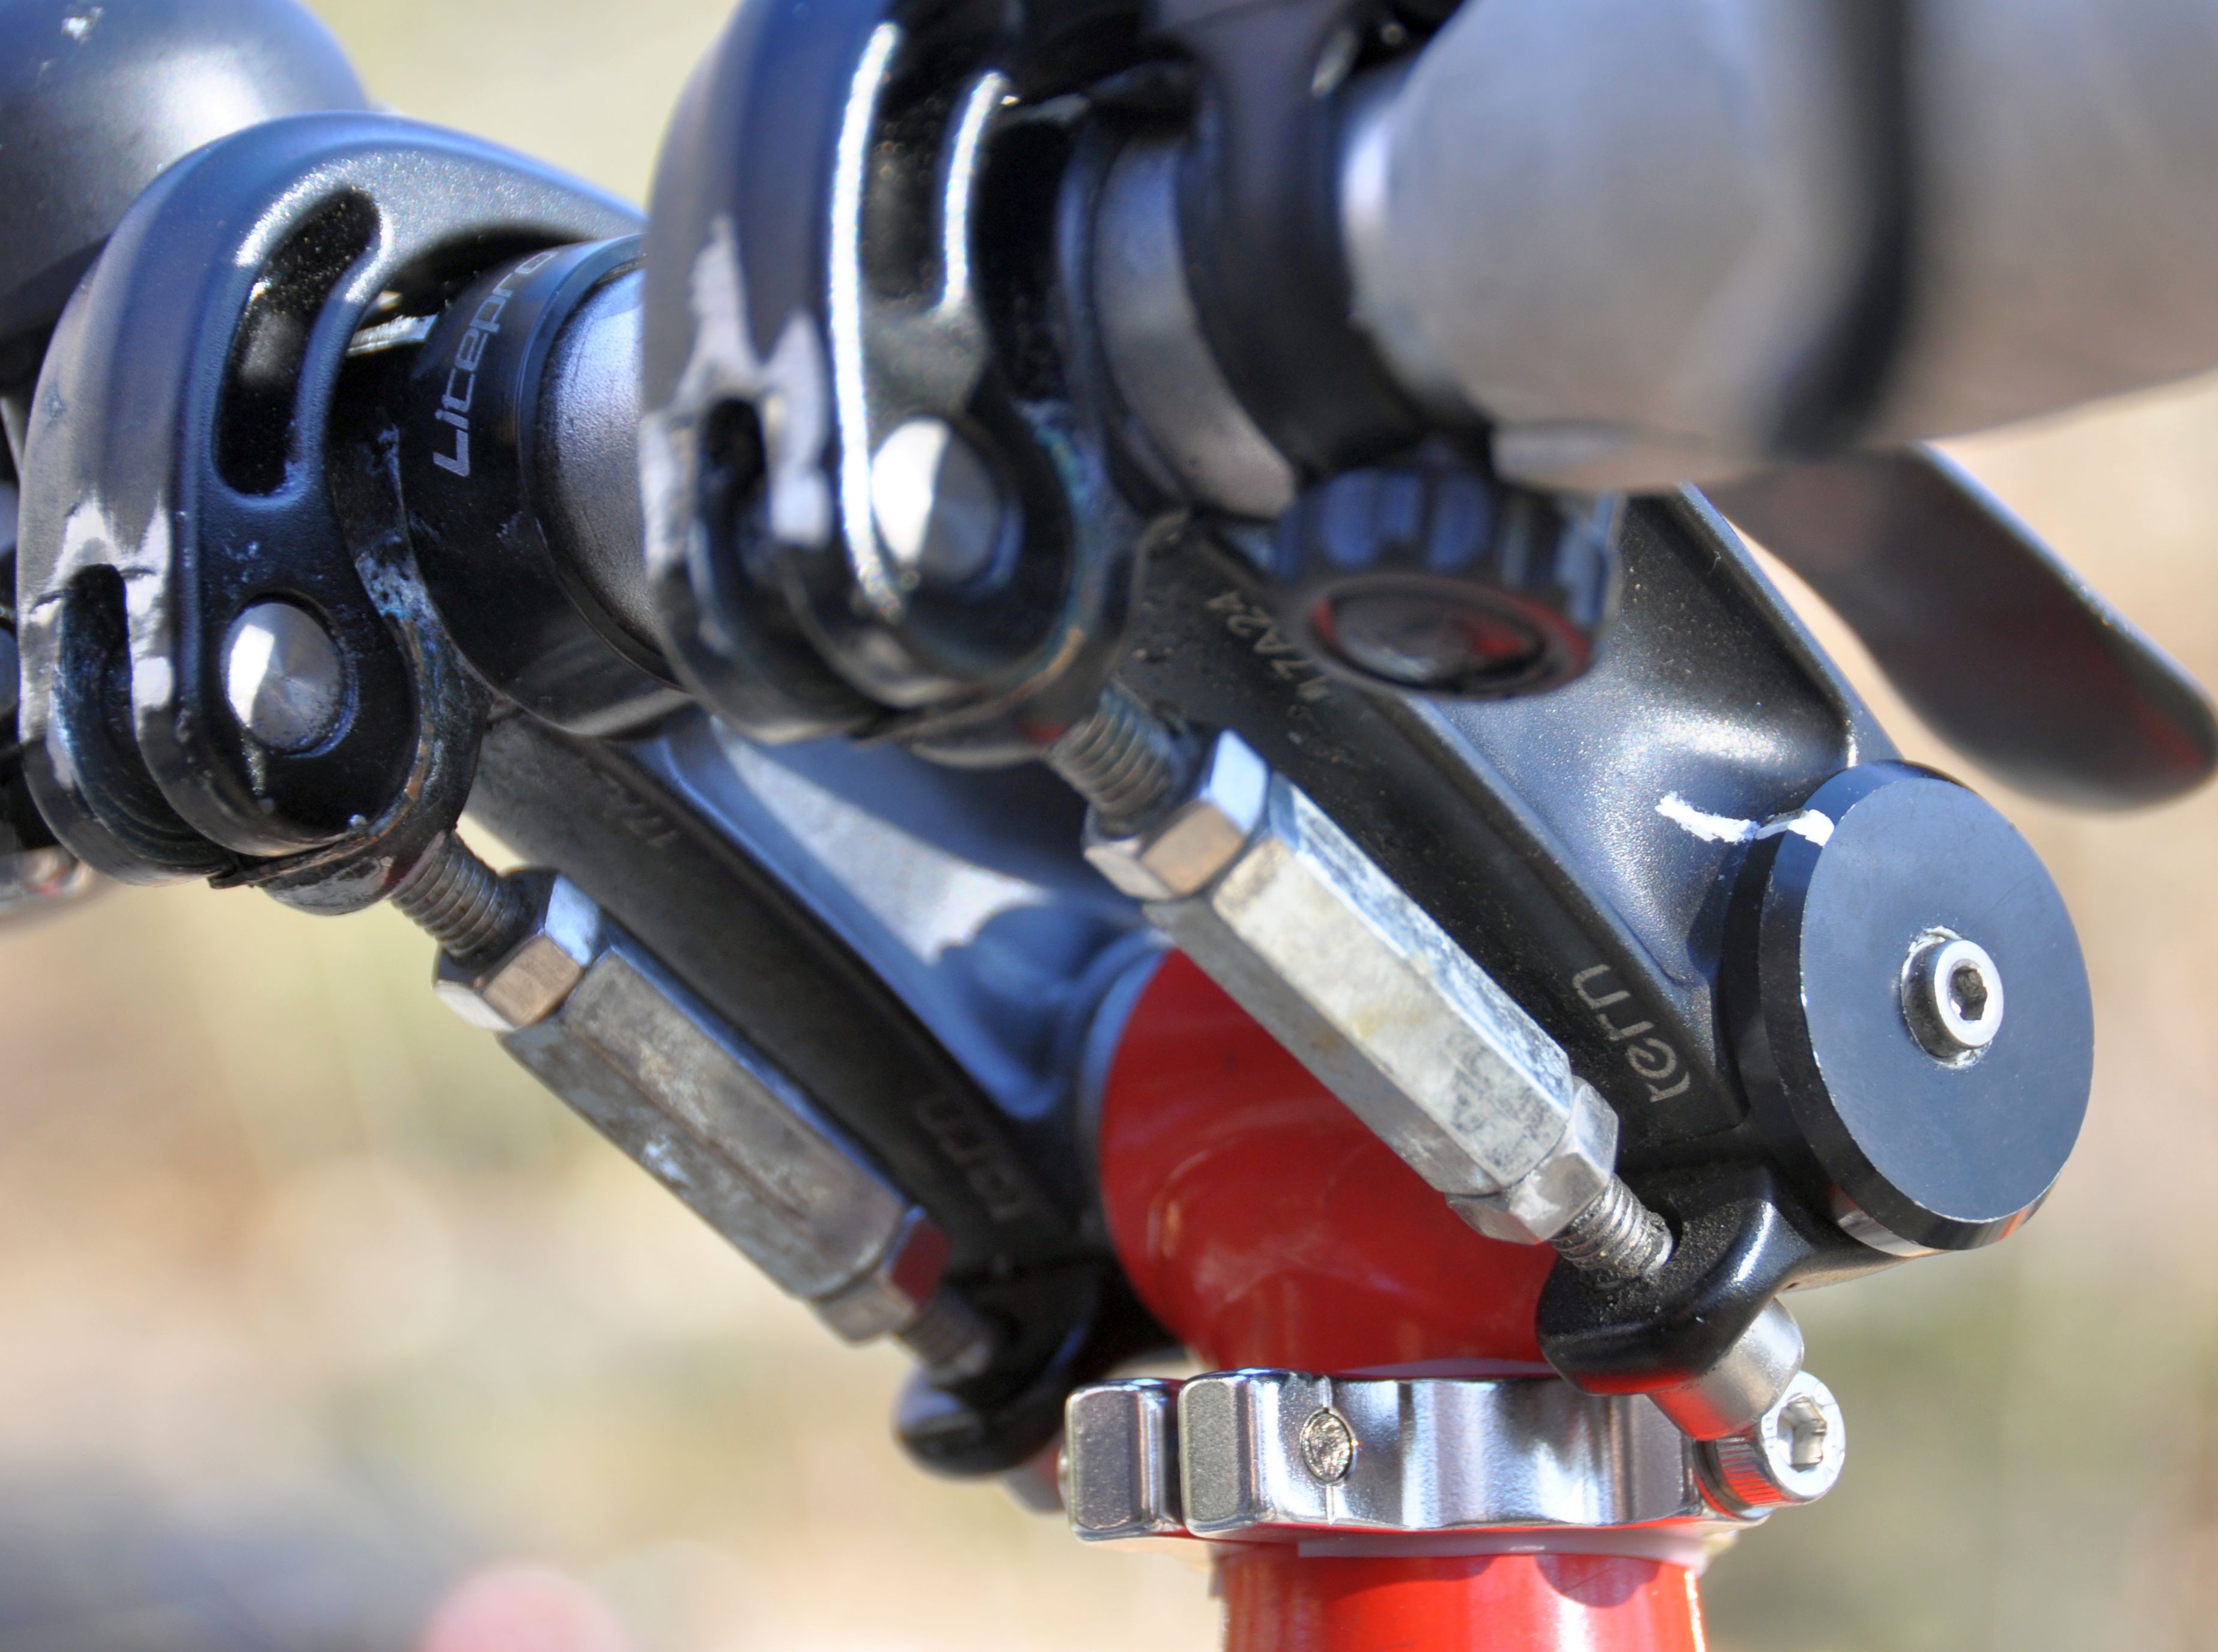
First, you have to remove the part which clamps to the 1.125 inch vertical steerer tube (encircled in blue). Your are then left with clamps with an inner bore of exactly 1 inch or 25.4 mm, and this is just diameter of the Brompton handlebar stem. It is this lucky coincidence which makes it possible to use the Genetic stem on the Brompton.

On the Bromton, I filed away a mm or so in the lower part of the clamp (see photo) to make a perfect fit in the width – this may not have been necessary:
The angle adjustment on the Genetic stem is secured one on side by a few teeth (see yellow circle in the photo) – I carefully filed those away:
The top part of the photo shows the important difference to the Andros stem: the Genetic stem has teeth which engage when you fix the angle, i.e. the angle is indexed. If the bolt or quick release get loose, you have some play, but it never slips. And whenever you feel a tiny bit of play, you can re-tighten the bolt.
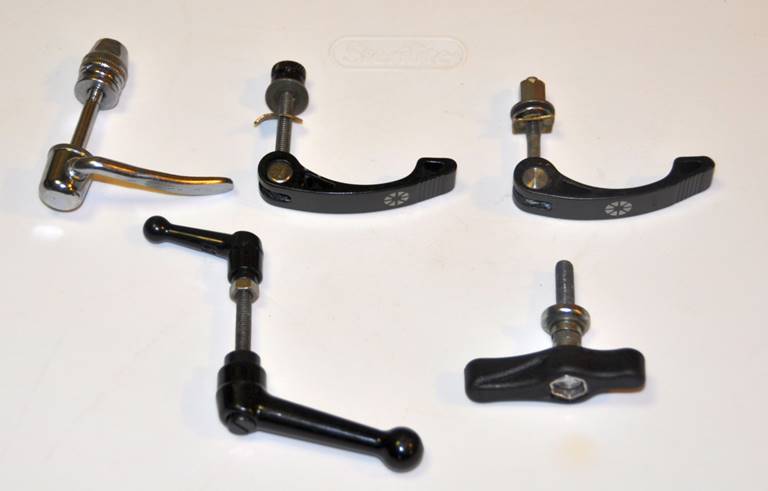
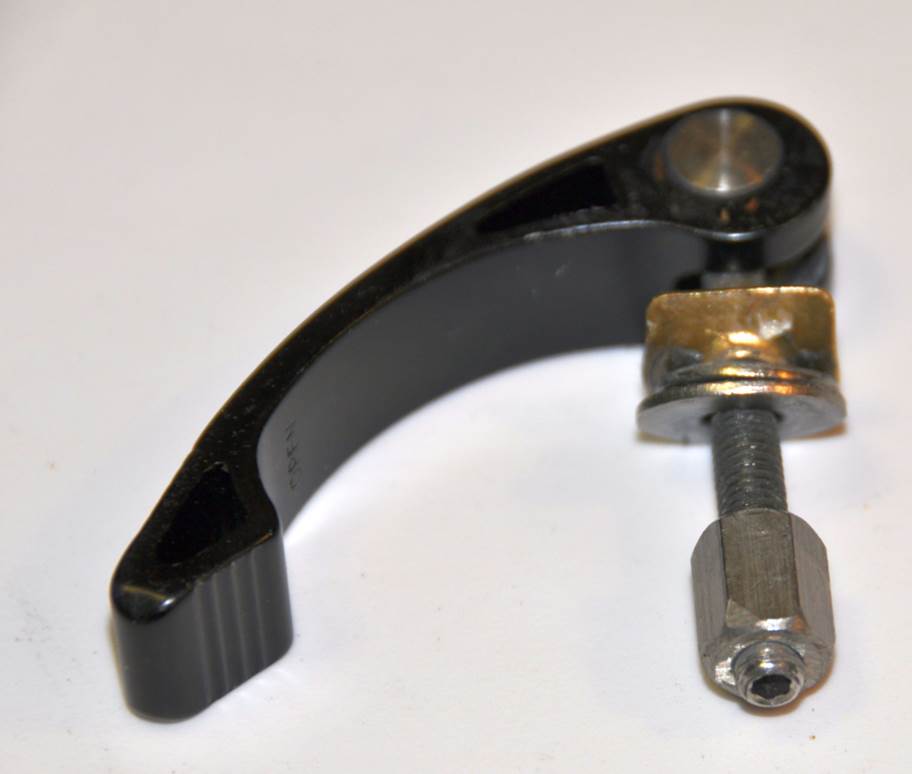
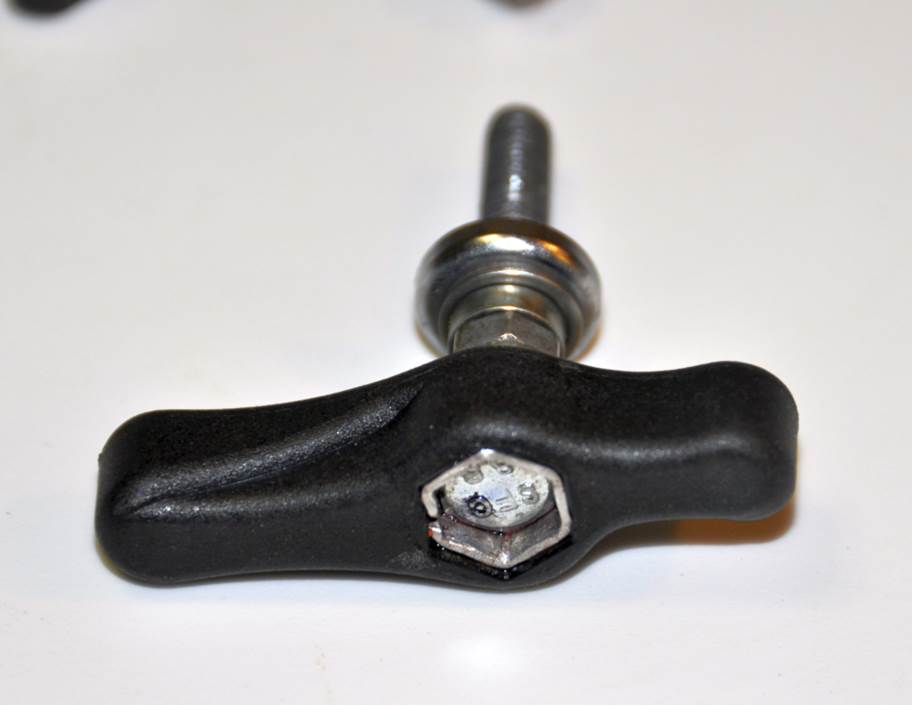
Using a 25.4 mm tube (cut off from a seatpost), the stem can now be mounted on the Brompton. For the fold, I replaced the M7 hex bolt of the Genetic stem with either a quick release or a thumb screw. Over the last ten years, I have tried out various solutions:

Different solutions for quicly folding the Genetic stem. I first used an internal cam quick release (top left). People say they are more reliable and preferable compared to external cams. Howver, after a couple of year, the bolt cracked around the internal cam, and I replaced it by long levers (buttom left). Later, I bought the extra strong quick releases from Dahon for handlebars, which are stronger than most seatpost qucik release levers (top middle and right). I also modified a Brompton hinge bolt (bottom right).
My currently preferred solution is the Dahon quick release:
Dahon Folding Bike Quick Release Clamp Lever Assembly
or from
http://www.thorusa.com/accessories/handlebar.htm
The bolt is a little bit too short for the Genetic stem if you want to use a locknut or two nuts. So either you have to take the bolt out and put a longer one in (using thread locker, top middle), or use a coupling nut with a set screw to adjust the quick release (top right , and see below):
I also modified a Brompton hinge clamp lever by replacing the M8 screw by an M7. M7 screws are not sold in many places, but you can find them e.g. at Bolt Depot or Home Deport:
M7-1.0 x 60 mm Zinc Class 8.8 Metric Hex Bolt:
https://www.homedepot.com/p/Everbilt-M7-1-0-x-60-mm-Zinc-Class-8-8-Metric-Hex-Bolt-839038/205037778
Metric tap bolts, Zinc plated class 8.8 steel, 7mm x 1.0mm x 50mm:
https://www.boltdepot.com/Product-Details.aspx?product=6085
Since the hex head is smaller than the Brompton M8 bolt, I had to bend some sheet metal around the head, and used an extra washer and thread locker. This worked very well and I liked the matching look with the Brompton hinge clamps. But in the end, I went back to the Dahon Quick Release since its clamping force was higher than for the Brompton lever.
Comparison Andros stem – Genetic Juzzi stem:
· The Genetic stem has the big advantage that it doesn’t use a friction based quick release to fold the handlebar. The angle adjustment is indexed with teeth, and if the bolt (thumbscrew or quick release) gets loose, you first notice play long before it can fail, and then you tighten the bolt.
· The Genetic stem is faster to fold (only one axis and indexed position). And the fold is smaller (the folded bike is a few cm thinner).
· The disadvanatage is that the double rotation of the Andros stem gives more range for height and reach adjustments. I liked the longer reach I got with the Andros, and compensated for this with the Genetic stem by adding short aero bars.

Long reach handlebars for the Genetic Juzzi/Satori Turn Up stem Back to top
I have tried out different handlebars for the Genetic stem.
(1) Bullhorn bar
First, I cut off a bullhorn bar which I had. However, I realized that it had a
large radius bent, and the straight forward section was too short and not
comfortable to grip. So I replaced it with a bullhorn bar with a tigher bent:
Element Alloy TT Team Trial Bullhorn Cycling Handlebar 31.8 x 440mm
https://www.ebay.com/itm/323995507650
Short bullhorn, with extra aero bars: https://www.amazon.com/gp/product/B07FL829B7
This solution was acceptable, but I decided to improve on it by getting an even sharper bent by using a straight handlebar and bar ends (see above). Another alternative I considered was Bike Friday’s H bar which would have been a perfect fit, but it had a long delivery time:
(2) Straight bar with bar ends
Here is a previous solution for the handlebar, before I added the drop ends.
It uses straight handelbars (www.amazon.com/gp/product/B07QC62HMJ) cut to 46 cm length, cut-off short bar ends (https://www.amazon.com/gp/product/B081FJ146F) and long bar ends as aero bars (https://store.bicycleman.com/products/handlebar-ends).
My initial goal was to get the longest reach and keep a width at the bar ends (my usual grip positionn) of 44 cm. I was lucky that this even optimized the fold. Since the bar ends are slightly angled inward, I used a width of 46 cm for the handlebar. At this length, the right brake lever just squeezed by the front tire when the bike was folded. I optimized the fold by clamping the straight bar shifted by 0.5 cm to the right. The aerobars are cut off so that they have just a little bit of clearance to the ground.
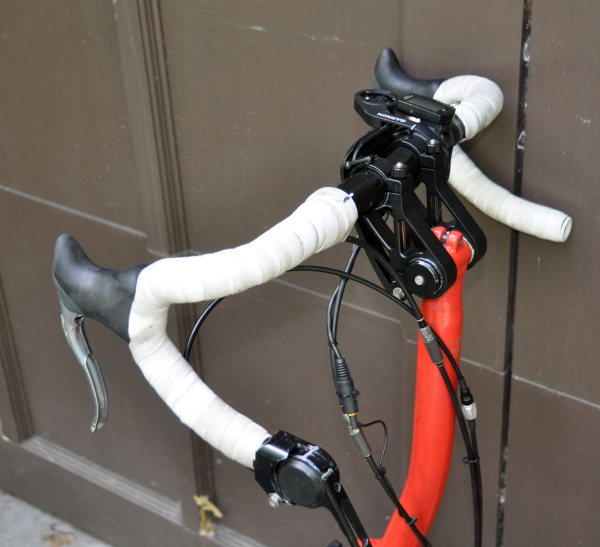
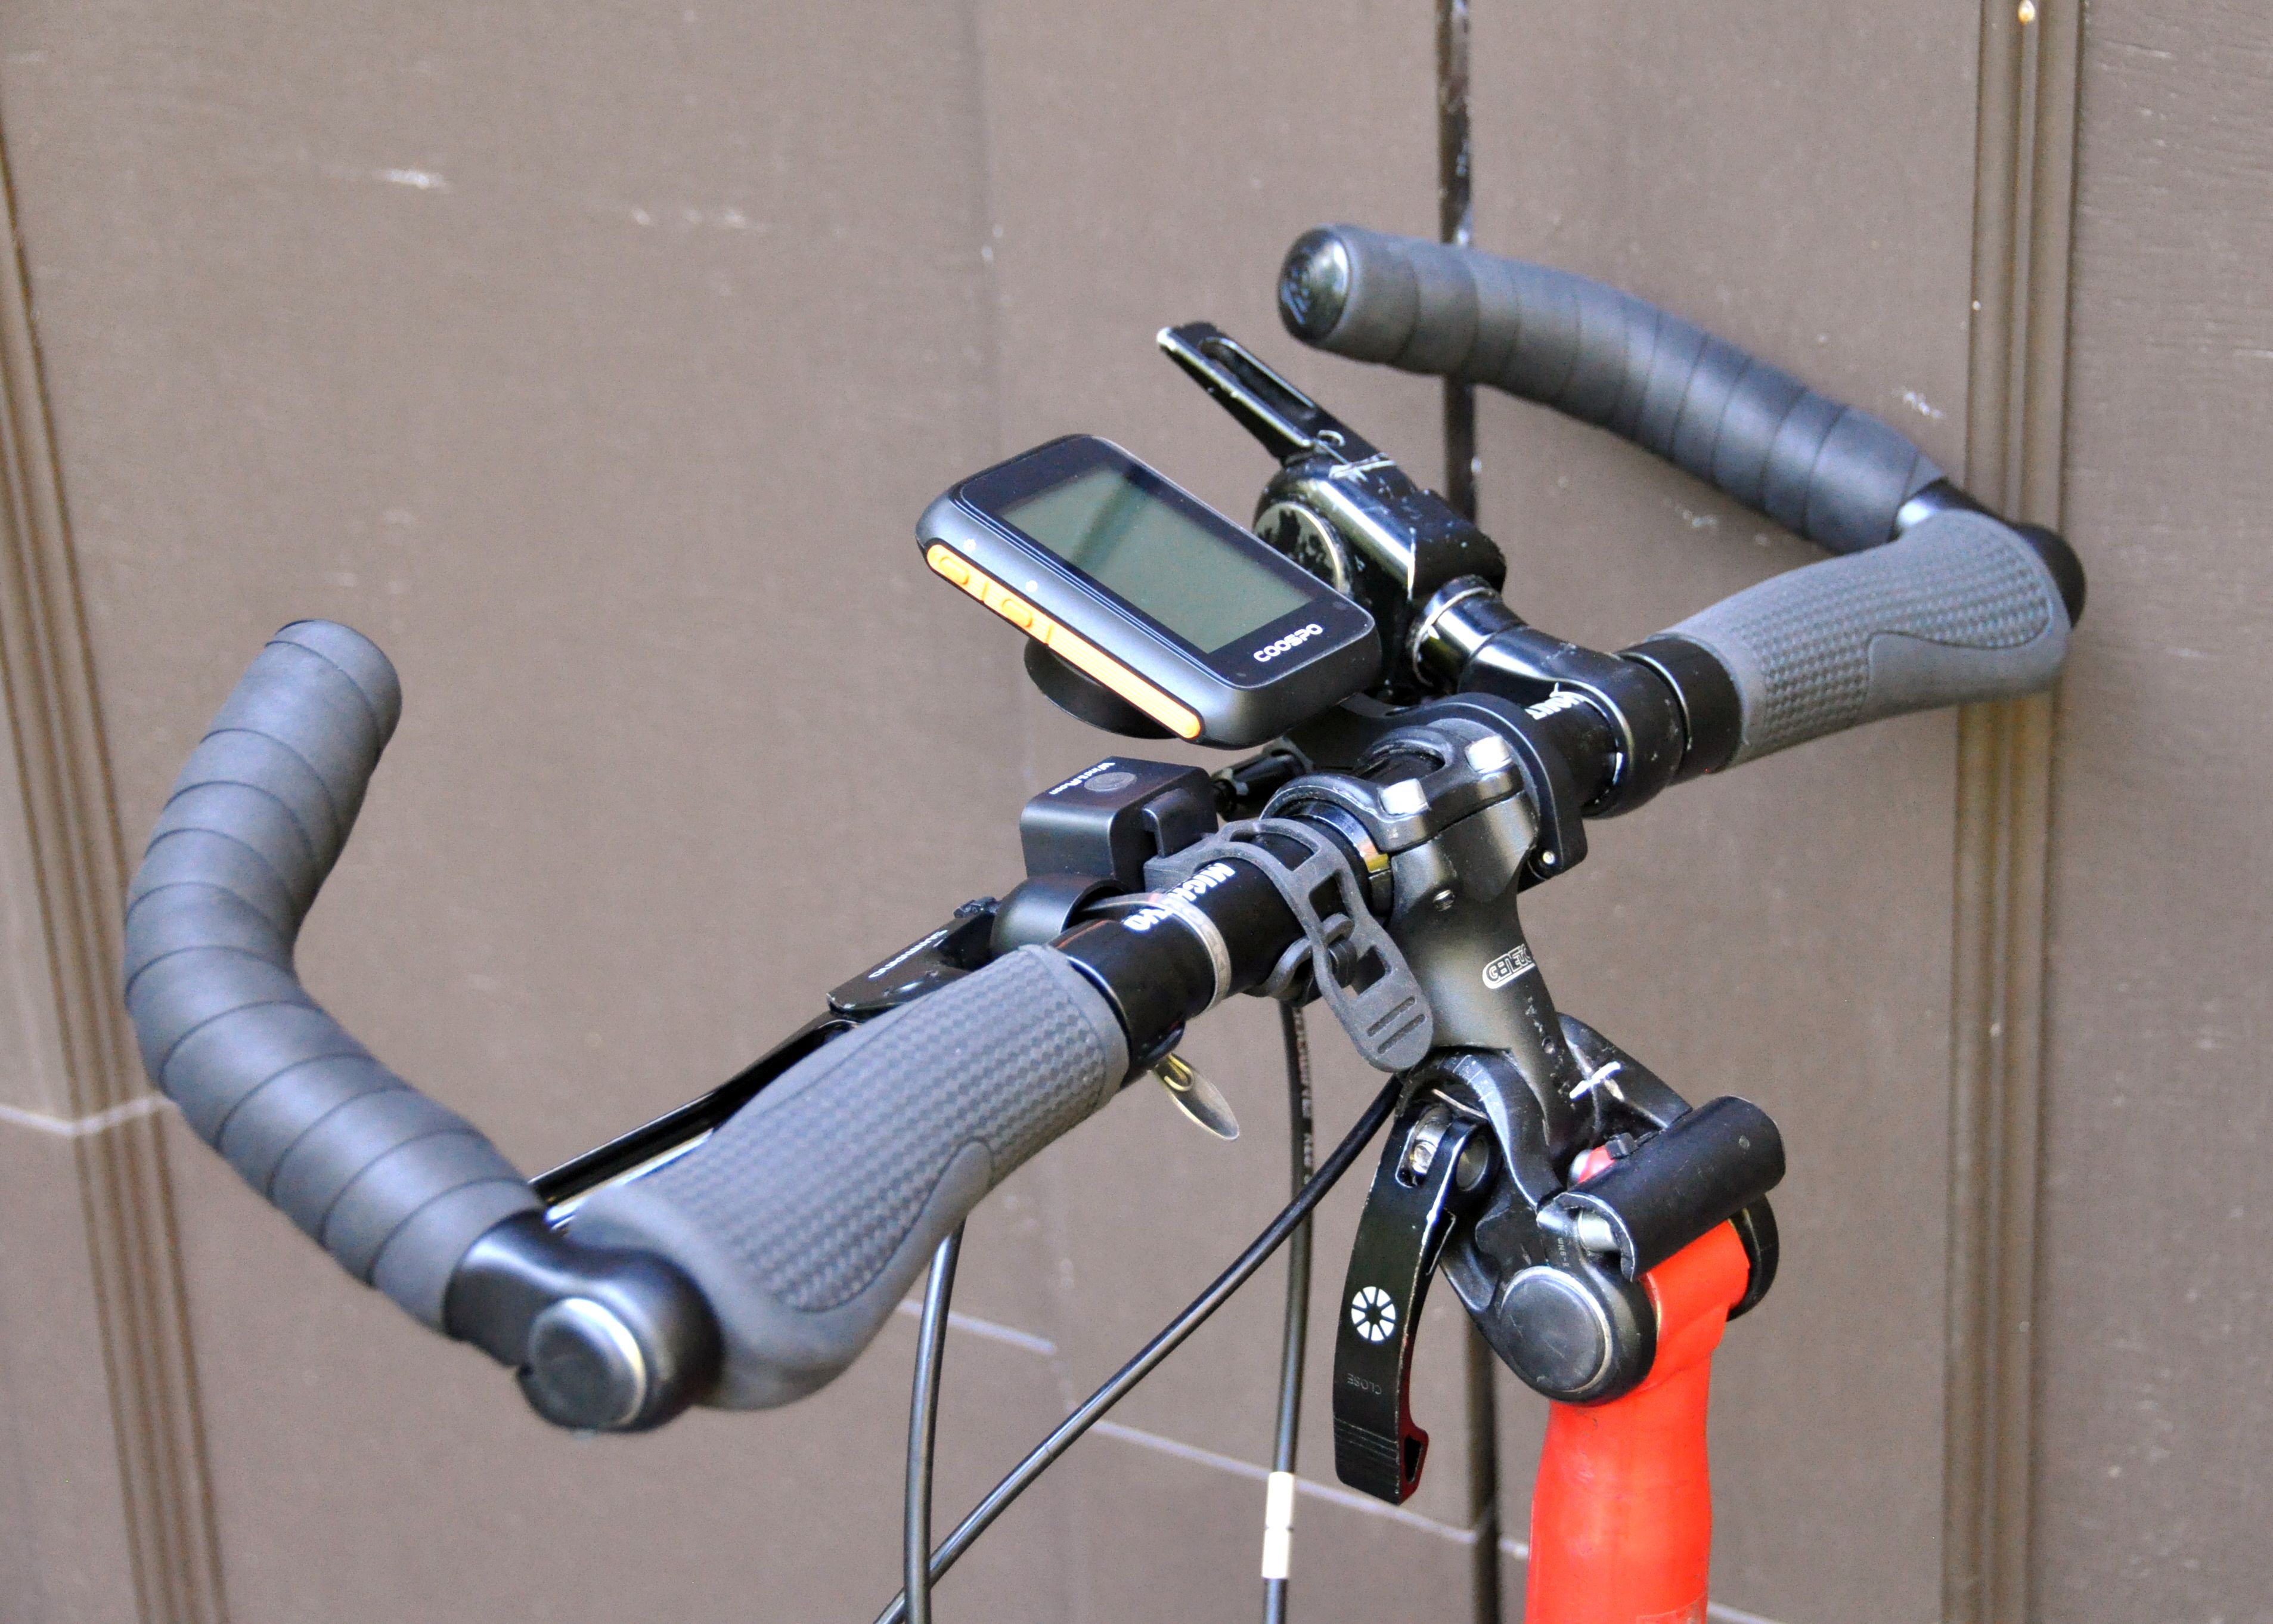
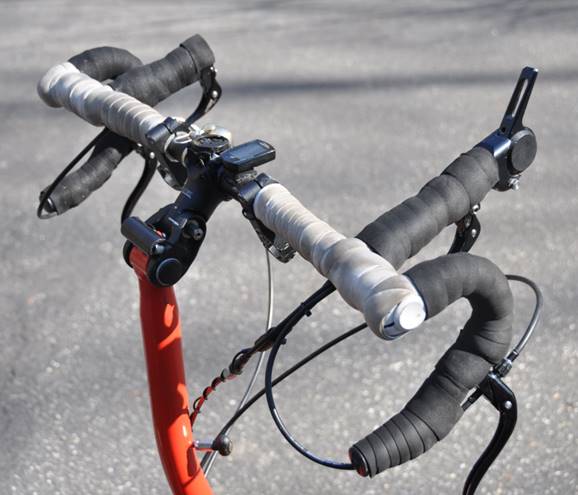
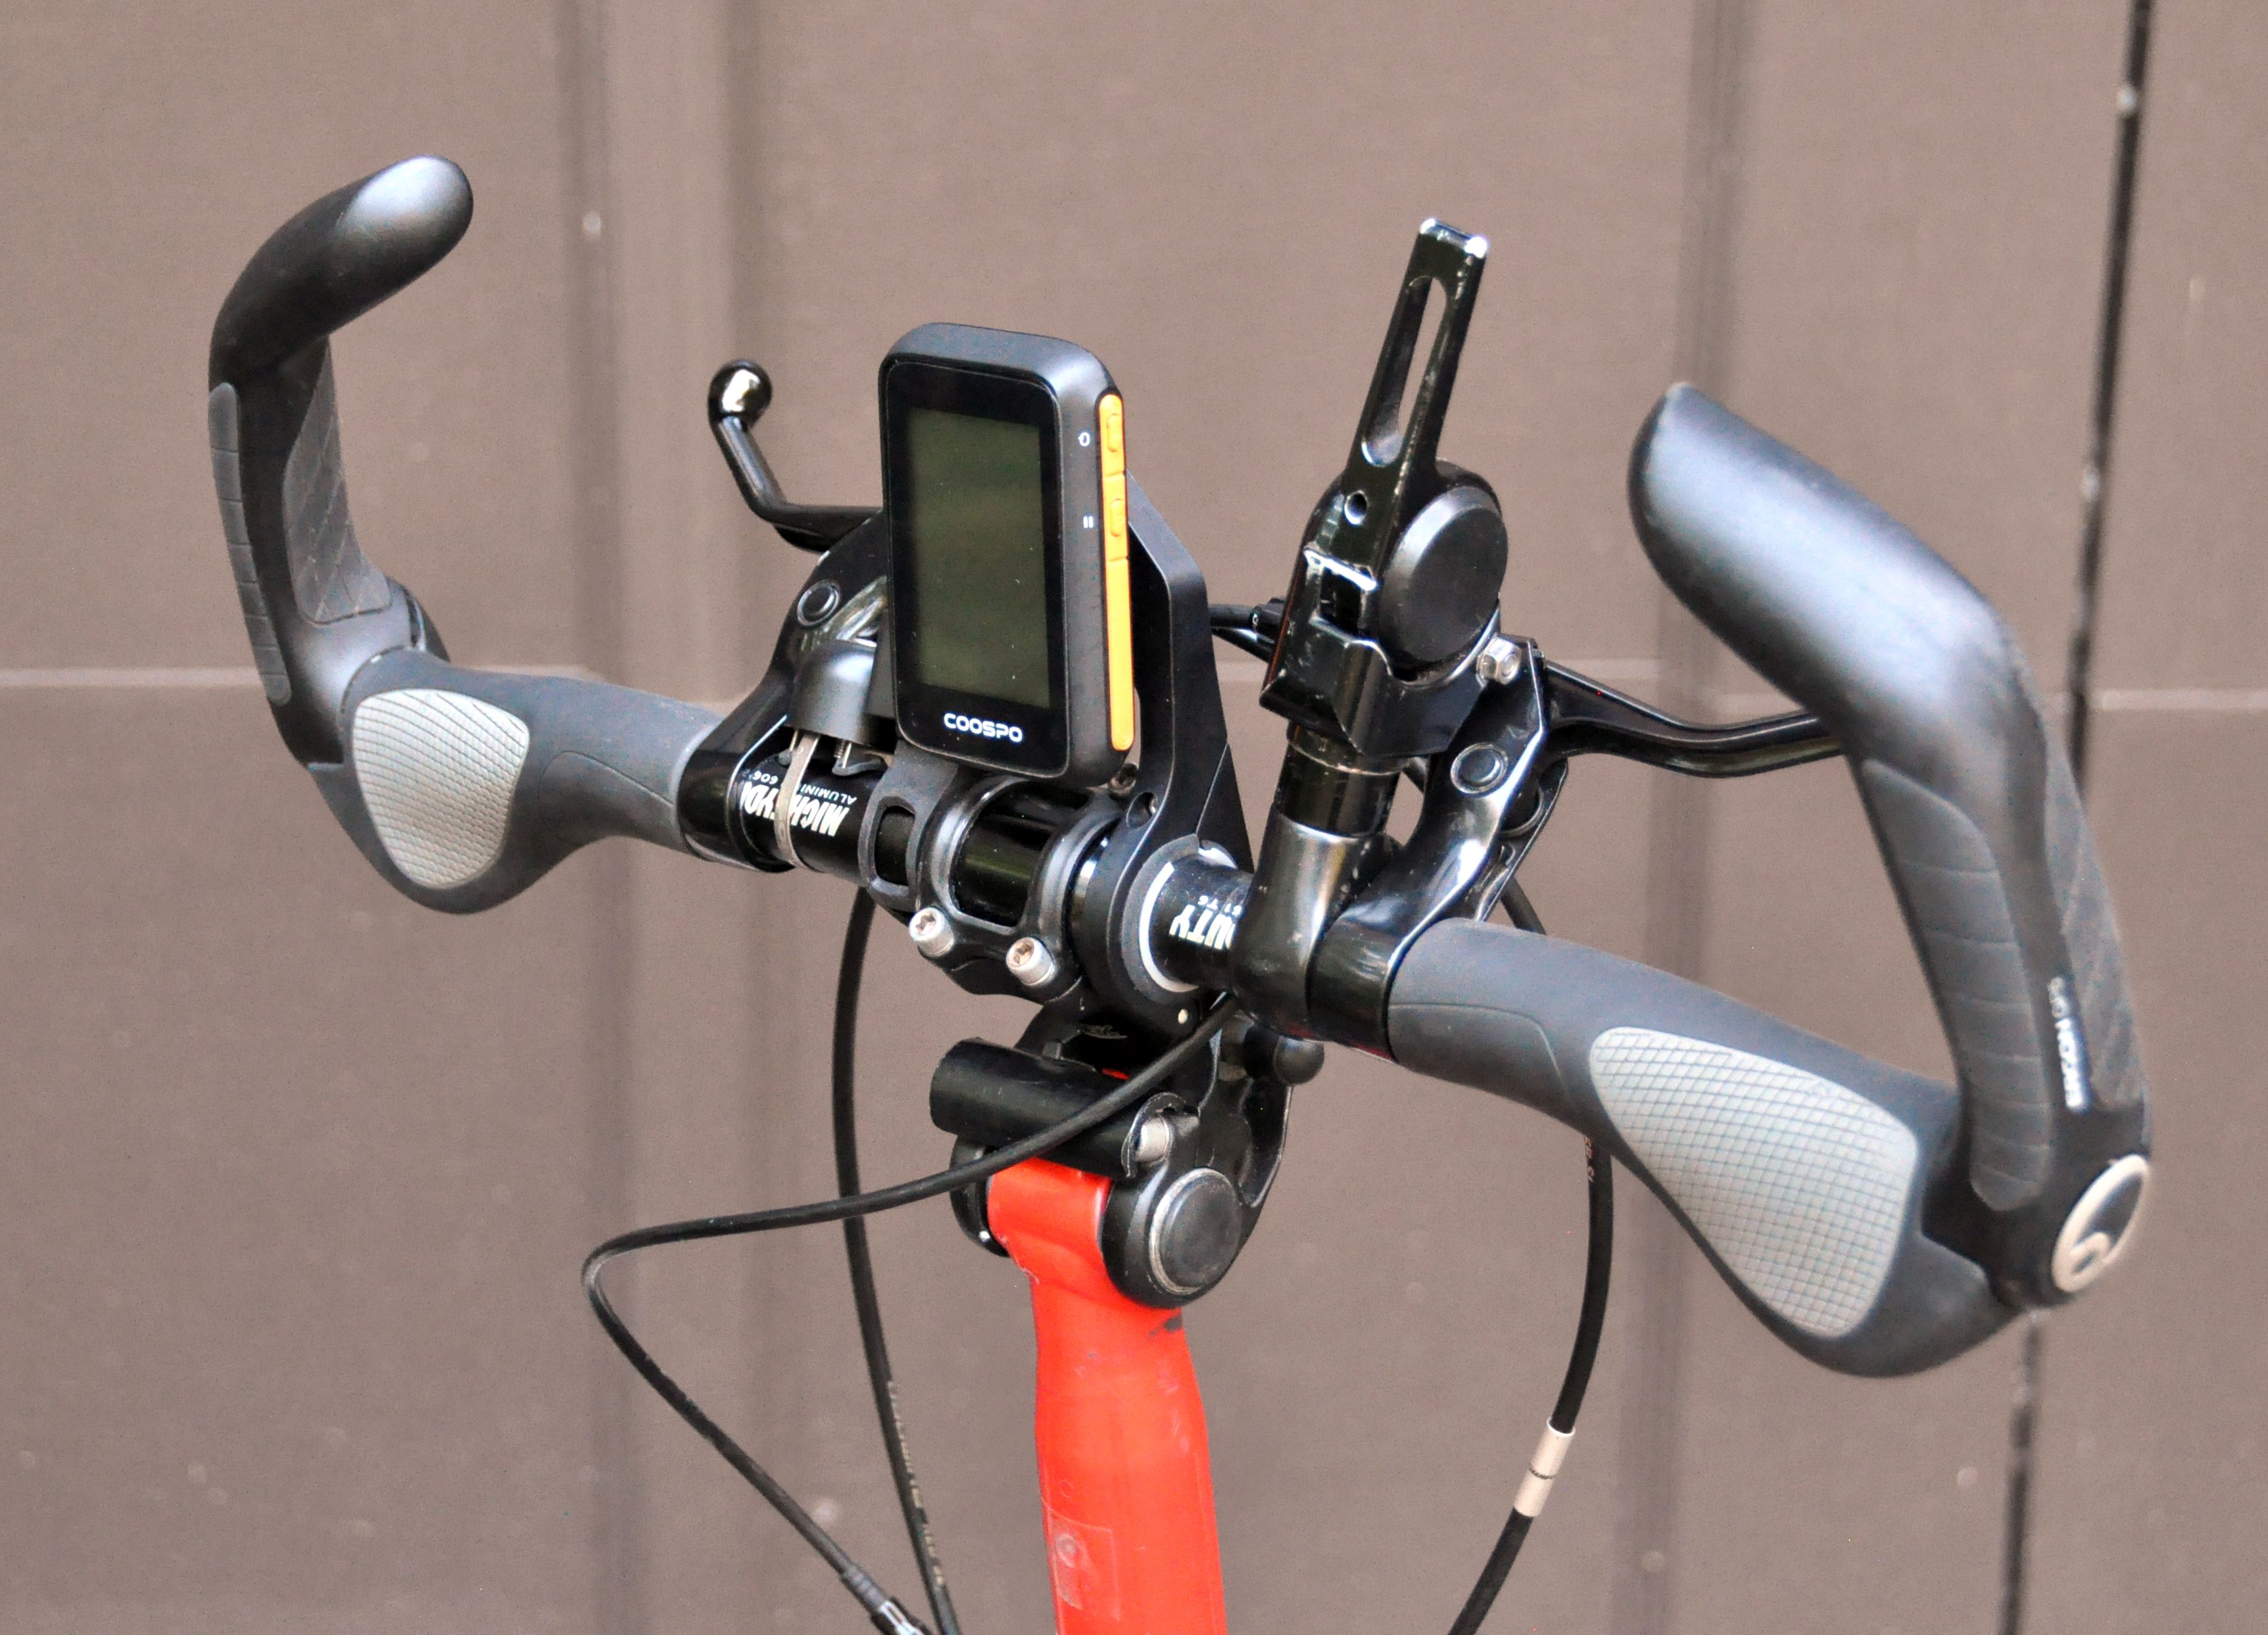
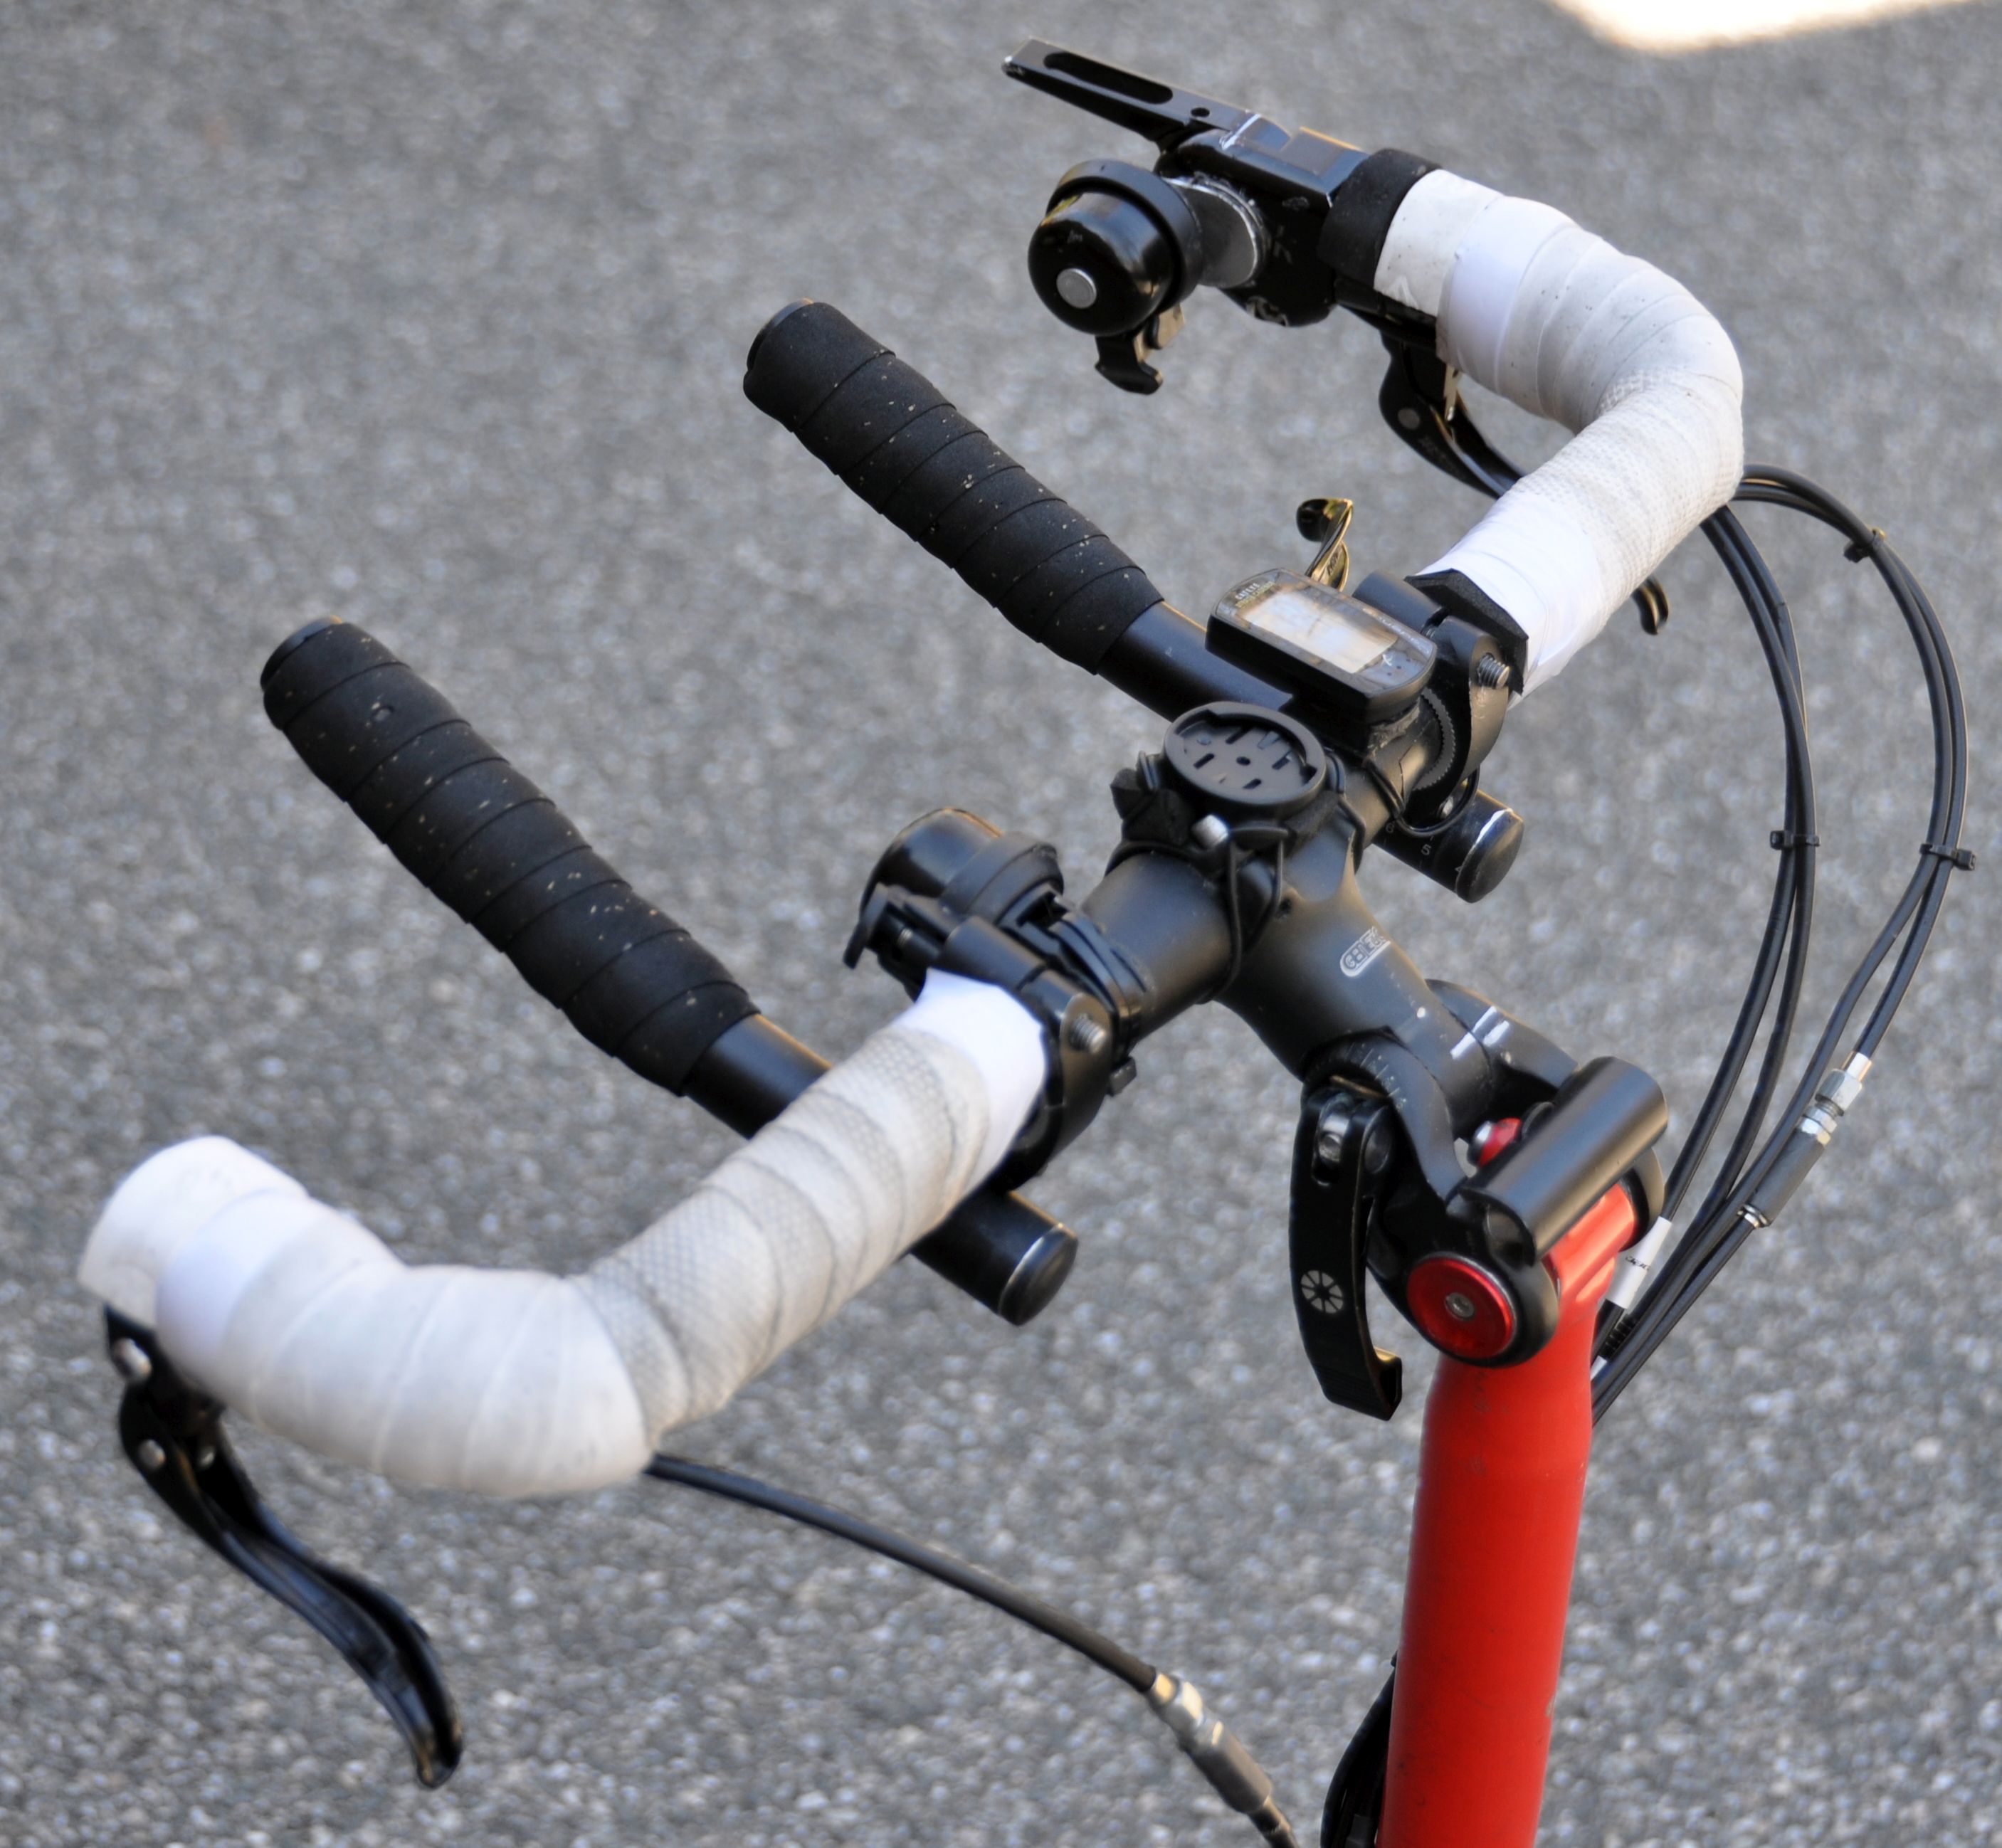
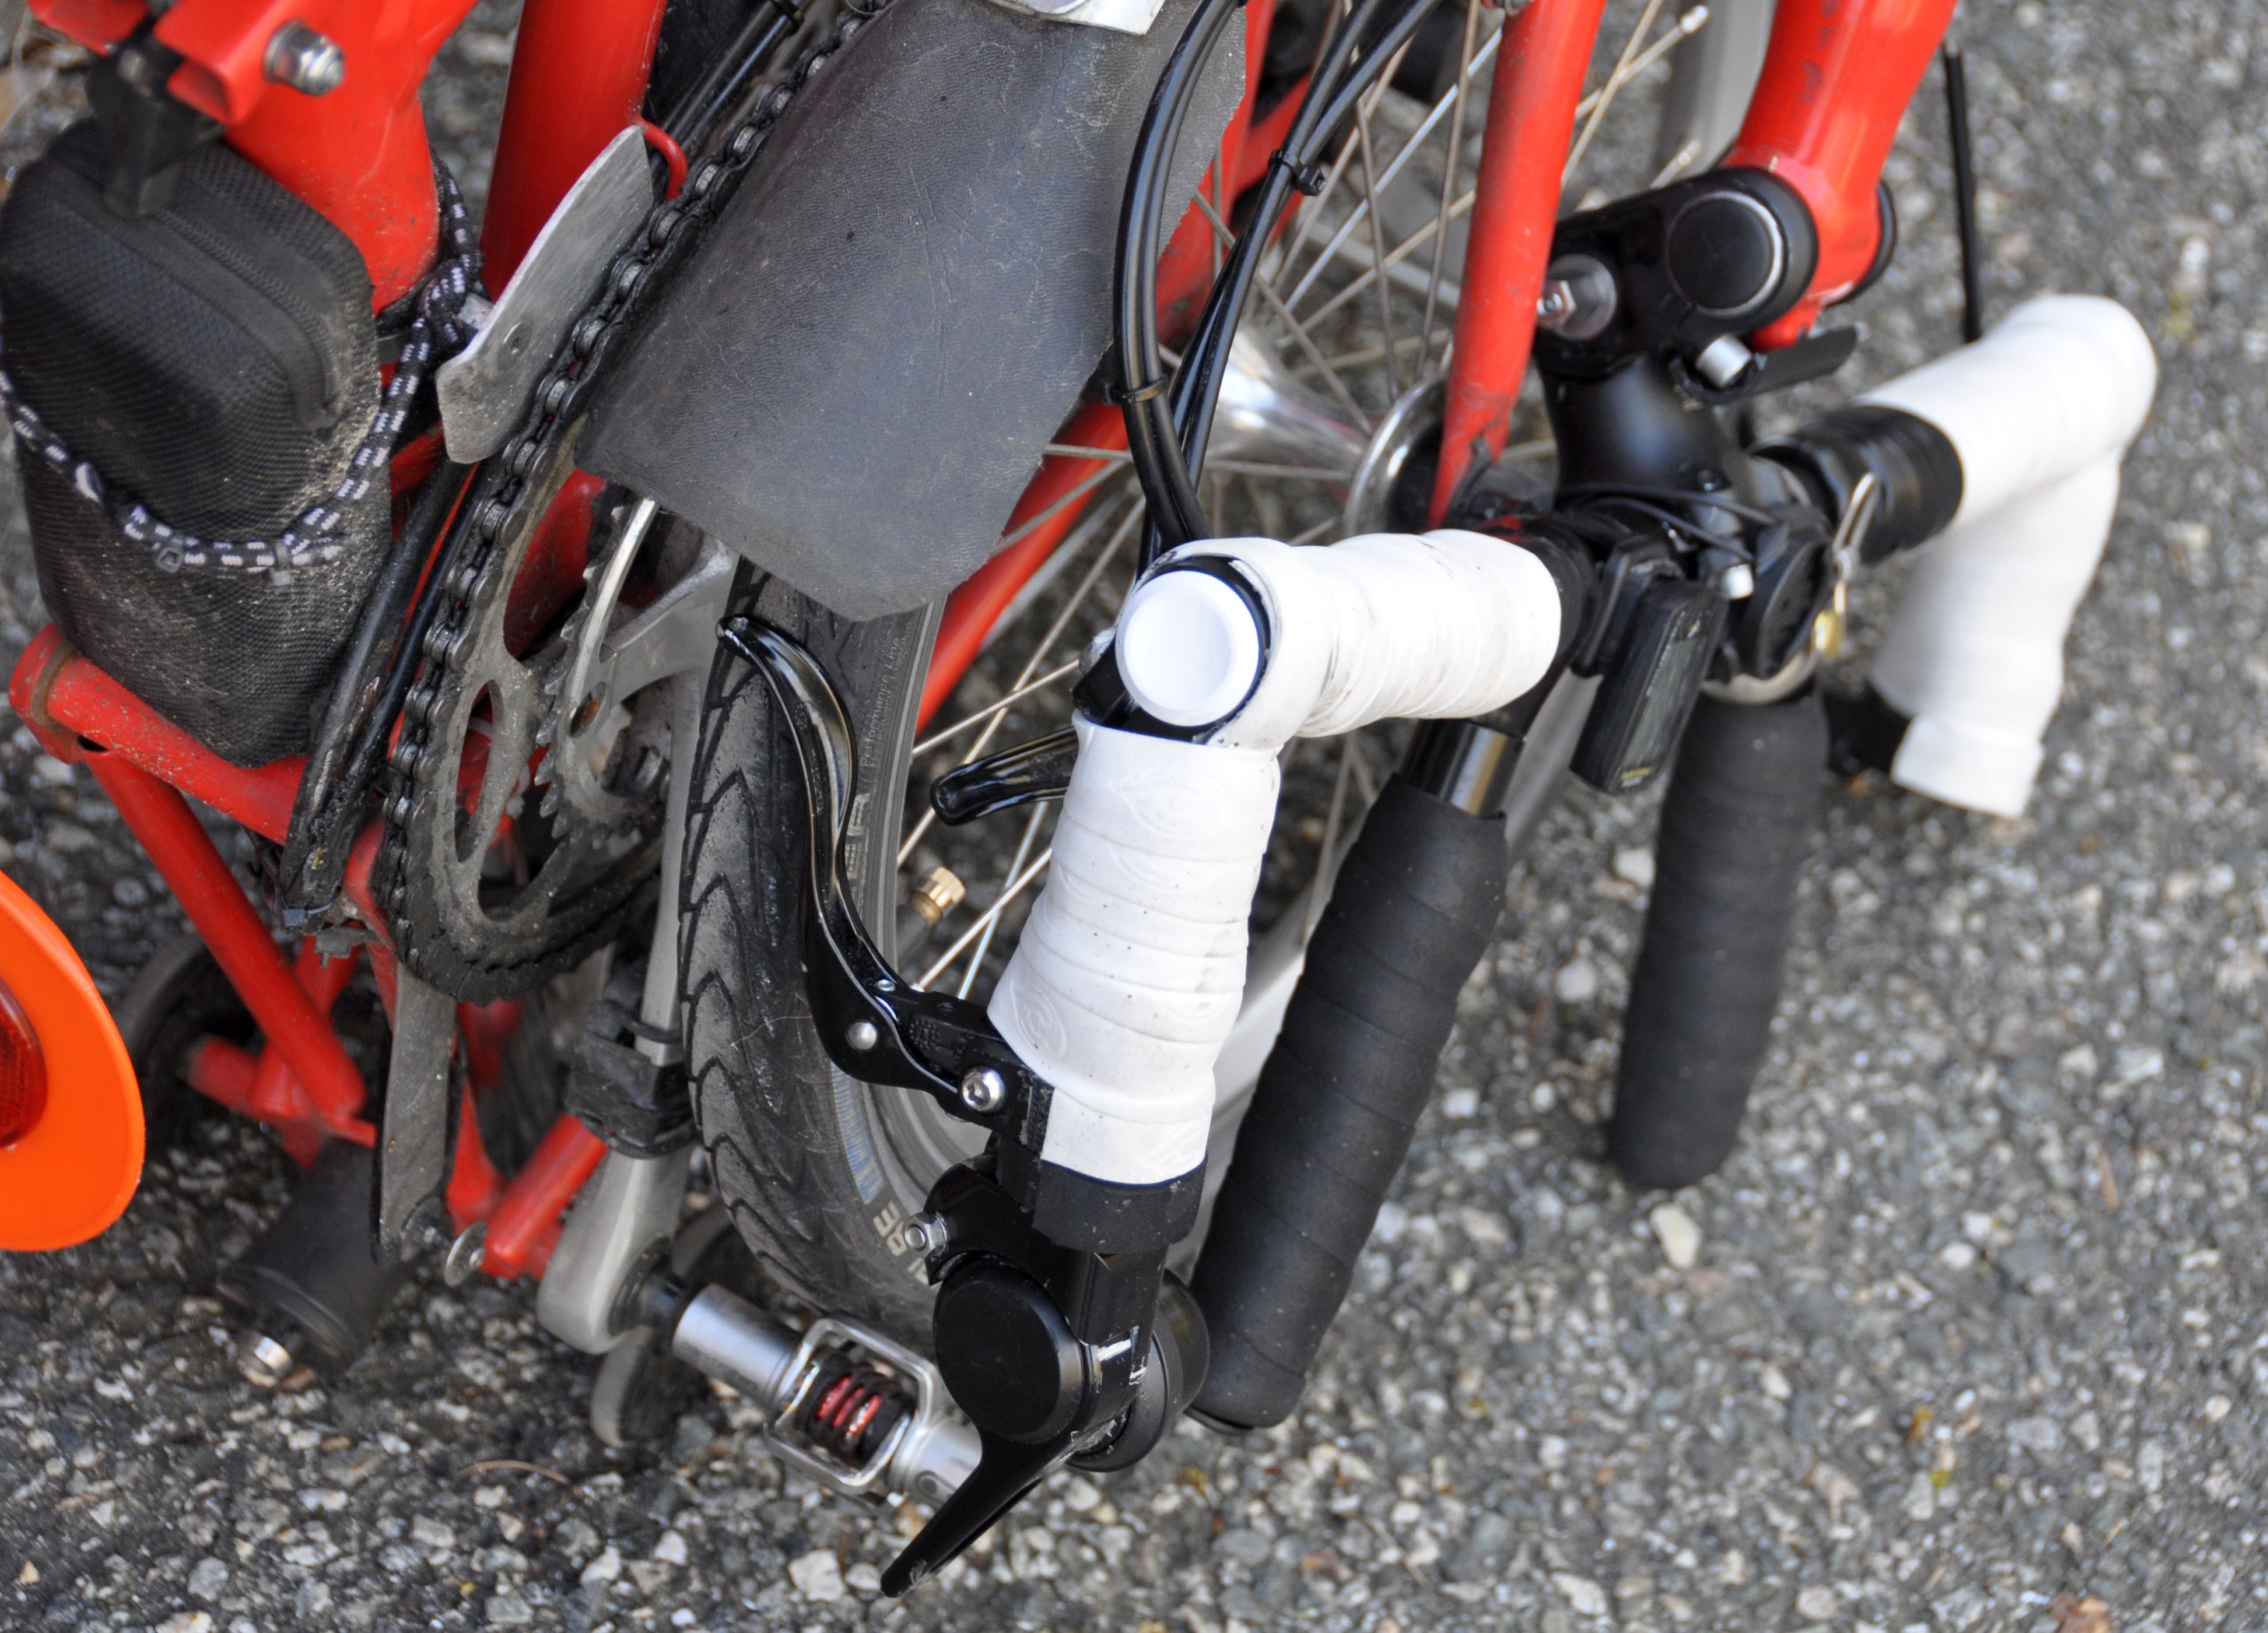
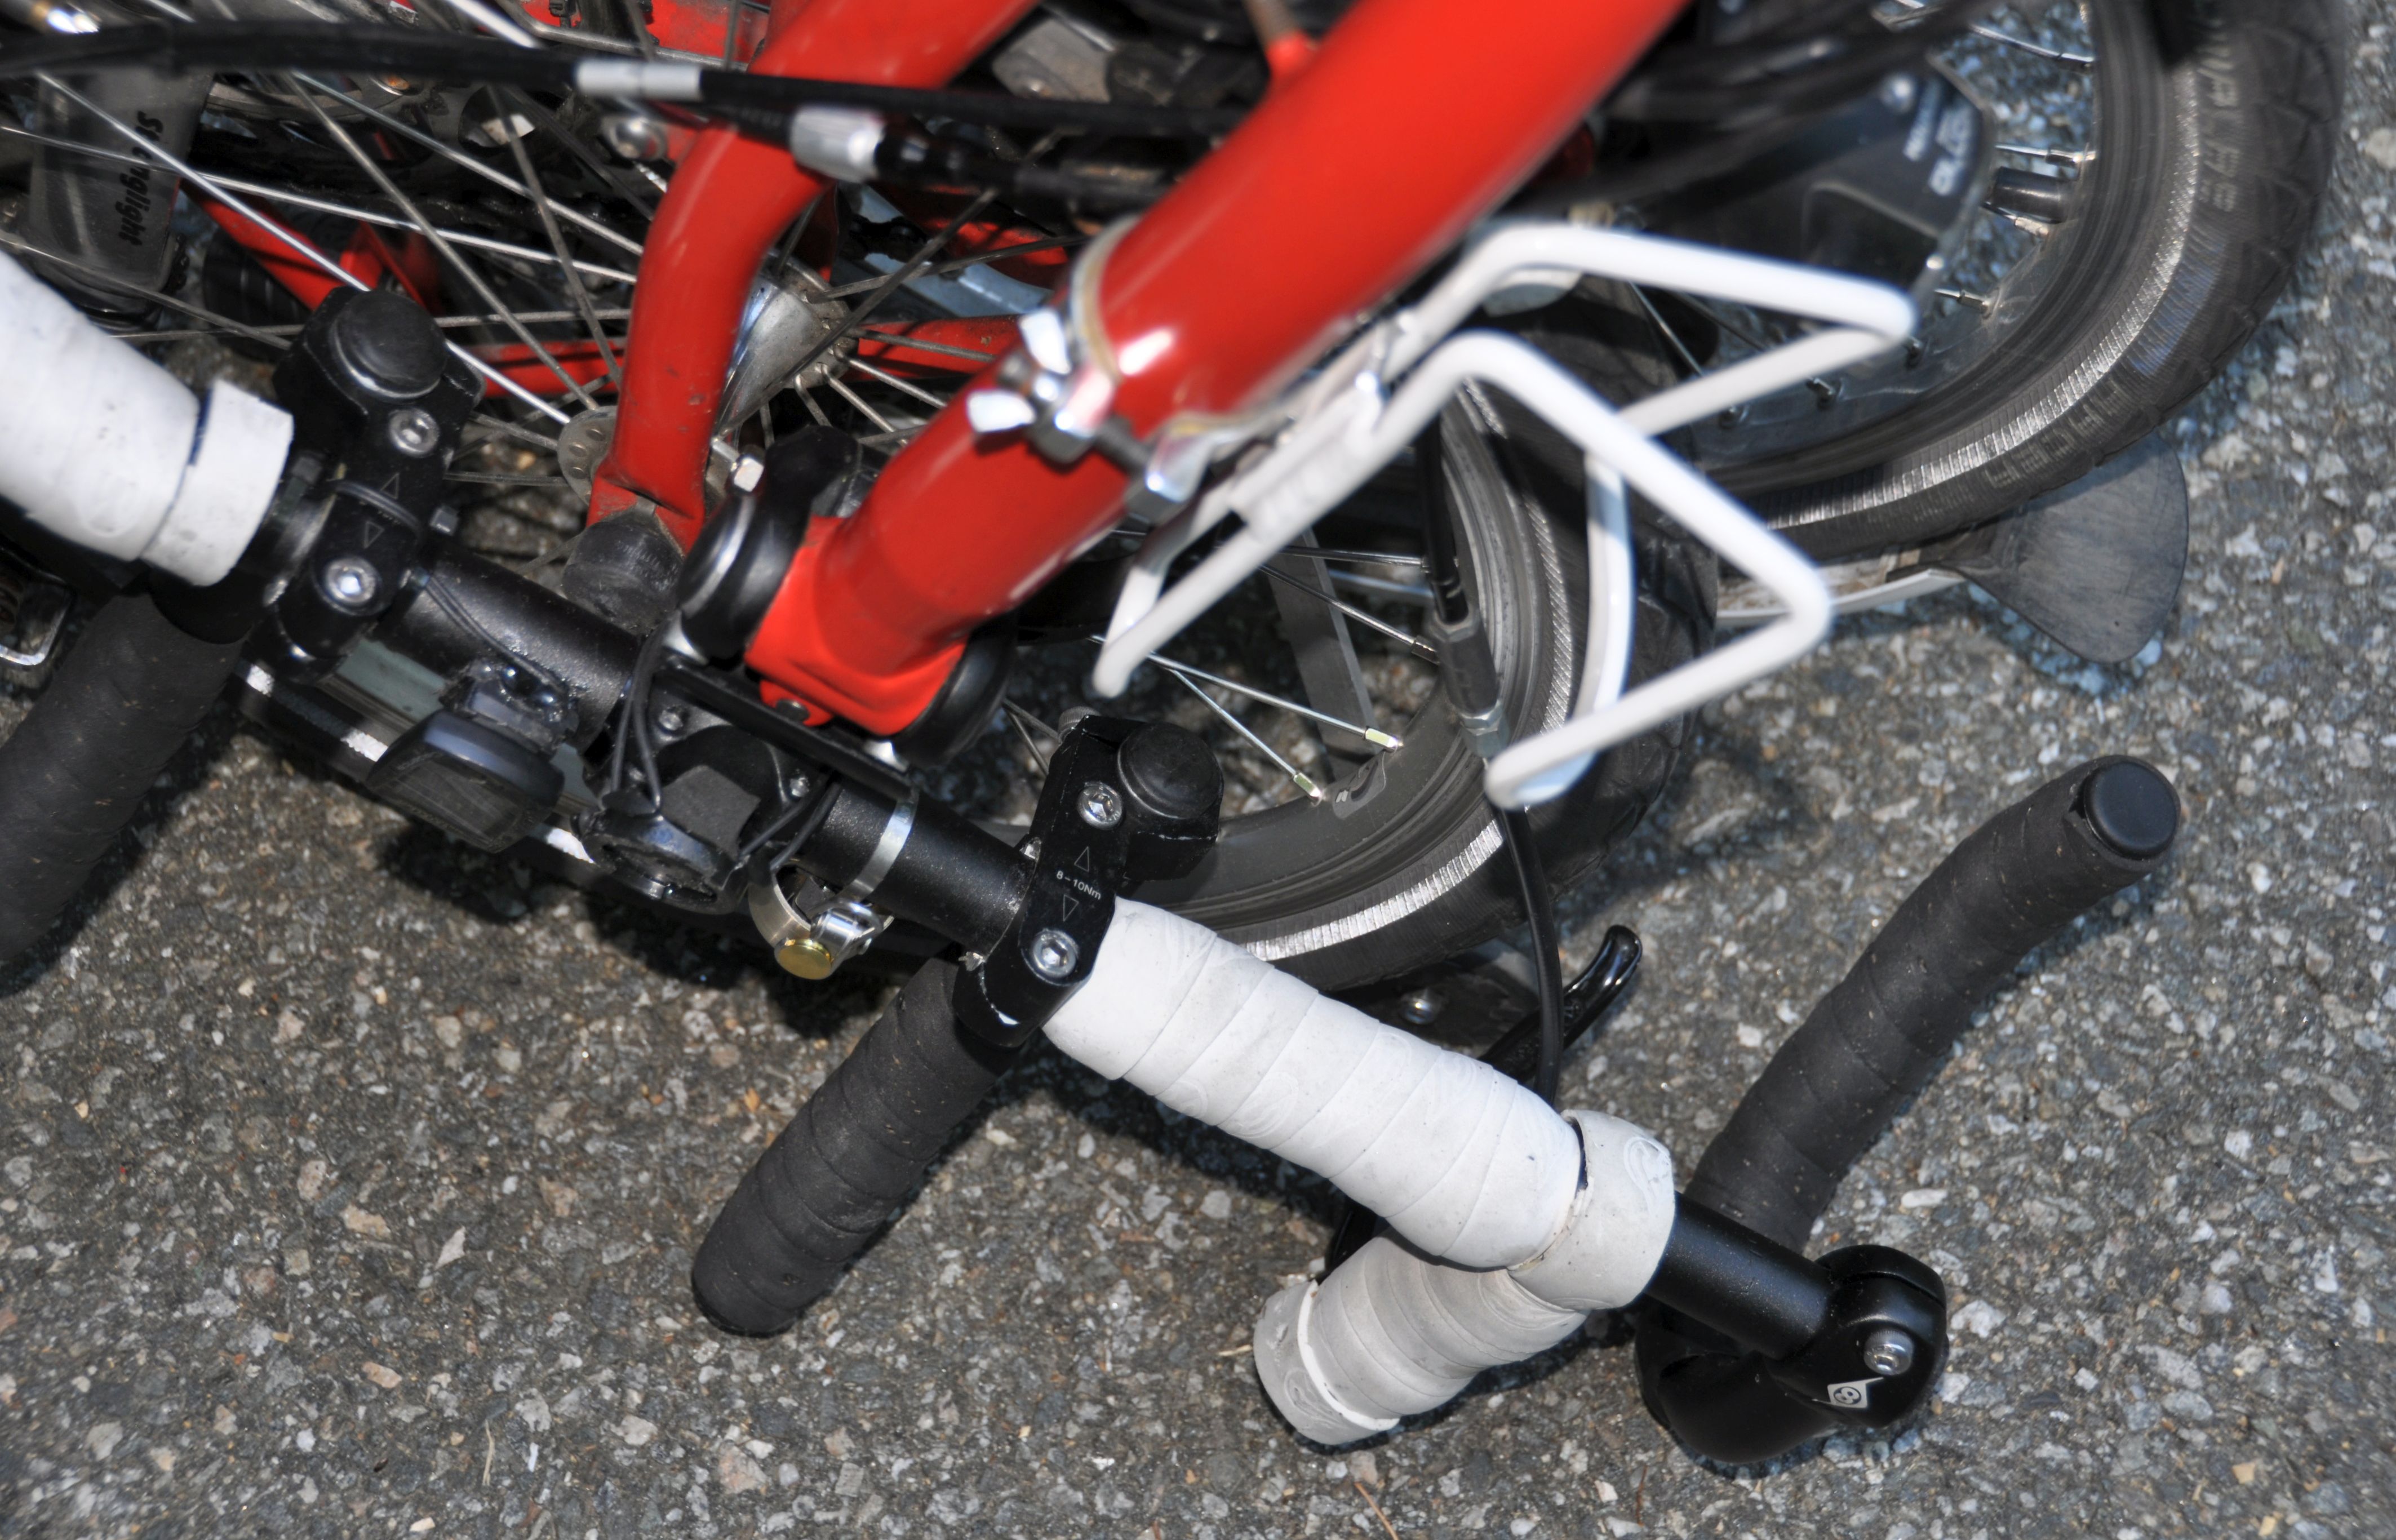
(3) Drop ends
I first thought it would be impossible to have drop bars on the Brompton without interfering with the fold. I couldn't see any solution with standard drop bars, but I was able to add drop ends which now allow me to ride in my favorite position – hands on the drops.
I use a 58 cm flat bar, and mount the bar ends with brake
levers. But now the straight handlebar sticks out on either side by 6-7 cm,
and this is just enough room to mount the drop ends (from Origin8)
https://www.amazon.com/Origin8-33617-Drop-Ends/dp/B0013G6PB8
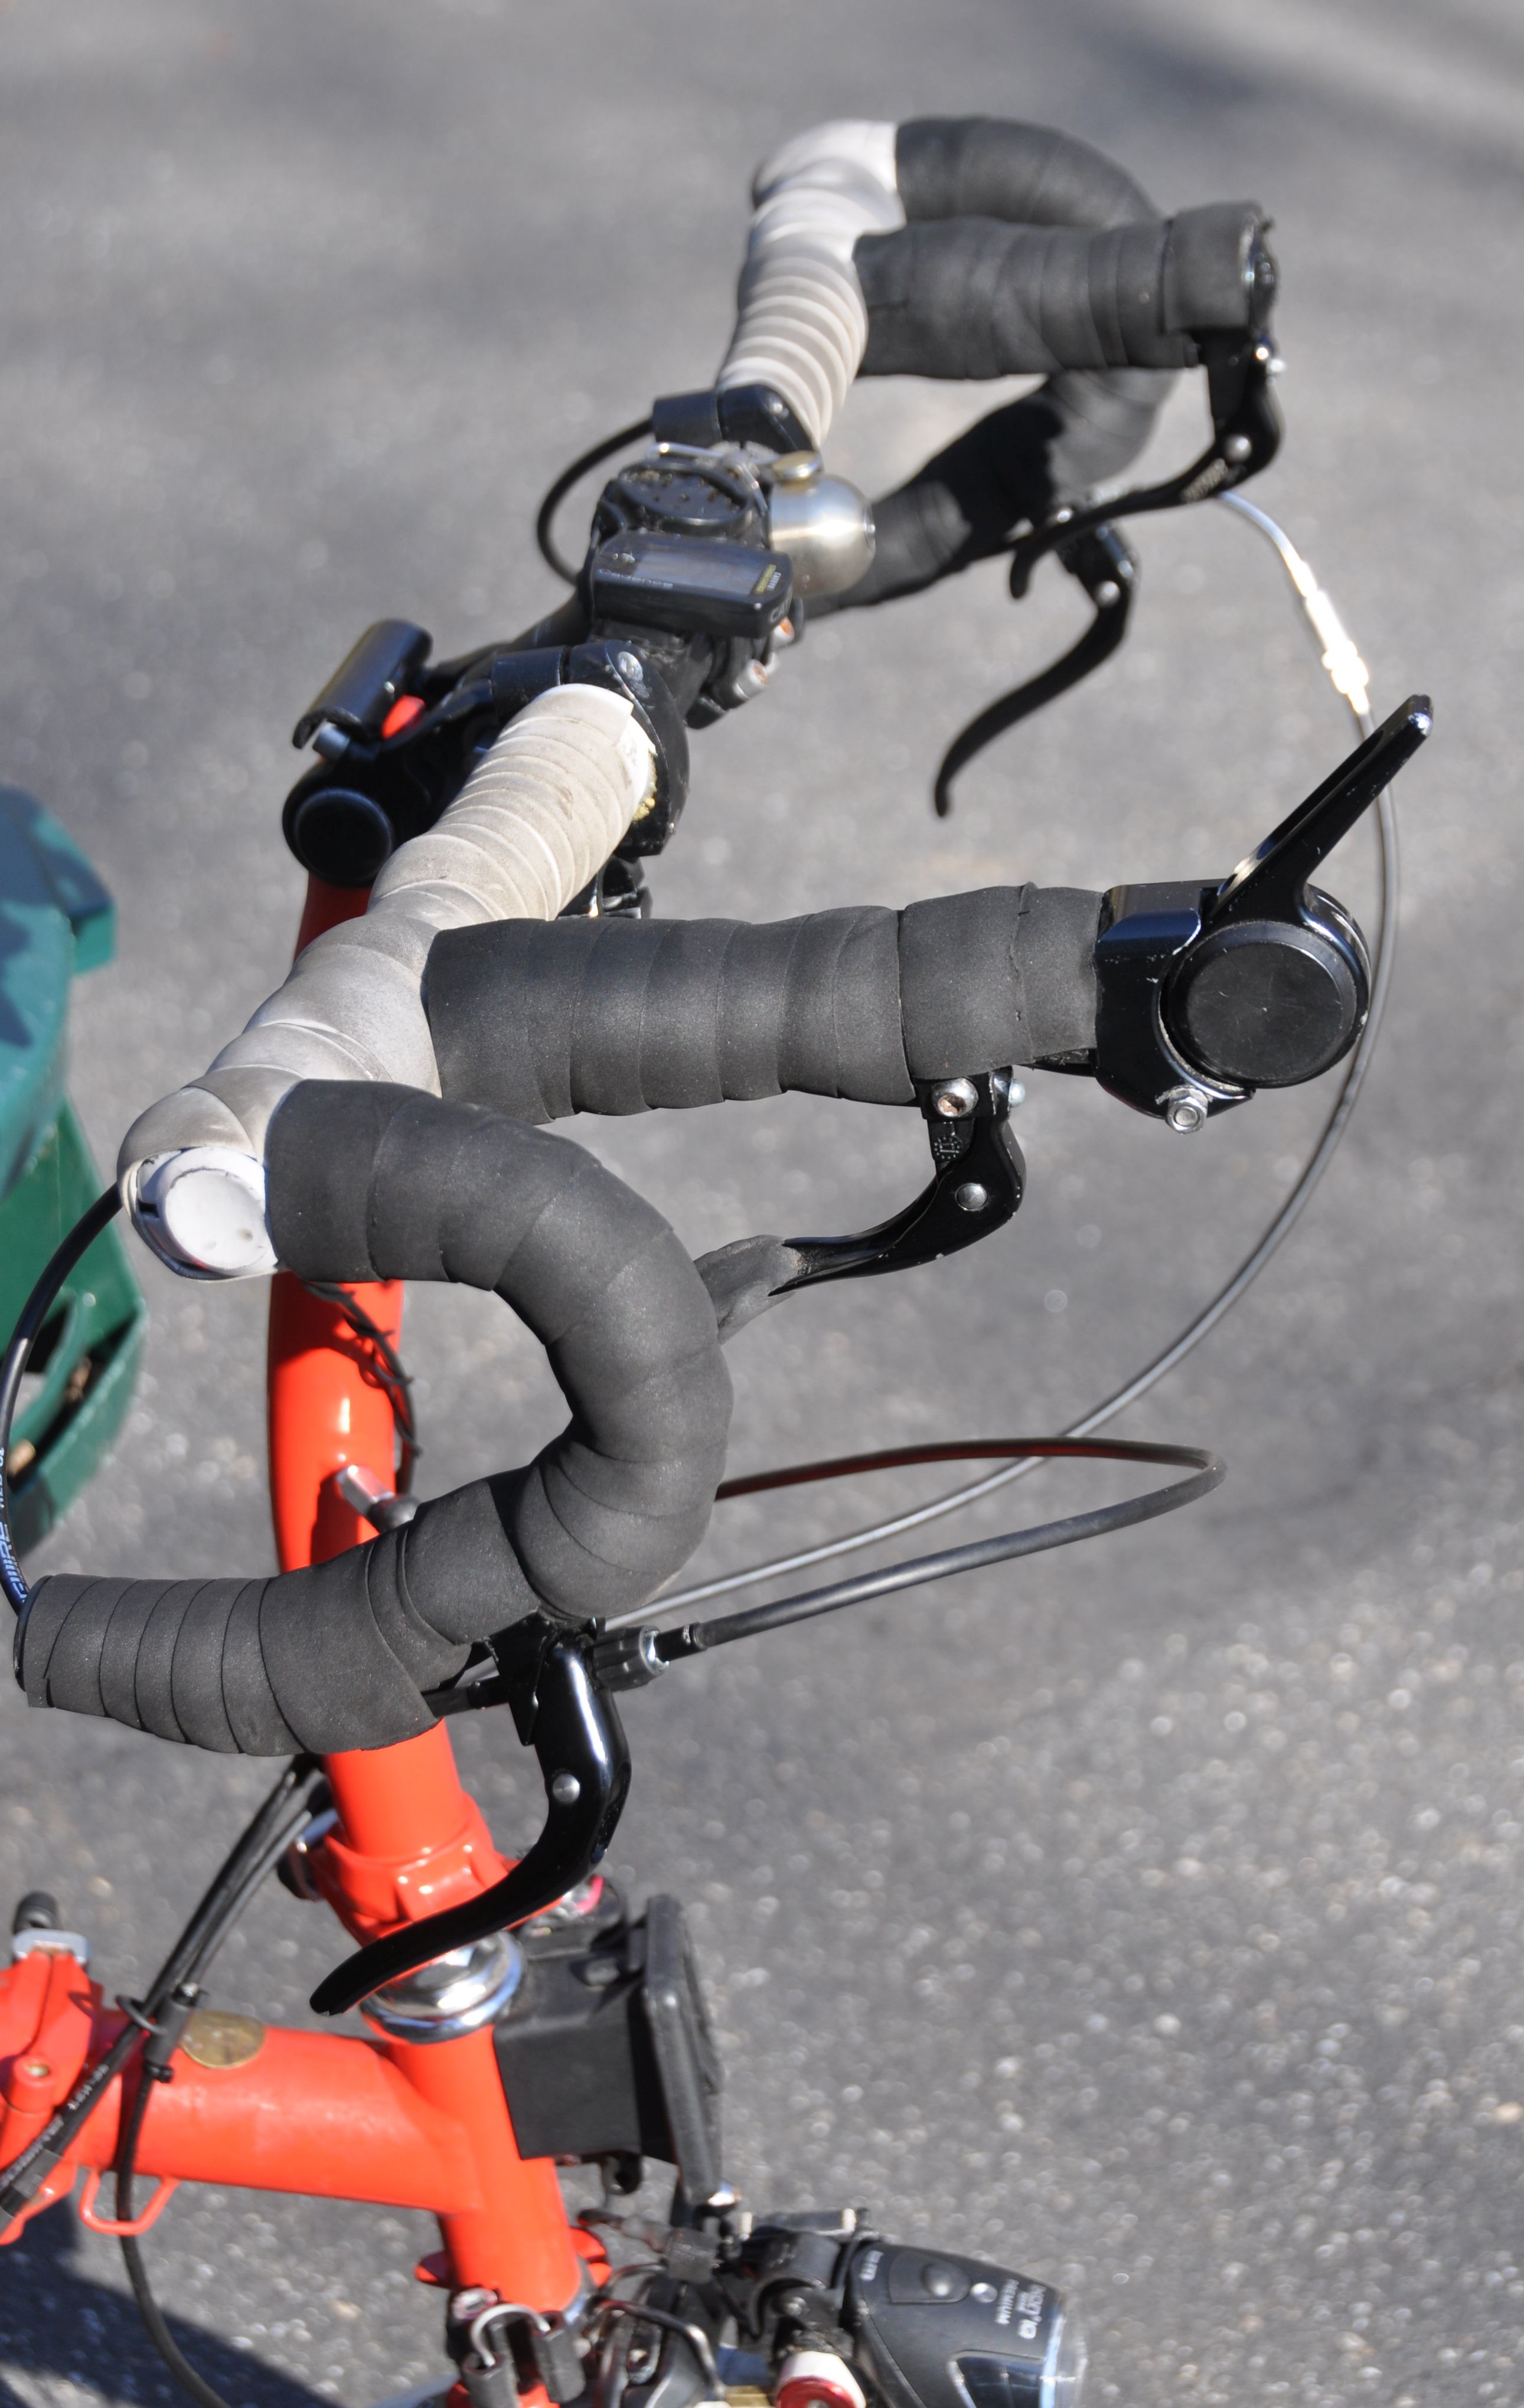
I like riding in the drops --- this is my favorite position. The width is unusually wide, but I am getting used to it more and more. BTW, the width is similar to the drops used with so-called gravel bars or flared drop bars (https://bikepacking.com/index/gravel-bars).
Here is my current solution for the handlebar. It uses
straight handelbars with 580 mm length (http://www.amazon.com/gp/product/B07FB3RRKJ)
cut-off long bar ends (https://store.bicycleman.com/products/handlebar-ends)
Origin8 drop ends ( www.amazon.com/gp/product/B0013G6PB8)
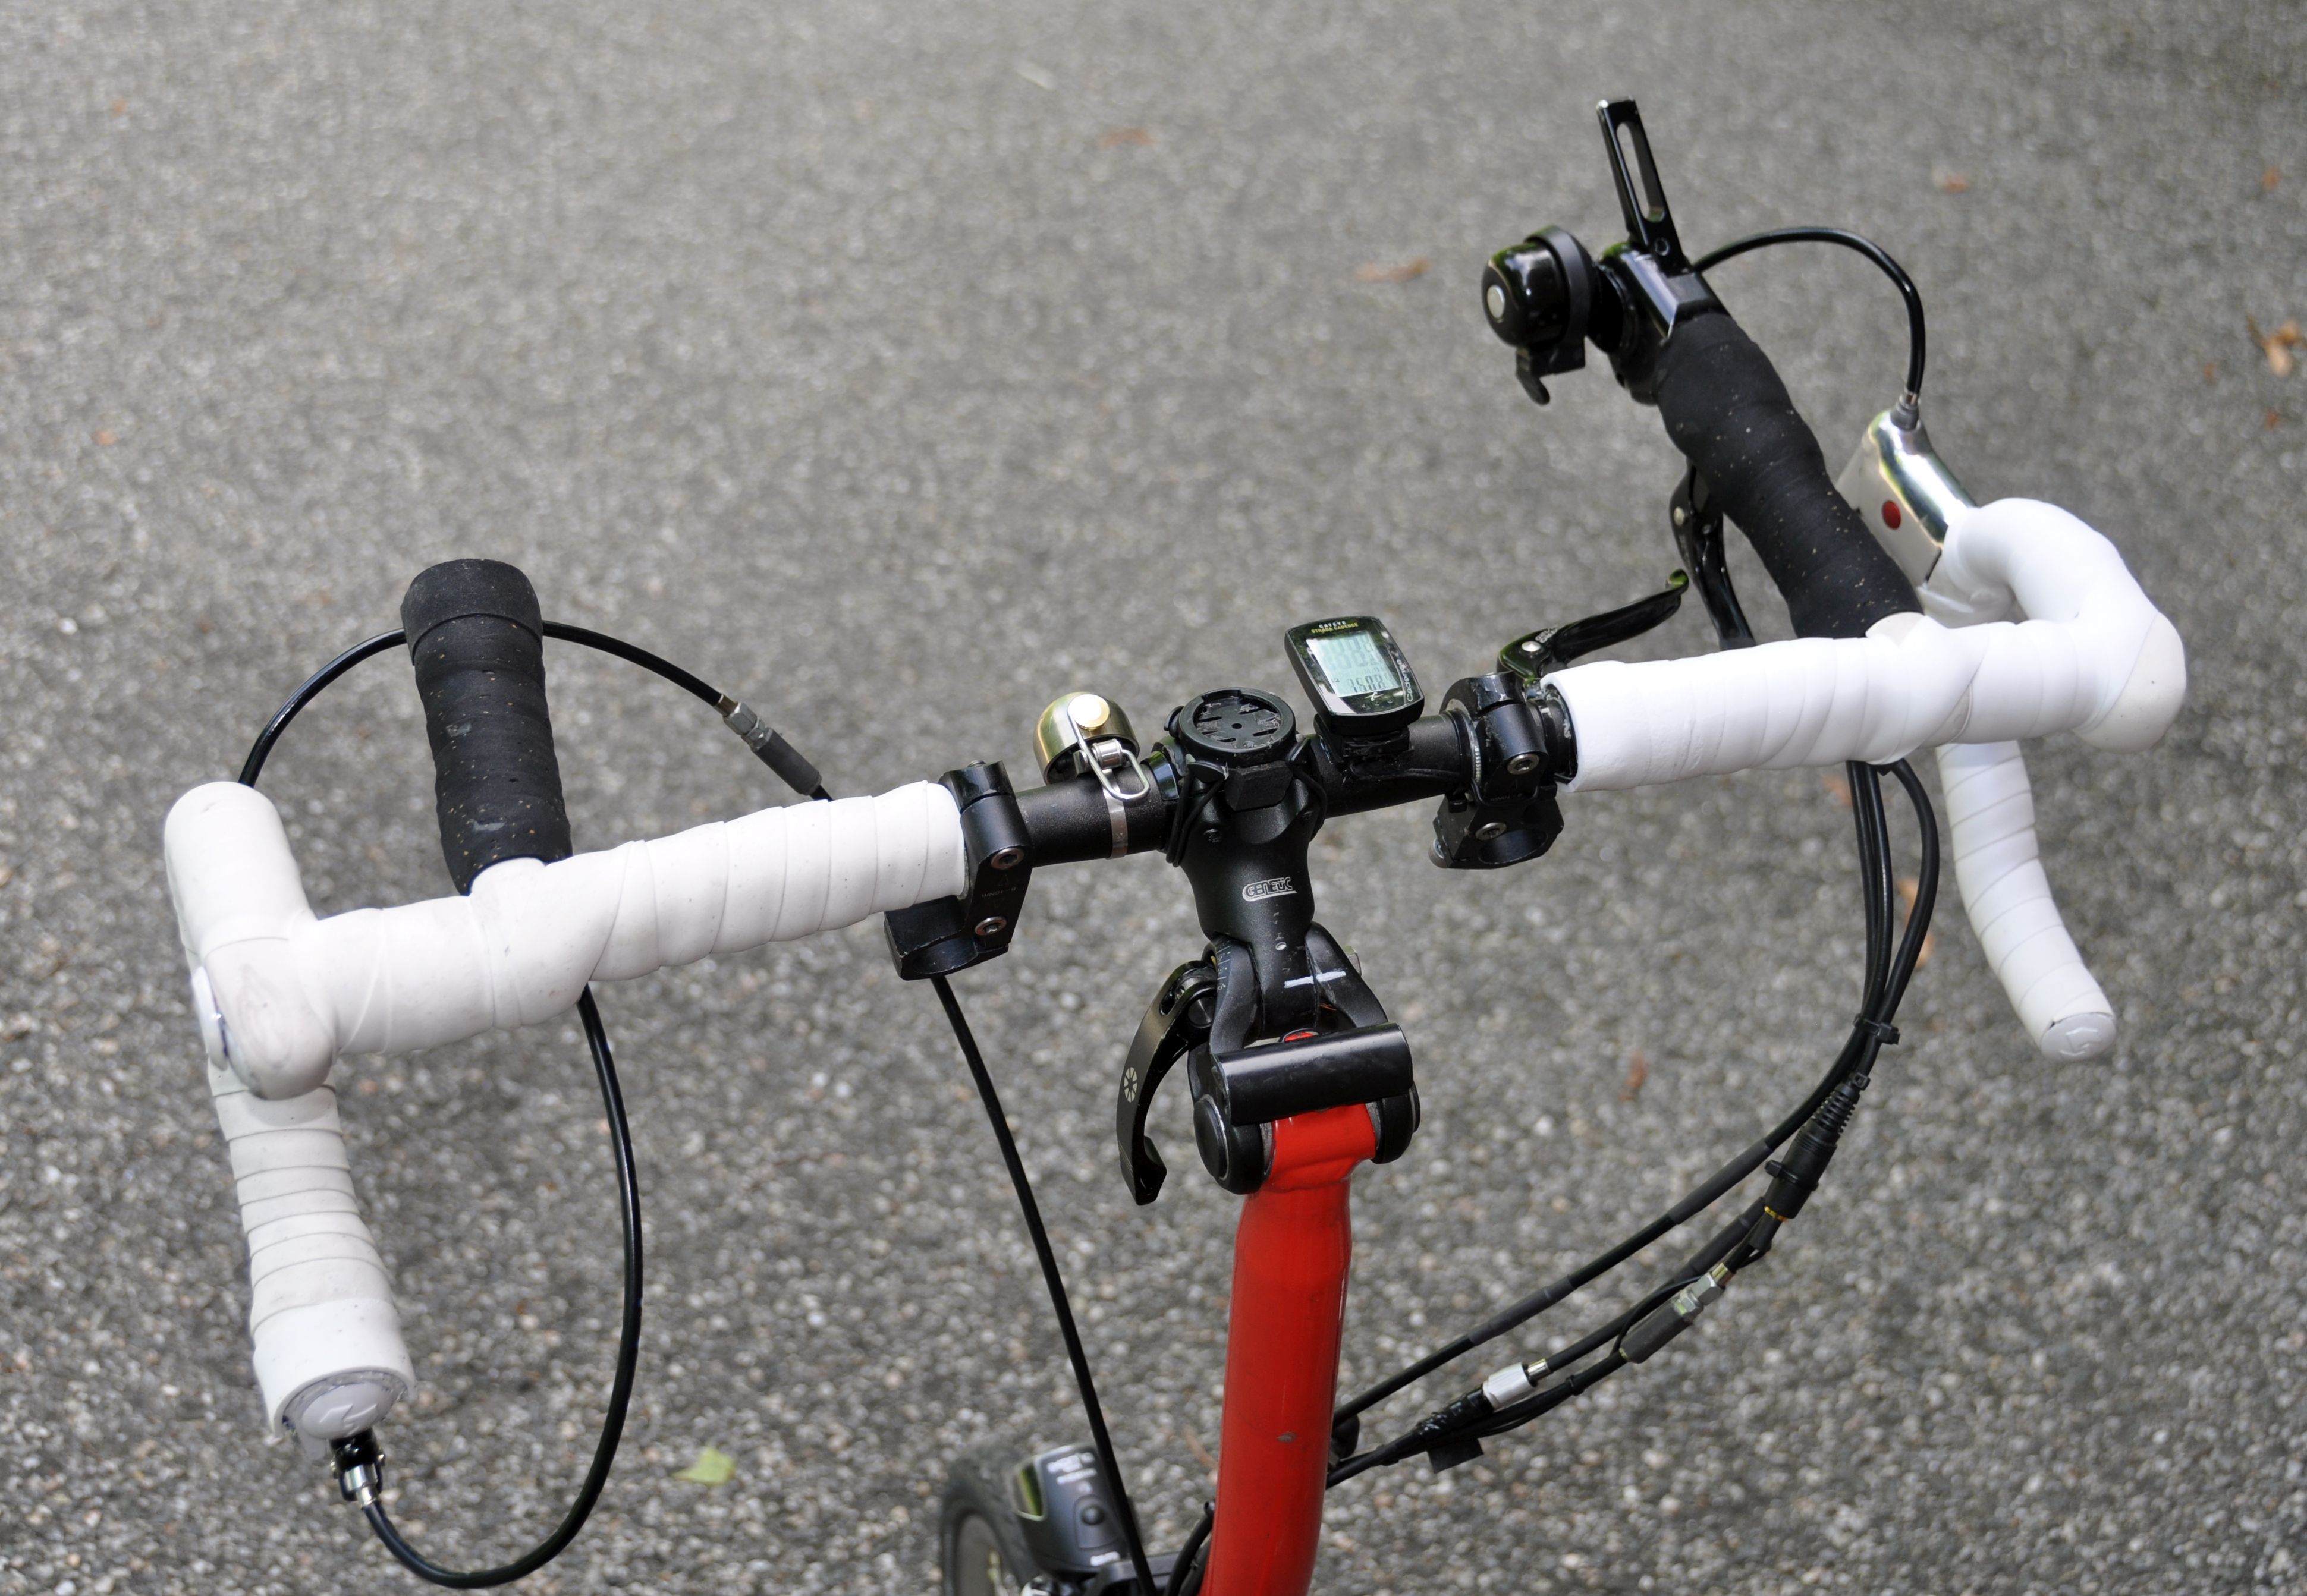
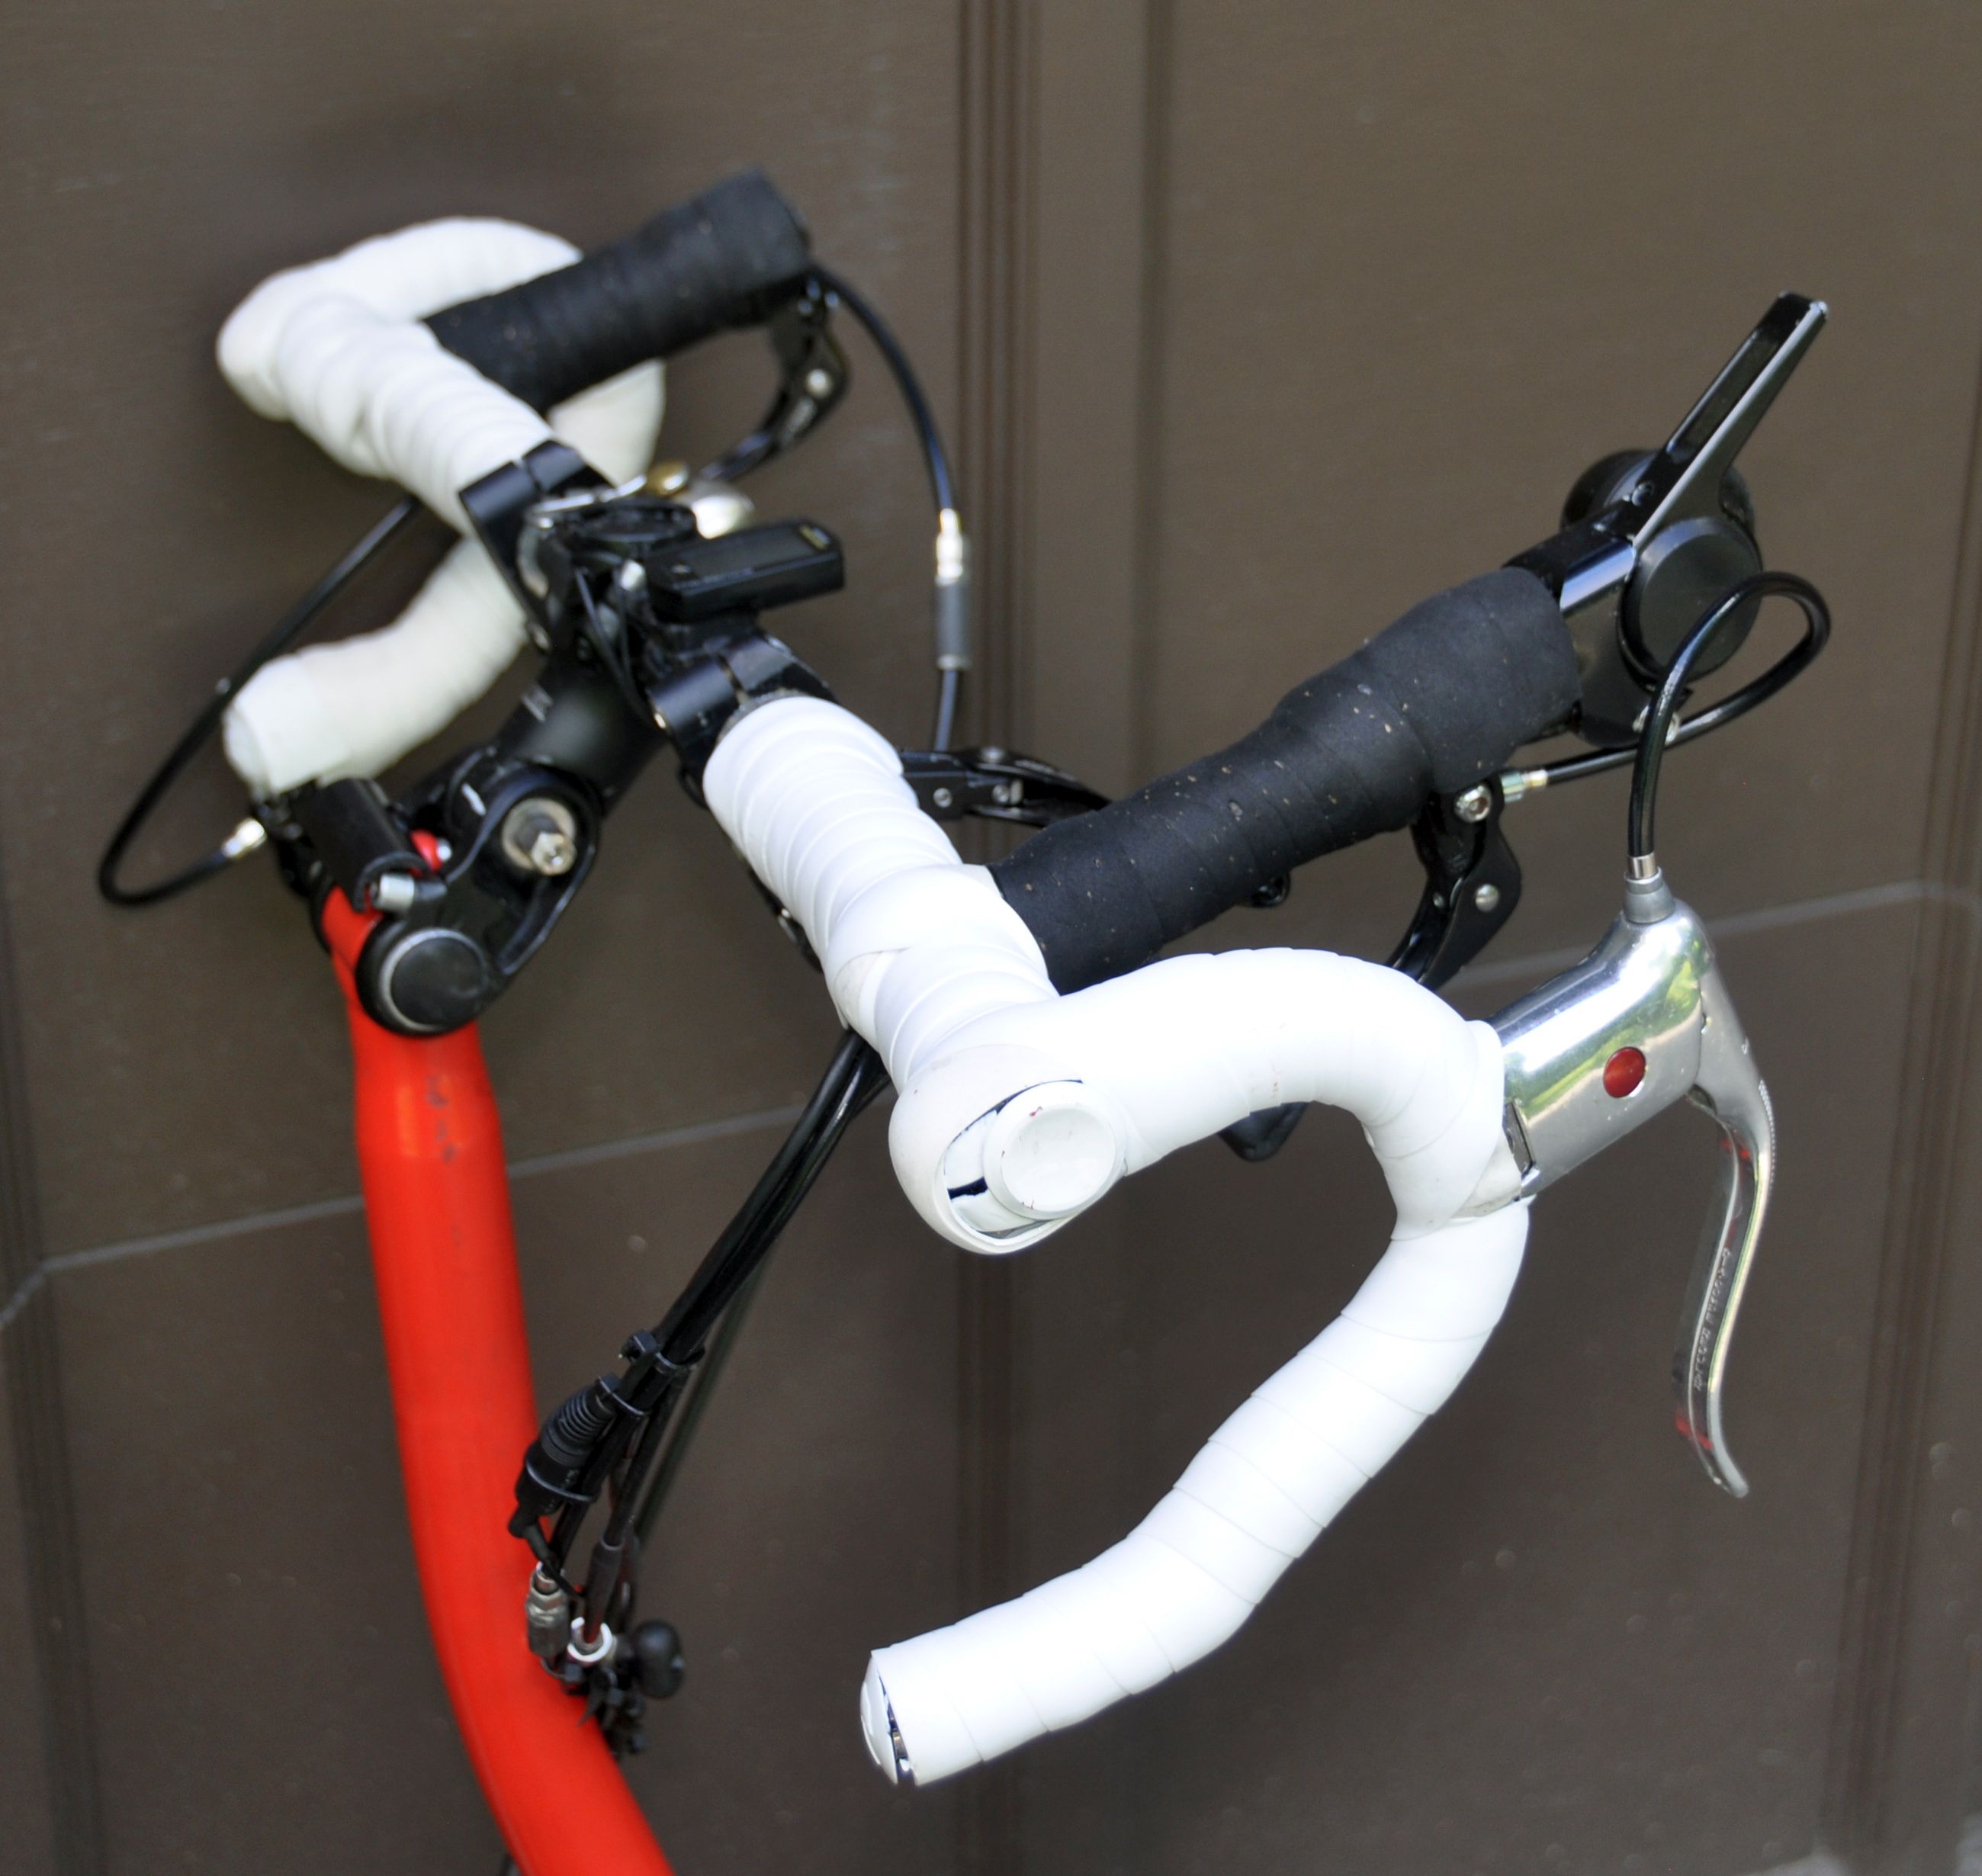
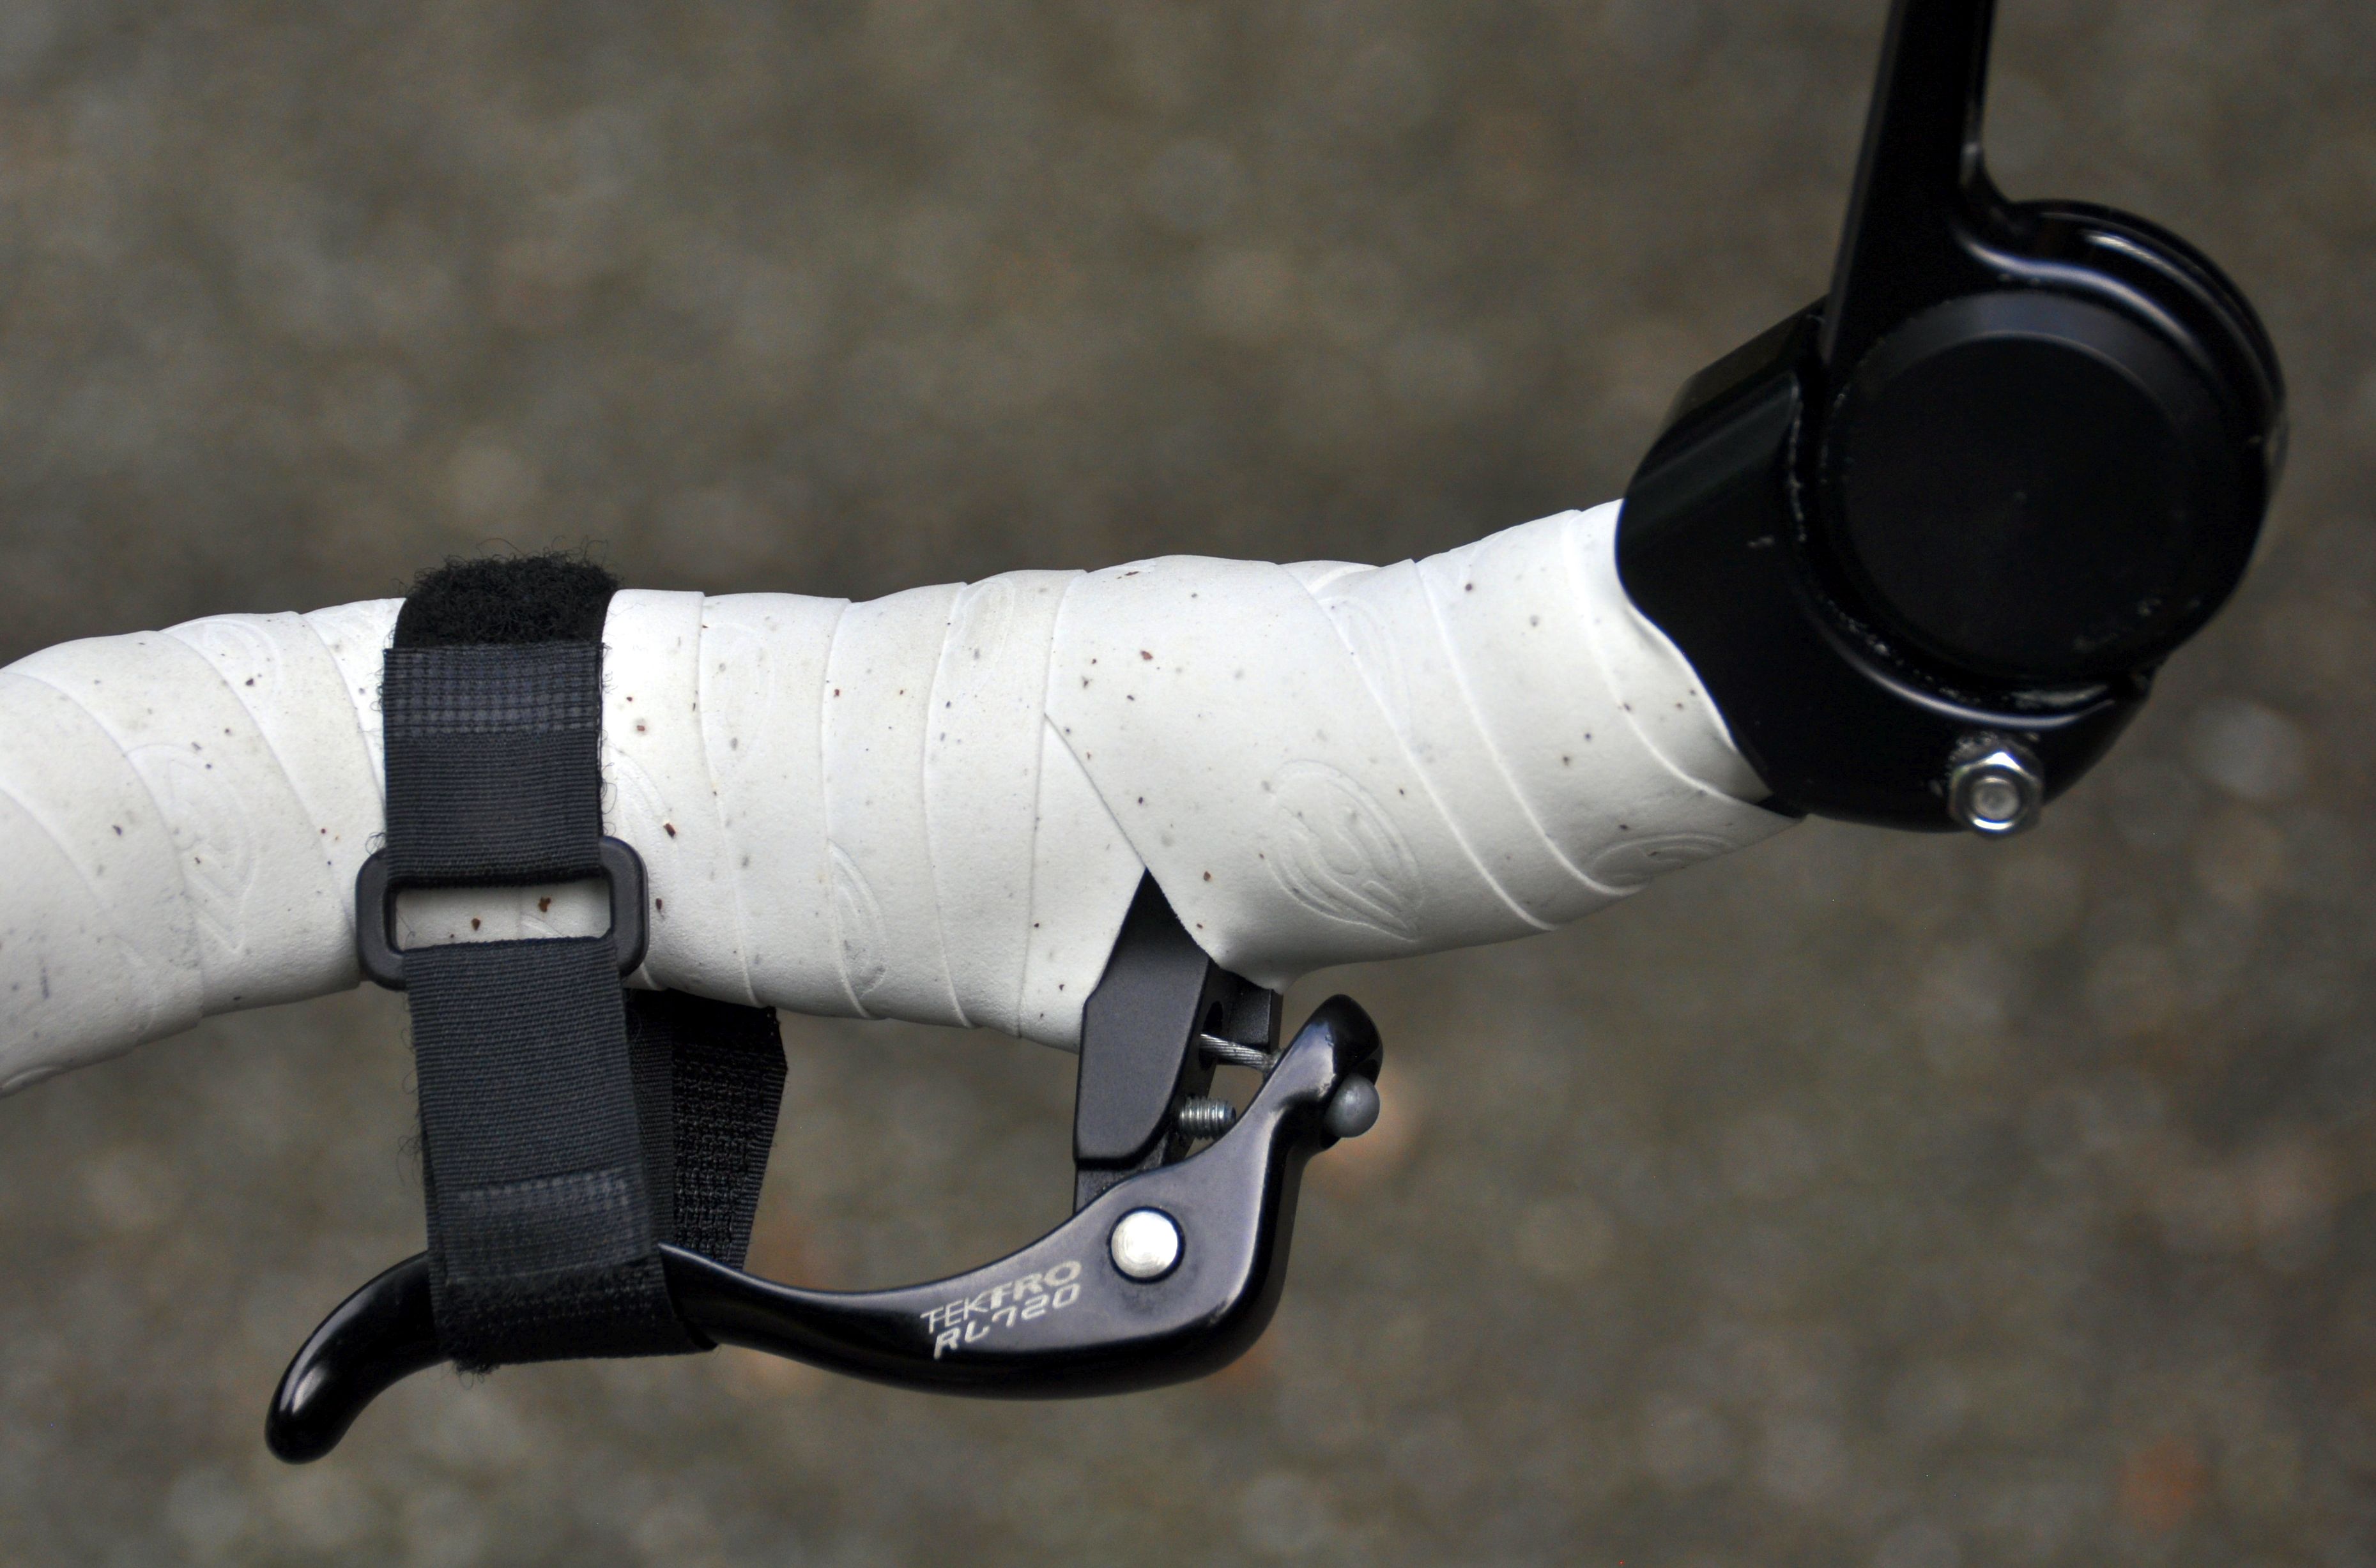
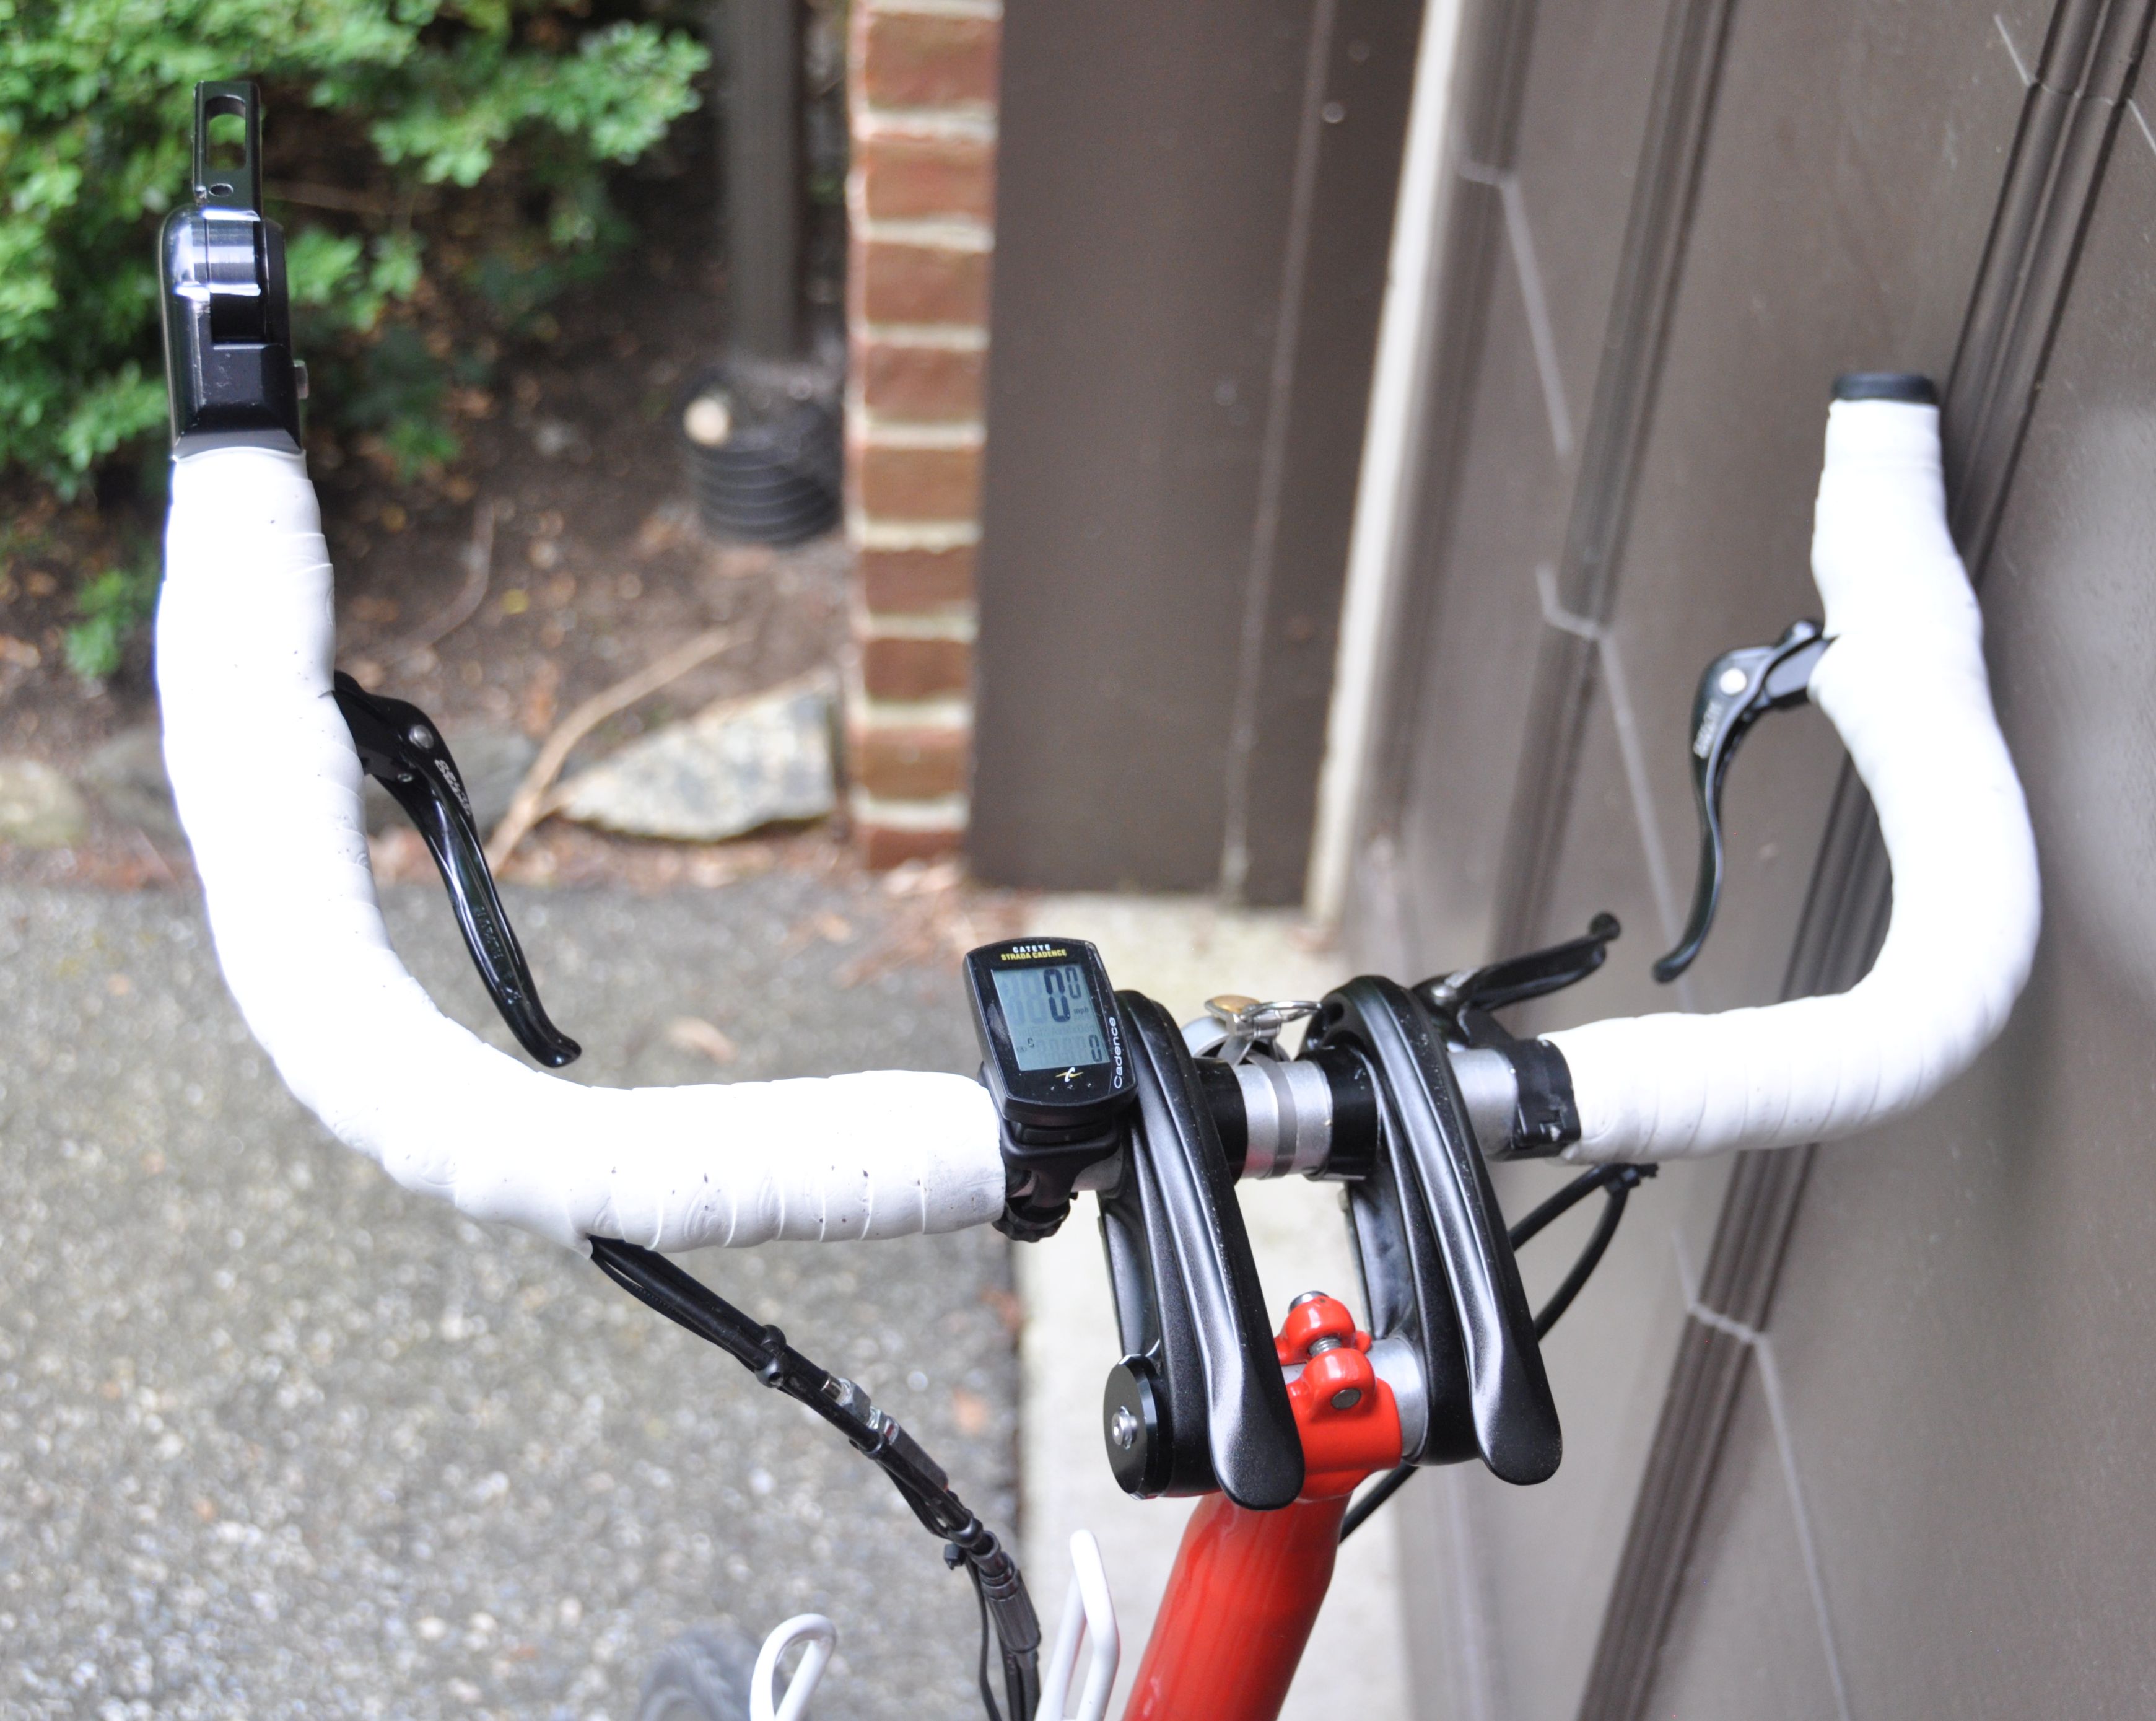
I am using two brake levers each for the front brake and the rear disc brake. So I can brake in both positions, on the bar ends and on the drop ends. Three of the brake levers are Tektro RL720 Cross Brake Lever – they can be put in the middle of a brake cable and paired with a second brake lever.
For the drop ends, I had to use two different brake levers. For the left side, I used the Tektro lever in reverse configuration (like an aero lever), since a road lever would have interfered with the fold. On the right side, there was no room for the same configuration, but for a road lever. For optimum cable routing, I used a non-aero road lever which are vintage, but available on ebay (Vintage Dia Compe road bike brake lever non-aero).

I can even add aero bars https://www.amazon.com/gp/product/B07FL829B7
without any interference with the fold, but I am not using them for commuting. I will probably put them back for longer tours – they offer another nice riding position.
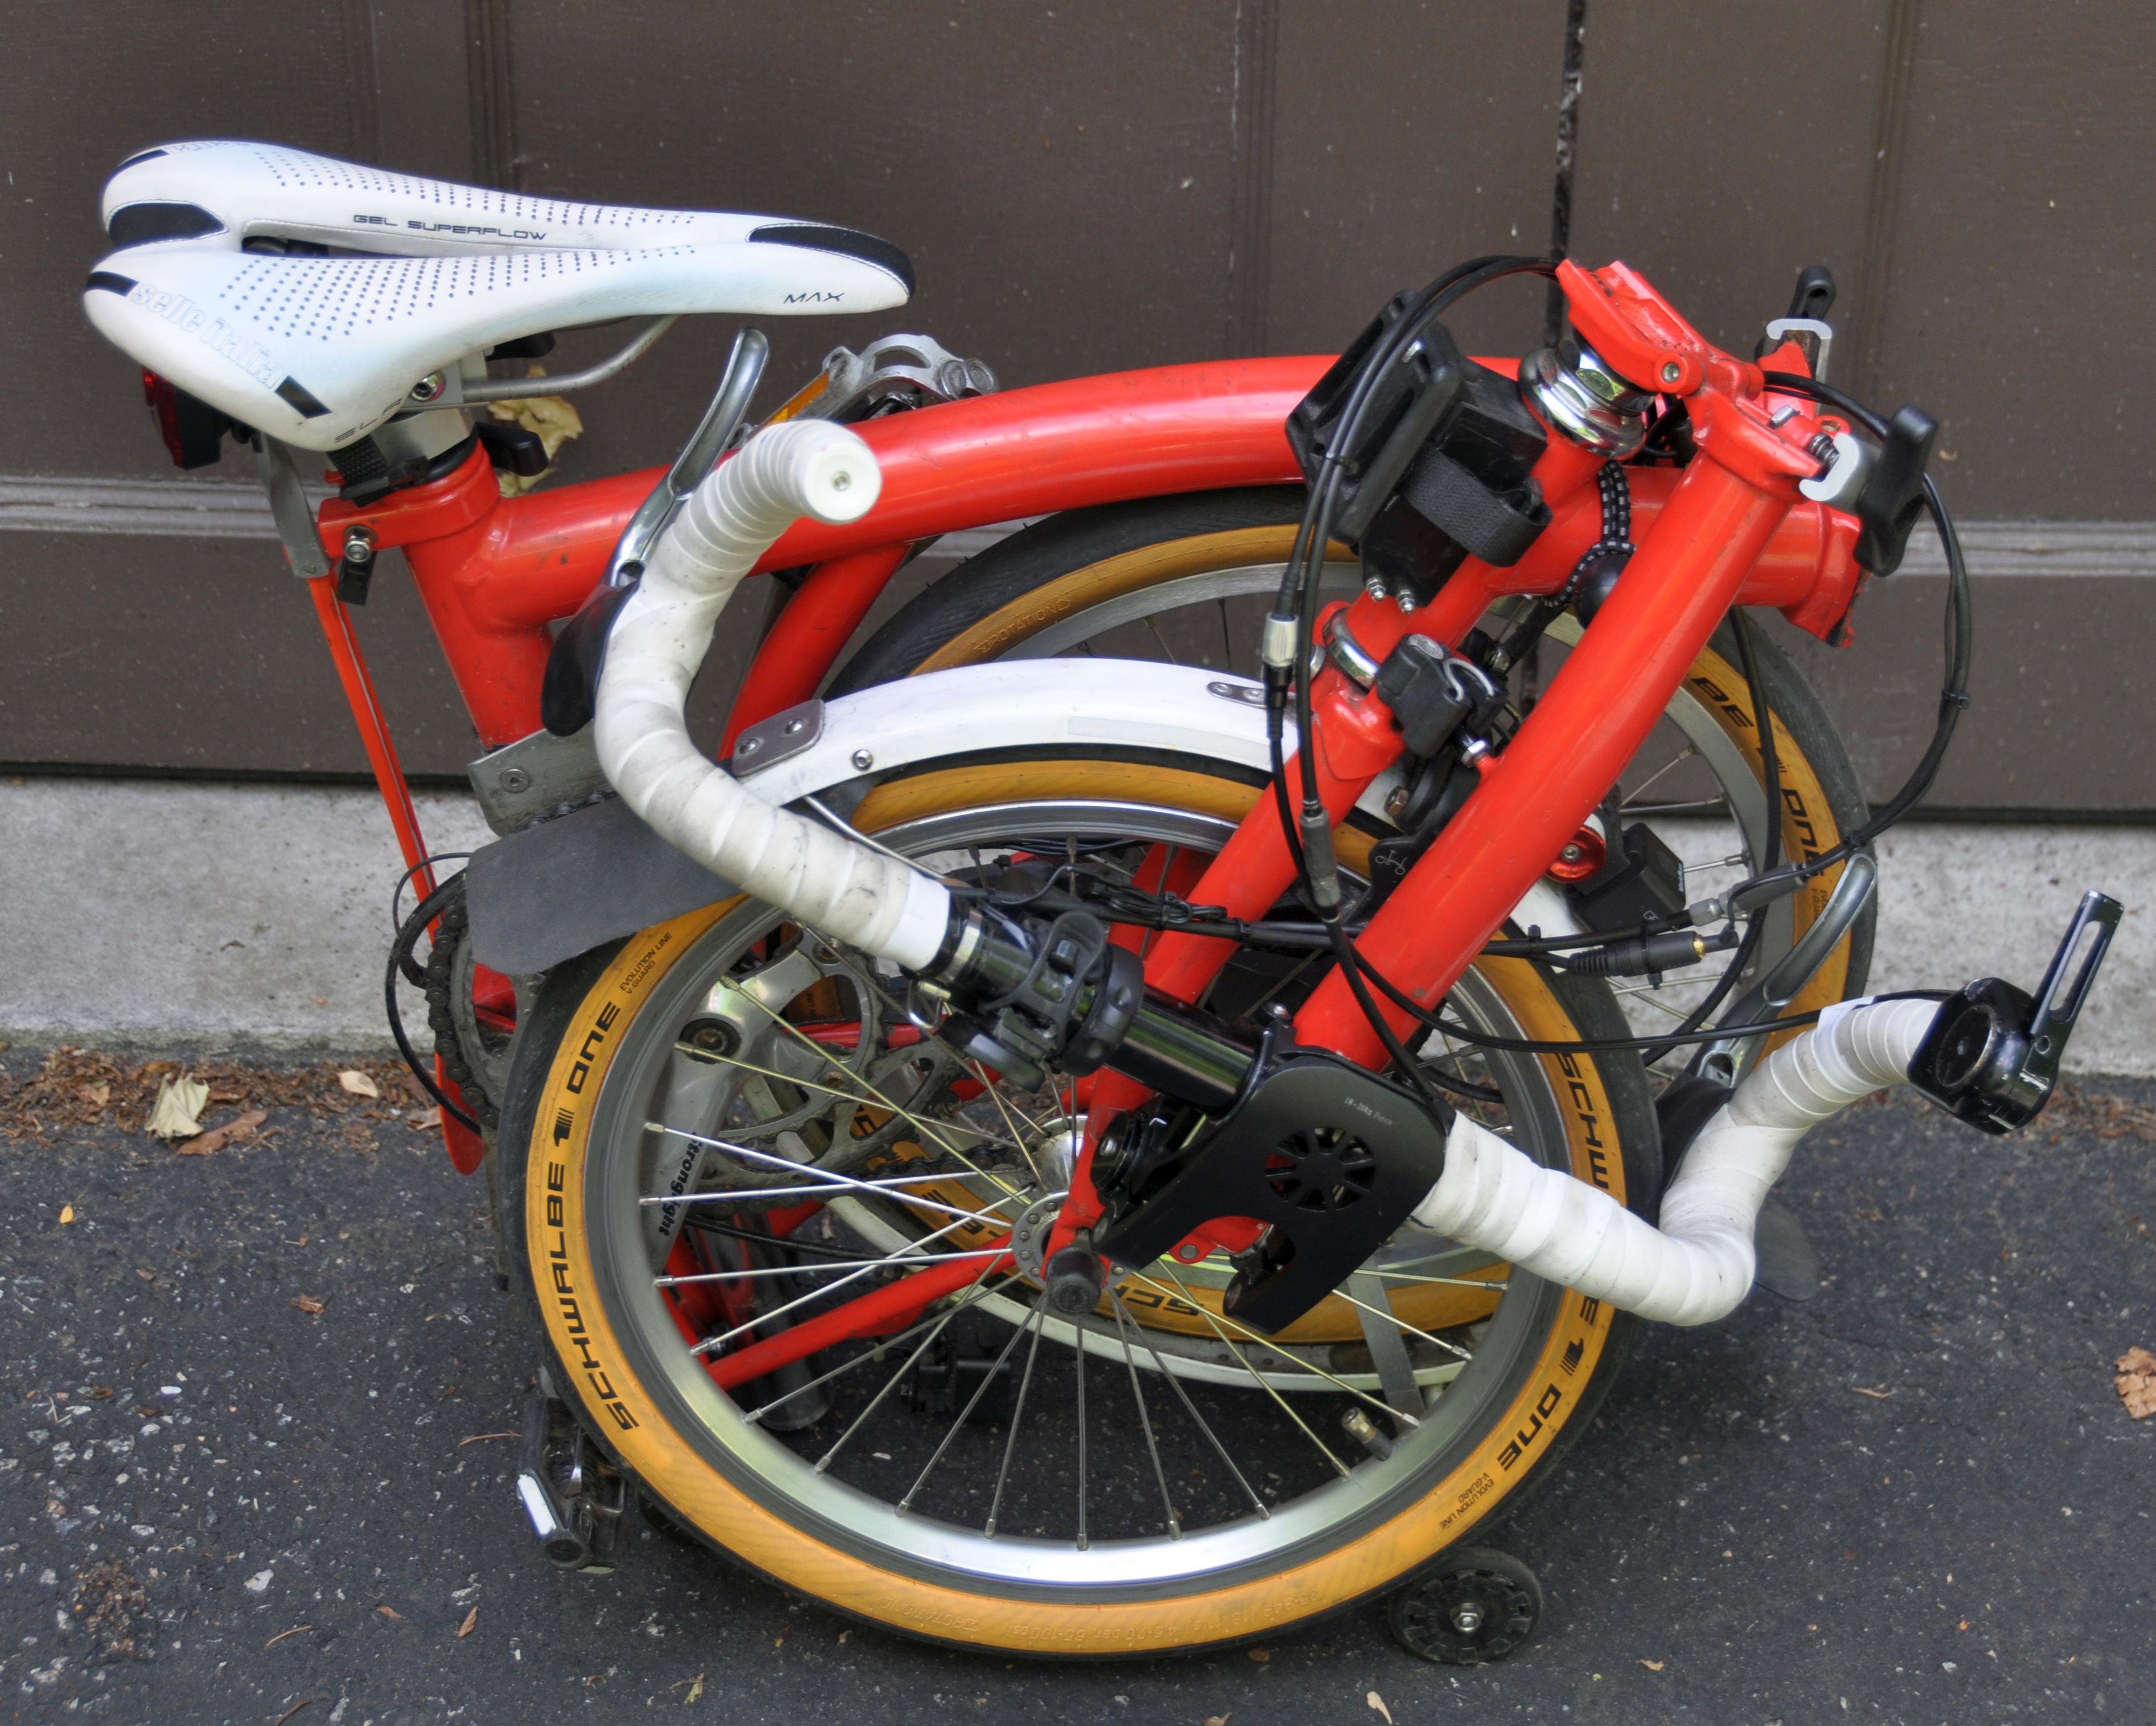
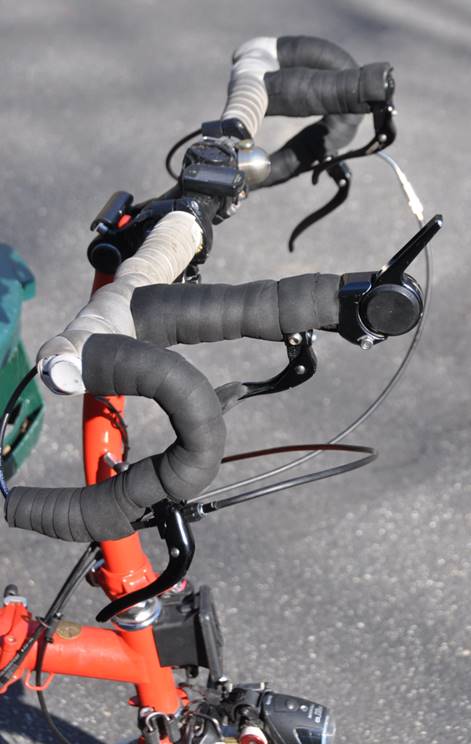
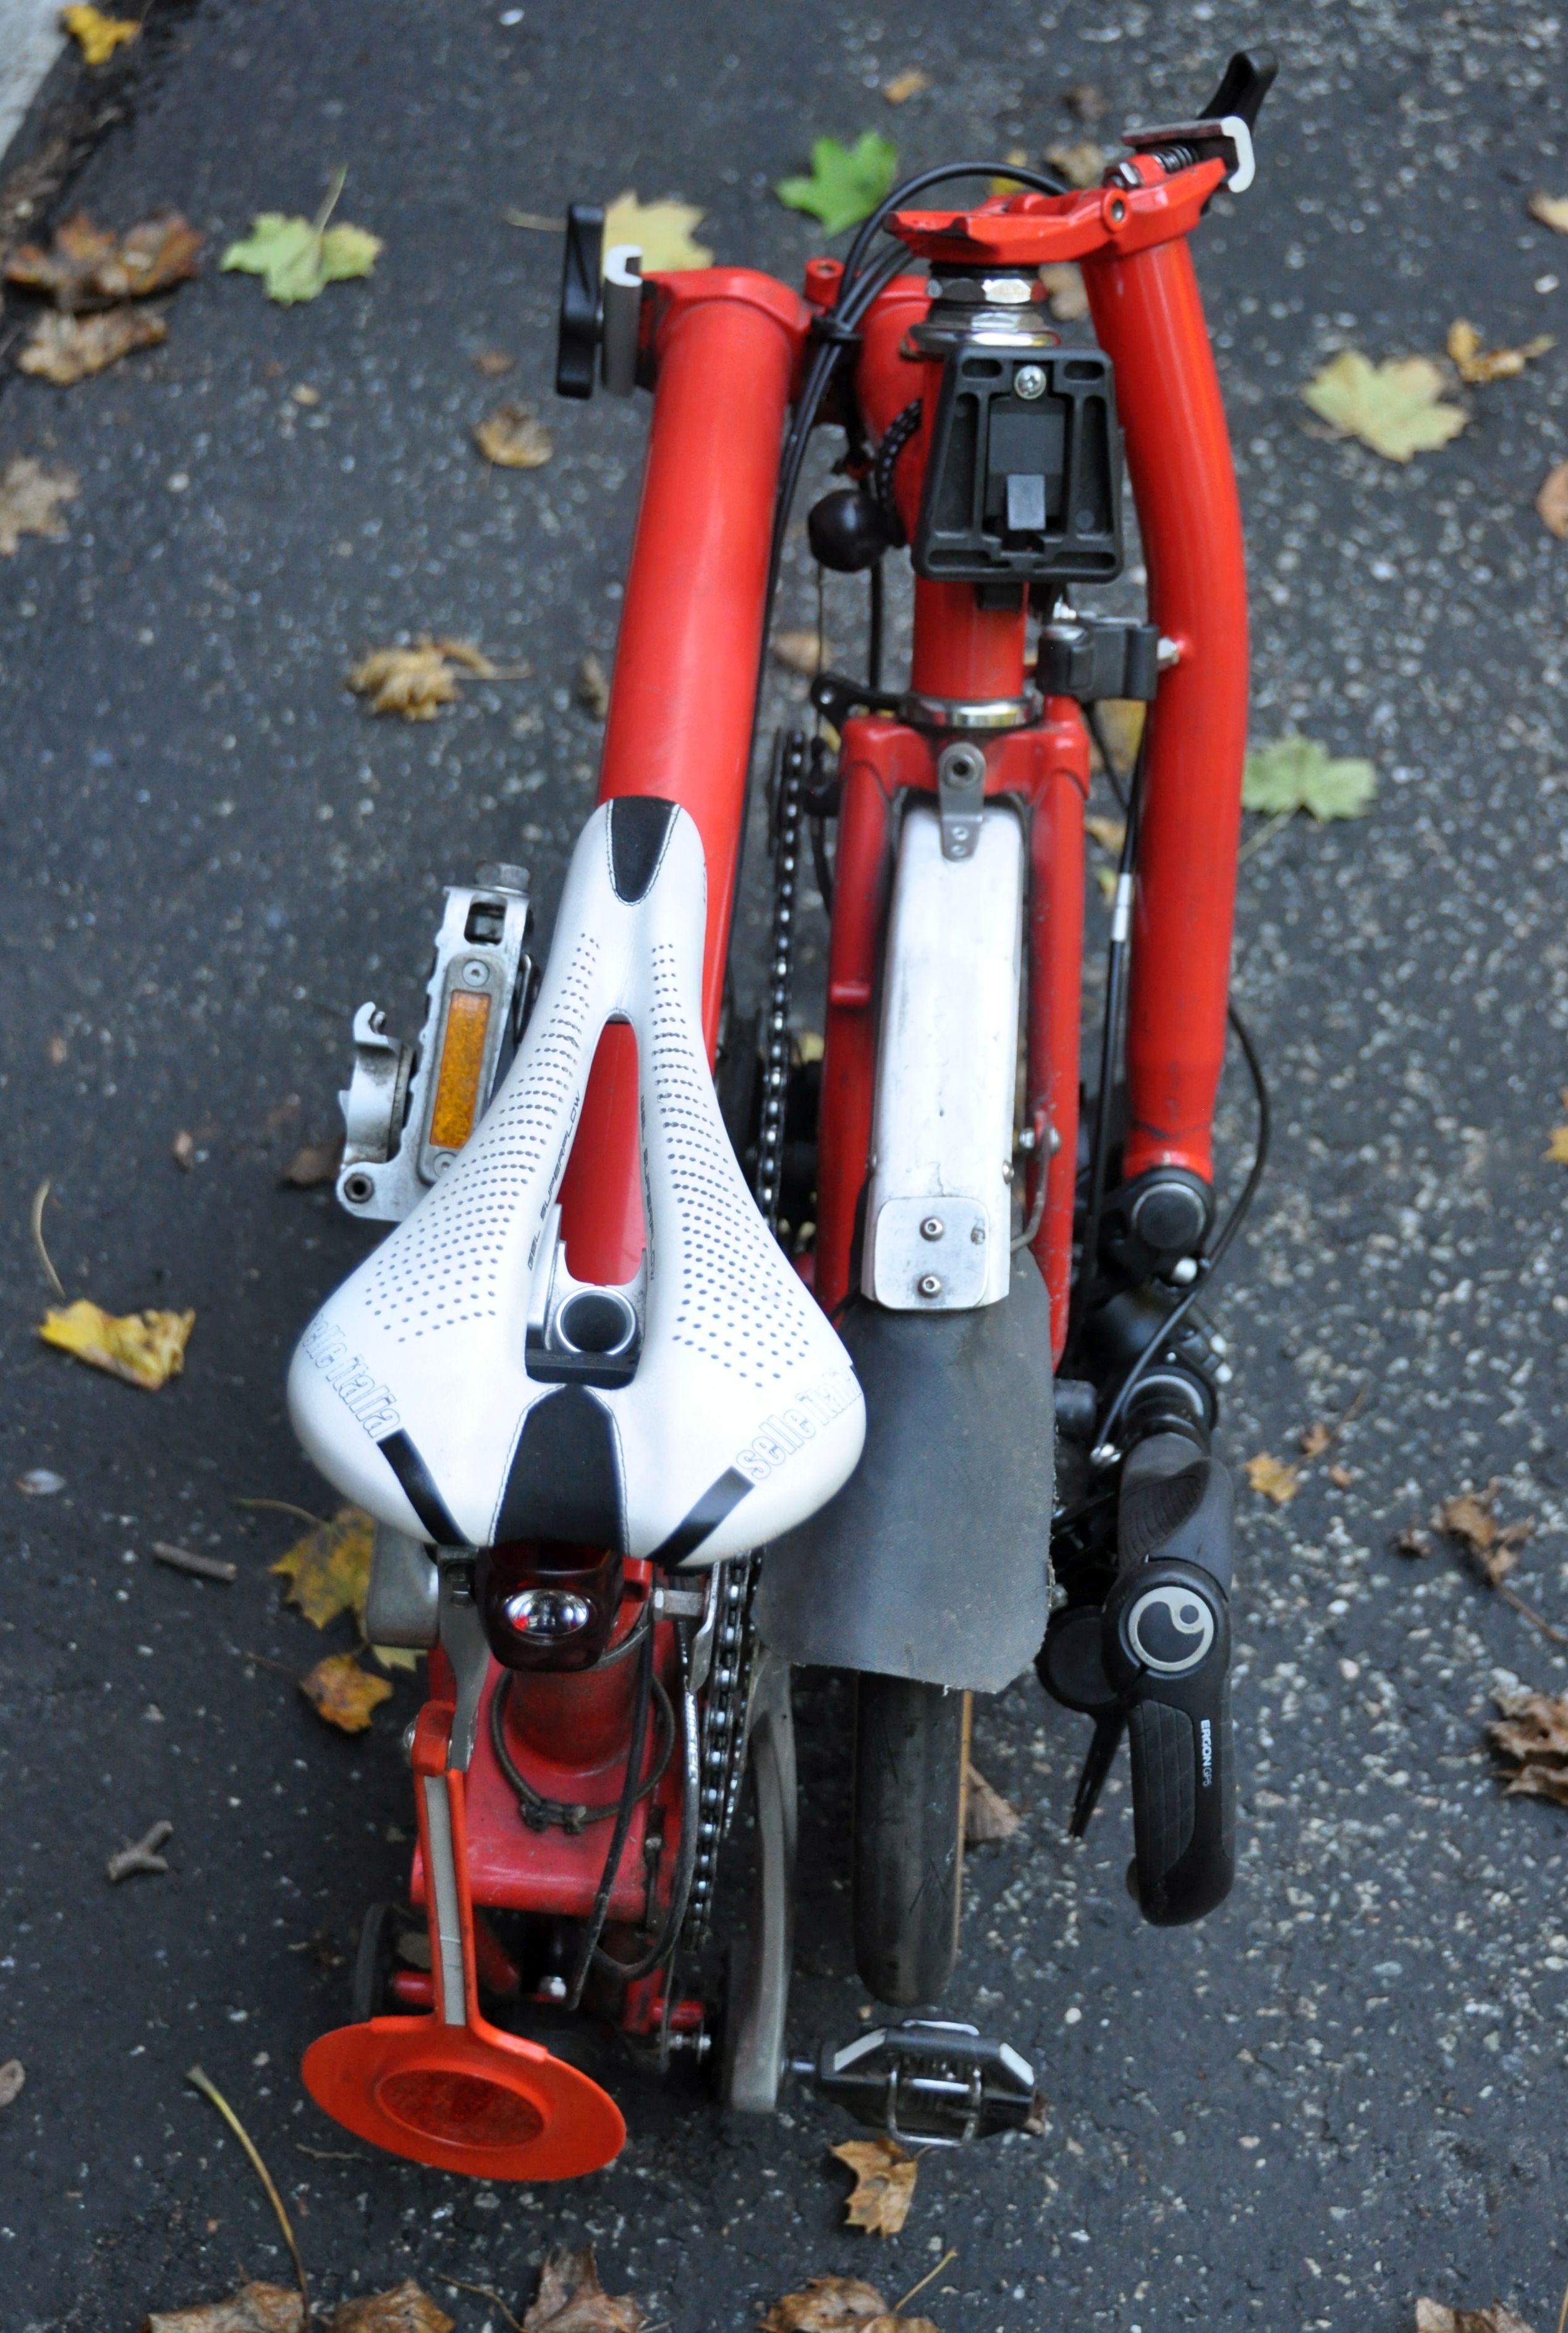
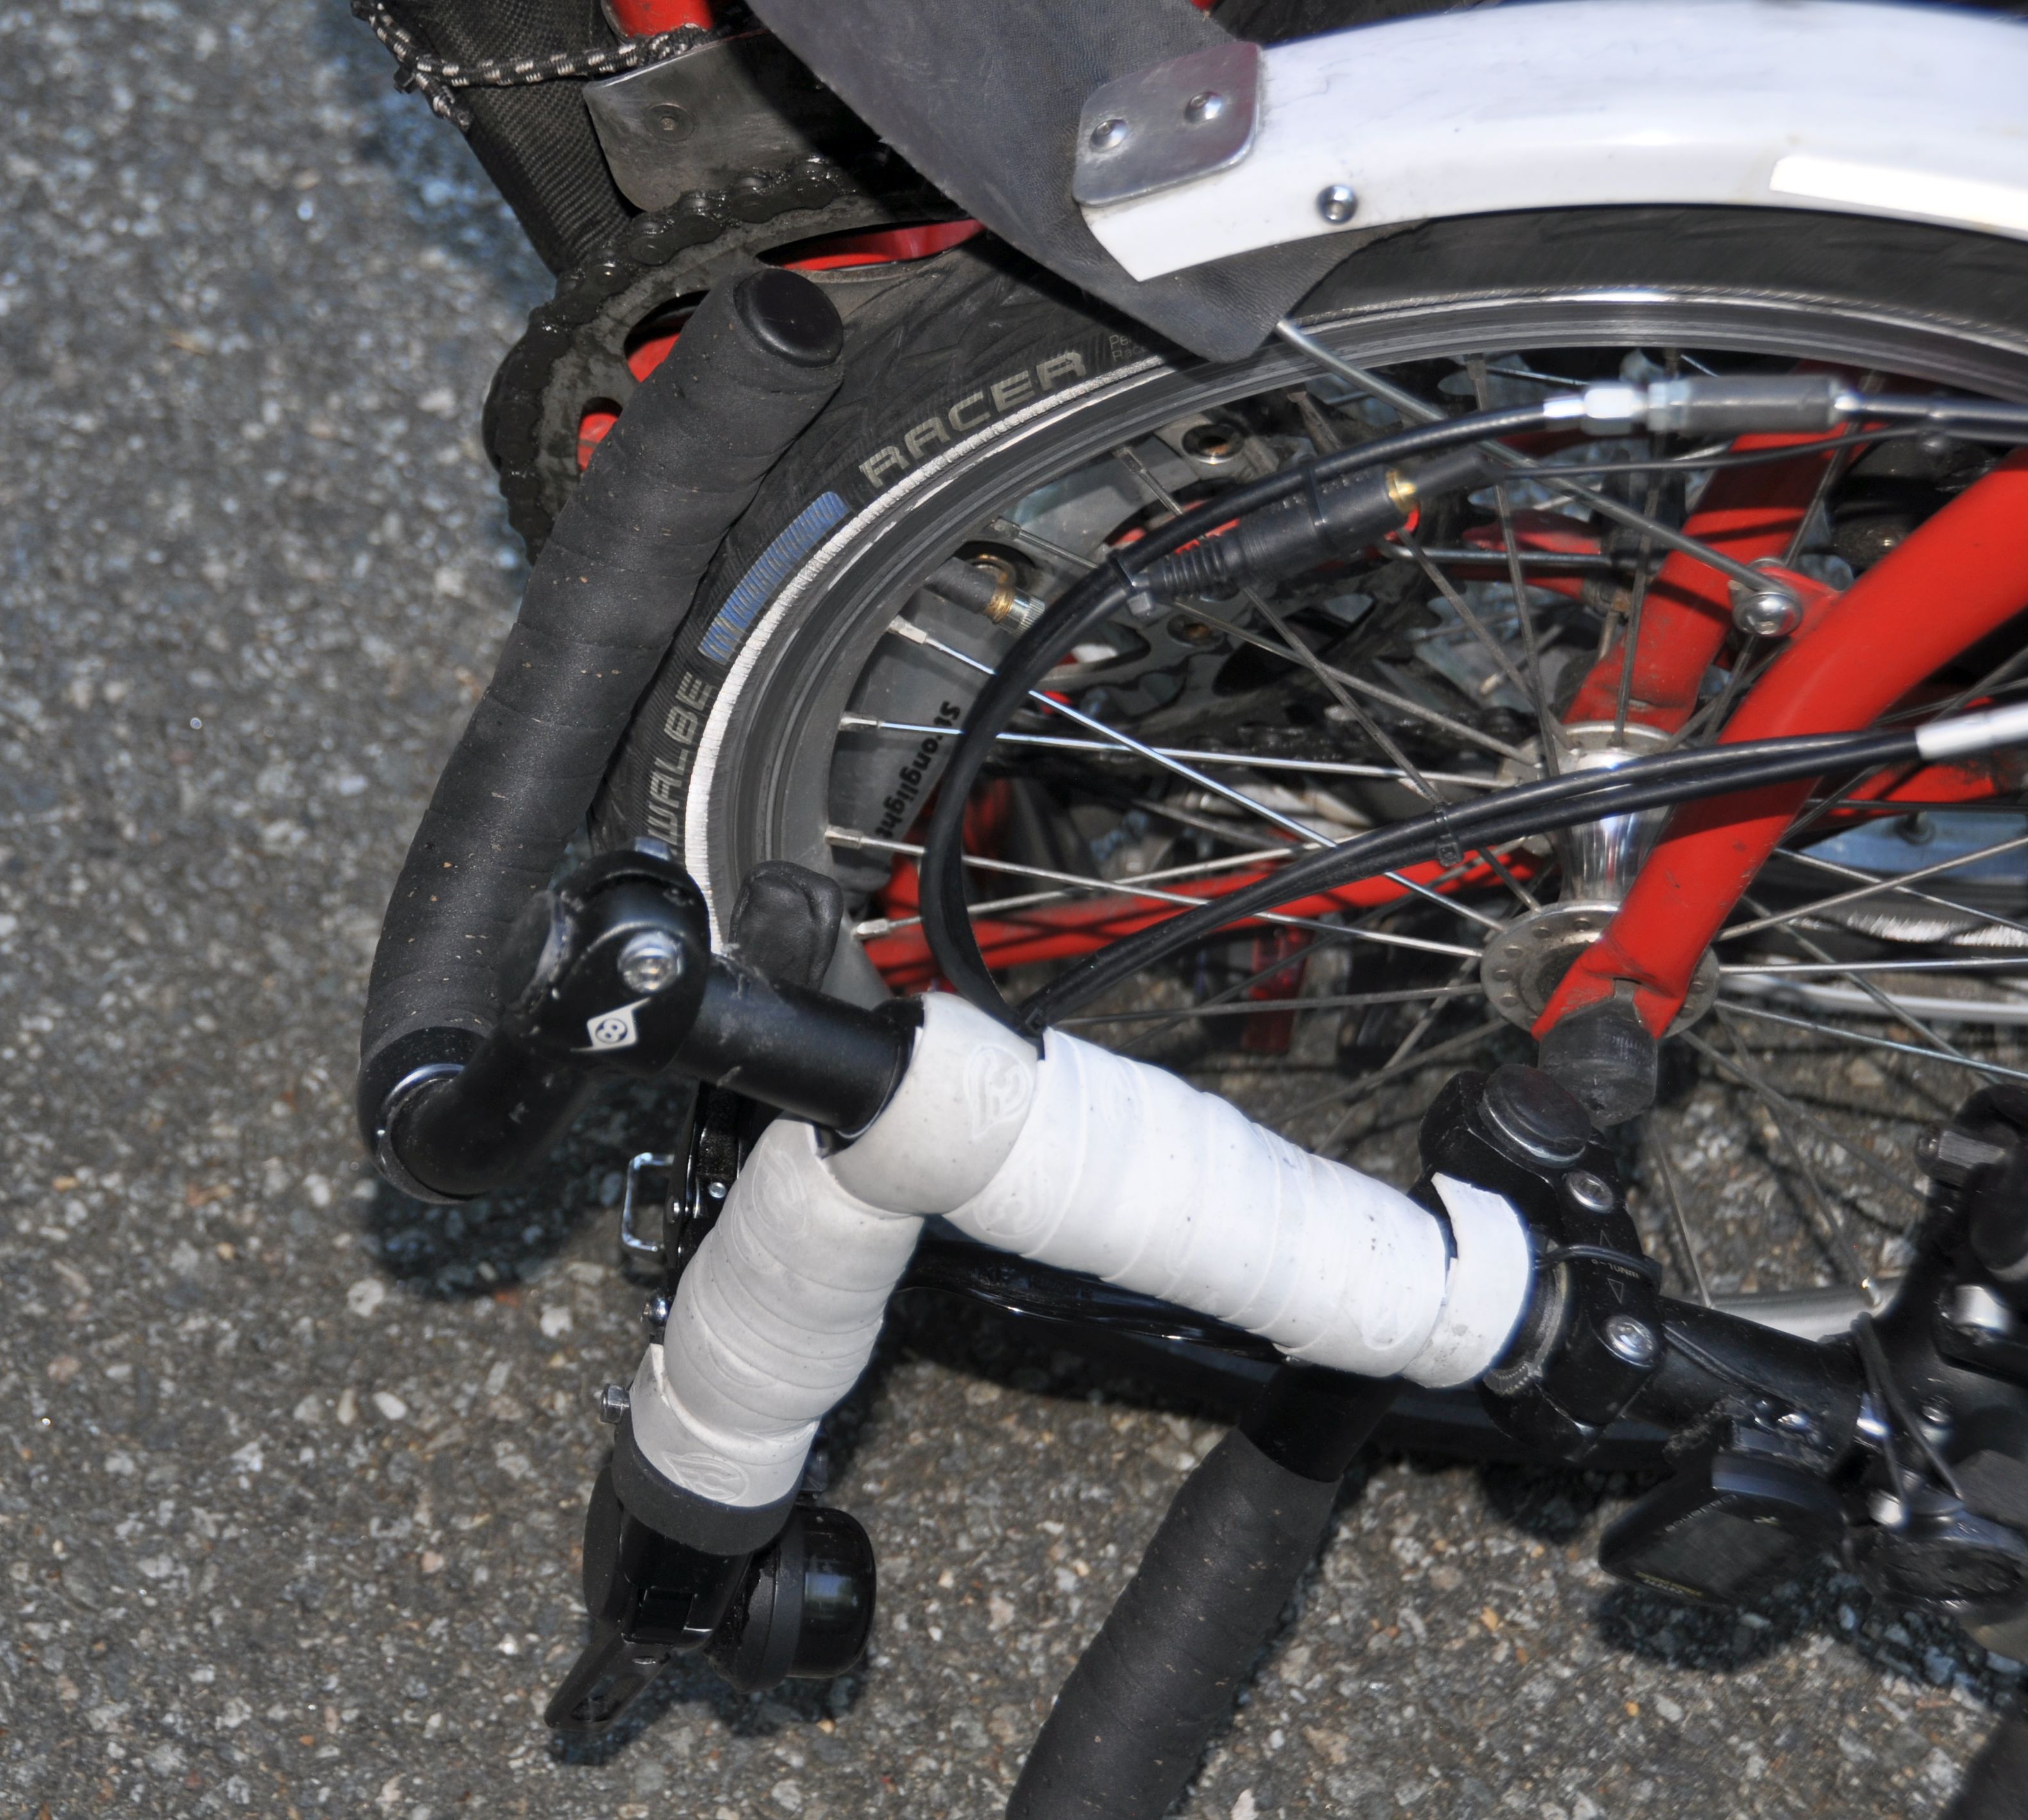
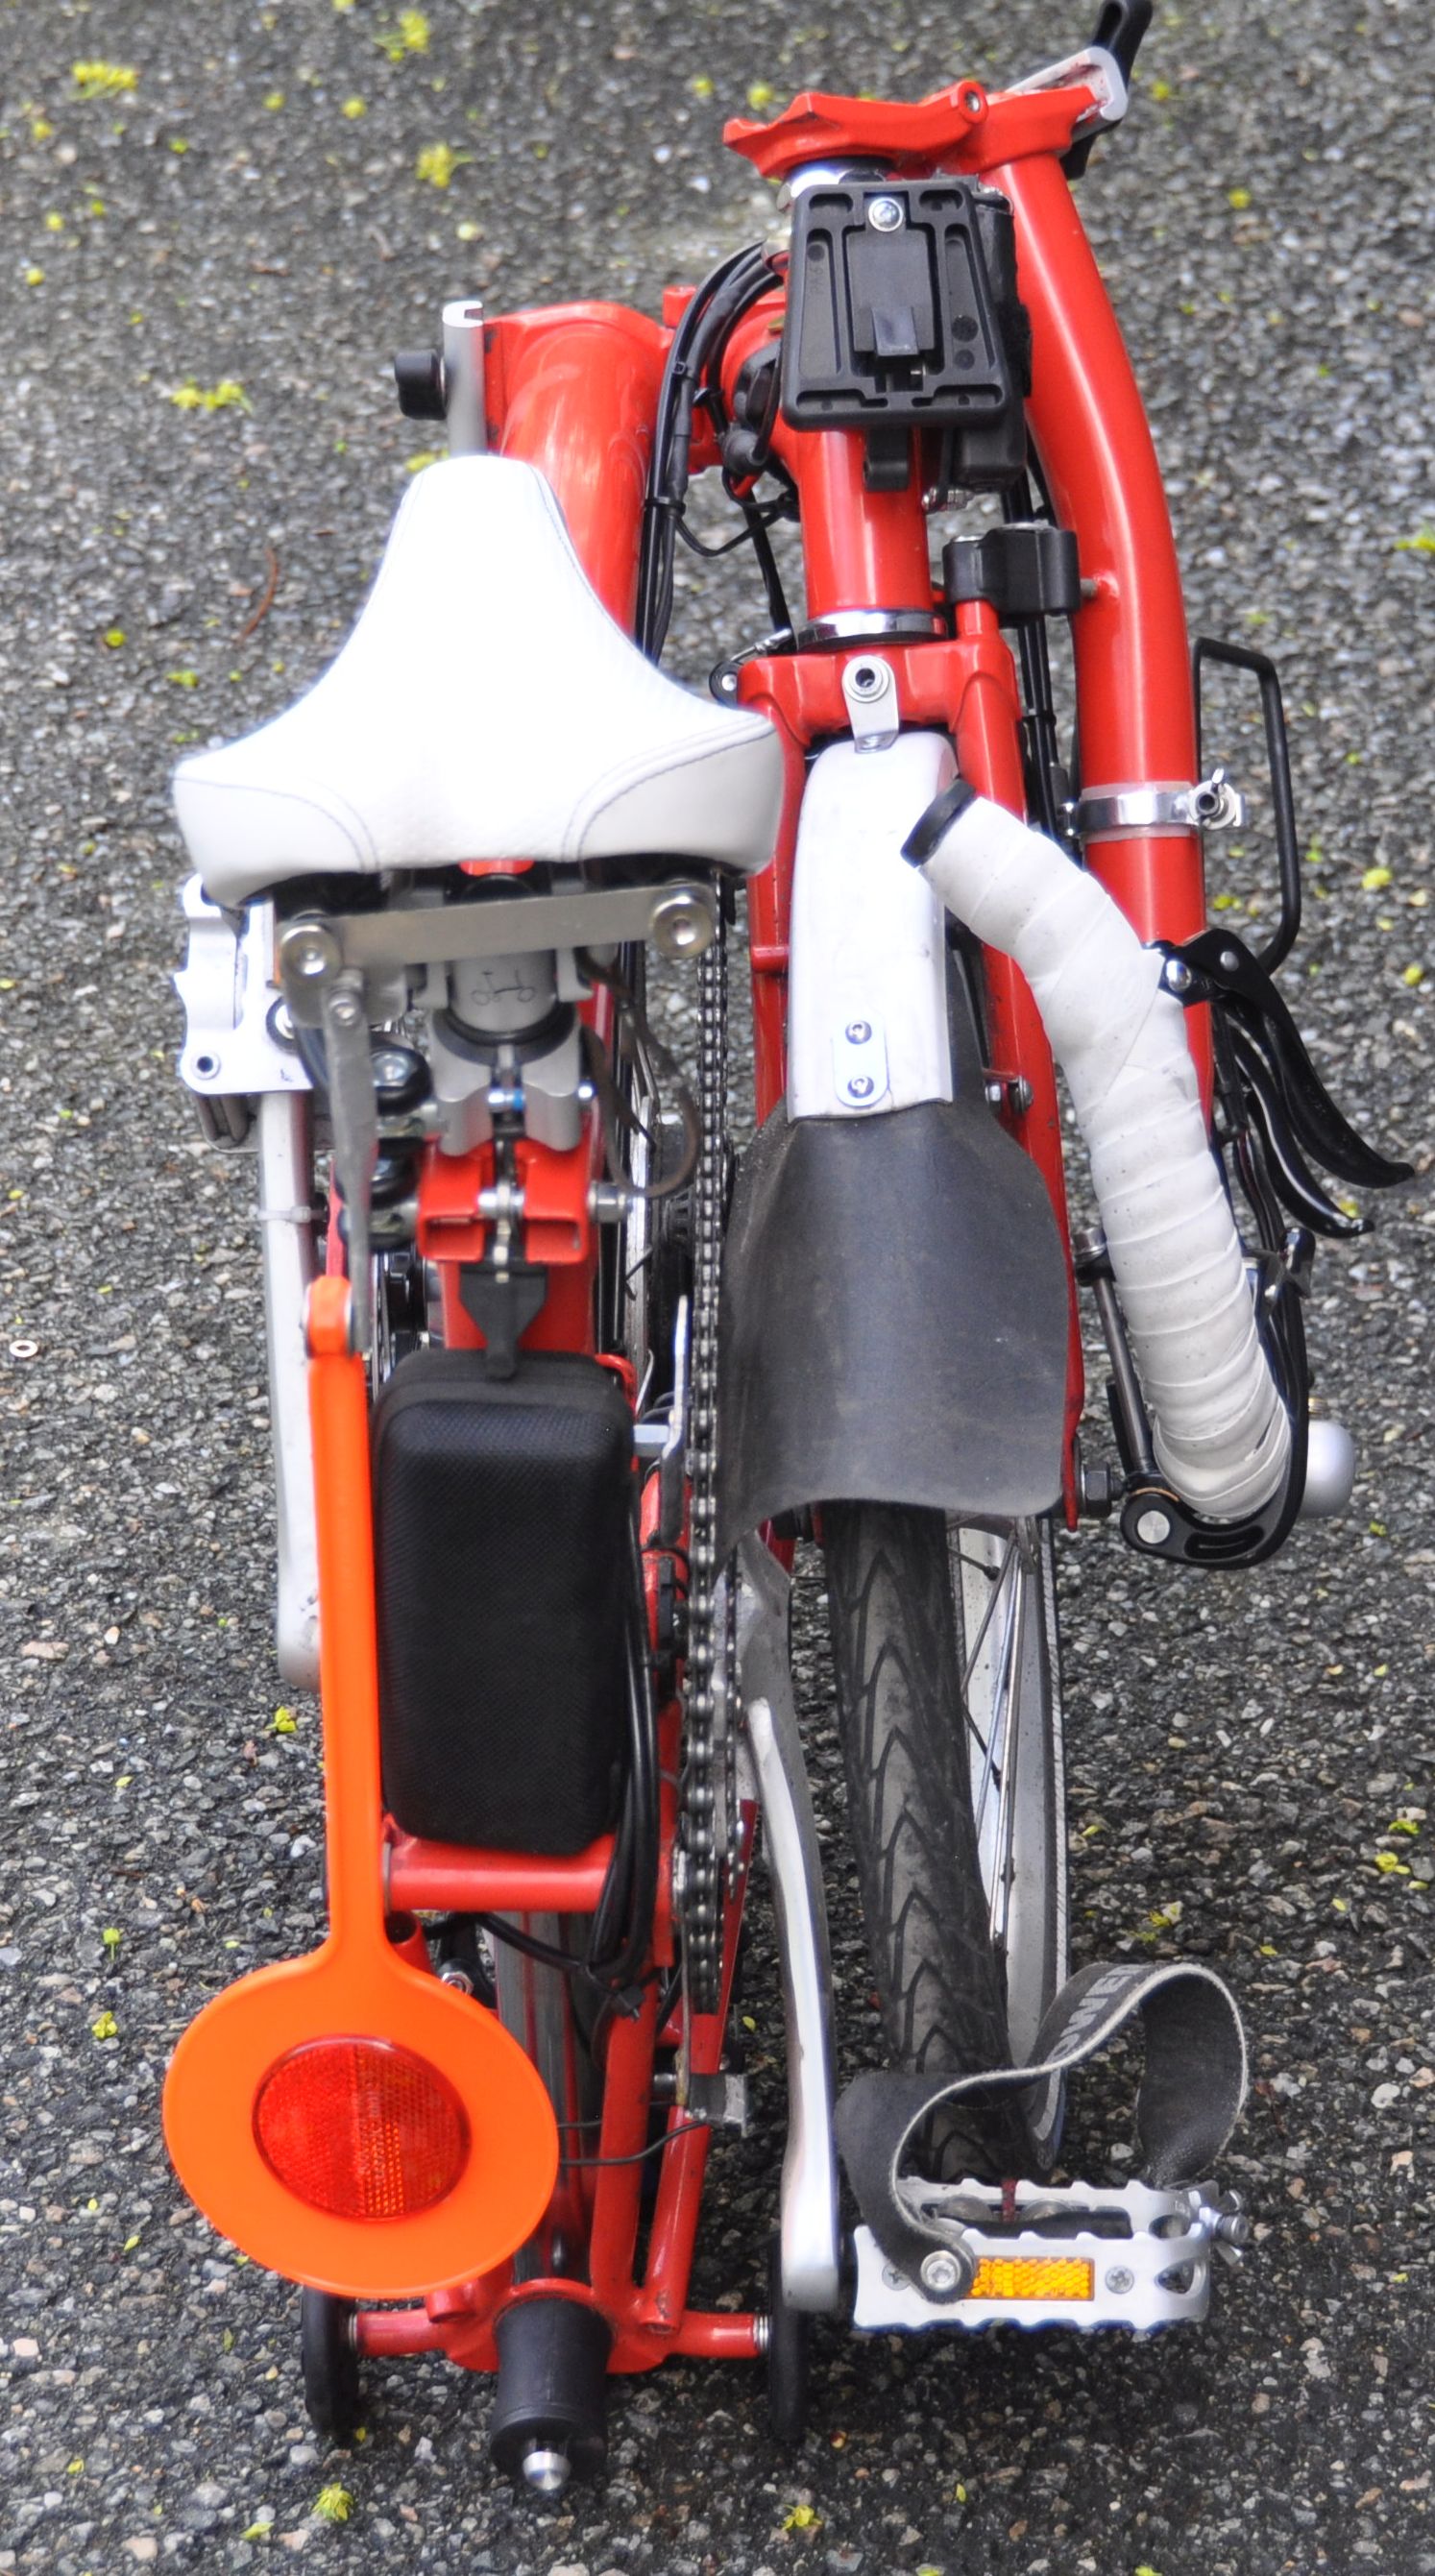
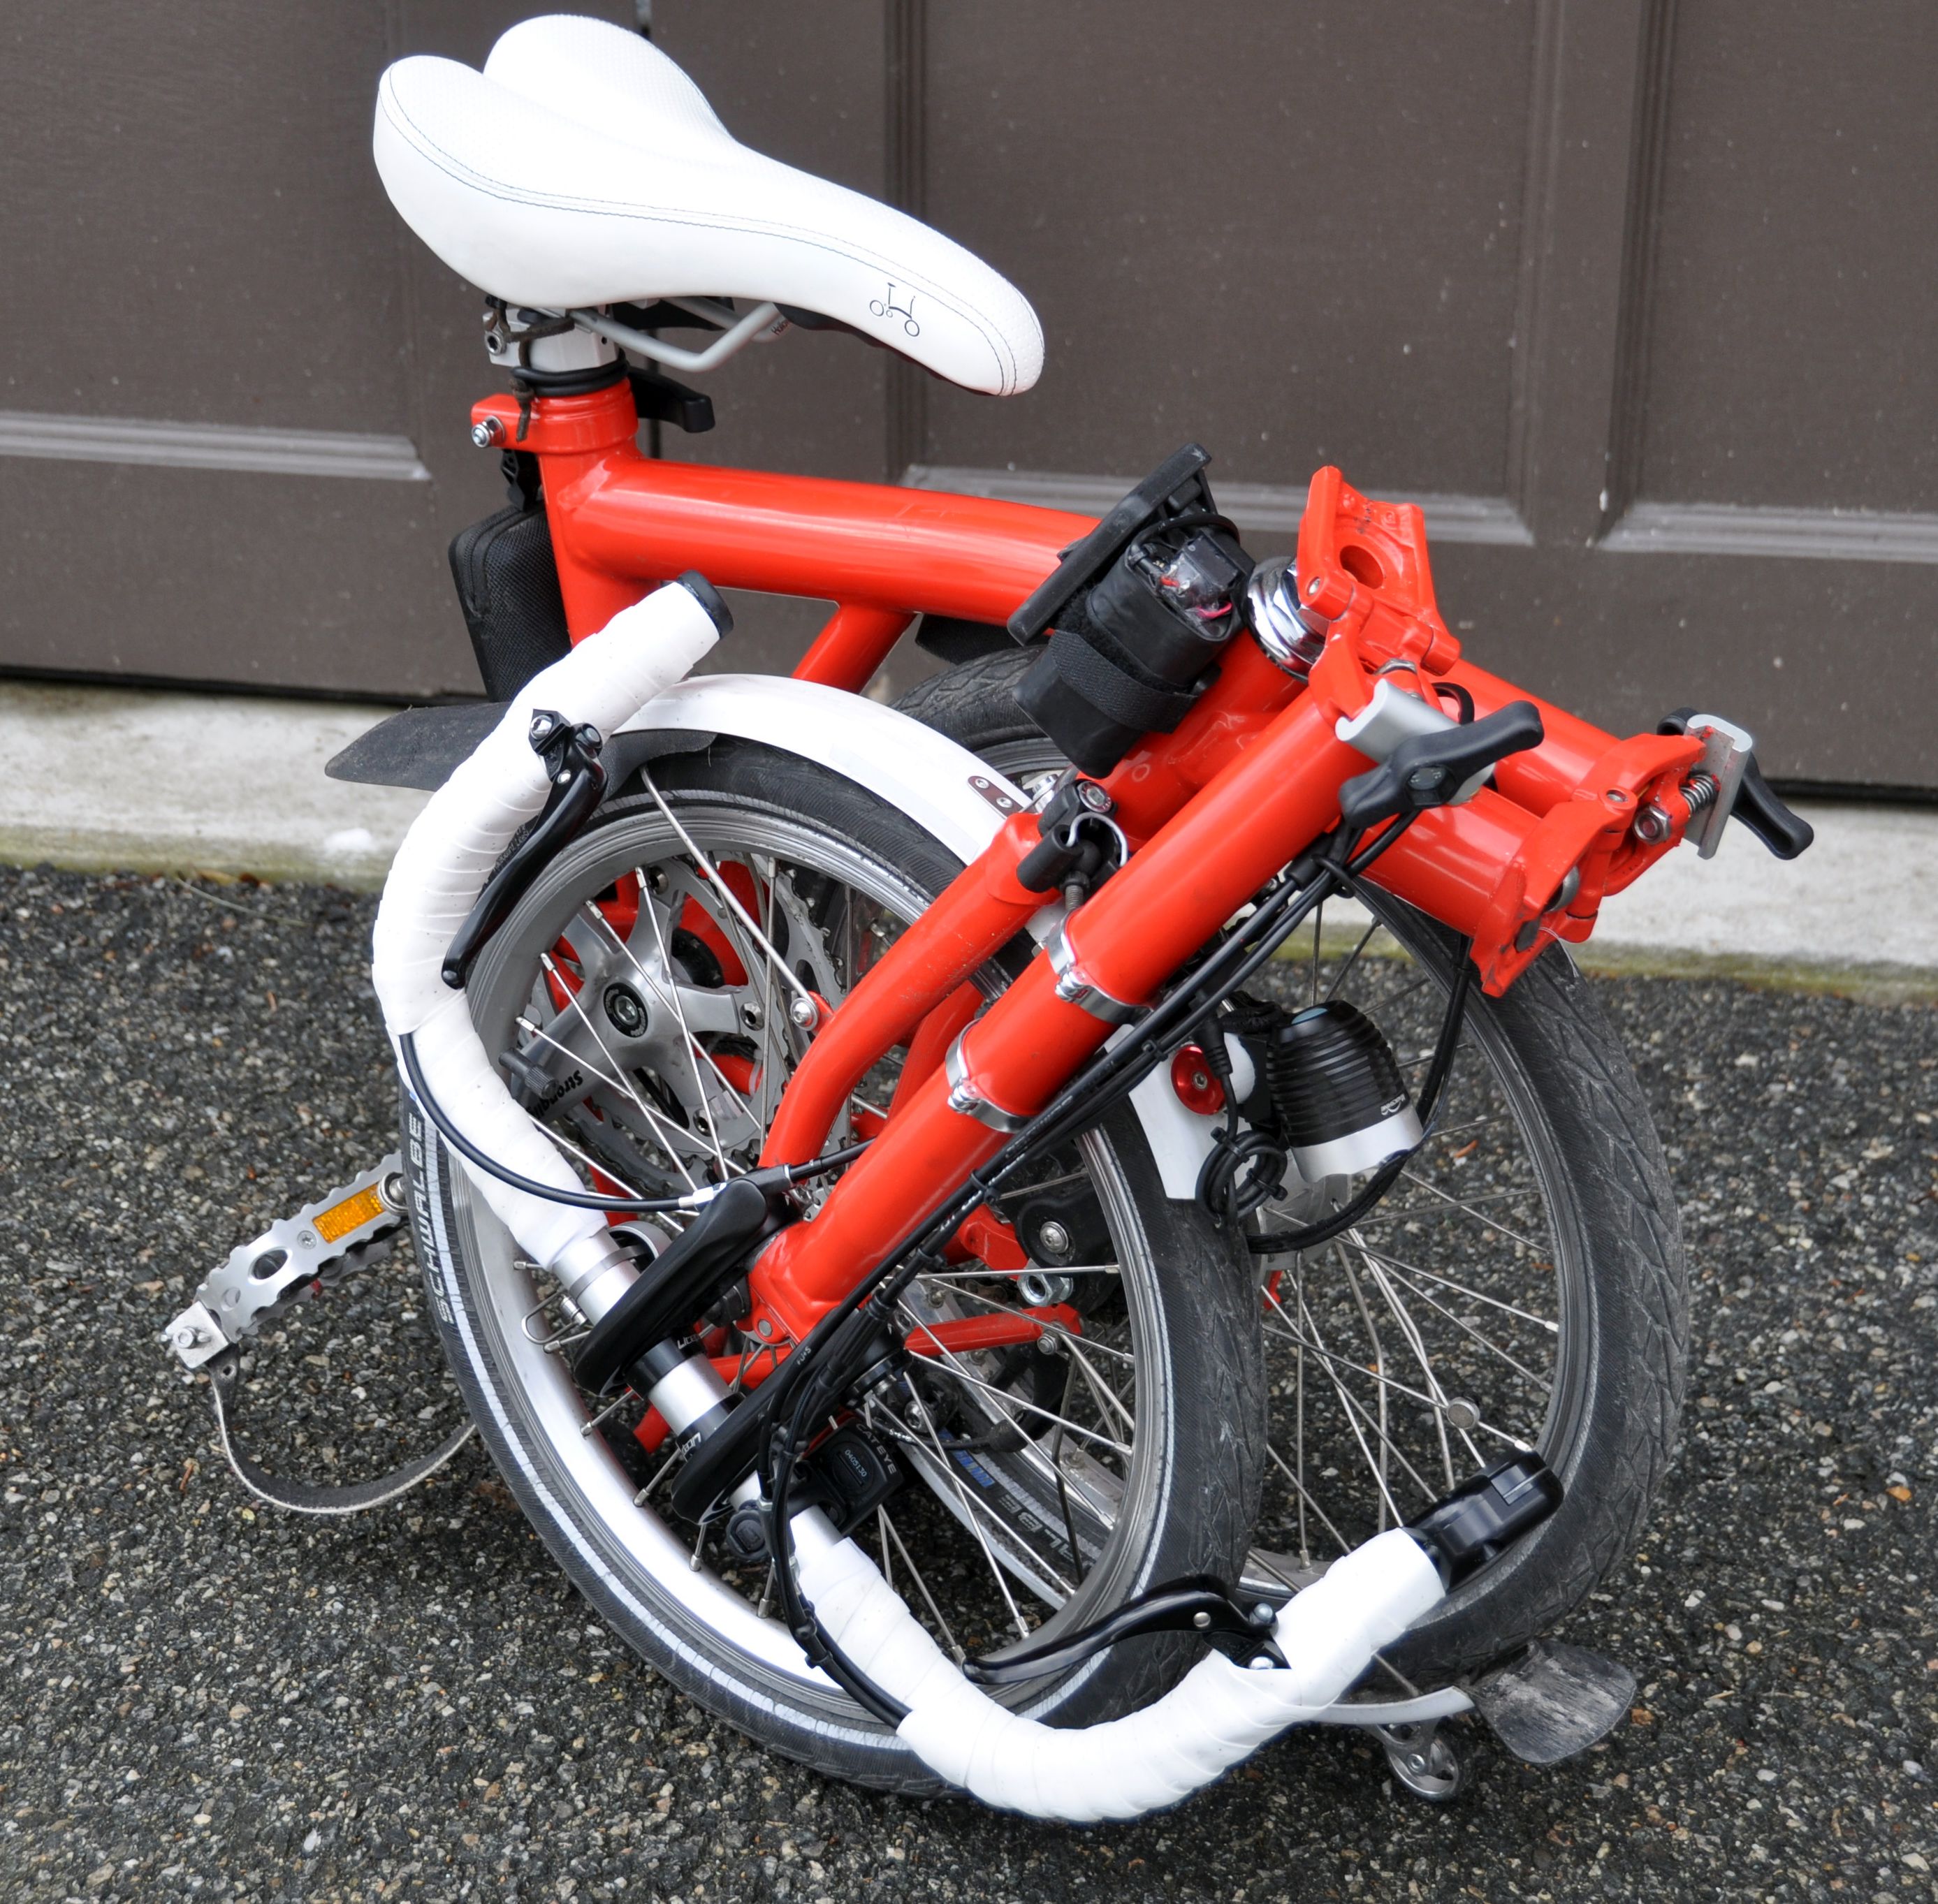
The fold is very compact – completely flat and narrow, and fits easily into the Brompton cardboard box:

A length of 58 cm is needed for the drop ends to clear the front tire during folding. The critical point is not when the handlebar is fully folded, but during folding. A handlebar longer than 58 cm would stand out after folding – so it is exactly 58 cm what you want.
Since this is tight fit, I used a few tricks to optimize it: (1) I moved the center of the handlebar 0.5 cm to the right (this is where I needed clearance with the front tire) (2) I realized that the distance between the drop ends changed when I rotated the flat bar. This happens because the flat bar has a small backsweep, and you can orient the back sweep slightly upwards to move the drop ends a little bit further apart. Alternatively, you could buy a slightly longer bar and optimize the length. You definitely need 58 cm, but you could try 60 cm and trim it if needed. (3) When I rotated the drop ends for the most comfortable position, they touched the ground when the bike was folded. I could get a few extra mm ground clearance buy adjusting the rear Eazy Wheels.
Some details of the folded handlebar:
When I fold the bike, the bar ends point upward. Note that the stem is not straight, but in a zig-zag. This gives me a few extra centimeters of reach.

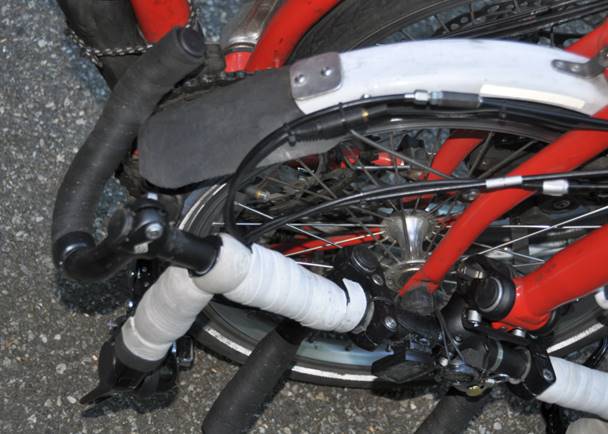
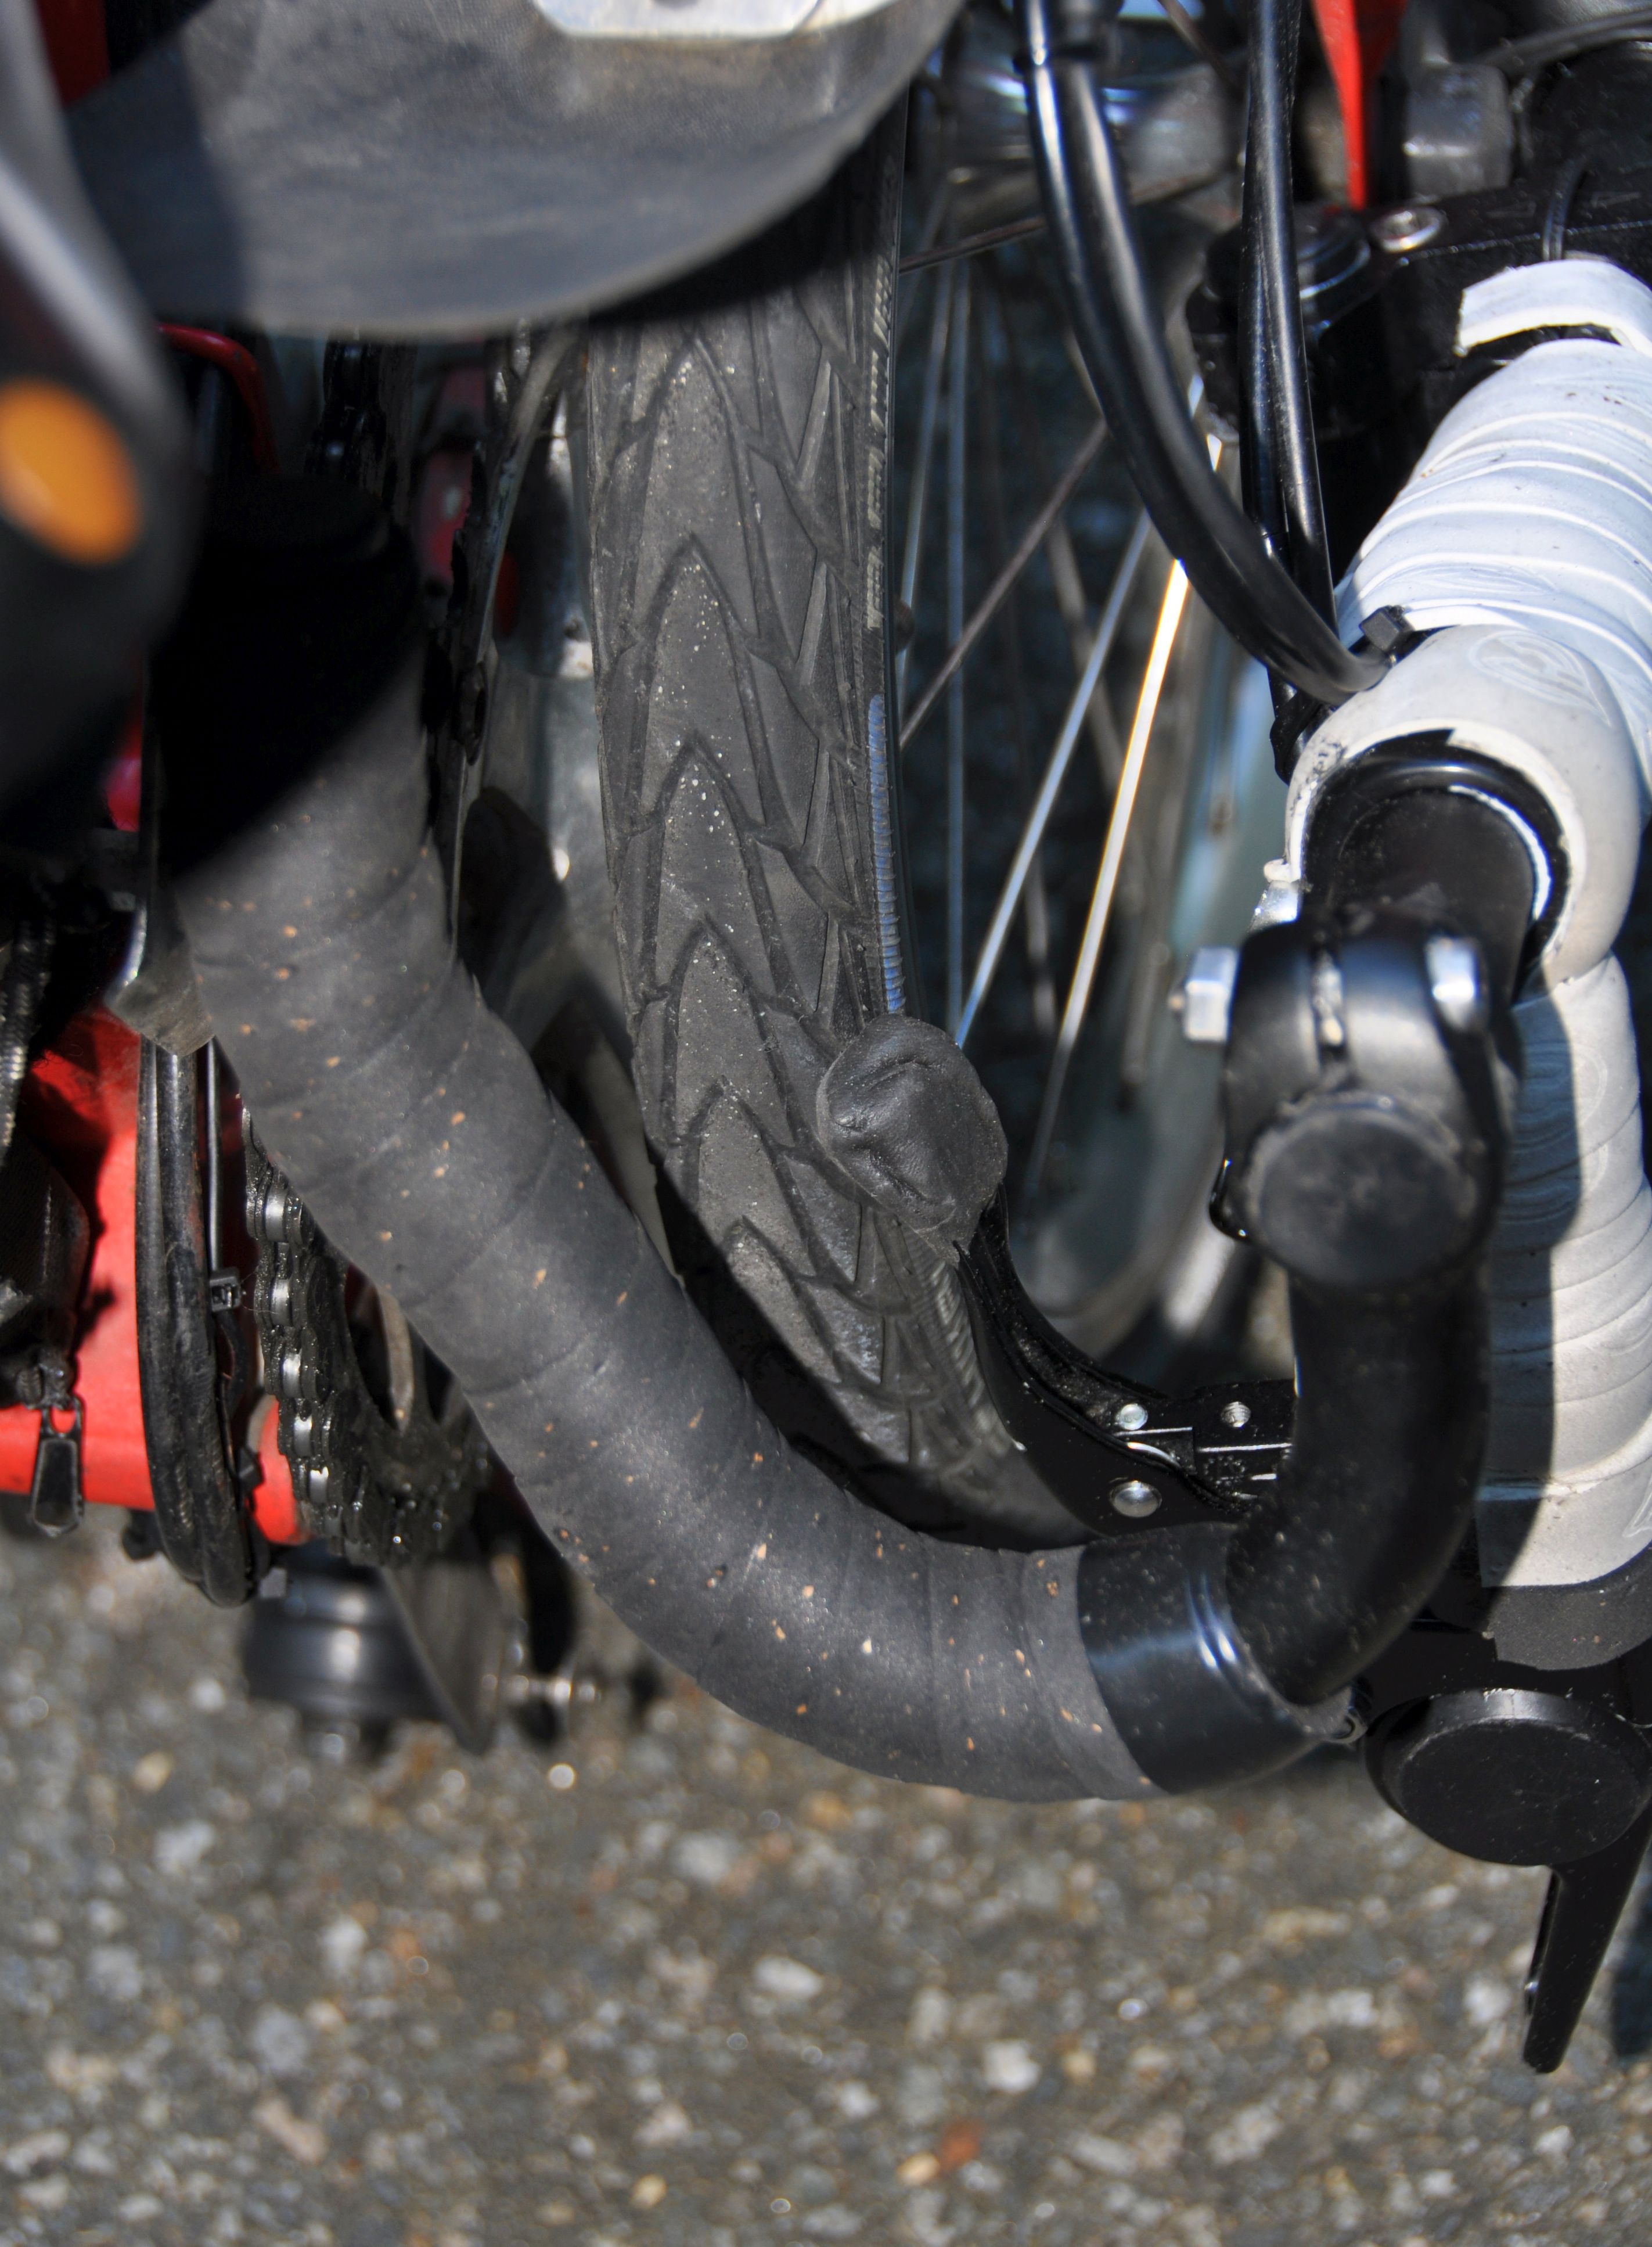
This photo shows the critical moment of the folding when the drop end touches the front tire.
The end of the brake lever (which bents out like a hook) touched the front tire when folding. I cut it off, filed it round, and molded the end with Sugru (moldable glue). Otherwise, one could have tightened the brake lever with velcro to move it out of the way – but this would have been one more step when folding the bike.
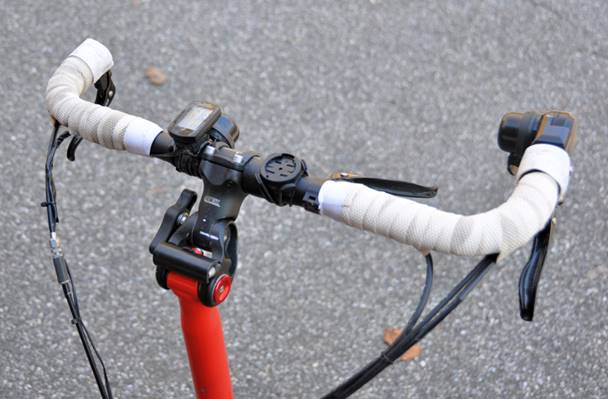
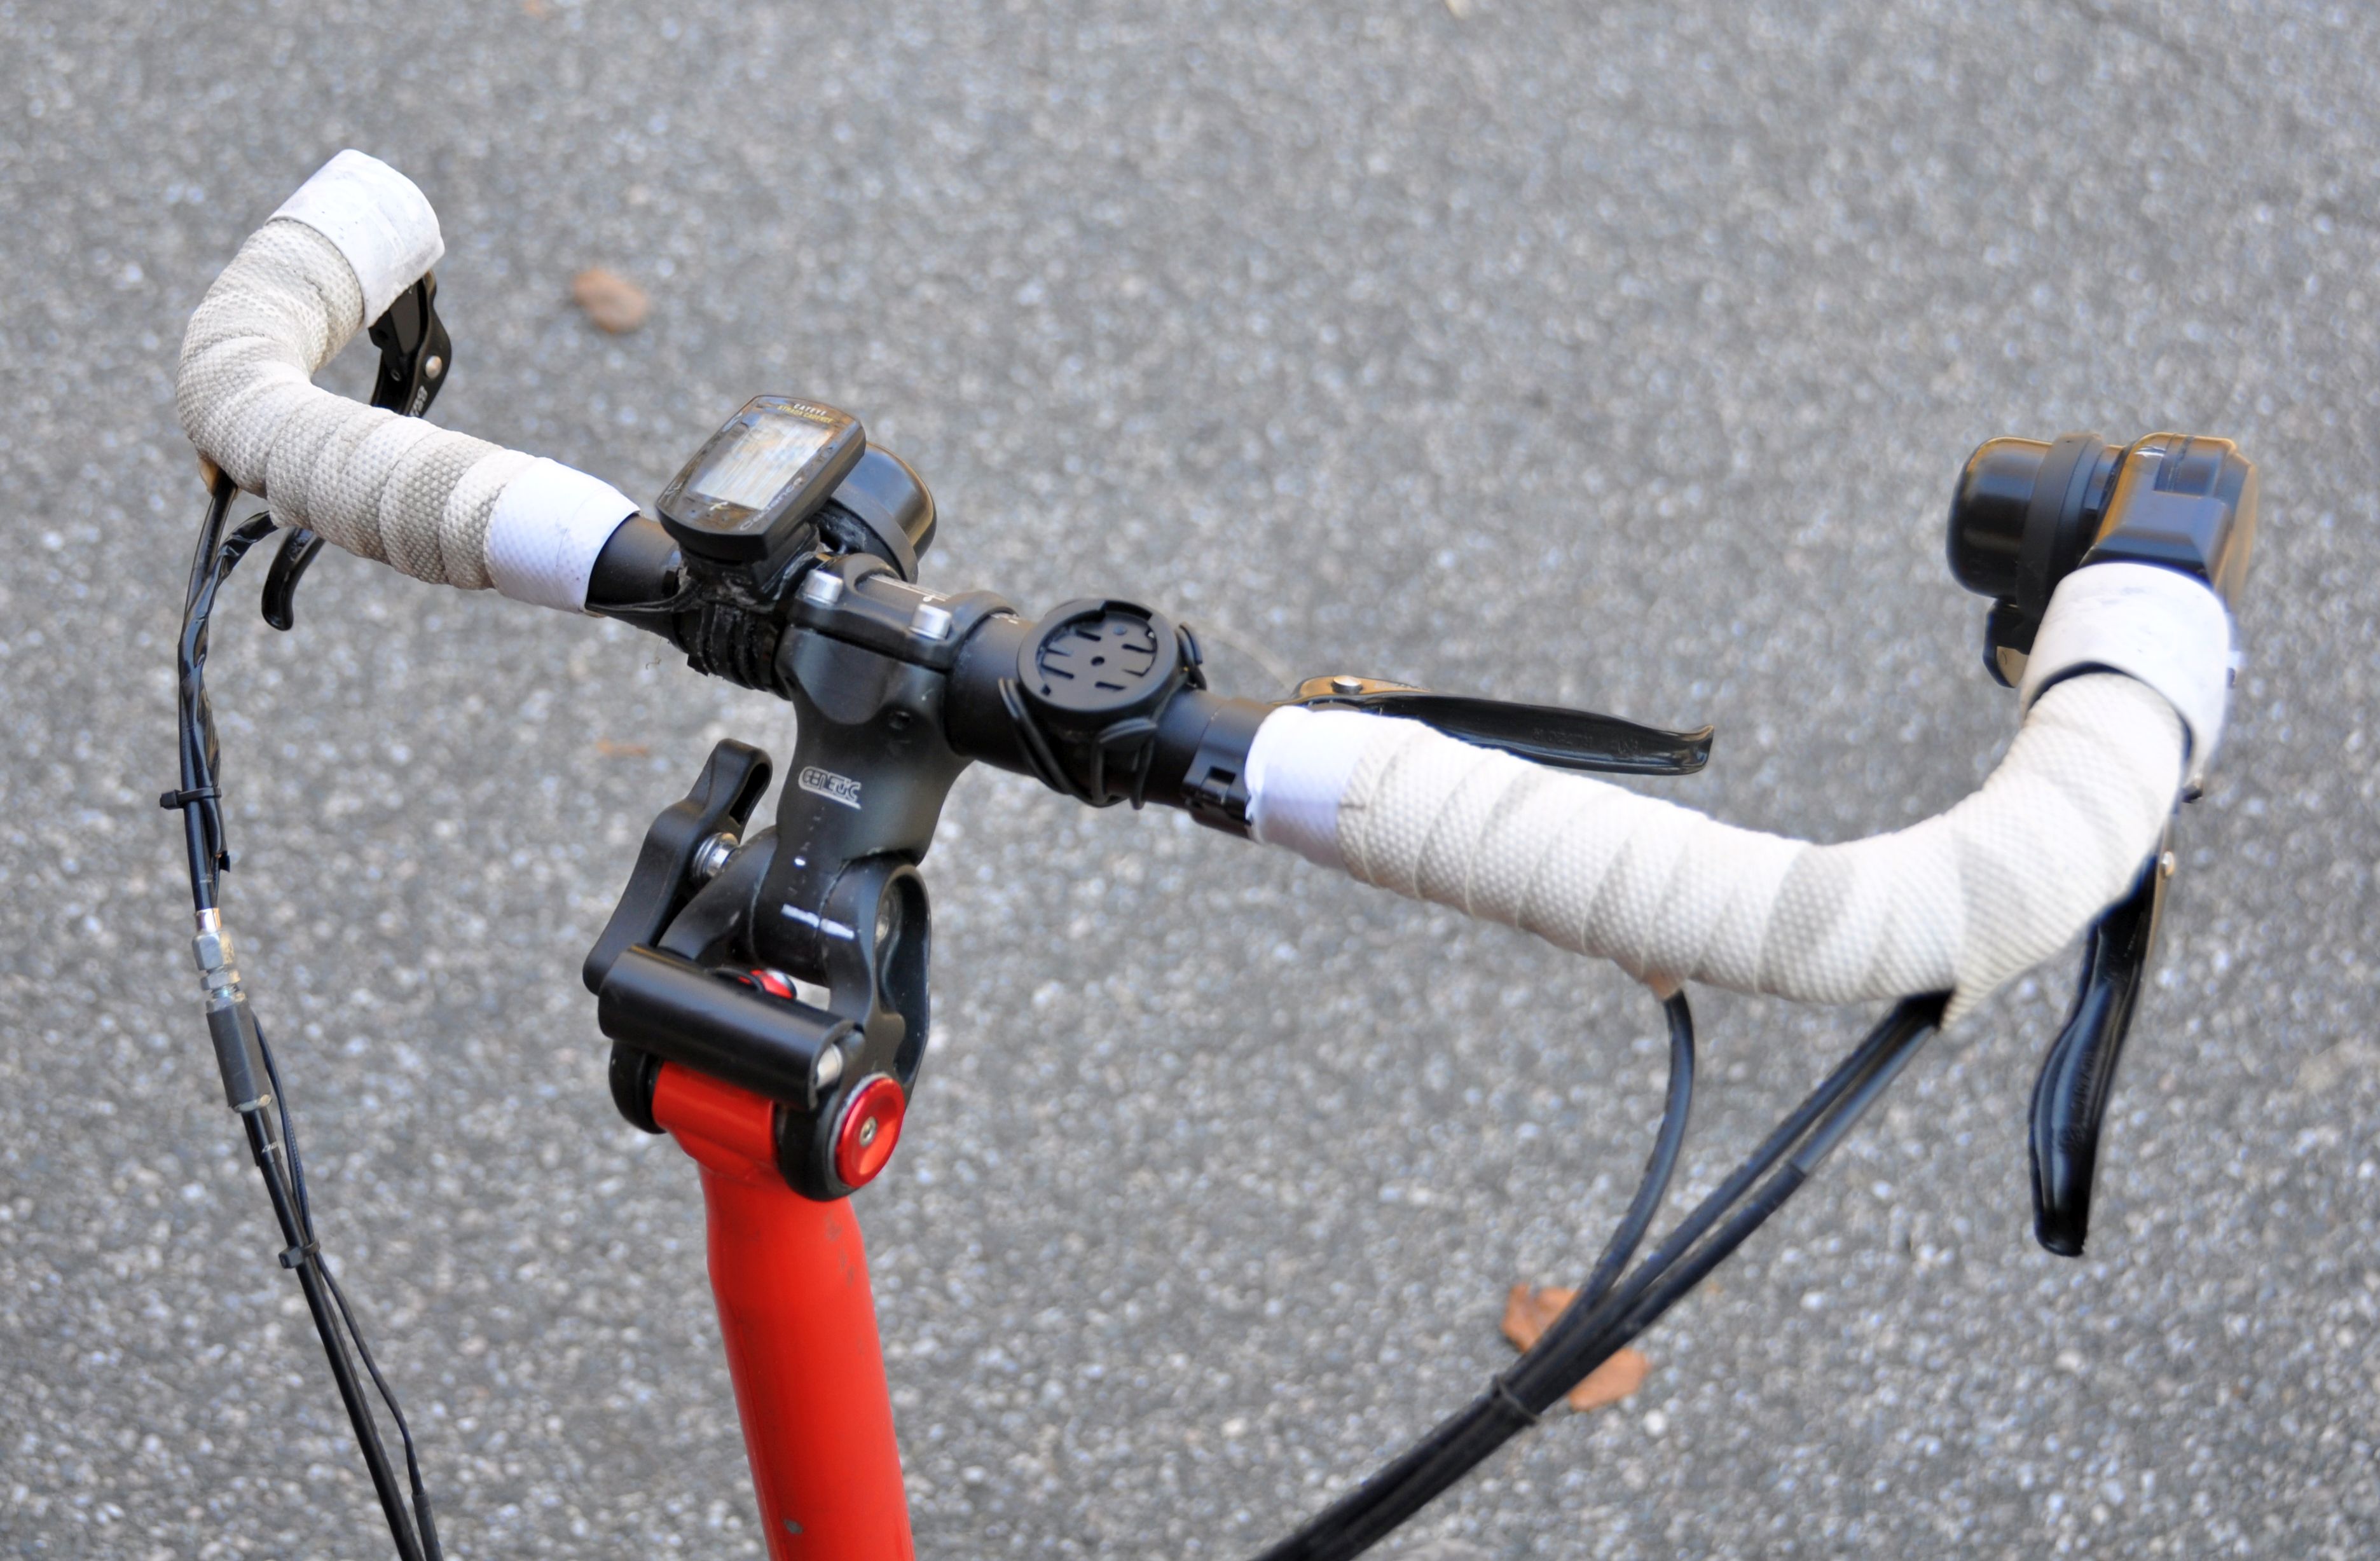
Note: Improvement for brake levers
Since I wanted keep the folded bike small, I couldn't put brake levers on the drop bar ends in the usual places. What I did was an asymmetric configuration, where the left lever was aero style and mounted at the end of the bar end, and the right lever a standard drop bar lever (see above). I thought I would get used to is, and automatically move my hands to the lever for braking. However, I could never adjust to the left-right asymmetry, even after many rides.
Fortunately, I found now a way to have an almost fully symmetric setup, by using a middle position for both levers. It works much better! And the Brompton still folds, without anything sticking out.
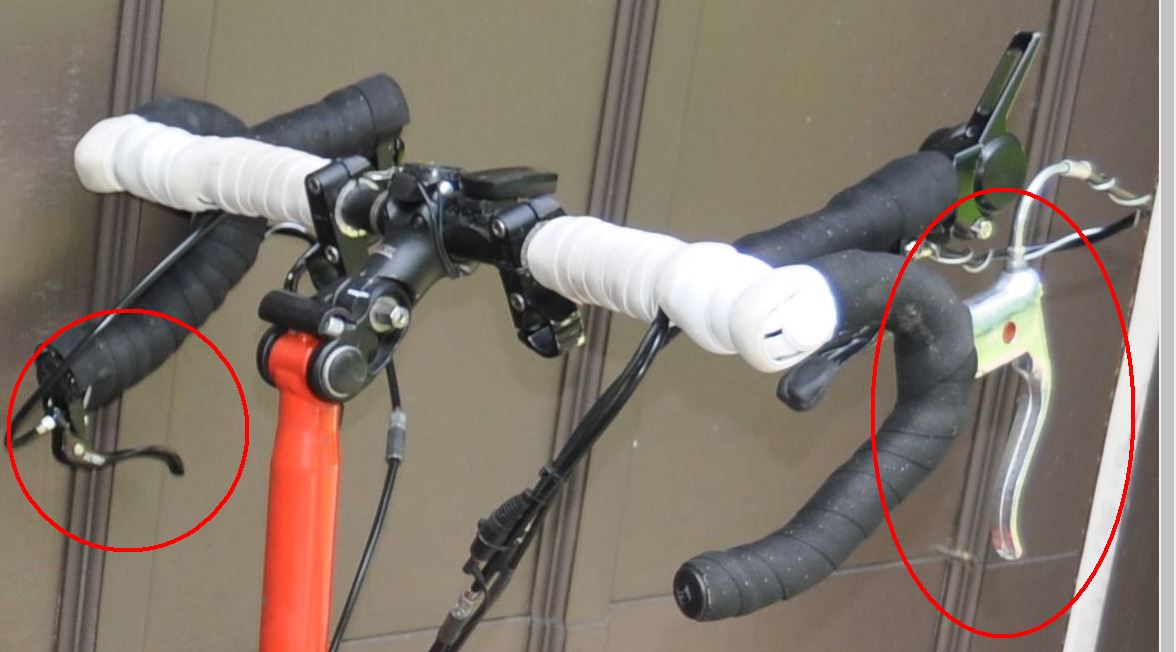
The asymmetric setup of the brake levers

The new setup of the brake levers
The bike still folds without anything sticking out
Cables for brakes and gears Back to top
I am now using compressionless brake housing and polished brake and gear cables --- big improvement, I highly recommend it. I chose the Pro cables from Jagwire and have put them already on two of my bikes.
Switching gears for the Alfine-11 is now much smoother, and I have fewer skips. The polished inner cables reduce the friction substantially. The compressionless outer housing means that you lose less travel of the cable when you brake. The rear brake is no longer spongy. For the first time, I have now brakes where the rear and front brakes feel similar!
The compresssionless brake housing is stiffer, but does not cause any issues at all for folding the bike. Those Pro cables will probably not make a difference for the front brake of a regular bike where the cables are short, but for folding bikes, they provide noticeable improvements. So unless you are perfectly happy with the performance of your brake, you should consider this cable upgrade!
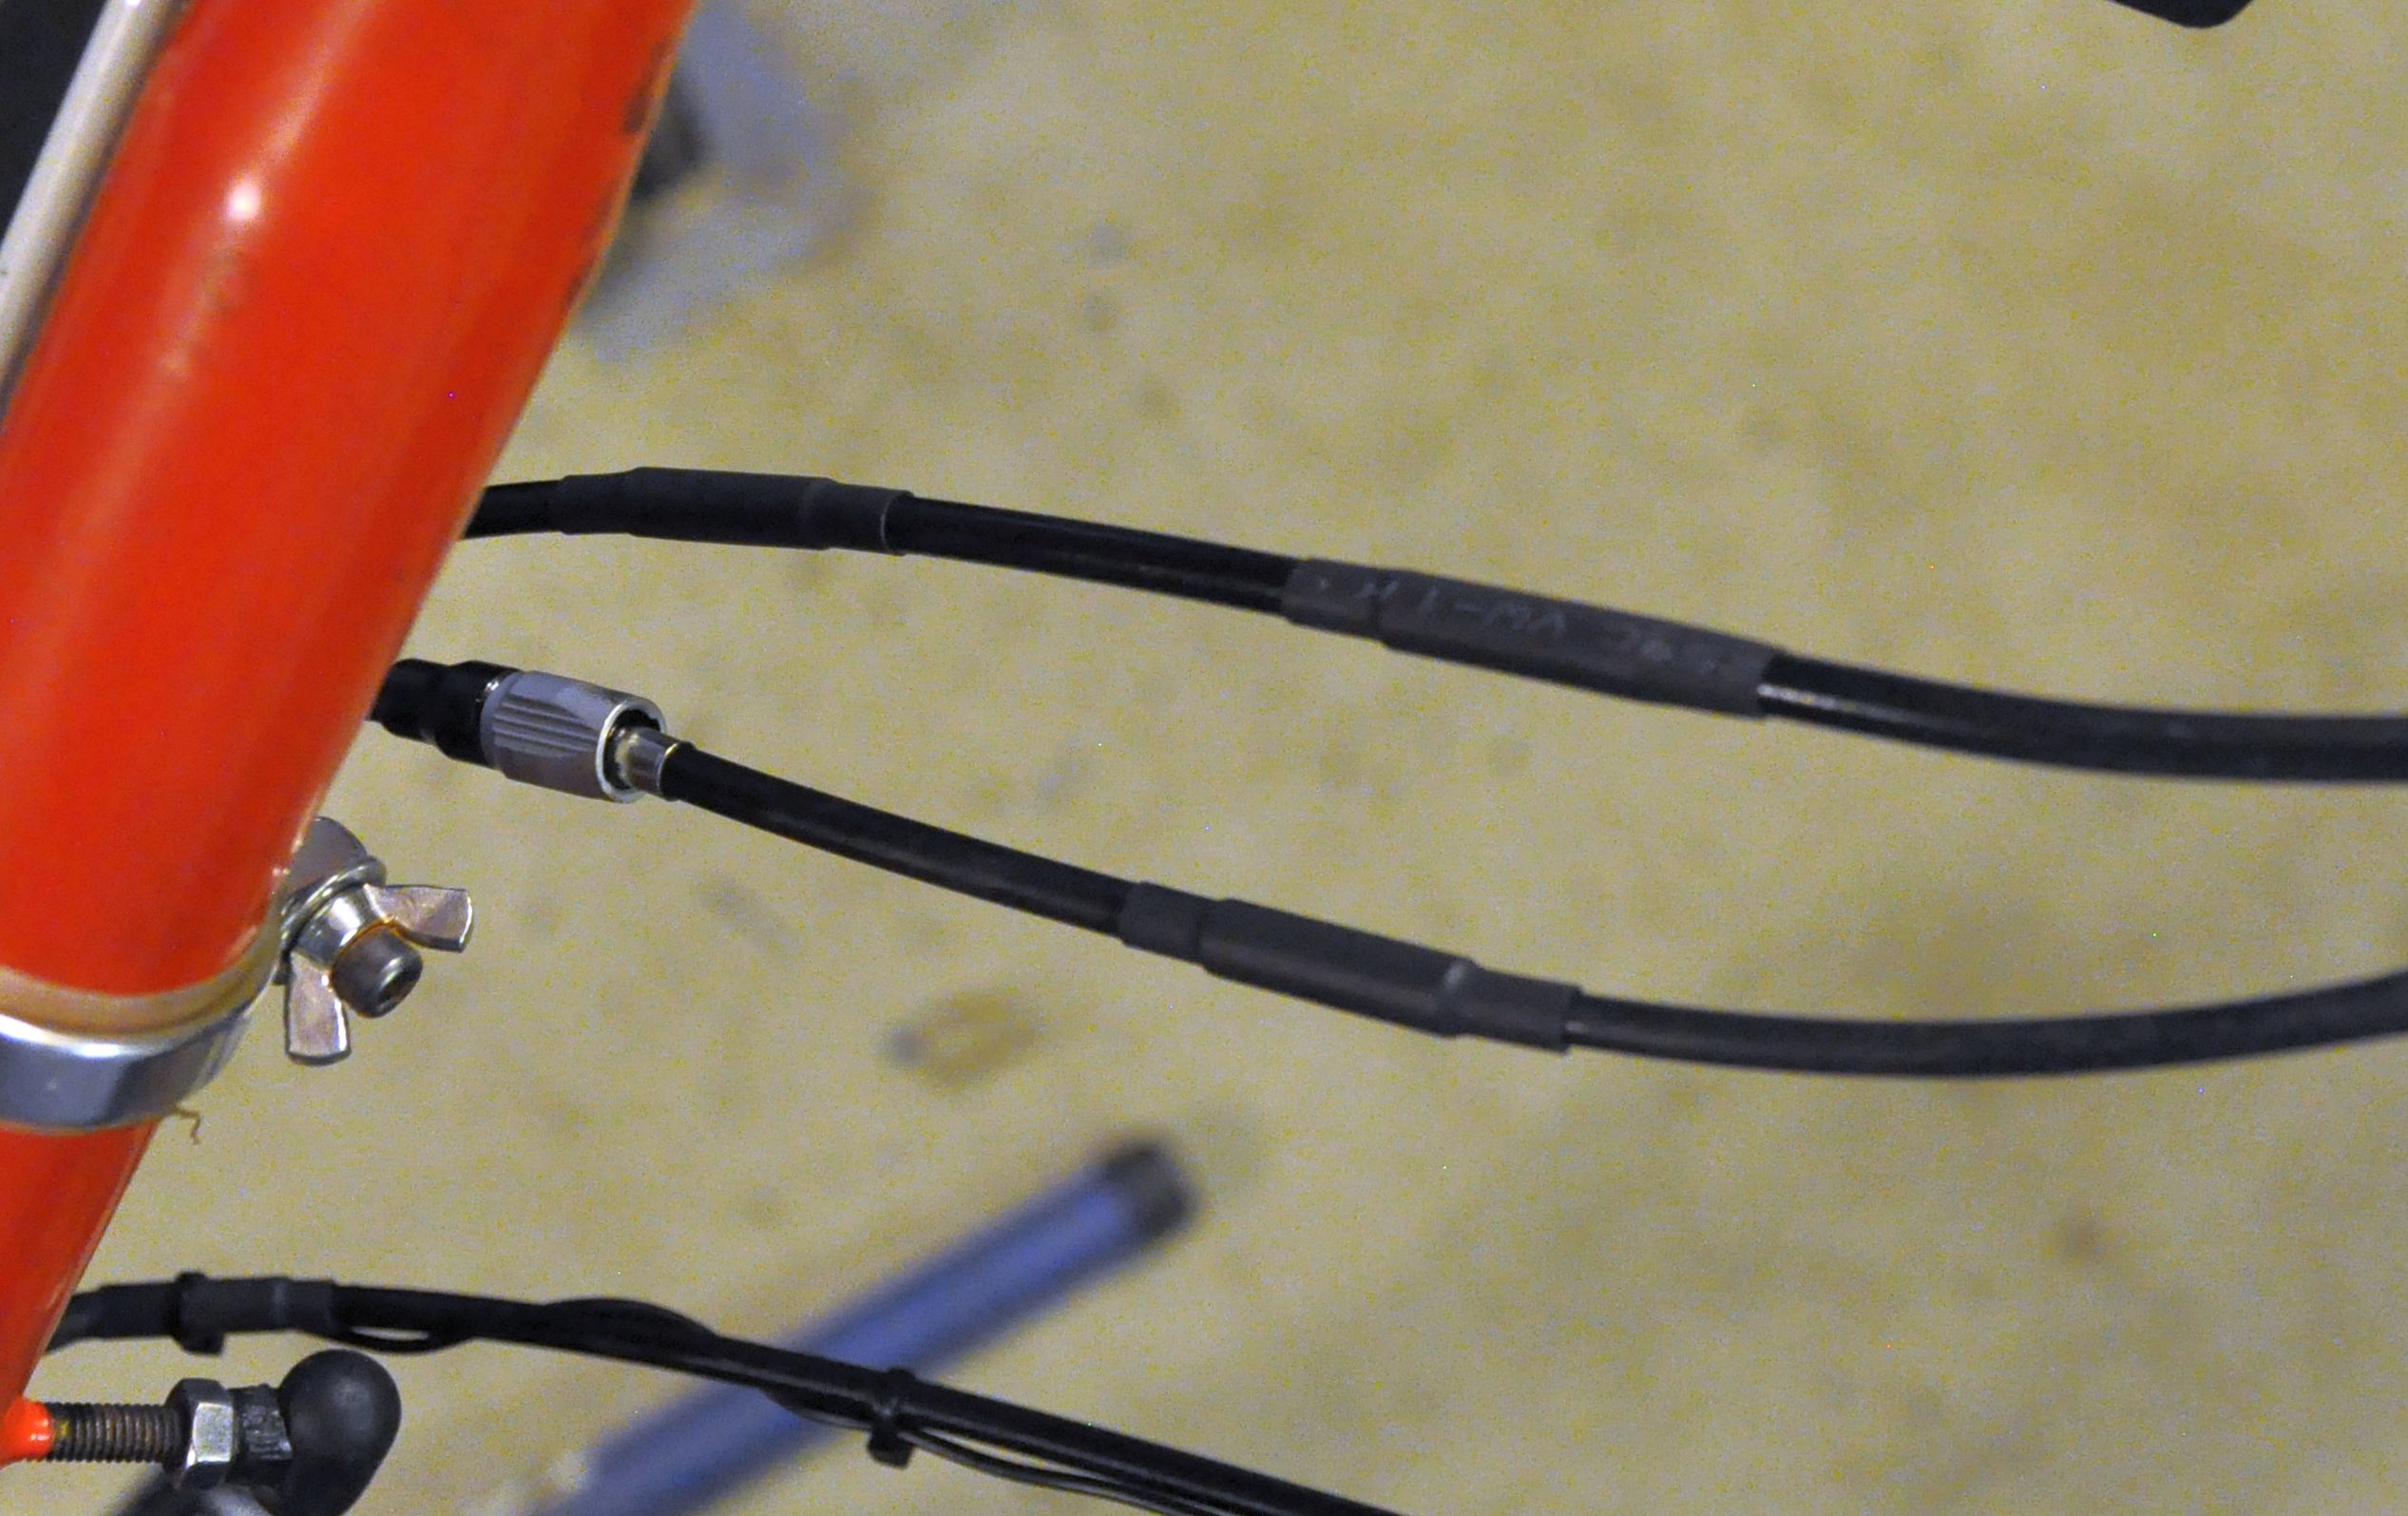
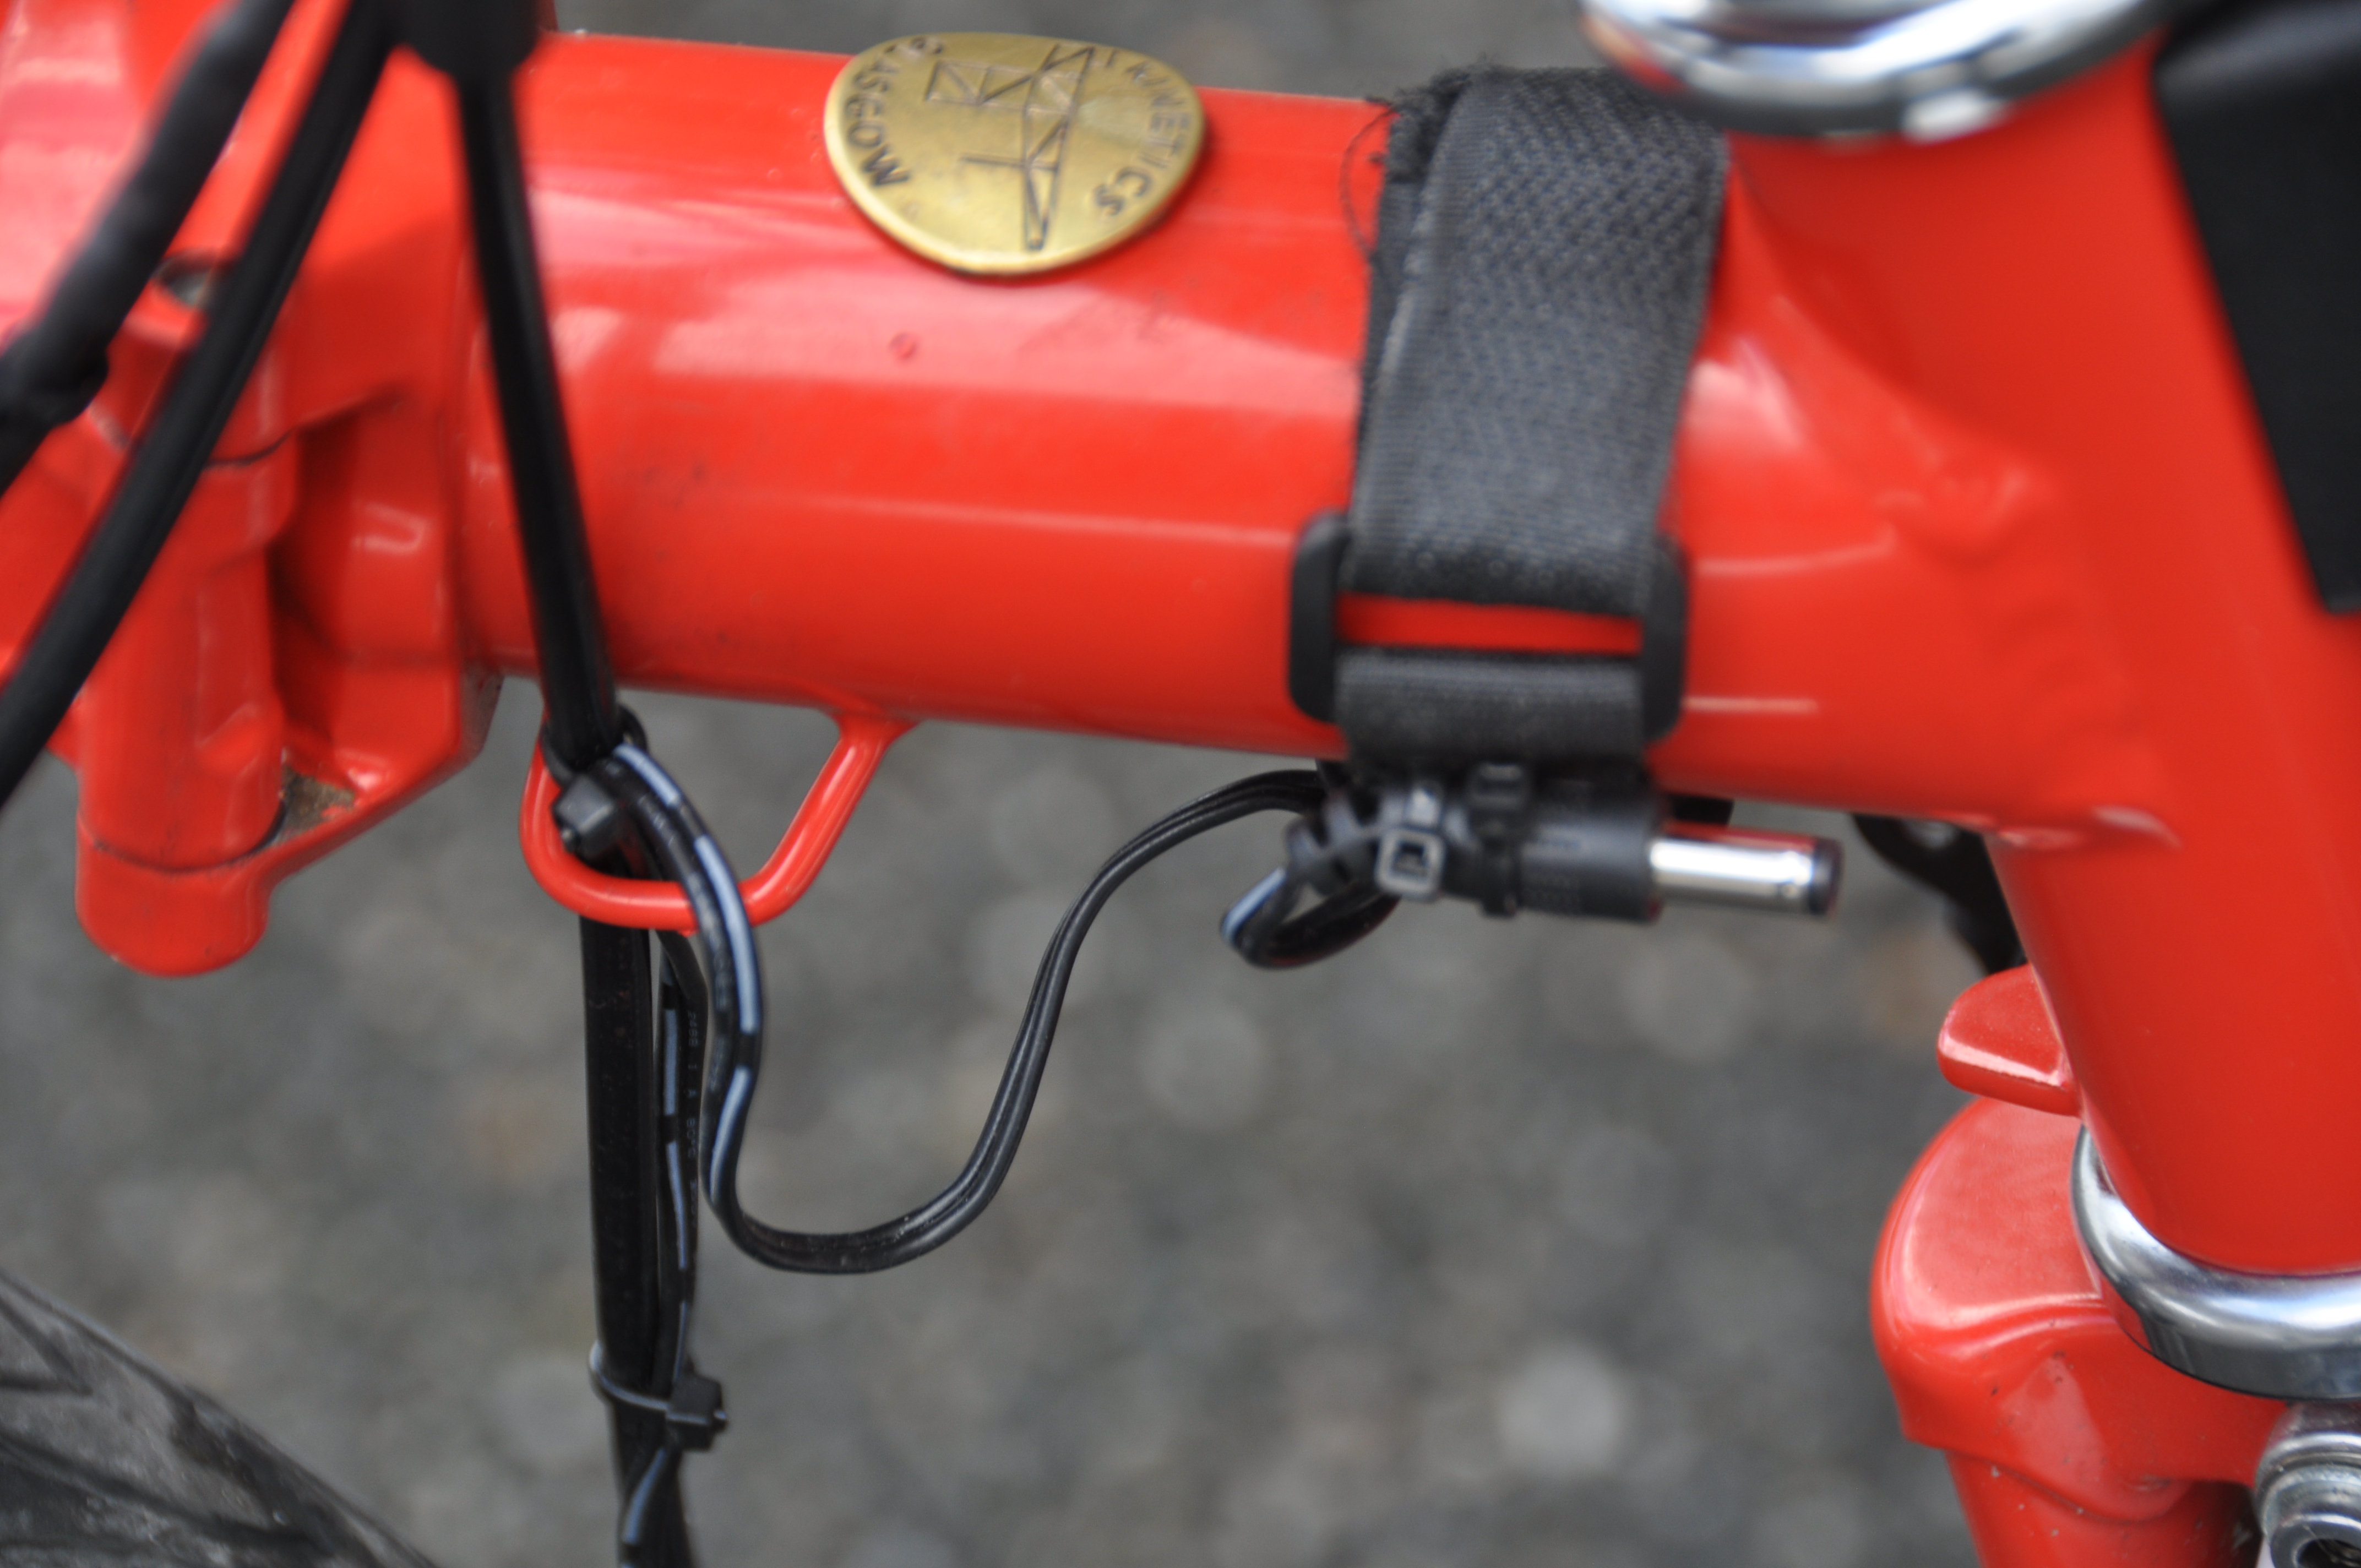
Note: Extending brake and gear cables
During my handlebar modifications, I frequently had to change the length of cables. Rather than installing a new brake or gear cable (which would mean re-wrapping the bars and routing new cable housing along the frame) I have used double ended connecting ferrules to splice in a short section of housing (made be Jagwire). To make it neater, I have put shrink wrap over it.

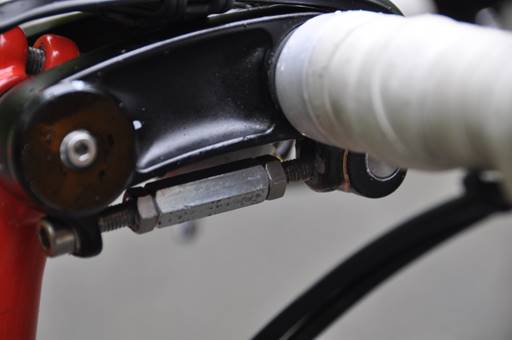
Power Grips Straps Back to top
I have cleats on all my other bikes, and was looking for a way to hold the feet on the pedals of the Brompton. I tried out the Power Grips straps and like them. For me, they are not as good as cleats, but clearly help to keep the feet well positioned on the pedals. Mounting on the Brompton pedals is straightforward, but tedious --- you have to drill holes, cut treads and find oversized washers (see photos).
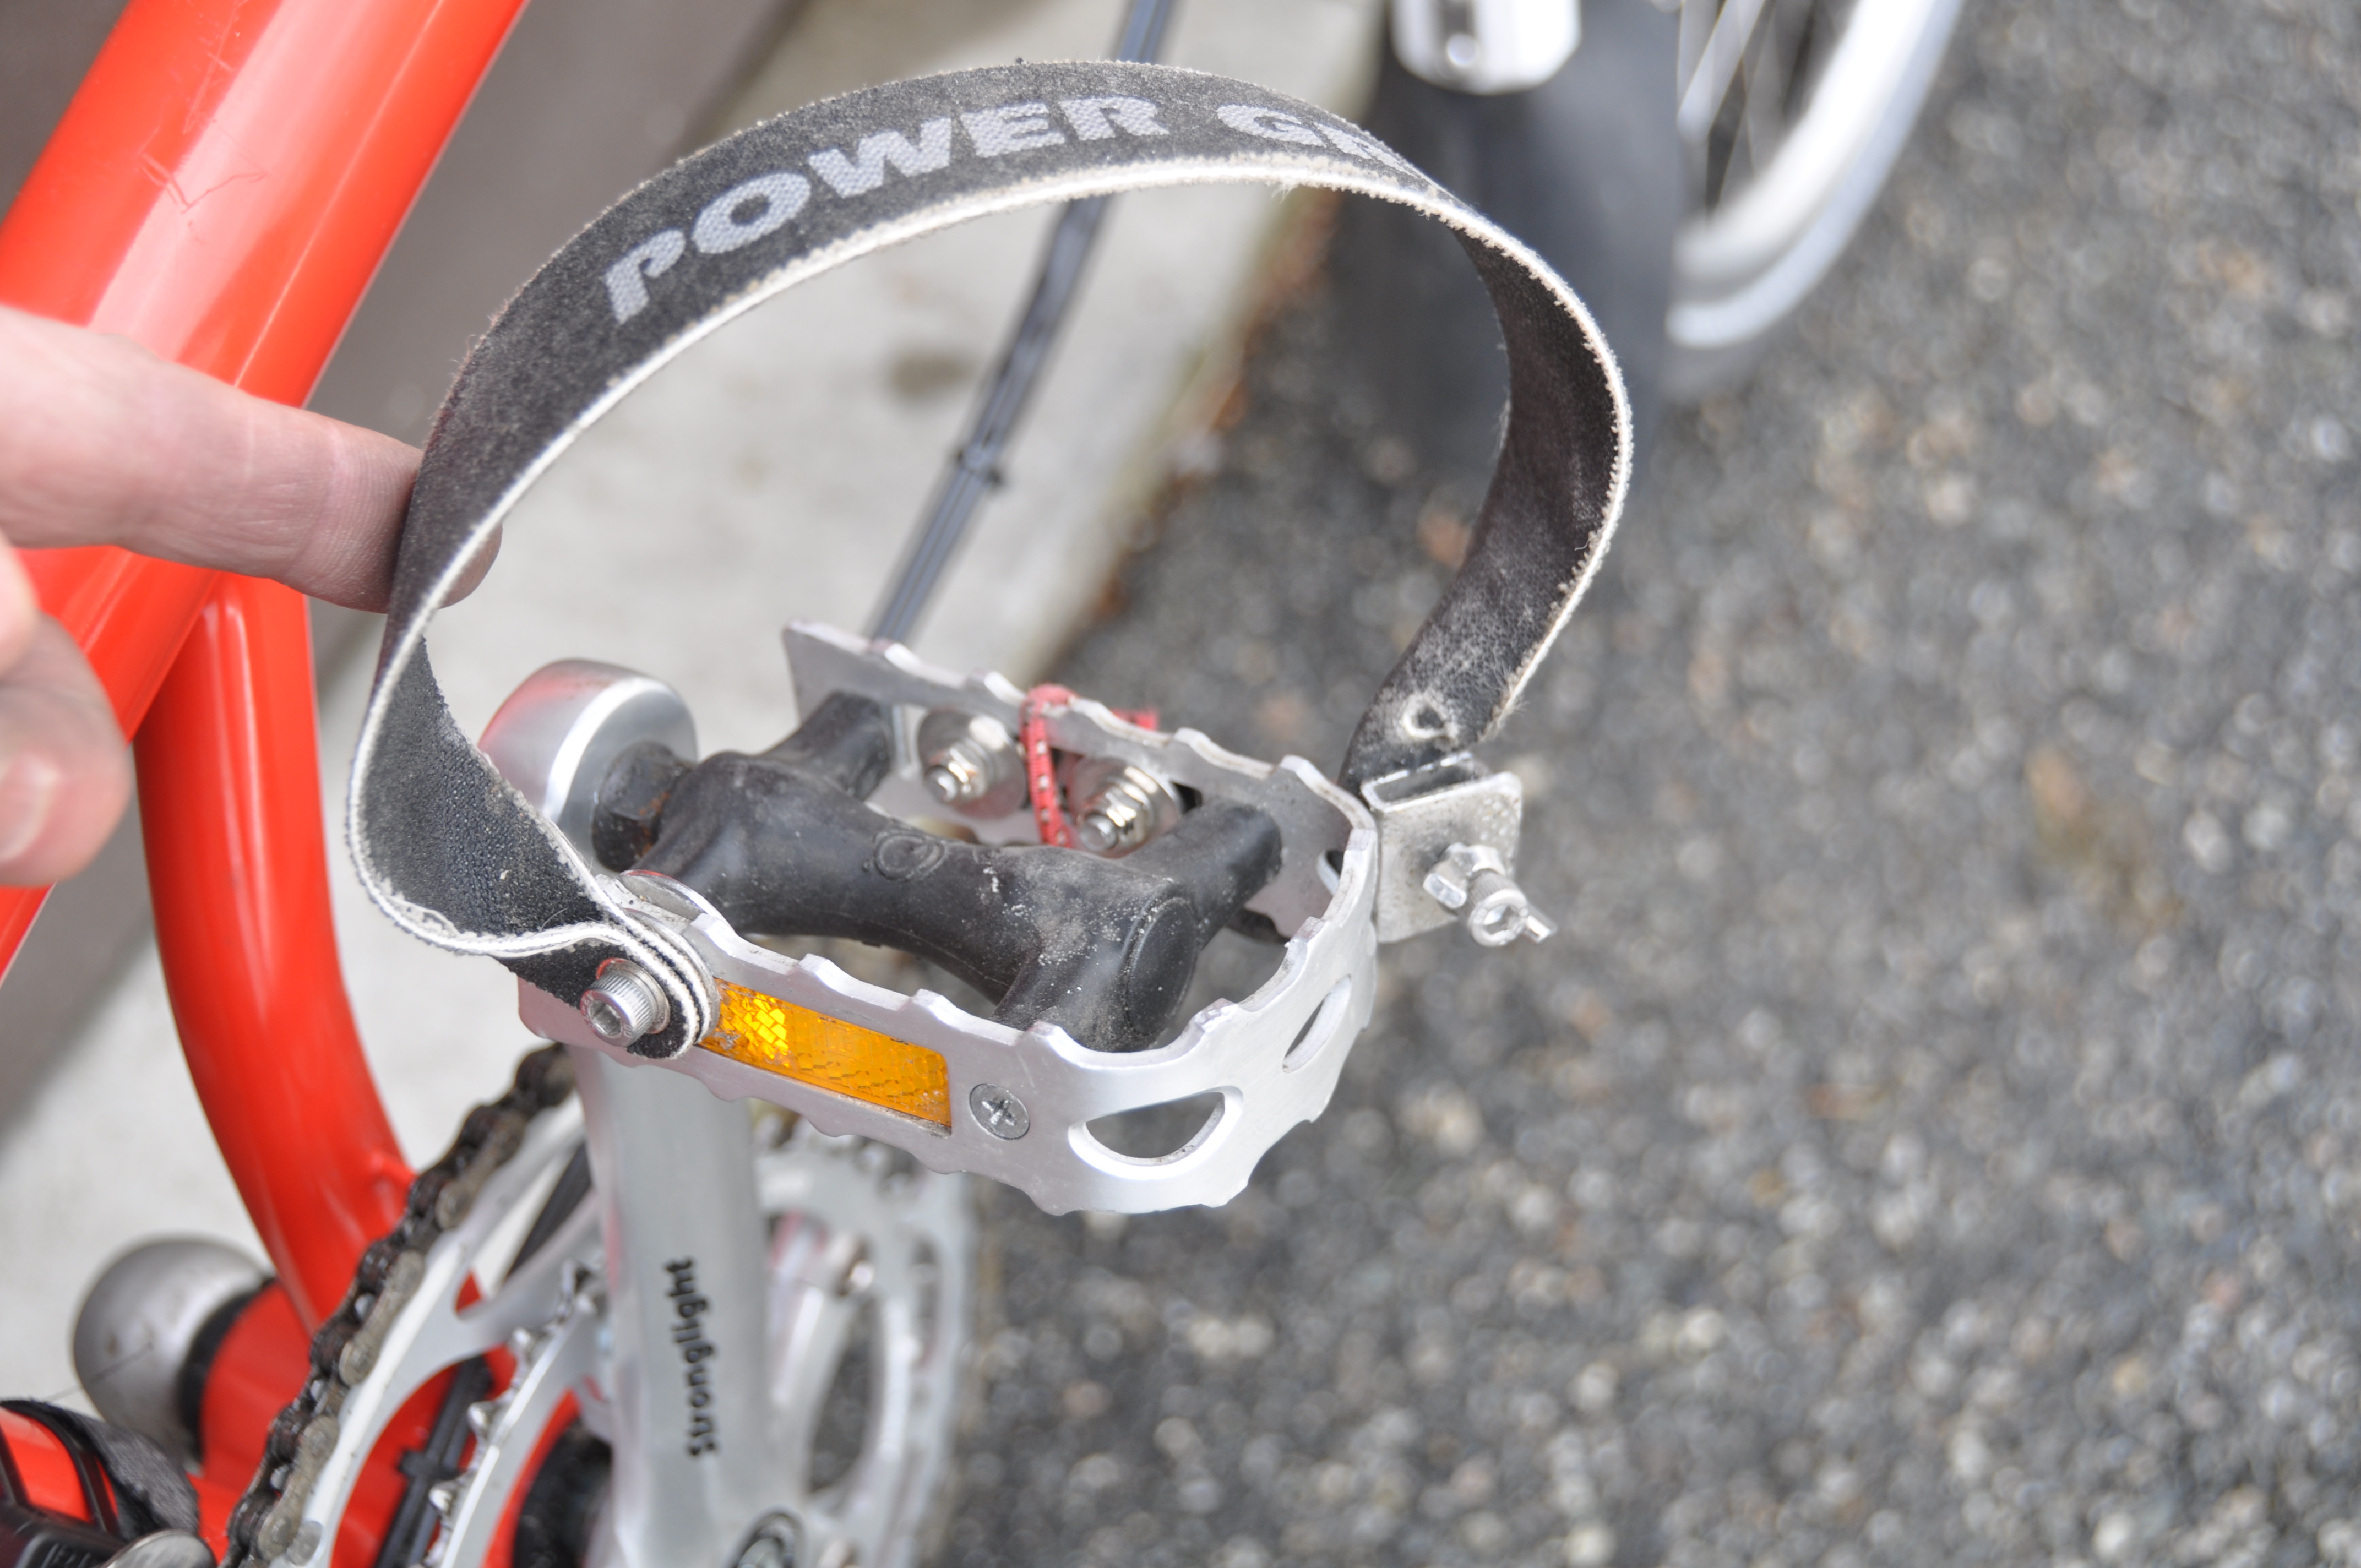
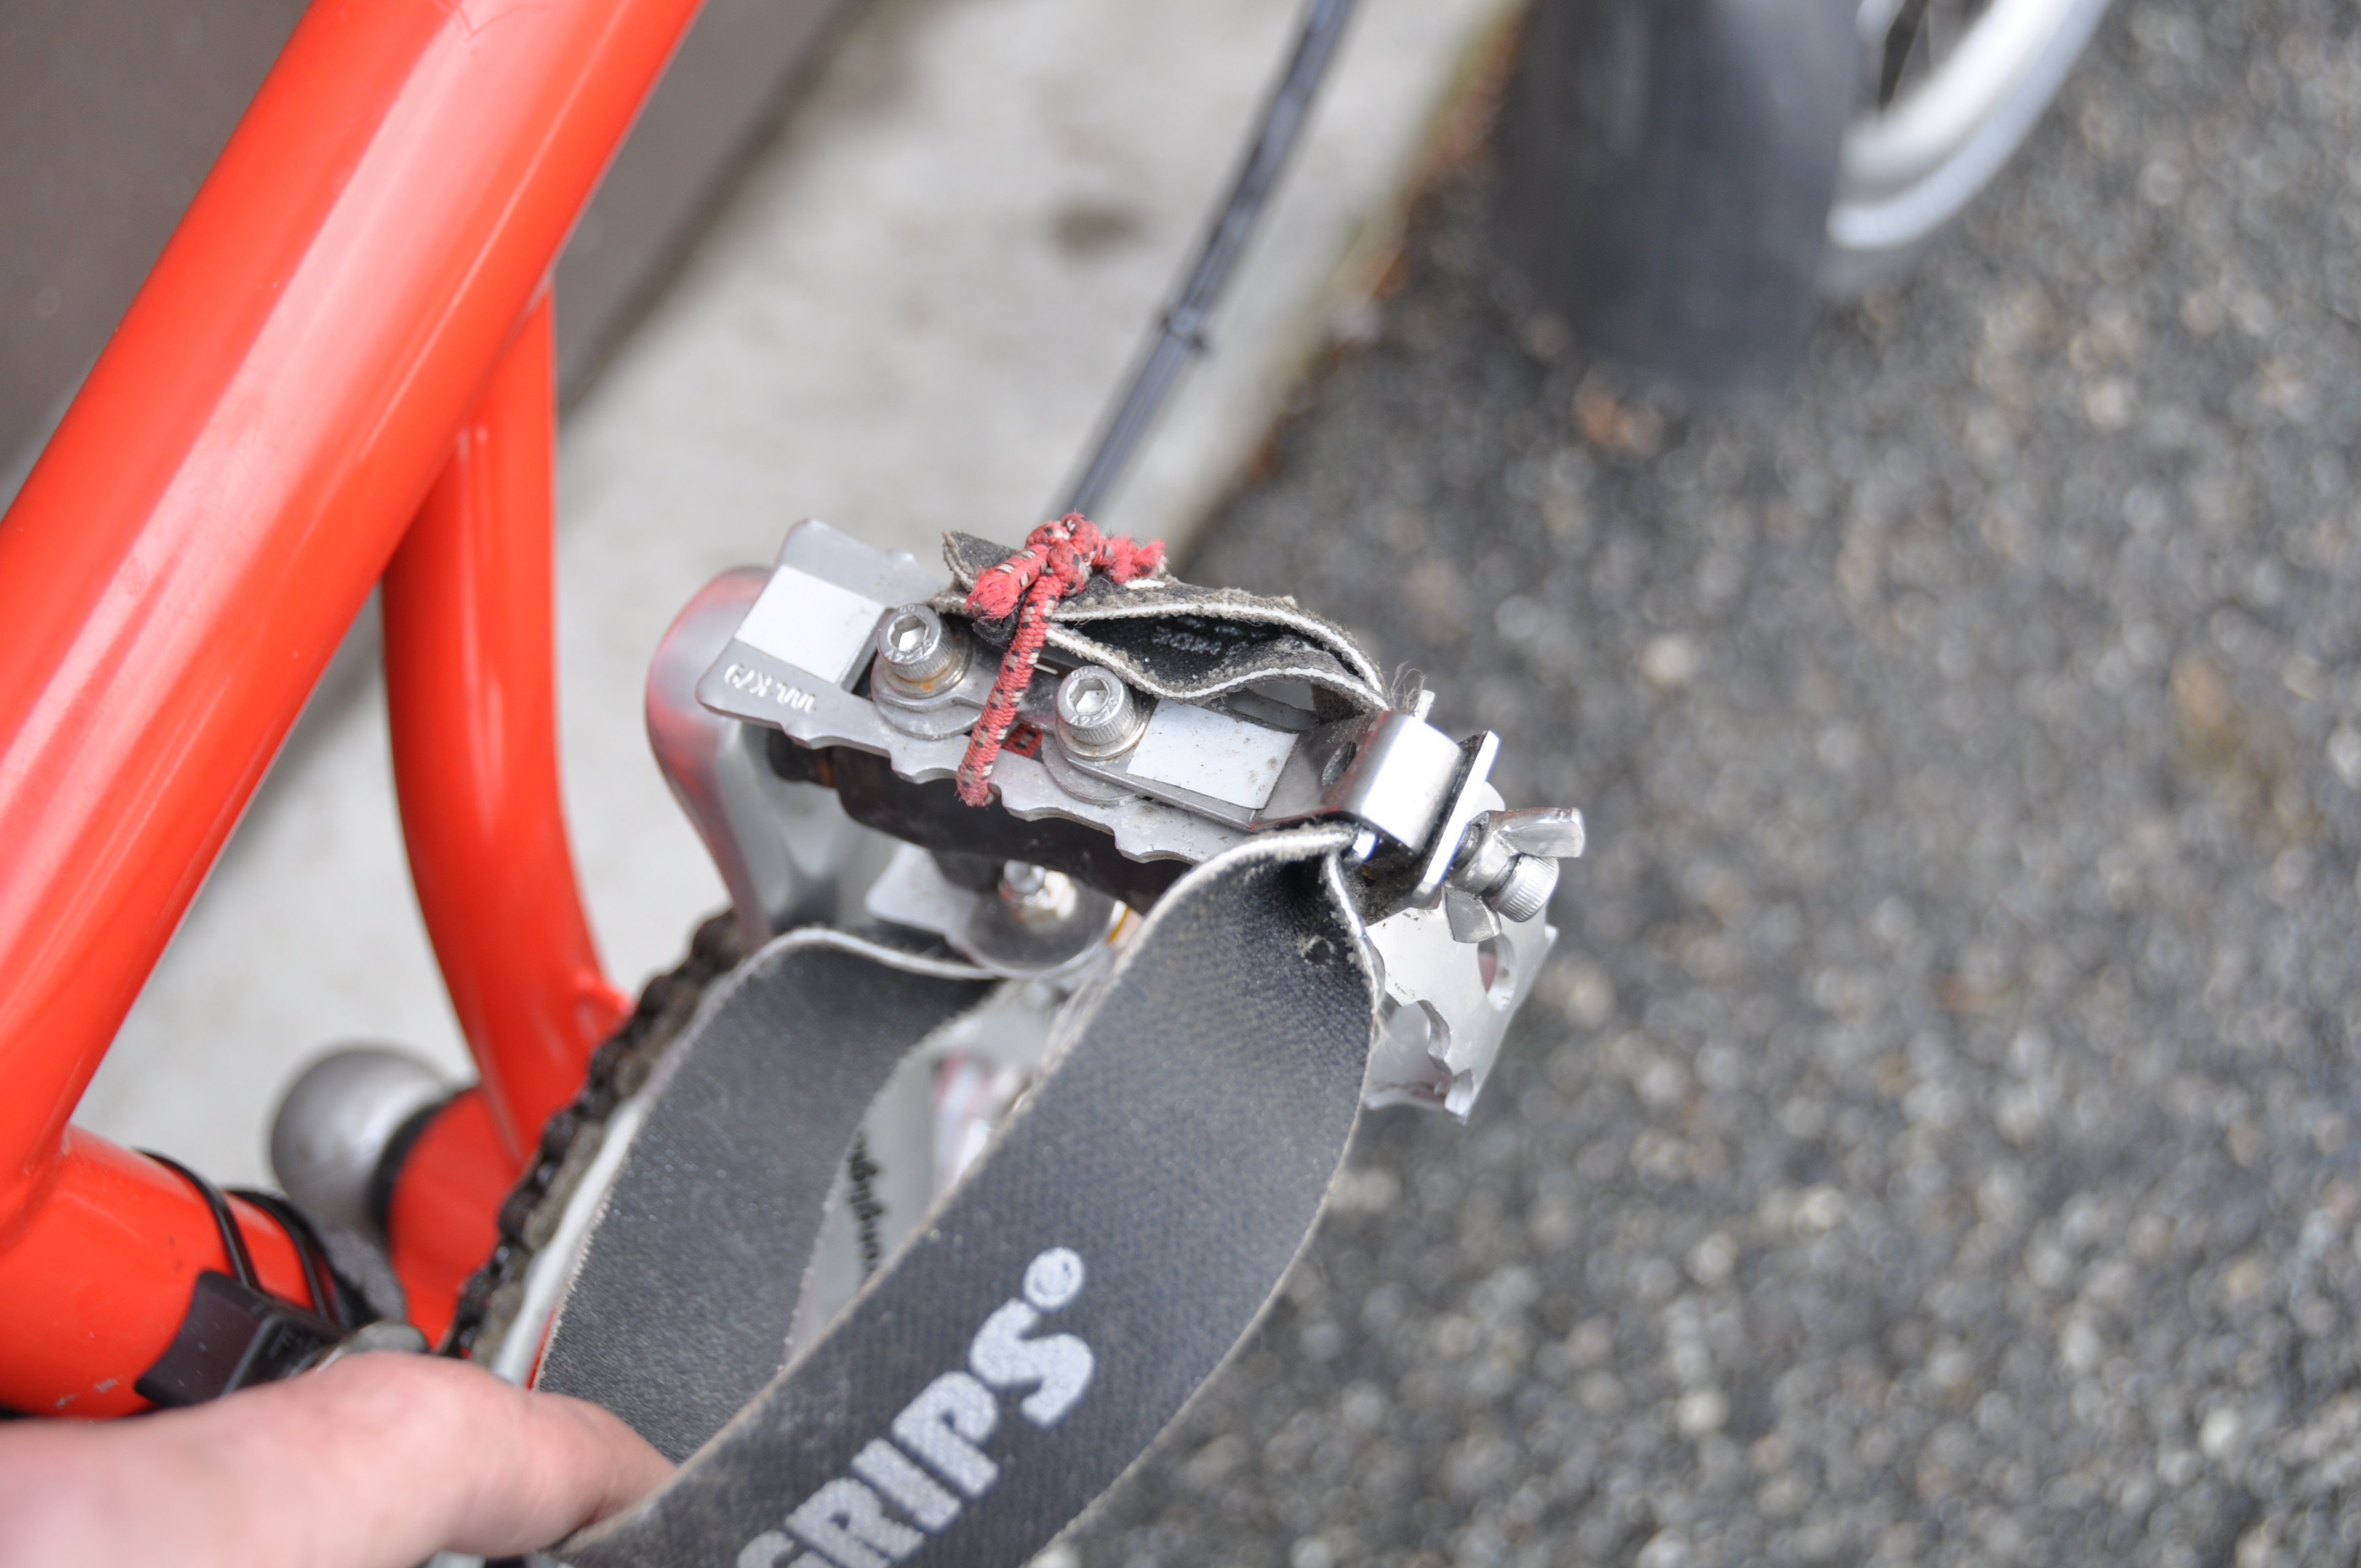

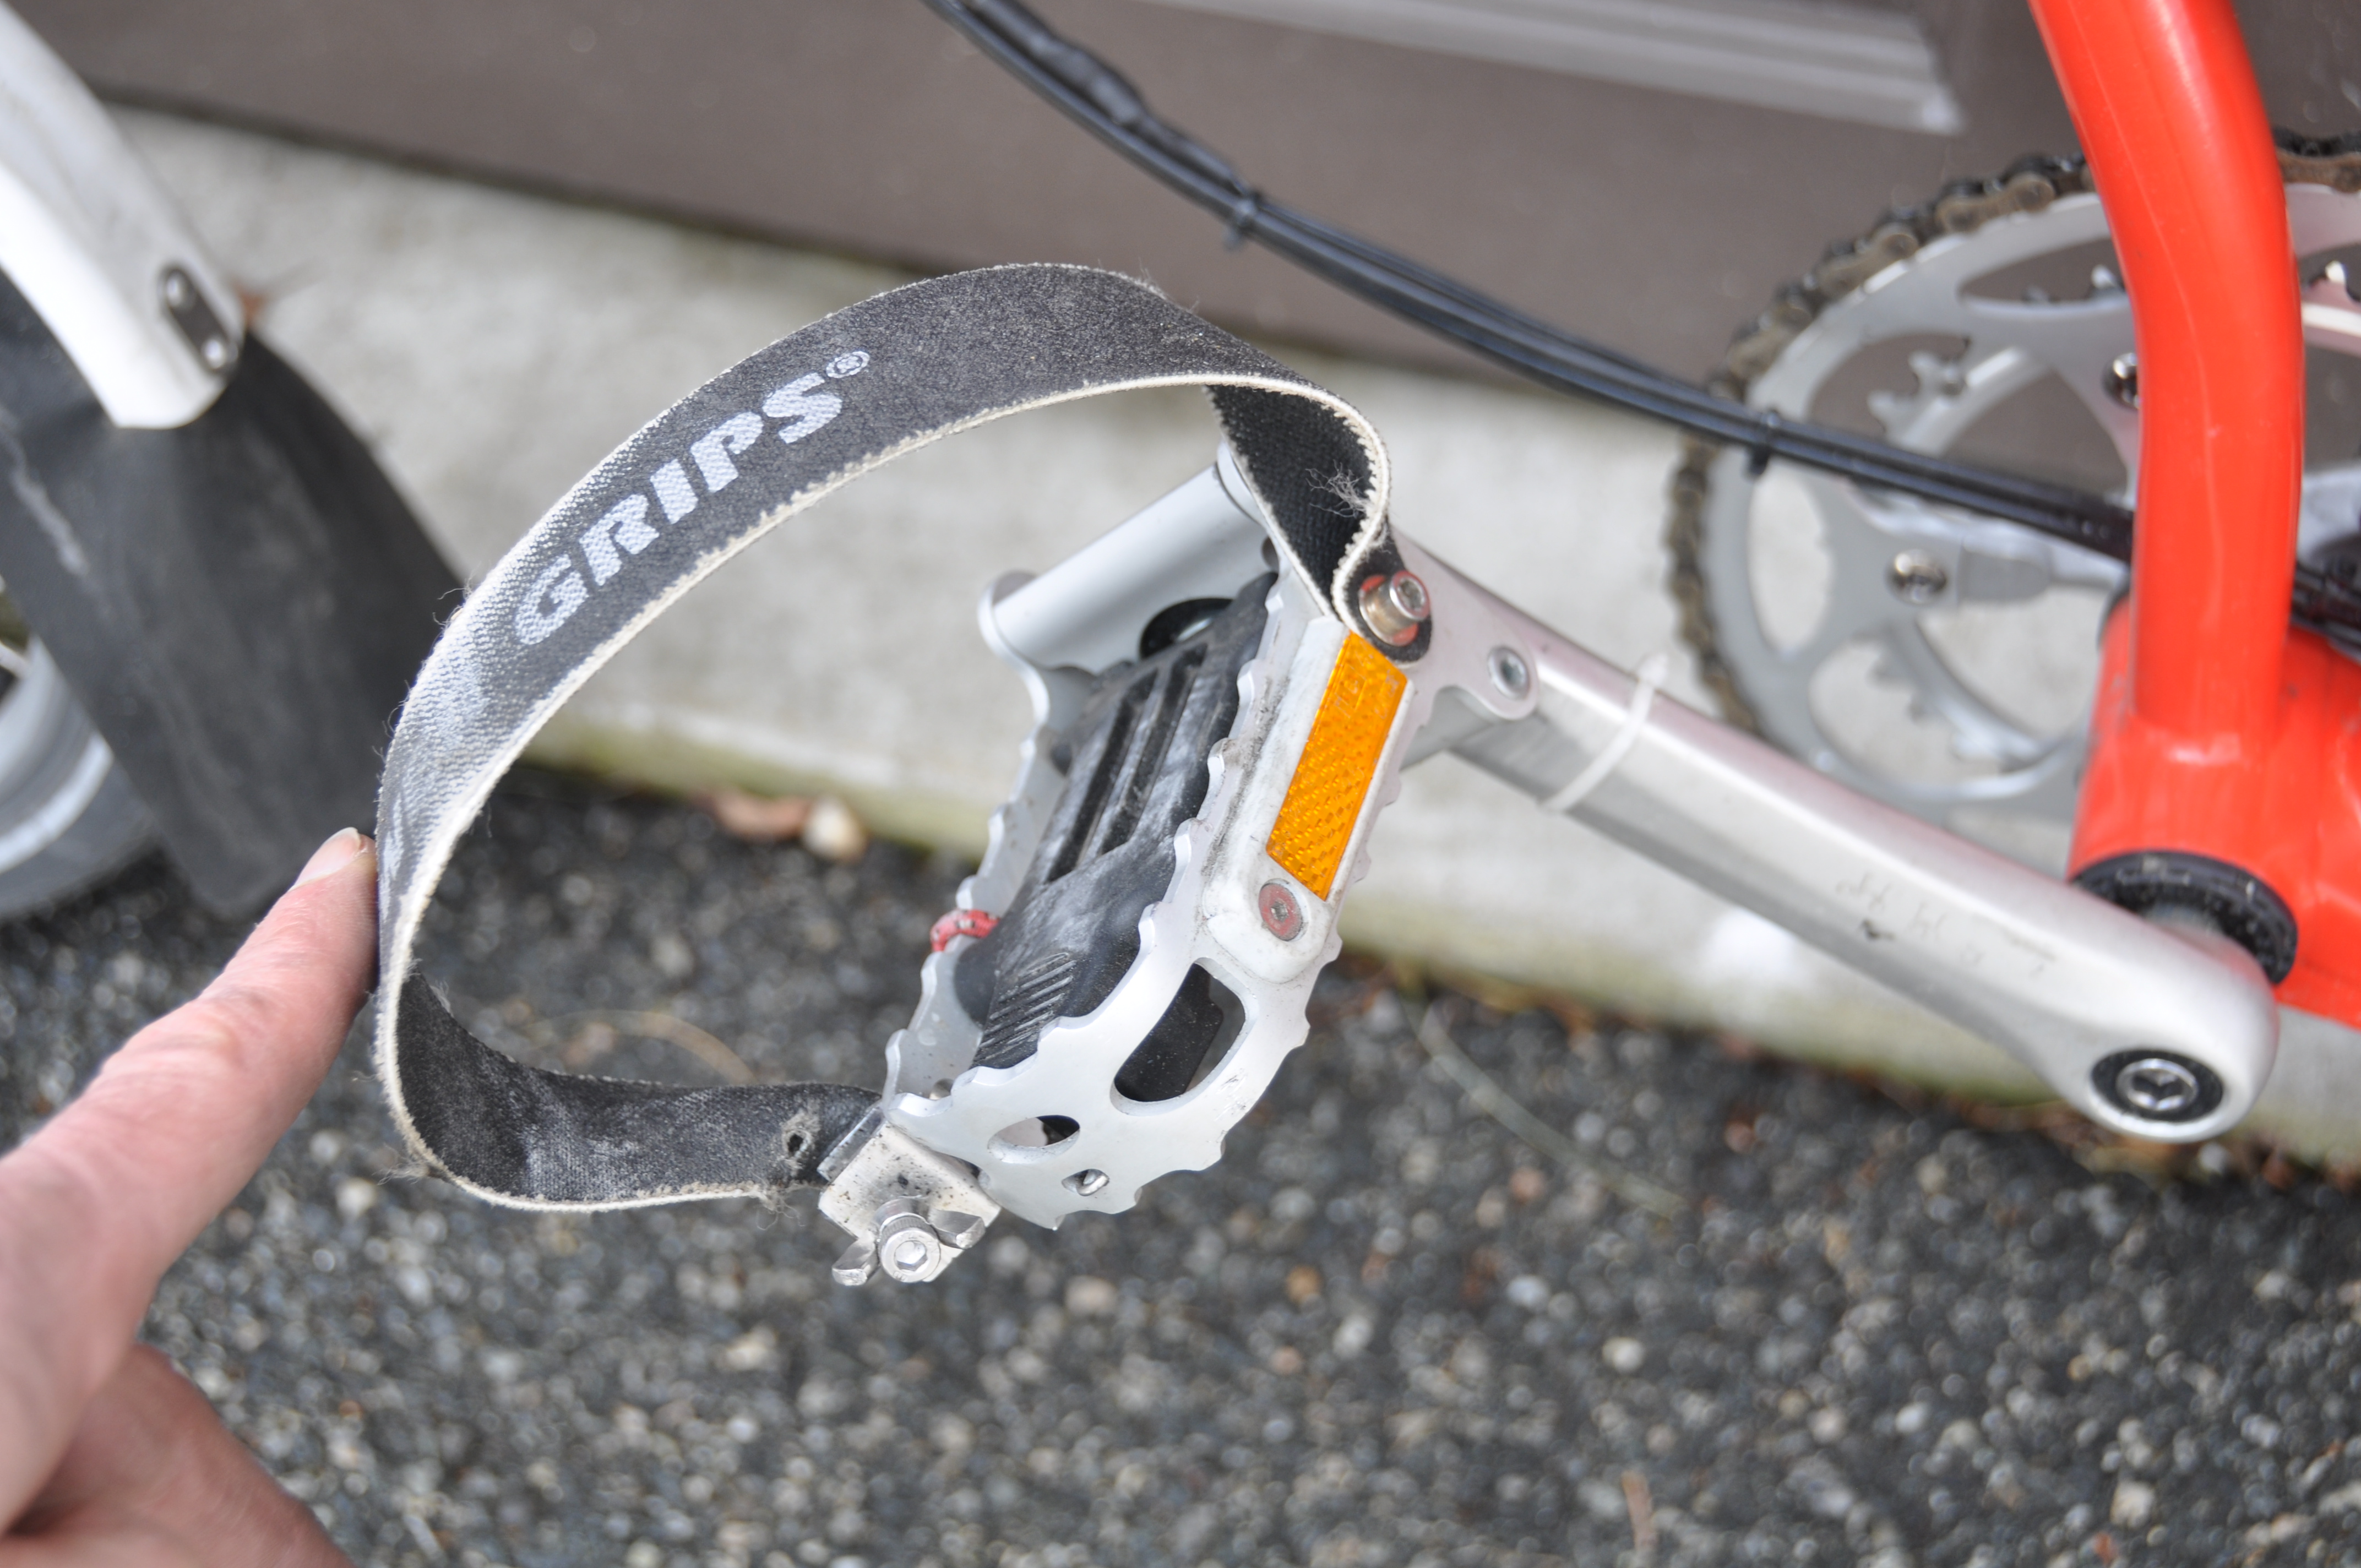
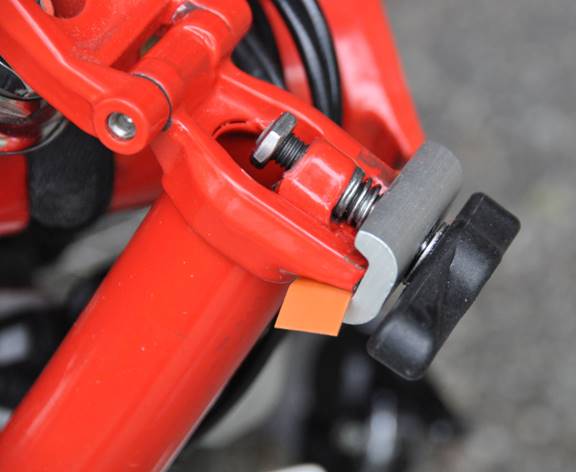
Improving the adjustment hardware:
The Power Grips straps have to adjusted when you wear different shoes. Originally, this required a screwdriver or Allen wrench, but I added a wingnut. The screw presses against the strap through a U shaped piece of sheet metal. The piece (on the right side in the photo) caught on the straps when you tried to shorten or lengthen them. I replaced it by a bigger piece (made from thin aluminum, shown in the middle), and now it works very well --- you just loosen the wingnut, and then the strap slides through the attachment.
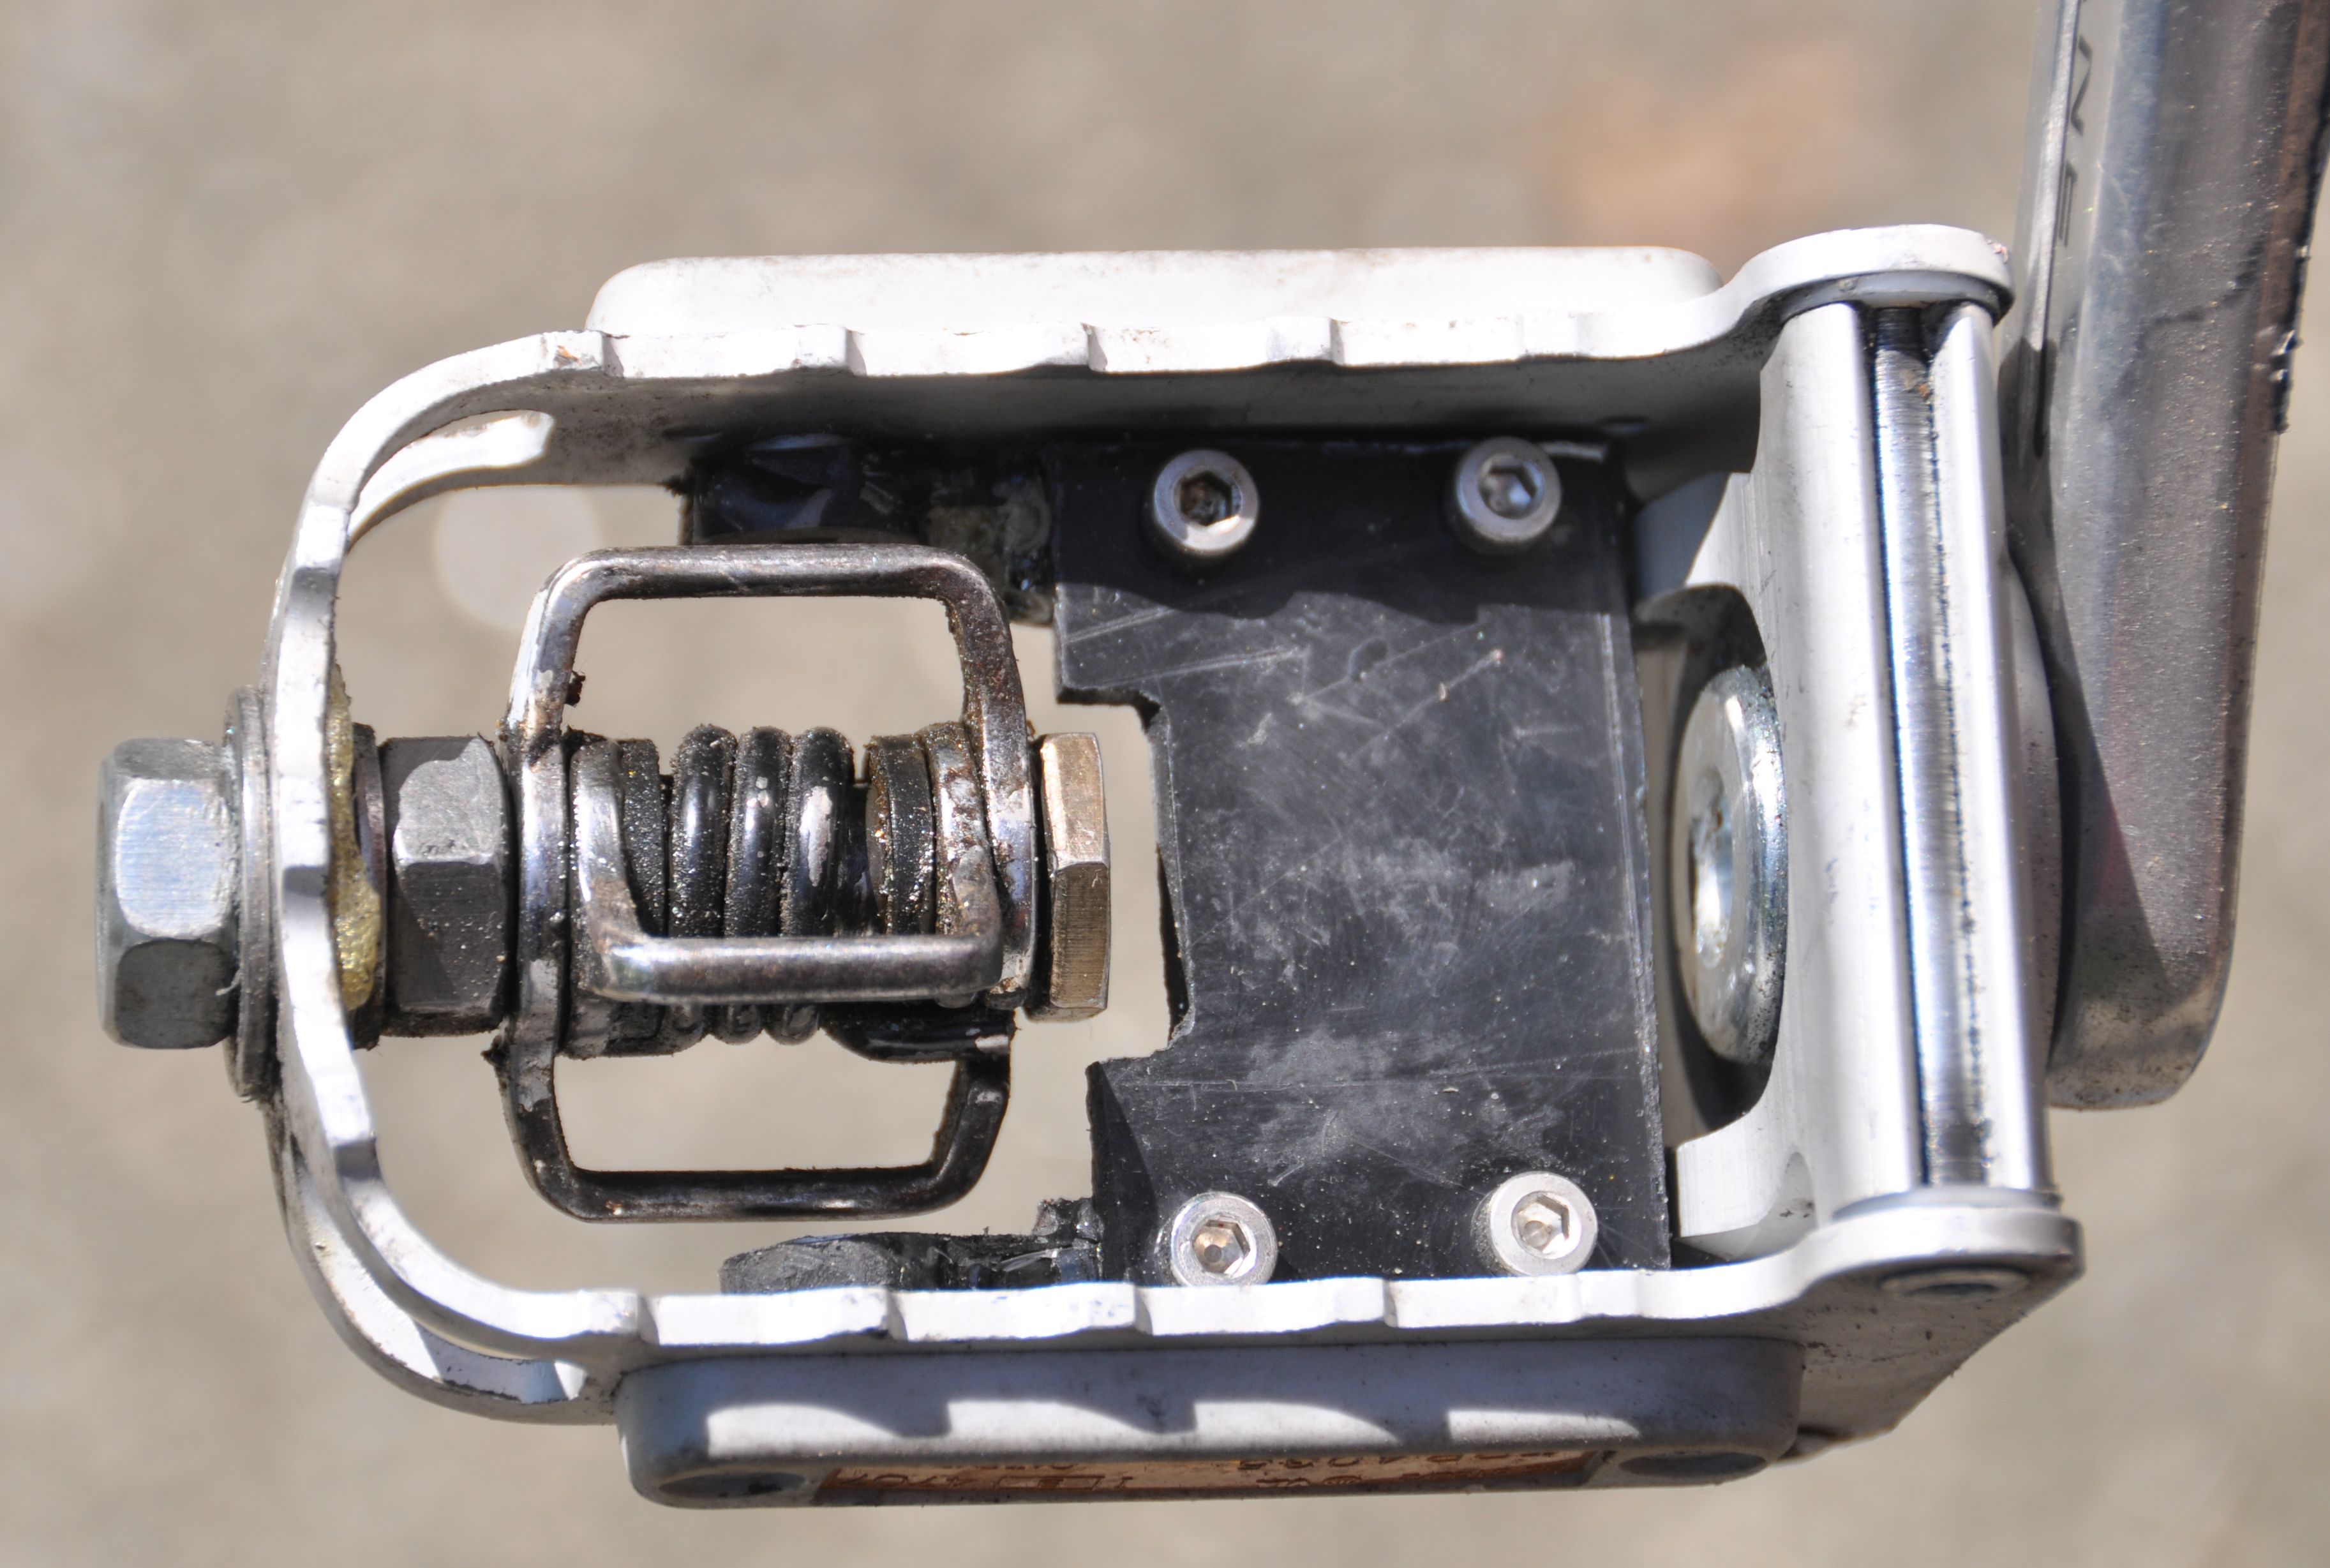
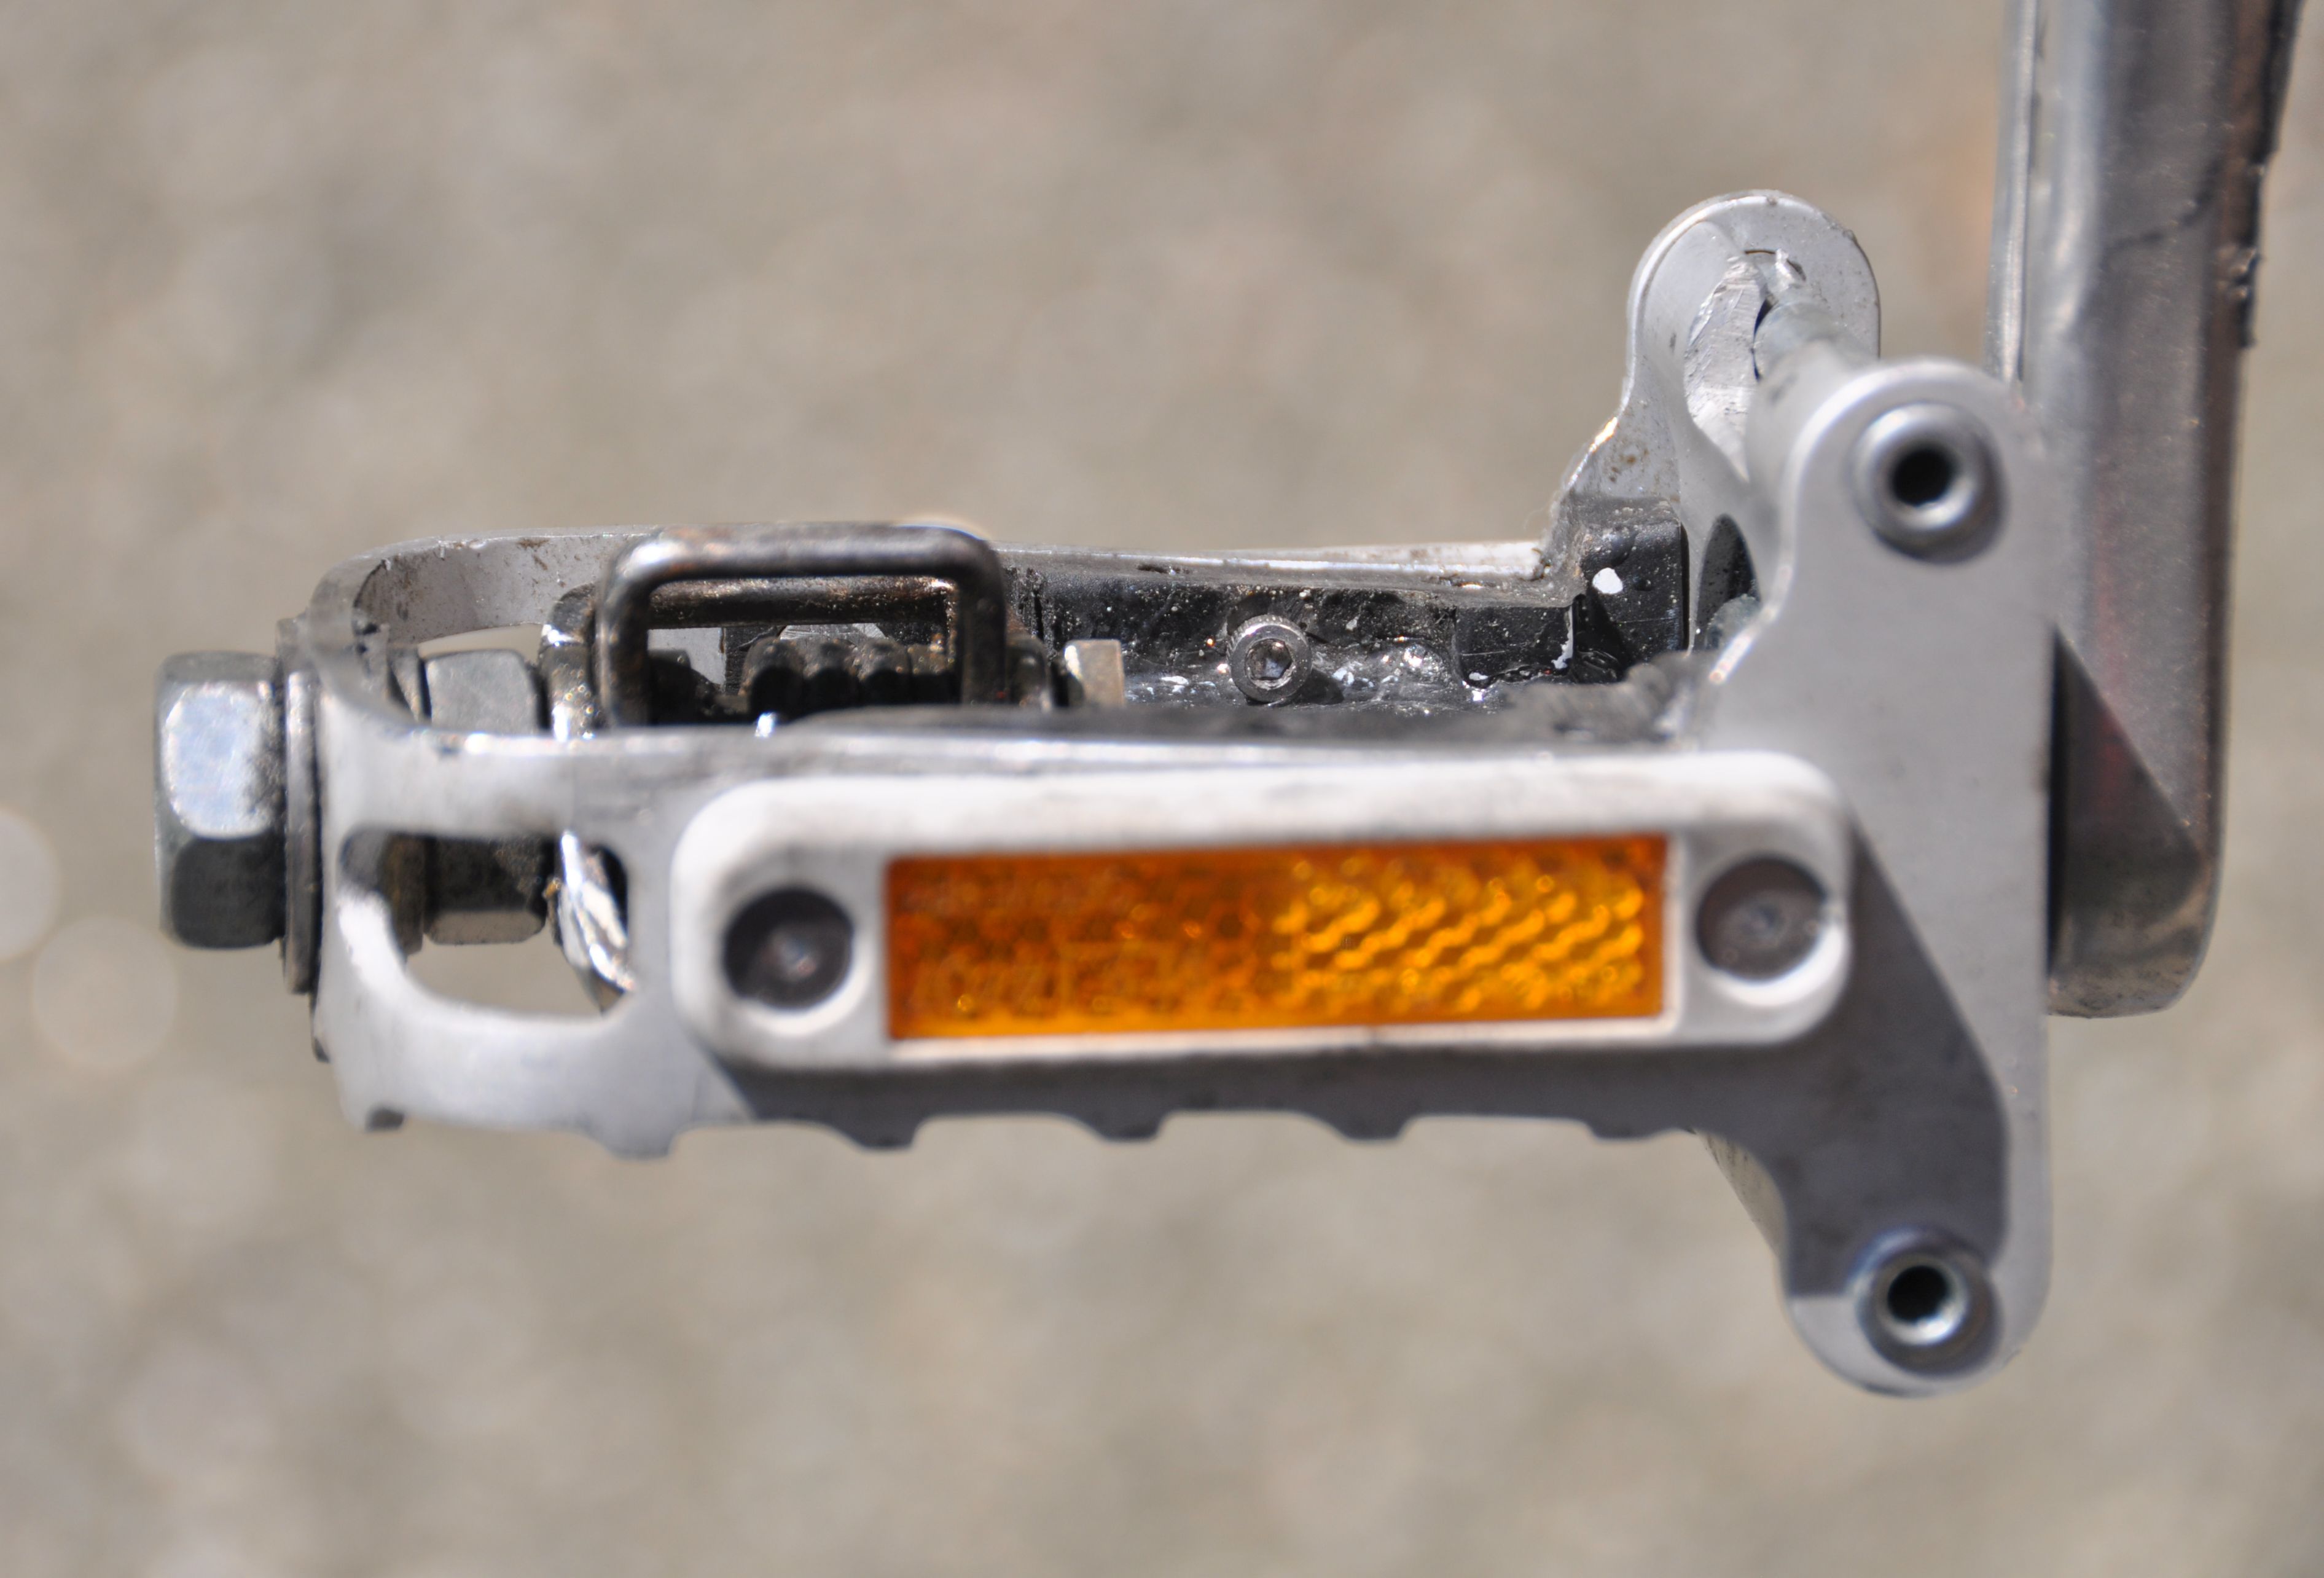
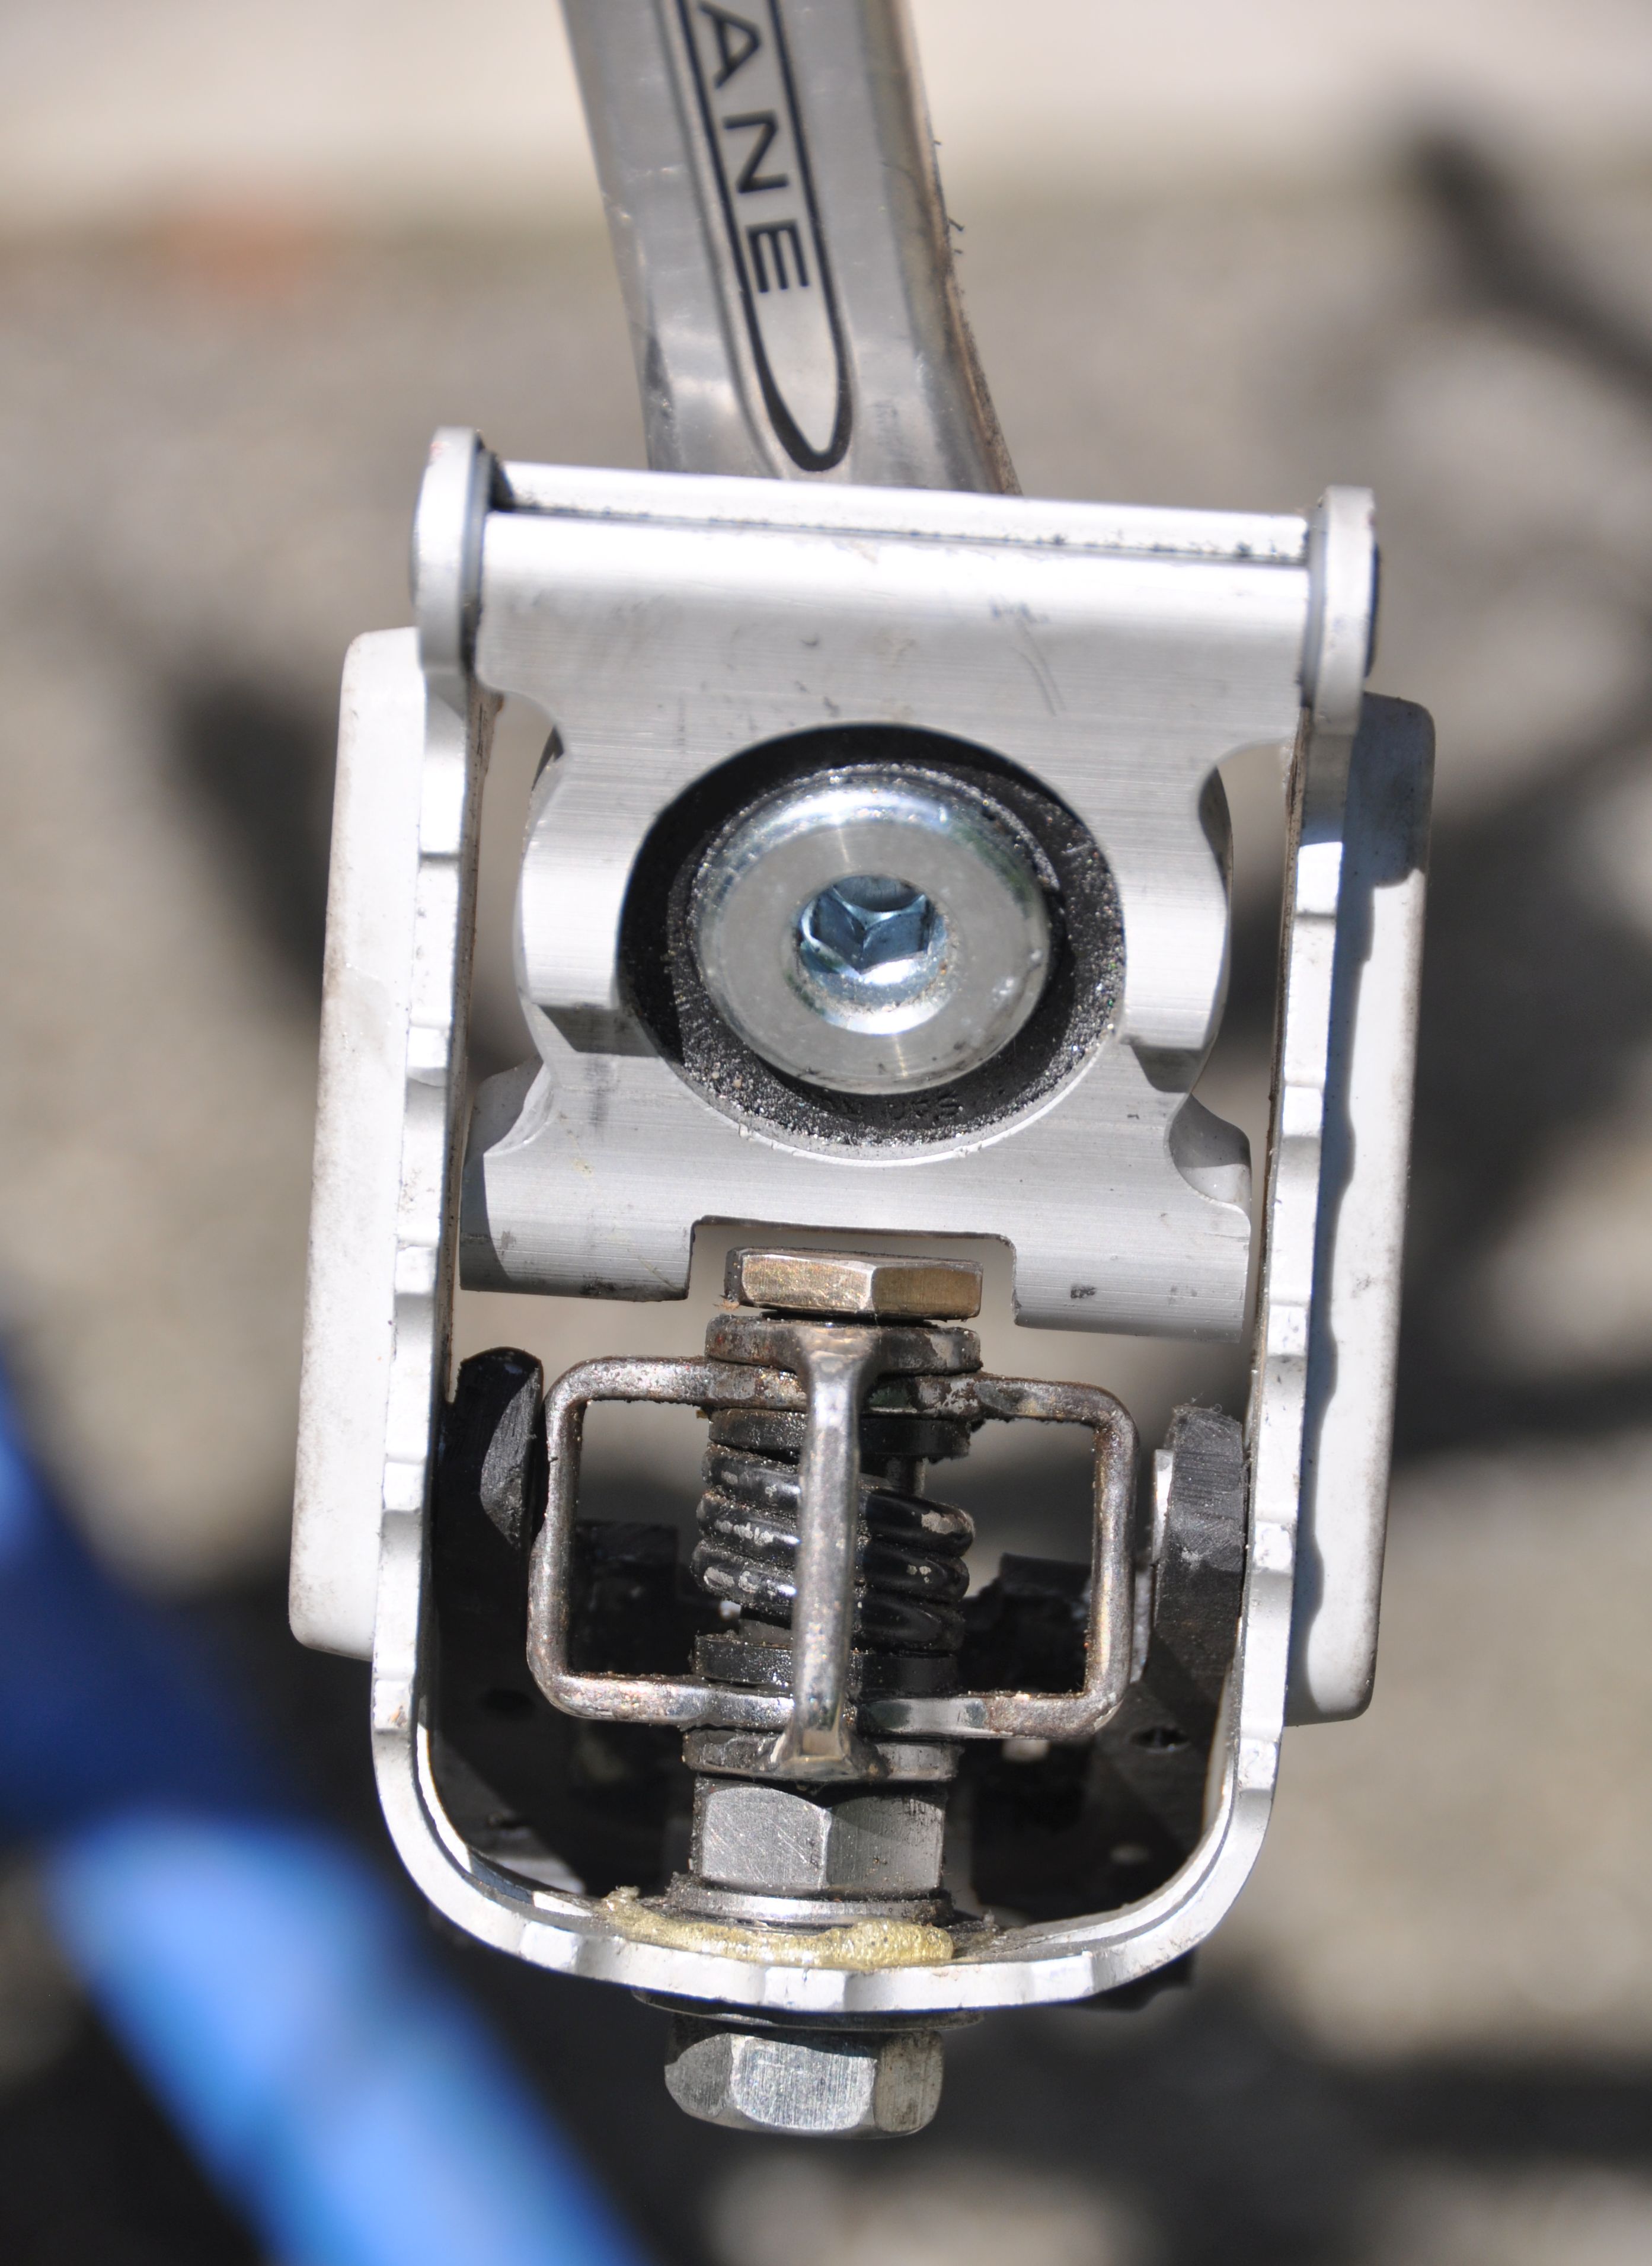
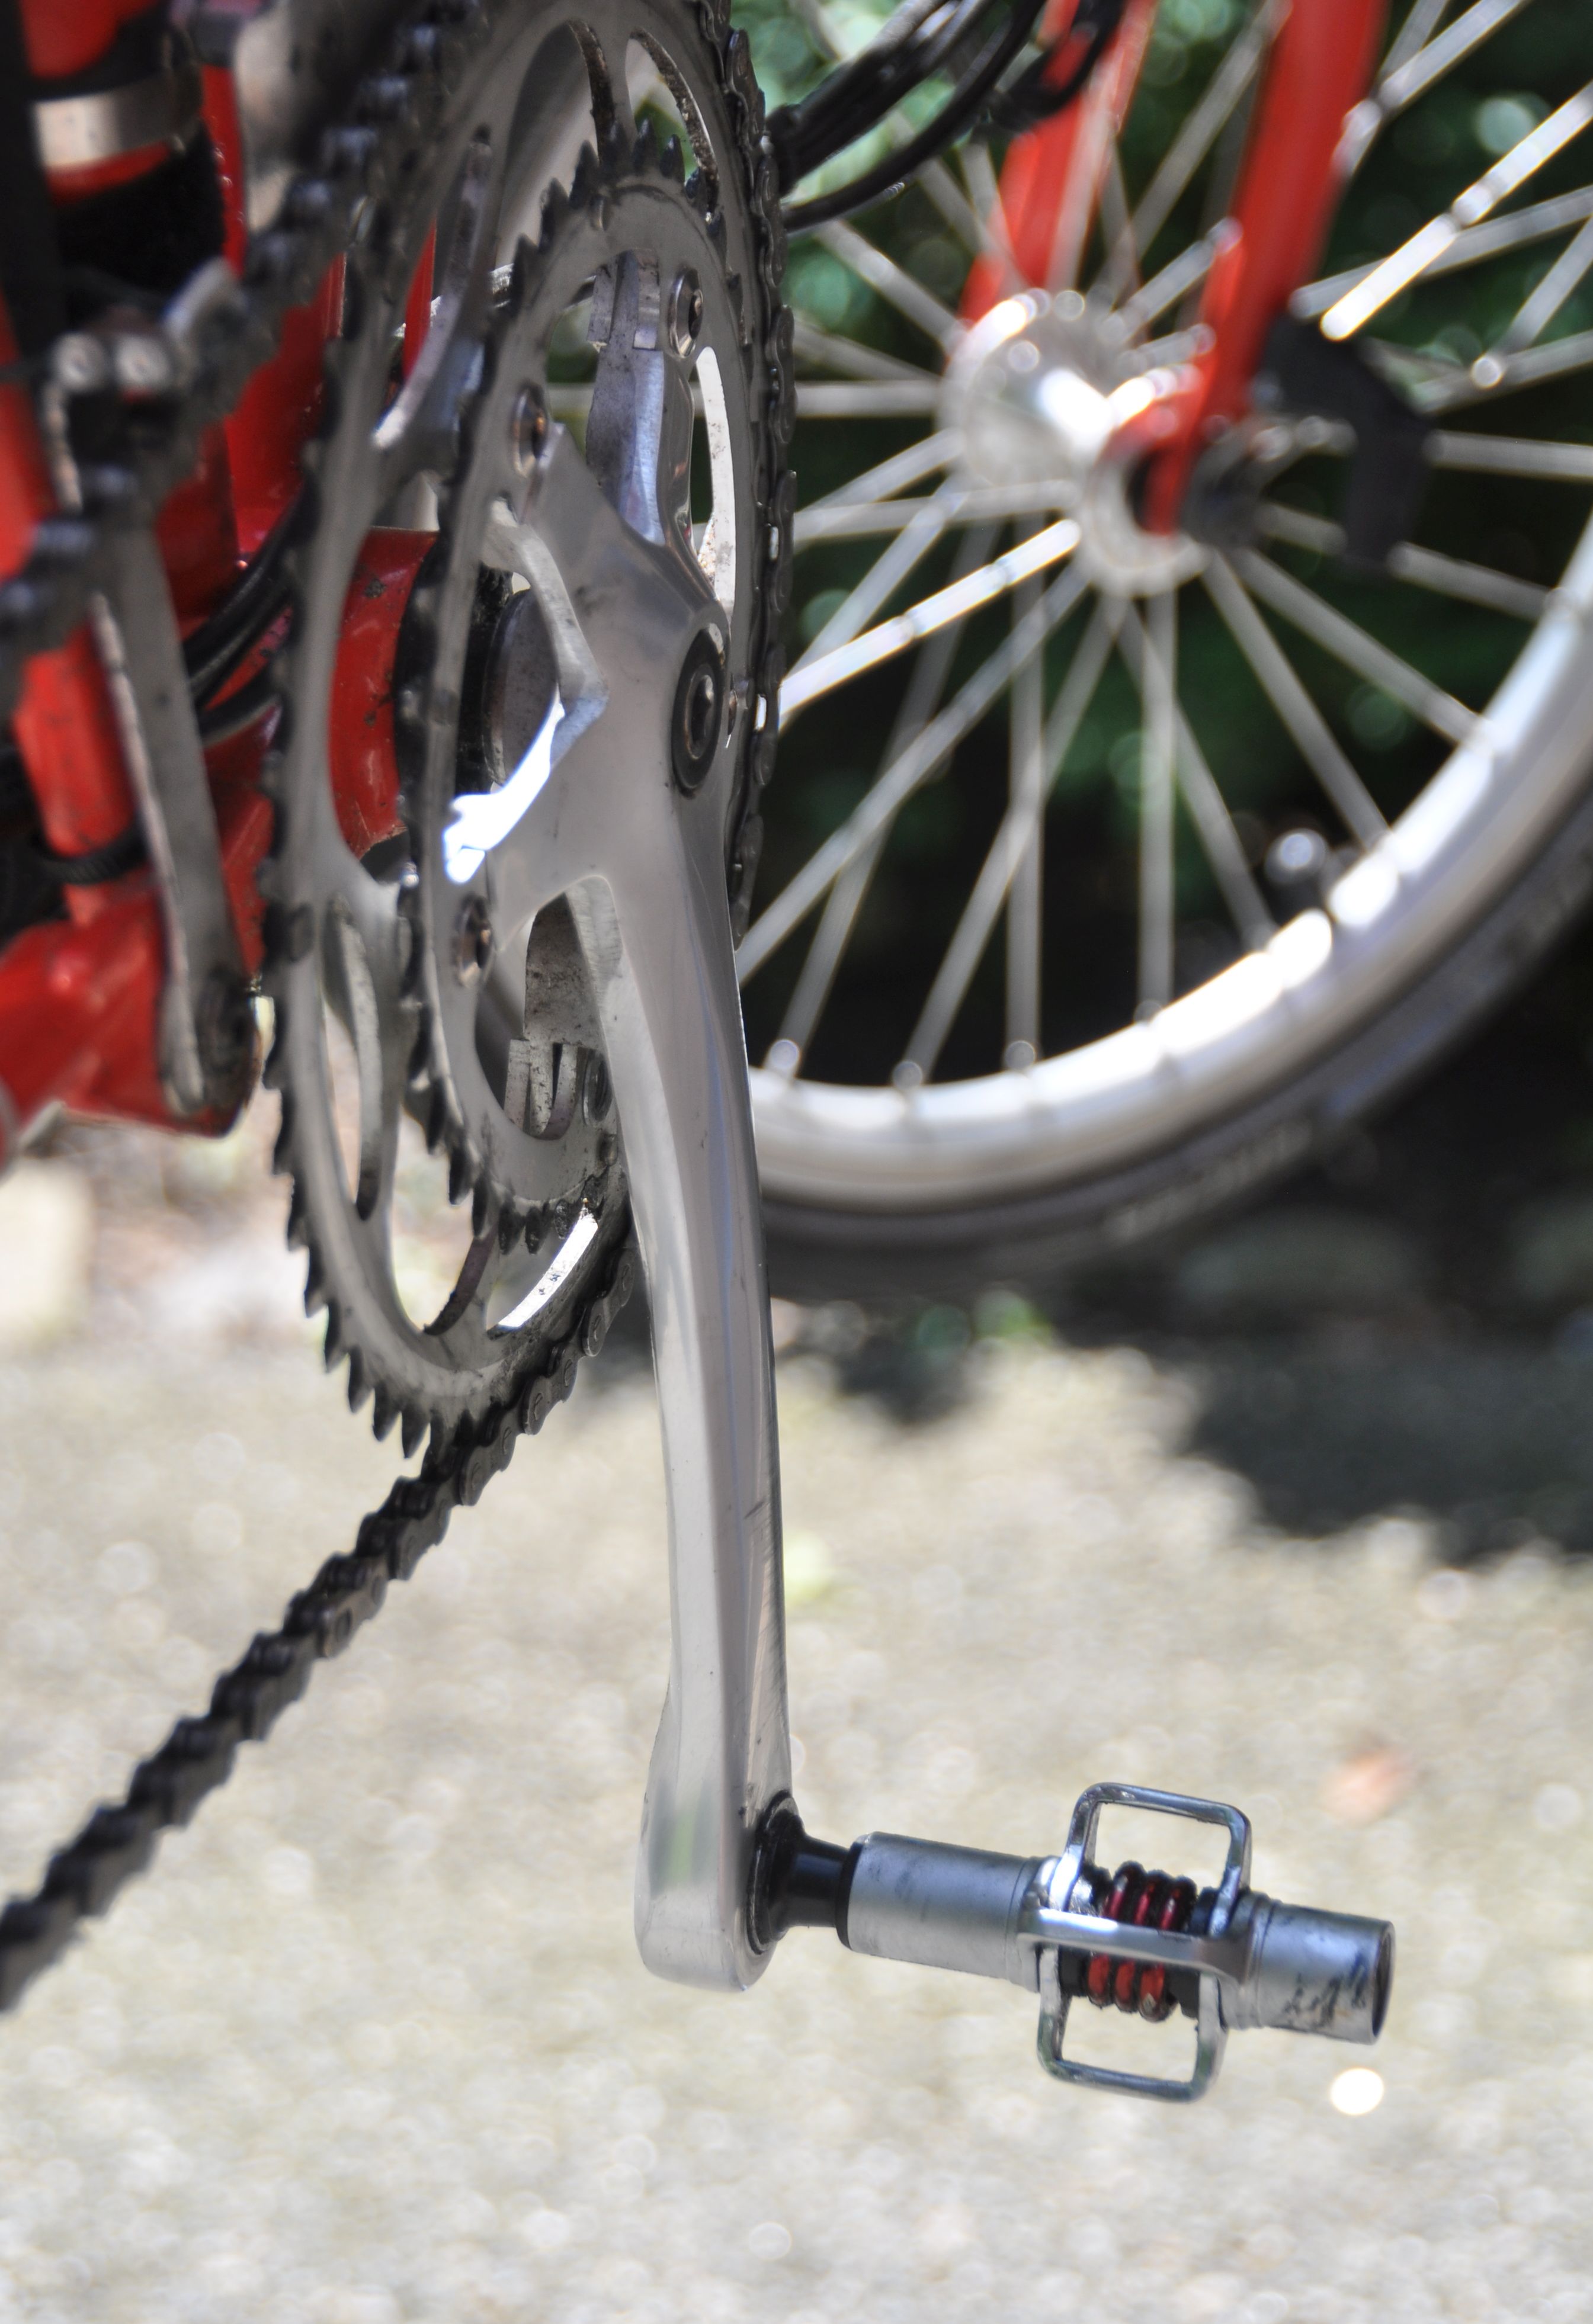
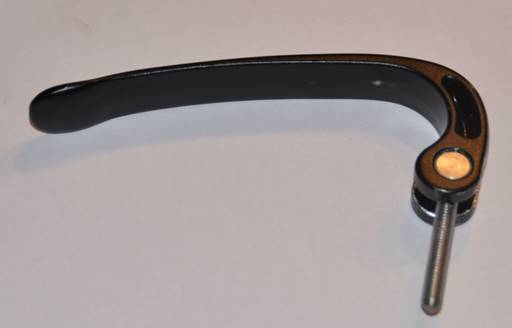
Folding eggbeater pedal Back to top
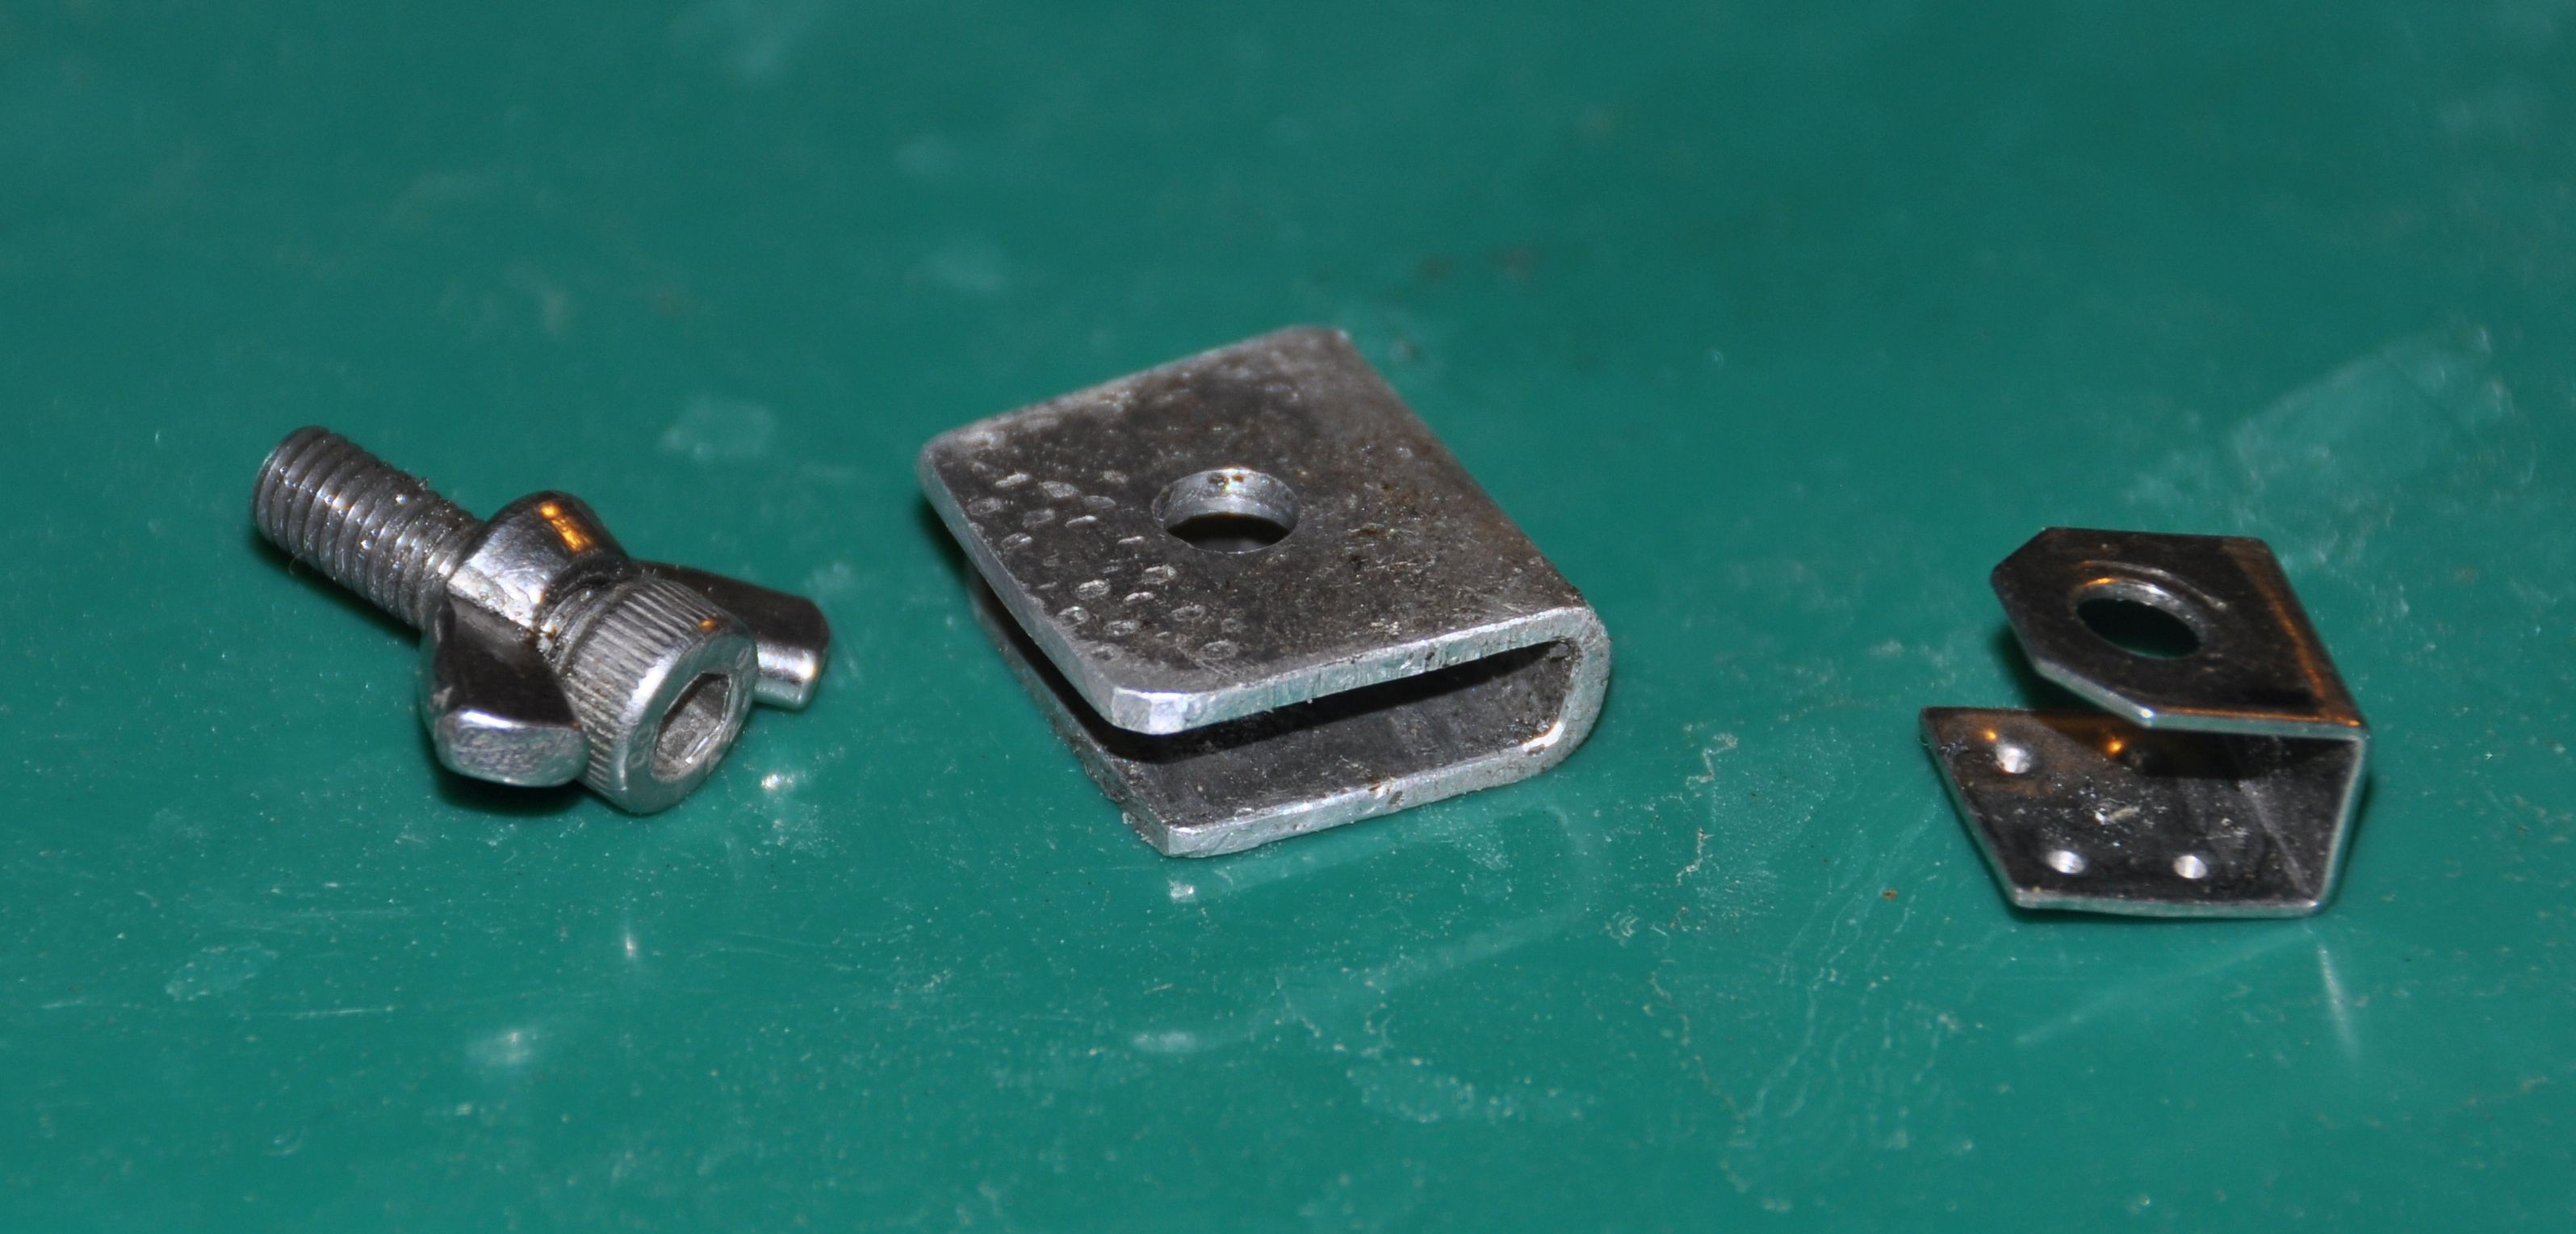
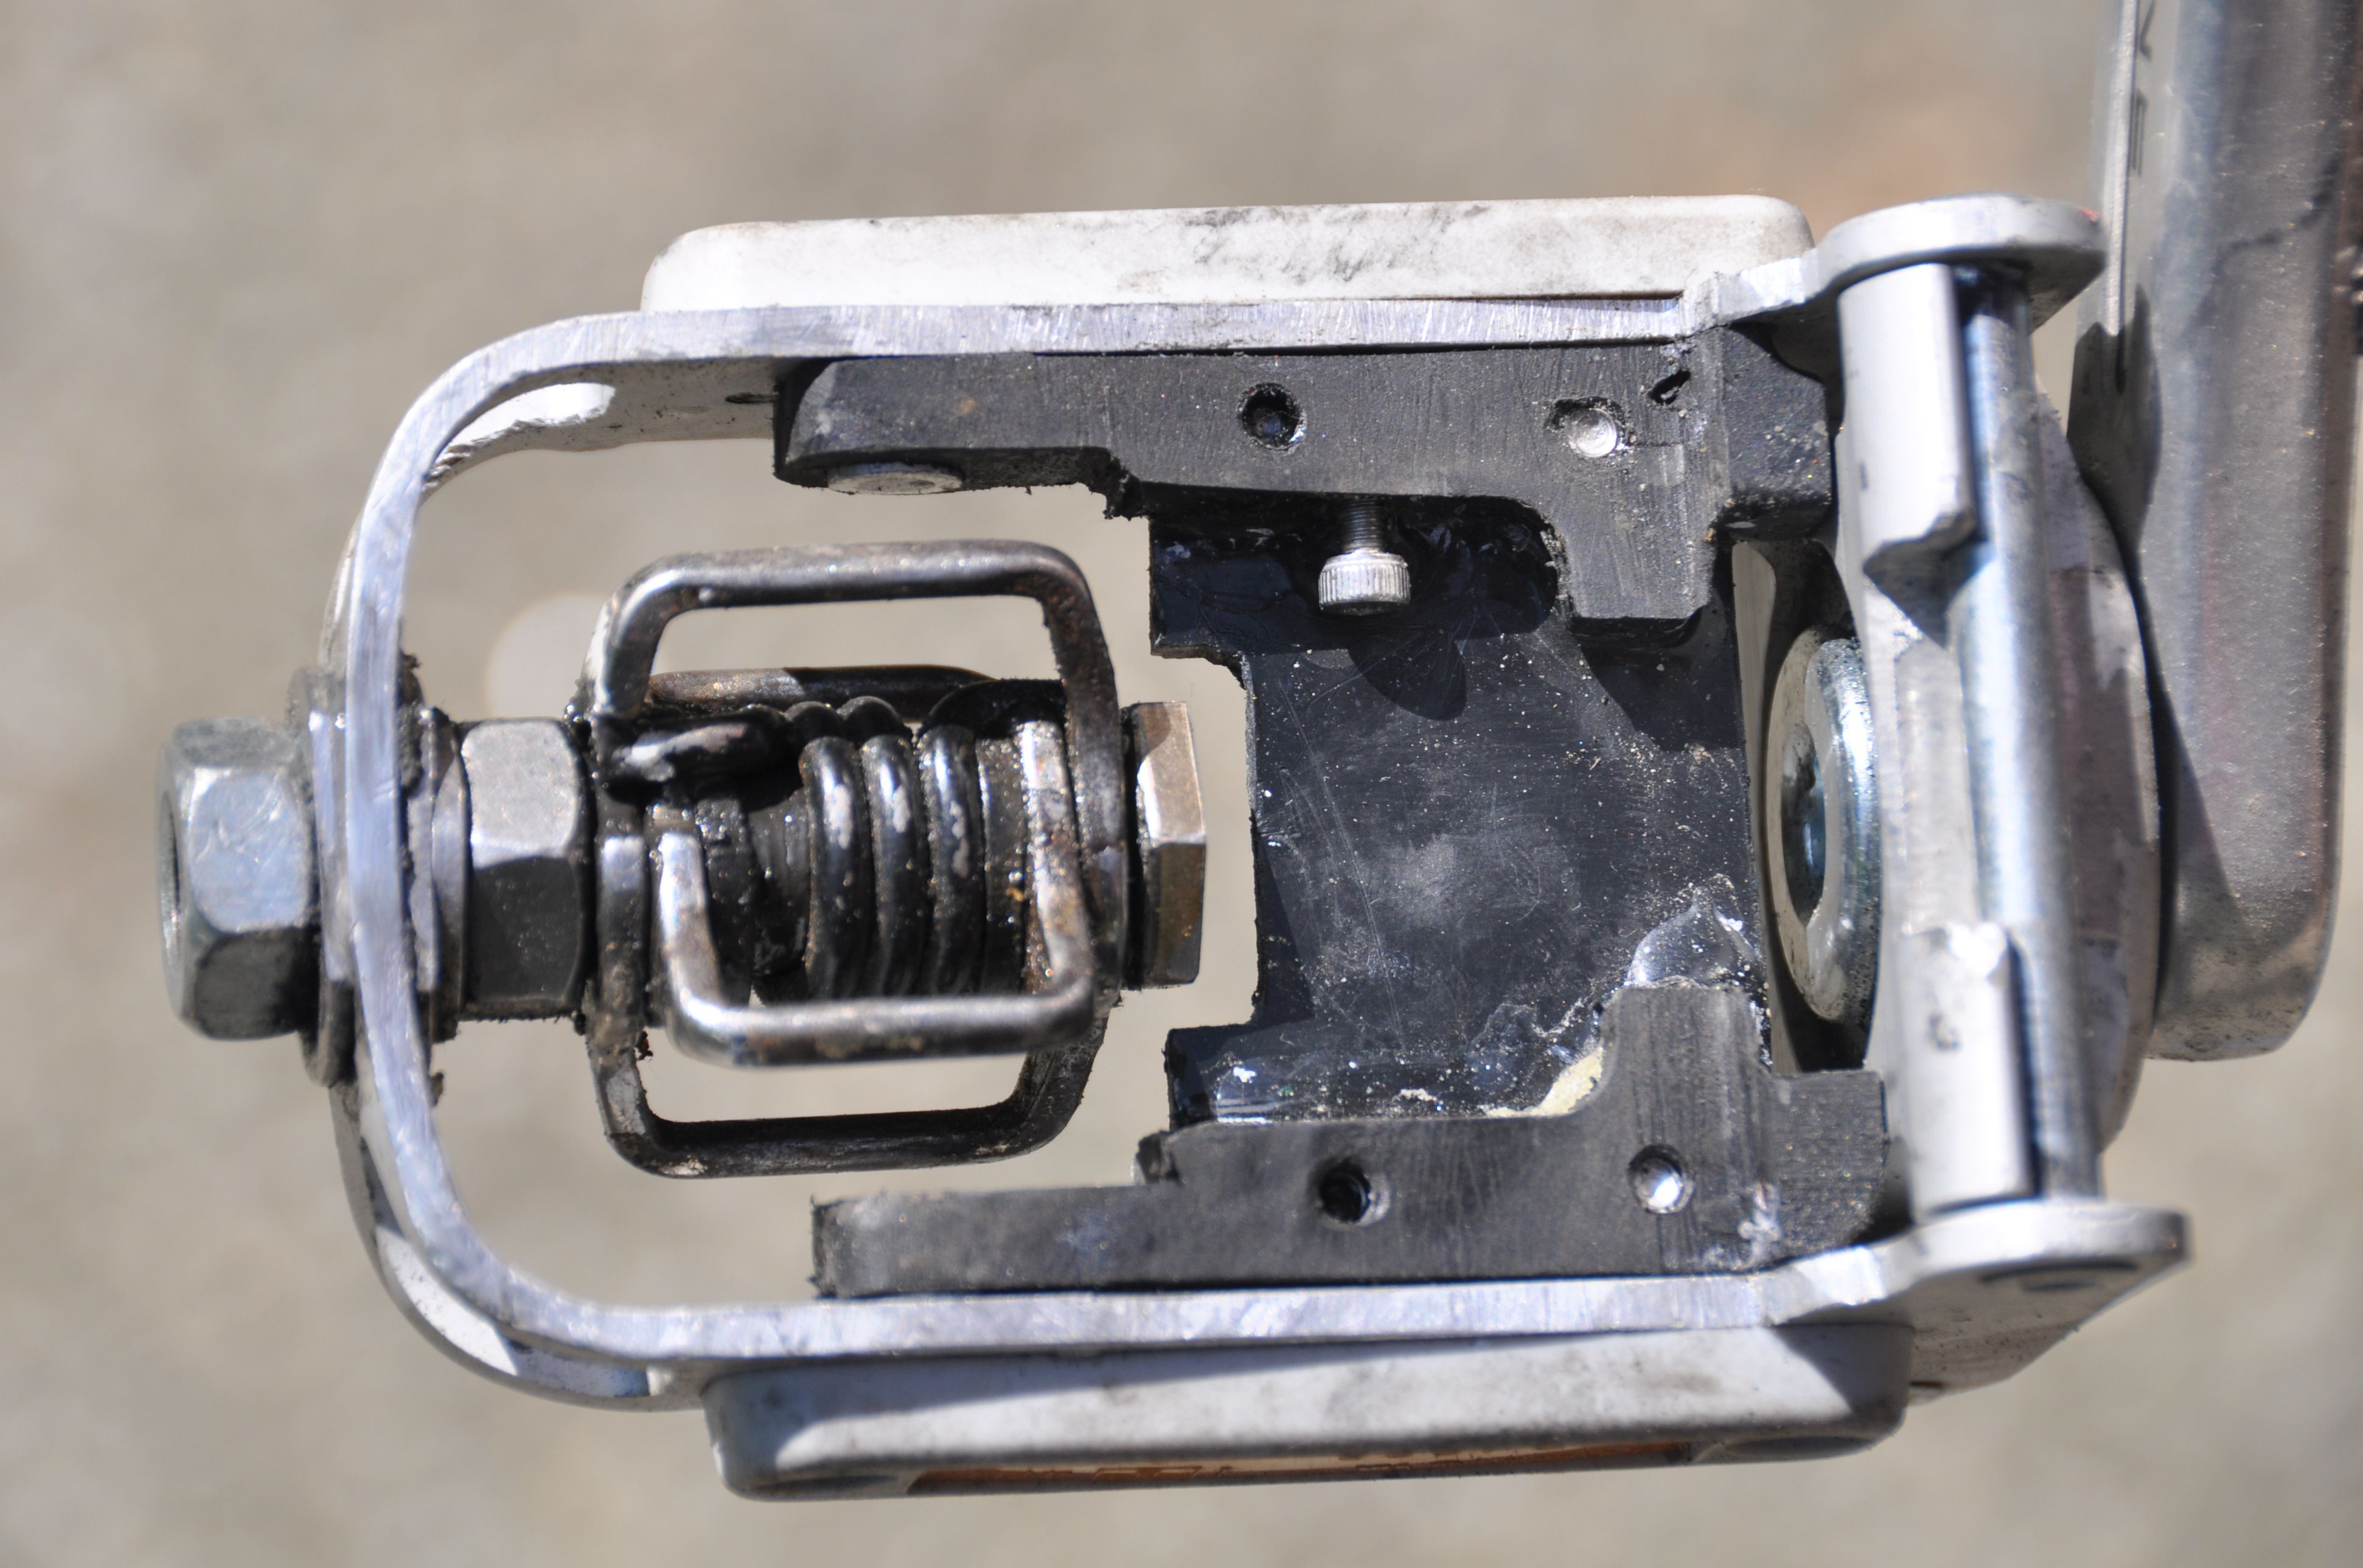
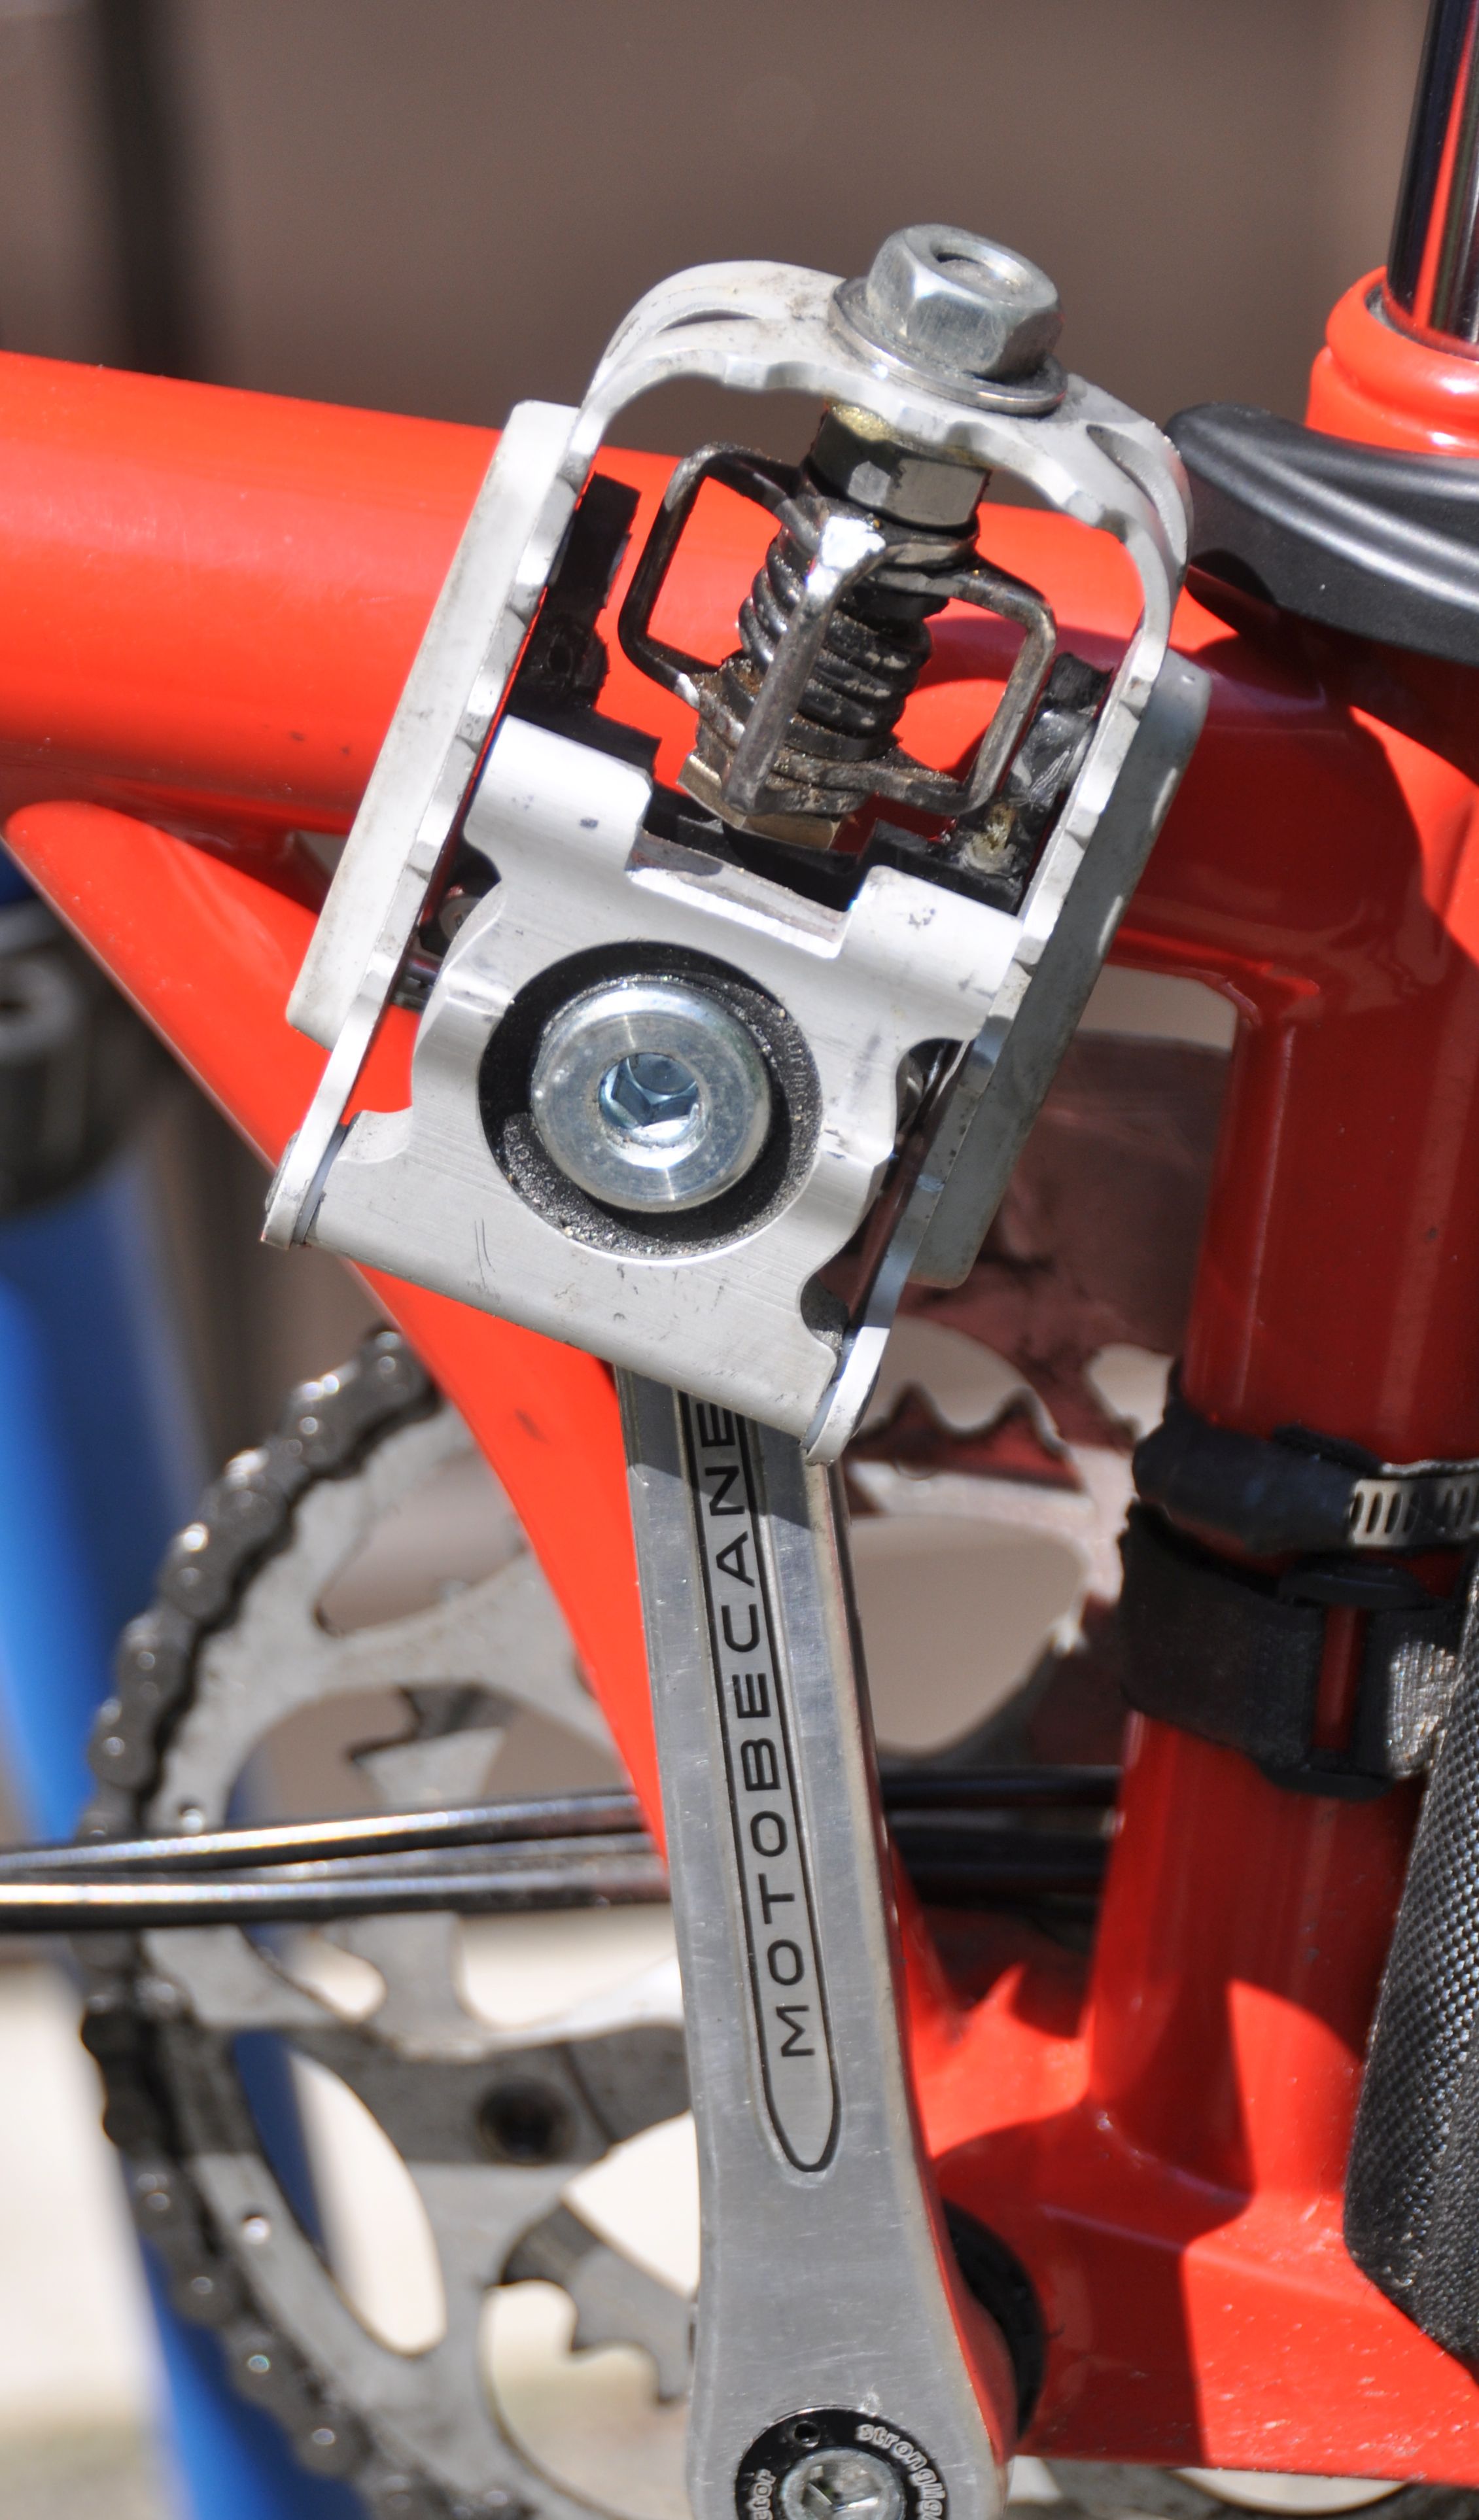
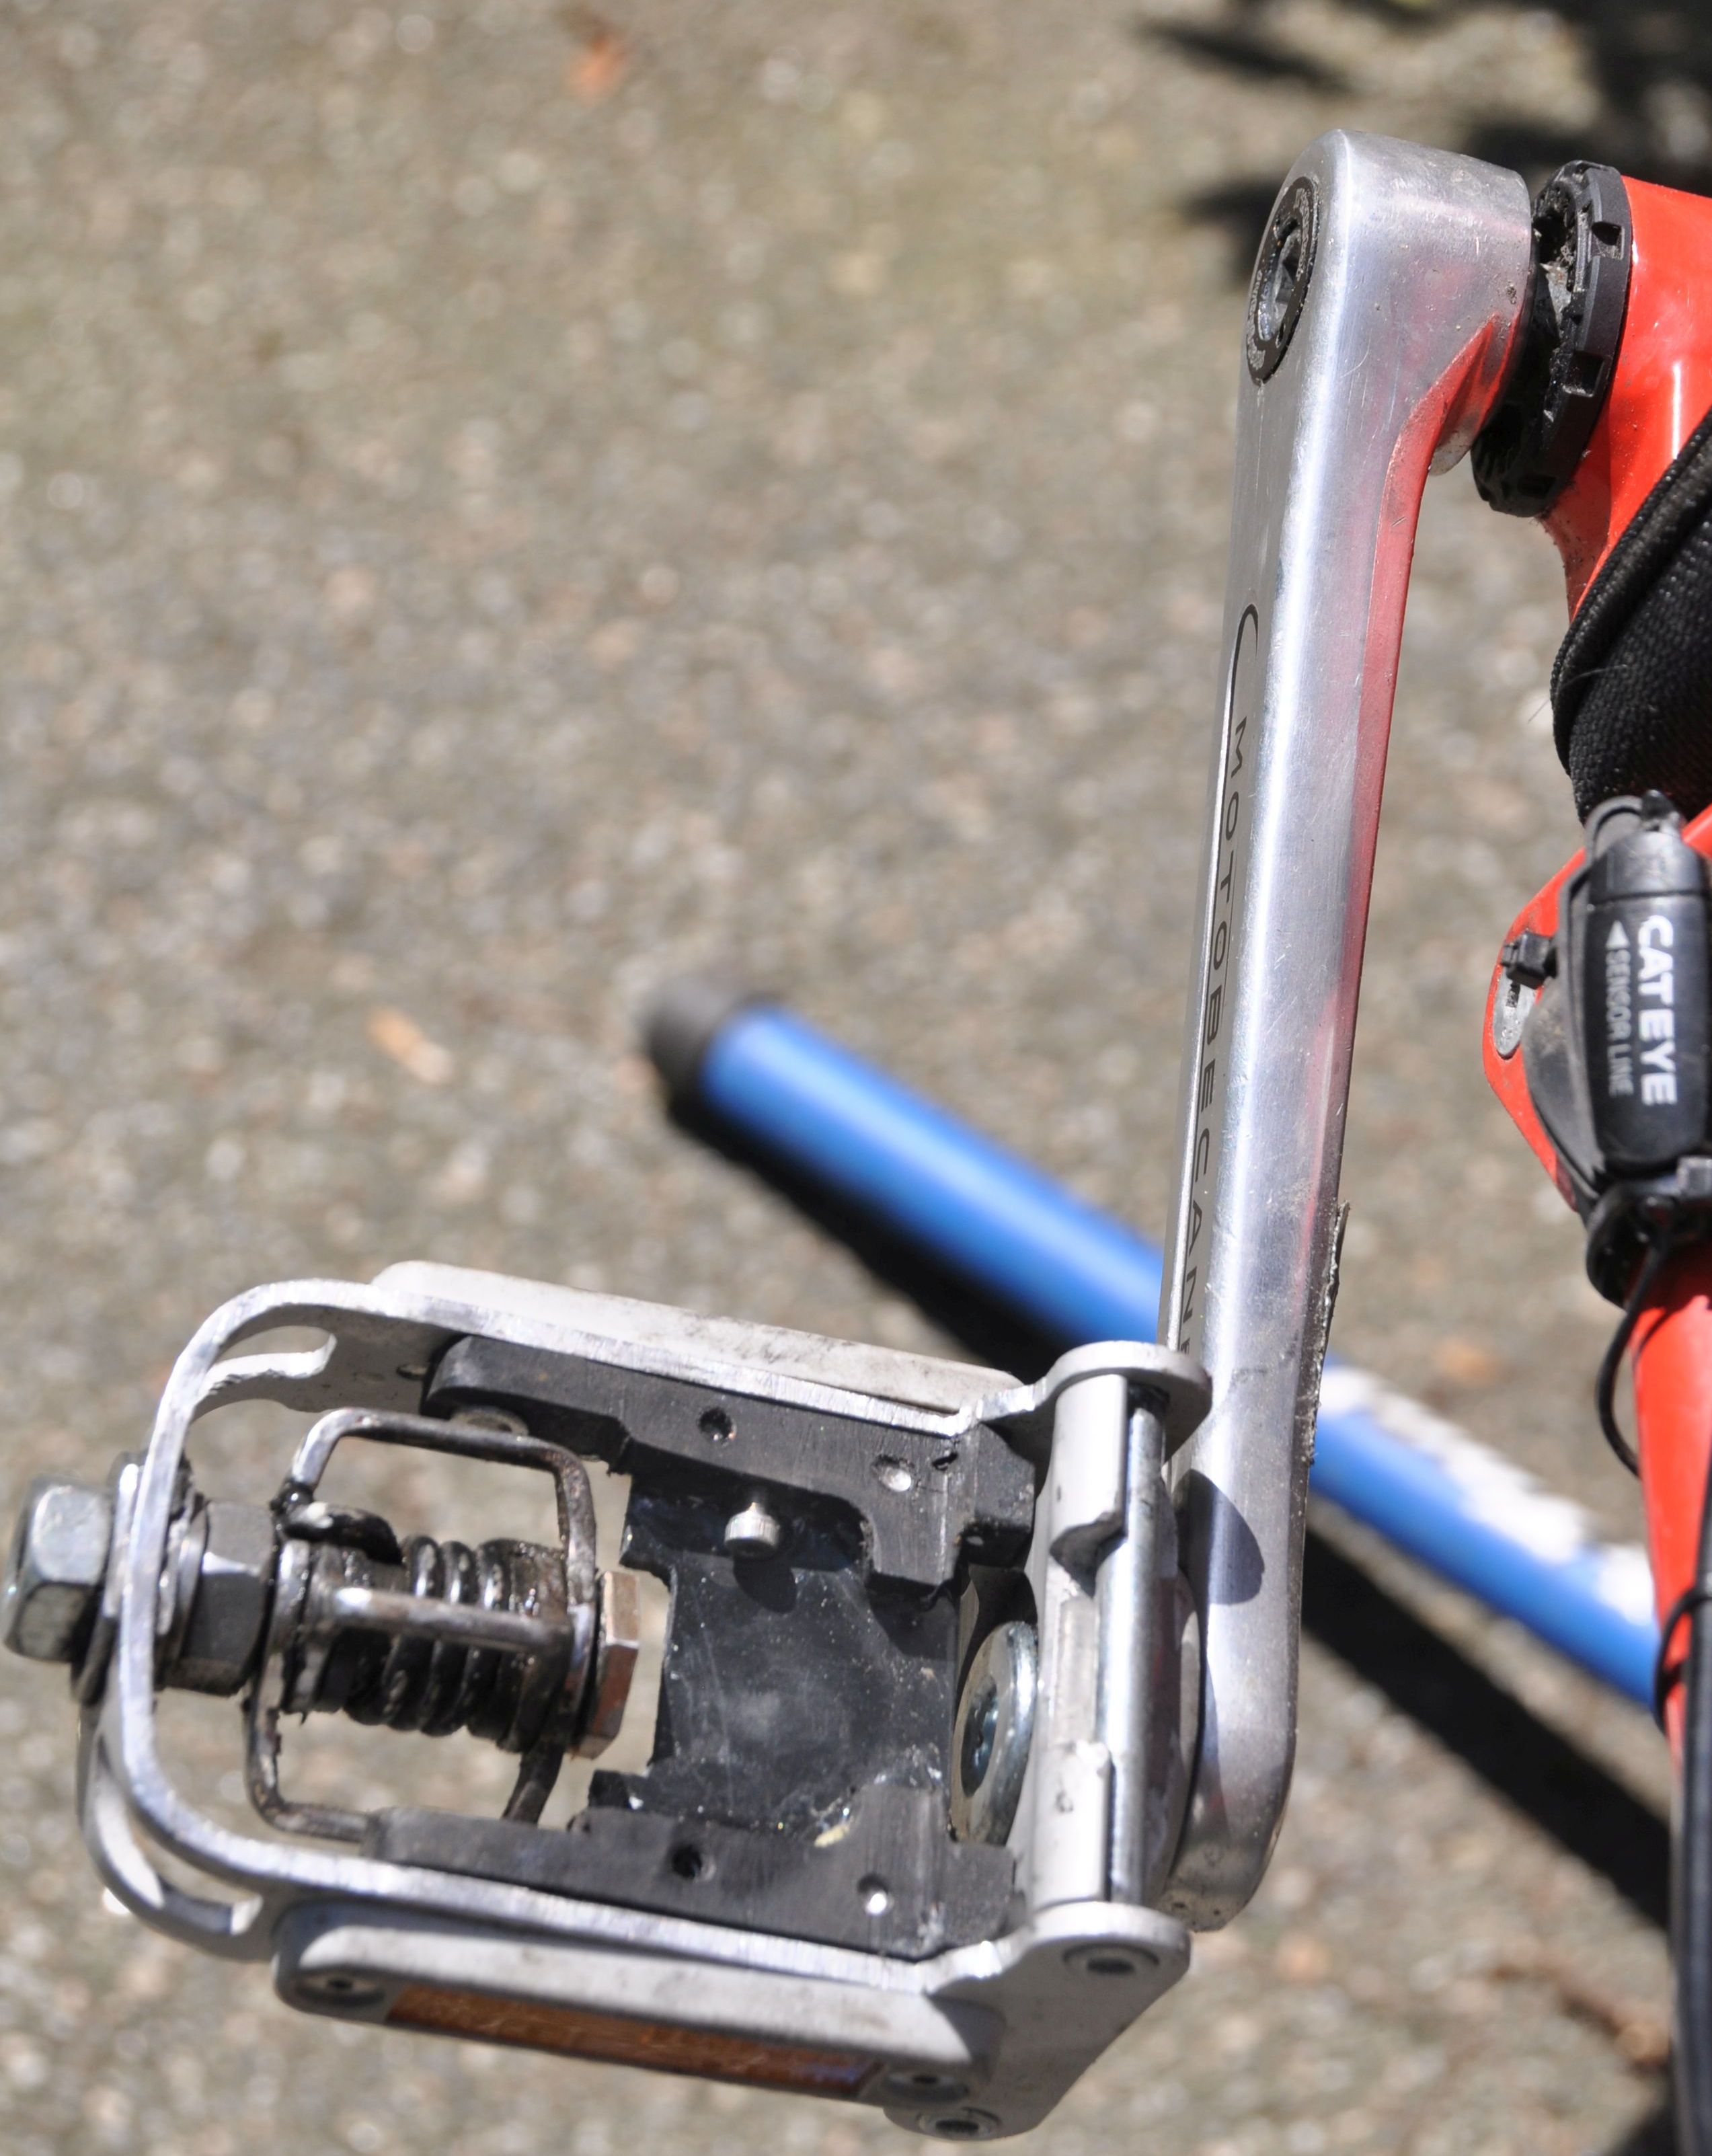
I like clipless pedals. For the Brompton, I tried for a while Power Grips Pedal Straps and started liking them, but I enjoy even more riding with clipless – I have them on all my other bikes. For the Brompton, the only available option is removable SPD pedals – but I have Crank Brothers eggbeaters on all my other bikes, and several pairs of shoes with eggbeater cleats. Also, removable pedals are less convenient than folding pedals. So I was motivated to build a folding eggbeater pedal. In essence, I used an old Crank Brothers Candy pedal, a folding Brompton pedal and combined them, using a hacksaw, a grinder and files. Amazingly, it did fit! I could even use the original black plastic folding plate which keeps the pedal unfolded, by cutting off two thin sections and connecting them with a small plastic plate using glue and screws. The folding plate no longer has the spring, but stays in place through friction.
The foot on this pedal is further out relative to the crank. I first wanted to compensate for this by using a pedal extender on the right pedal, but I didn’t like the larger stance (or Q factor). So I had to bring in the folding pedal by using a vintage crank which is straight and not bent outwards as most modern cranks. Also, with some filing, I could move the eggbeater spiral closer to the crank. Now the two pedals are almost symmetric, only a few mm difference. I have used the pedal now for several weeks, also on a bike tour, and it performs (and folds) very well.
Note: I disassembled two different eggbeater candy pedals. They were different. In one of them (shown in the photos) the spiral was held by a tube with 8 mm inner diameter, the other one had 6 mm. Since I had first opened up the 8 mm, I used M8 bolts and nuts to connect the spiral to the Brompton pedal.


Hinge clamps Back to top
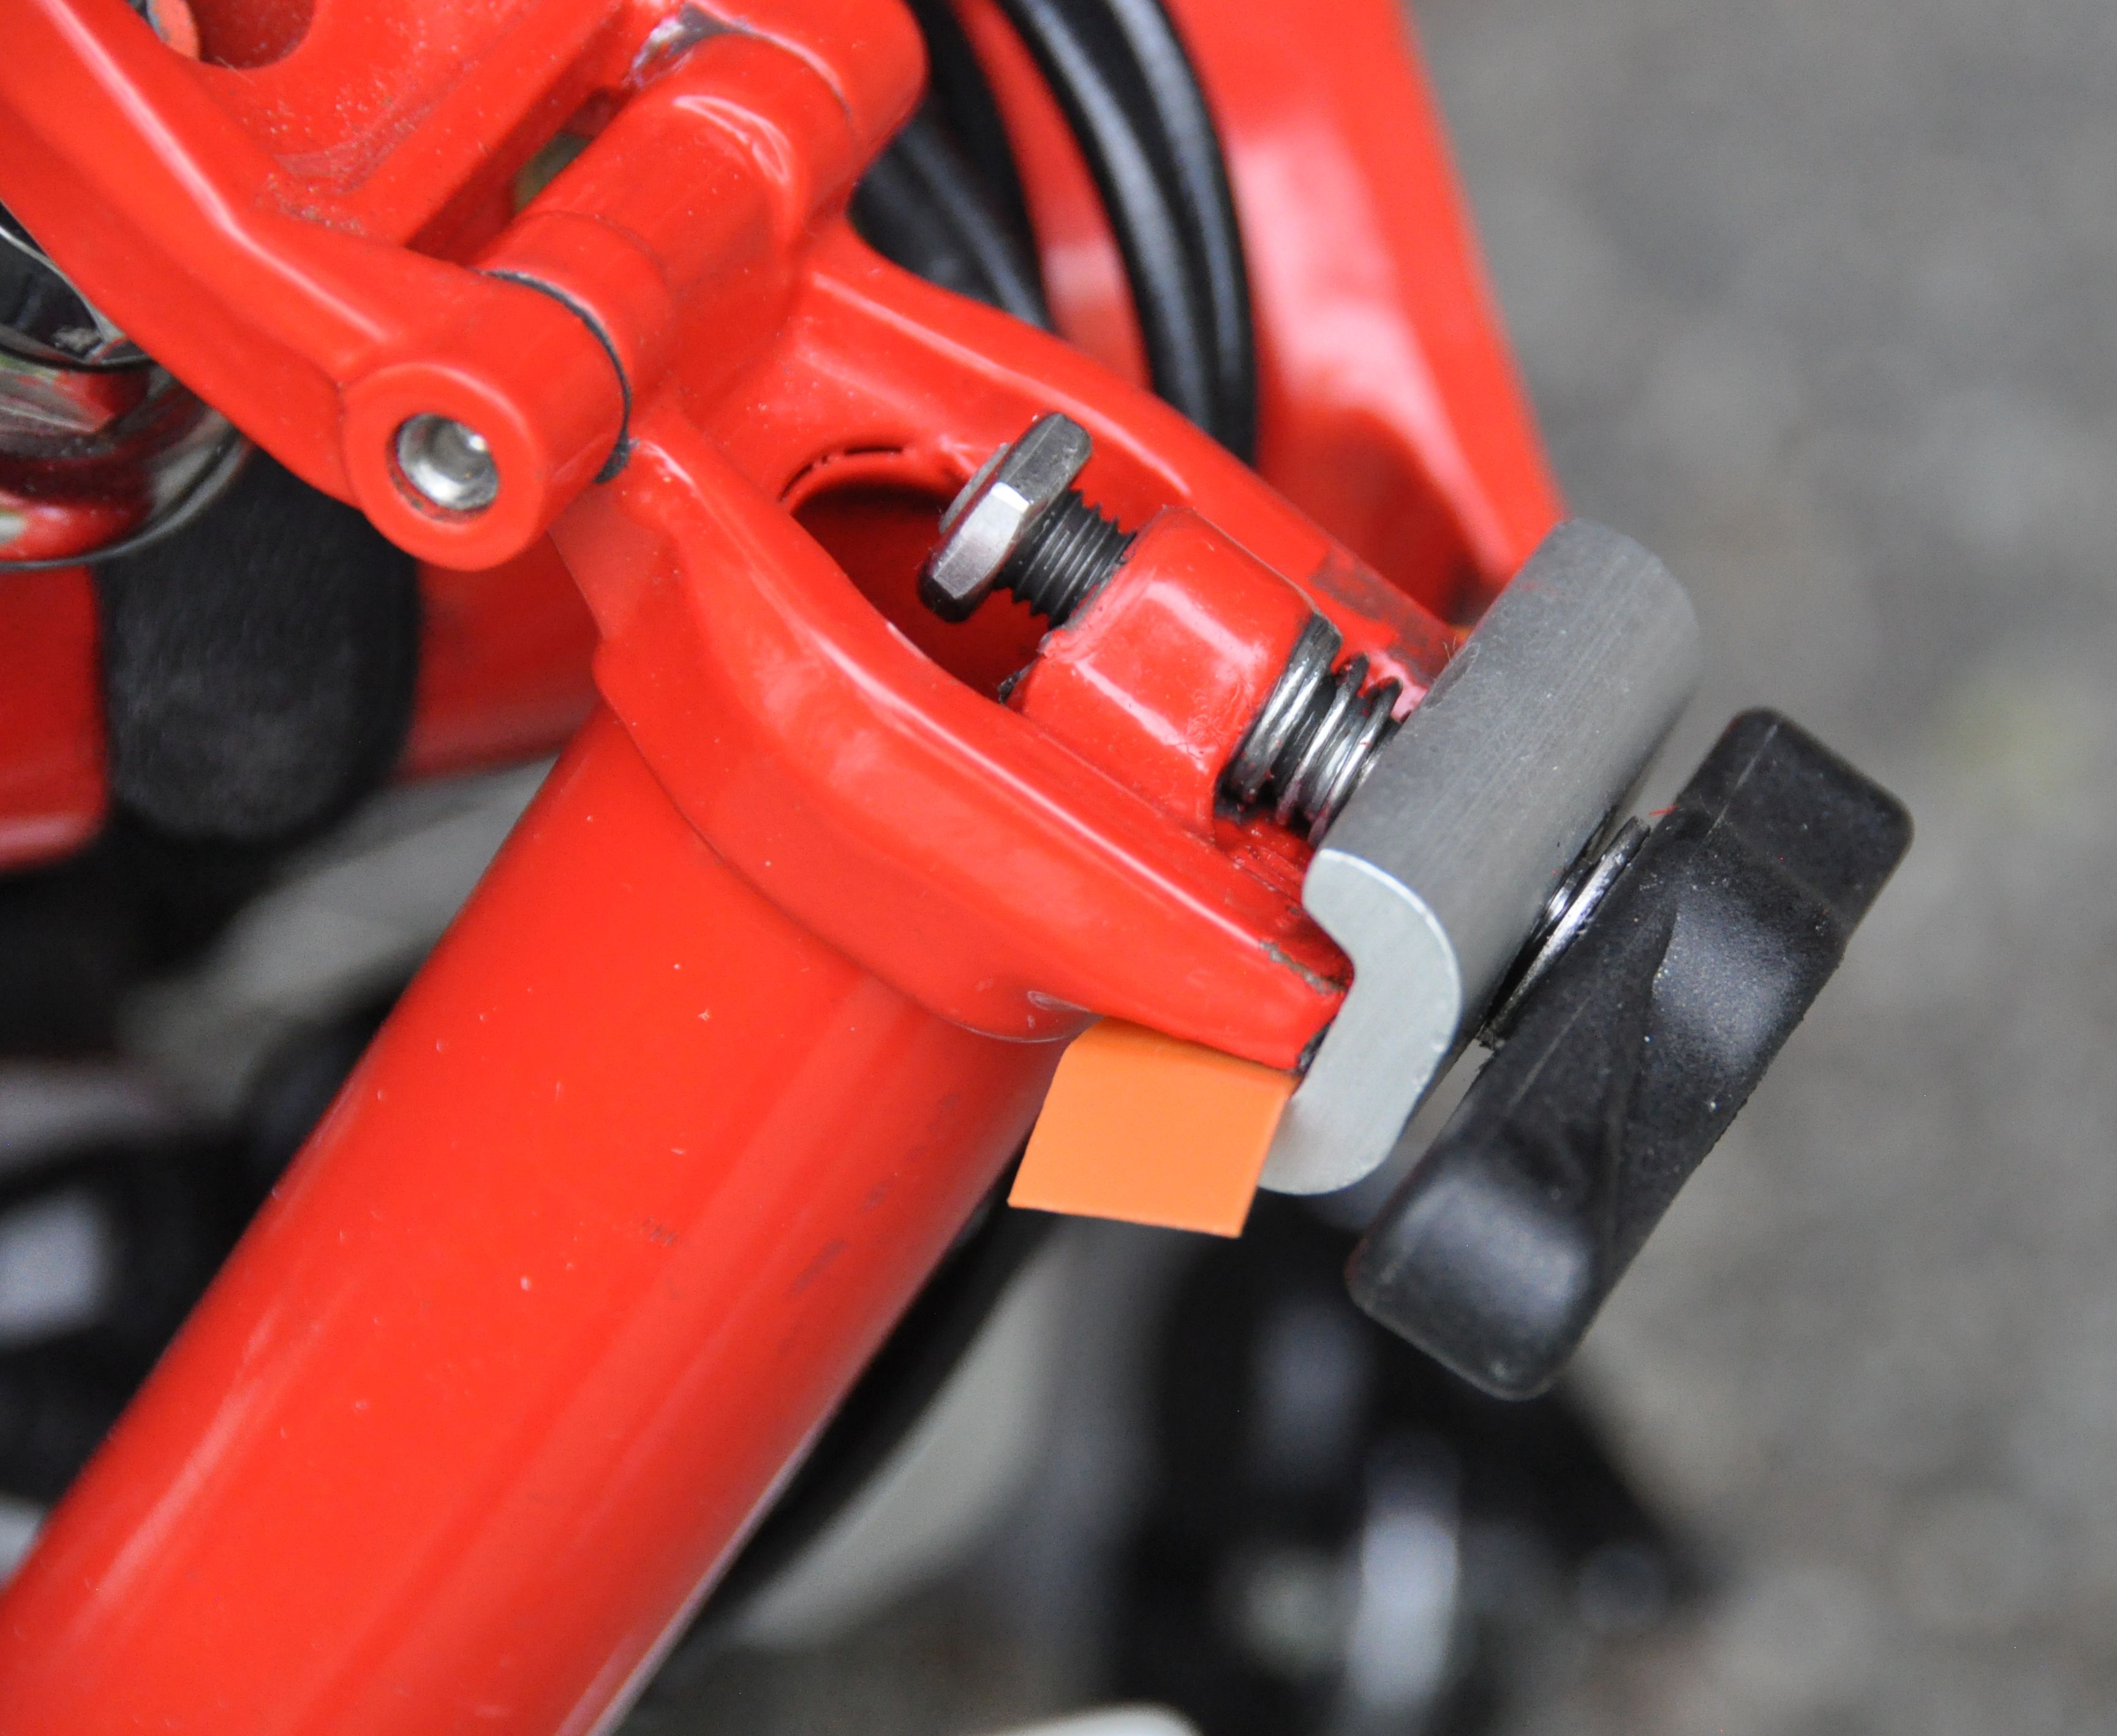
Here are my 2 cents (and parts list) on how to modify hinge clamps to avoid rotation. File away 1 or 2 mm of the upper lip, add a spring and an M8 hex jam nut.
Springs: from Amazon, Compression Springs, Outside diameter: 7/16", Length: 1-1/16", Gauge: 041.:
https://www.amazon.com/gp/product/B008RF771U
Hex jam nut (from Bolt Depot https://www.boltdepot.com/Product-Details.aspx?product=13573 ) is adjusted to within a quarter turn for the hinge just to release, and then fixed with blue Thread Locker. Has been working perfectly for many months.
Note: A hex jam nut is a thinner version of a hex nut. The original M8 bolt is too short to pass through a whole lock nut with its nylon piece, so the nut may not lock (but you can always use thread locker). I prefer the thinner nut, since I want to be able to insert an inner tube into the main tube of the bike, and with the jam nut I have just enough clearance.

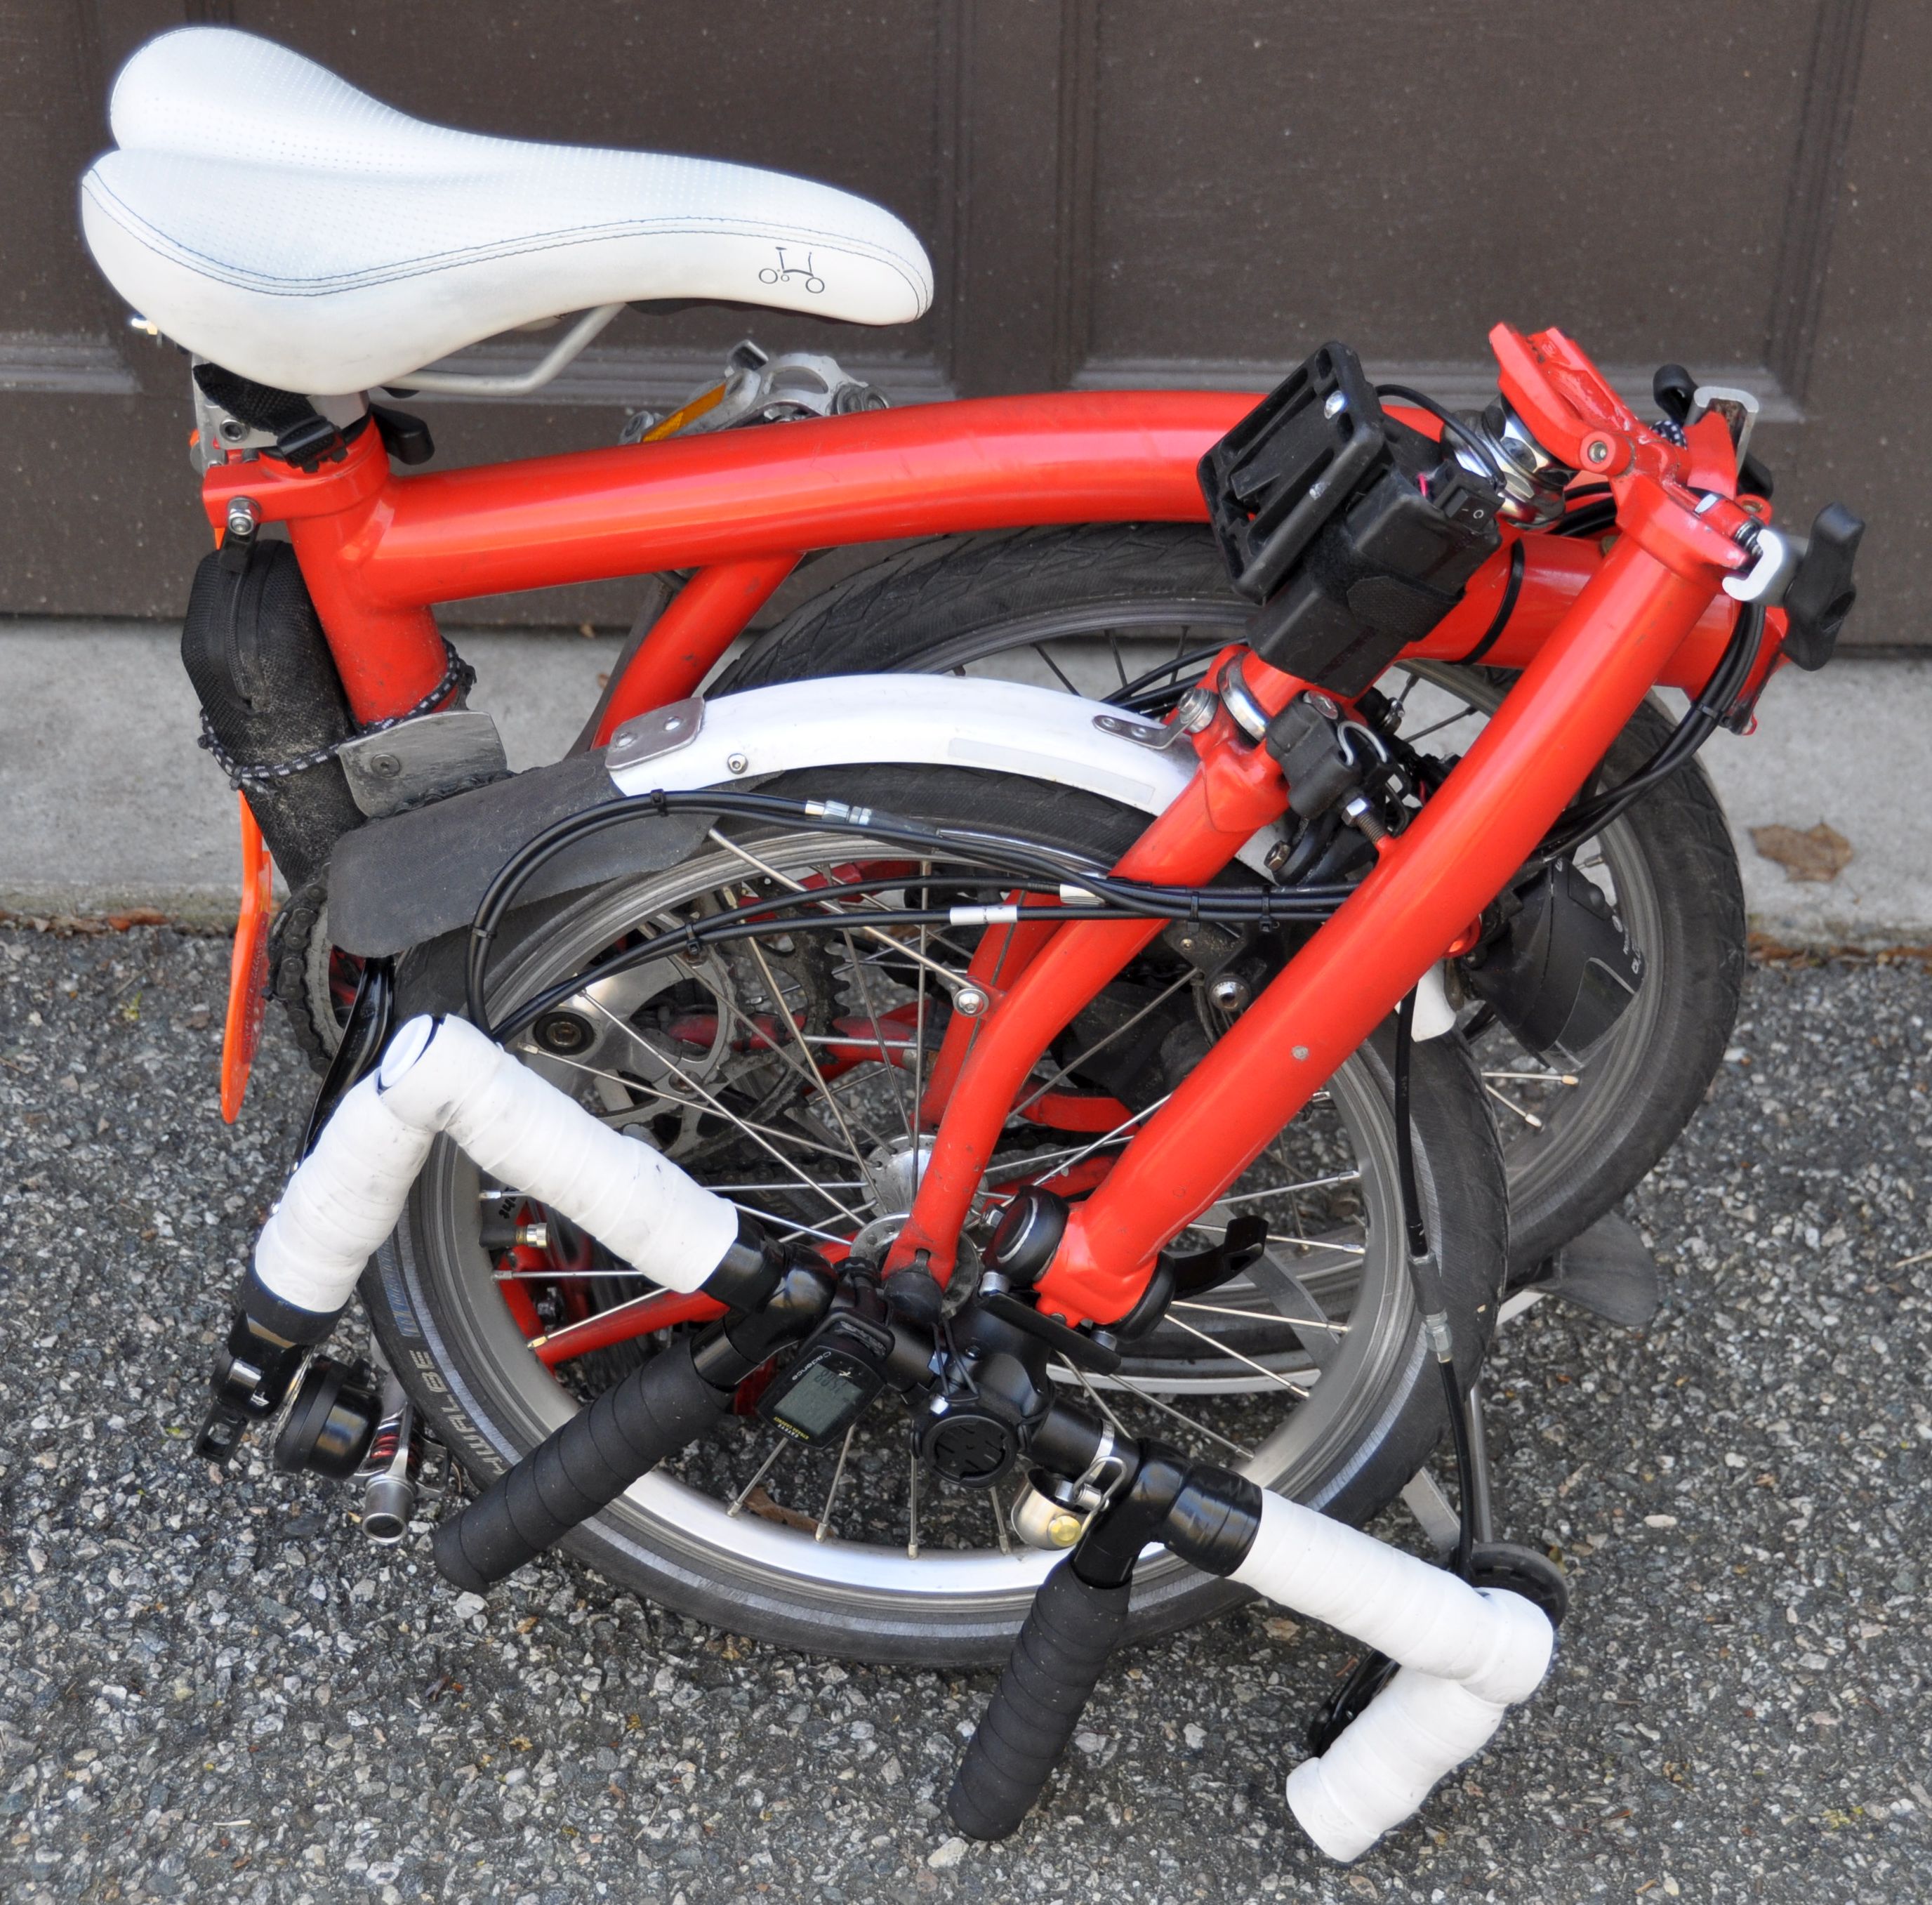
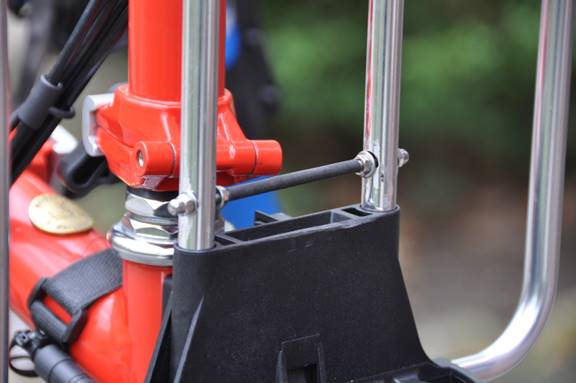
Mid Stop Block Back to top
The mid stop block allows the Brompton to be carried and rolled without the saddle pushed all the way in. The saddle can now be a convenient handle to roll the bike. The mid stop block locks the folded wheel, so it doesn’t unfold when you lift the bike. This is big improvement if you want to roll the bike most of the time, but then carry it up a few stairs.
Several people have designed a mid stop block for the Brompton using 3D printing or machining. A challenge is that different Brompton models have slightly different frame dimension. I have made a mid stop block using thermoplastic which can be molten in hot water or with a hair dryer. What's nice about this is that once you have put it on the bike you can warm it up and change its shape, i.e. make it a little bit thicker or thinner to fit the geometry of the bike. I took me a little while to learn how to use this material. If you heat it up too much, it become gooey and almost liquid.
Update: I am now using a small plastic part attached with cable ties. Works well and looks neater!
Update: Even simpler and more sturdy: A plastic sheet wrapped around the stay and secured with hose clamps.

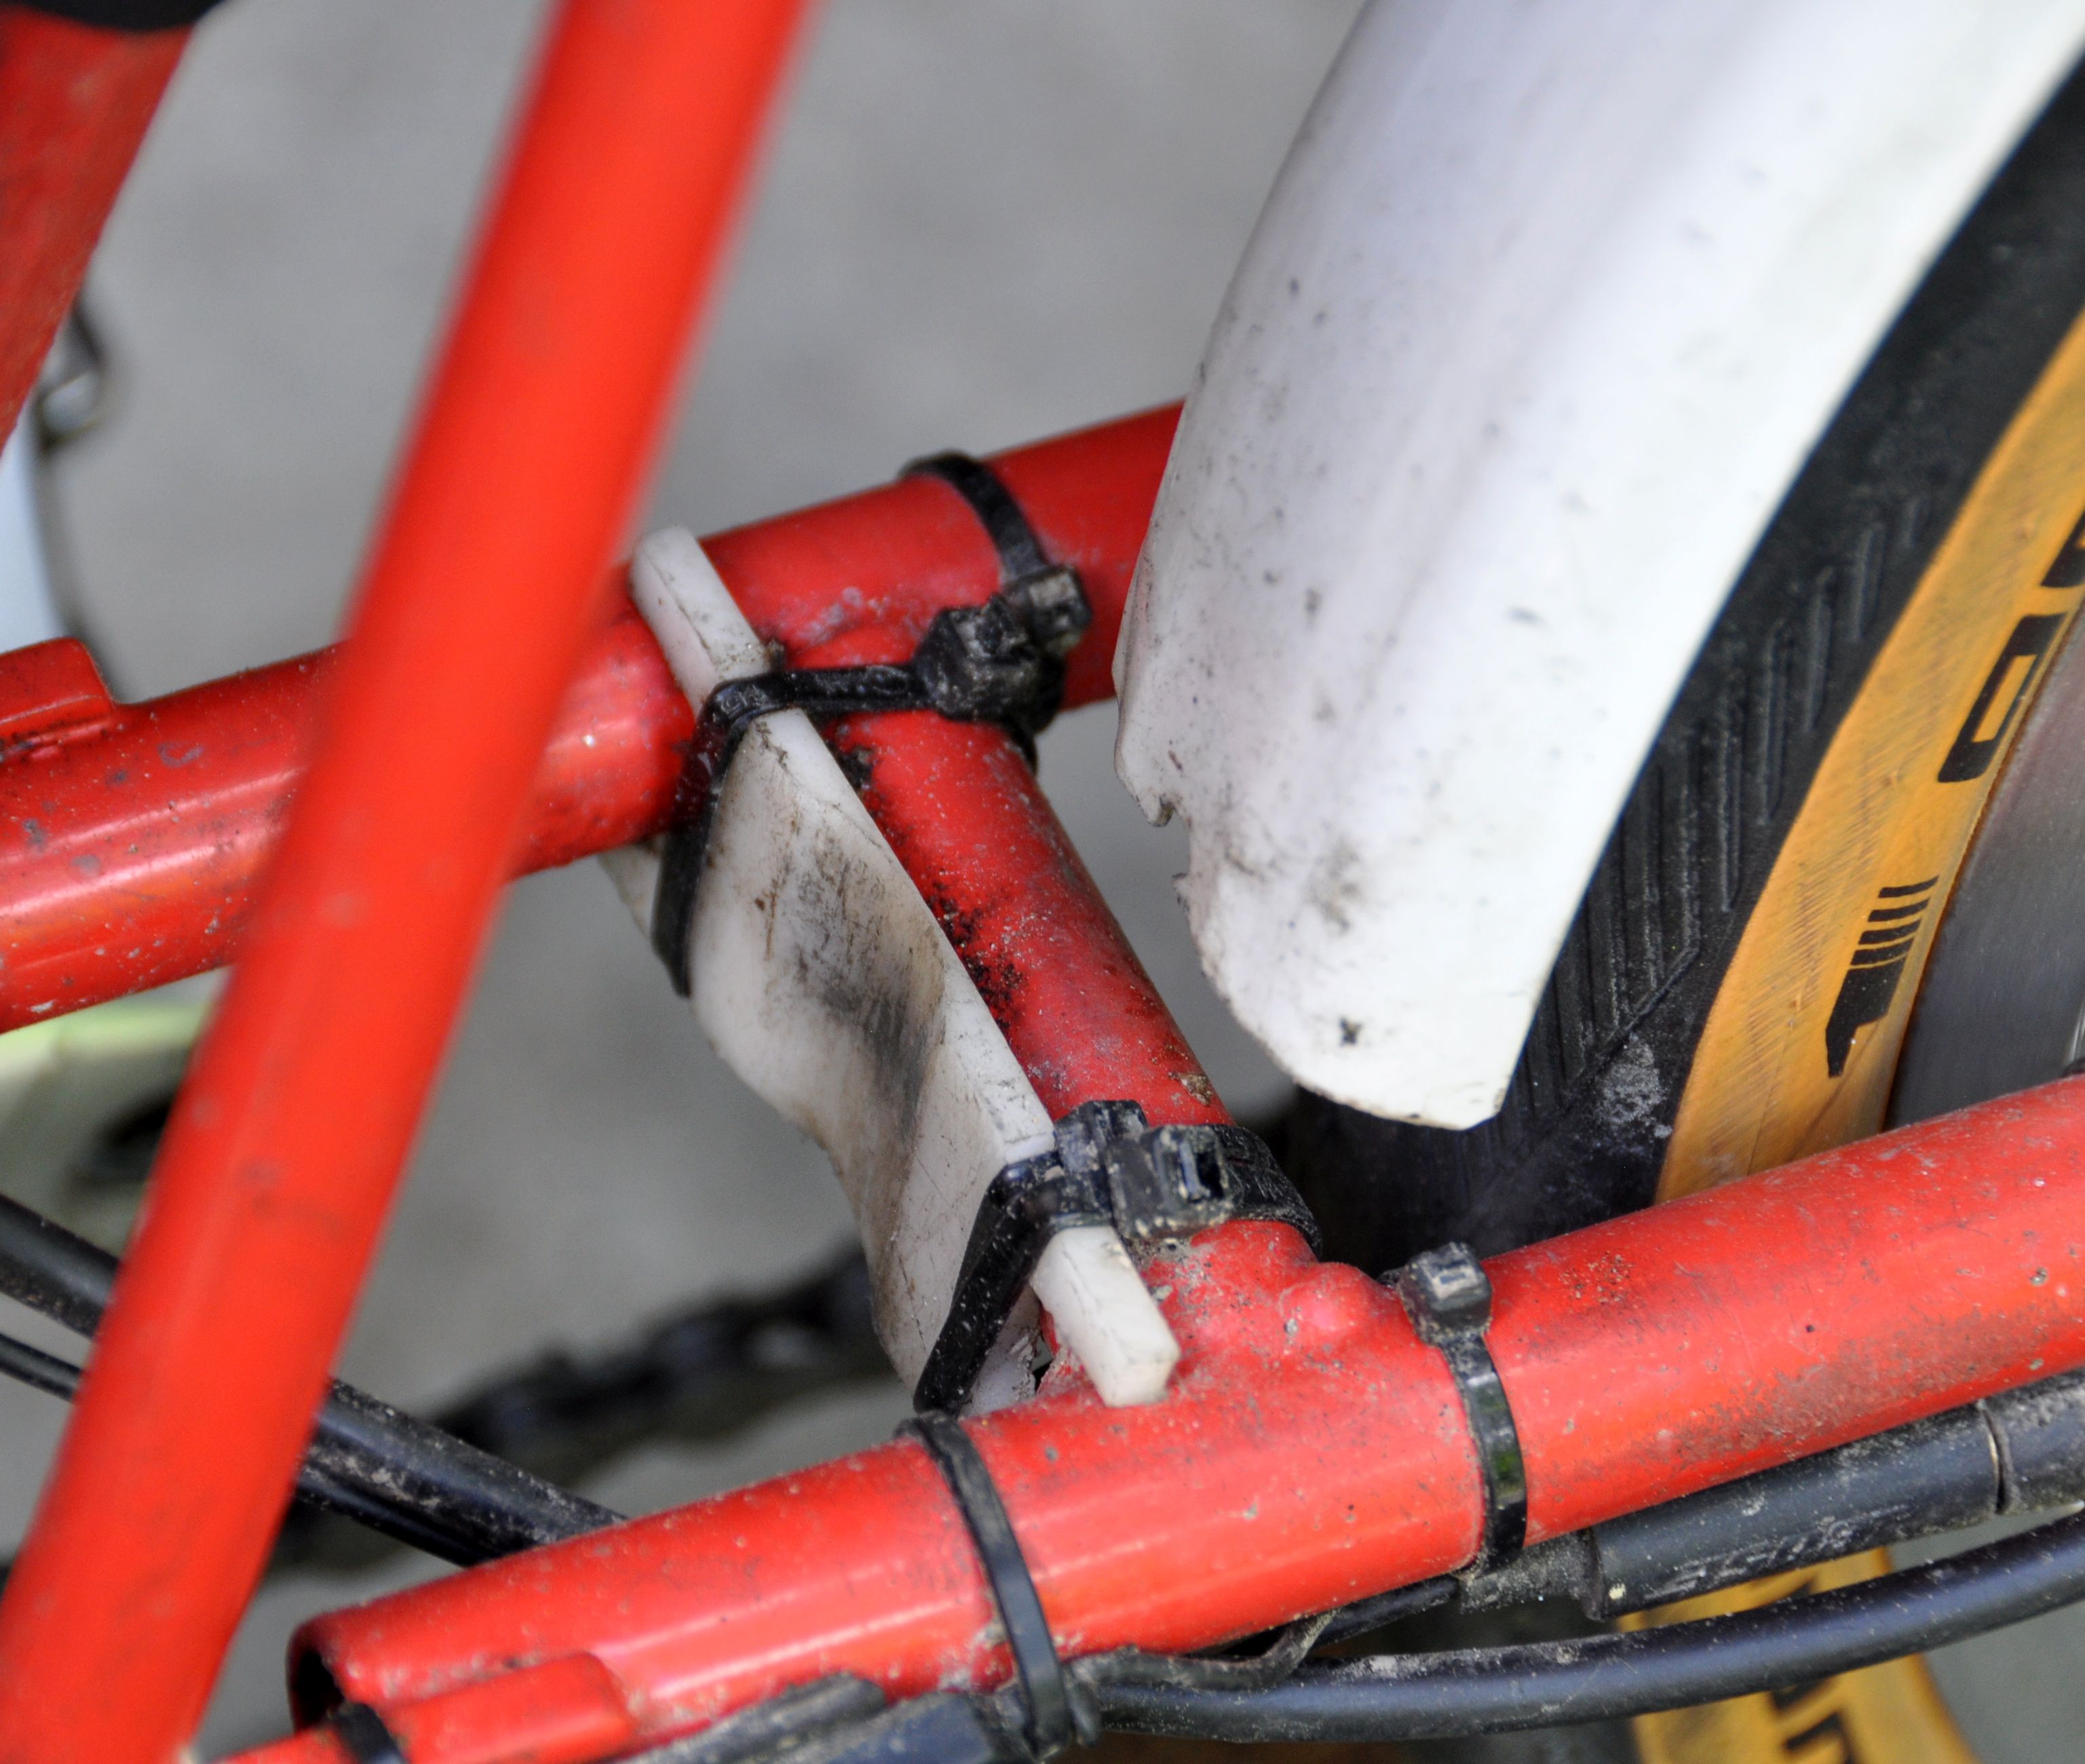
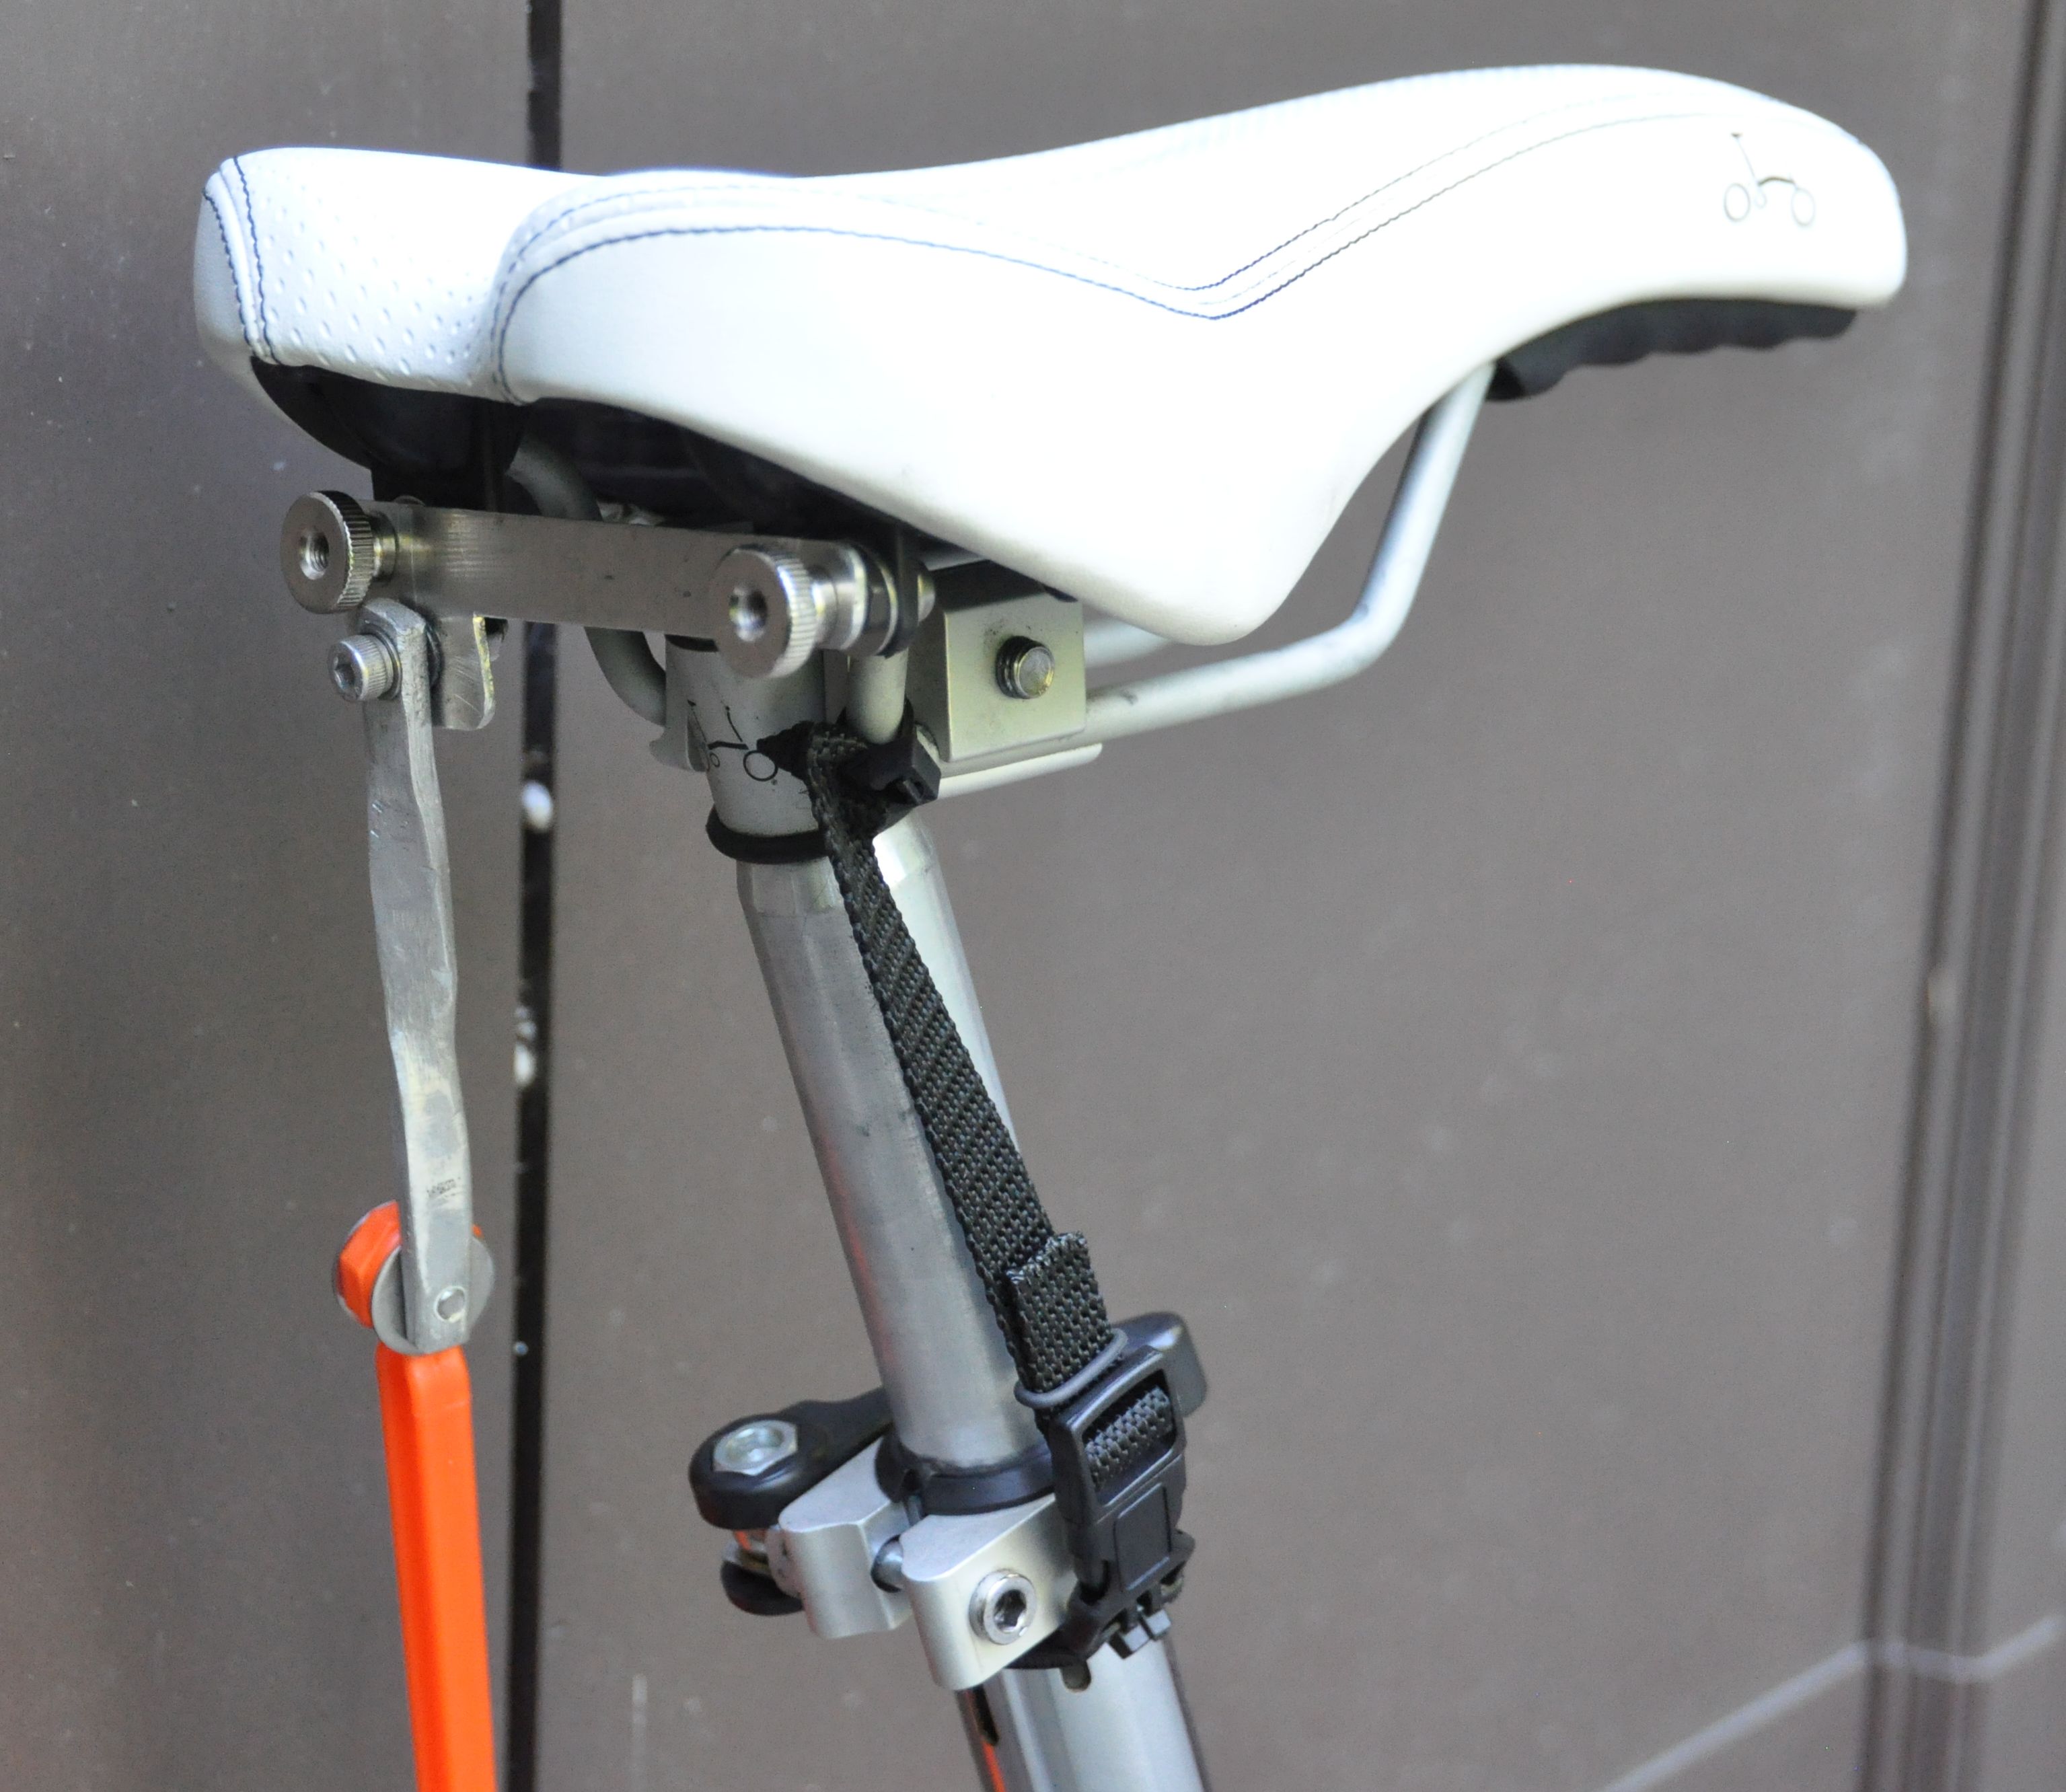
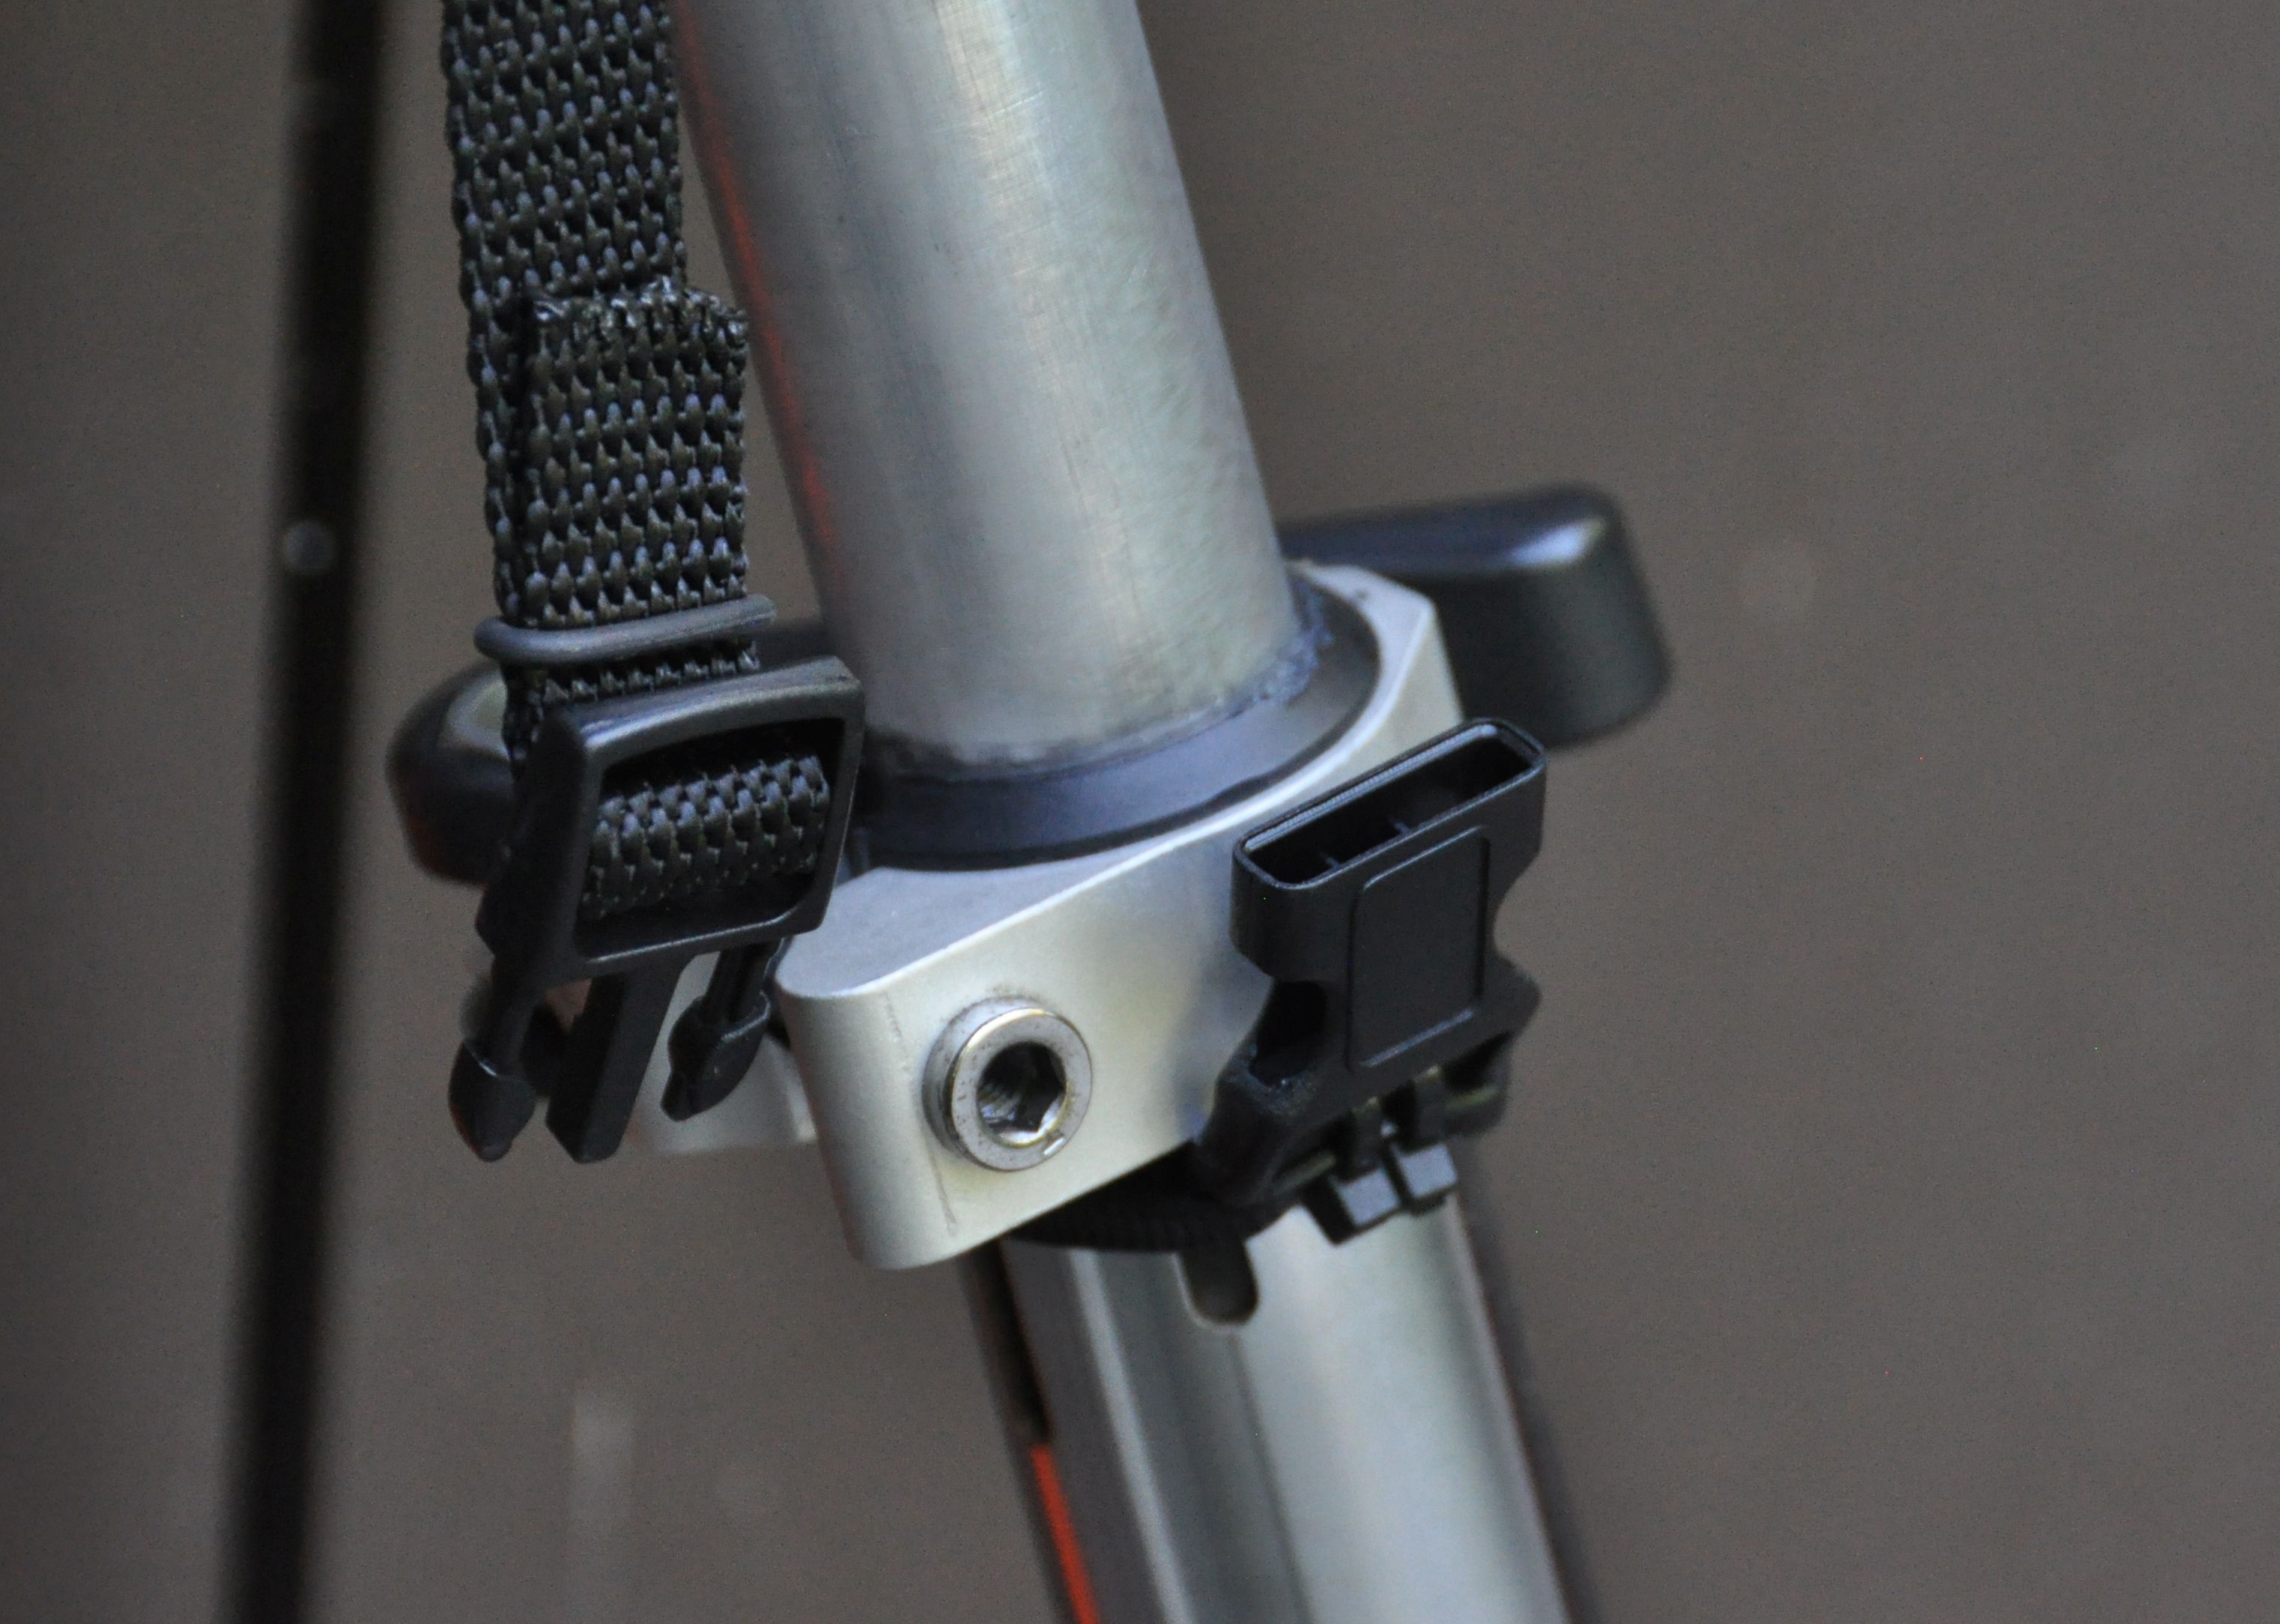
Saddle height limiter Back to top
Saves 5 sec every time I fold it :)
Parts list:
Piece of (leather) shoe lace
Cable tie
Rubber O ring
You can easily pull out the saddle by sliding the knot through the rubber O ring. That’s nice for packing the bike or for exchanging saddles.
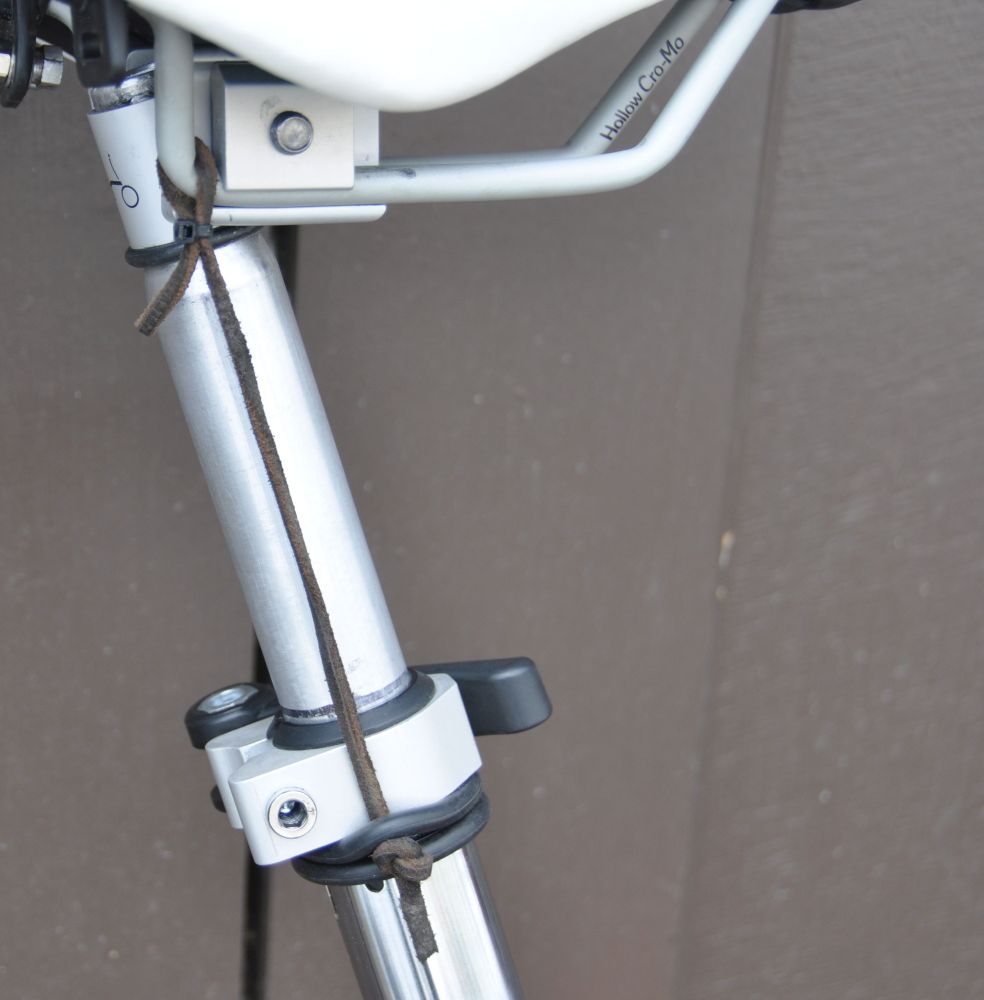
Update: The leather shoe lace turned out to be somewhat elastic and can be stretched. I replaced it by a piece of webbing which is stiffer: It stops the seatpost always at exactly the same height. Also, I added a quick release buckle. It is now very easy to make small adjustments to the saddle height, and also to take off the saddle (for packing the bike) or to swap against another saddle.
Carrying grip for the Brooks saddle Back to top
I always carry the Brompton using the nose of the saddle. I bent it inwards for optimum balance, to put the nose closer to the line above the center of gravity. The Brompton saddle has a nice built-in grip. I was missing this feature on the Brooks saddle. I first tried to add some foam padding, but it was too soft, and the saddle rails were pressing through. What worked well: A piece of garden hose, reinforced by putting a round piece of wood inside, and putting black shrink tubing around it (for the nicer look).

Update: I now carry the Brompton by grabbing the top tube of the frame, and don’t use the saddle any more for carrying.
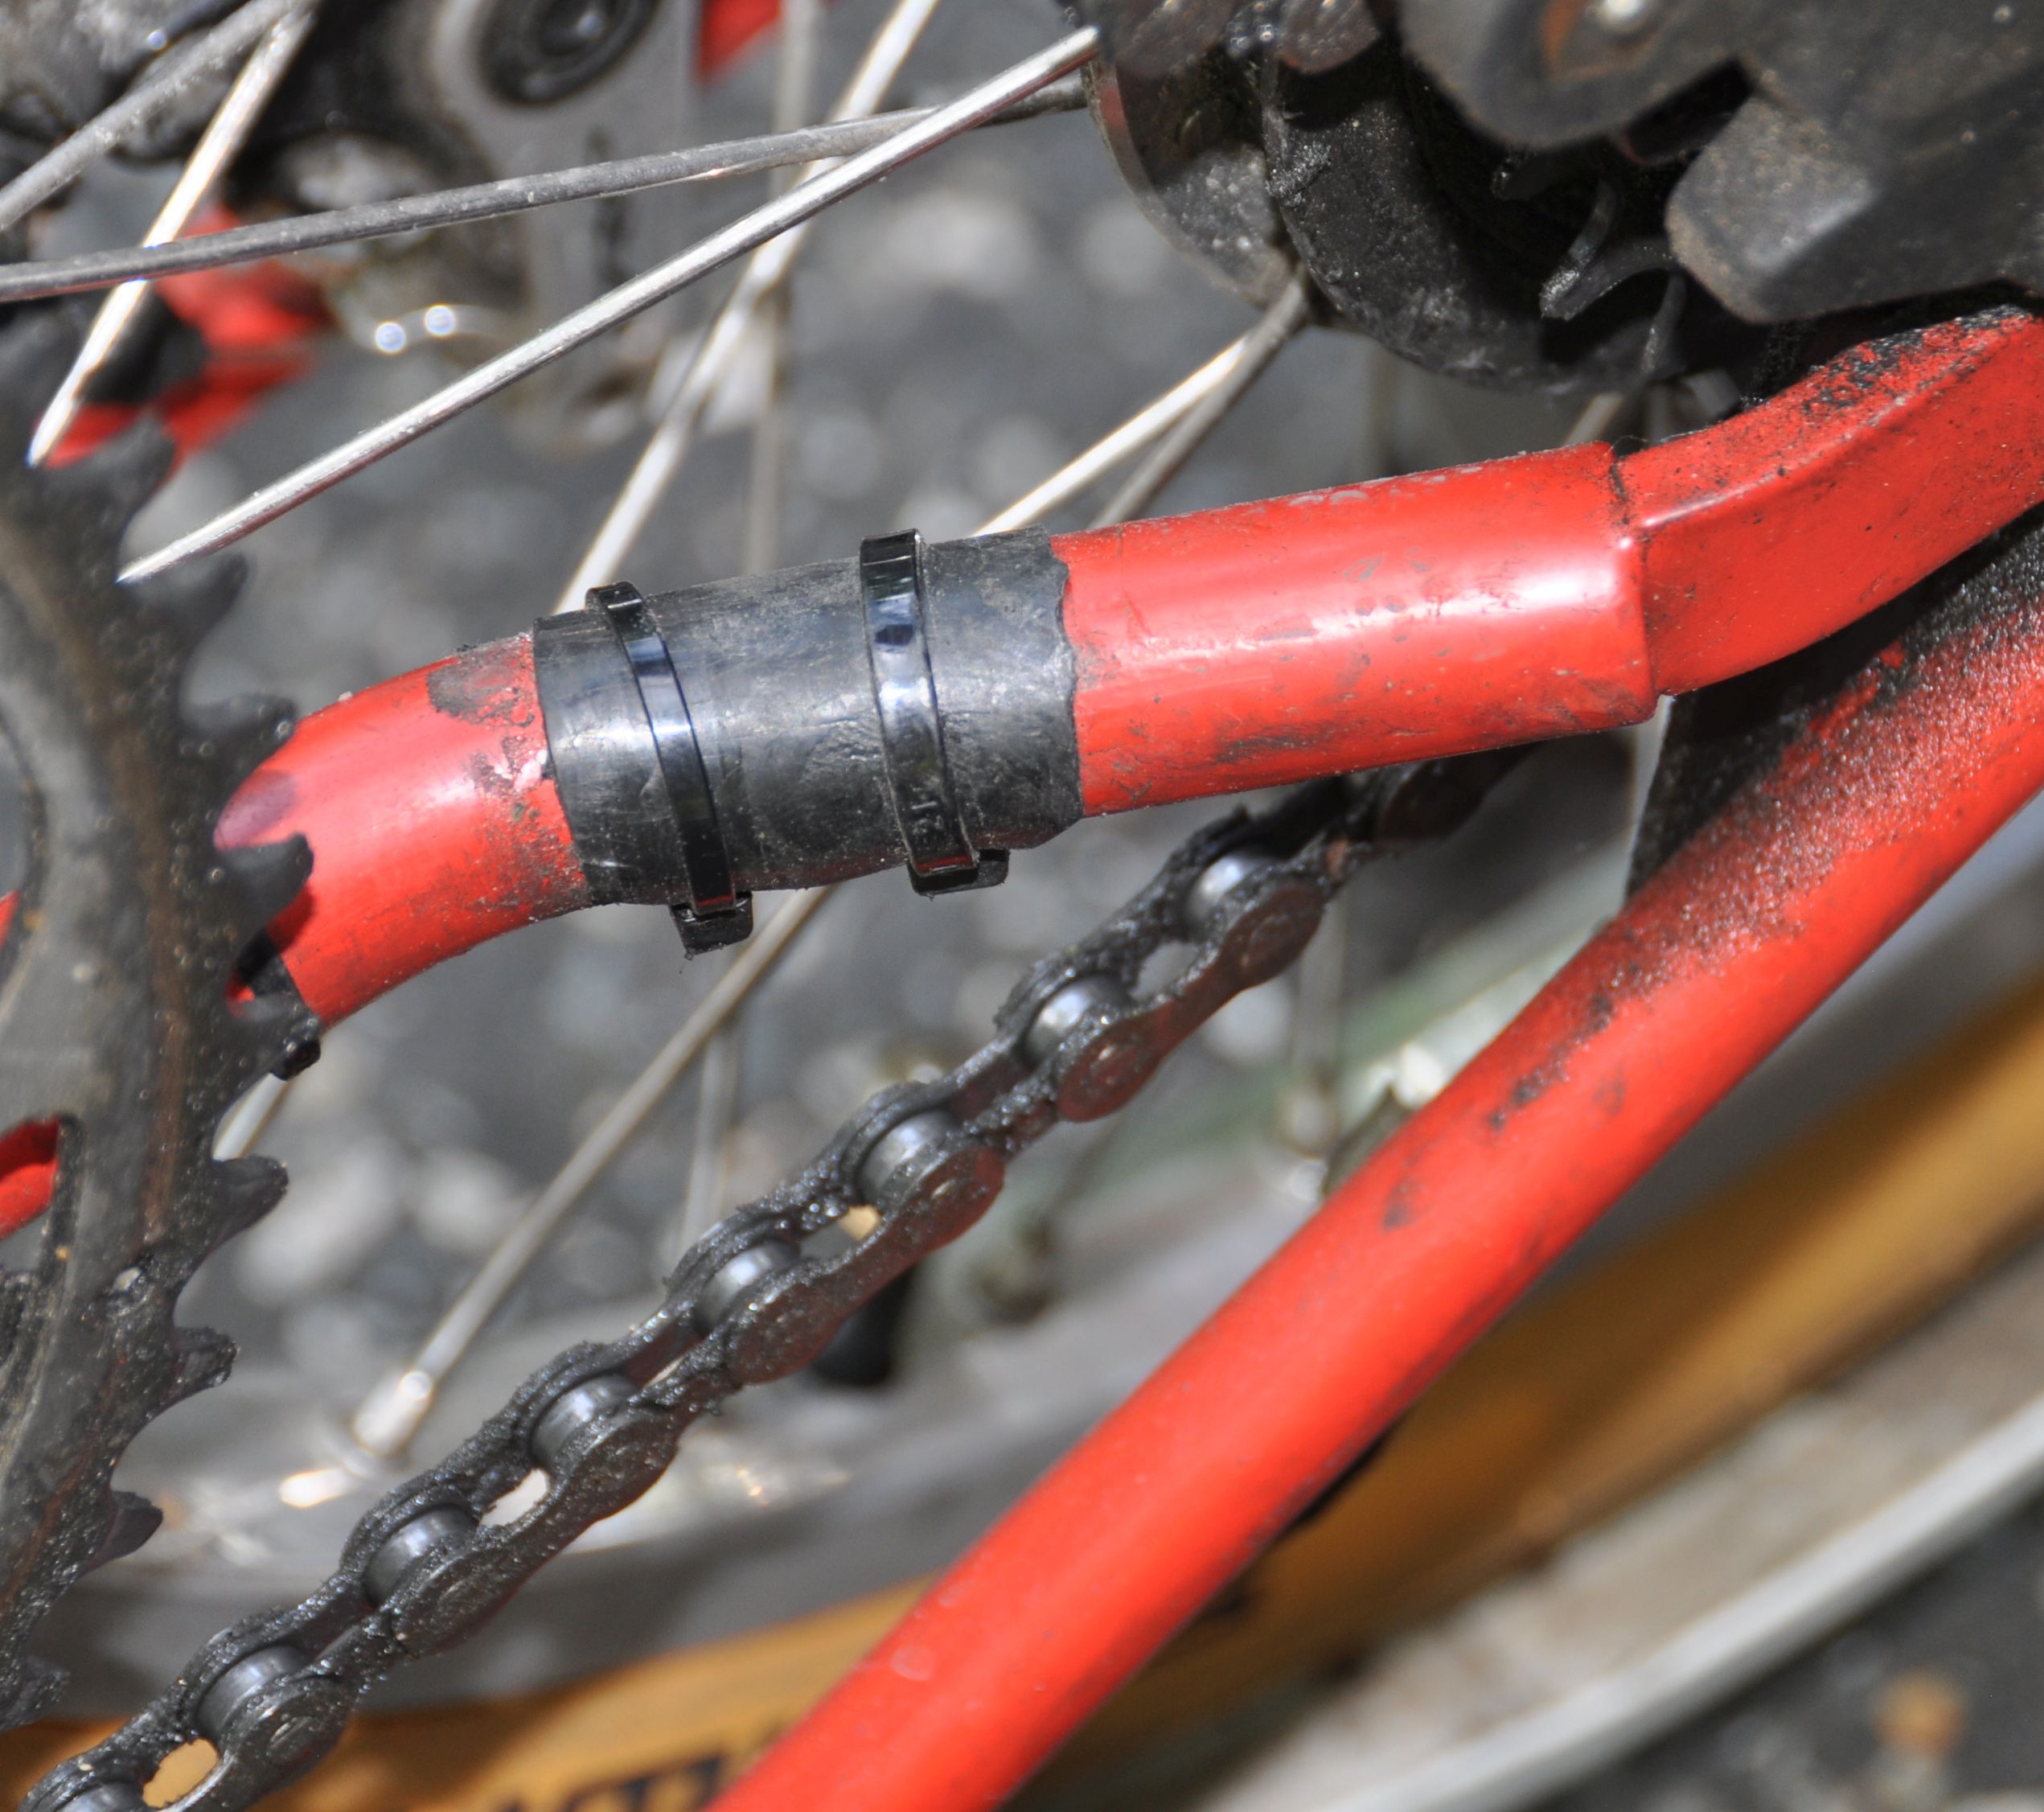
Frame protector for fork clip Back to top
A piece of thin aluminum shim metal, cut with scissors, pre-bent, and attached with double sided tape.
I like that it doesn't cover the top of the tube.
Update: The aluminum piece got bent and came lose. I am now using a thin stainless steel shim metal glued to the tube.

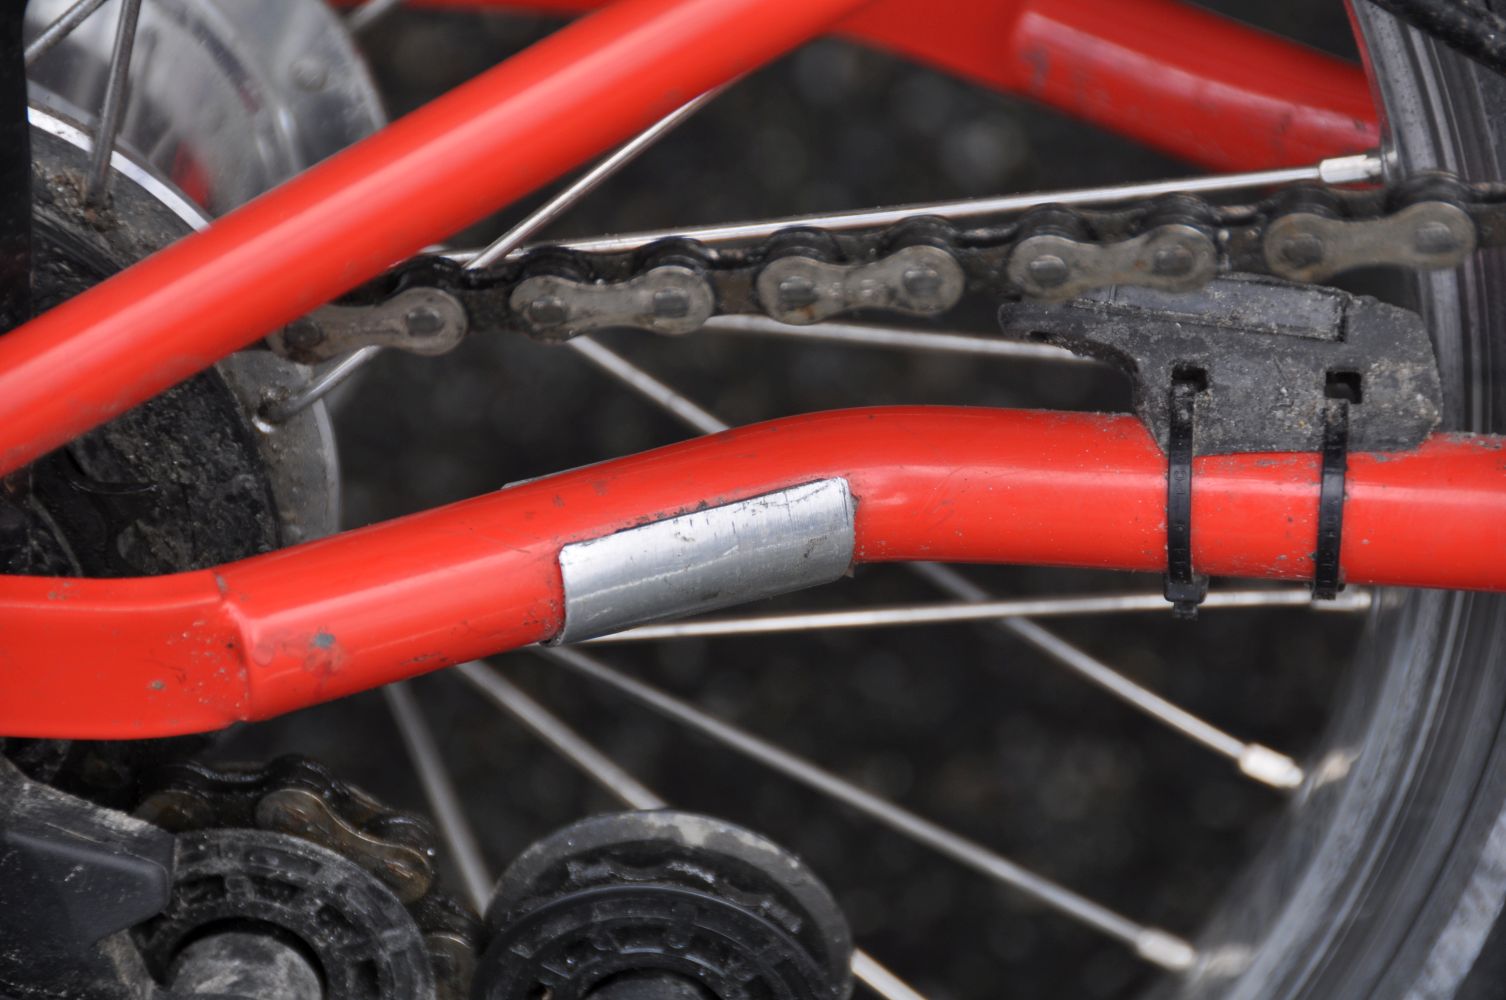

Update 2: Various glues and double sided tapes all came lose after a while. I am now using a piece of thin plastic and cable ties.
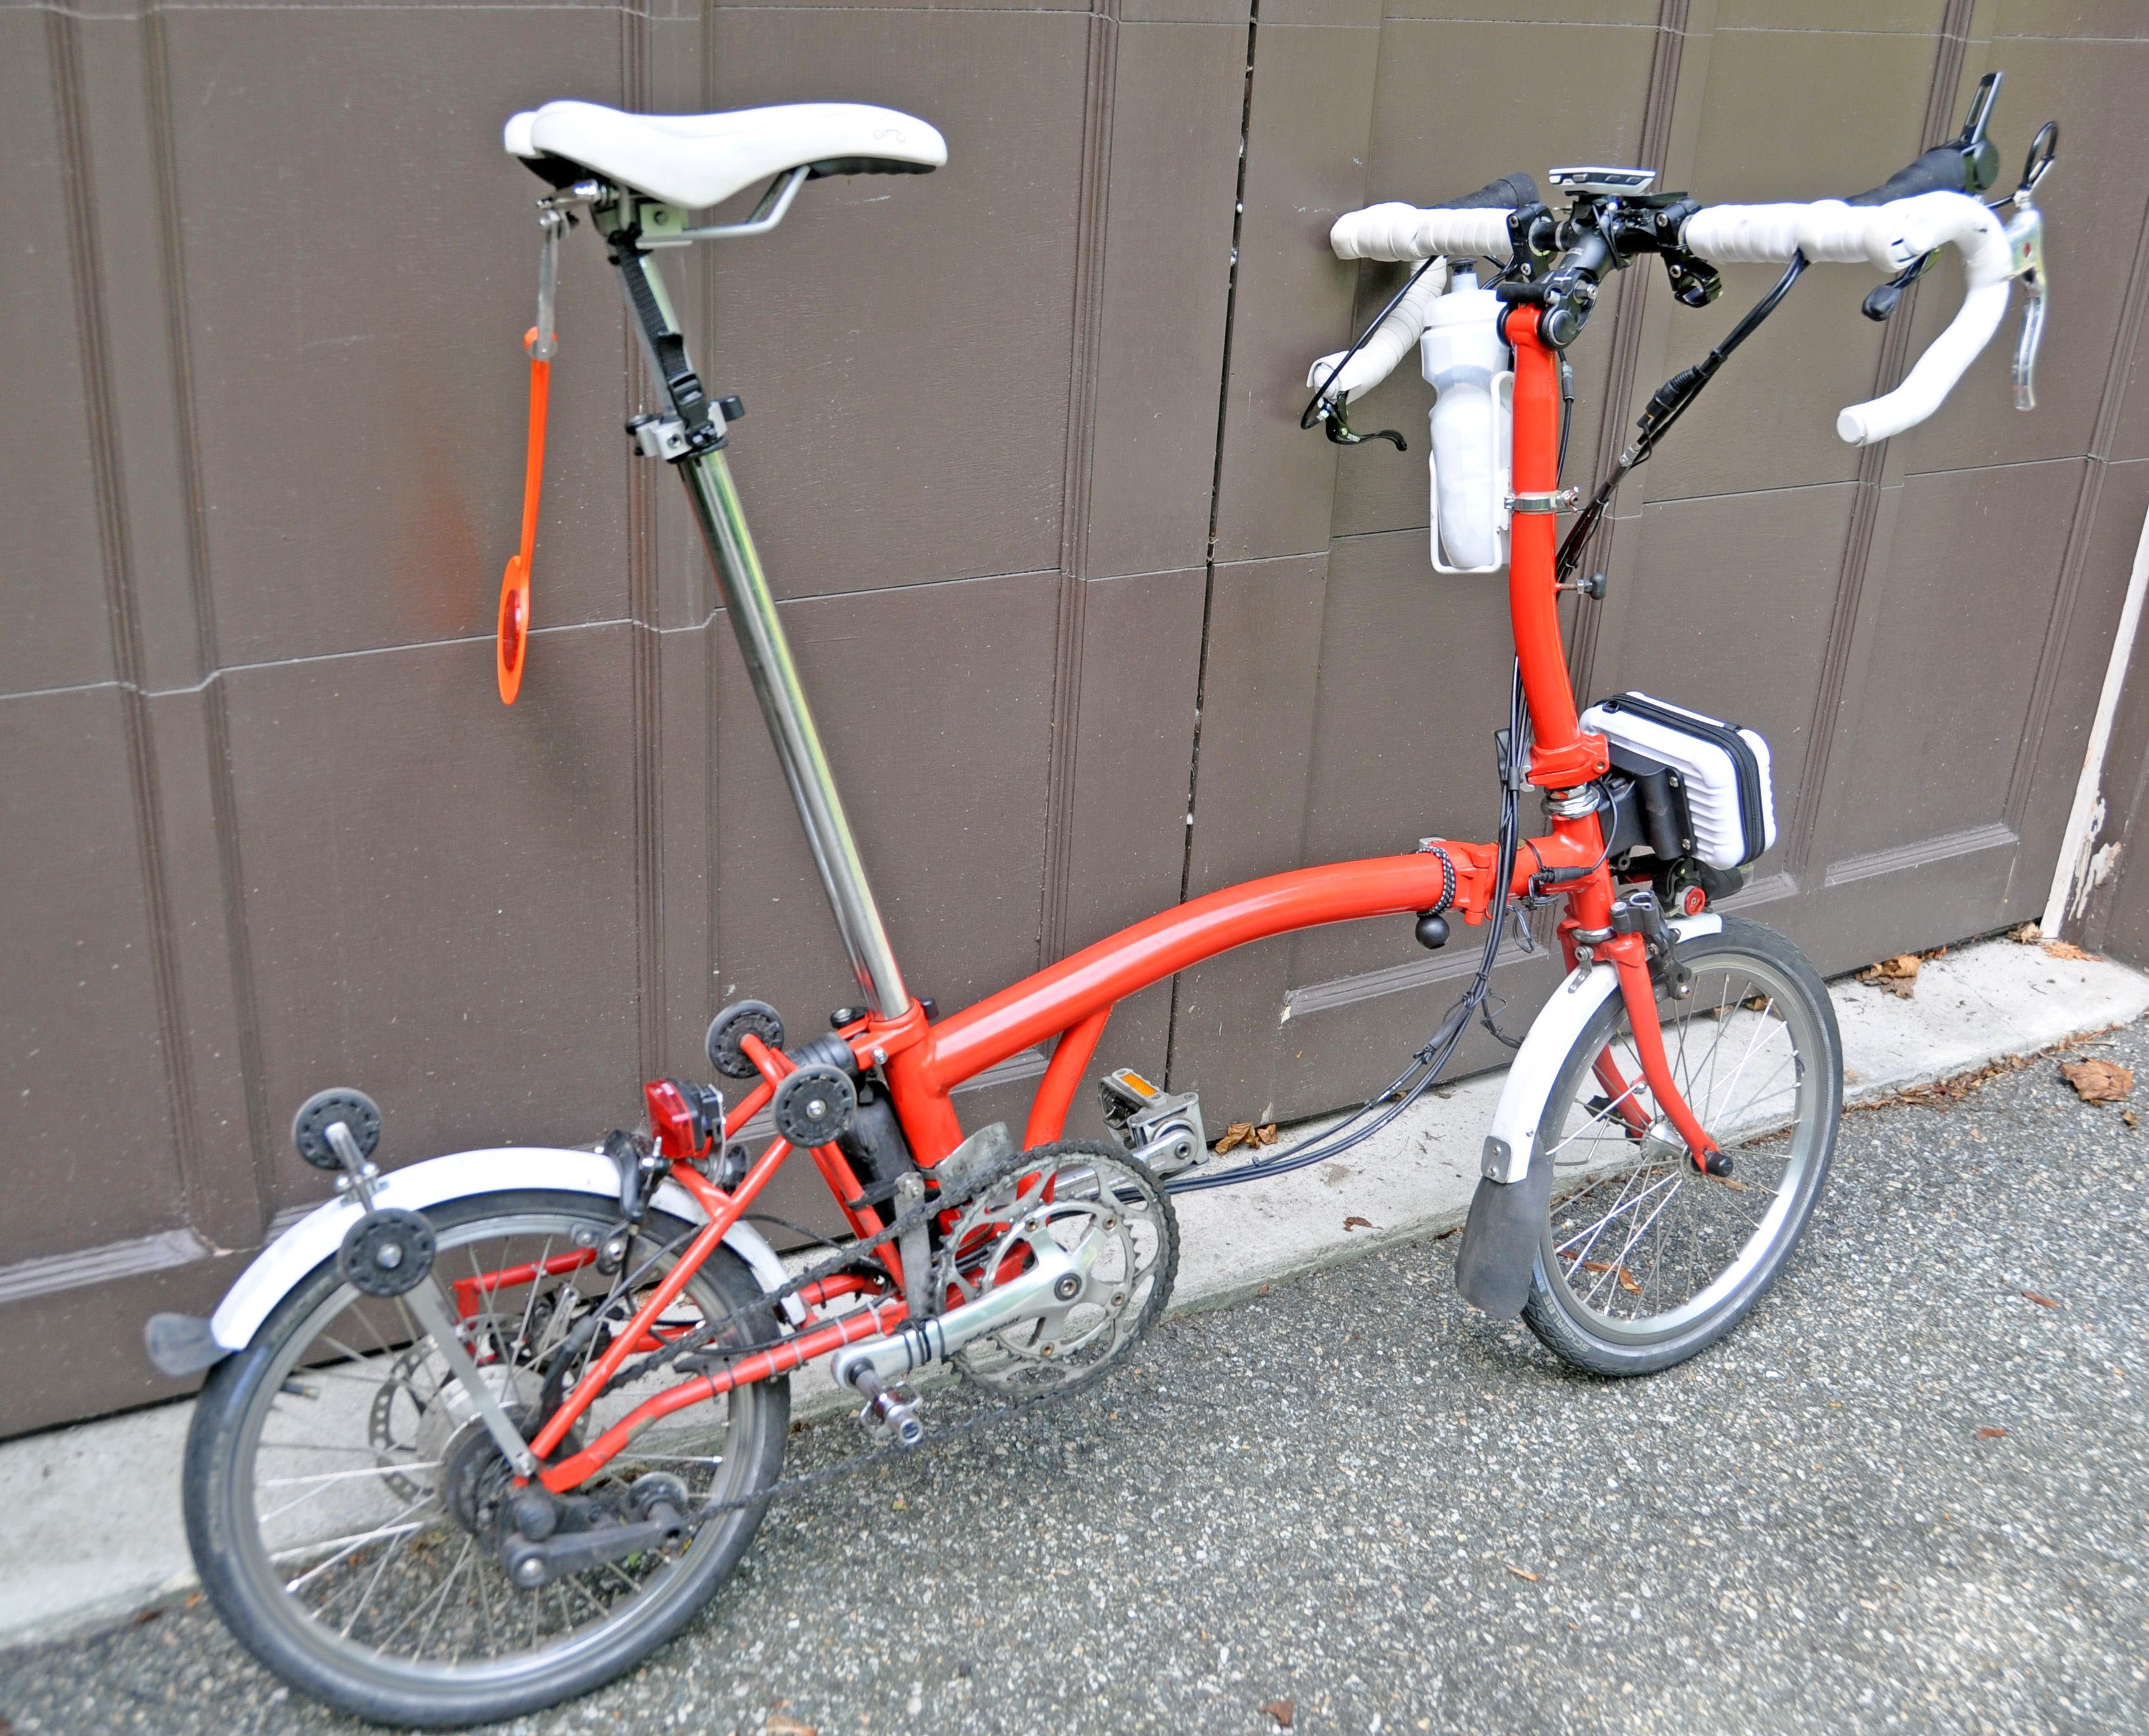
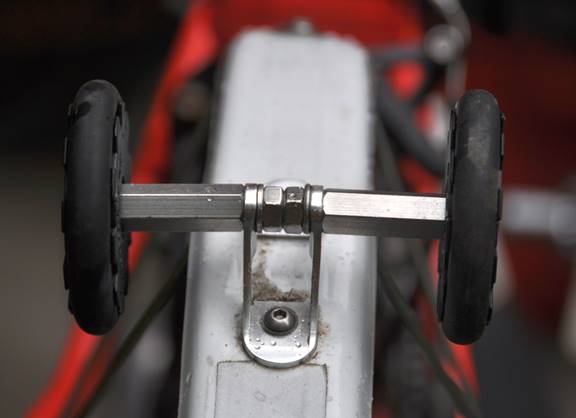
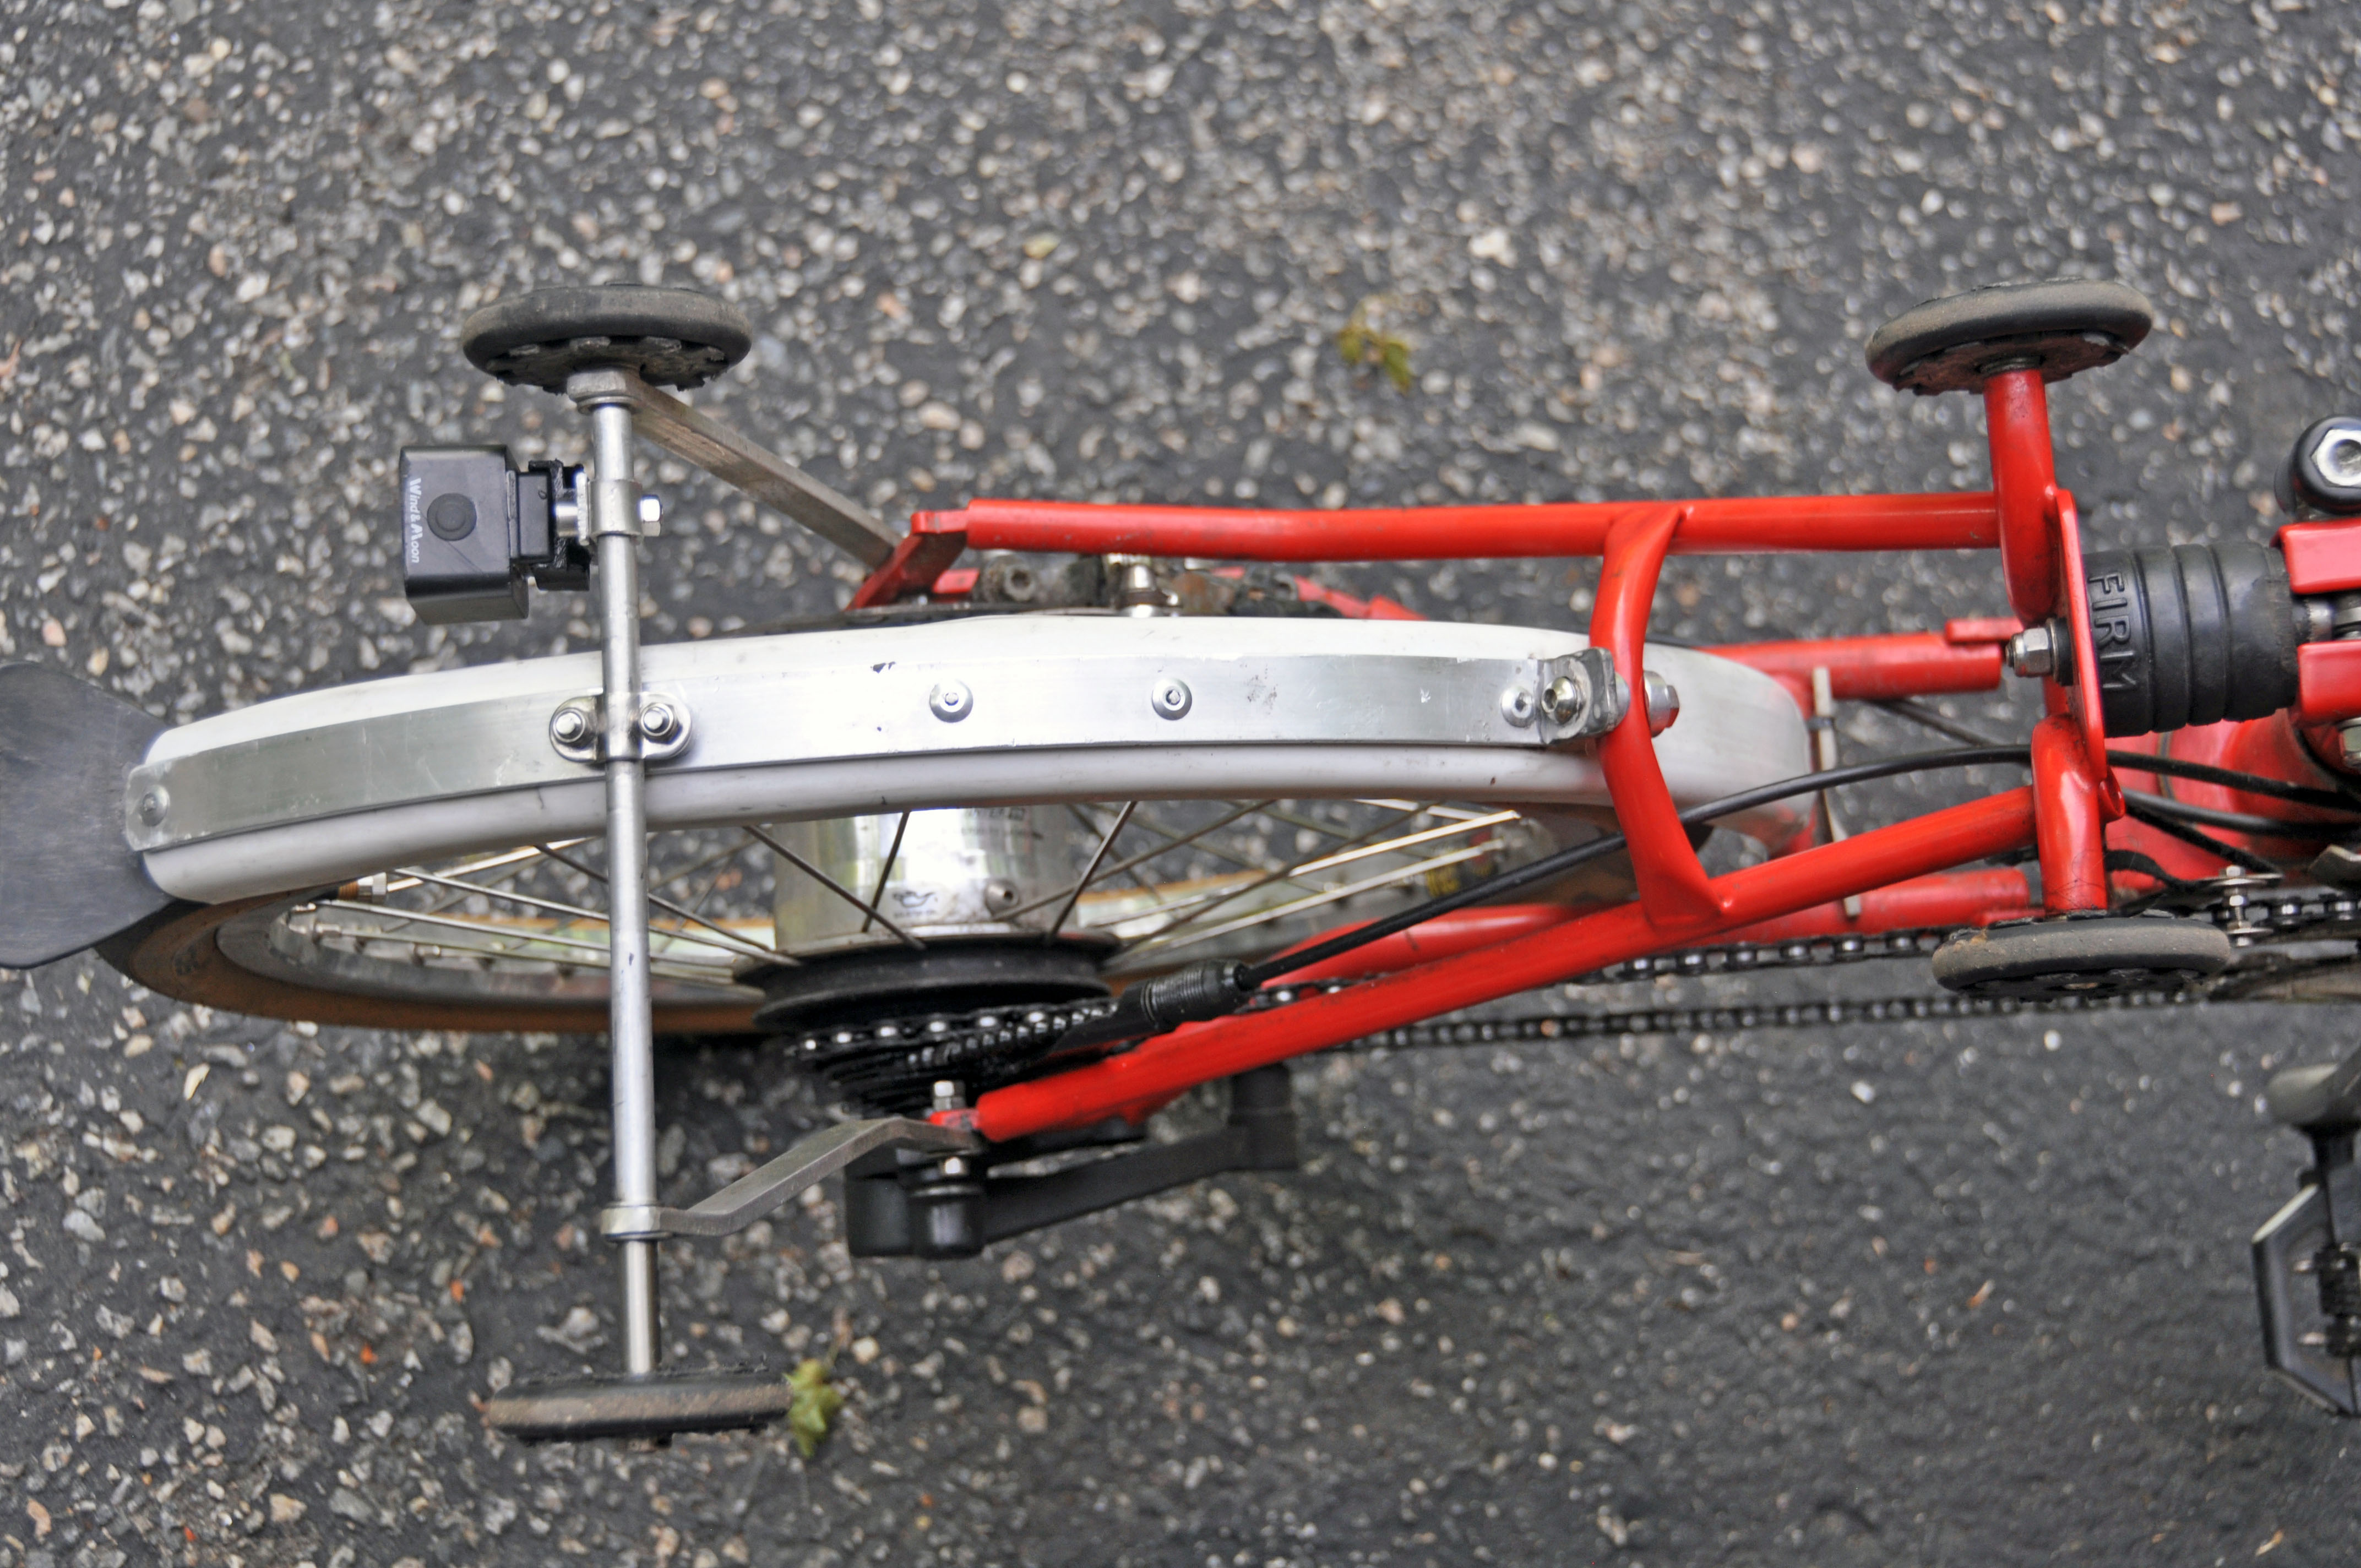
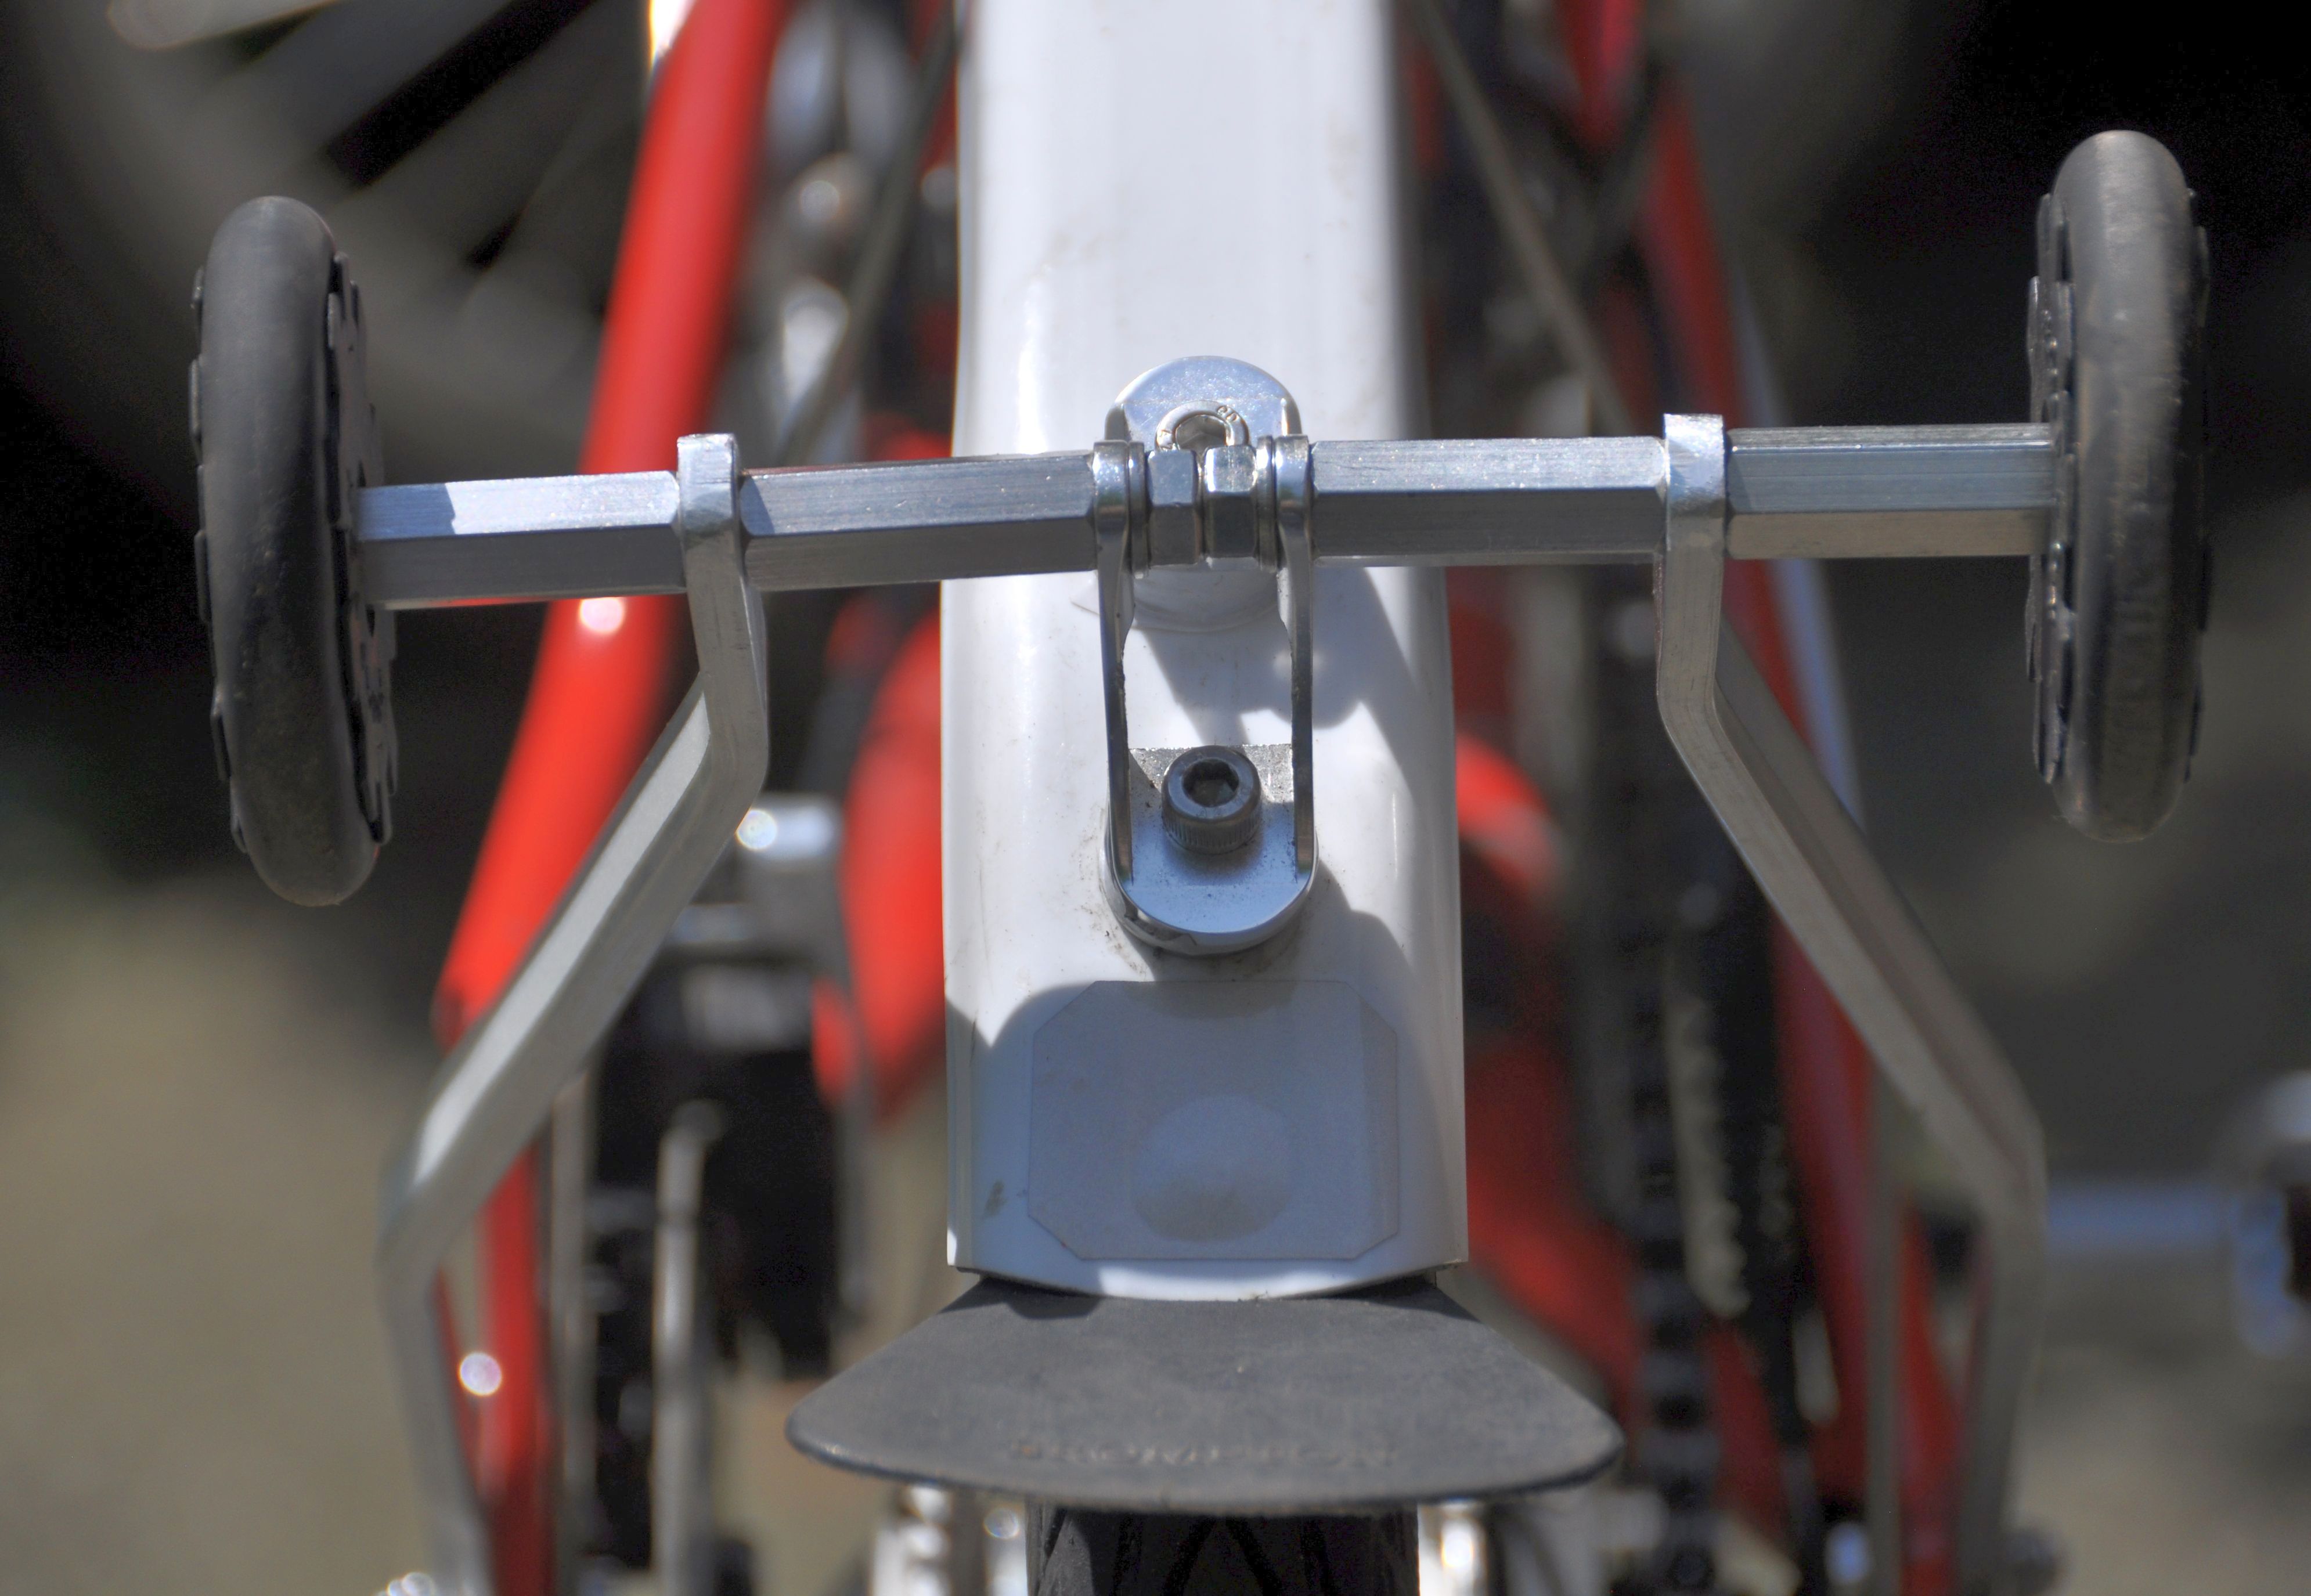
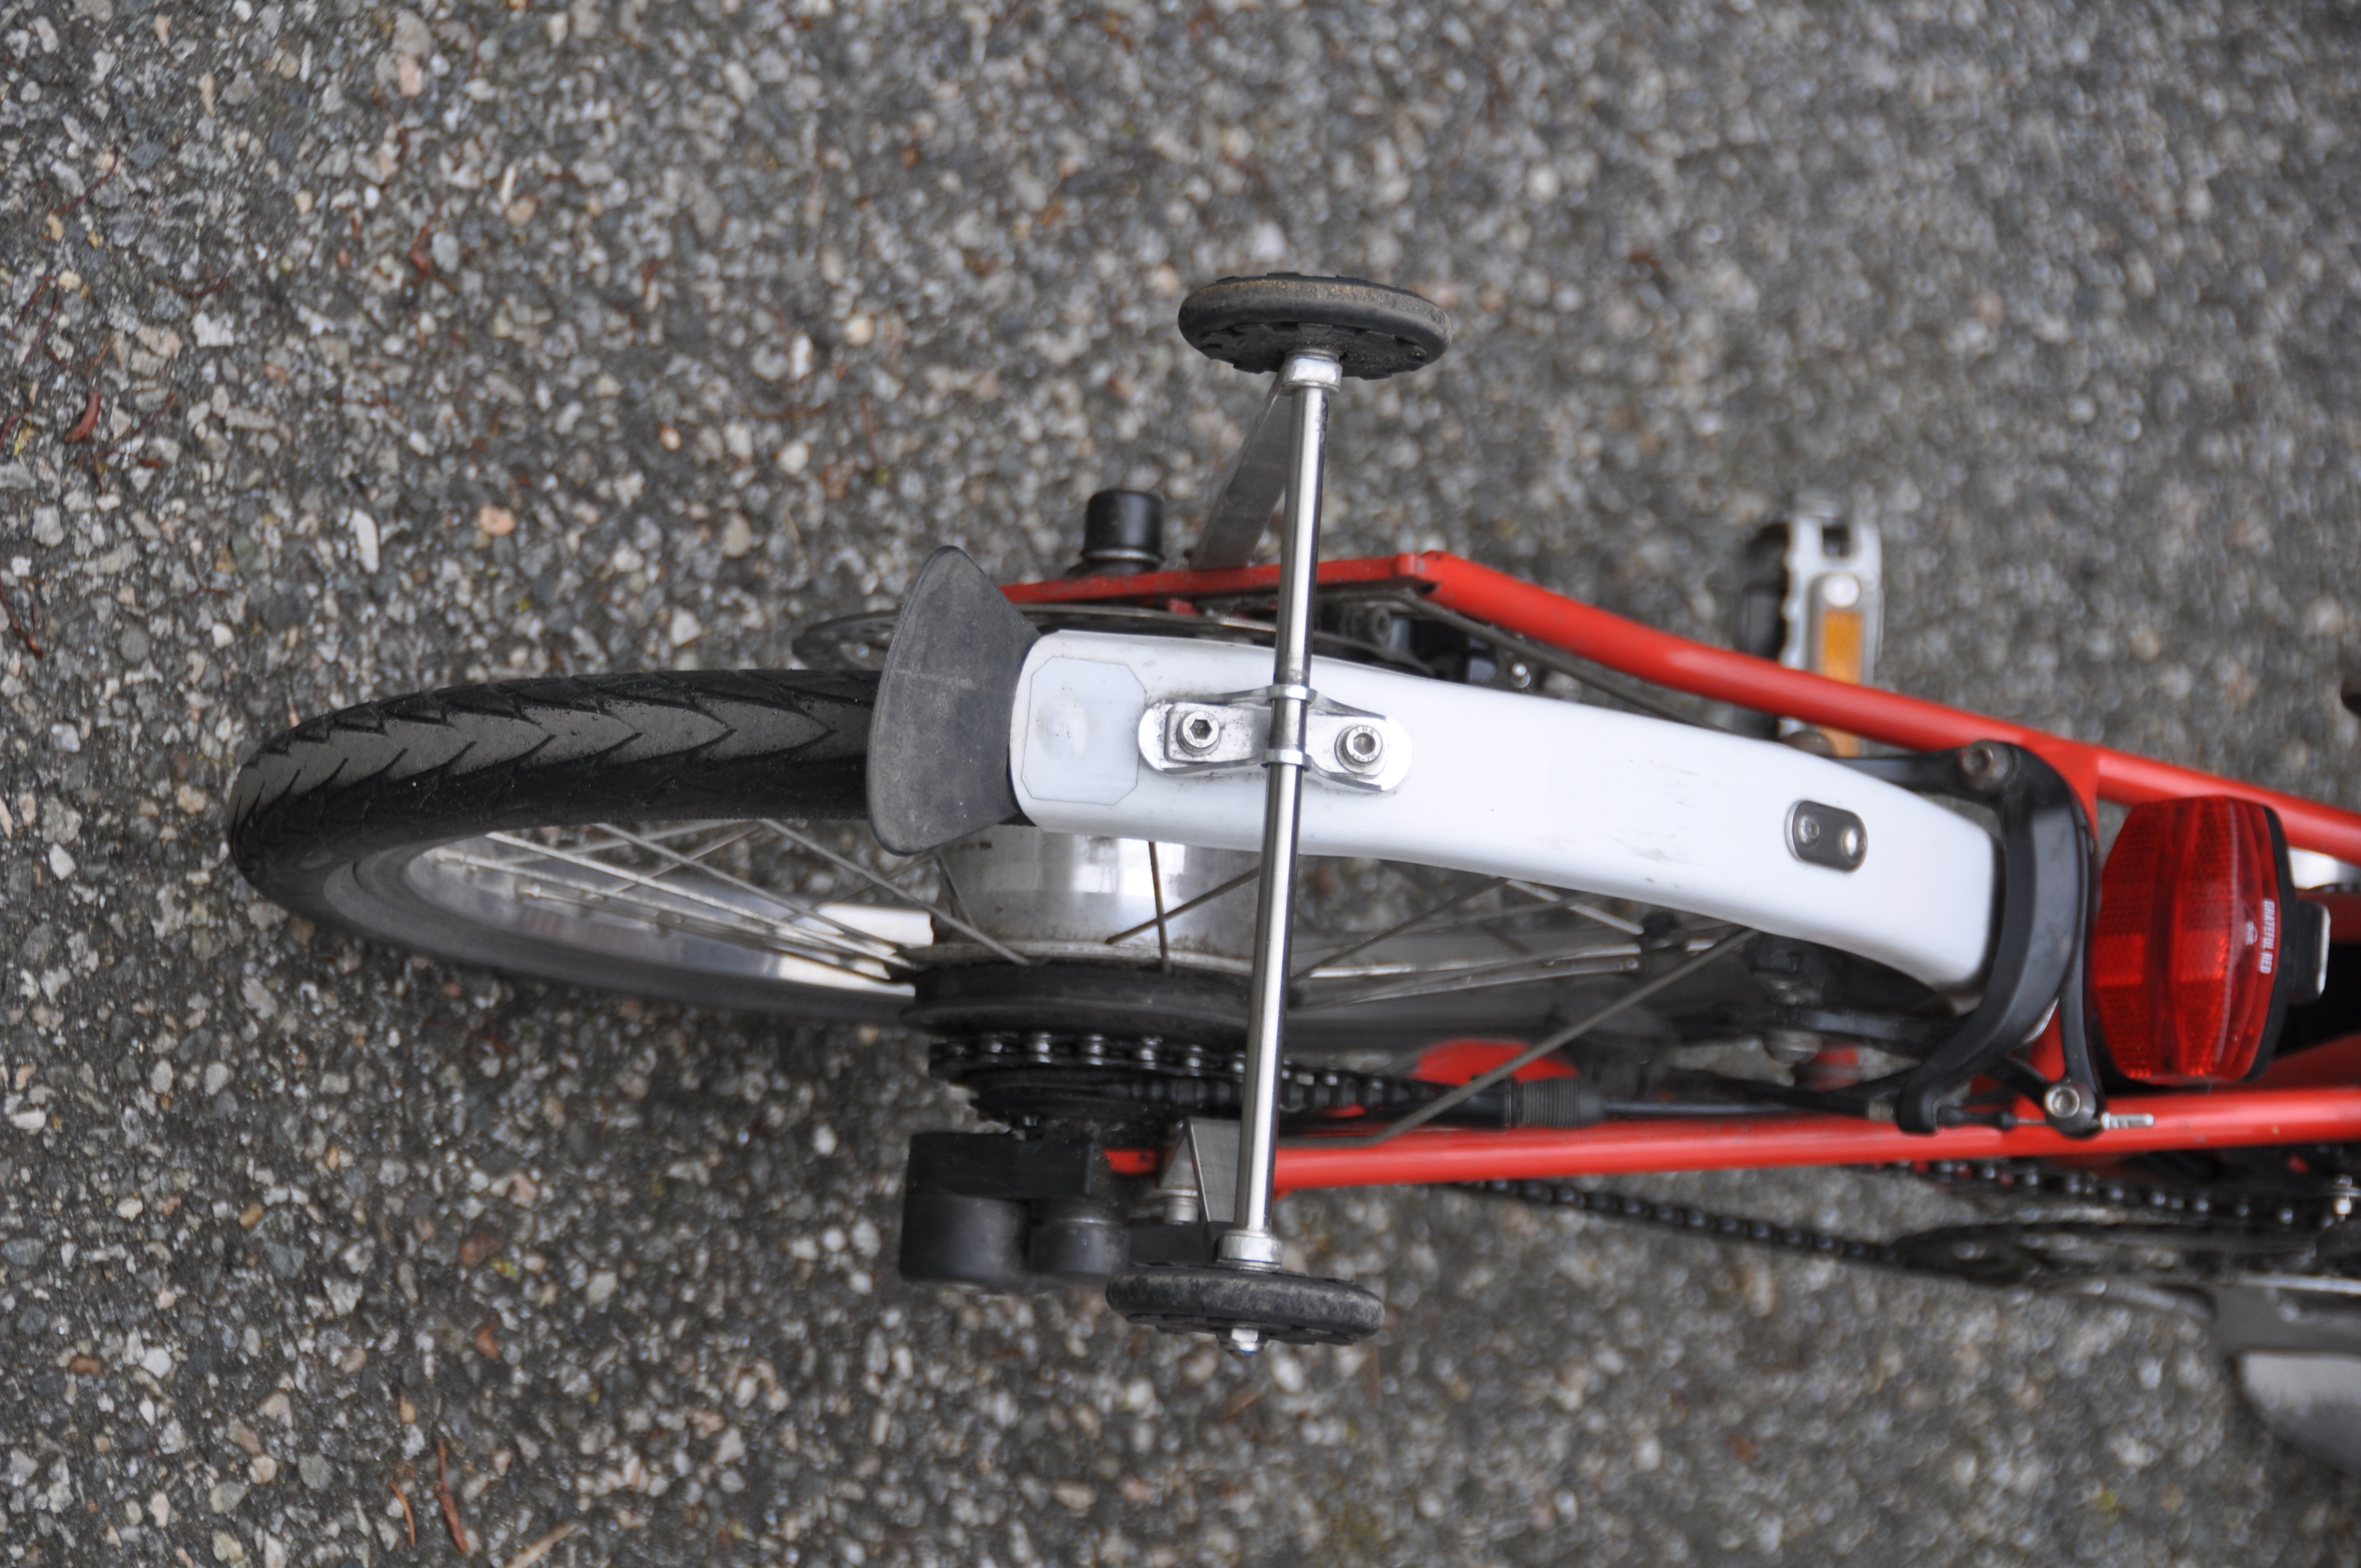
Wheels for rolling the bike Back to top
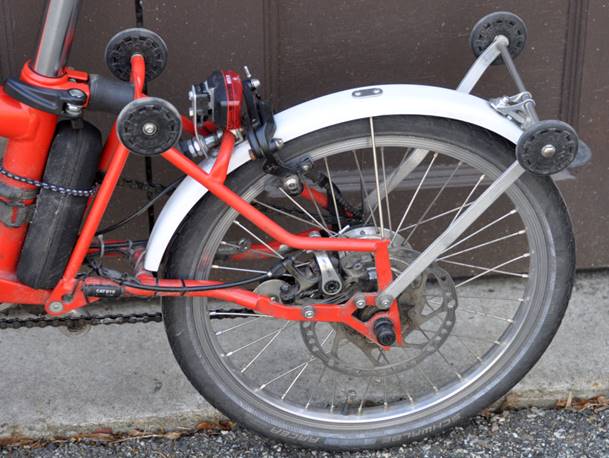
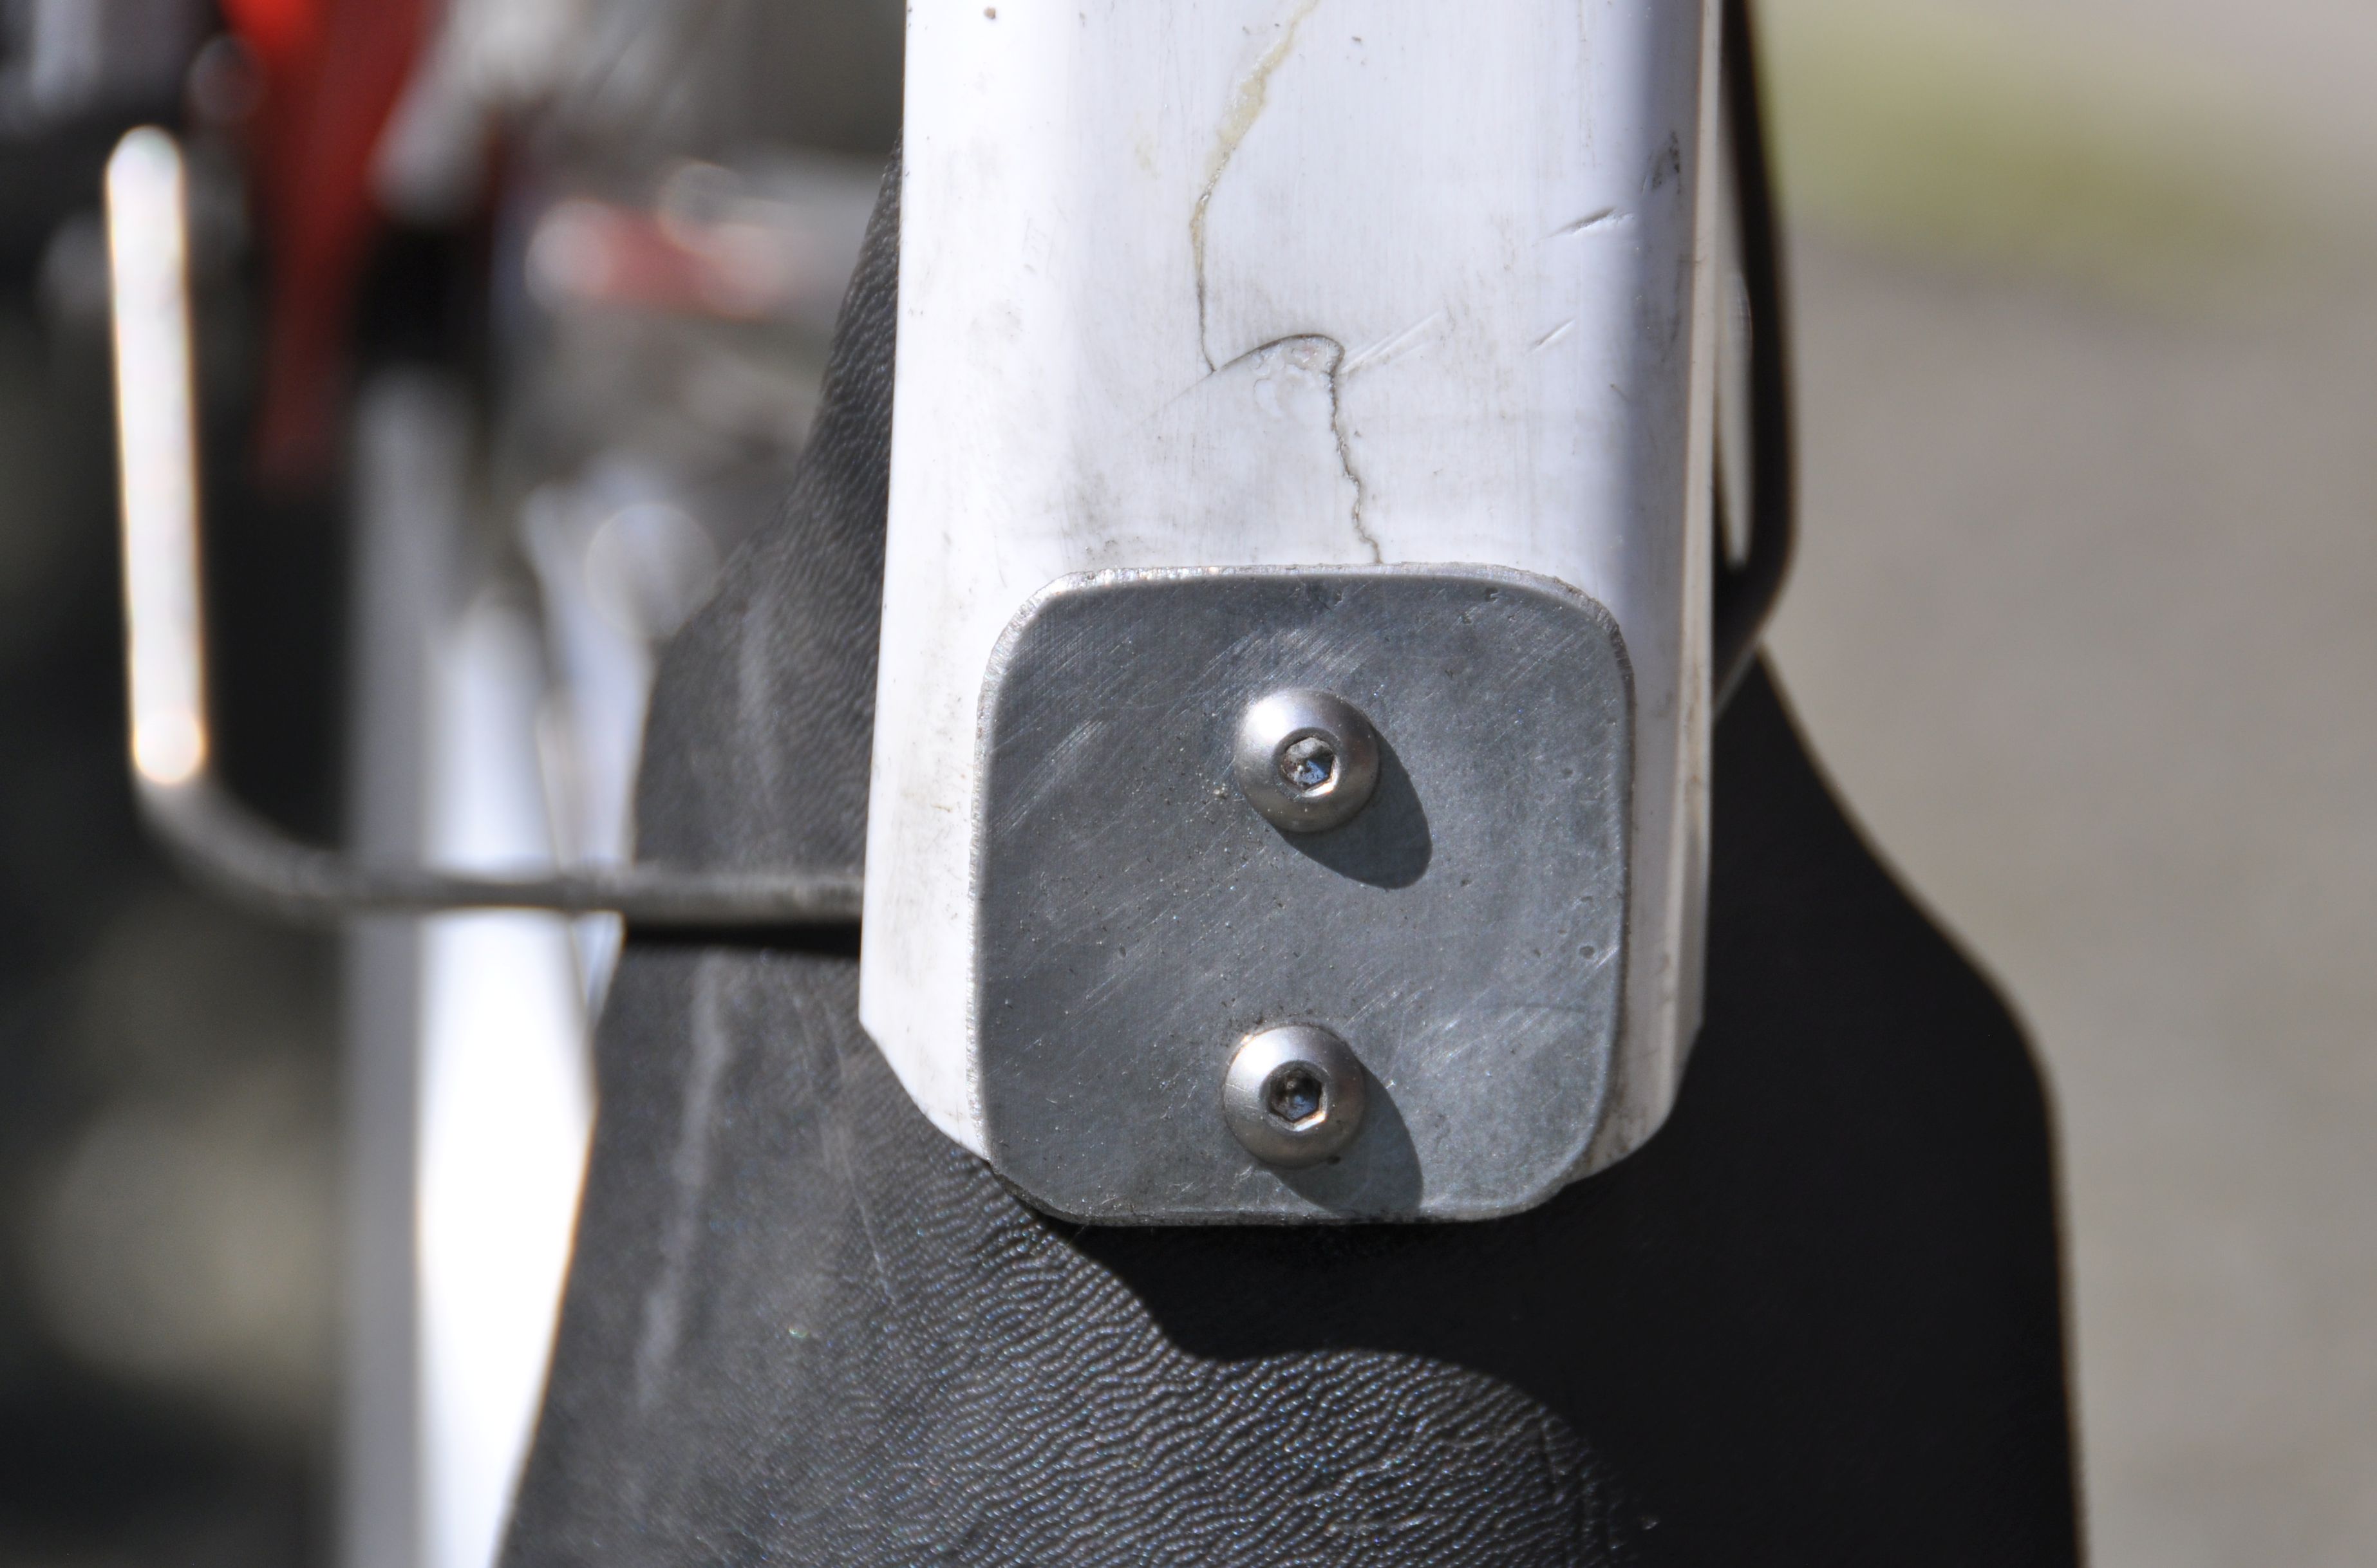
I often roll the bike and want easy rolling and high stability against tipping over. The original mudguard wheel is to flimsy and unstable. After a few iterations, I developed a solution which works very well for me.
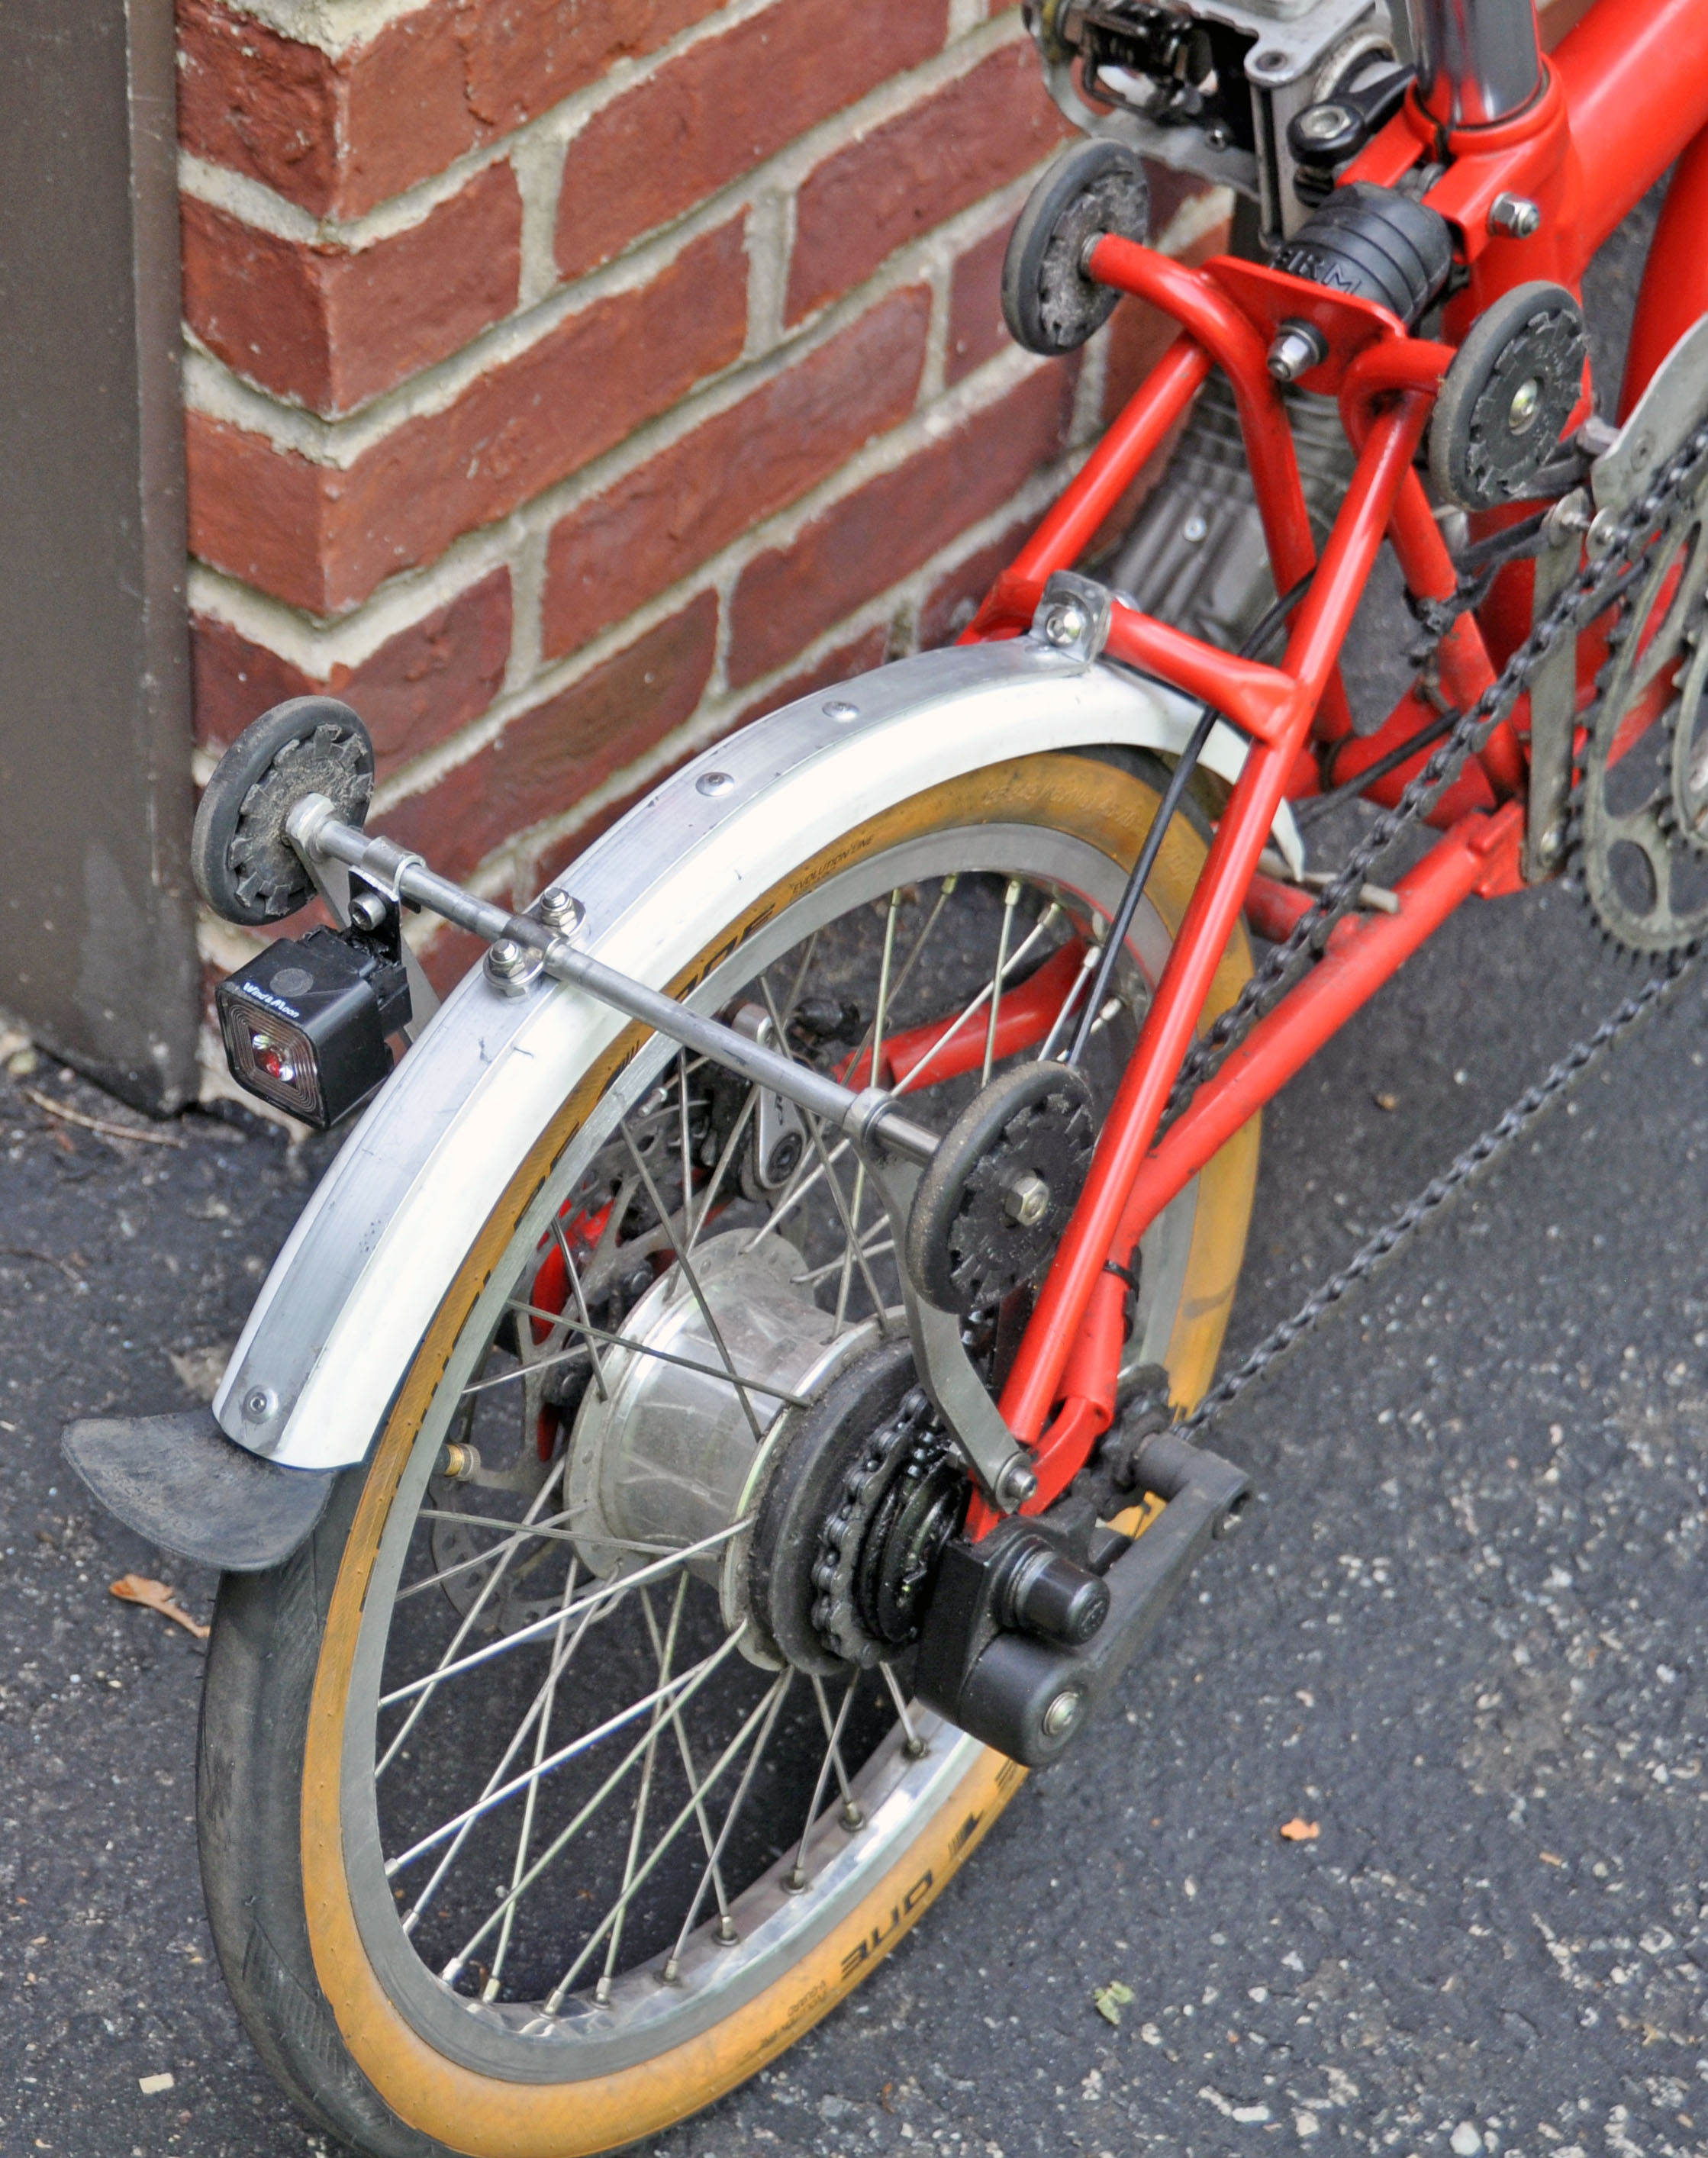
After several years, I found some cracks in the fender, and reinforced it with an aluminum bar (3/4” x 1/8”).
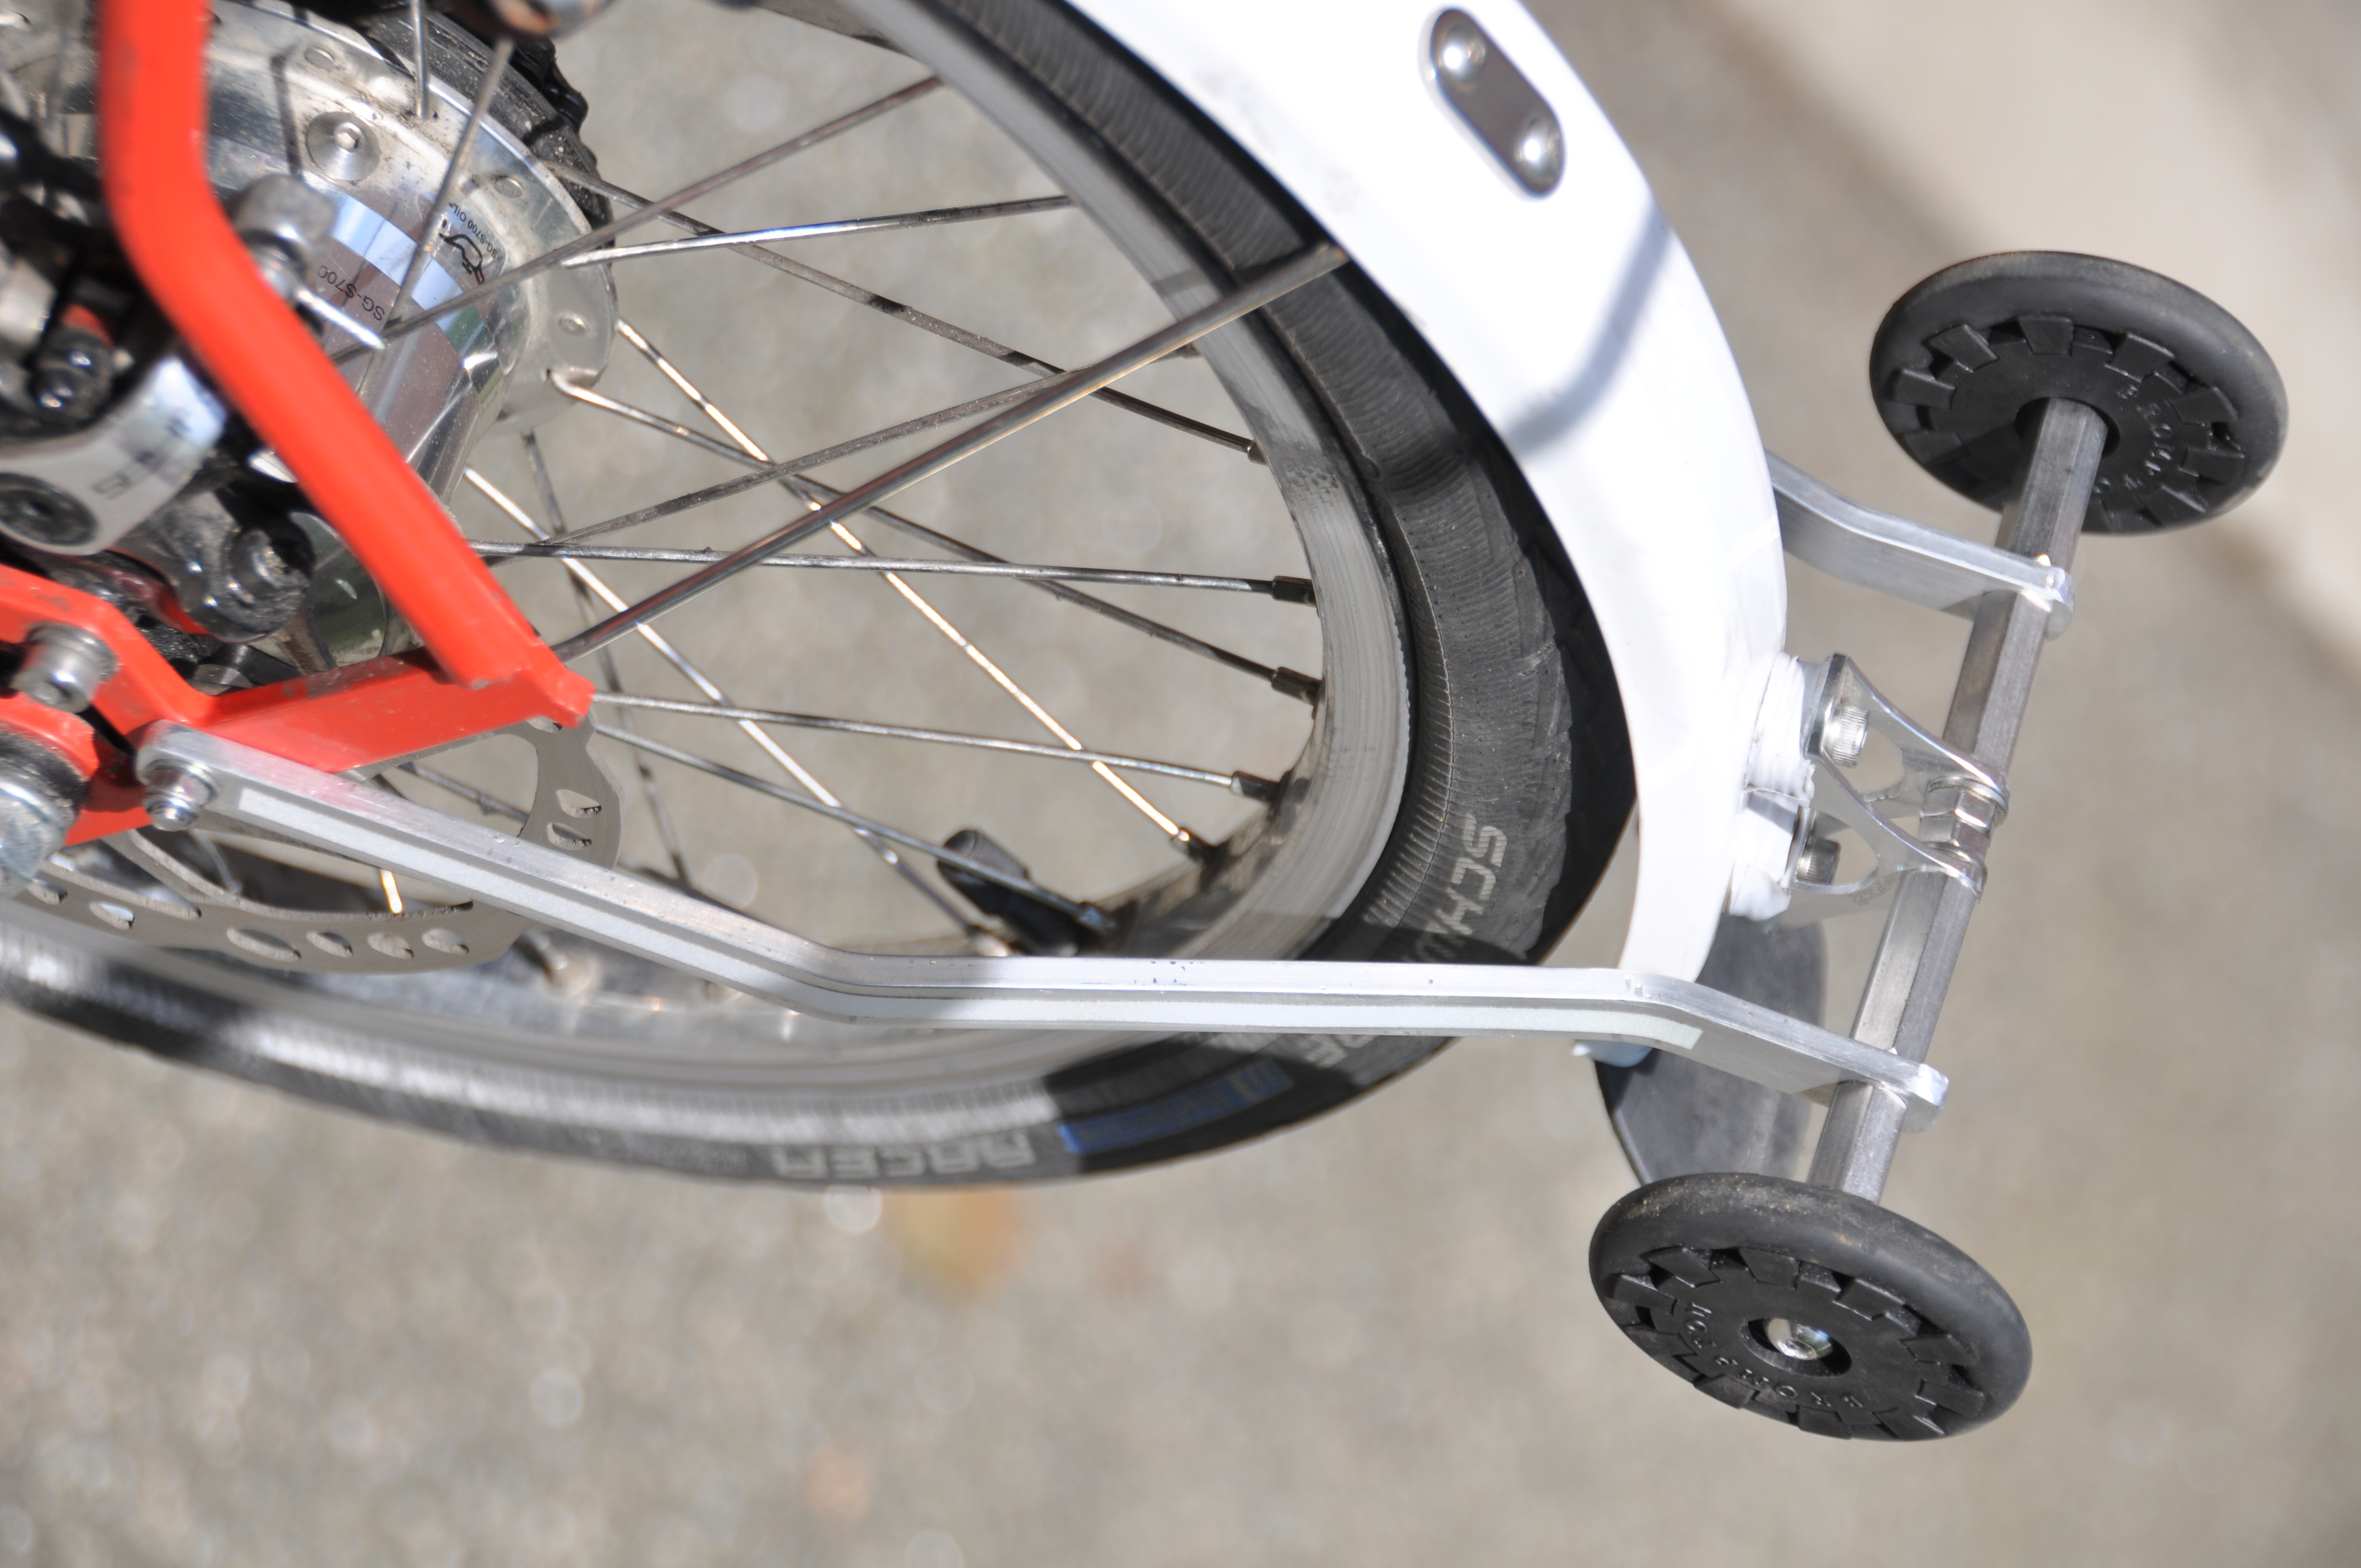
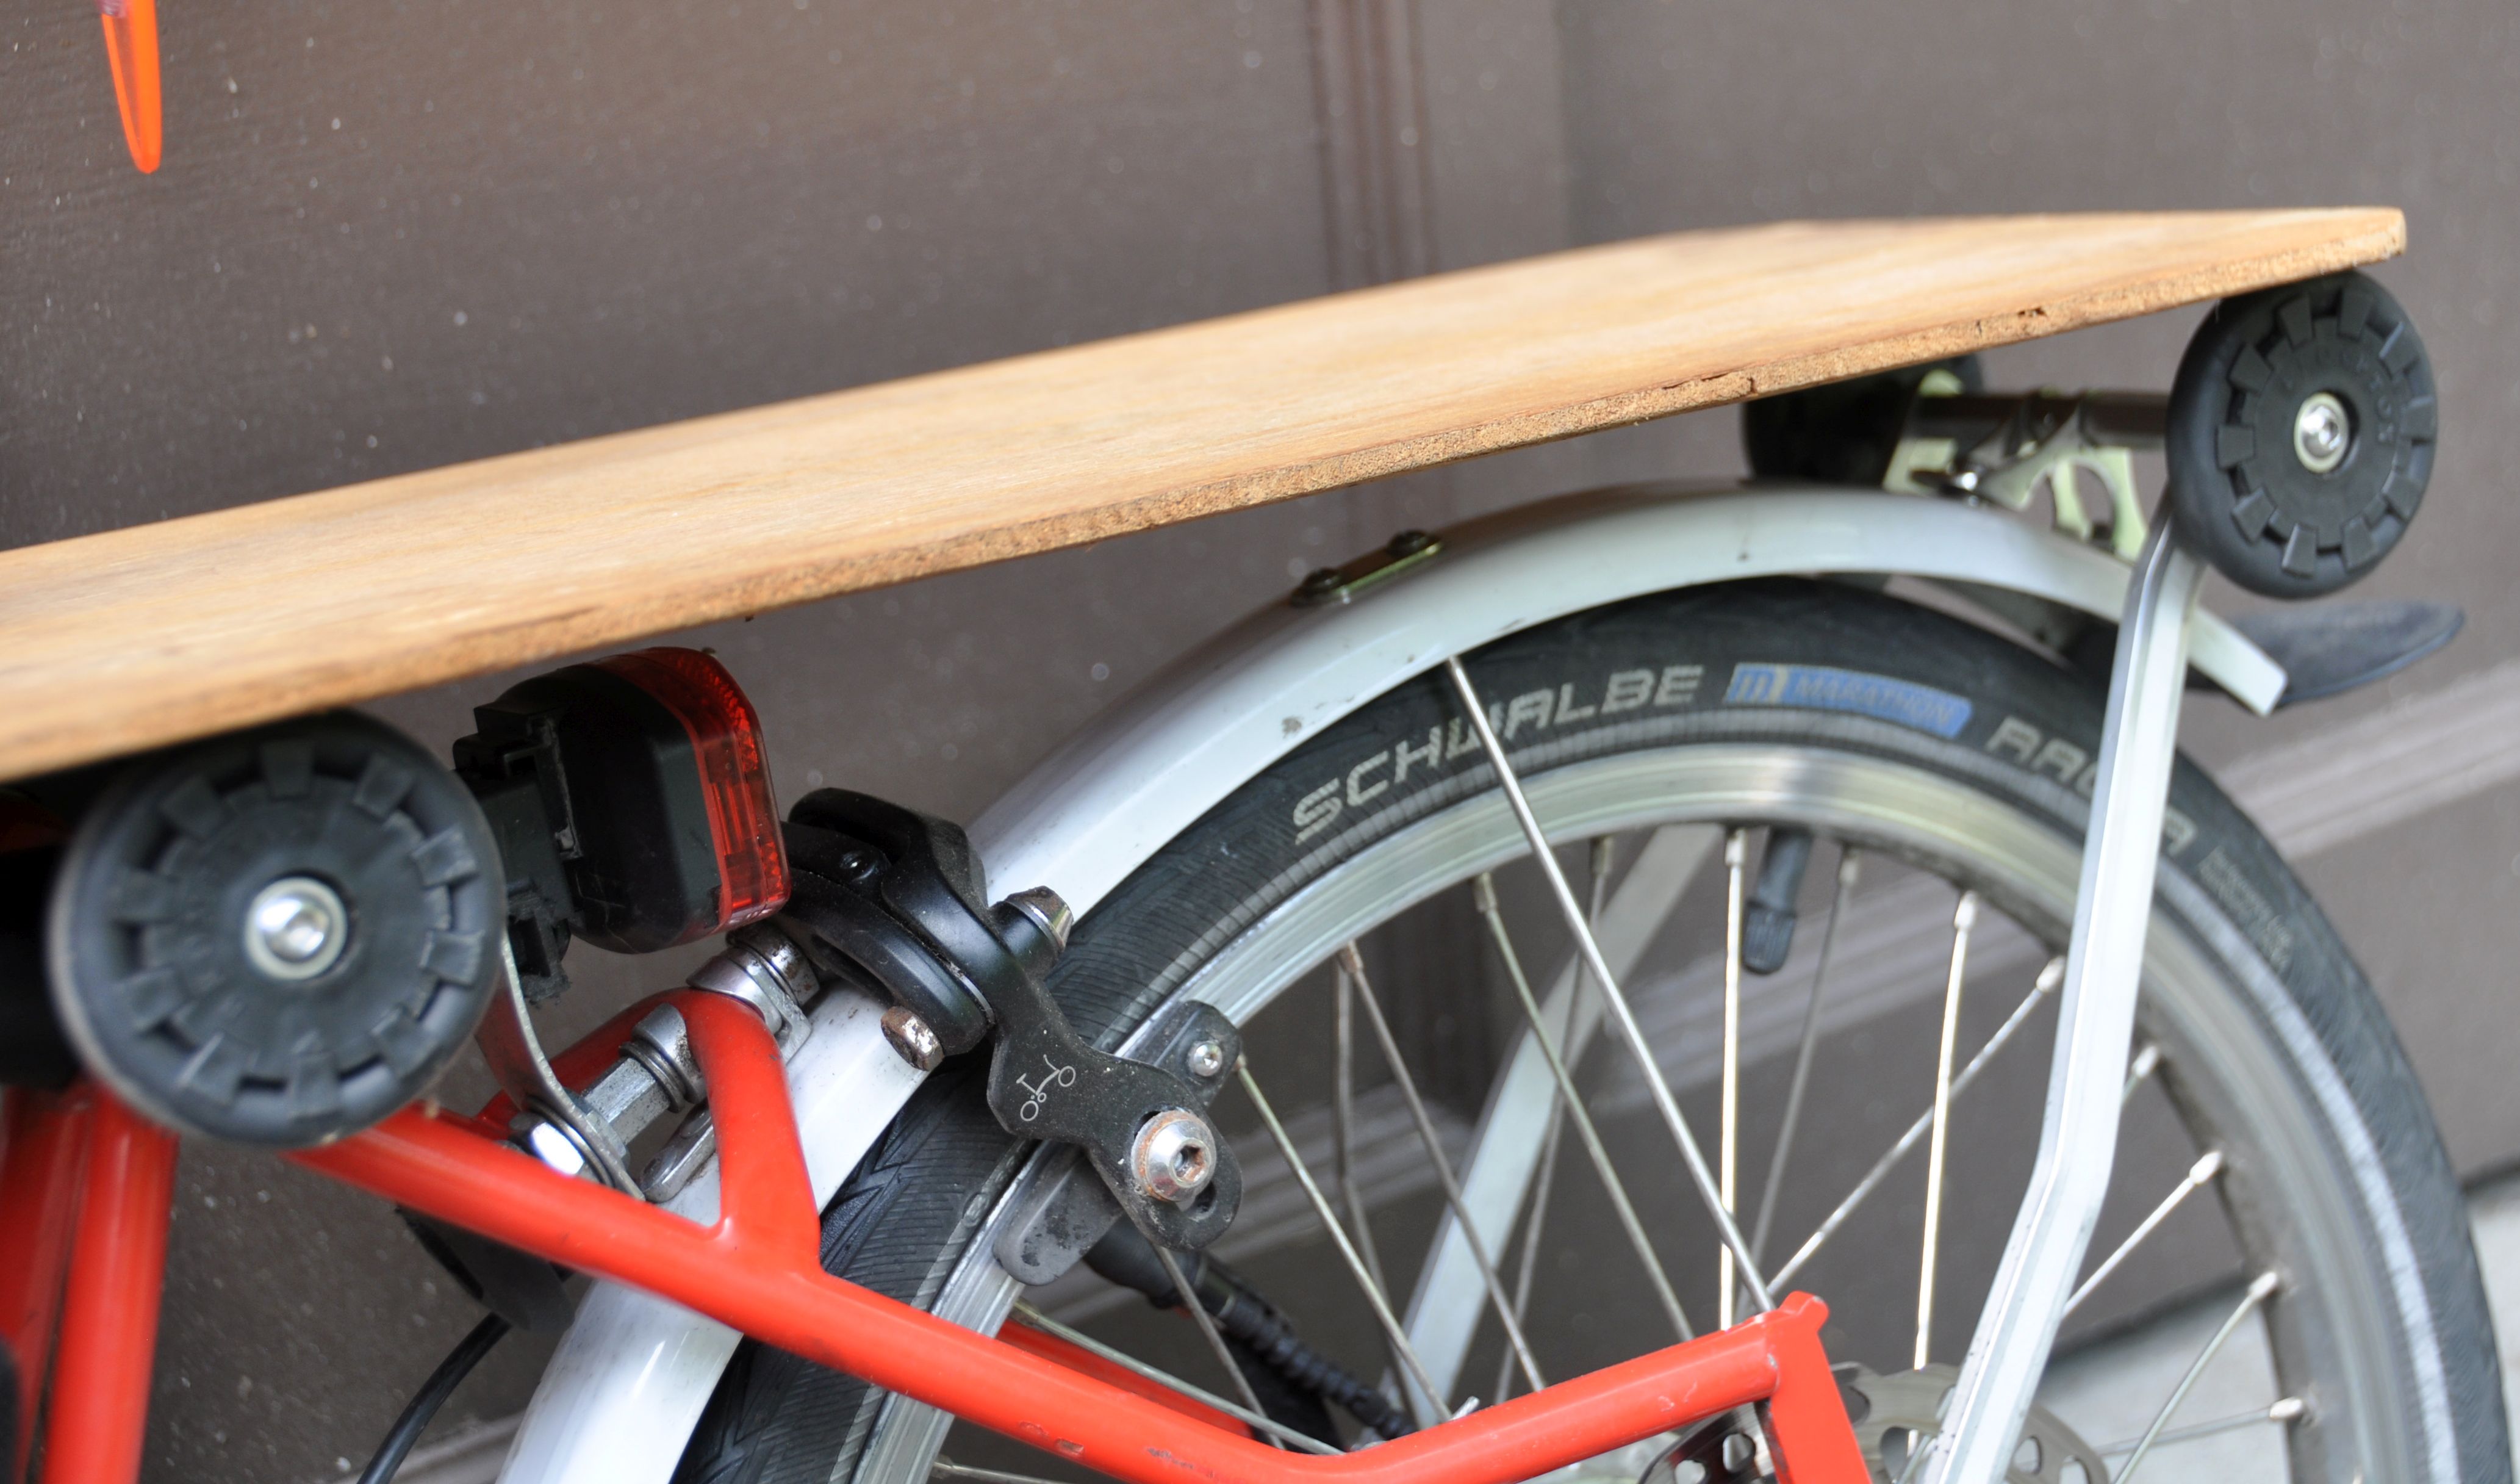
The wide separation between the wheels makes the Brompton super-stable when it is in the kickstand mode, or folded. It is now much easier to roll it around when folded, and you can easily pull it behind you with the handlebar, and it is also very stable in Shopping Cart mode. Big improvement! I think I have now the performance of Eazy wheels mounted to a rack, plus an Eazy Wheel extender – but in a more minimalistic version.
An extended width between the Eazy Wheels is very useful. However, extending the width between the front wheels is limited by heel strike, and telescoping extenders may have their own problems. The ideal way to extend the width between wheels is on the rear, where the extra width (on the right side) does not interfere with the fold and can be realized with a very stable rear stay without any moving parts.
Why is none of the Brompton accessories companies offering such a solution? Wouldn't many people who buy the rack buy this instead? There are several commercial versions for mudguard stiffeners, but it much more effective to have stiffer fender stays which connect directly to the rolling wheels.
Parts list: M6 threaded rod, stainless steel tubing (OD
8 mm, ID 6 mm), M6 locknuts
Aluminum Rectangular Bar, 3/16" Thickness, 1/2" Width, https://amazon.com/gp/product/B003U6HT82
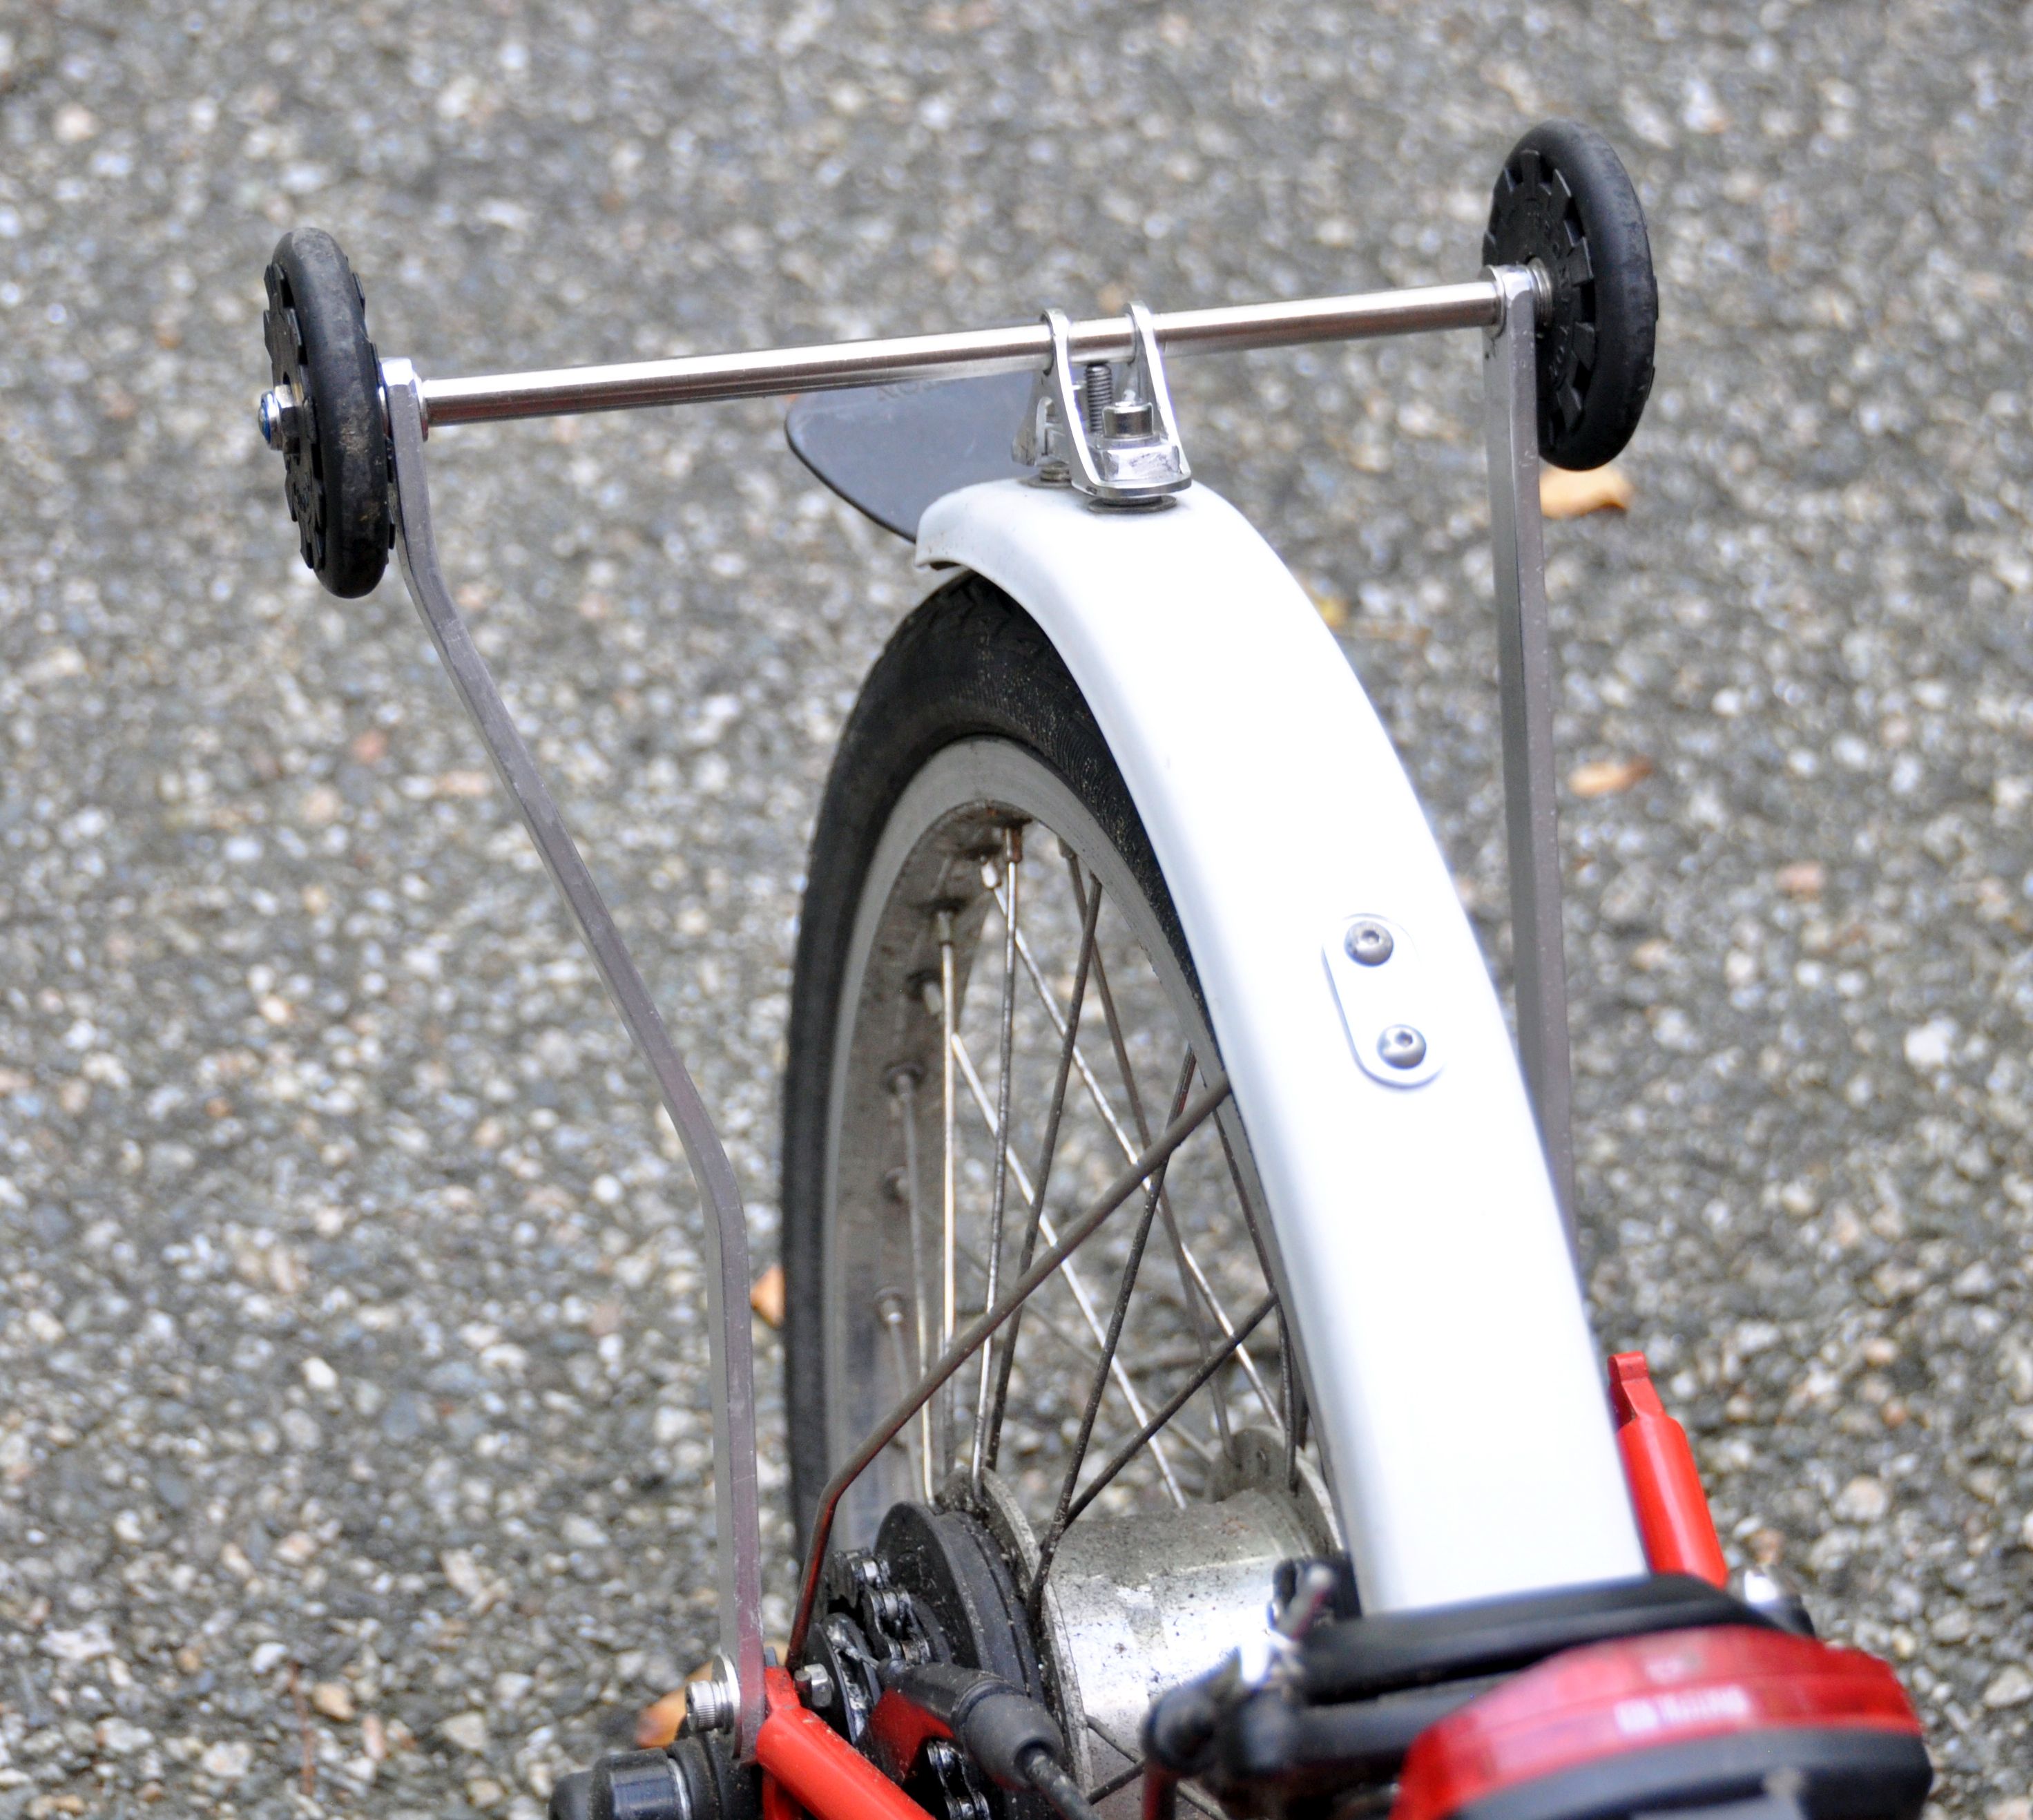
I modified the length between the two rear wheels several times when I changed handlebars --- to make sure there was no interference with the fold. Here is an earlier solution with a wider distance between the fender stays. If I had to rebuild the parts, I would use this design.
Here are some earlier solutions:
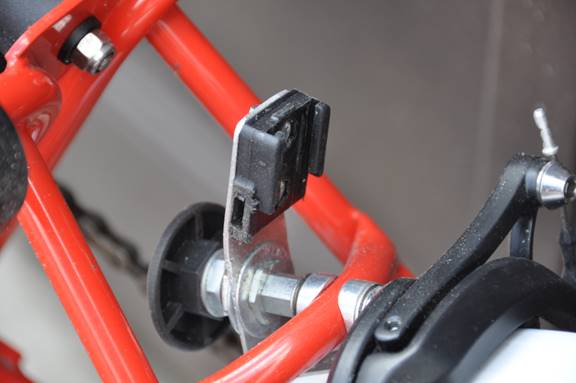
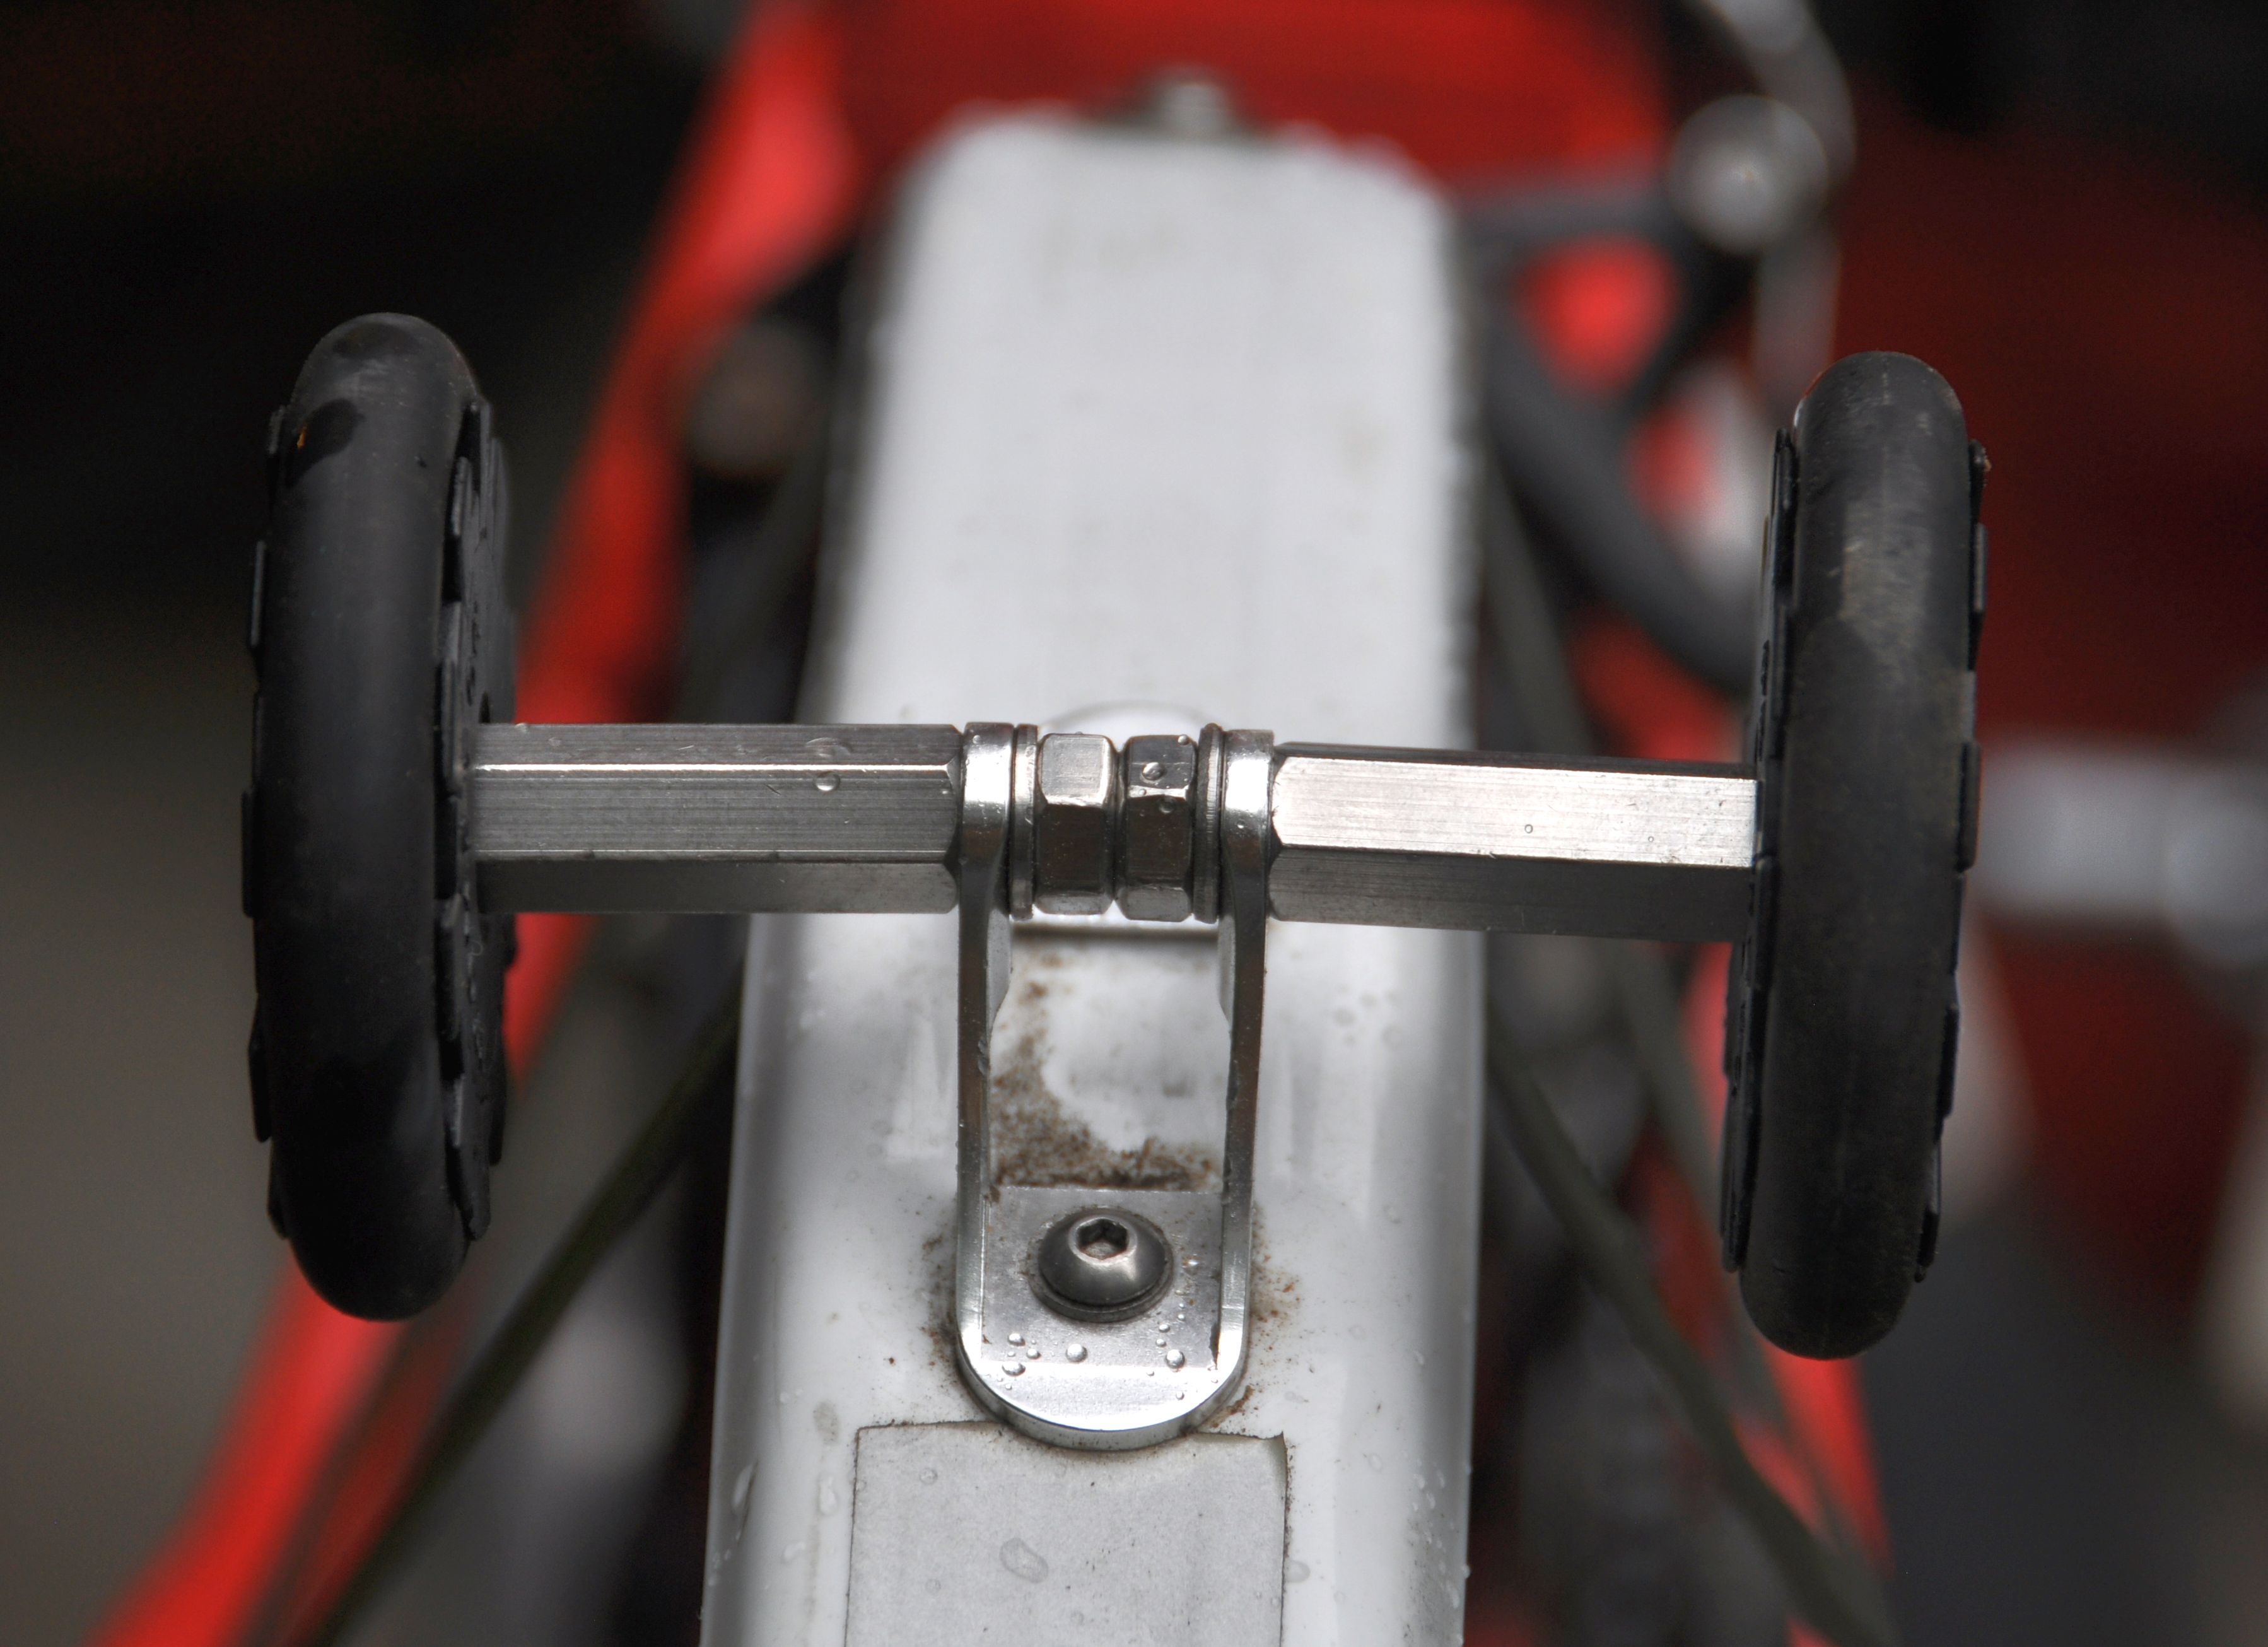
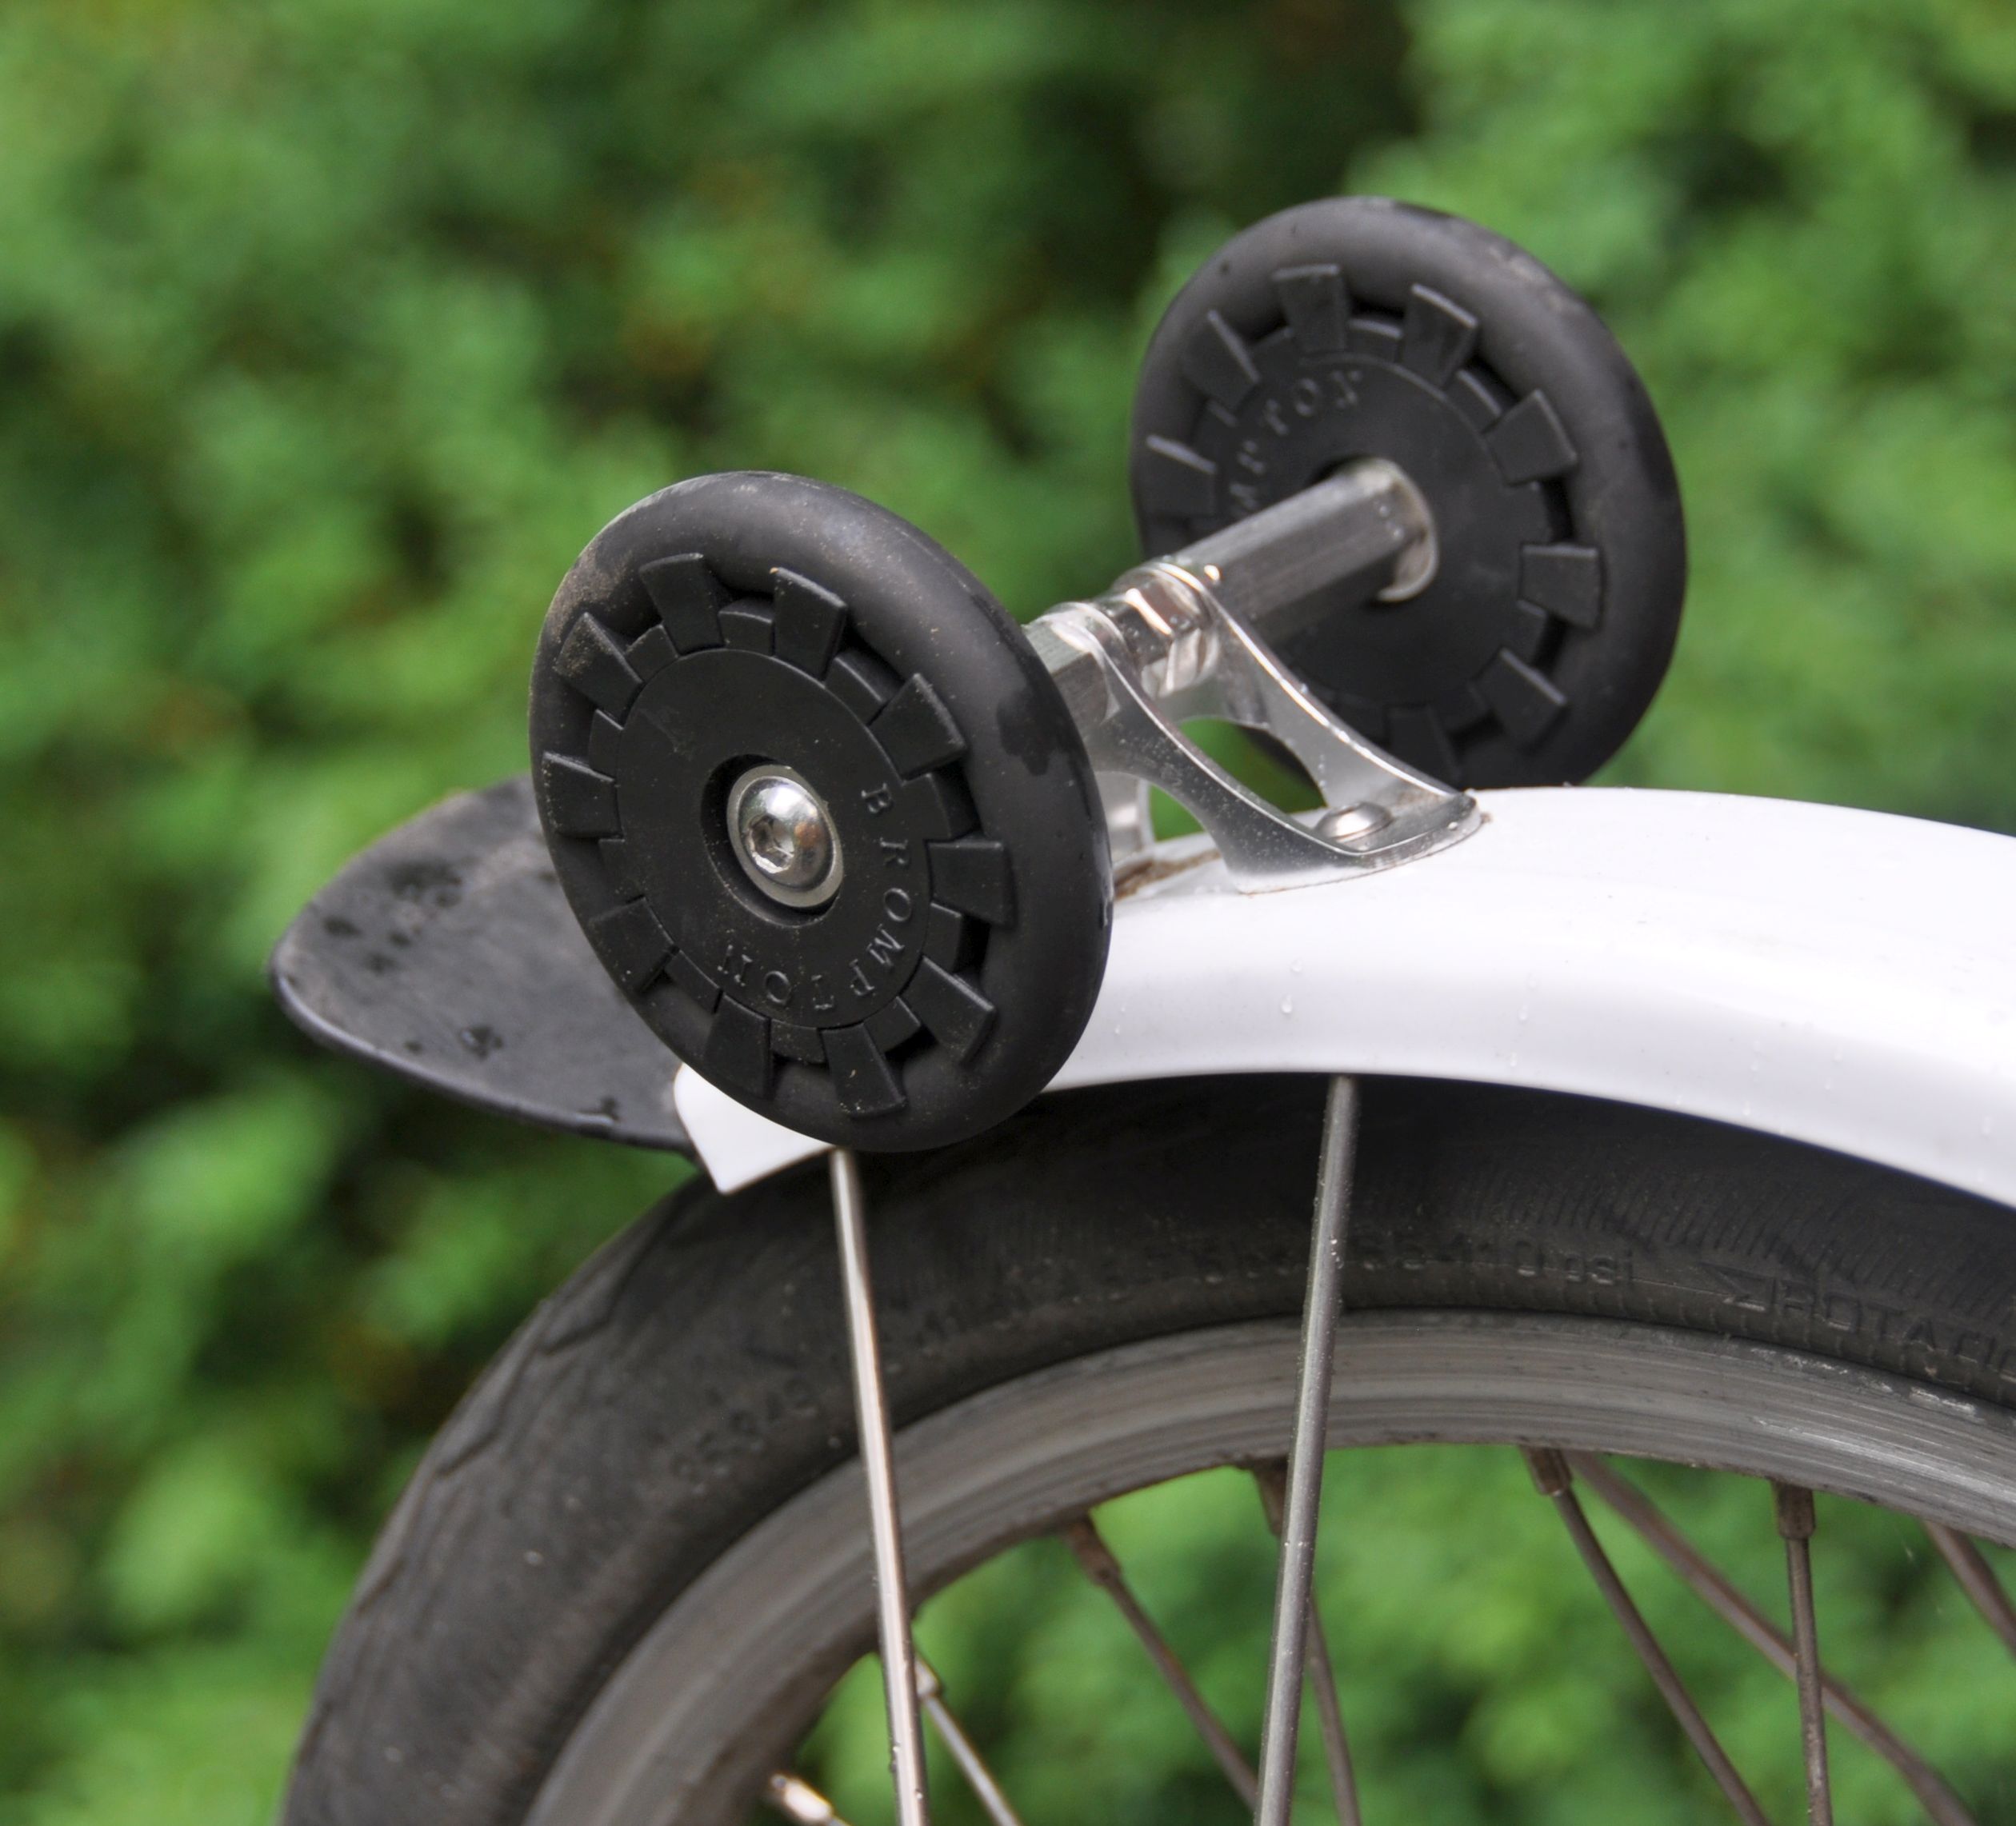
Double mudguard wheels
When folded, I usually roll the Brompton using just the two front rollers or Eazy Wheels. The mudguard wheel serves as protection to the mudguard, and for occasional rolling the bike into its storage place. However, many people said that four wheels (with the rack version) make it sometimes easier to roll the Brompton around. So I got interested in double mudguard wheels.
For this, I found a simple and inexpensive modification of the single mudguard wheel: You put an M6 bolt into the holder of the mudguard wheel and add two M6 coupling nuts ($2 each on Amazon https://amazon.com/gp/product/B07R46STQP or hardware stores). Now you can add any wheels you want (Eazy Wheels, Brompton rollers, skateboard wheels). The modular setup allows you to try out different diameter of wheels (to get the right clearance), and by adding another coupling nut or shortening the coupling nut you can adjust the width between the wheels. I first used the Brompton rollers, and they had sufficient clearance, but then I wanted to match the wheels on the other side and used Brompton Eazy Wheels. By-the-way, Nov designs has an “L type adapter” for $ 44, which is similar in function to my solution.
I like to have the option of rolling the folded bike on four wheels, without the need of lifting it. There is some flex due to the fender stays, and you can make the front wheel touch the ground (and my front wheel does not spin freely). However, when I pull the folded bike on its four wheels using the unfolded handlebar, the bike twists a little bit to the side, and the front wheel does not touch. Works very well! My only concern is whether the mudguards will be too weak and crack in the long run. In the end, I added reinforced fender stays (see above).
Earlier version of the rear fender stays
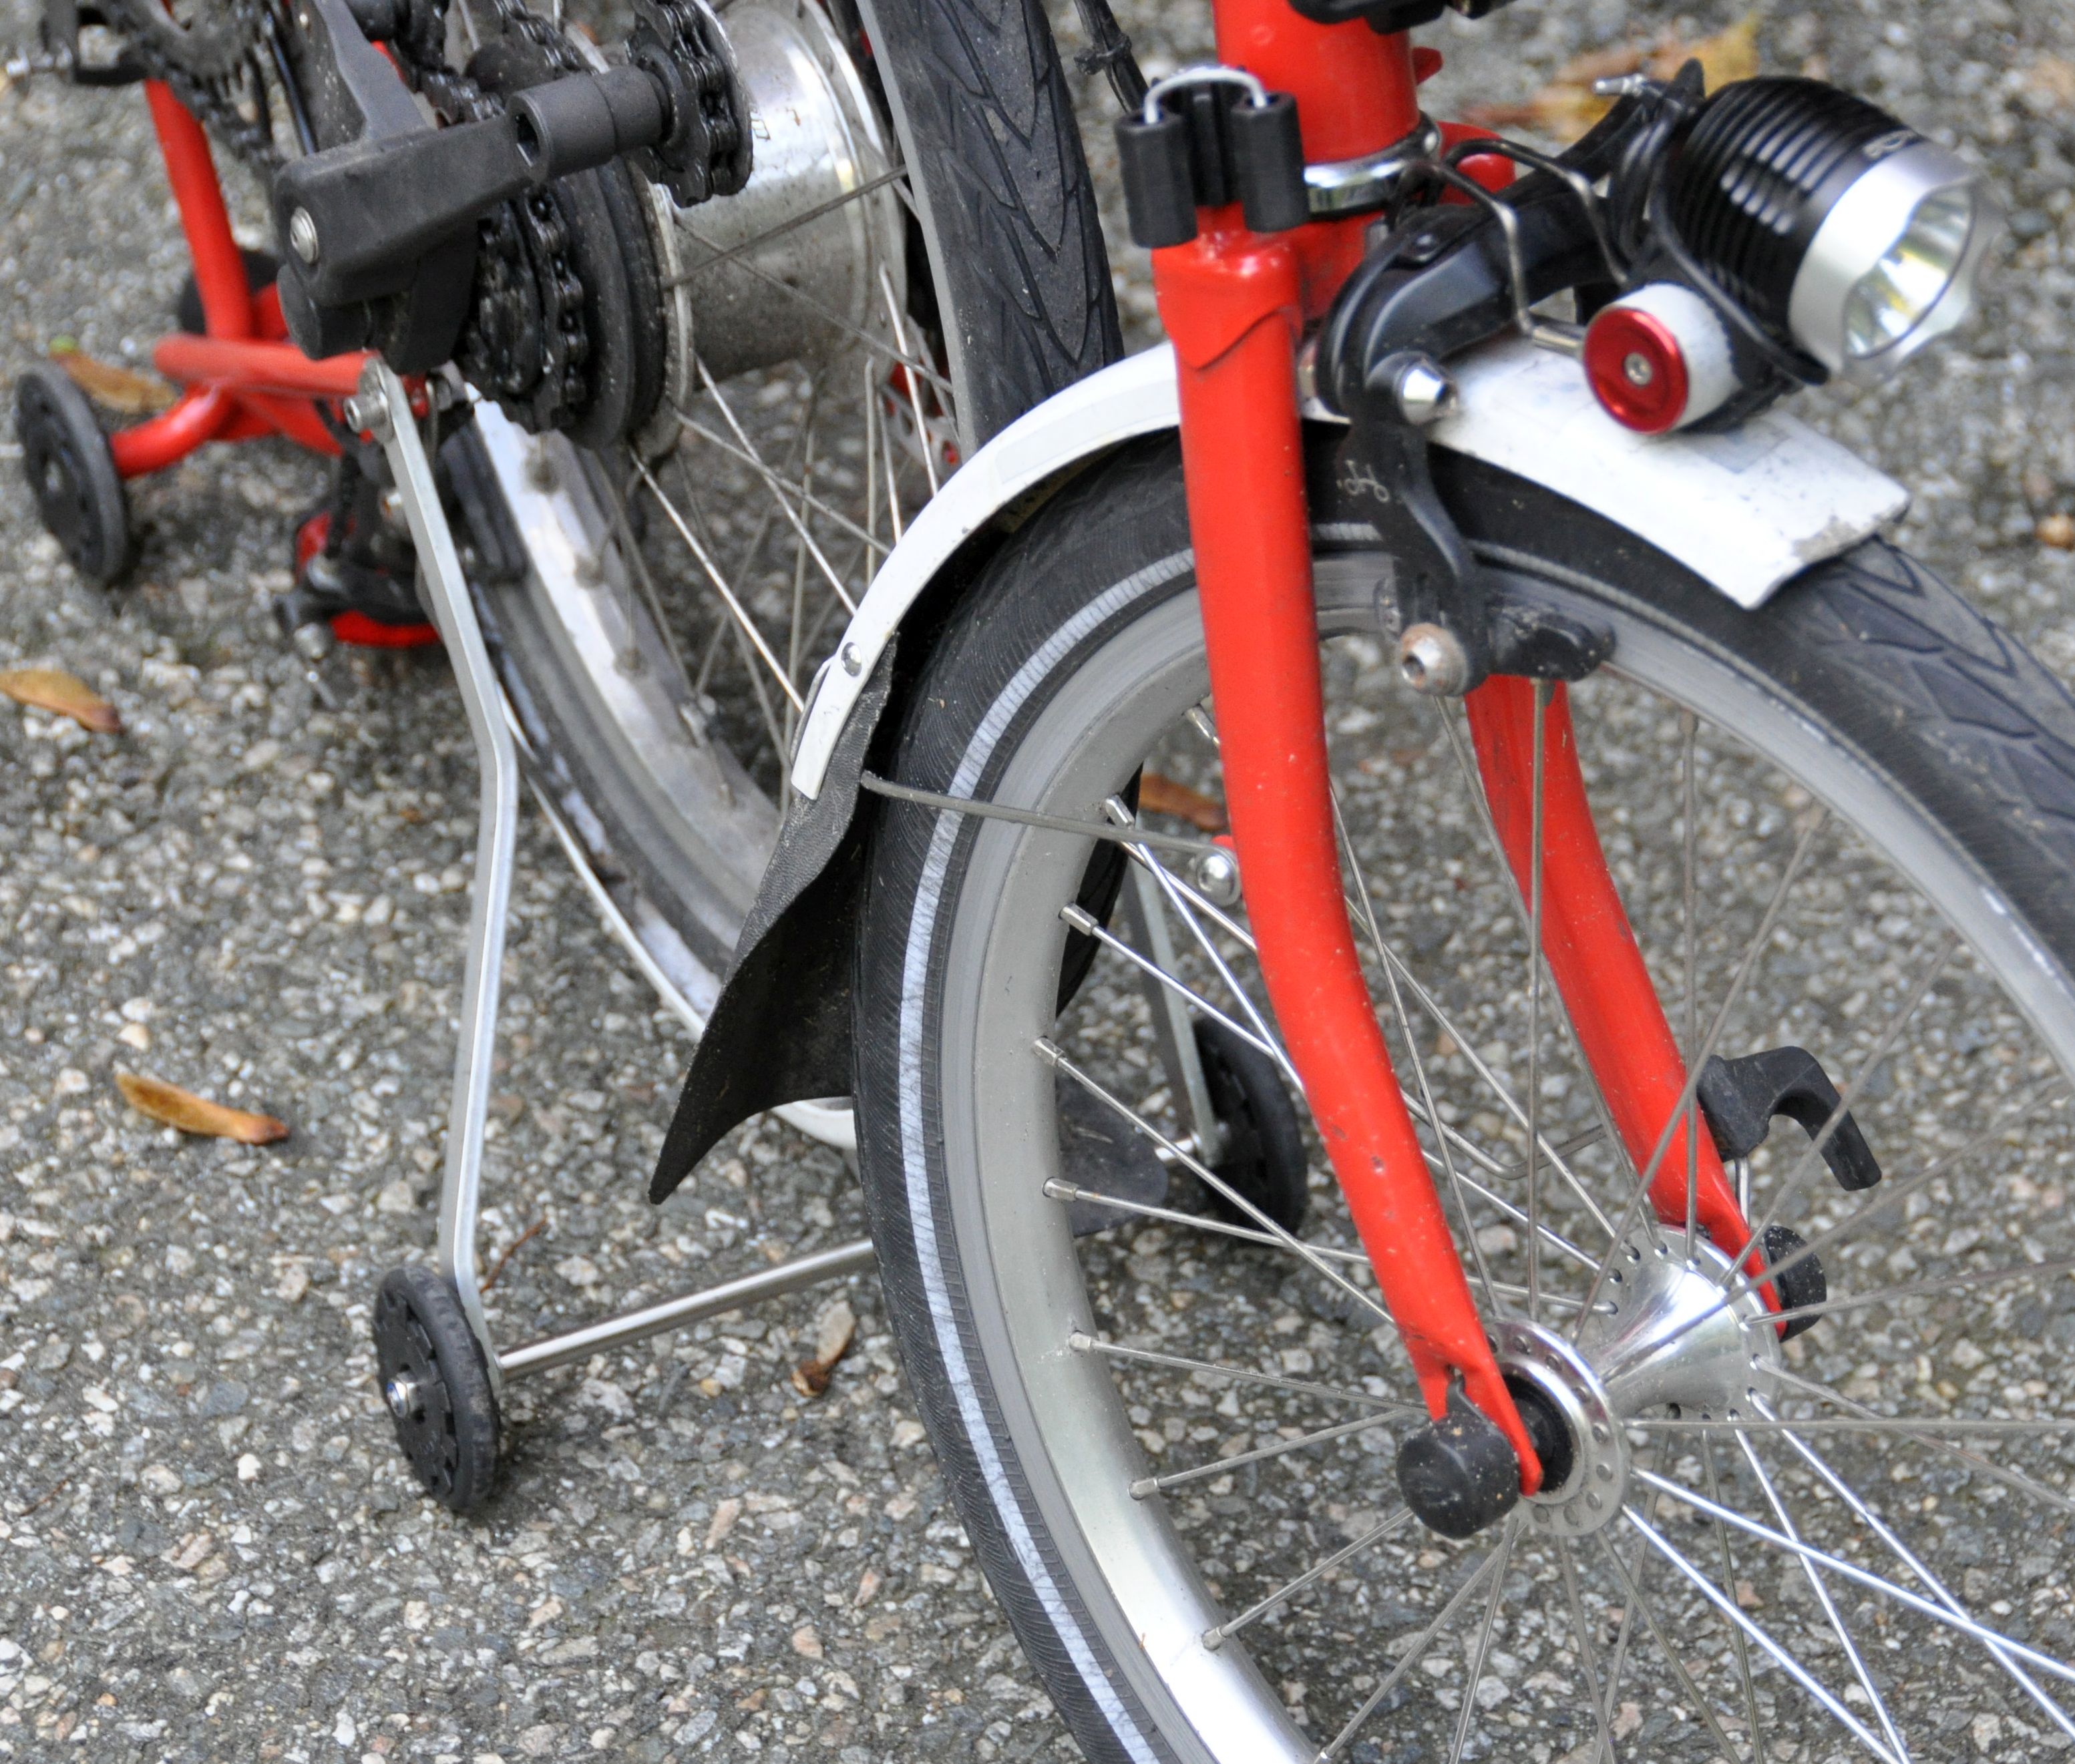

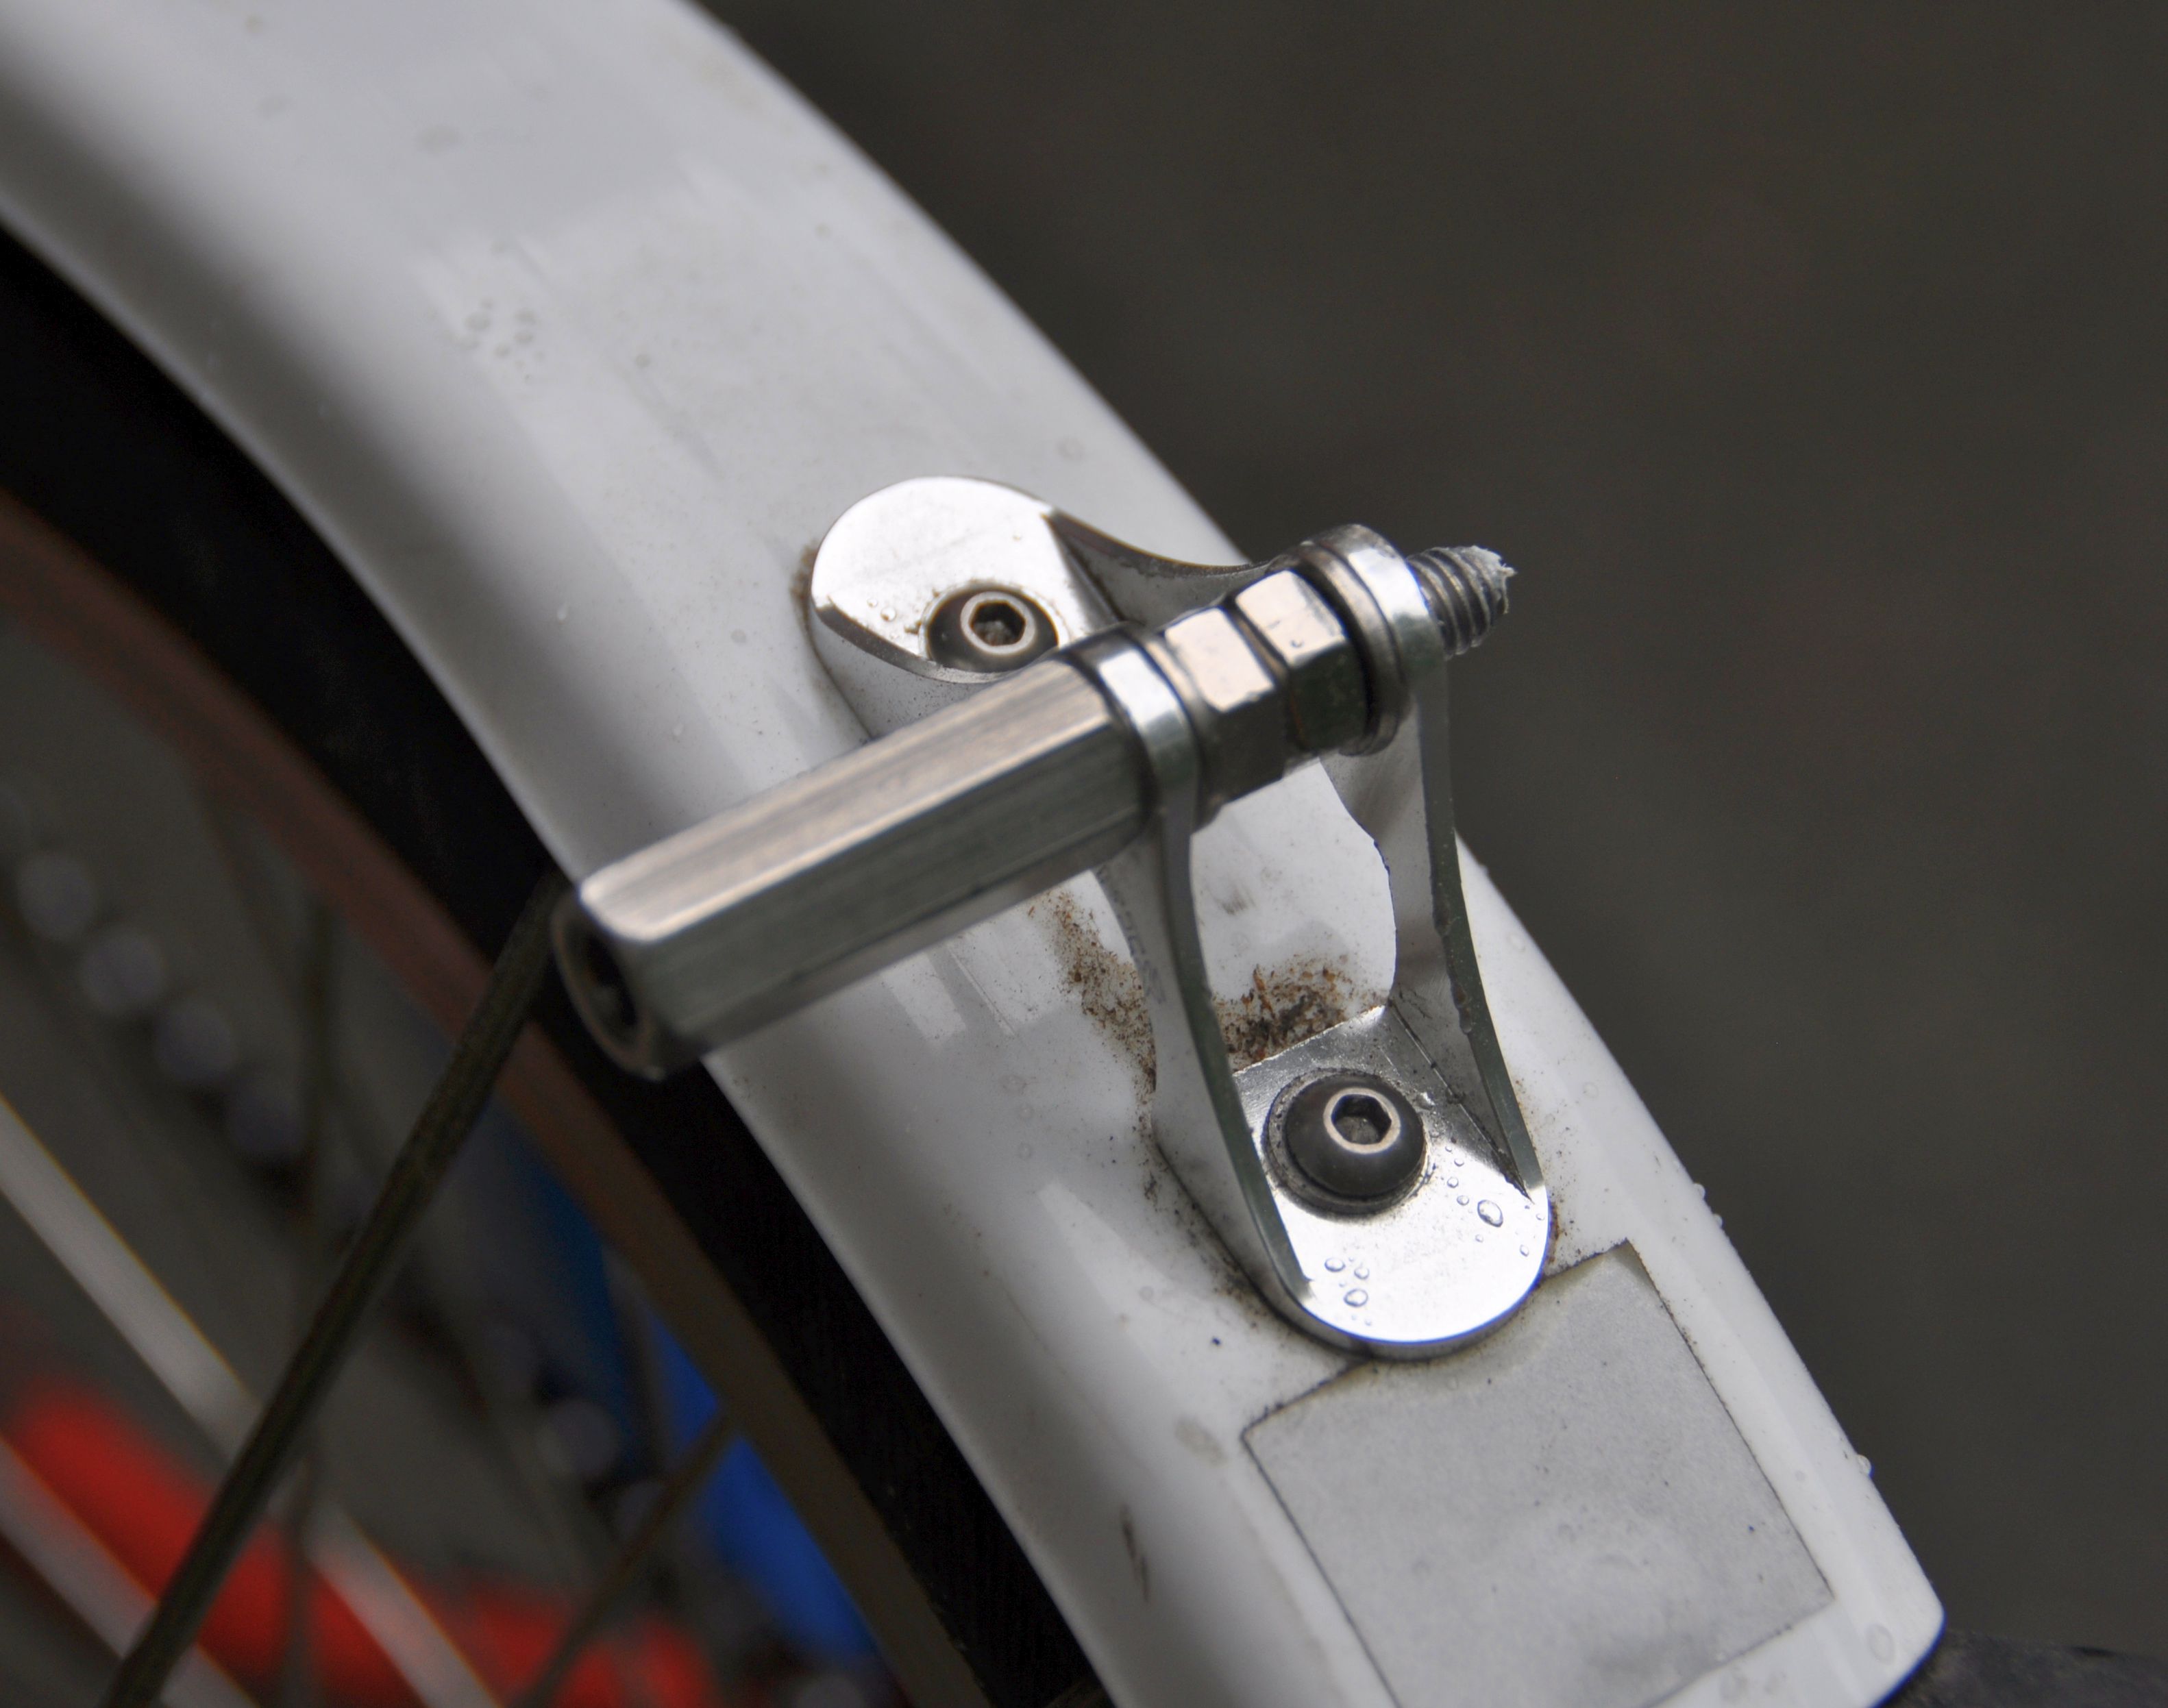
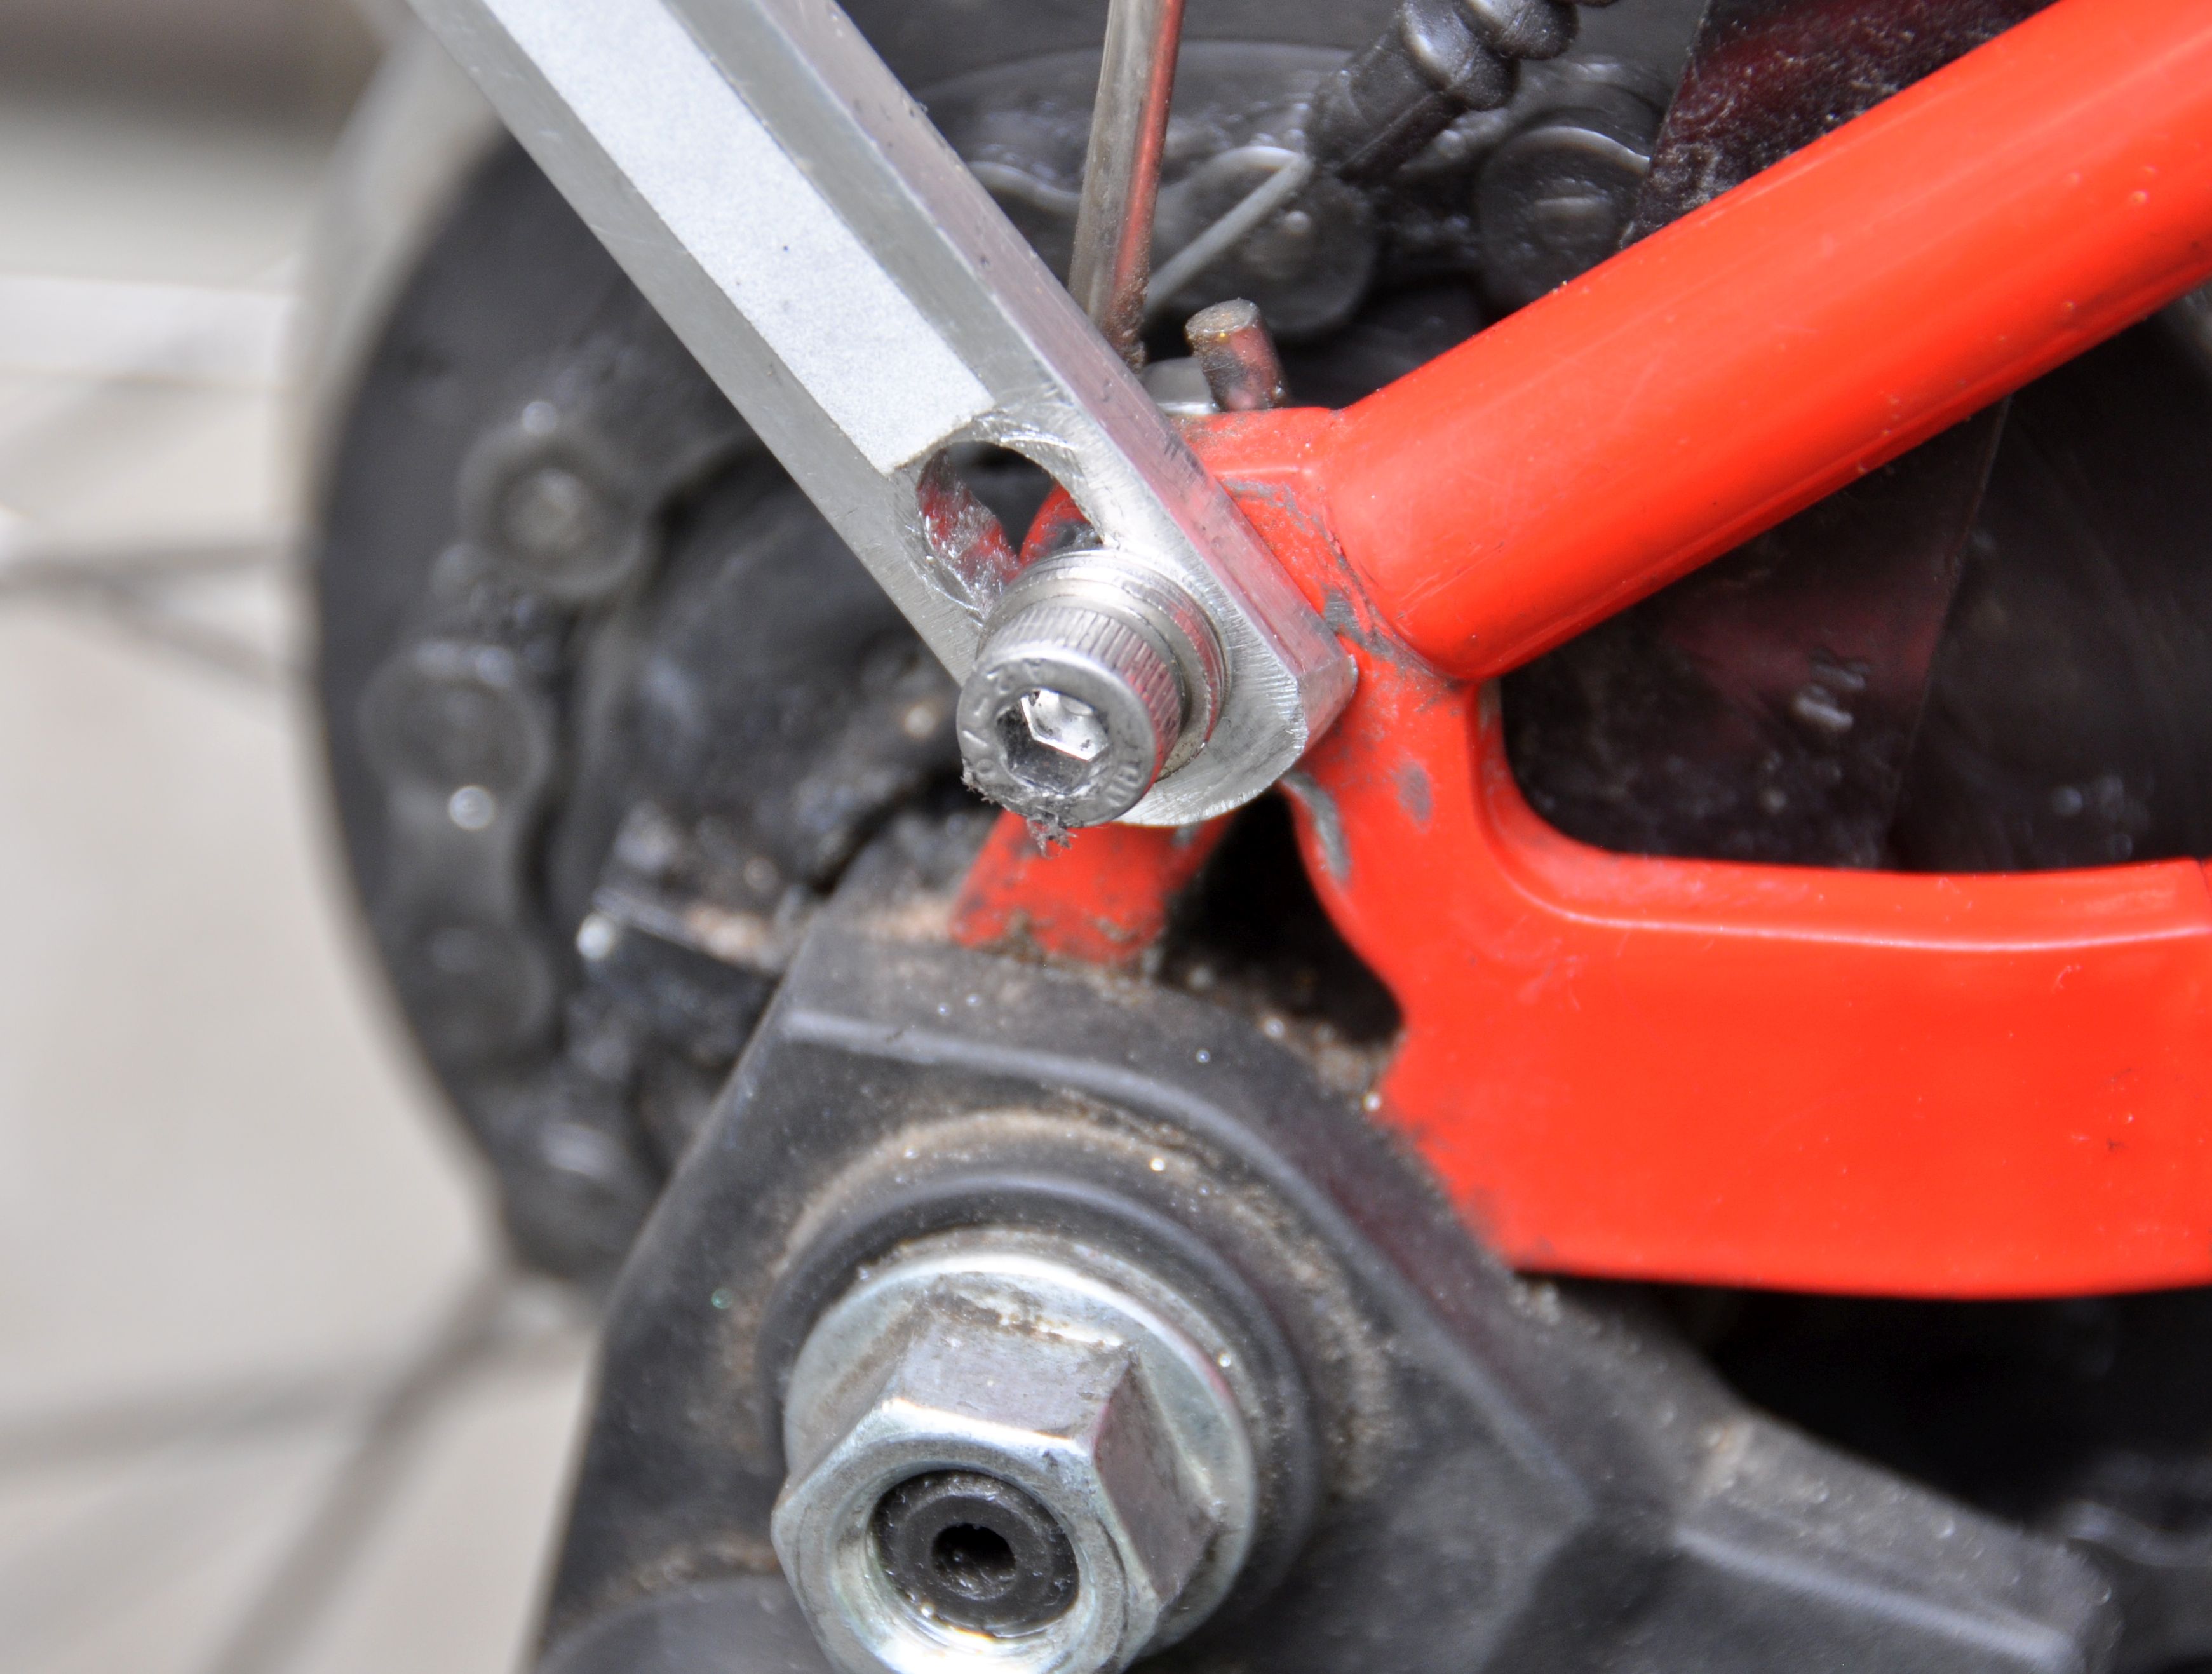
Here the rear fender is connected to the tubing with a modified mudguard wheel holder: I enlarged the hole to 8 mm and then used a set-screw arrangement. A simpler (but less elegant) solution could use hose clamps or cable ties.
Note added 1: The setup is very stable and rigid. However, the fender is necessary to prevent the whole setup to rotate. When you put weight on the rear Eazy wheels, there is a pulling force on the fender. I think the fender is very strong and doesn’t need reinforcement. However, the small angle bracket (a piece of bent sheet metal) which connects the fender to the rear brake bolt is thin, and it once got bent and stretched out (when I took the Brompton on a flight using the original Brompton cardboard box). I could bend it back and ride the bike, but afterwards, I replaced it by a thicker aluminum bracket (around 3 mm thickness) – see photo.
Note added 2: After several years, I found some cracks in the fender, and reinforced it with an aluminum bar (3/4” x 1/8”).
Note added 3: With four wheels, some alignment is needed to make sure that all four touch the ground. I can adjust the fender stays after enlarging the mounting holes to slots with a file. I align tem by placing a flat board on top of the wheels and checking that all wheels touch the board.
Reinforcing front fender: Back to top
My front fender had cracked due to some incidence. To stabilize the crack, I replaced the mounting hardware: Cut a piece of aluminum (1/16”), connect with screws and glue.
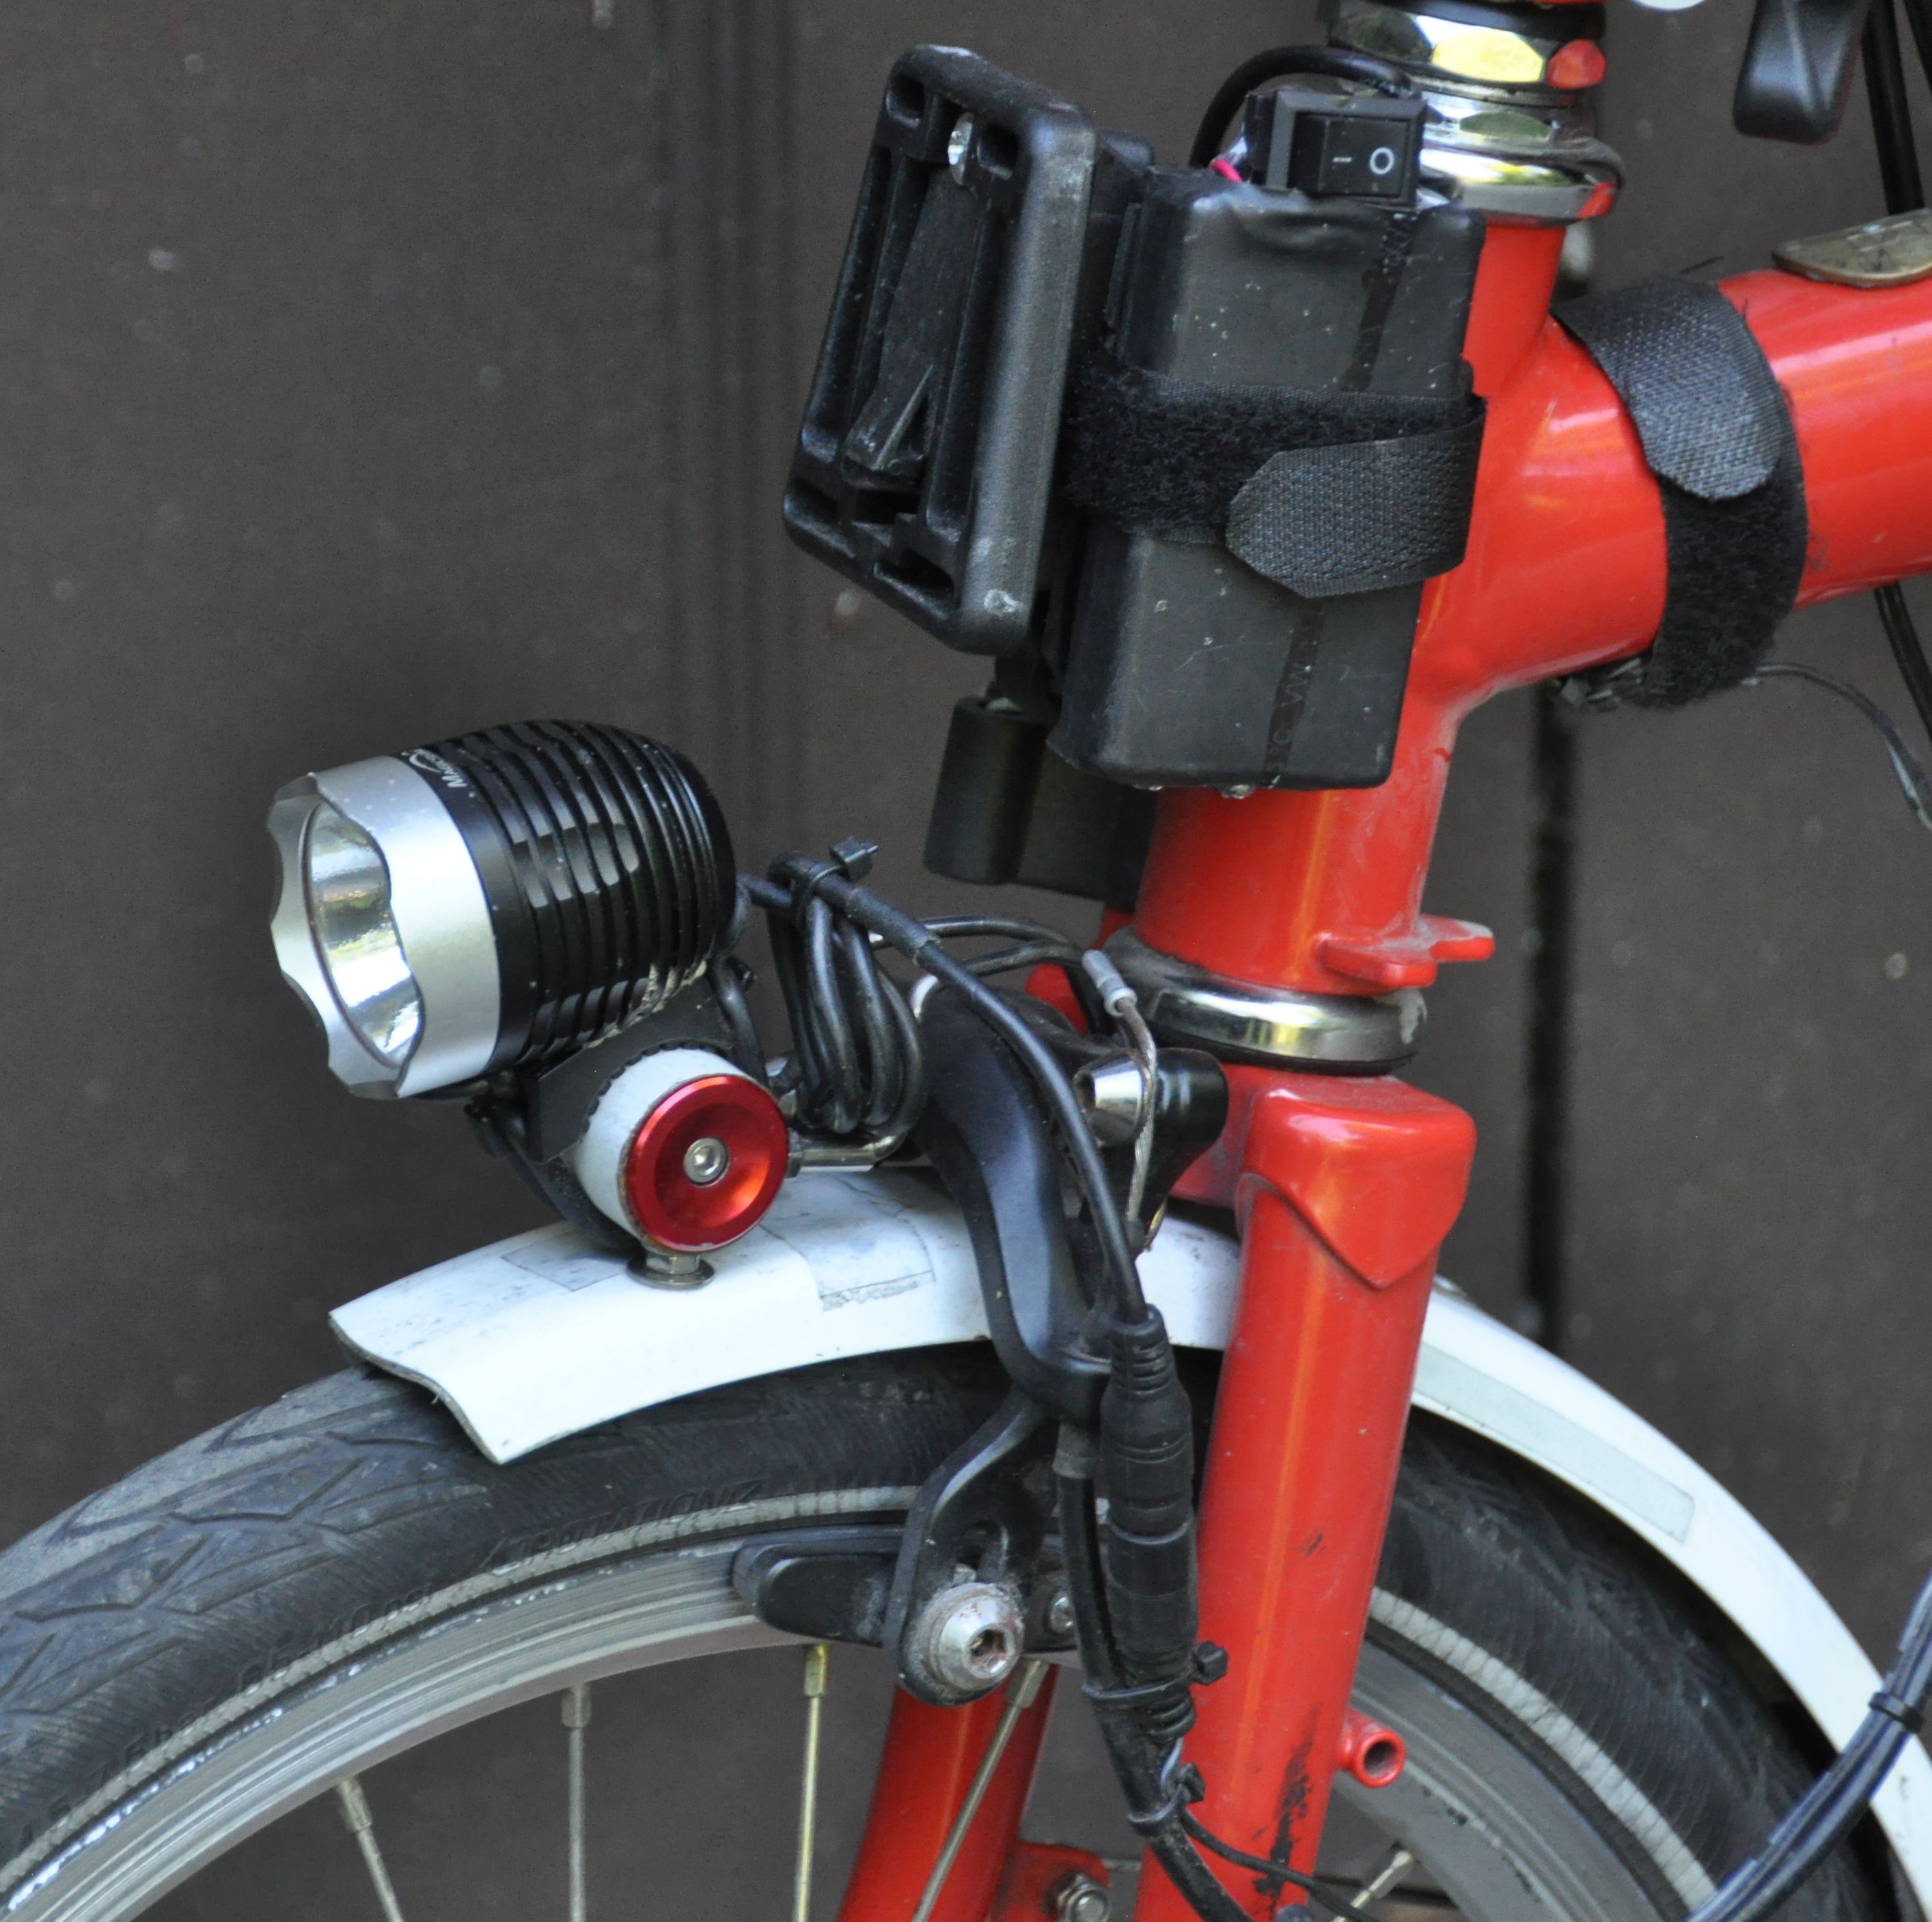
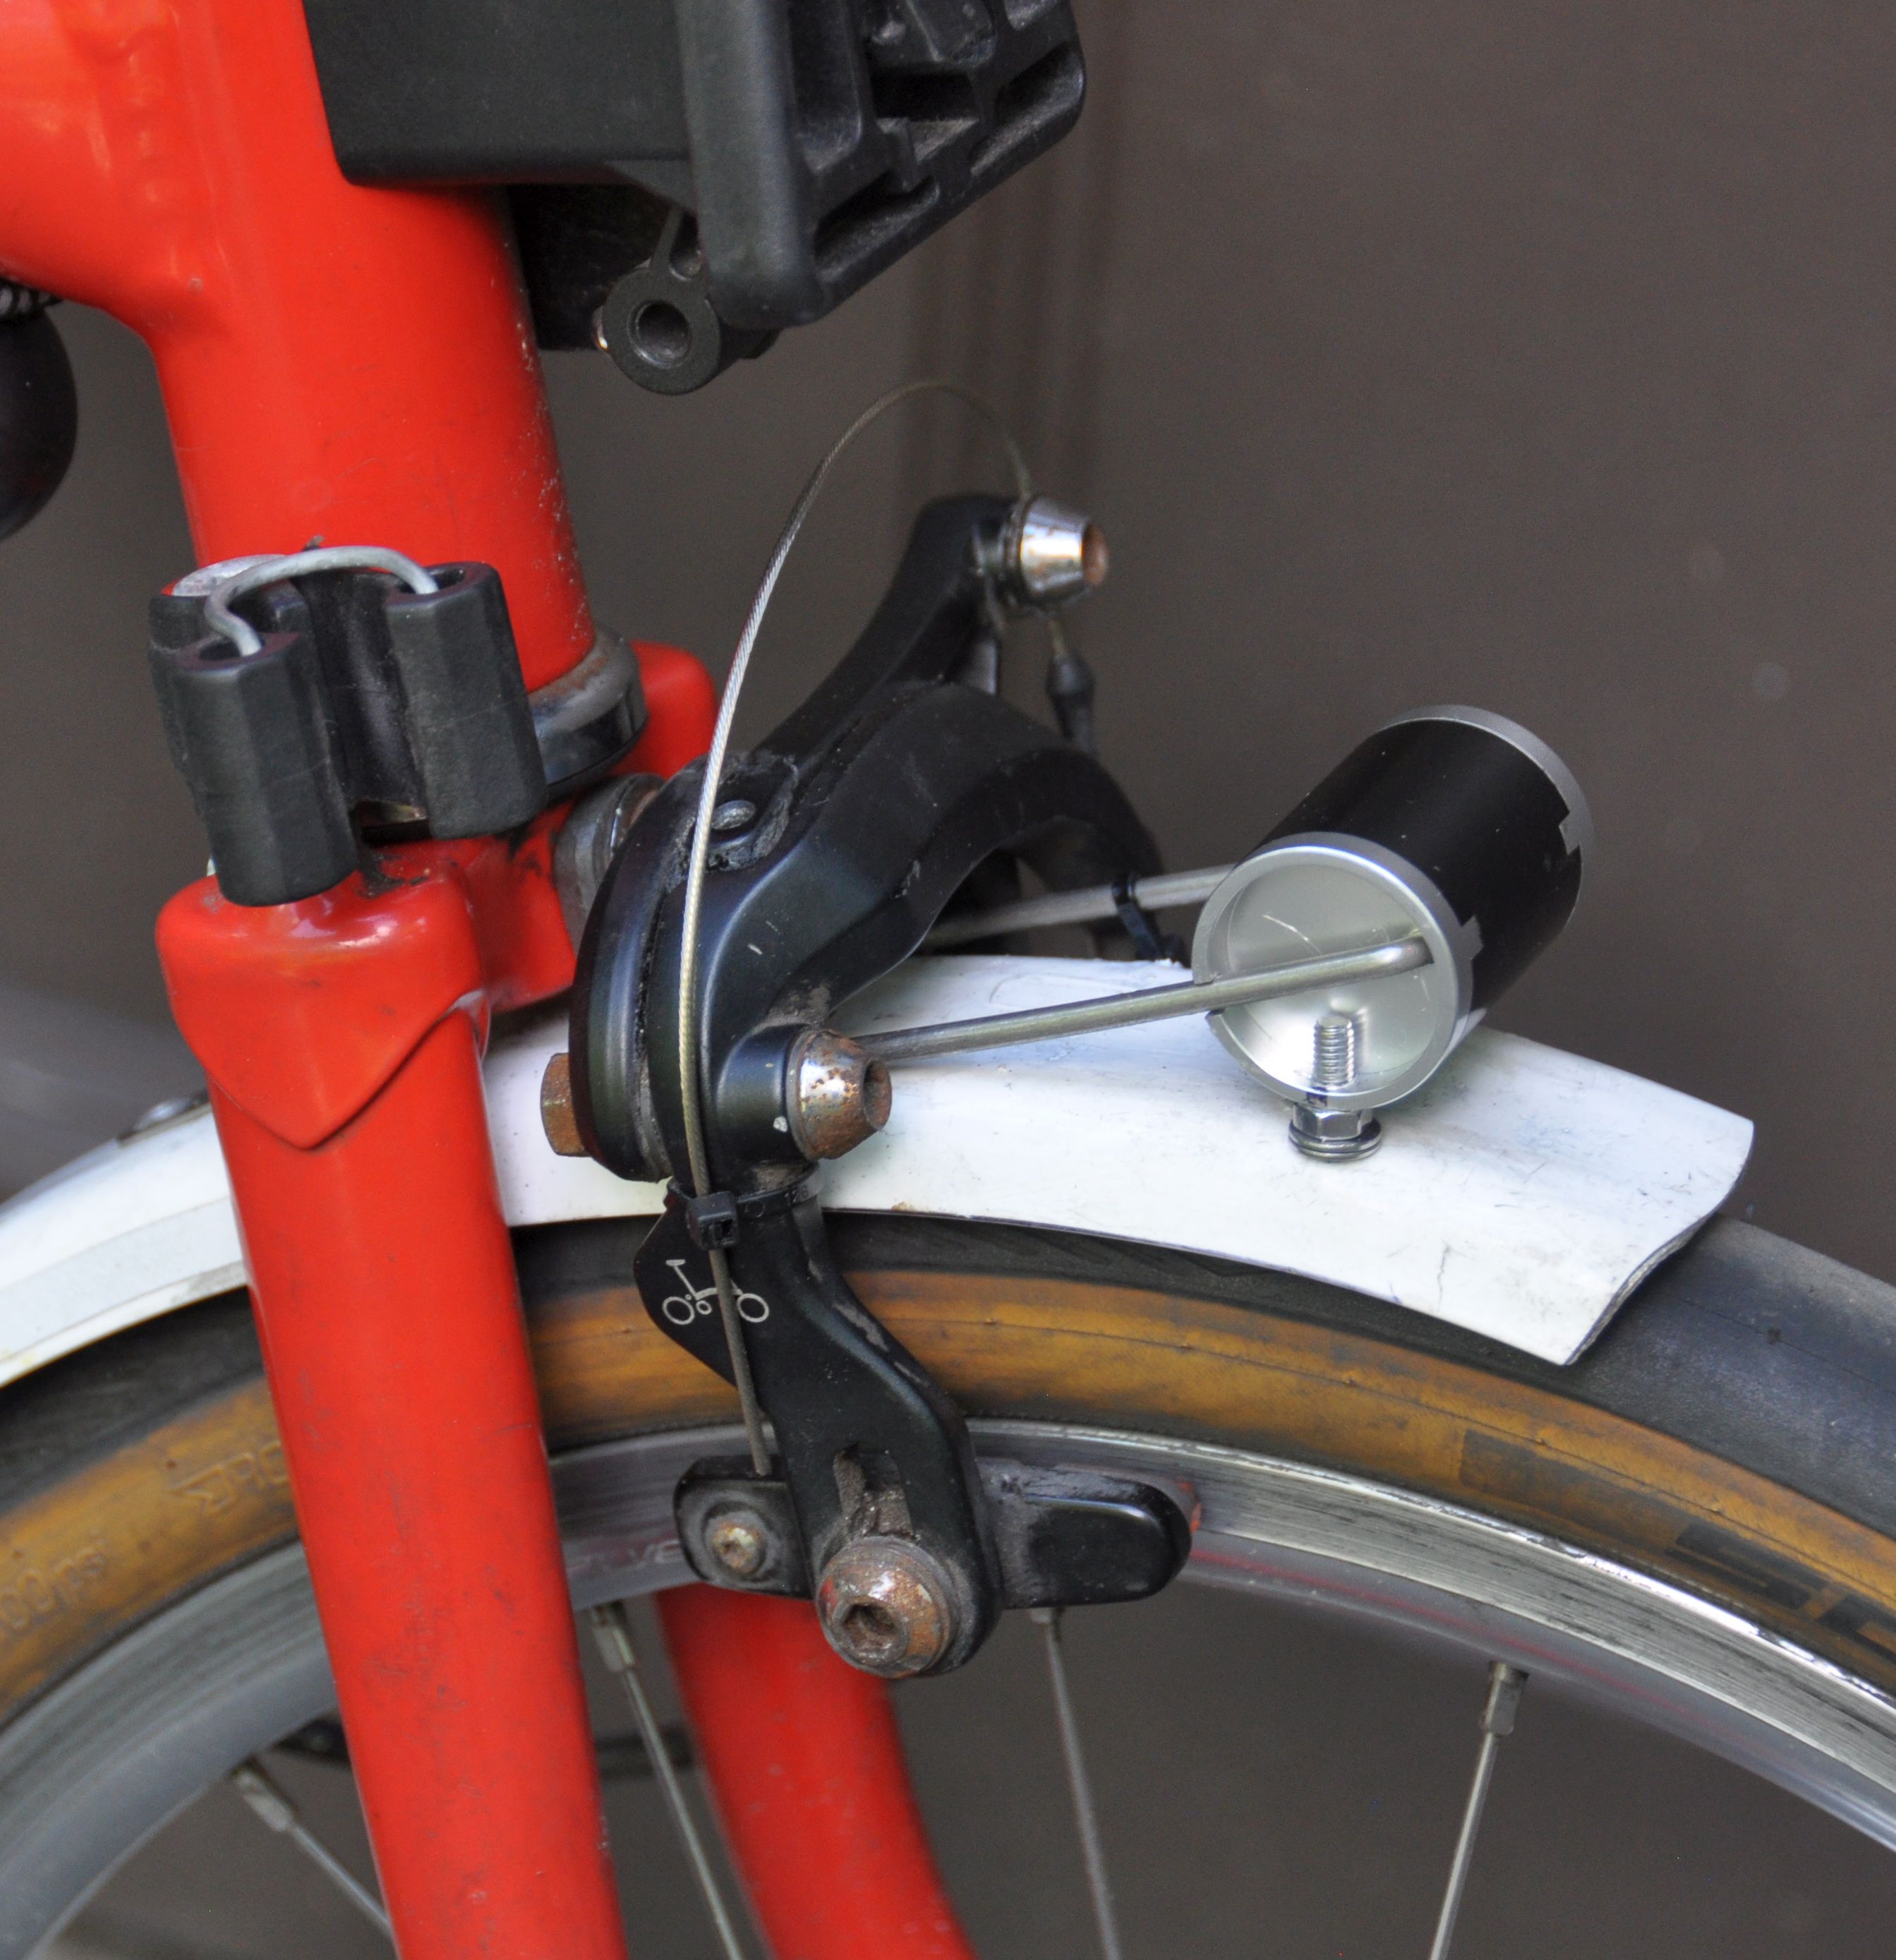
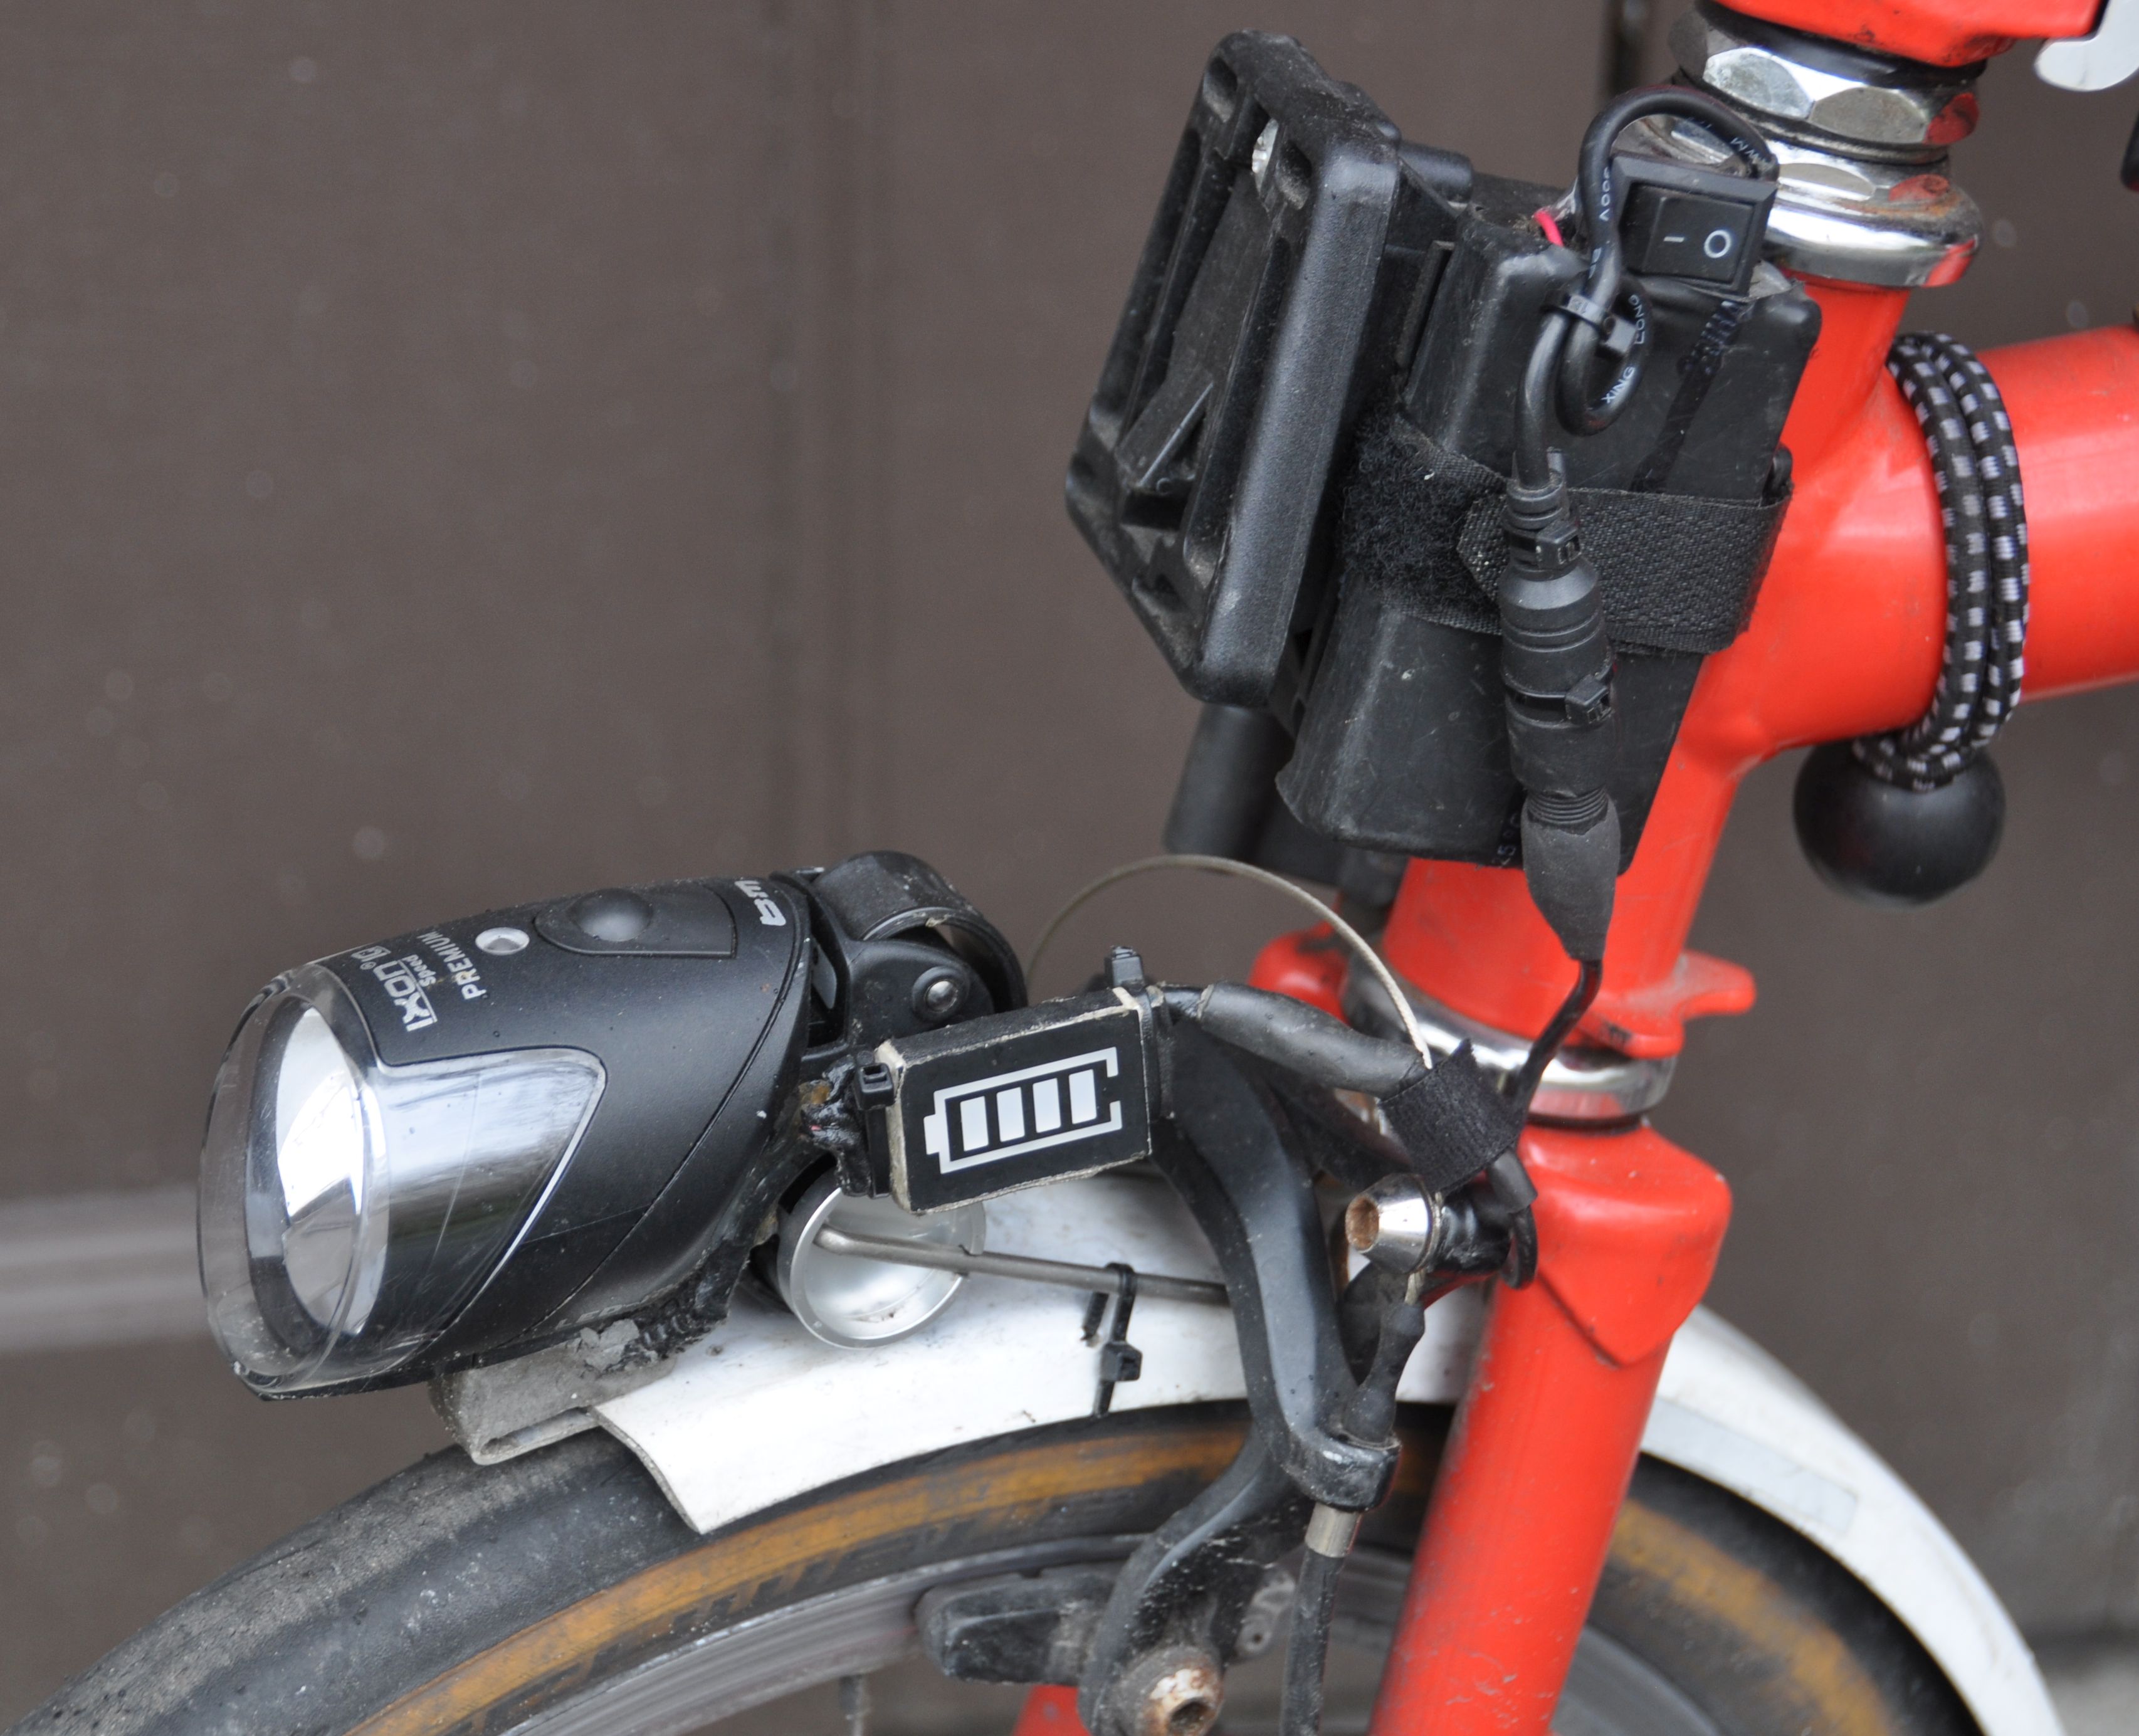
Front lamp Back to top
I have various front lights on my other bikes, and want to use them on the Brompton. So I build a holder for the lamps --- I used the reflector clip, bent it into shape and connected it to a piece of tube from a white seatpost, and used handlebar plugs (which I could color match to the bike). I placed the lamp holder as much as possible forward and down for enough clearance with the front carrier block and Brompton bags. I think the commercial lamp holders are less versatile.
Update: After several years of use, the lamp mount broke. I found a commercial mount which provides the same functionality.
Battery pack Back to top
The best place for the lithium battery pack turned out to be the front carrier block. I built a small holder and secured the battery with a Velcro strap.
For the cabling: I avoided cable loops by permanently installing an extension cable along the front brake cable. The battery plugs in on one side, the lamp on the other.
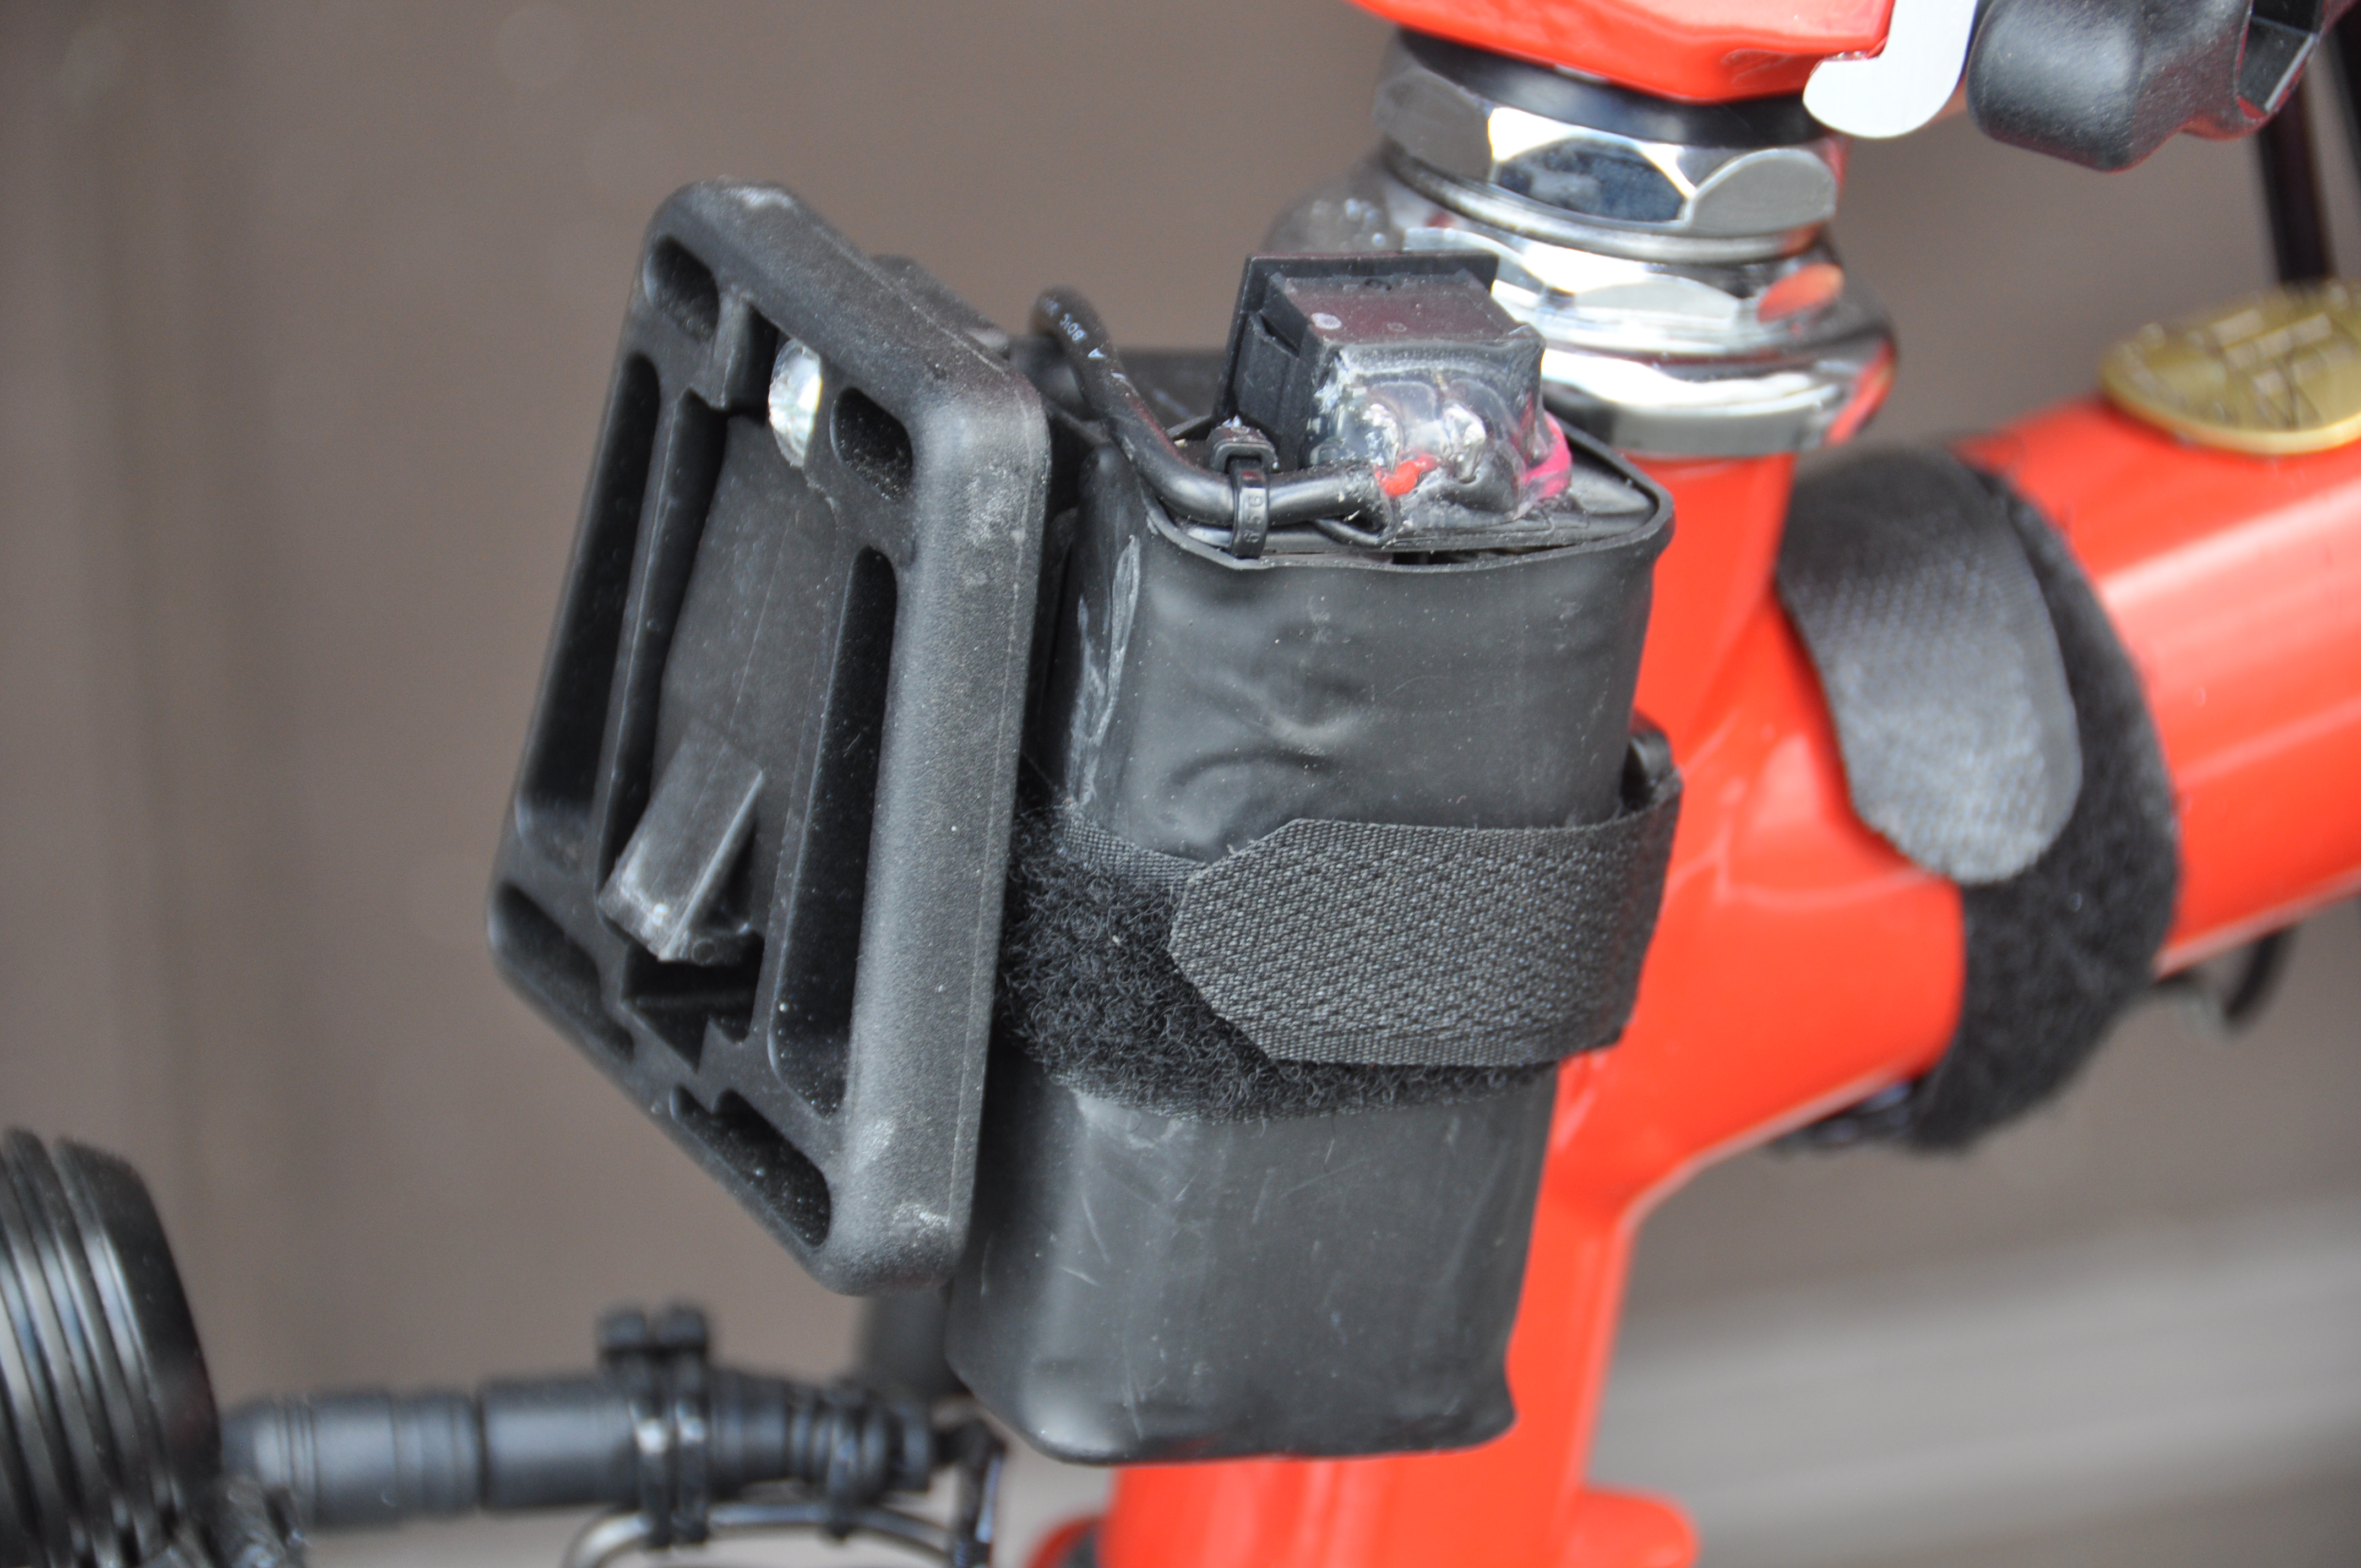
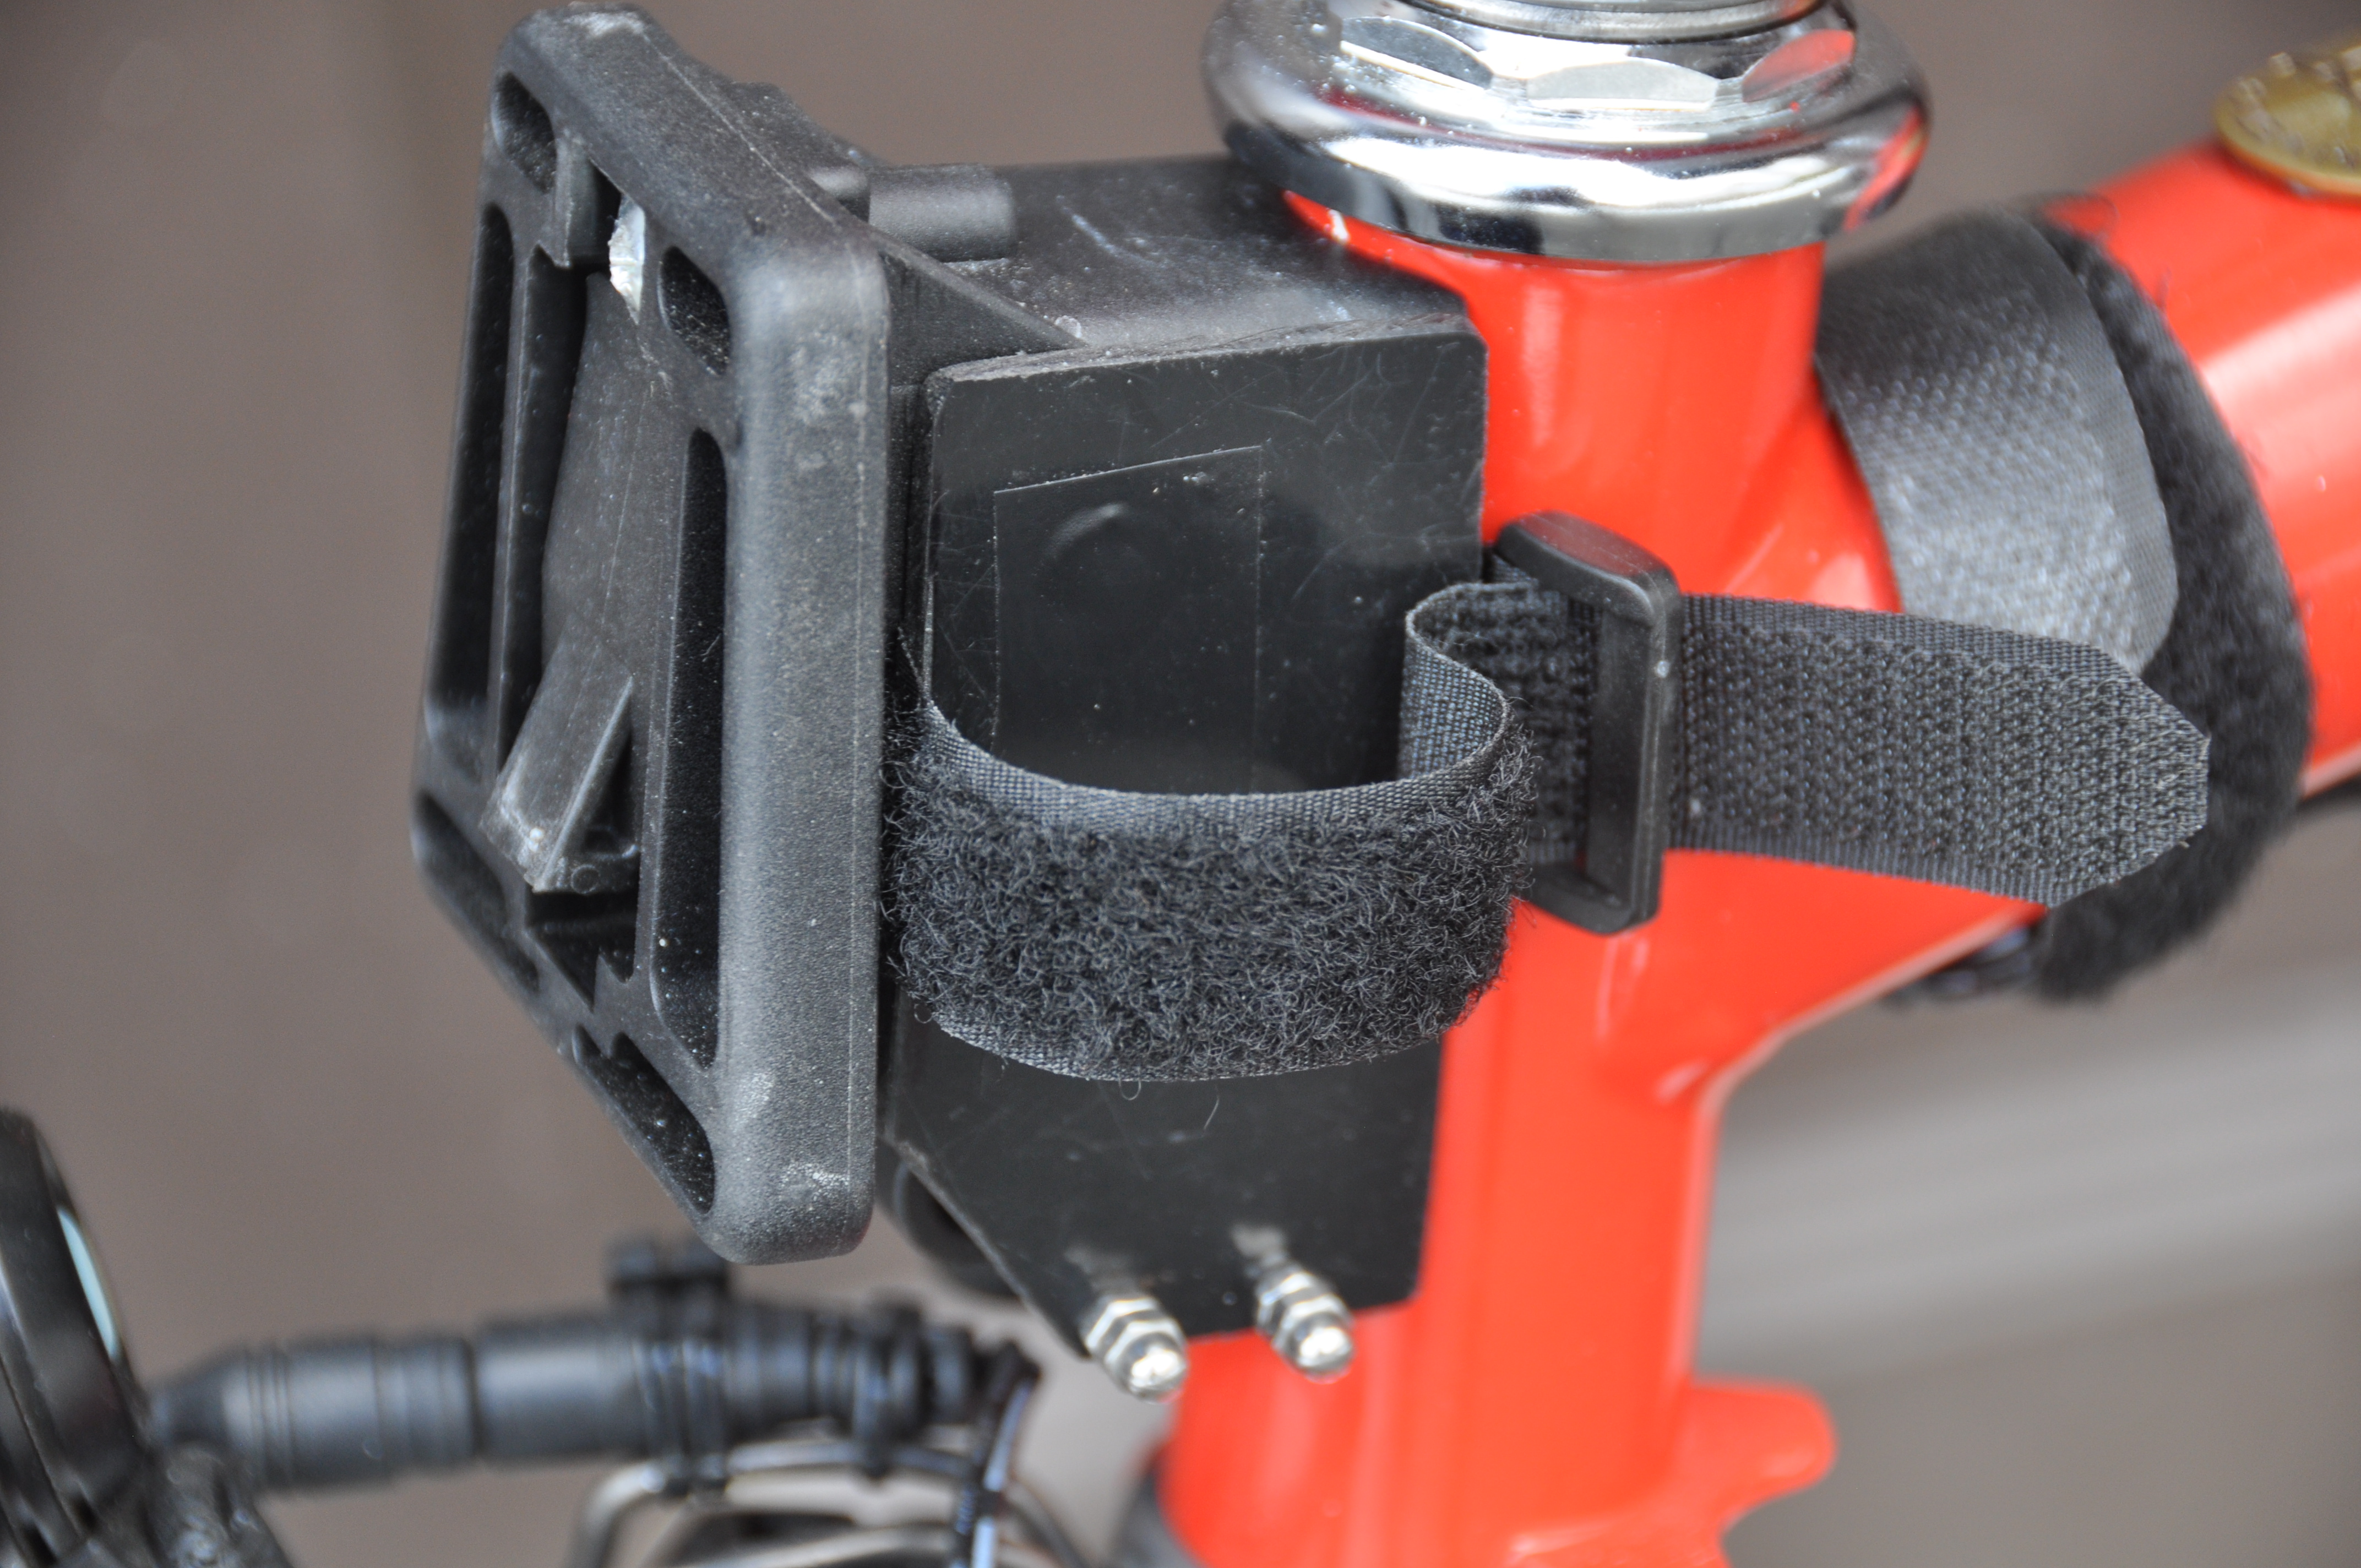
Works well with smaller and larger battery packs.
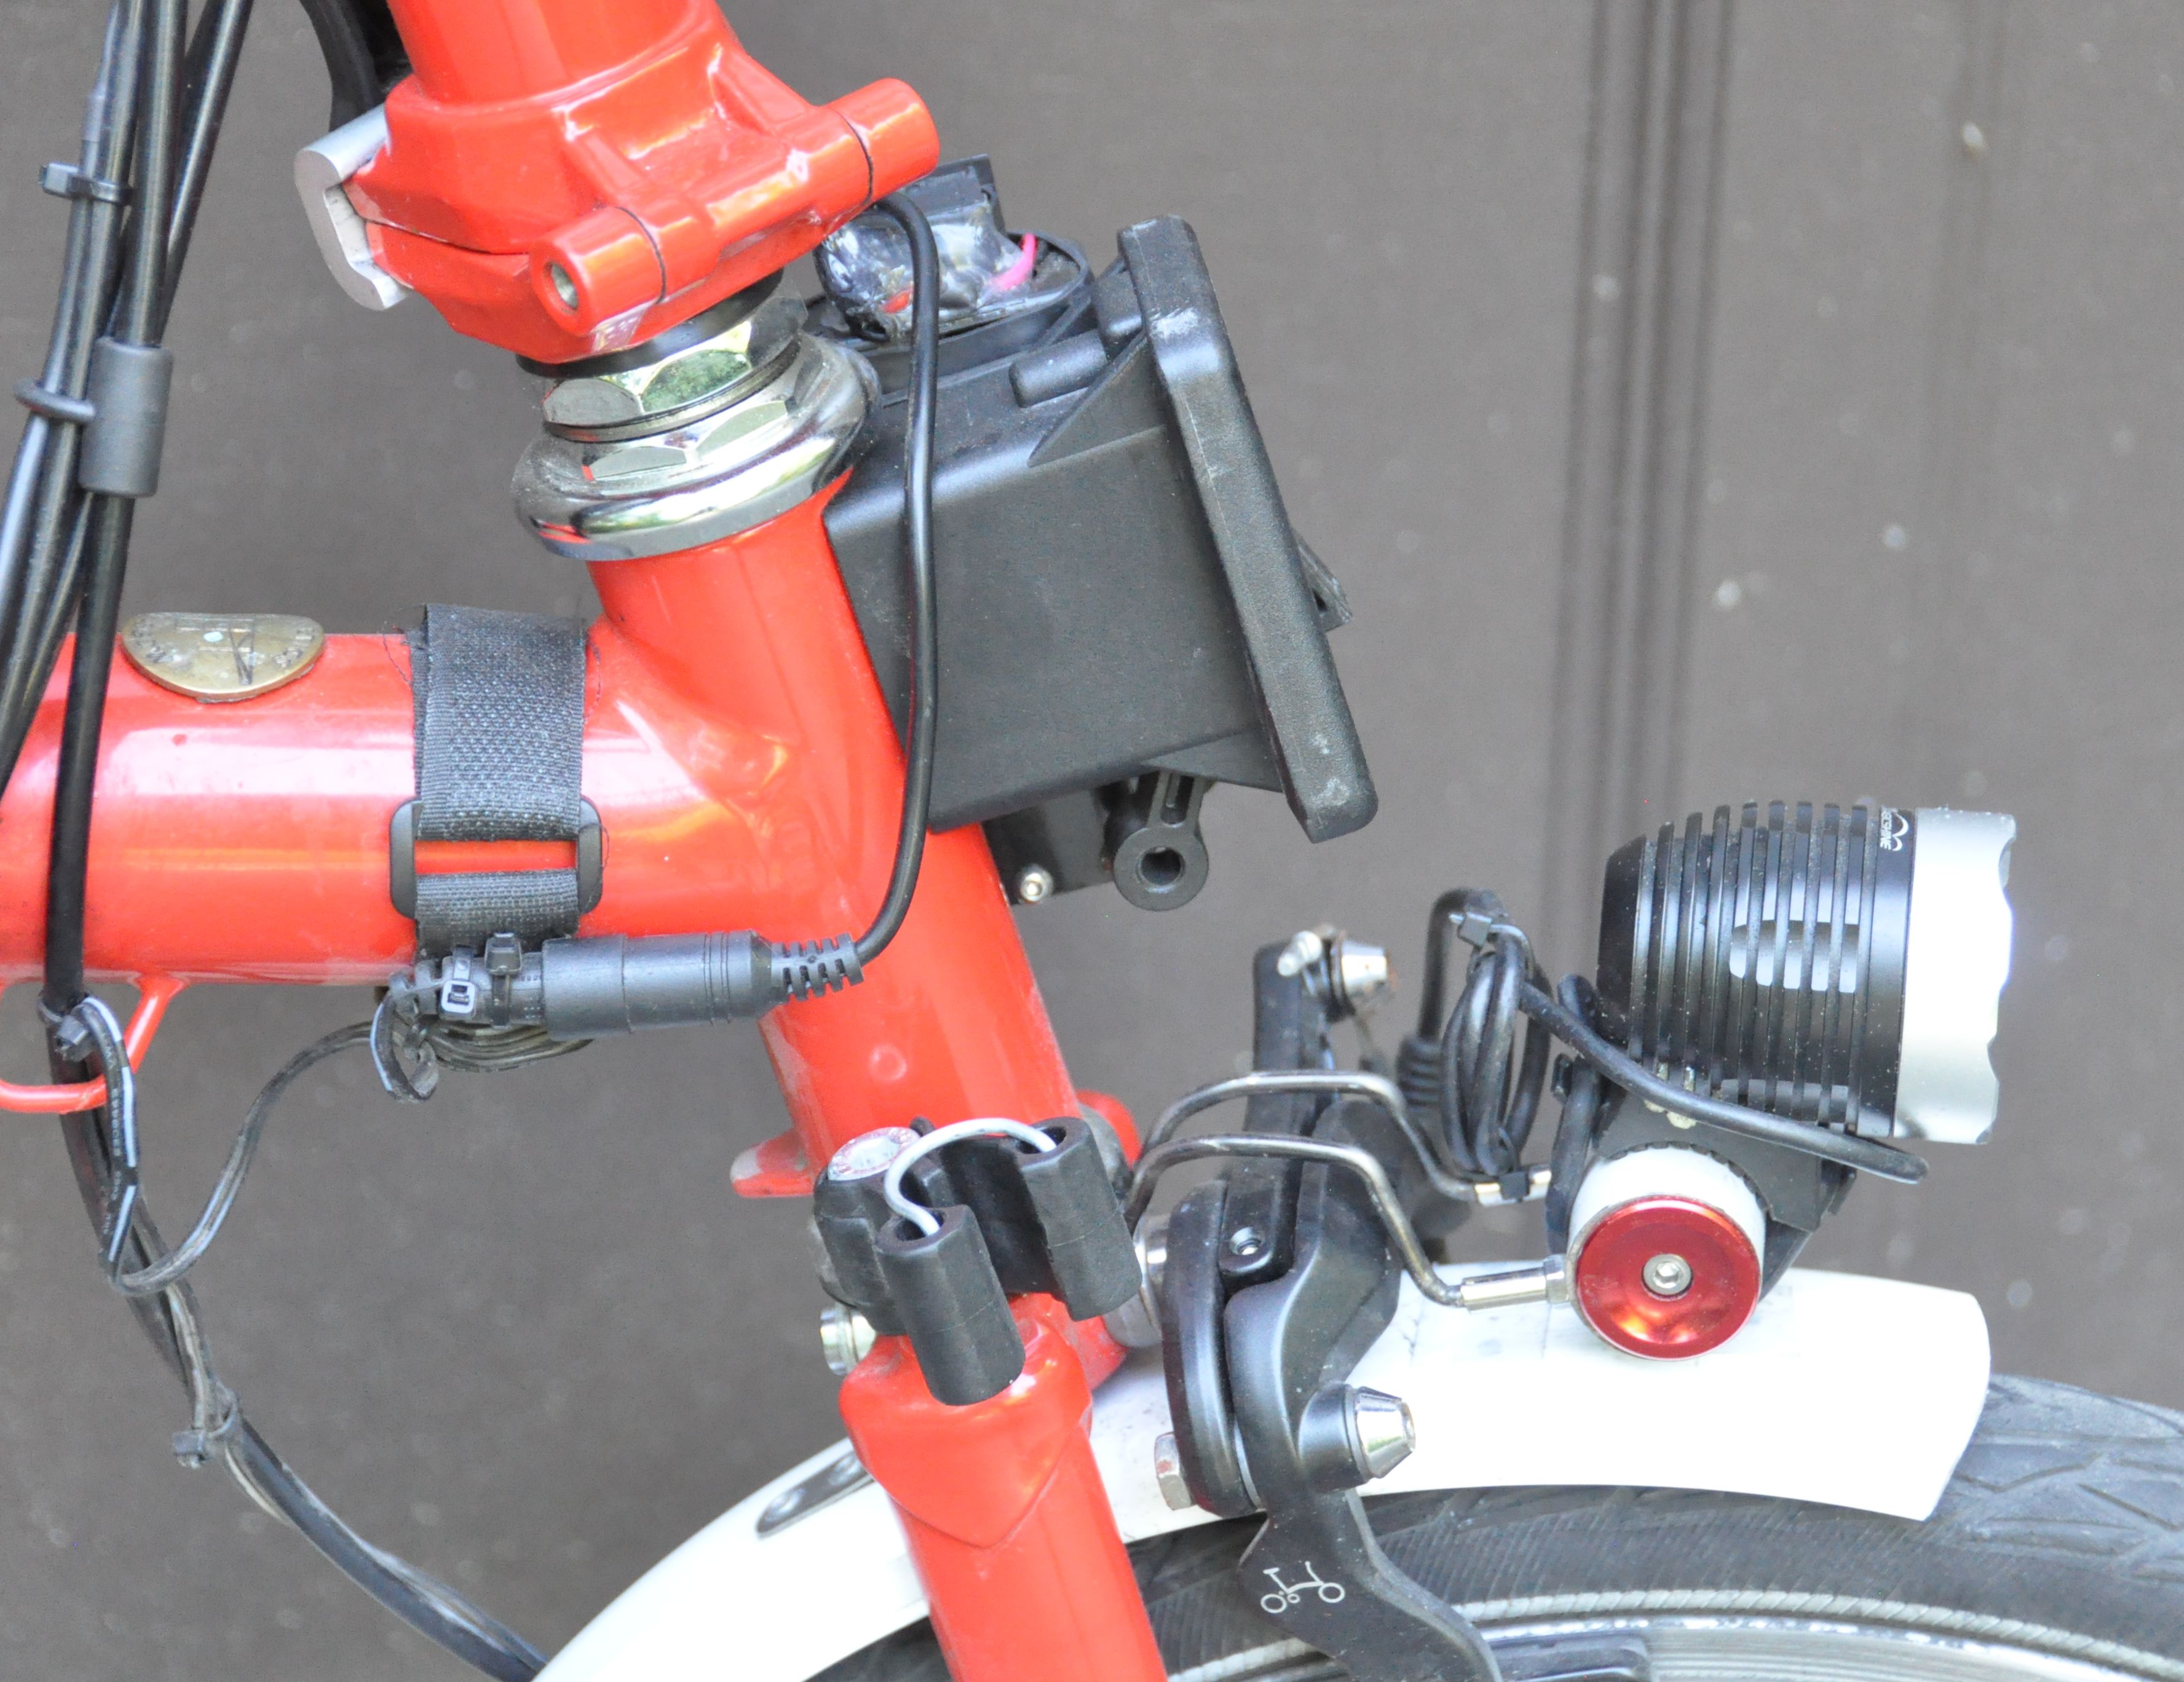
Update: I have removed the extension cable and have now connected the lamp directly.
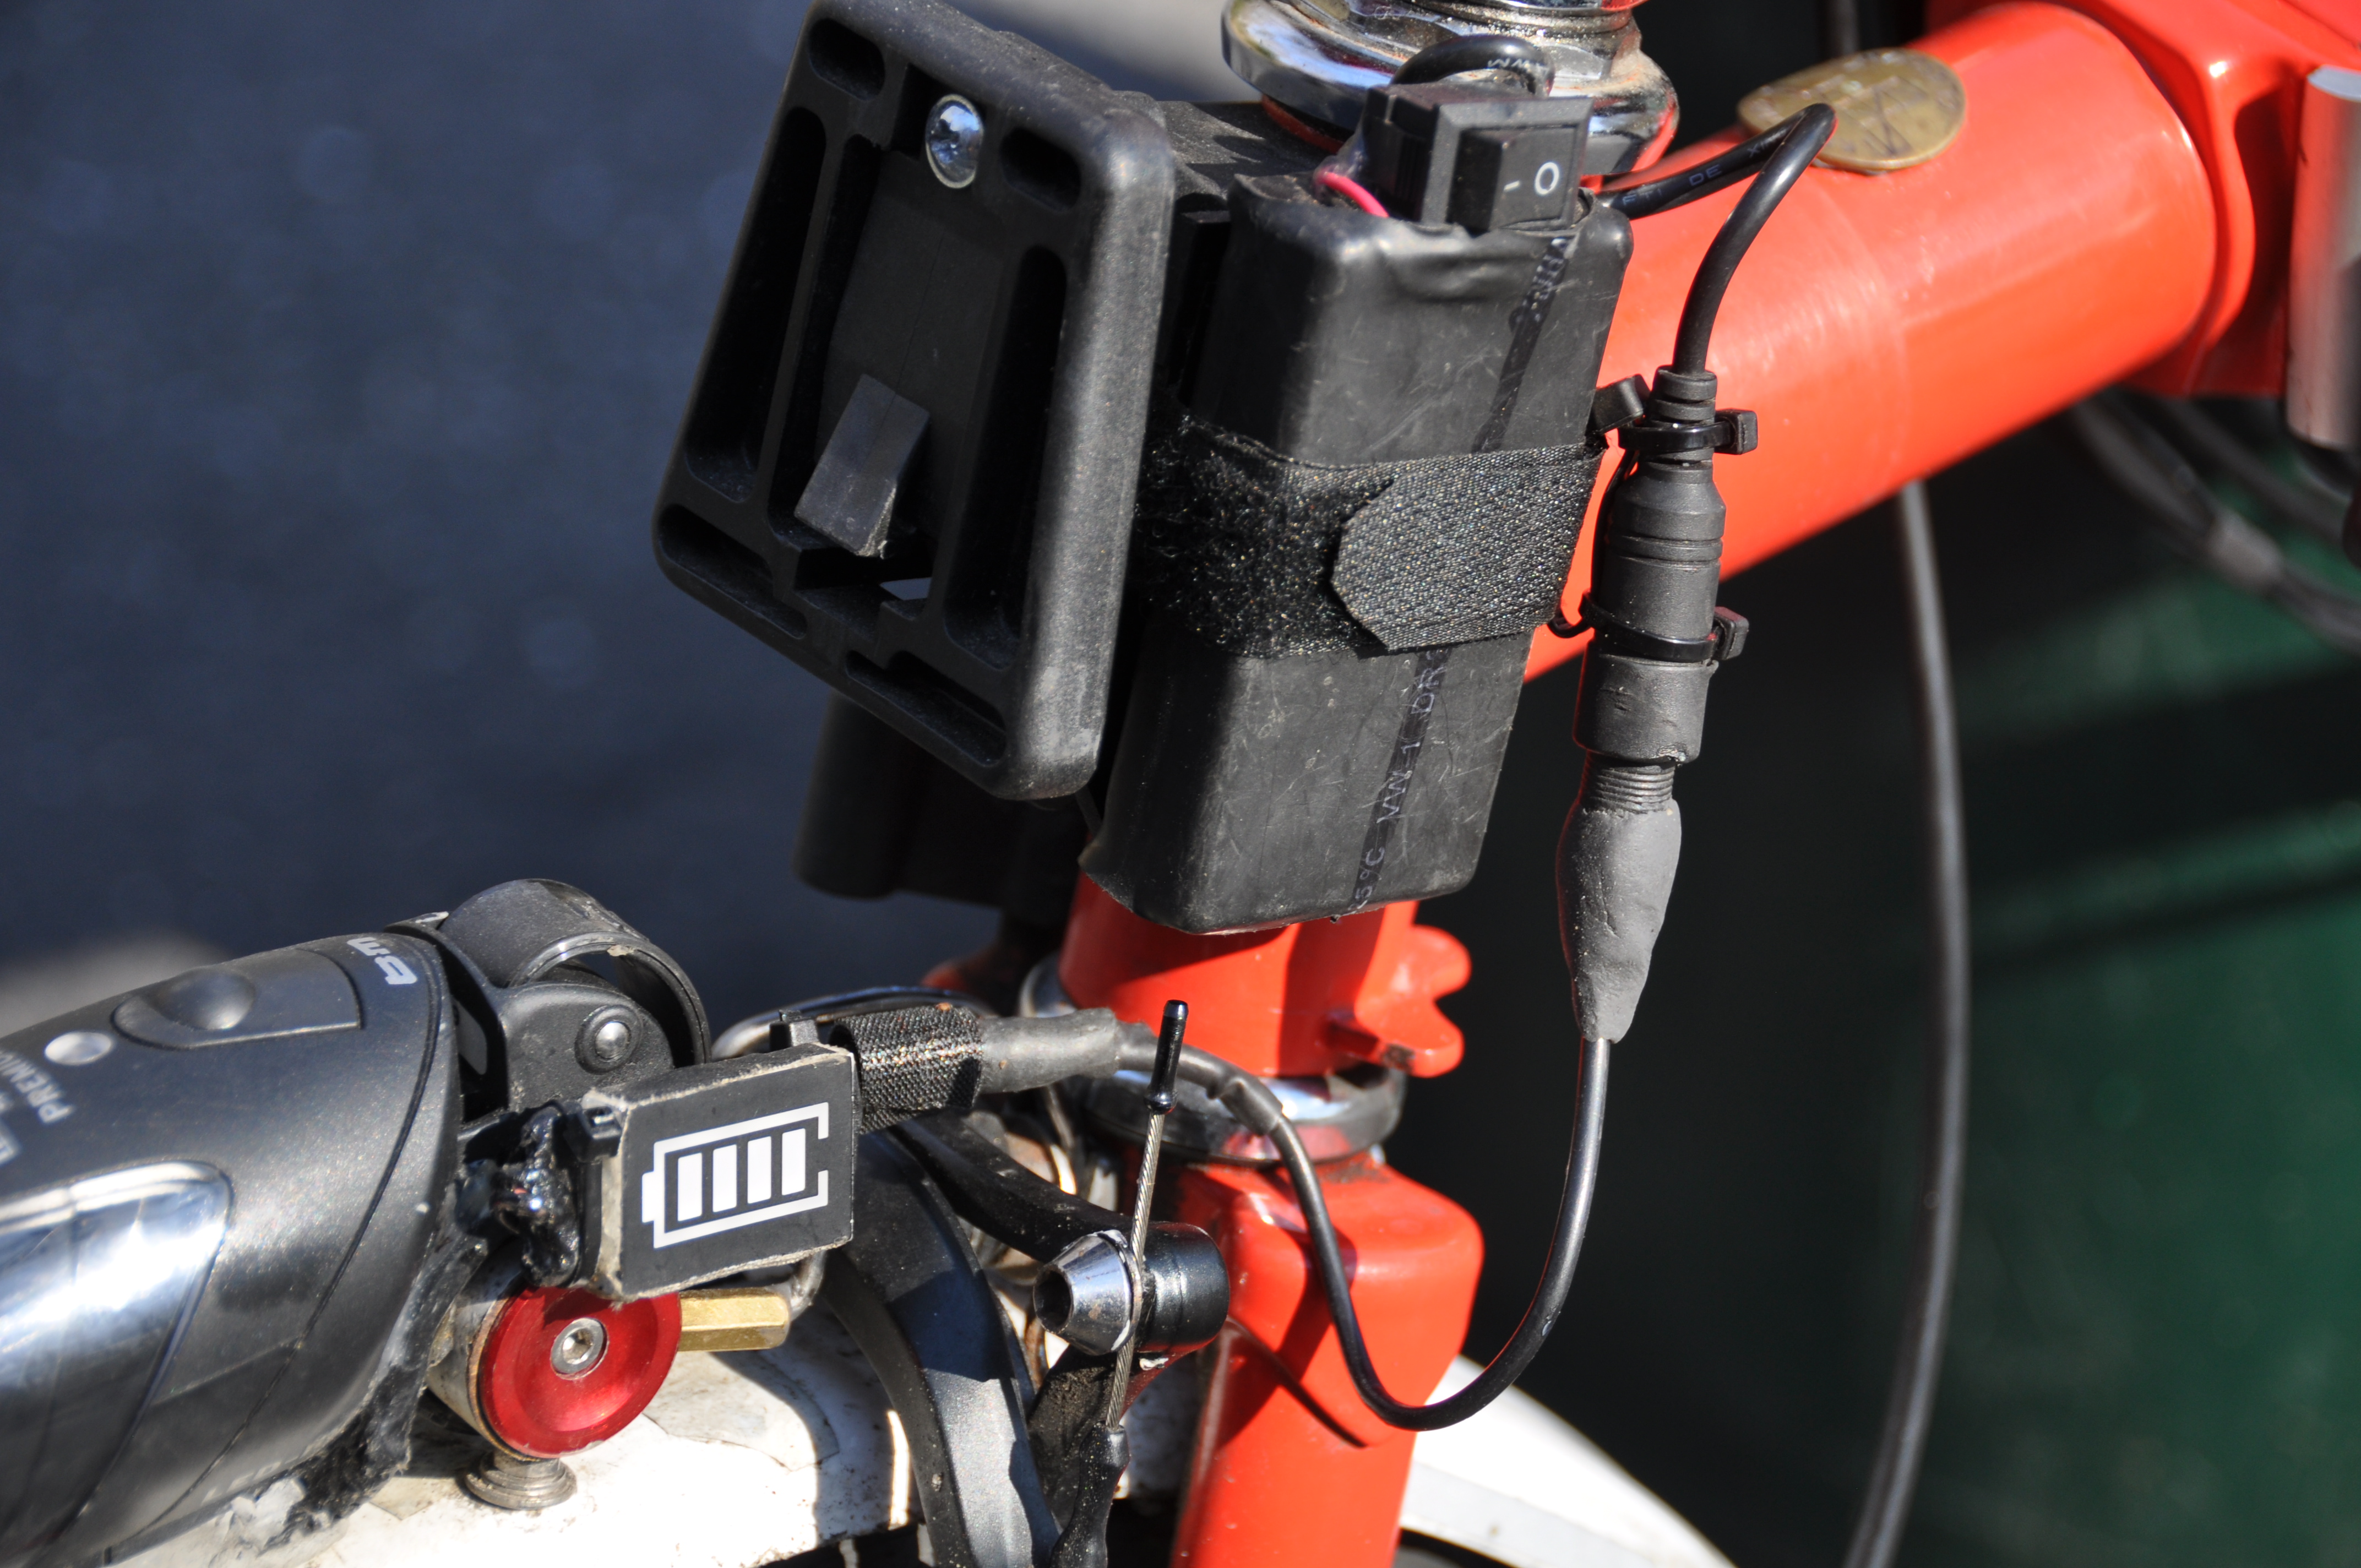
Battery gauge Back to top
I like the bicycle head lights from Busch and Mueller which obey German standards. The have a special mirror which shapes the beam which illuminates well the road in front of you, but with a sharp edge at the top to avoid blinding opposing traffic. I also like lights with external battery packs (I use bigger ones in the winter and smaller ones in the summer, and I always carry a small spare). However, the BM lights are either lights for e-bikes (and therefore don’t have a battery gauge), or they offer model IQ Speed Premium (which I bought for my Brompton) which is designed for a special 6 Volt battery pack (5 NiMH cells). The voltage regulator works well with 2-cell lithium-ion at 7.4 Volt (that’s what I use), but then of course, the battery gauge does not show the remaining charge correctly.
So I looked into adding a battery gauge, and found two very nice and inexpensive solutions (1-2 $ apiece):
One is small and has a nice bright display
https://www.aliexpress.com/item/32891061217.html?spm=a2g0s.9042311.0.0.7c2f4c4d4dyp9ub


The other one is very thin, and has a push button and can therefore be directly attached to a battery back without draining the battery.
https://www.aliexpress.com/item/4000001312682.html?spm=a2g0s.9042311.0.0.7c2f4c4d4dyp9u
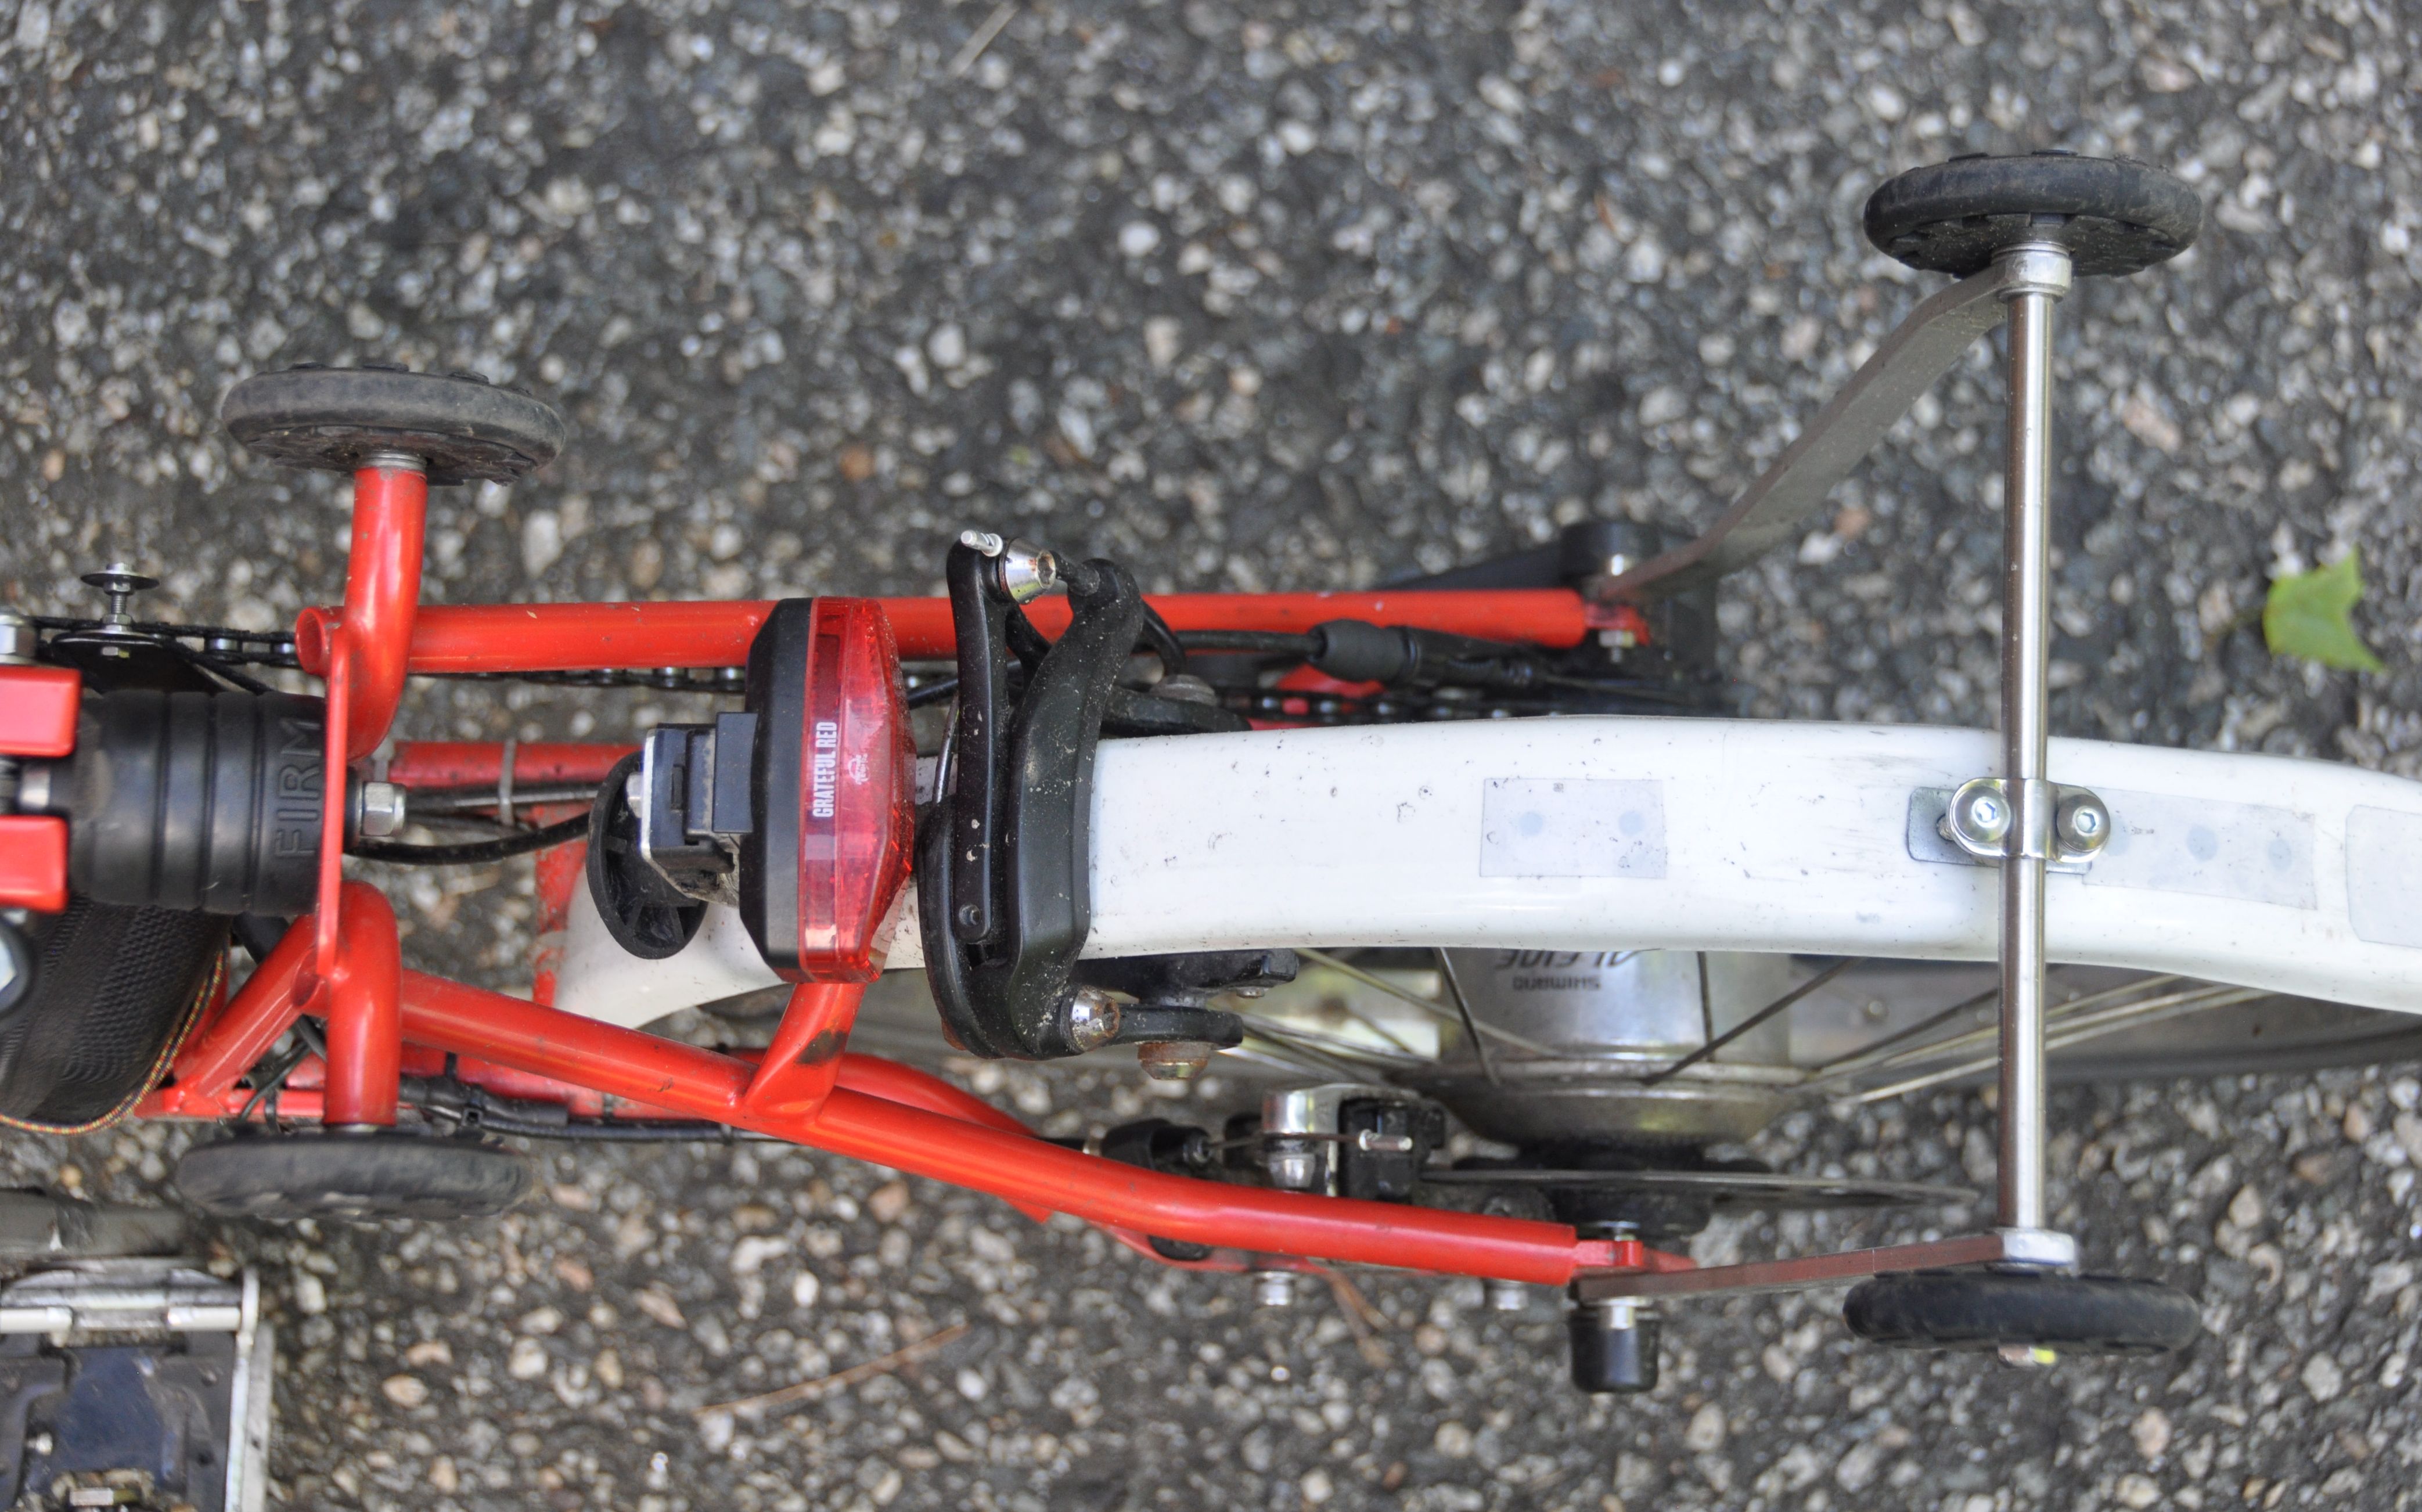
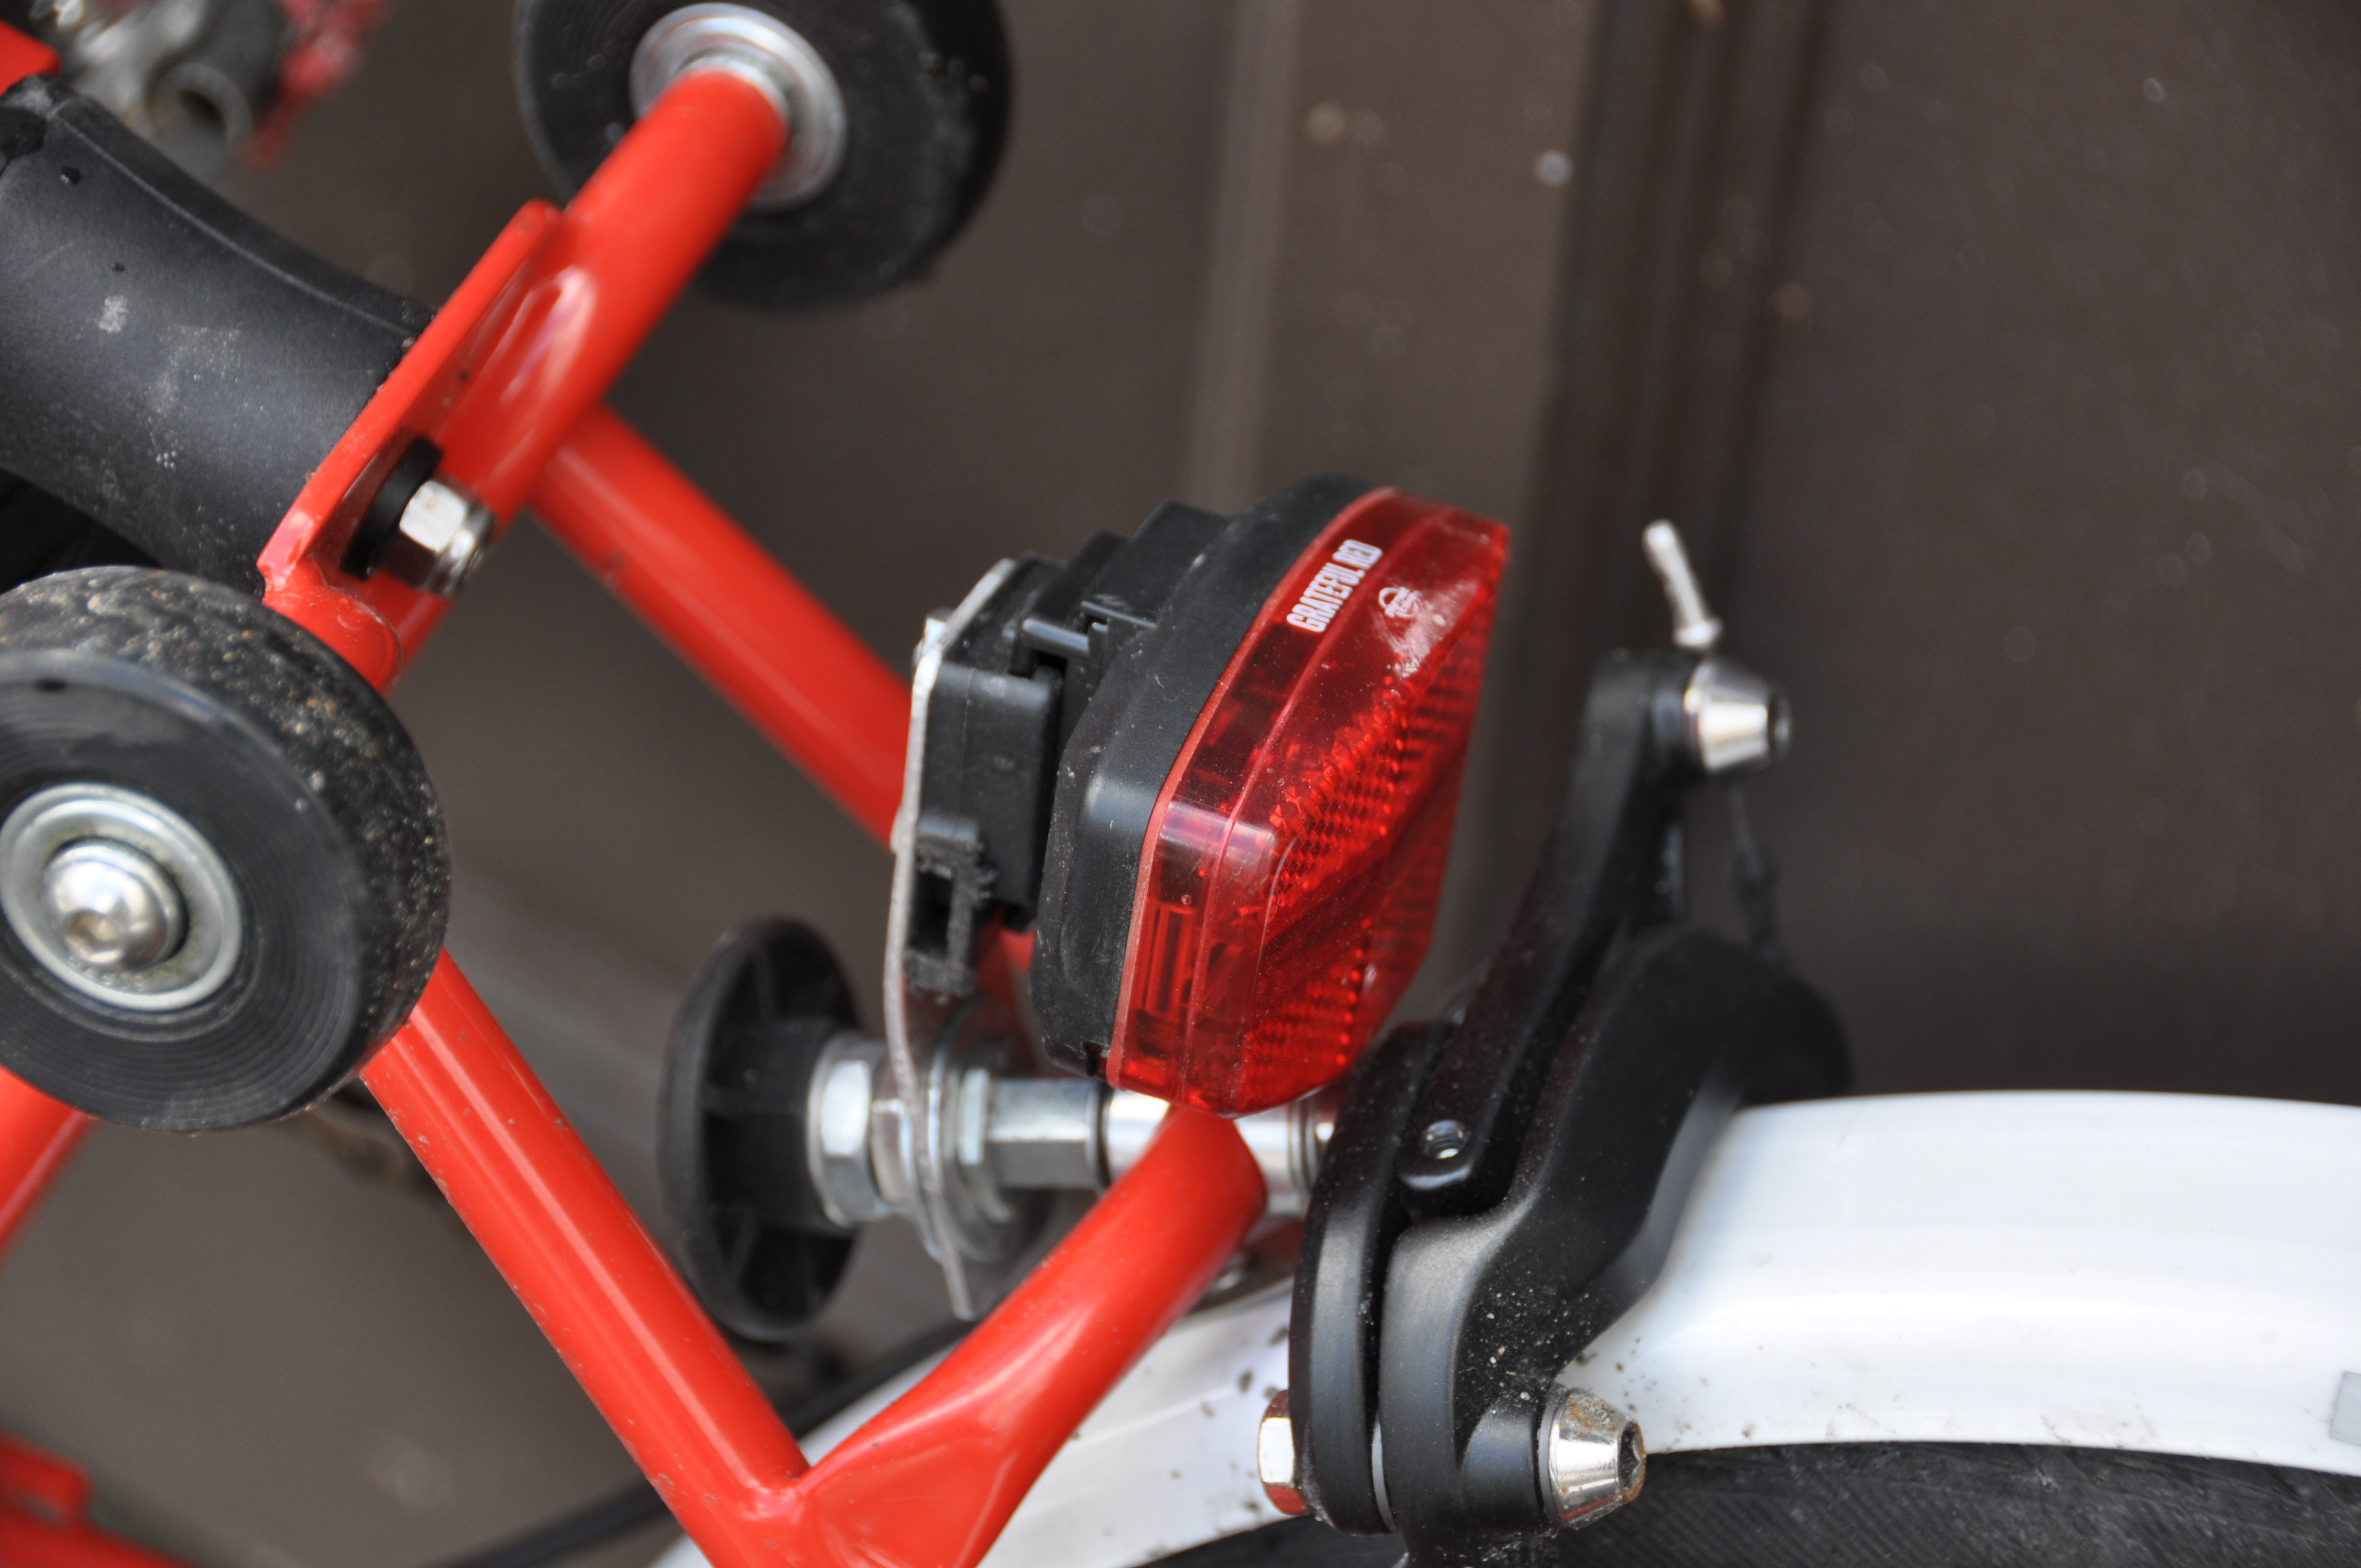
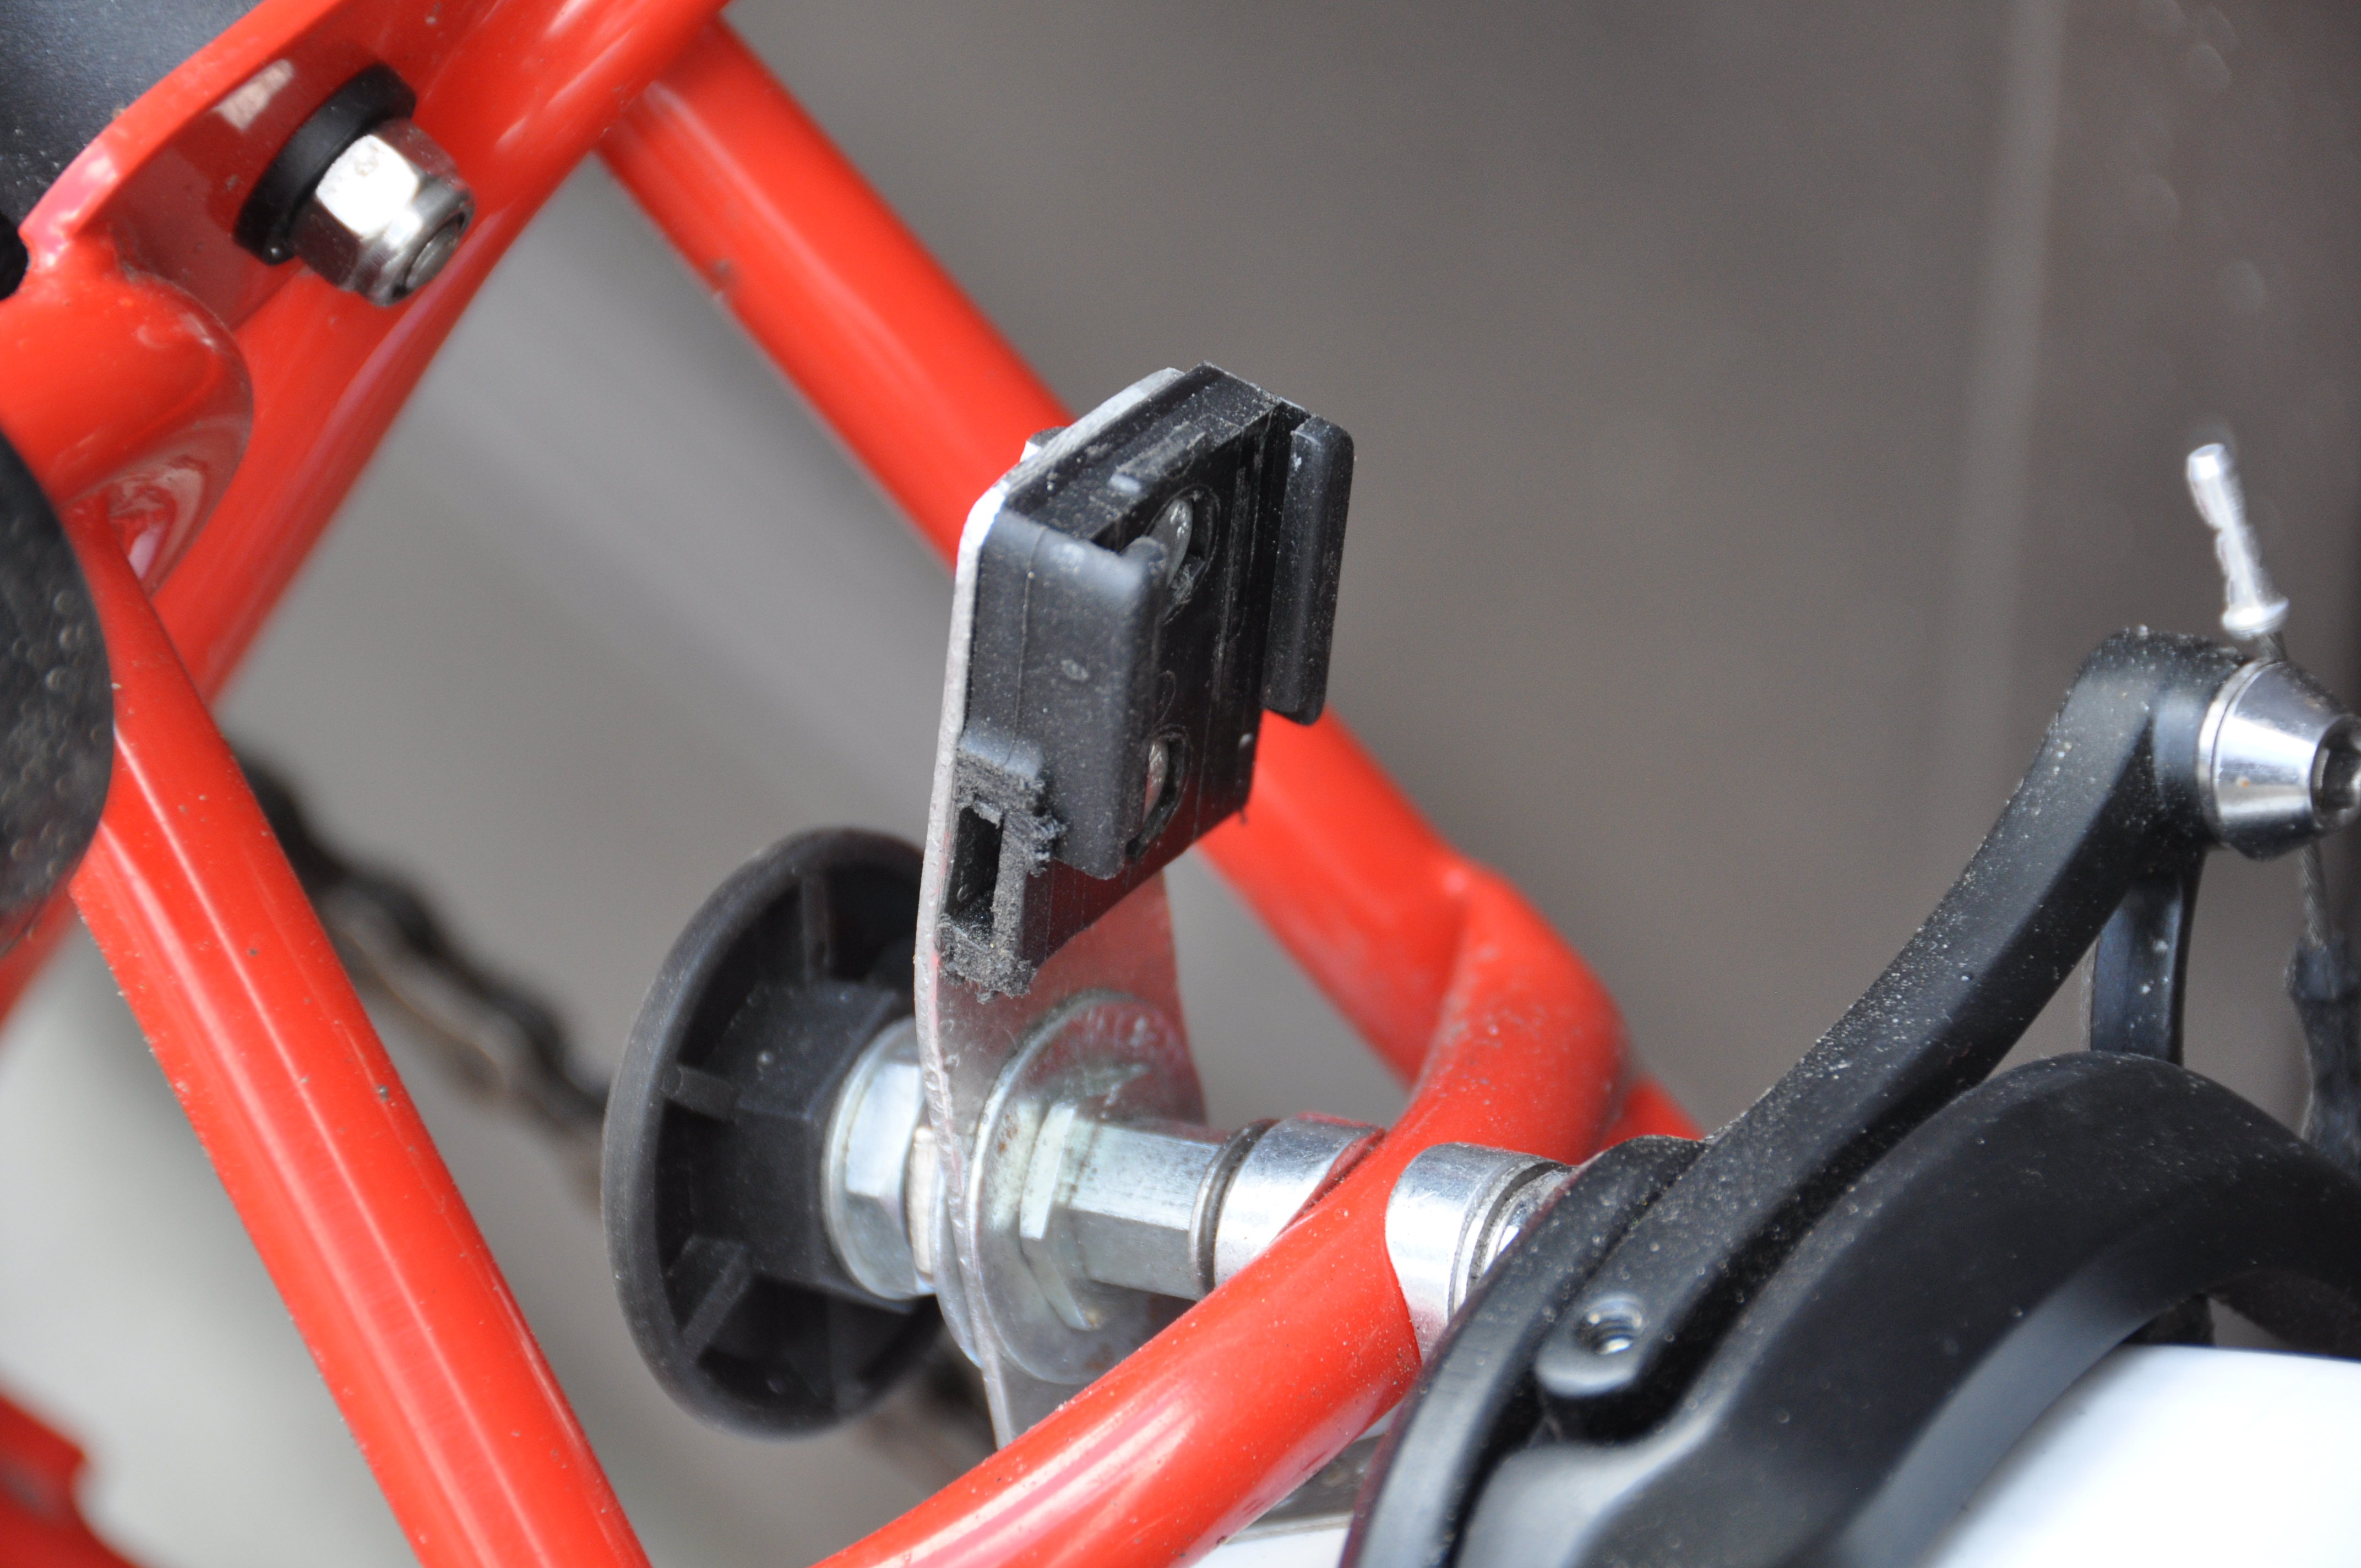
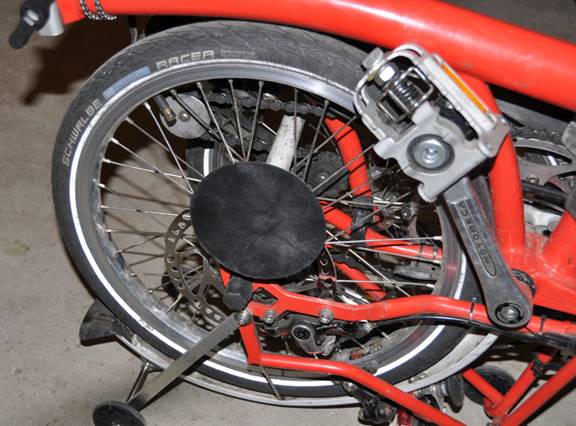
Rear lamp Back to top
I wanted to use a third party lamp which blinks and is removable. I was able to make a mount for a Planet Bike light. It fits well, but has only mm size clearances to the seatpost, the brakes and the ground when folded (using the original Brompton wheels. With the larger Eazy Wheels, there is more clearance). Well, with the Brompton, everything is a tight fit!
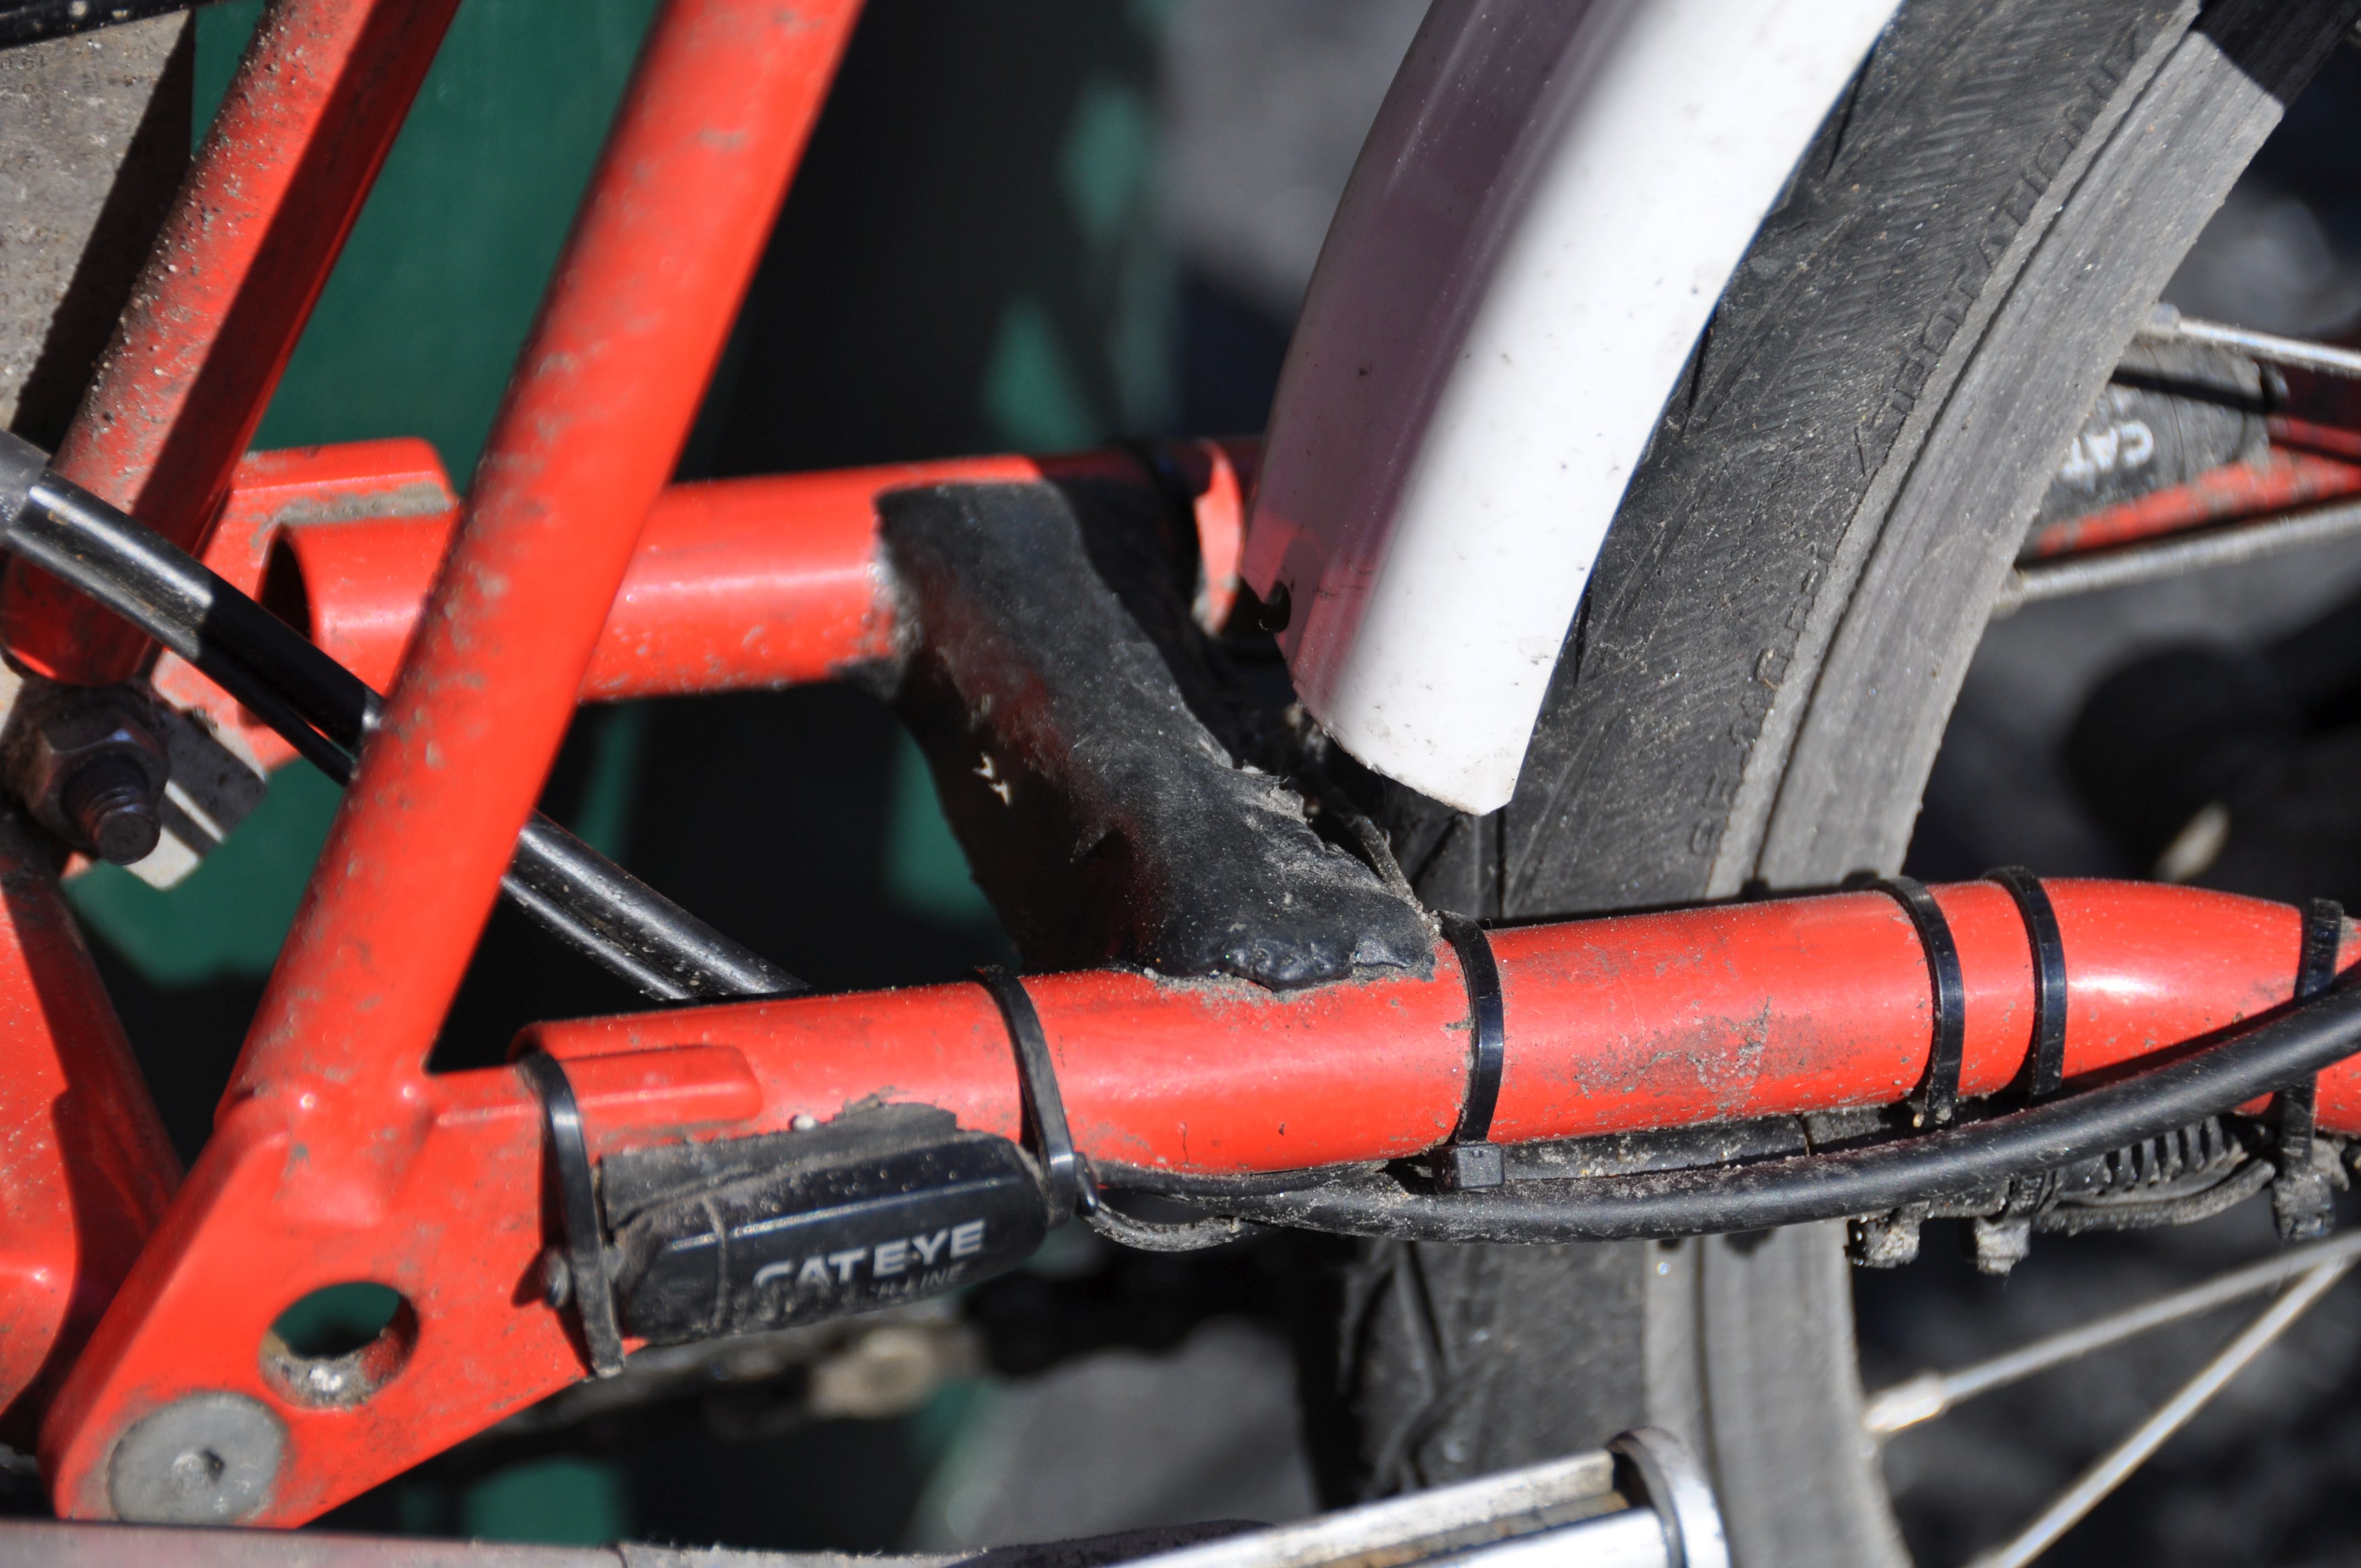
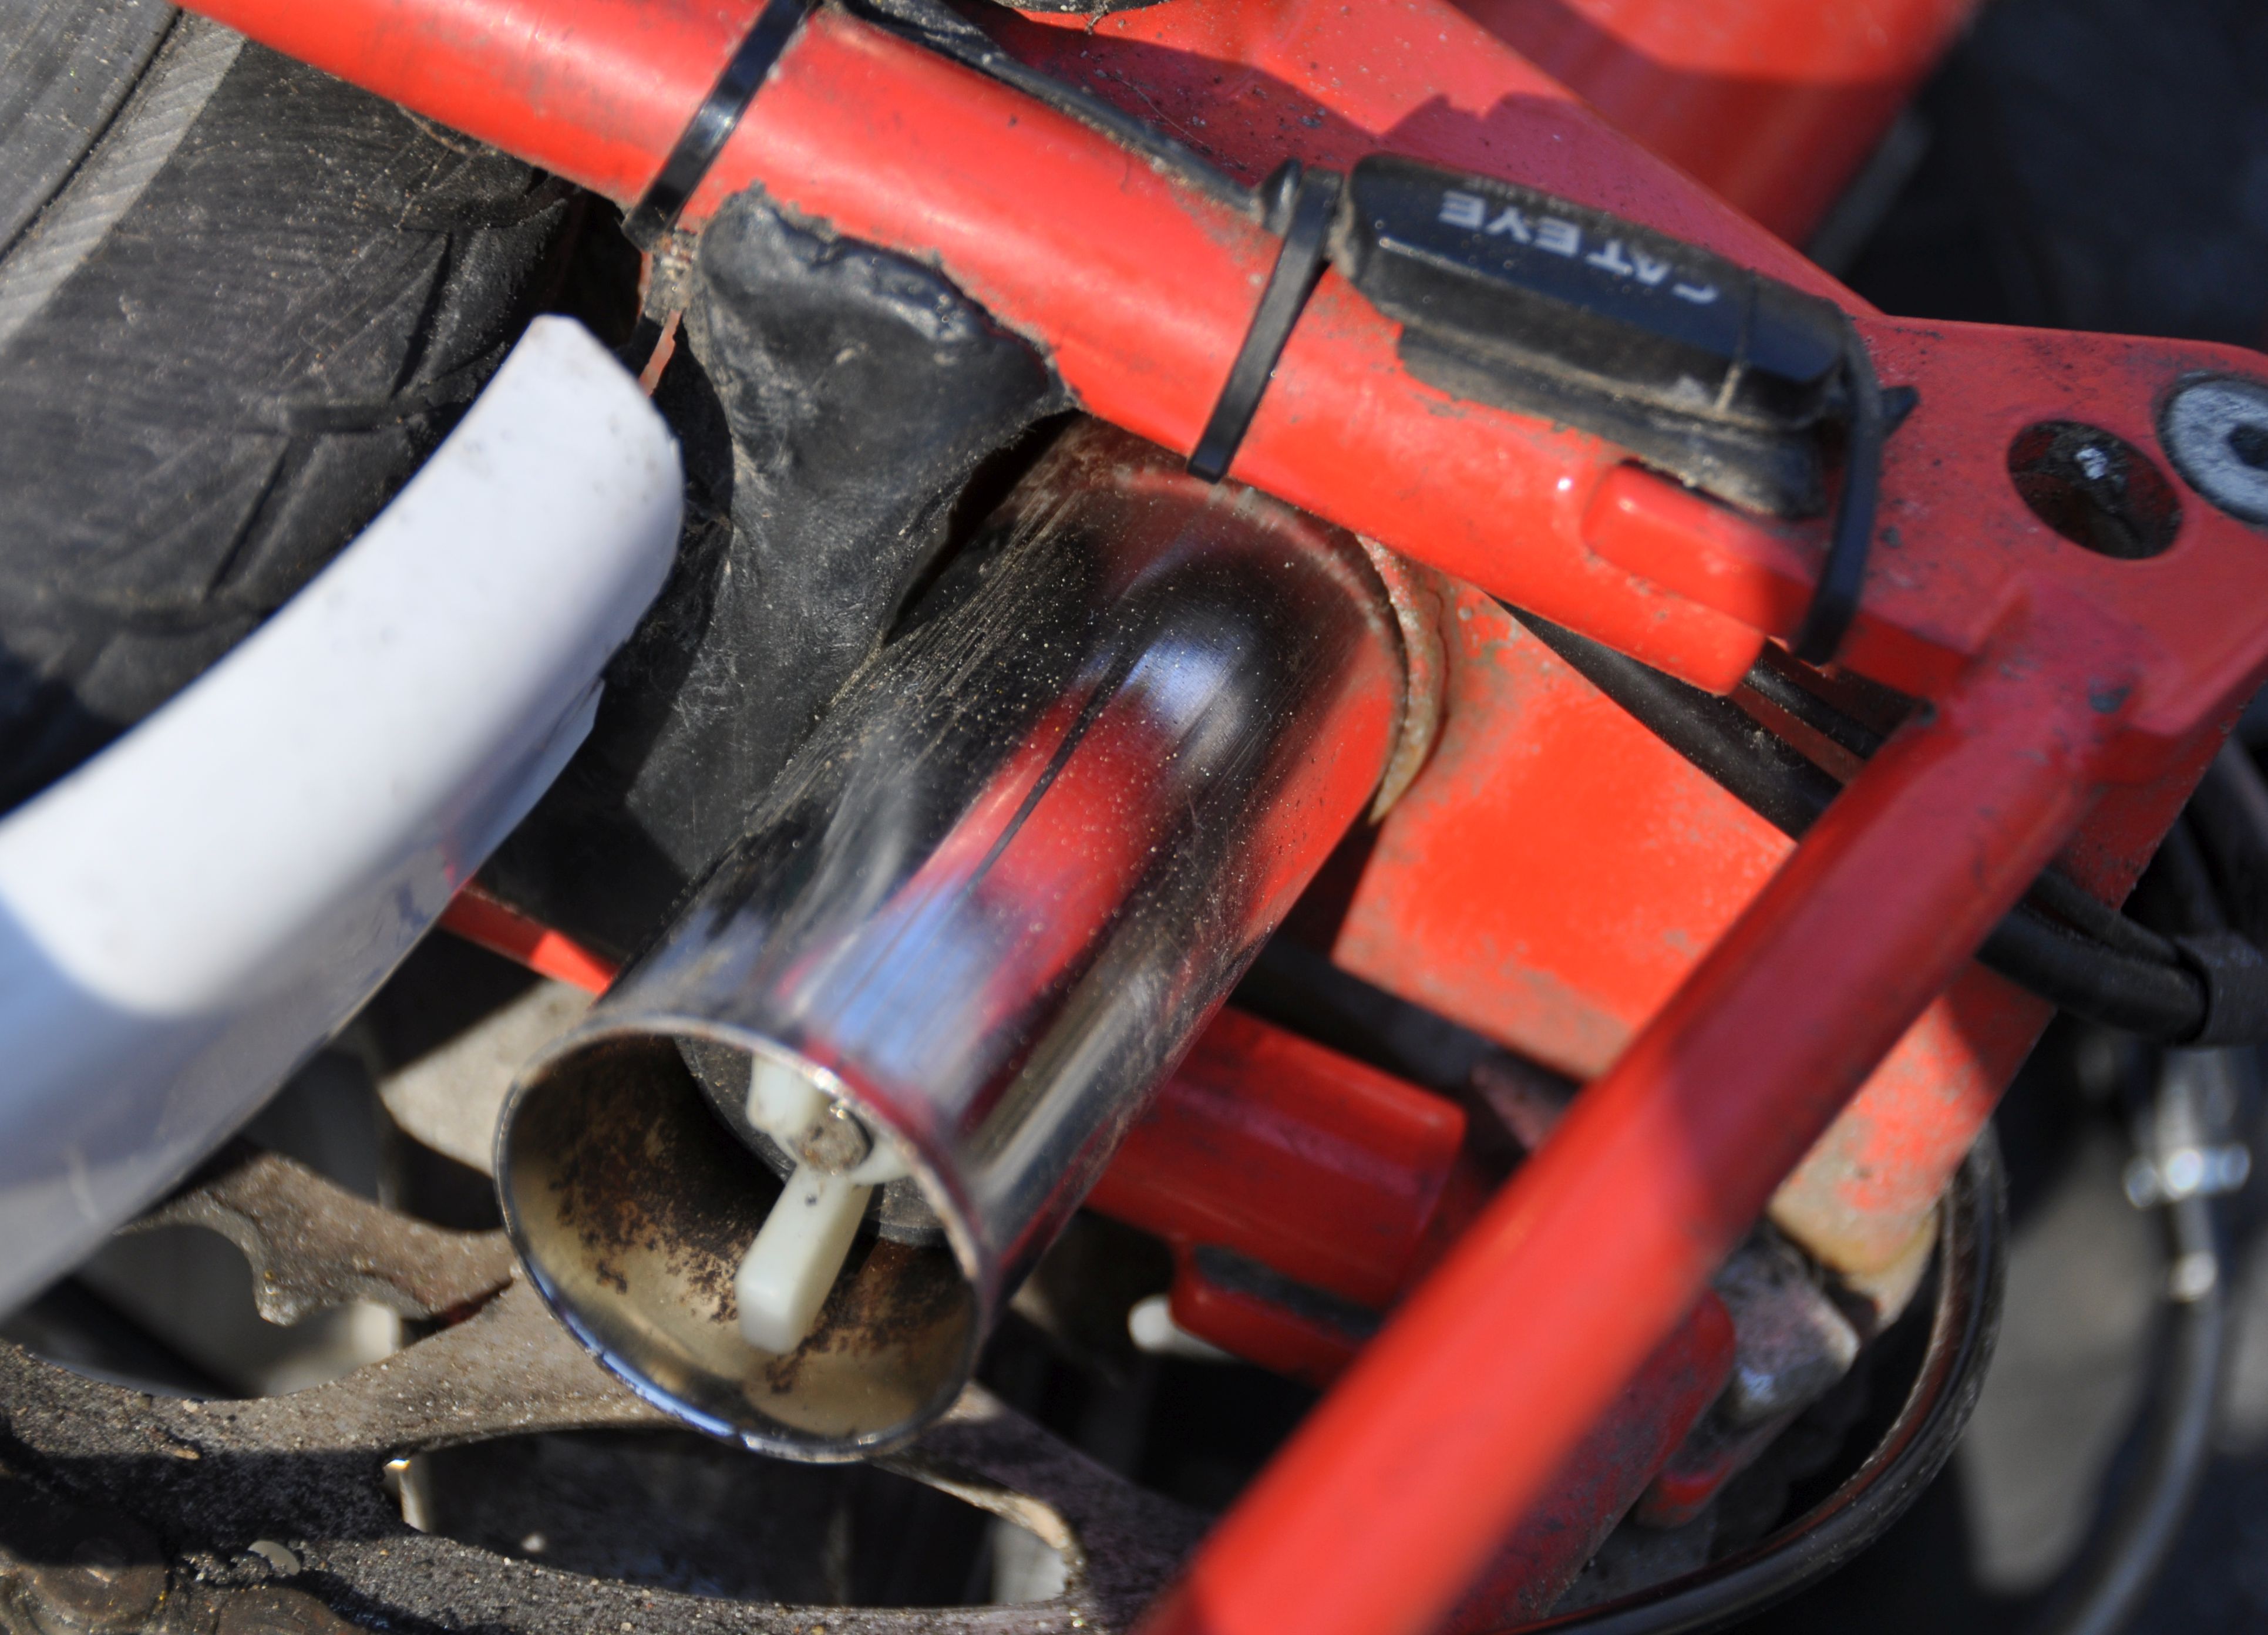
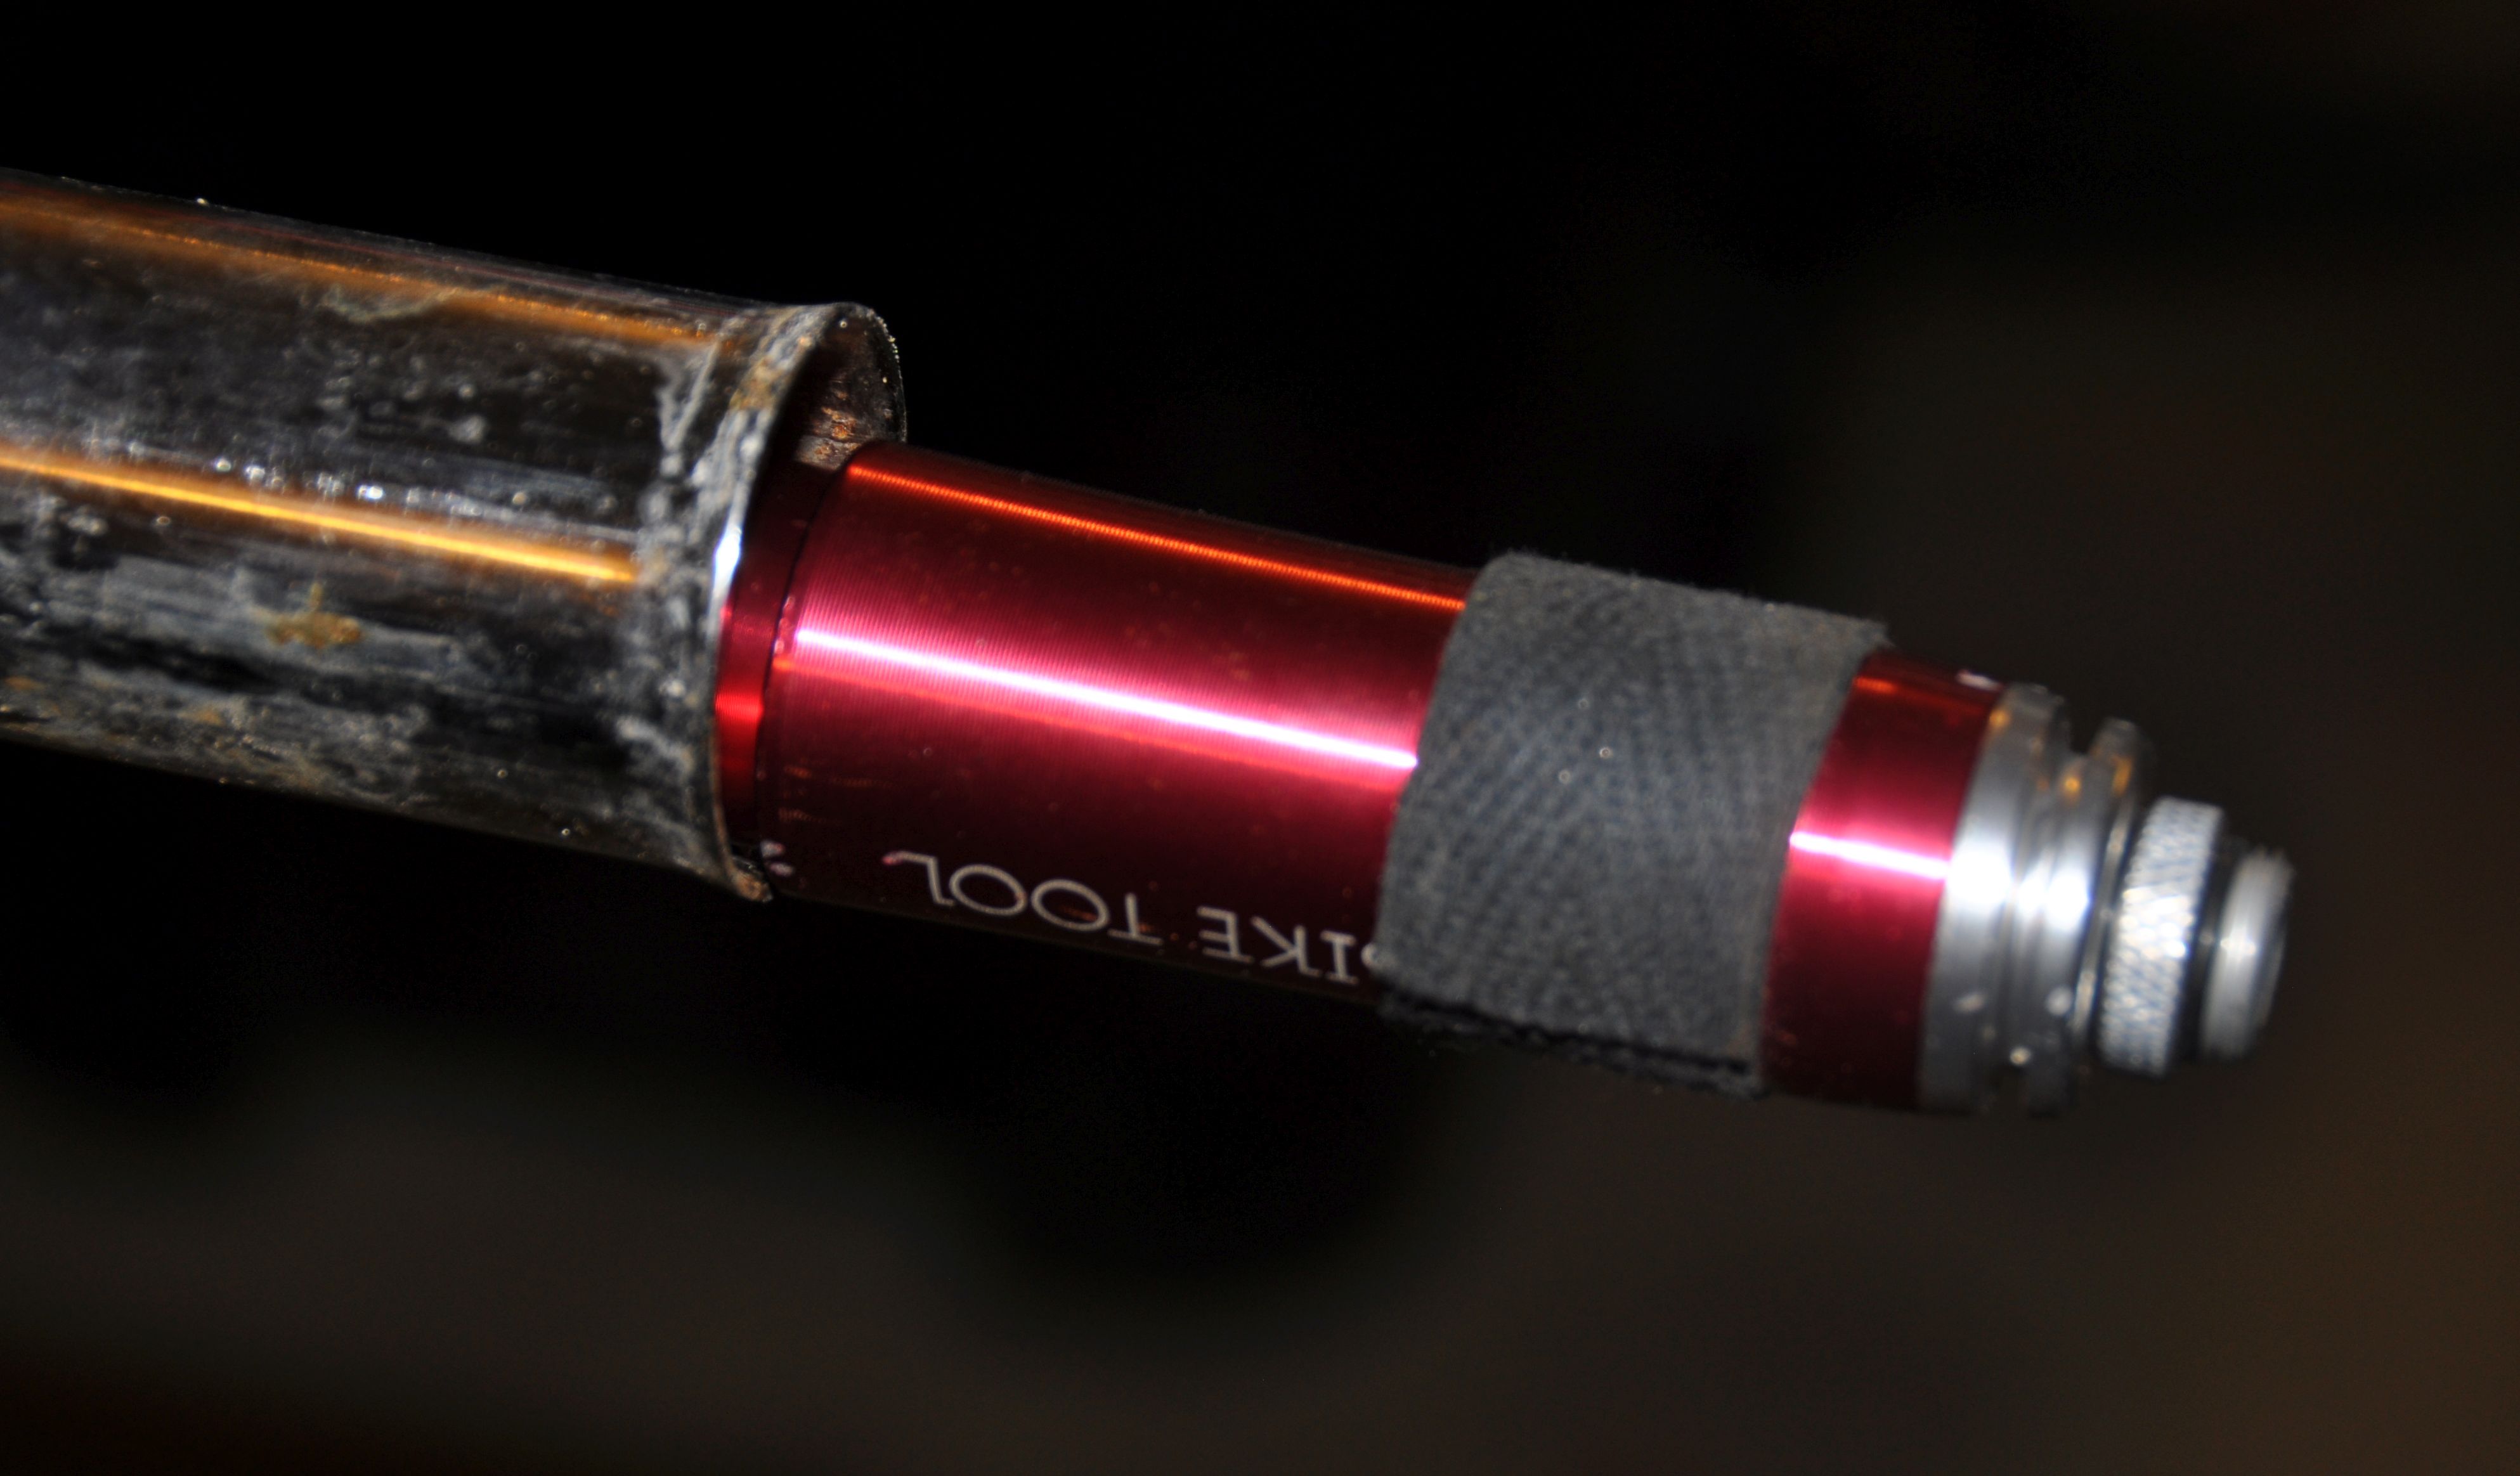
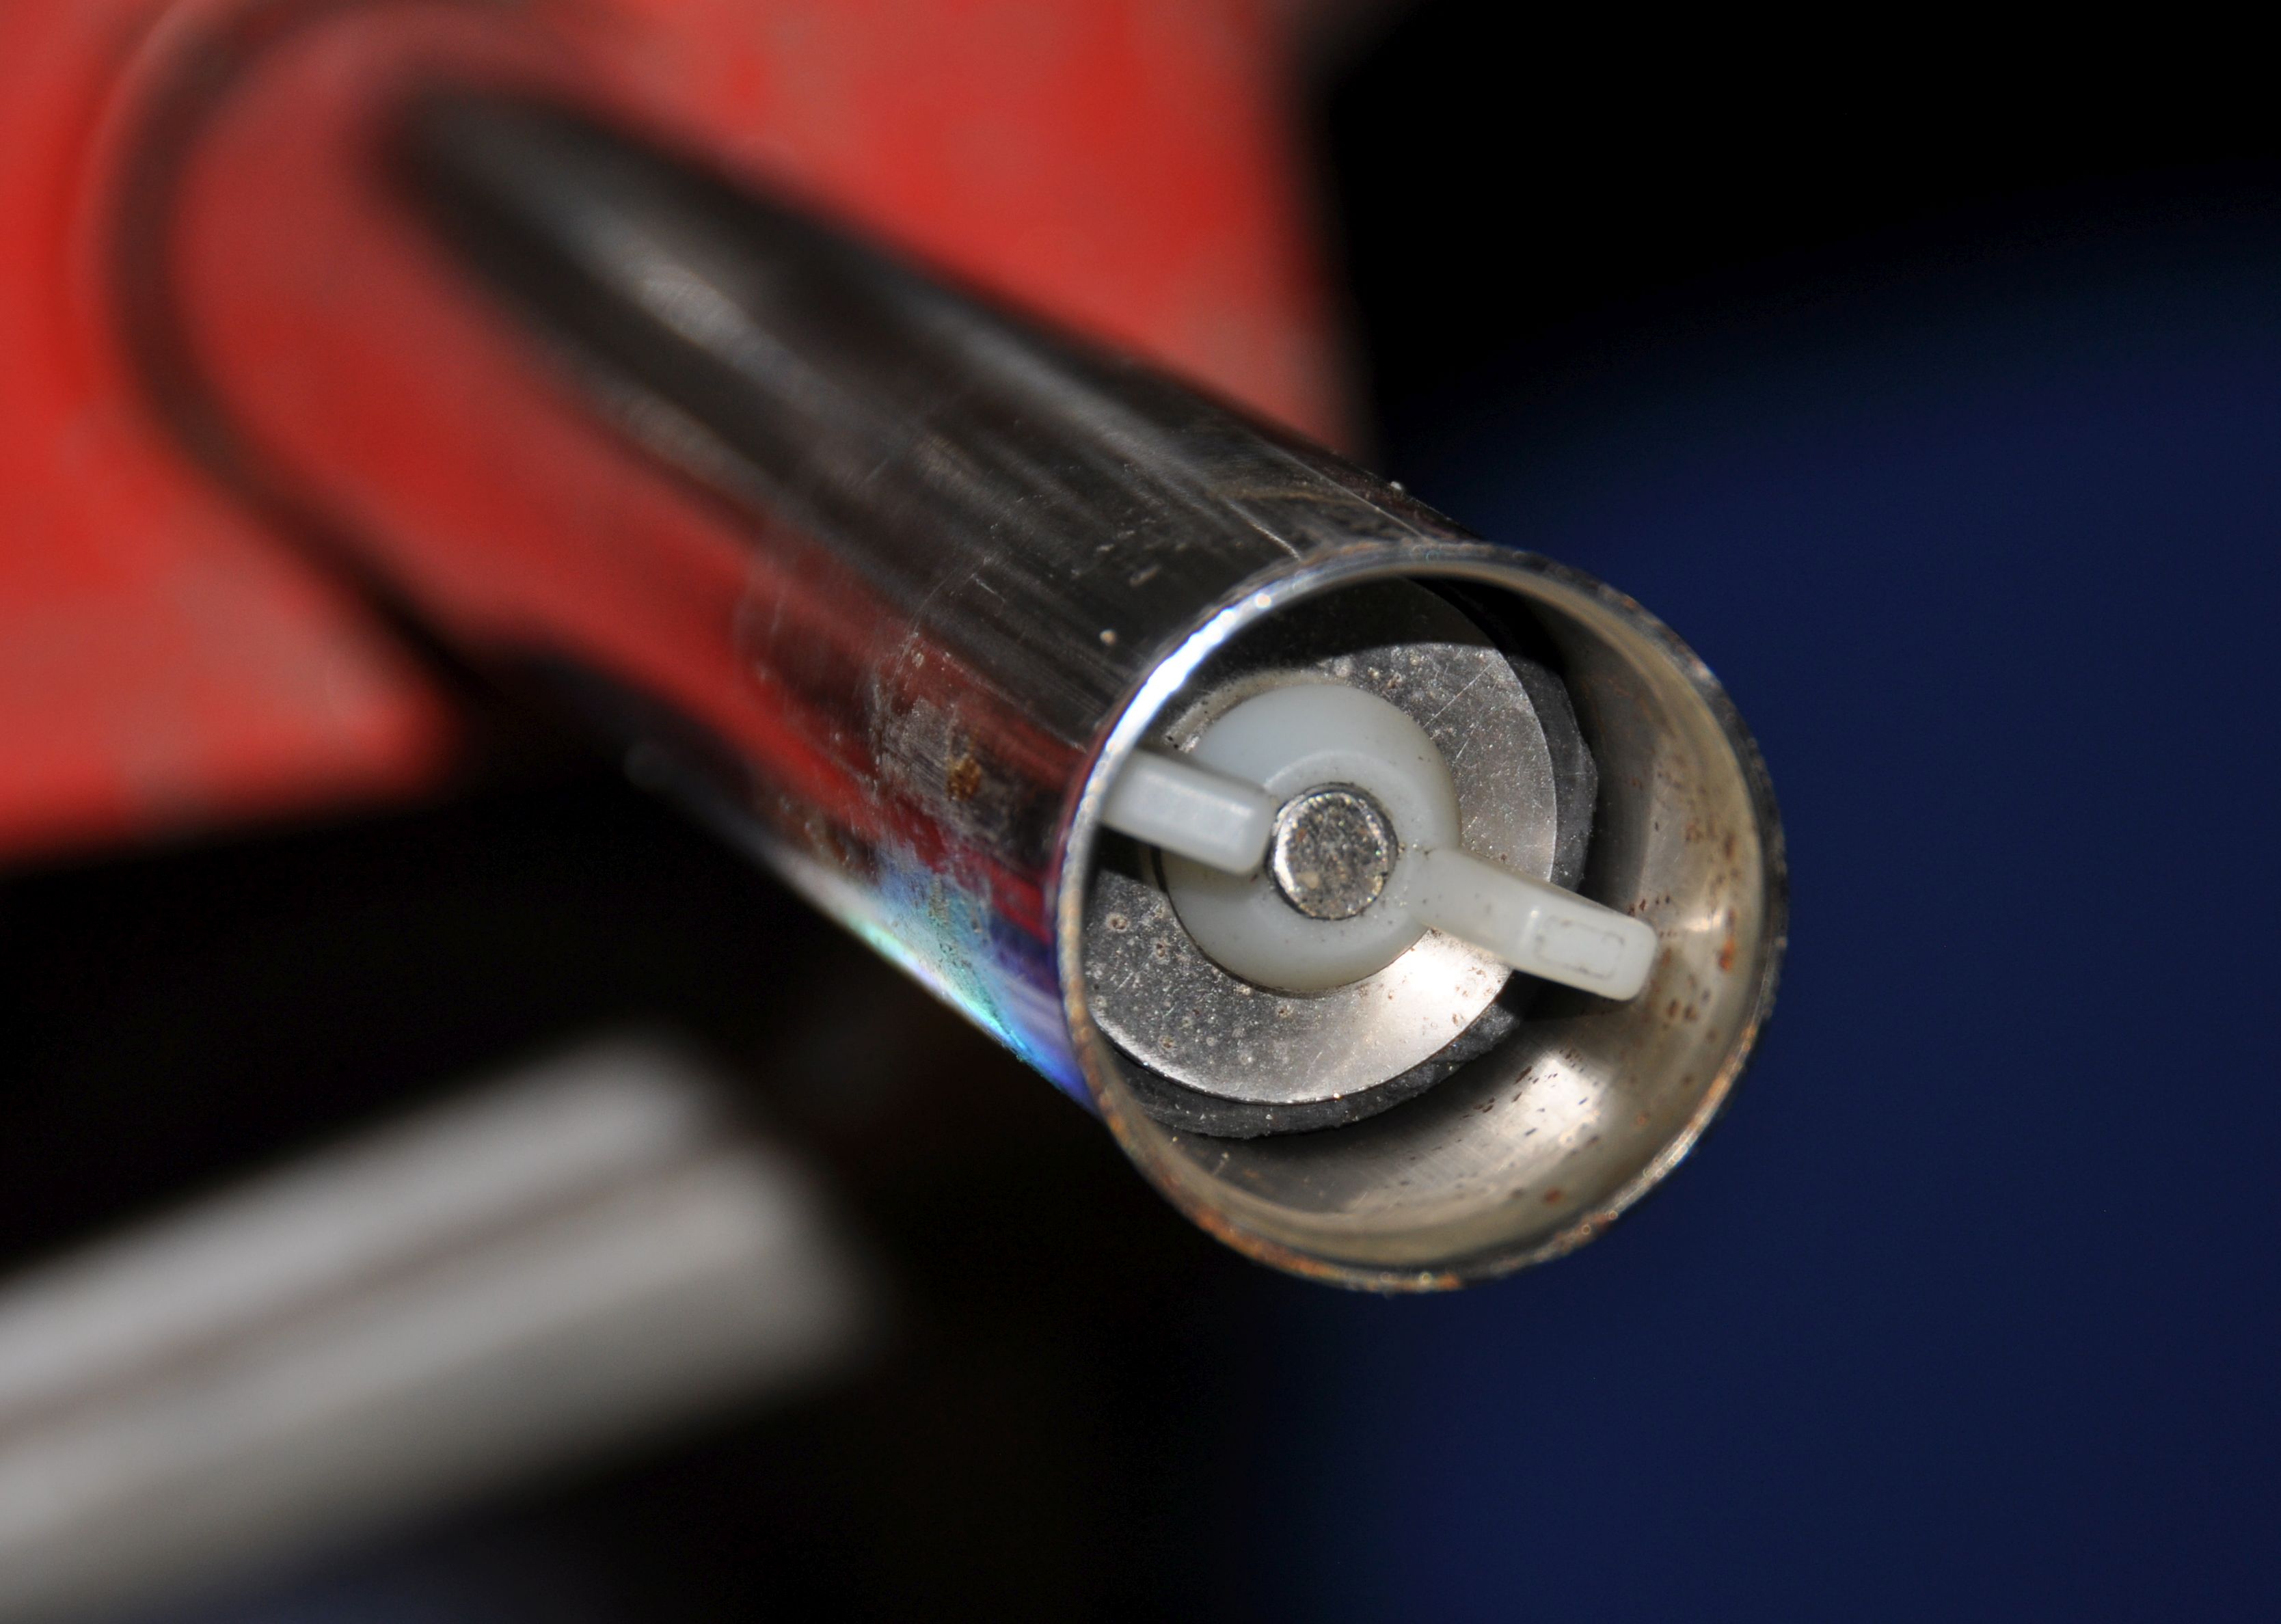
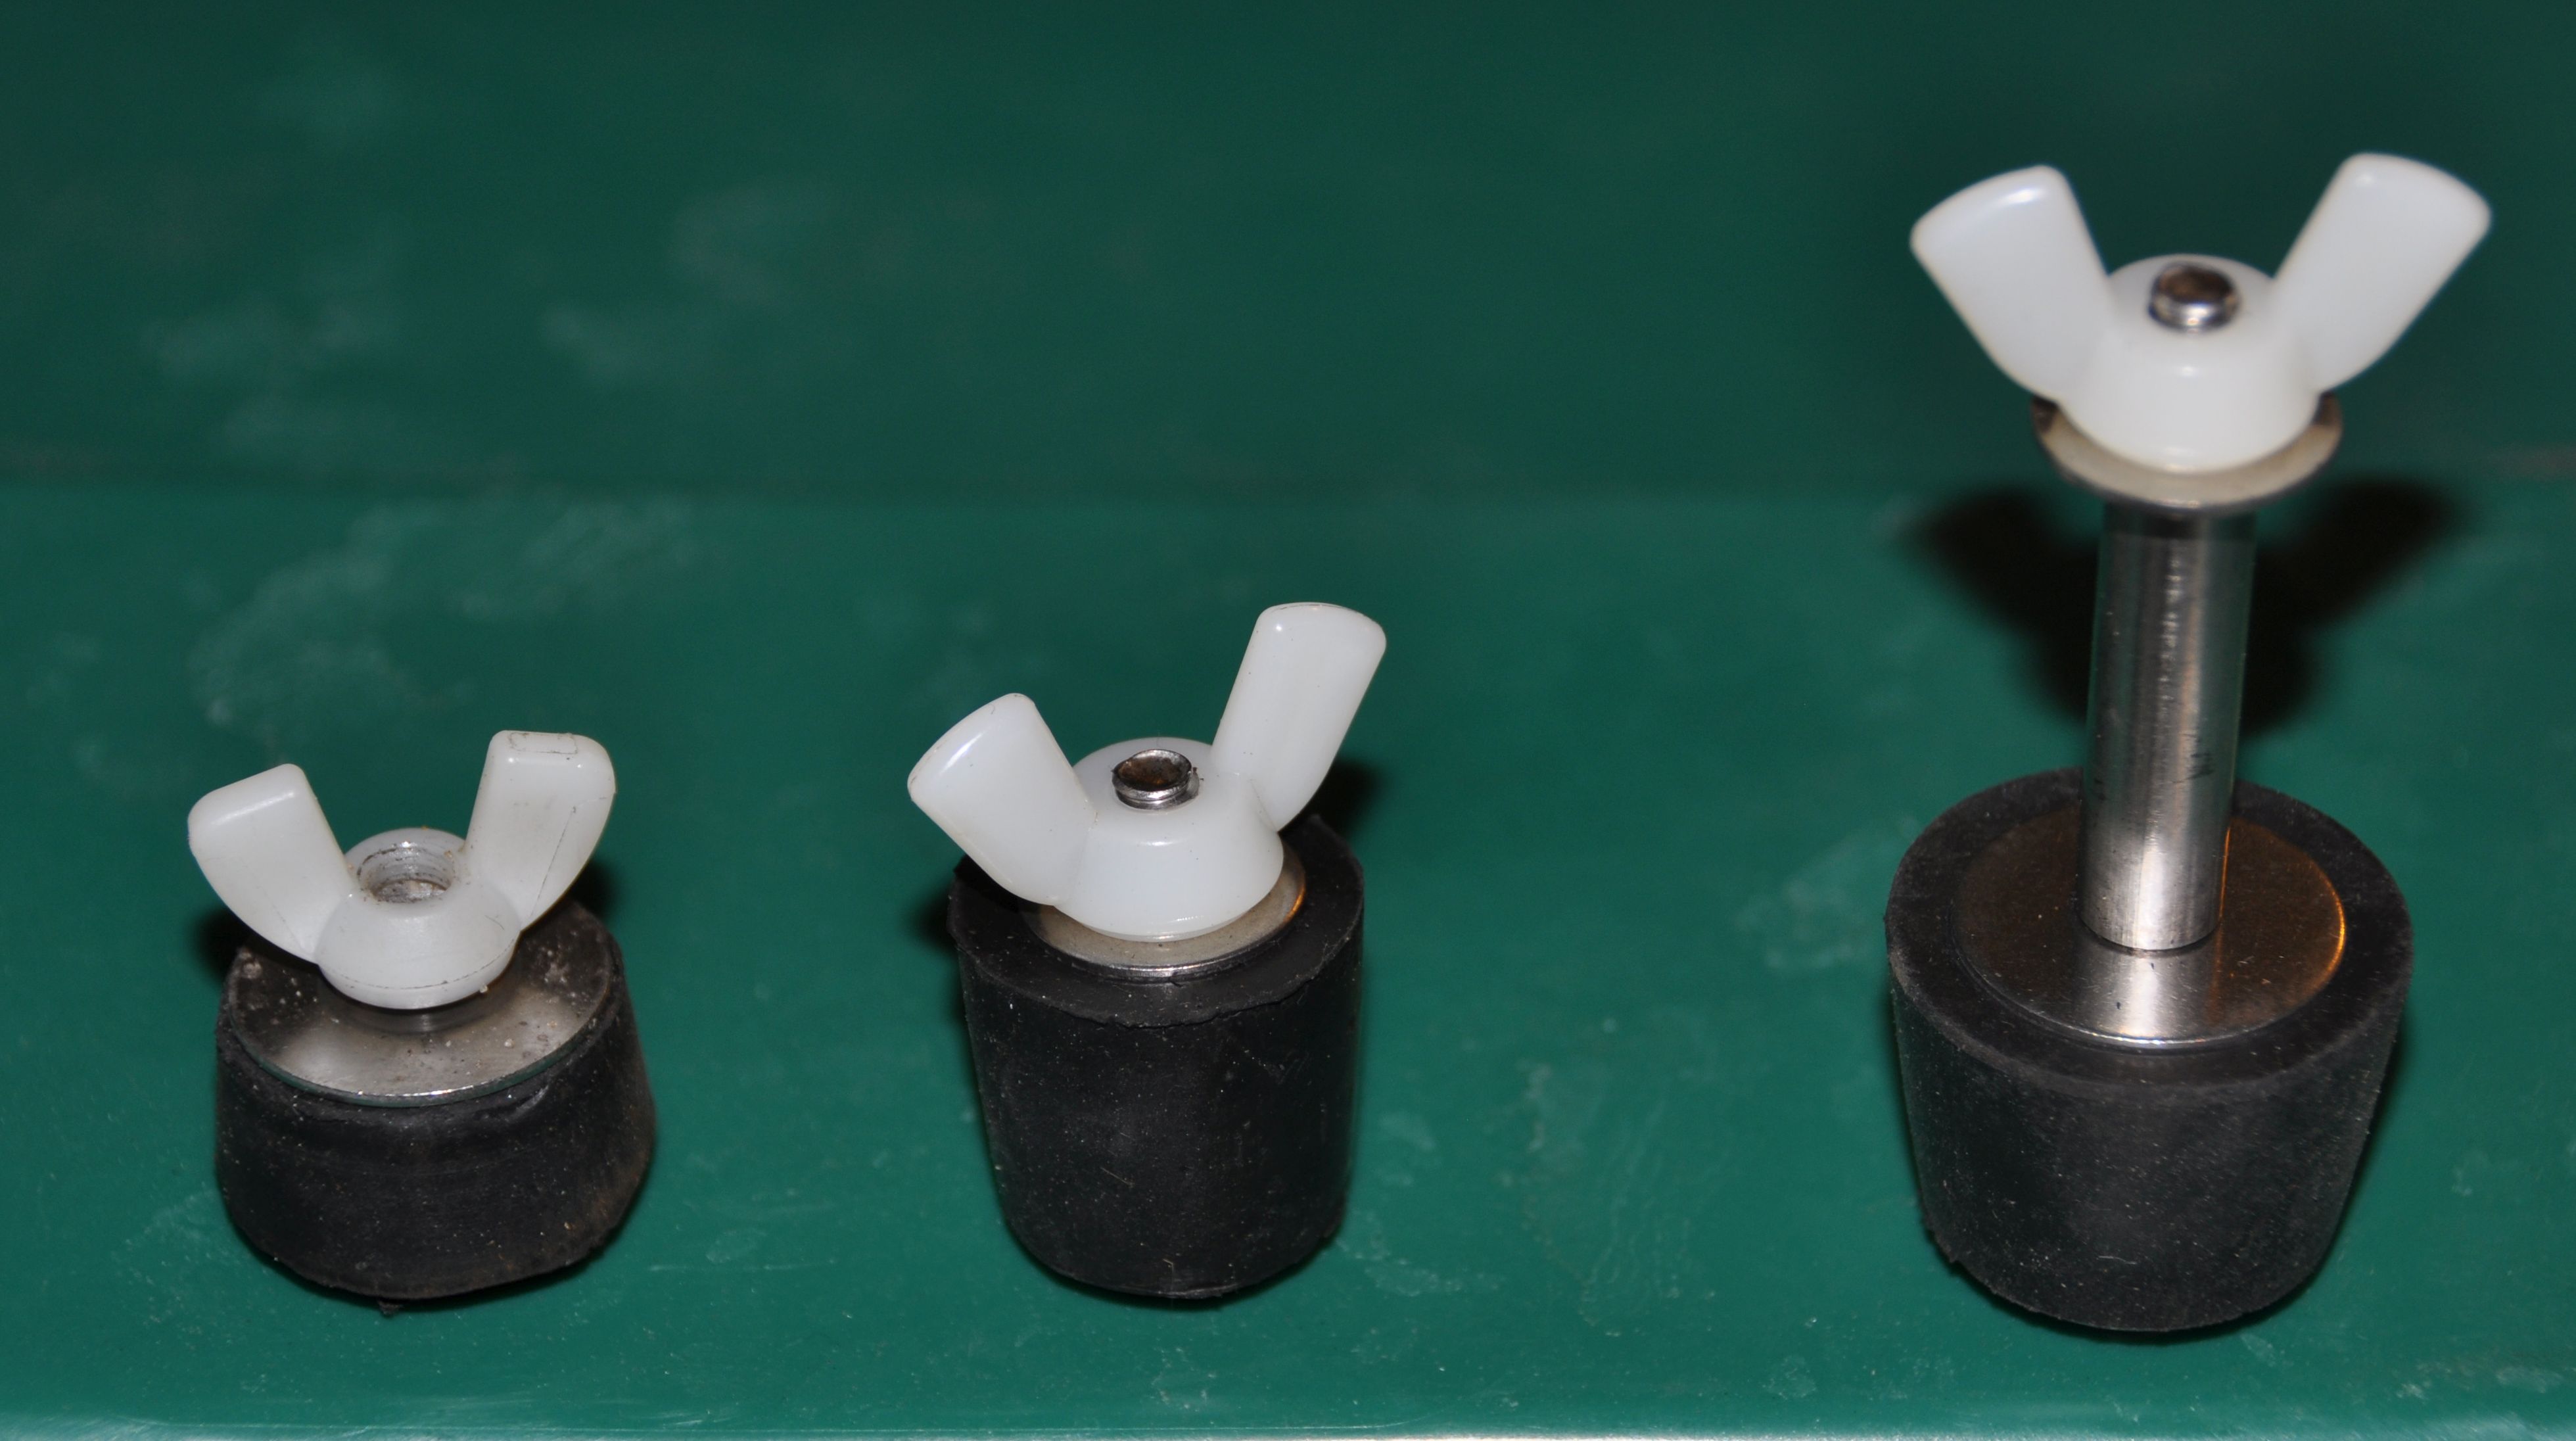
Pump Back to top
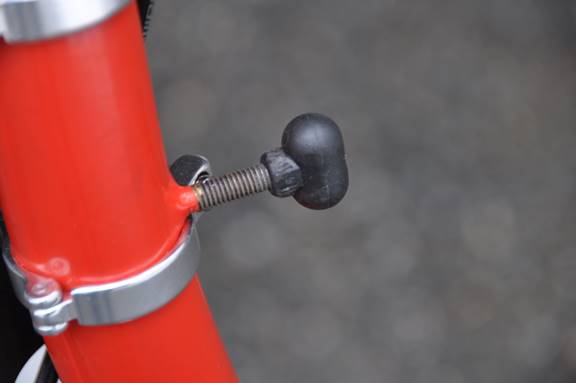
I like to store the pump in the seatpost. However, when I drove through a pothole, the plastic bung and the pump fell out. Here is my solution:
A rubber plug with a wing nut which can be fully inserted into the seatpost and tightened. This solves another issue with the original bung: It prevented the seatpost from being fully pushed in and therefore added to the height of the folded bike. I got the parts from pool supplies. I bought plugs of various sizes and combined a larger plug with the wing nut.
PS: I don't need the bung as a brake for the folded bike. When I fold the handlebar, the caliper brakes are pulled tight and prevent the front wheel from turning.
PS2: I like pumps with a built in pressure gauge. This is the one I am using: amazon.com/gp/product/B00XLGKU2S

At home, I ues a Topeak JoeBlow Floor Pump. For the Brompton, the distance between the spokes is too narrow to easily put in the pump head. I am using a pump adapter which works perfectly:
http://amazon.com/gp/product/B07MXBYPT2/
Toolkit Back to top
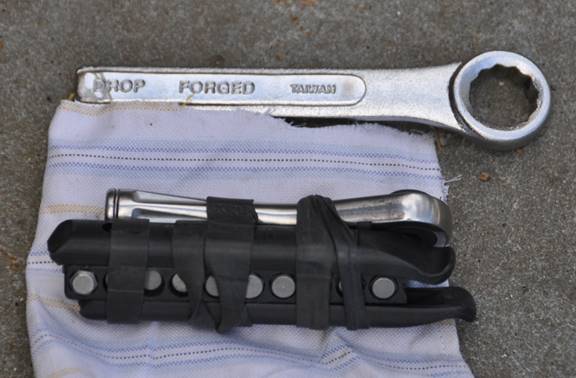
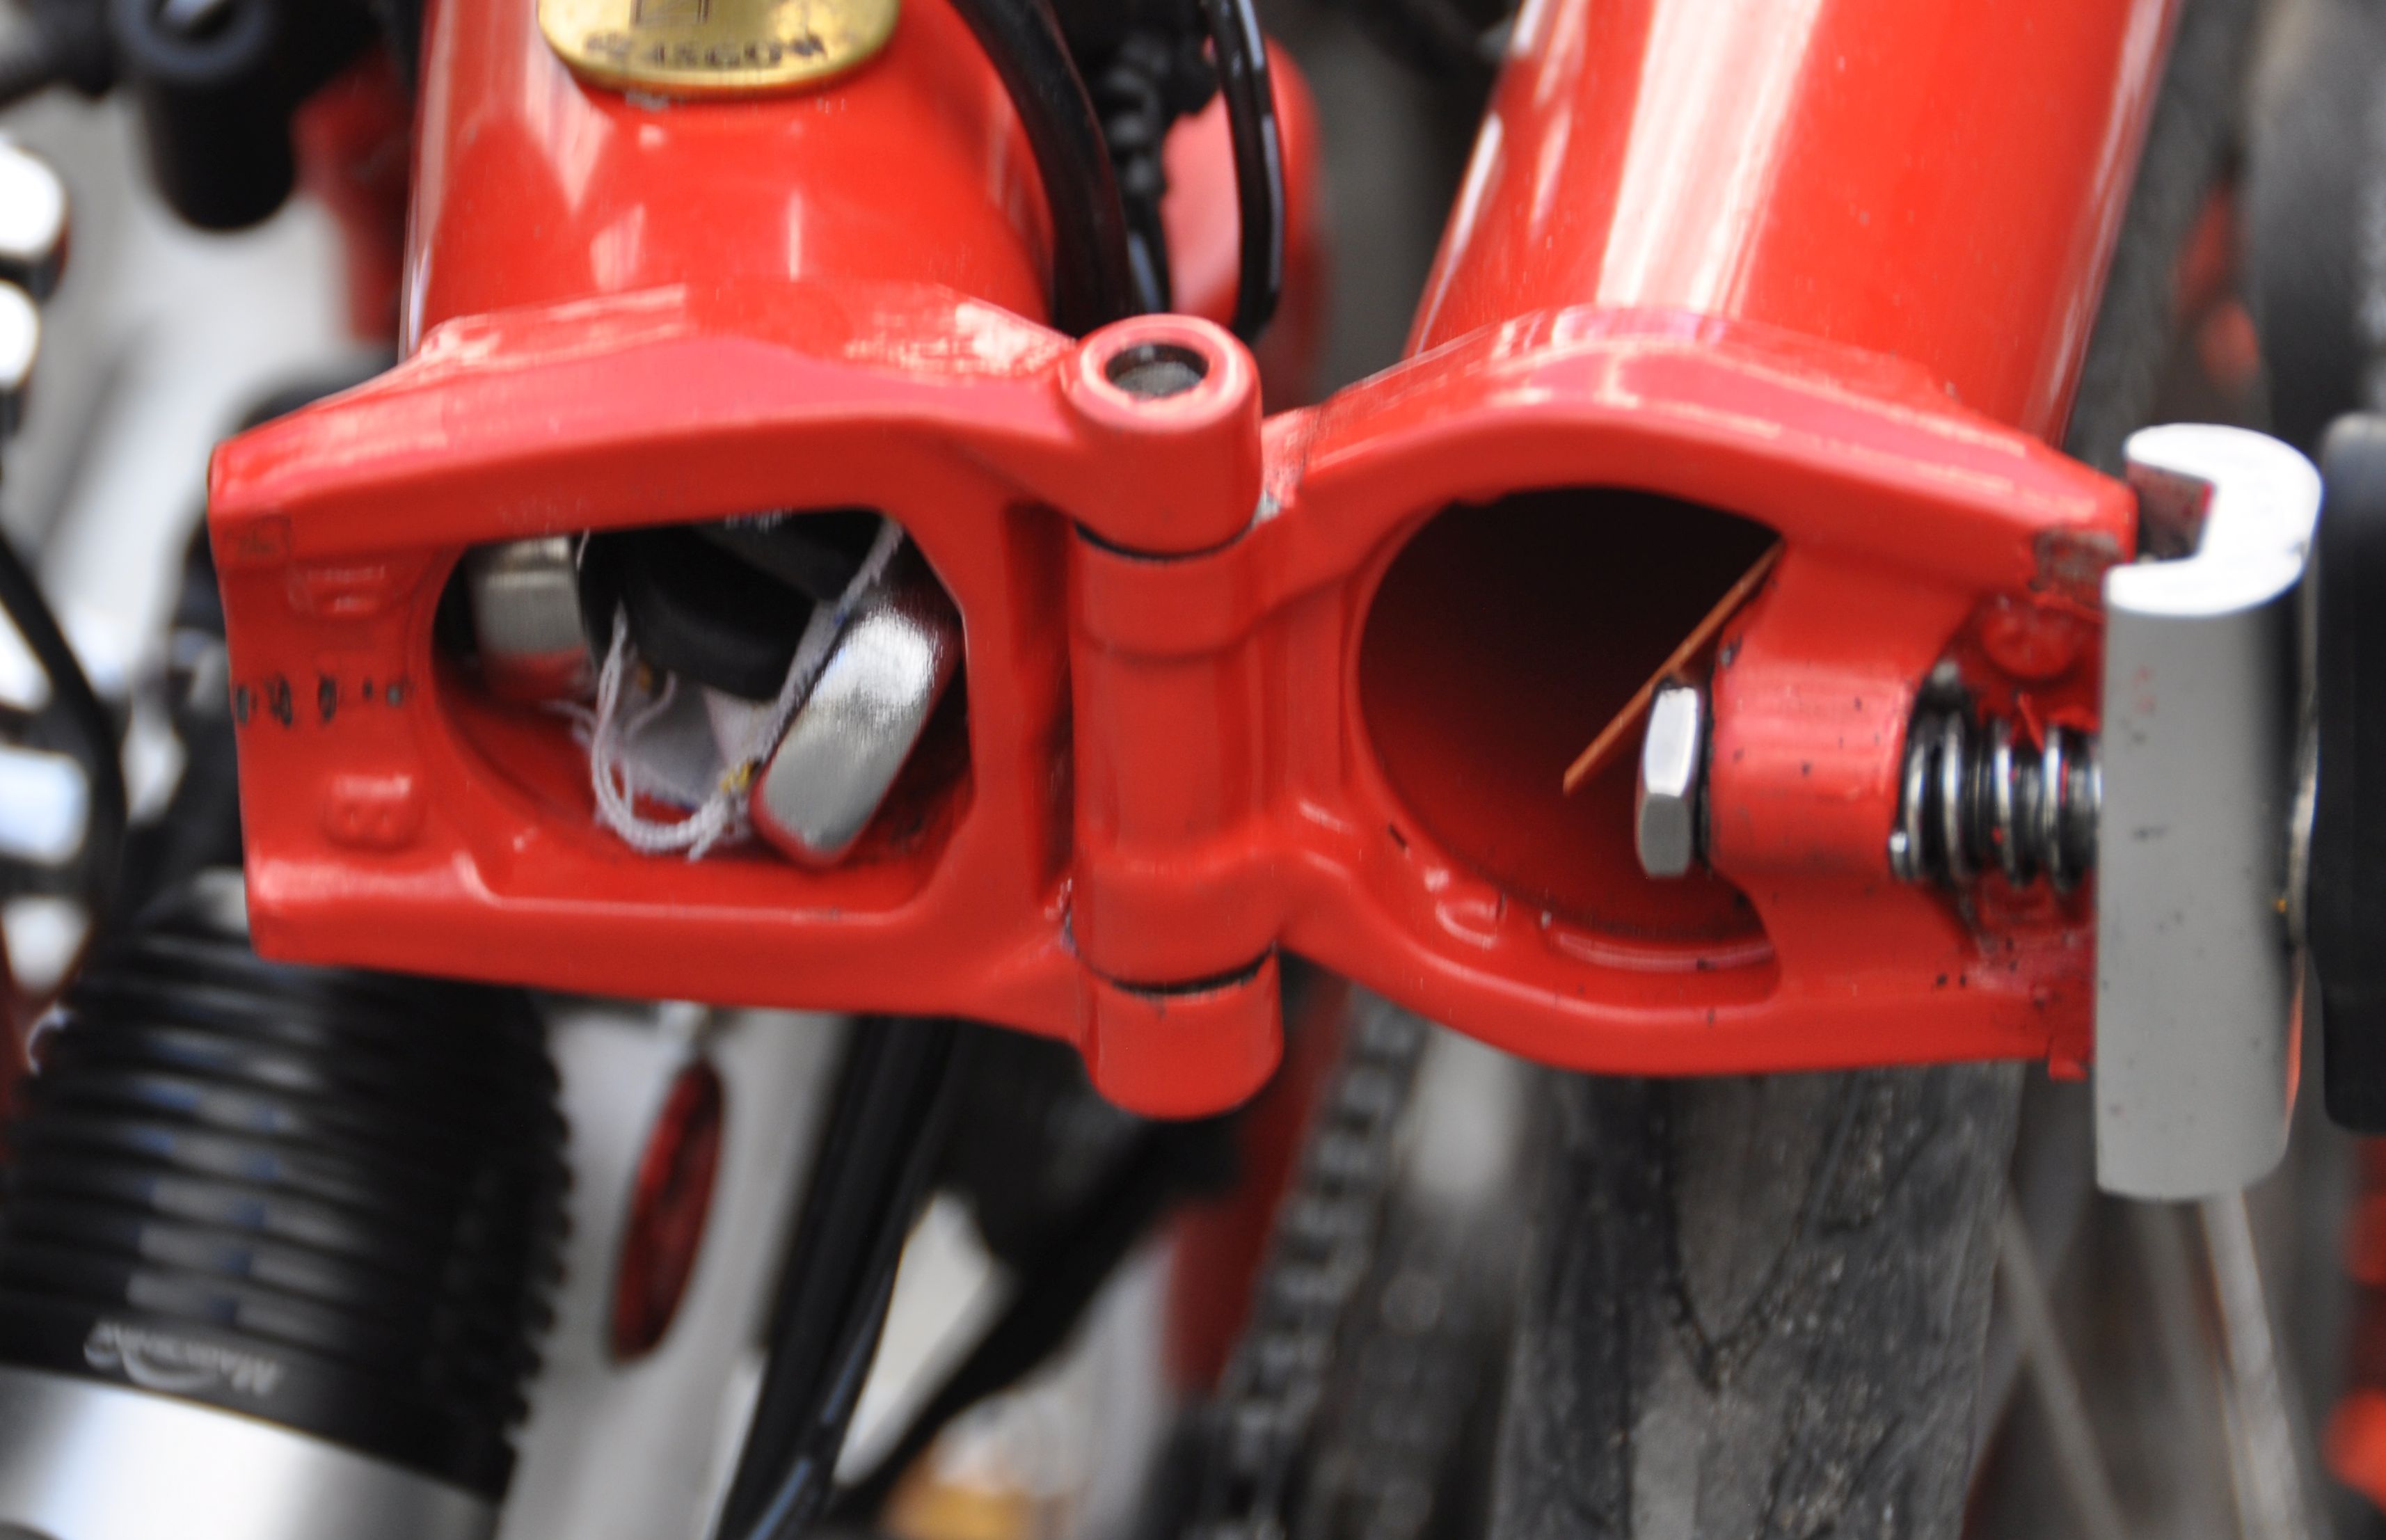
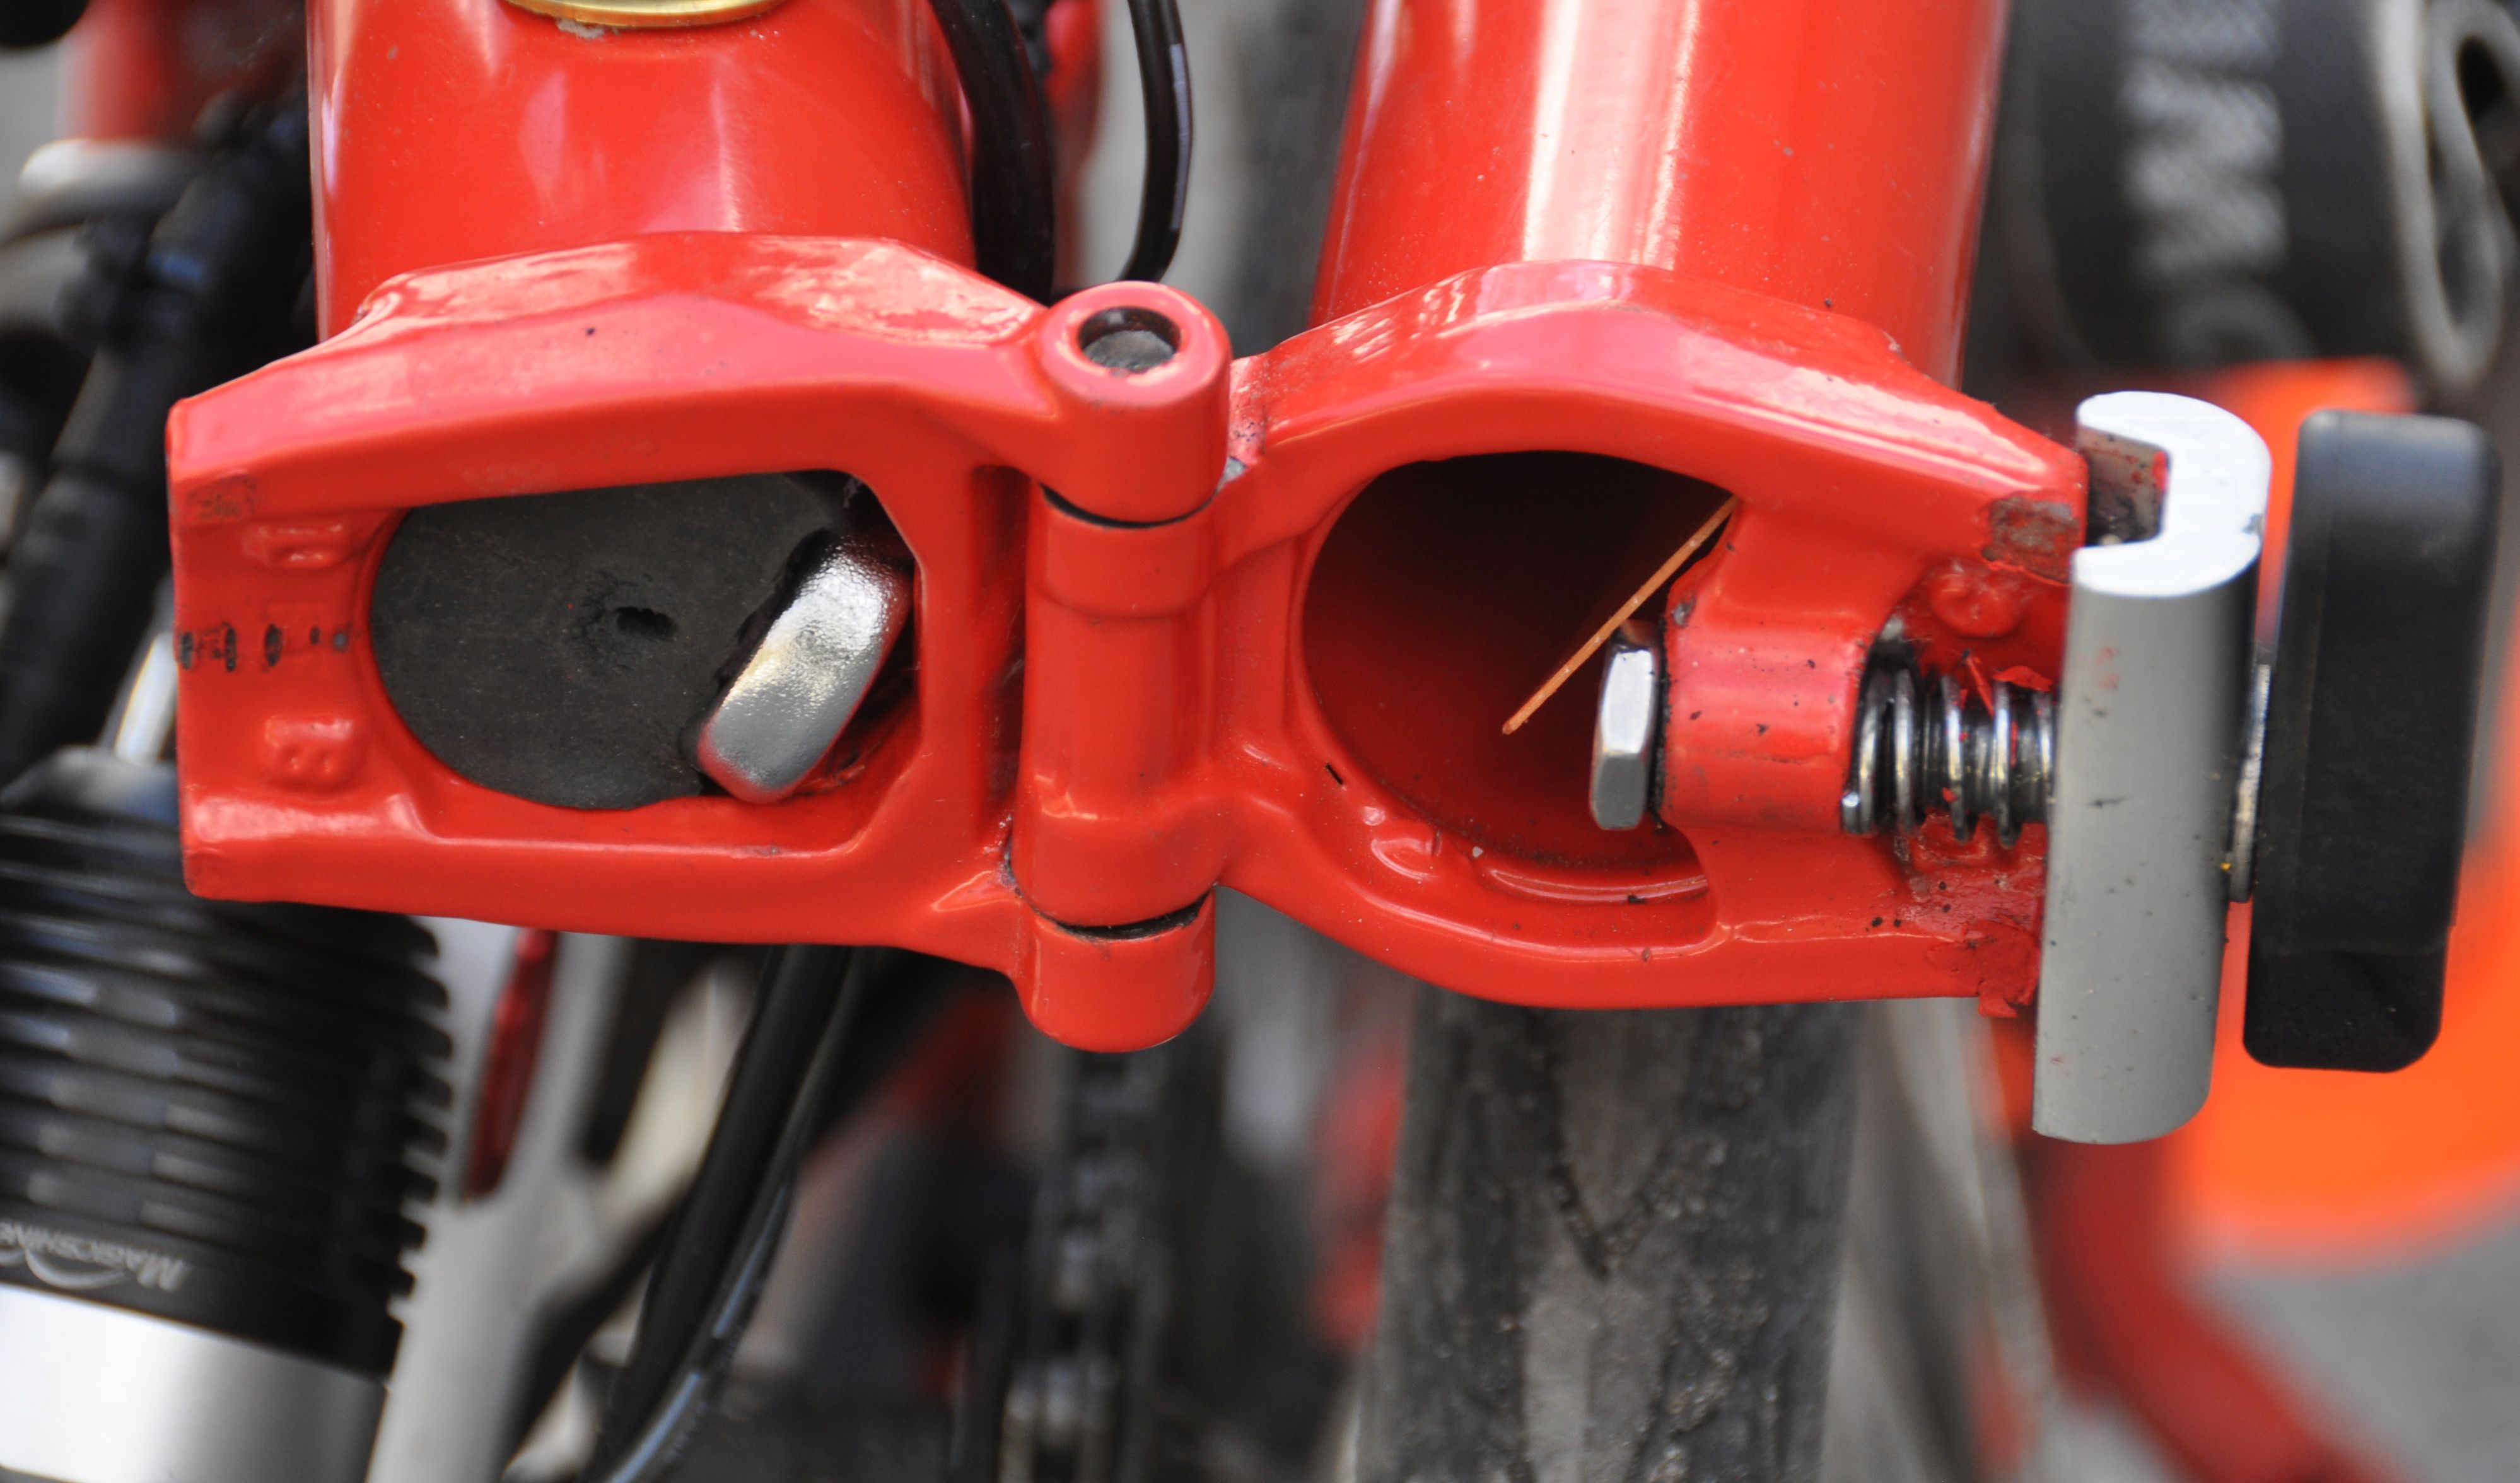
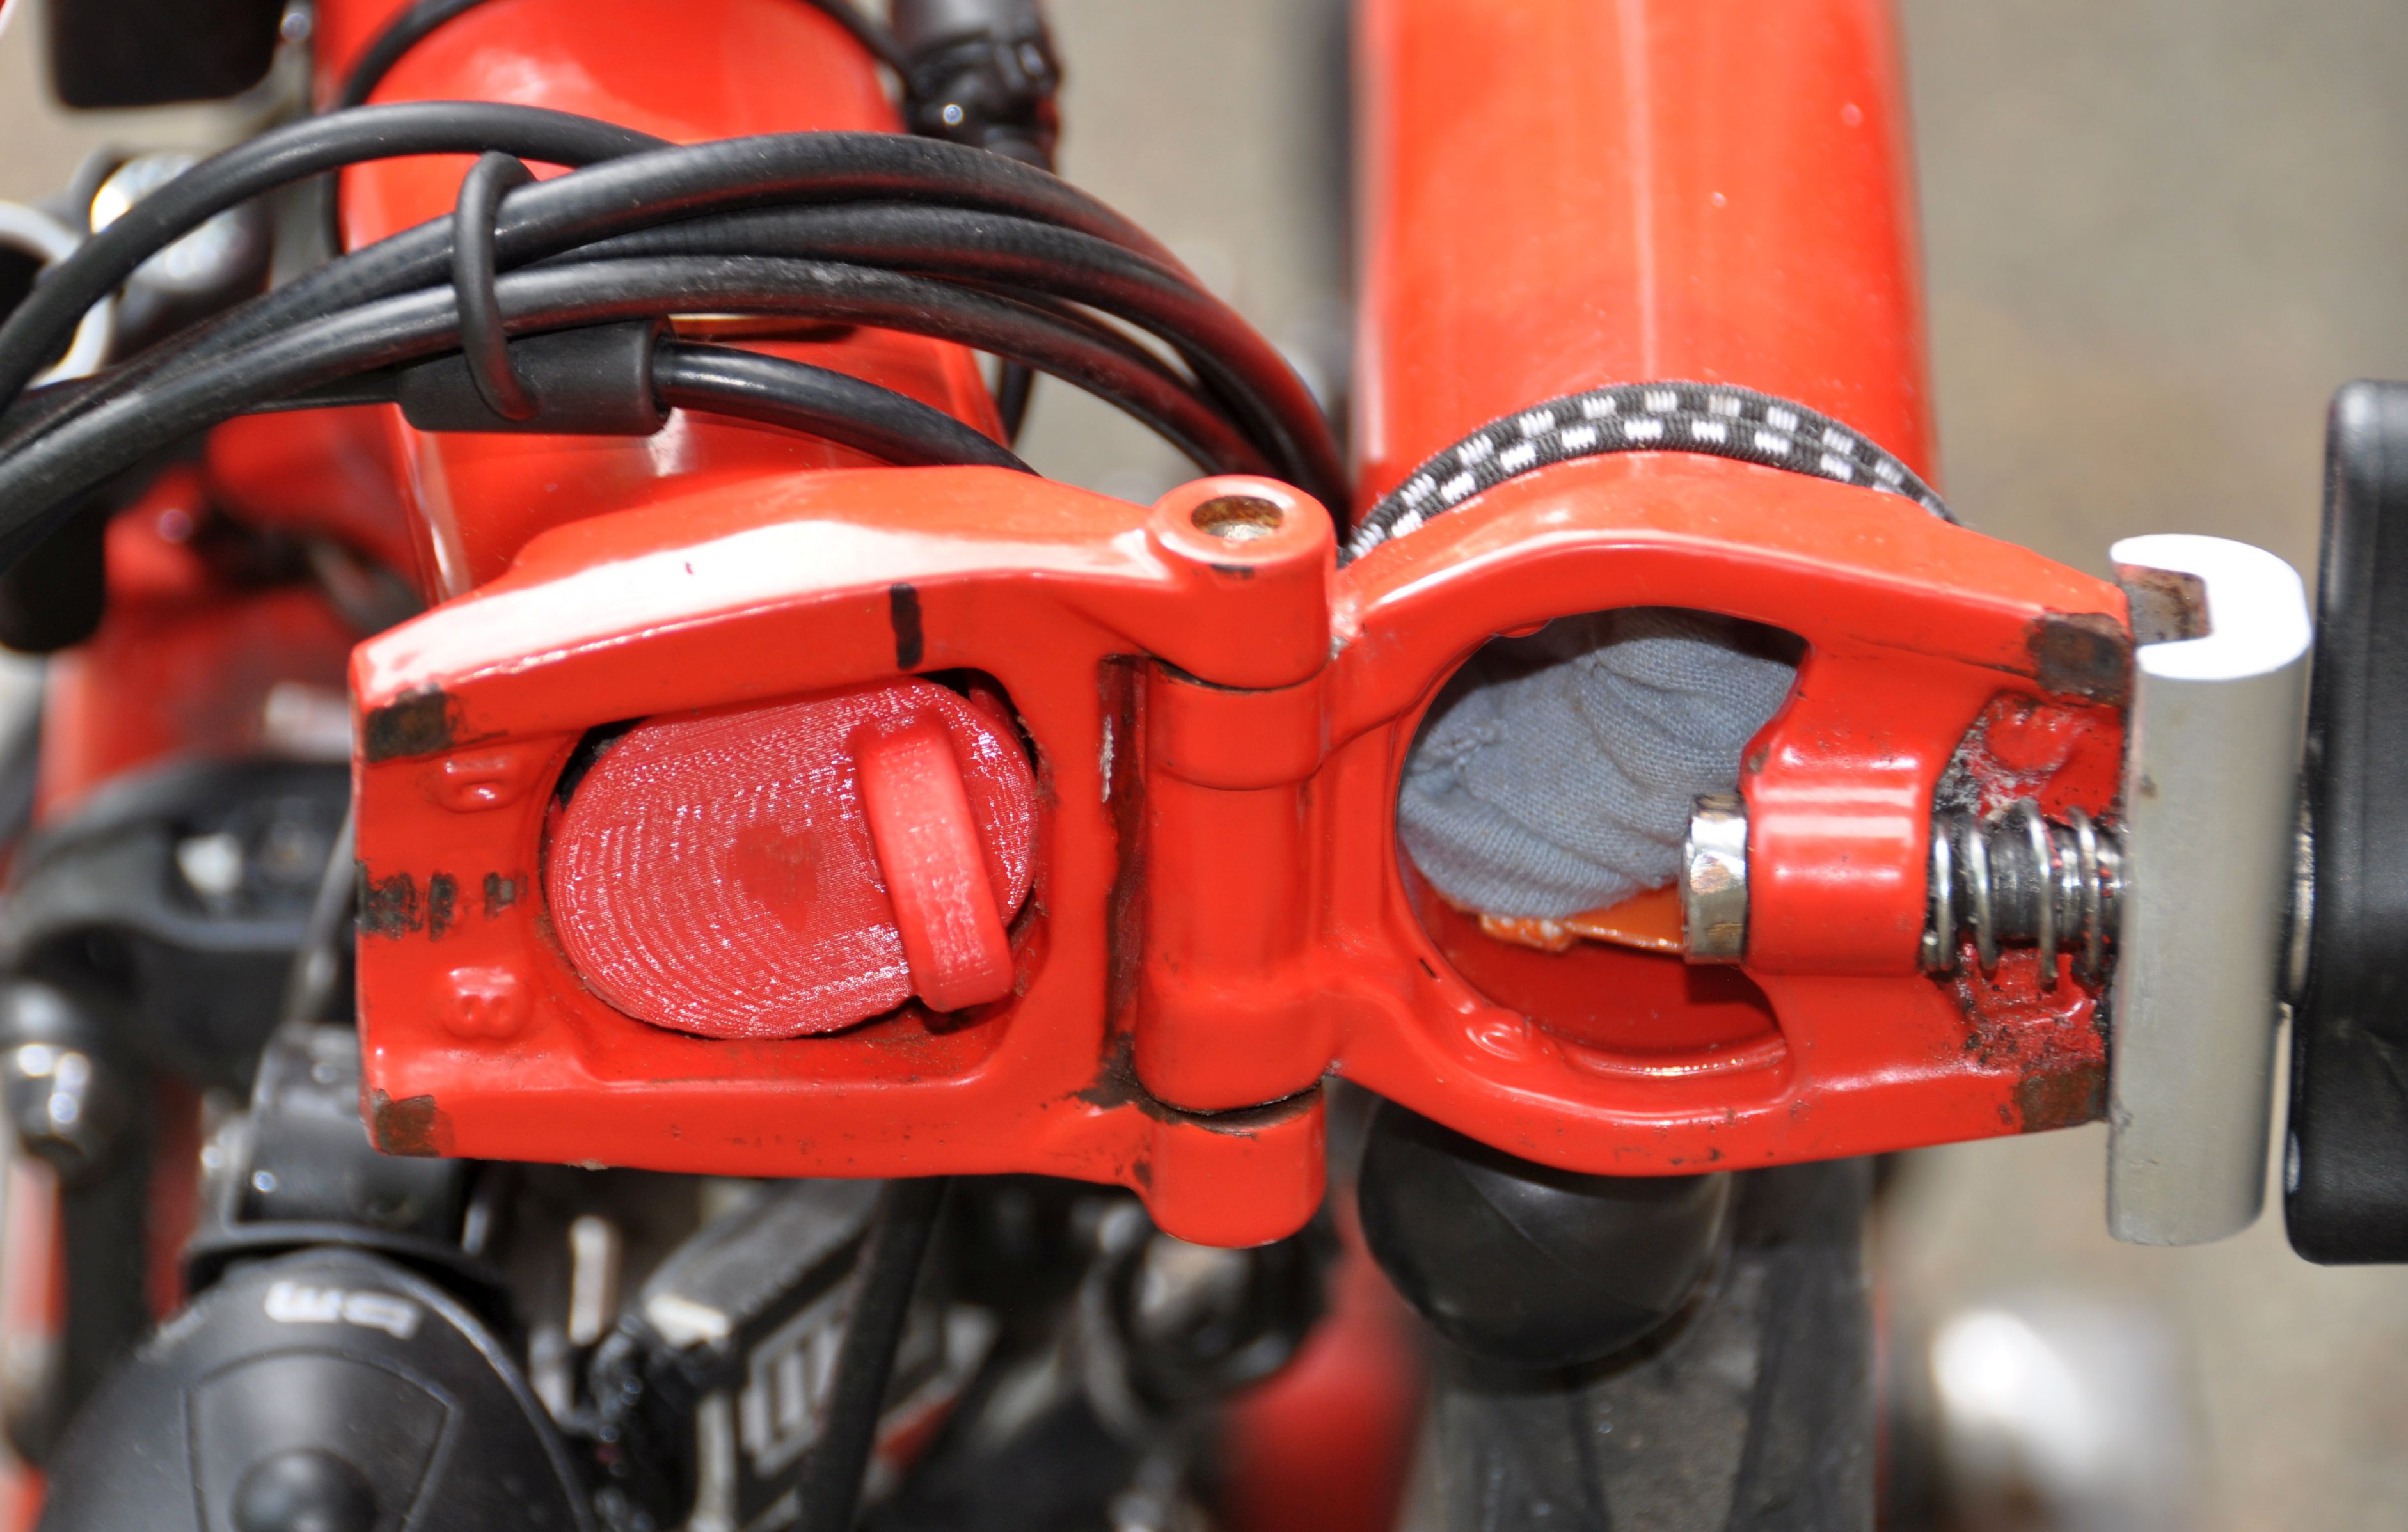
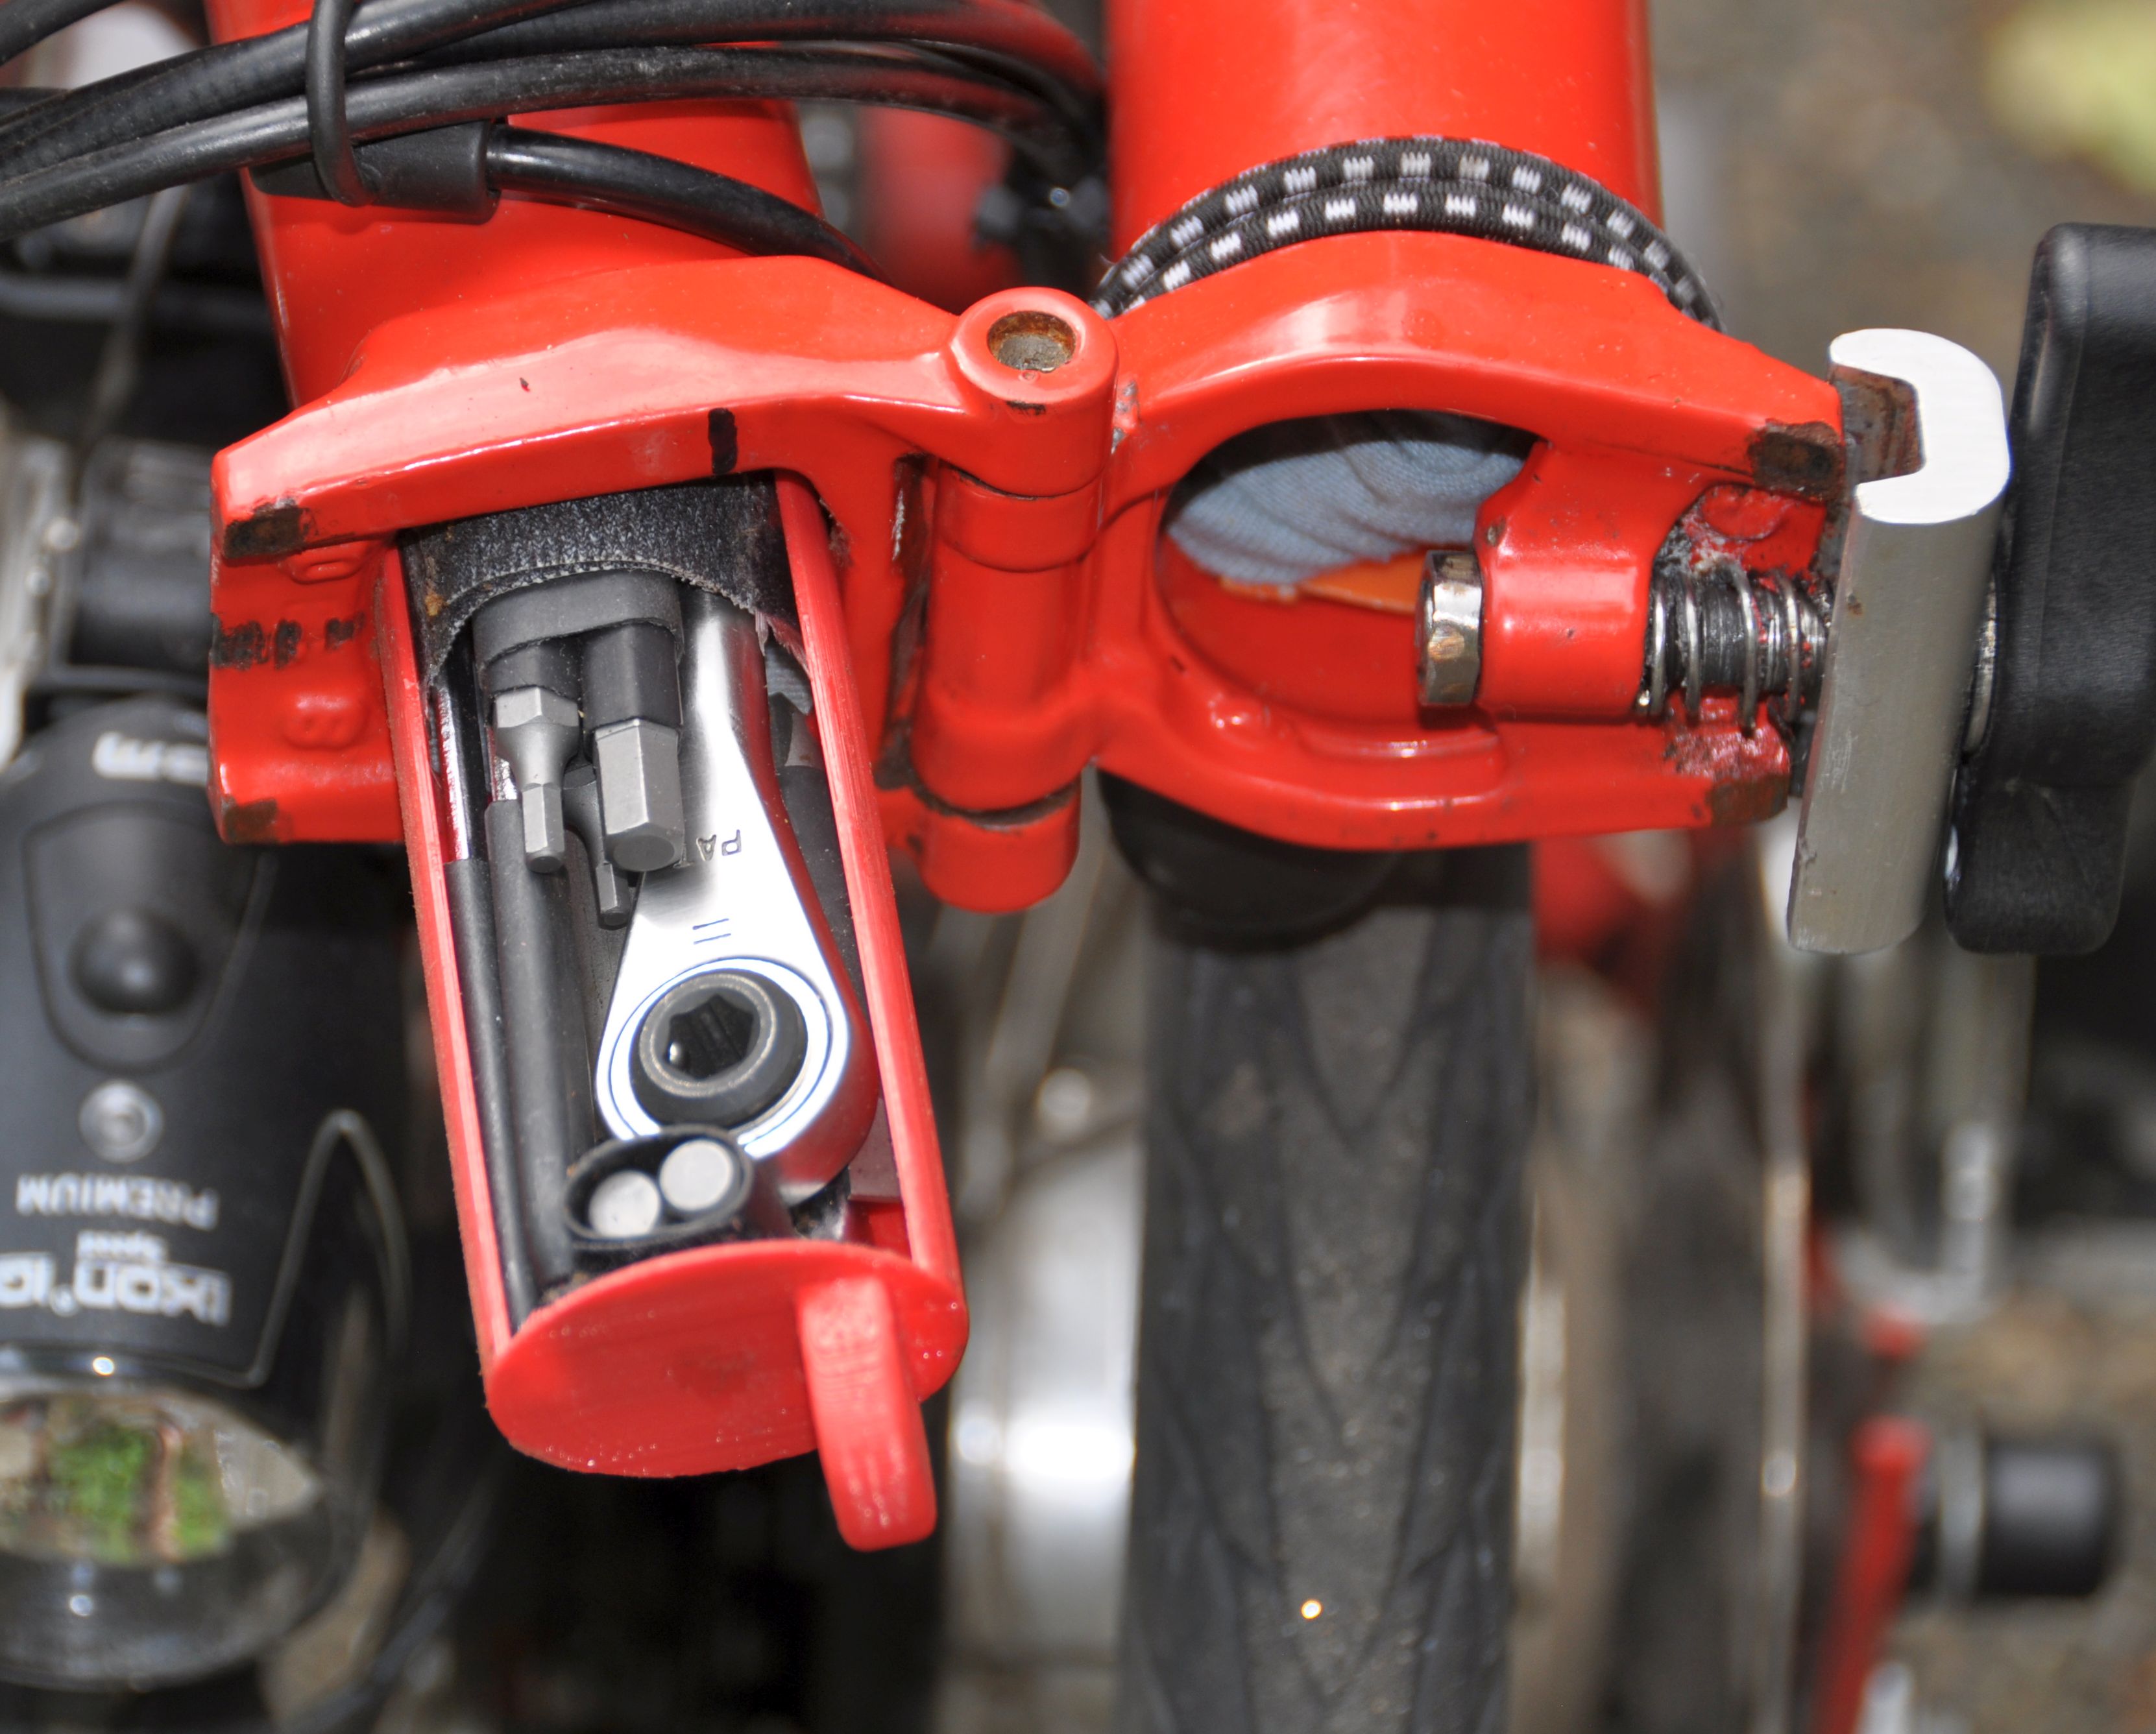
As many others, I store my tools and inner tube inside the frame. The tube is wrapped around a flexible strip of plastic with Velcro ties. The valve is secured with a piece of inner tube. I can easily push the tube in and pull it out, although the opening in the frame tube is narrower since I use a nut to limit the travel on the hinge clamps. You can put a 15 mm box wrench under the inner tube (a standard wrench cut off with a Dremel tool), secured with two short pieces of inner tube, or an 8/10 mm open end wrench.

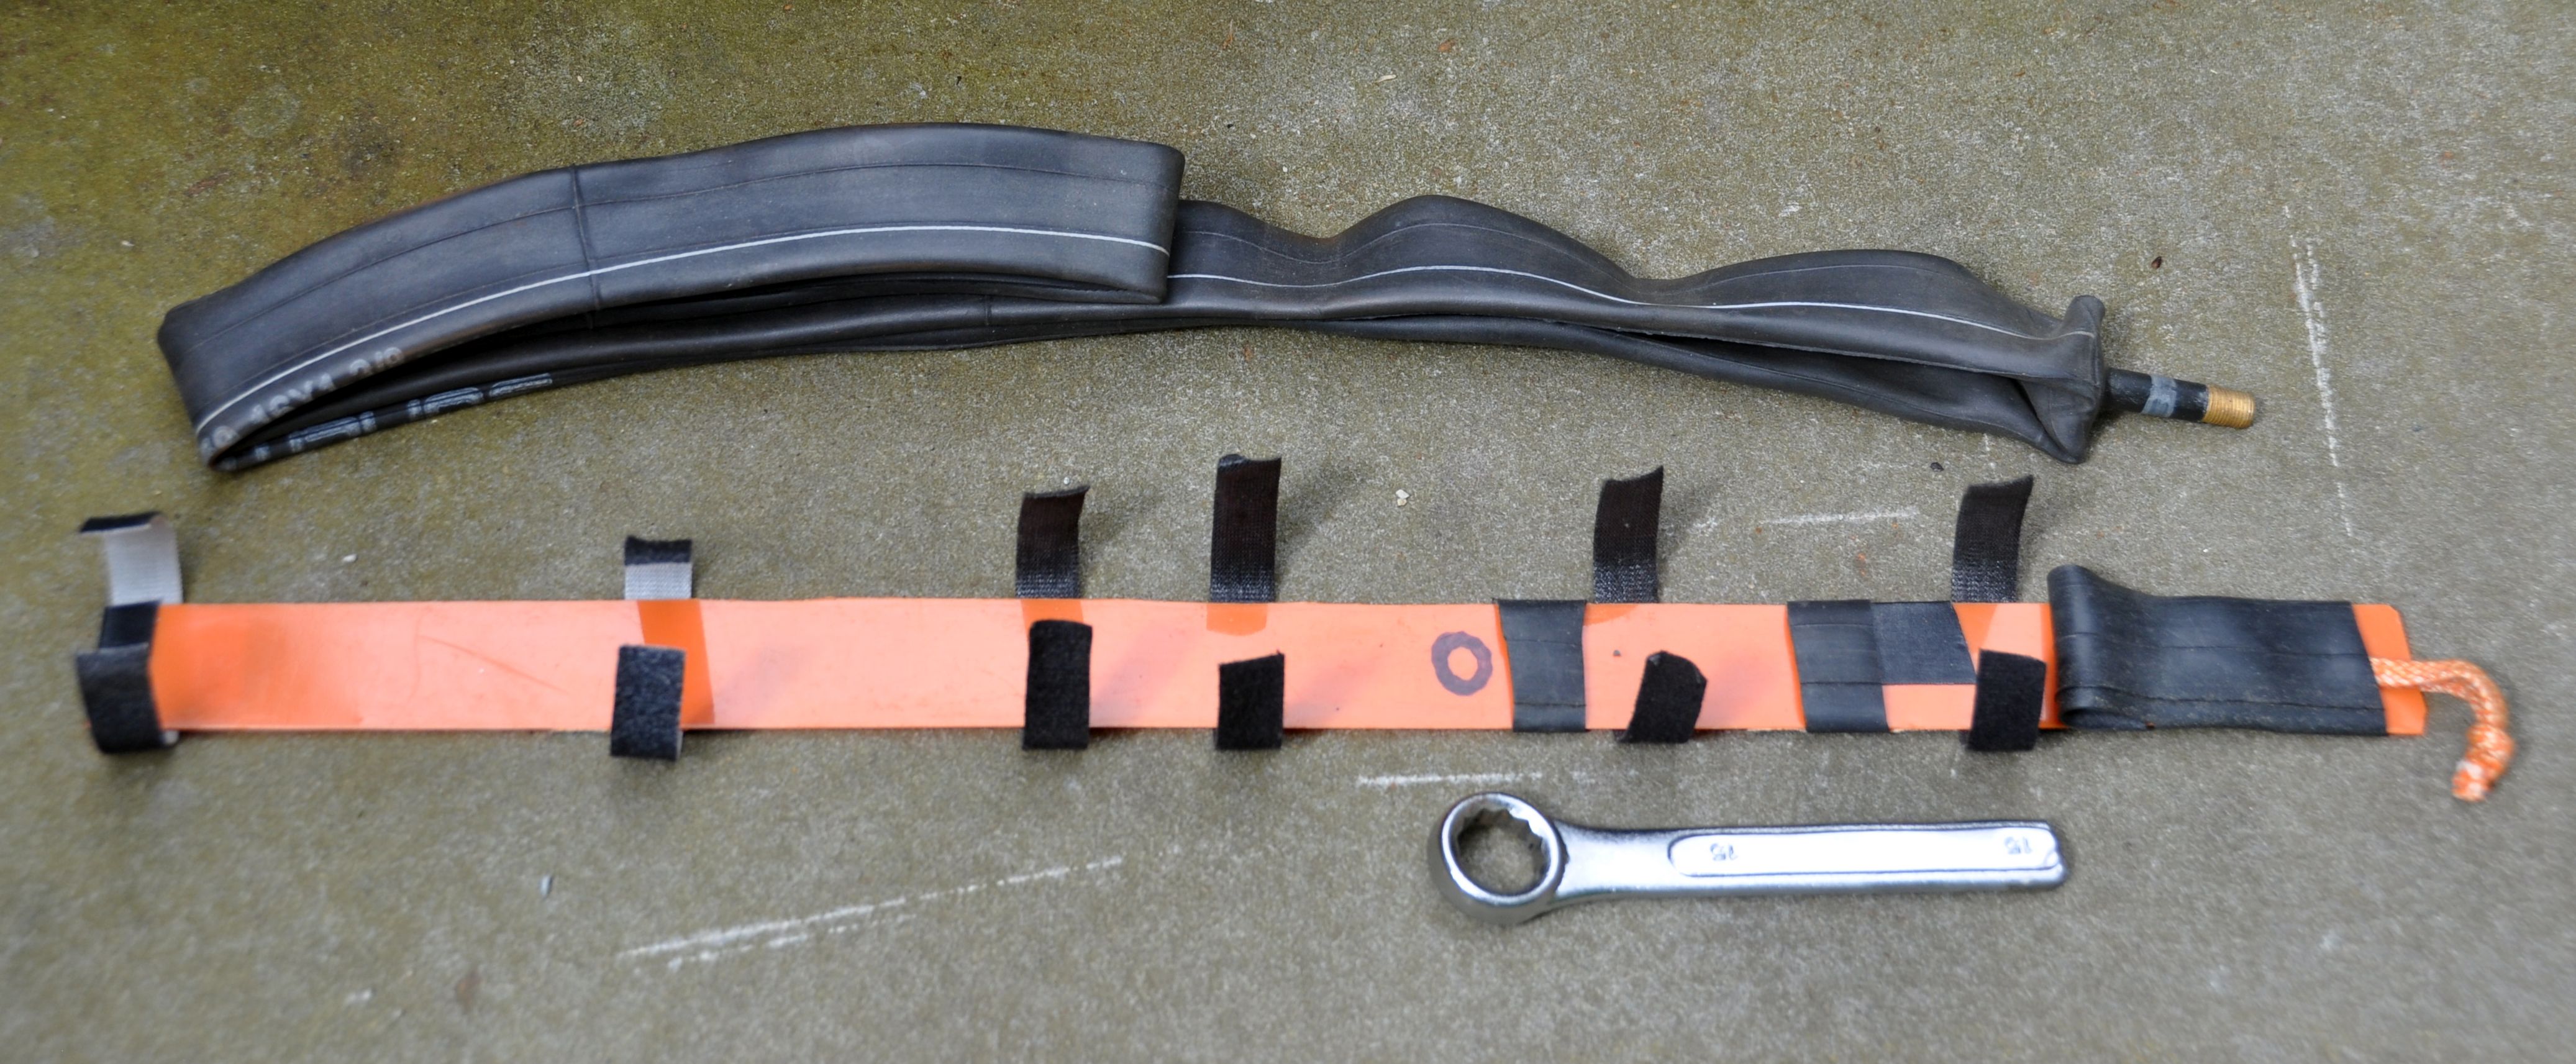
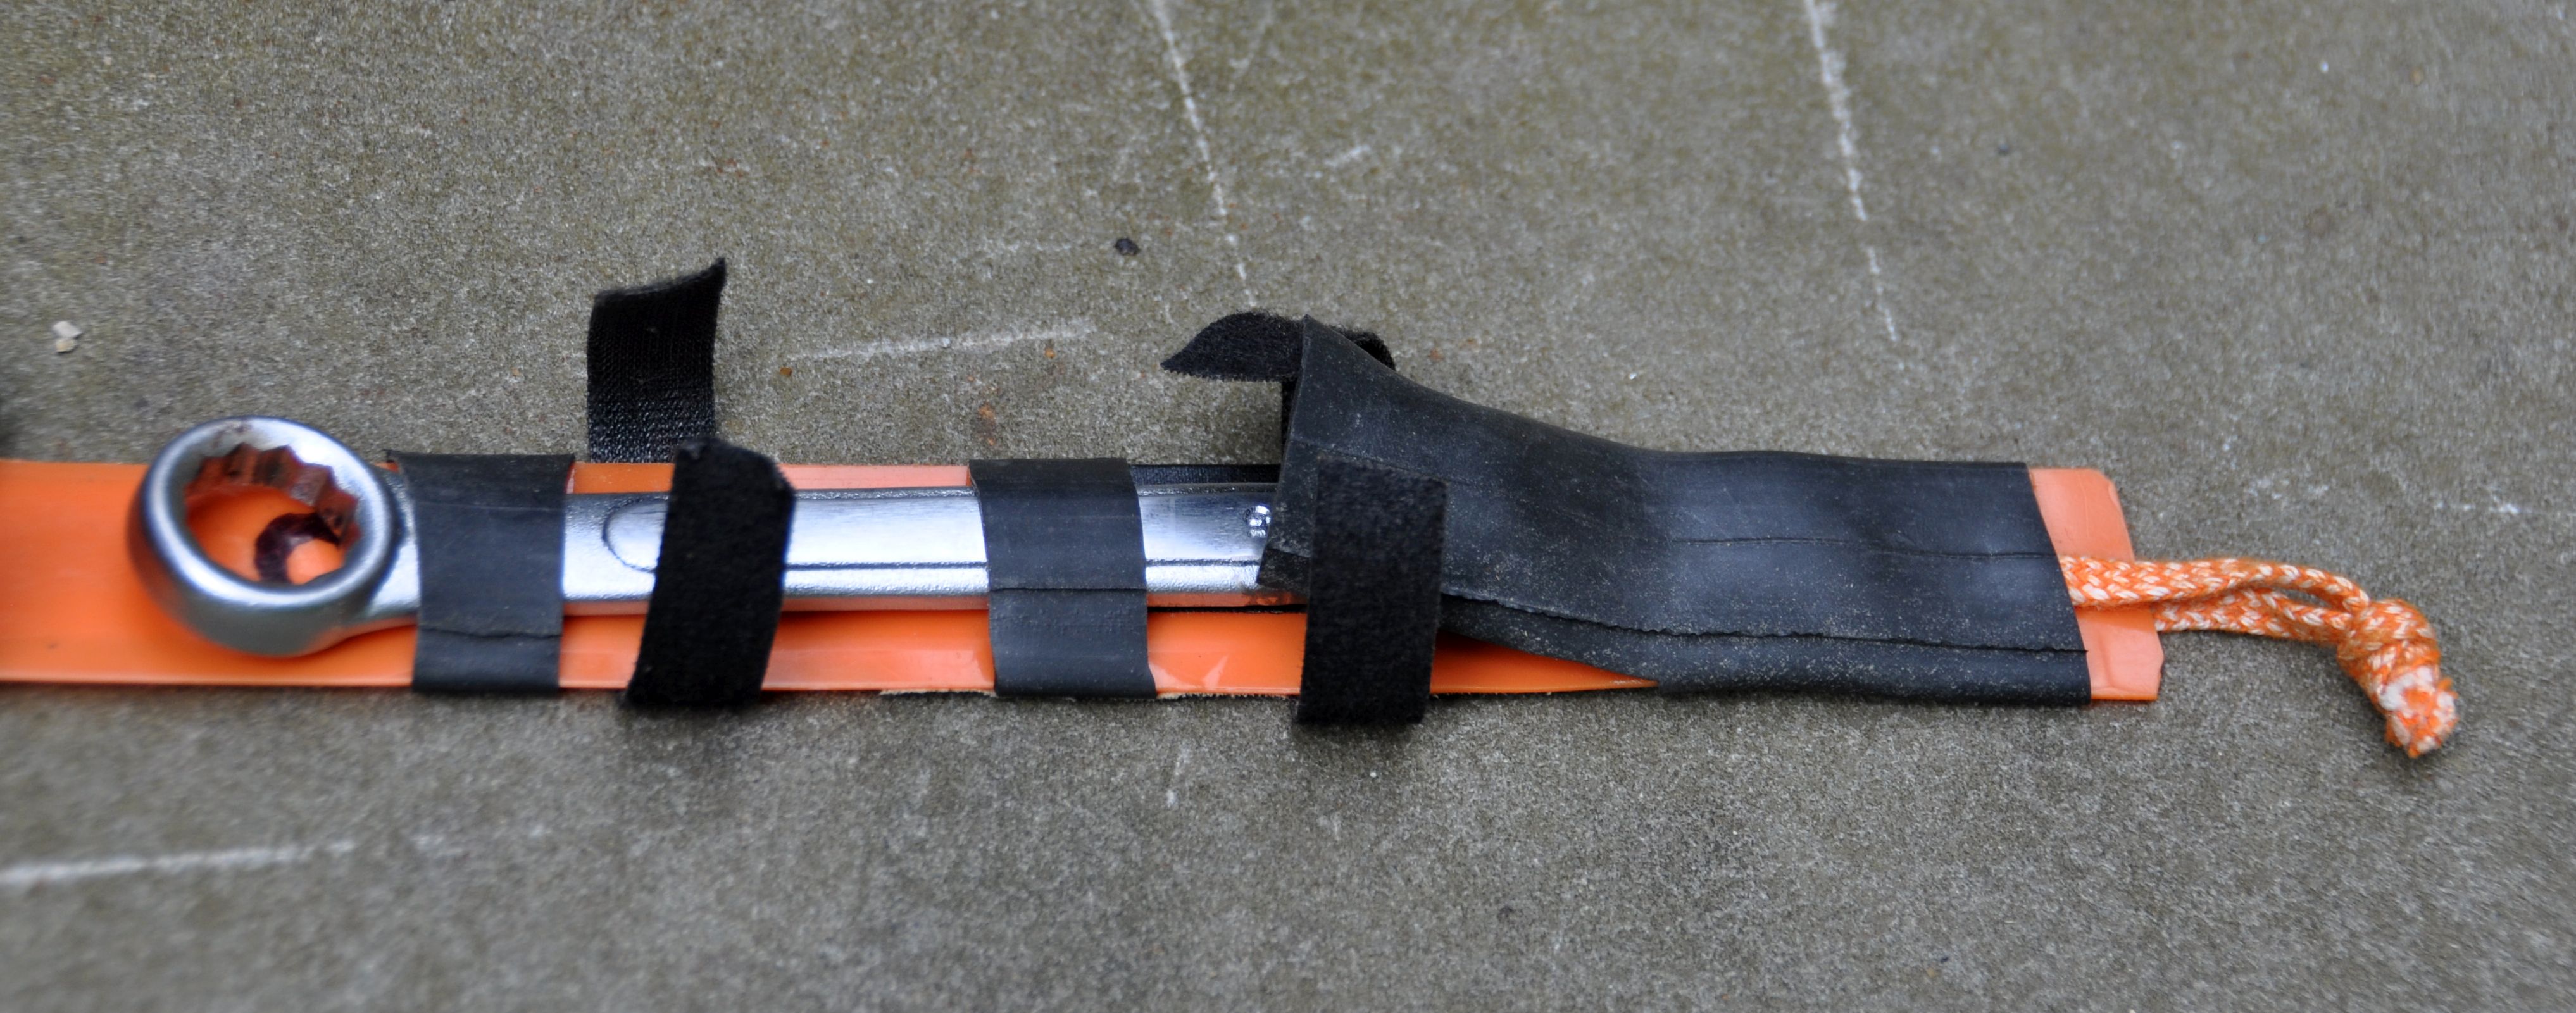
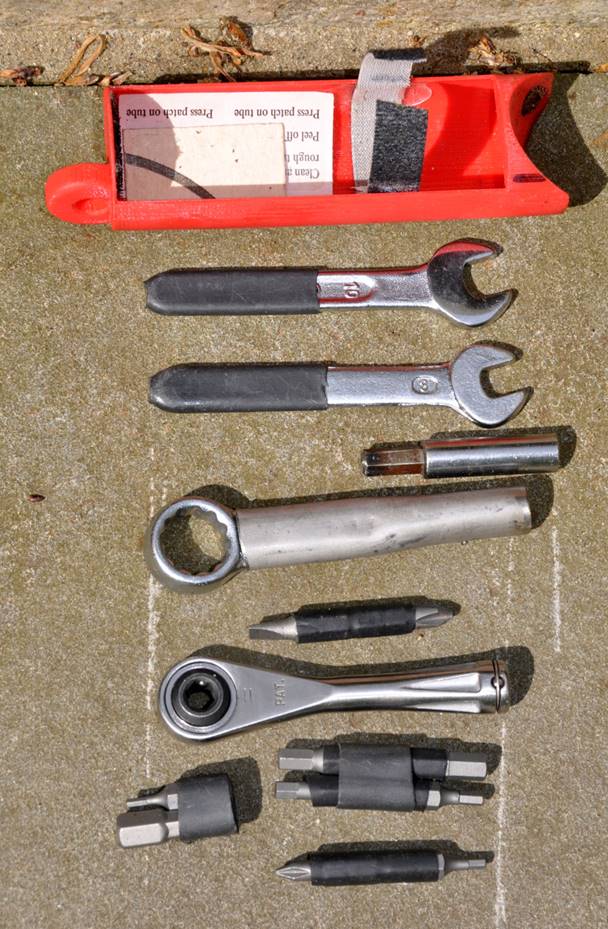
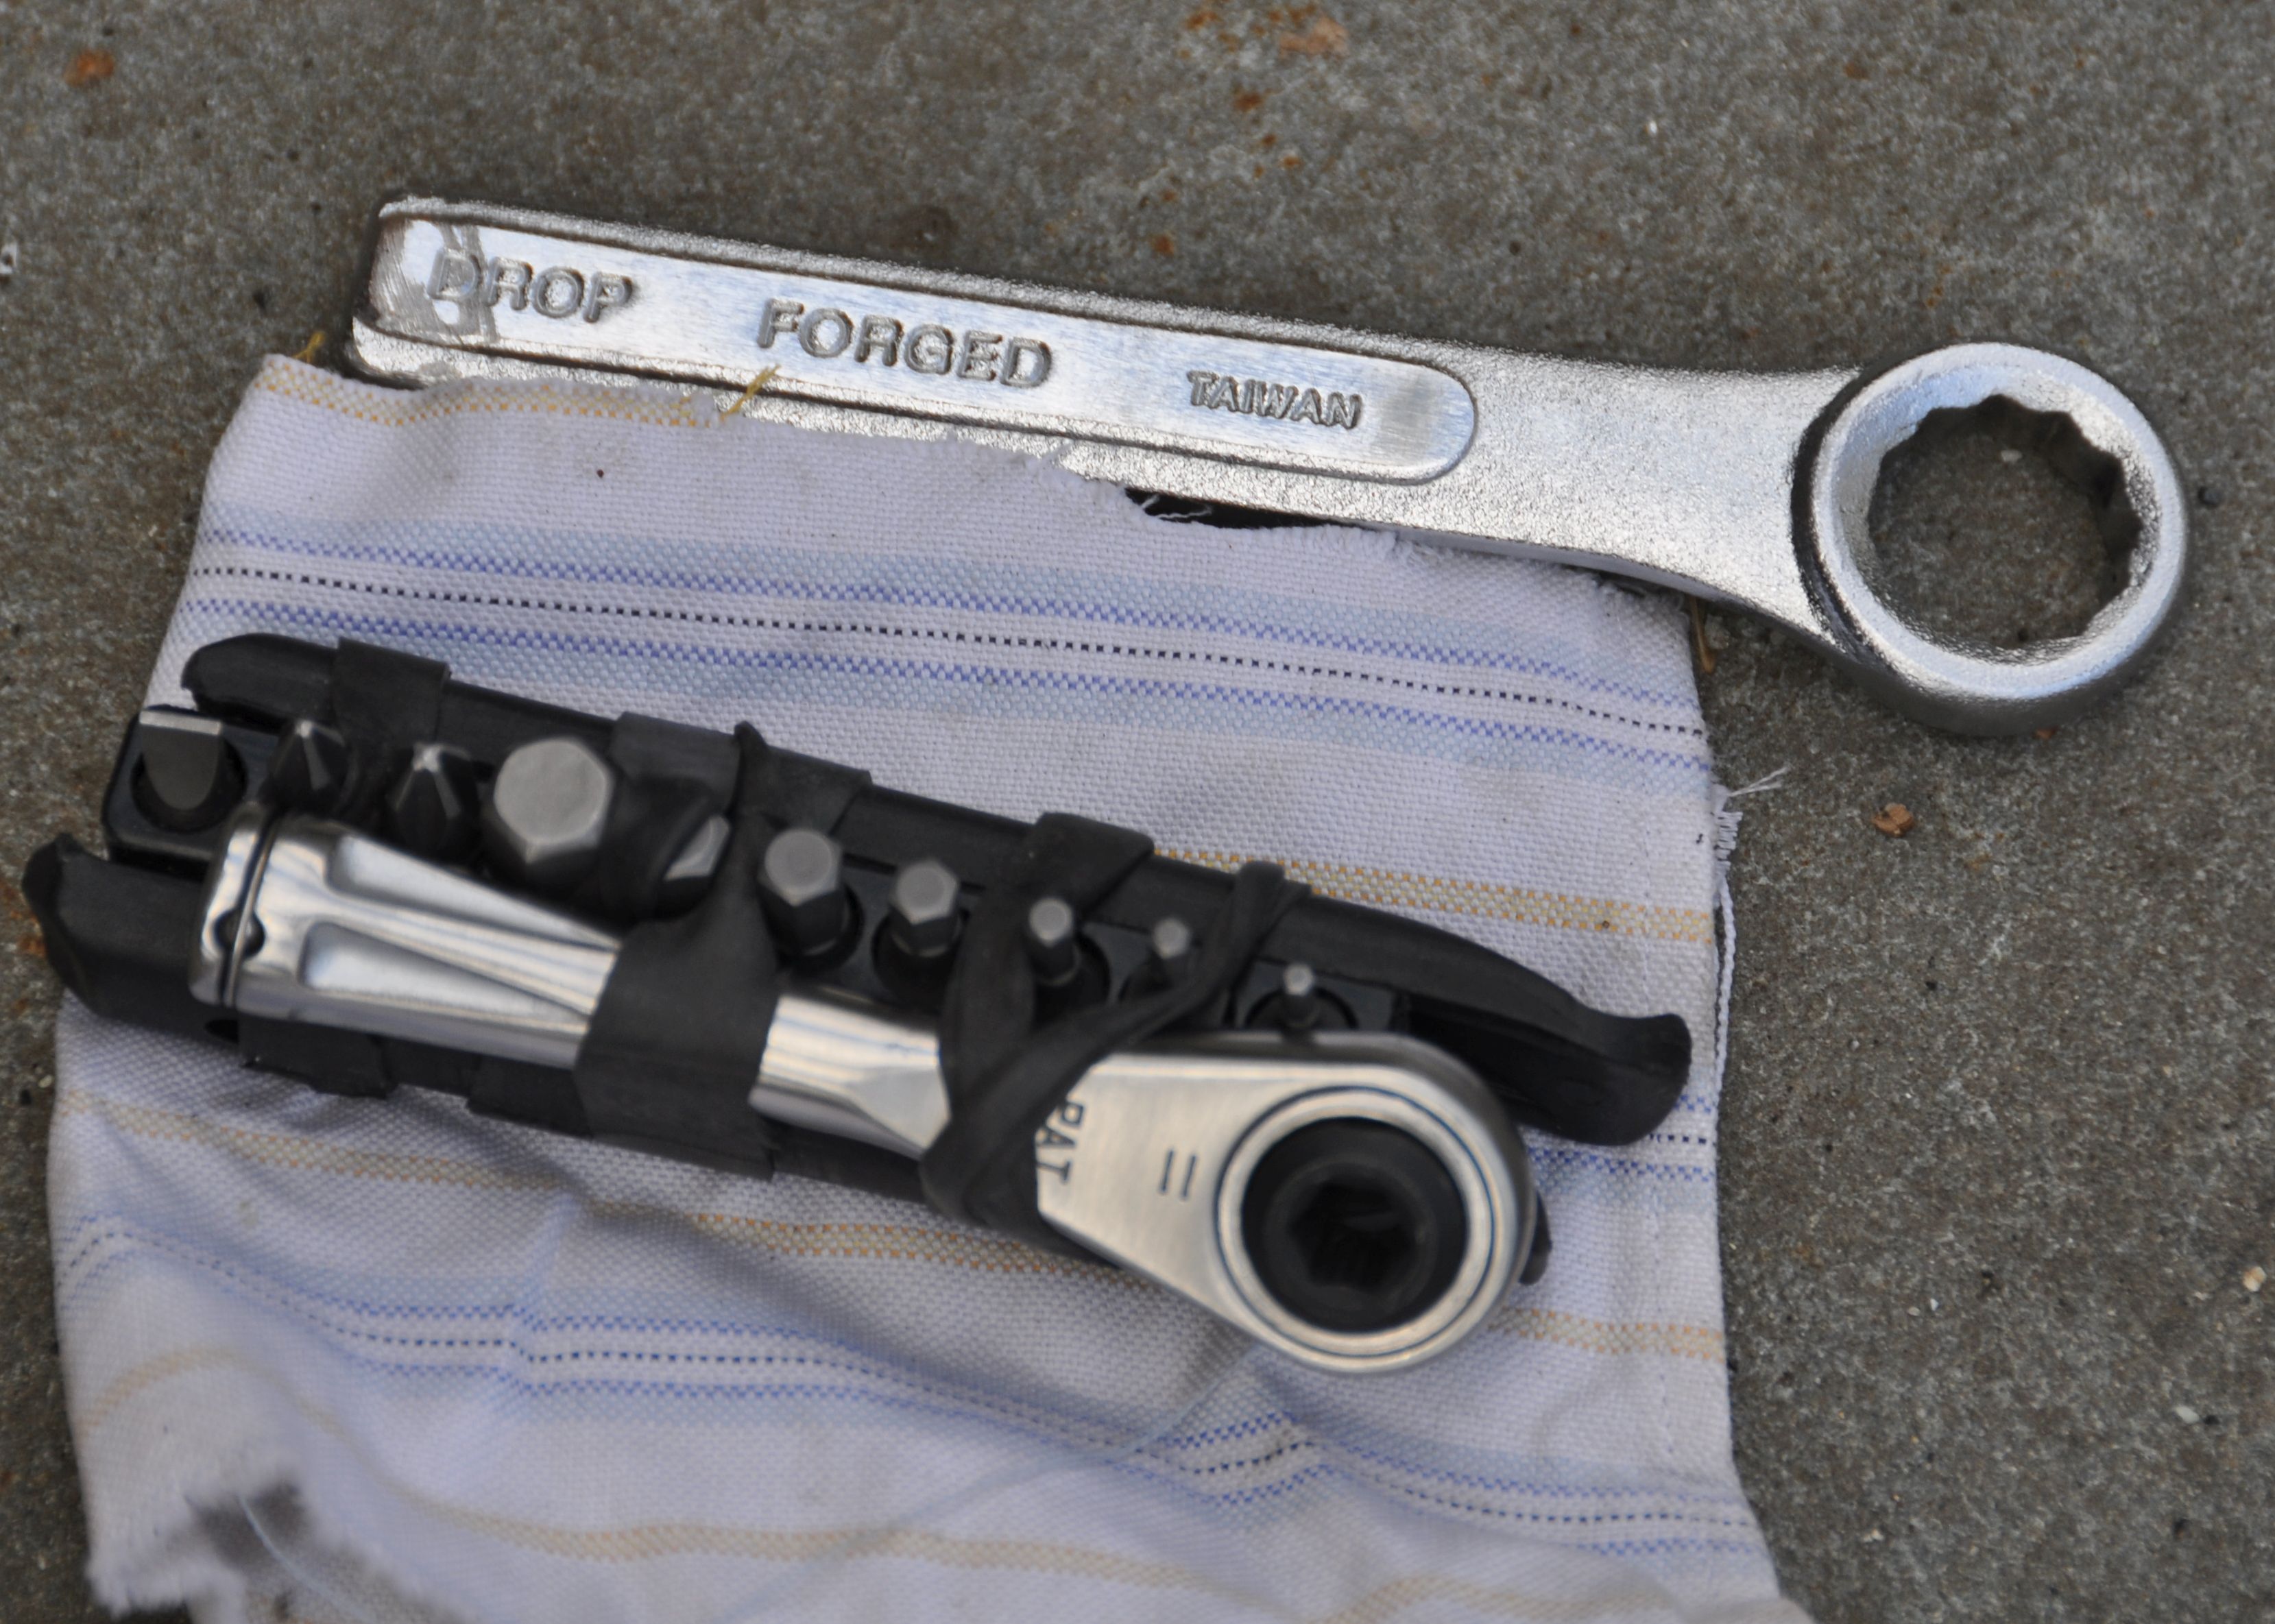
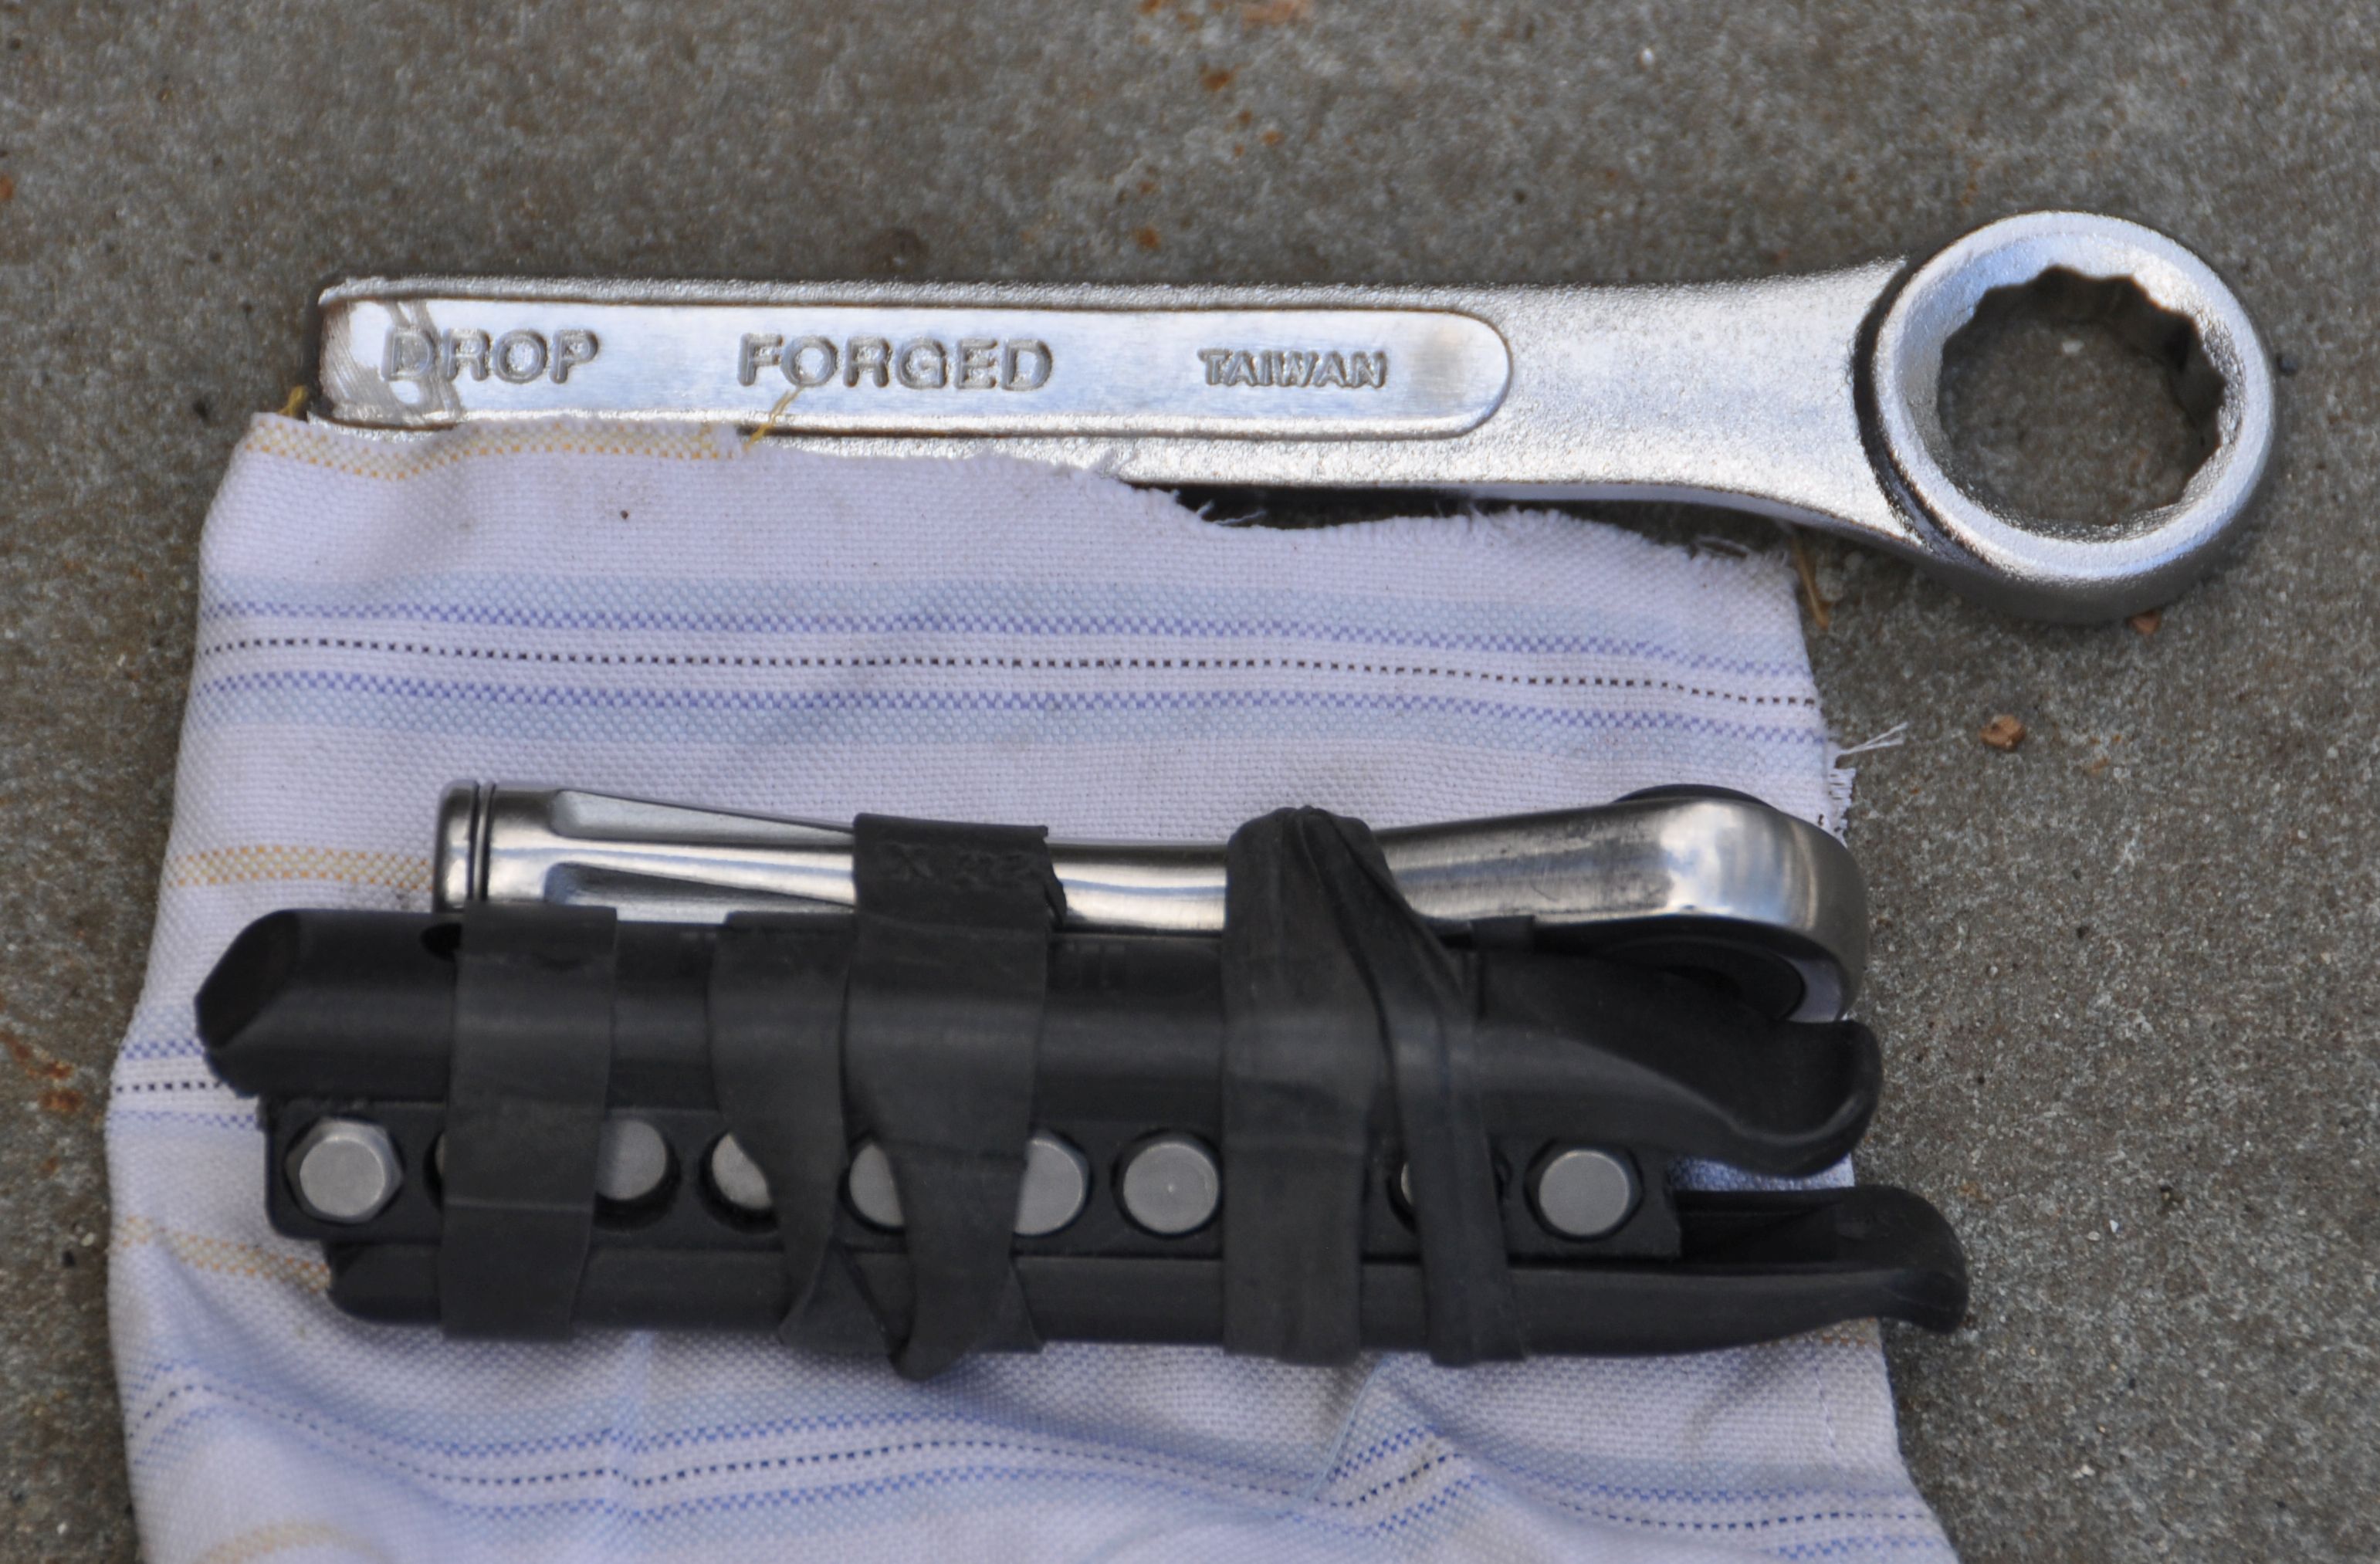
The tools go on the other side. I came up with two solutions. The first simply bundles up the tools using rubber bands (short pieces of inner tube). The tools are wrapped in a rag and secured with a rubber plug. In addition to the 15 mm wrench, the bits and two tire levers, I use an 8/10 mm wrench (Park tools) which is kept with the folded inner tube. The 1/4 inch drive ratchet was bought from https://www.amazon.com/gp/product/B01BUJXQJ6
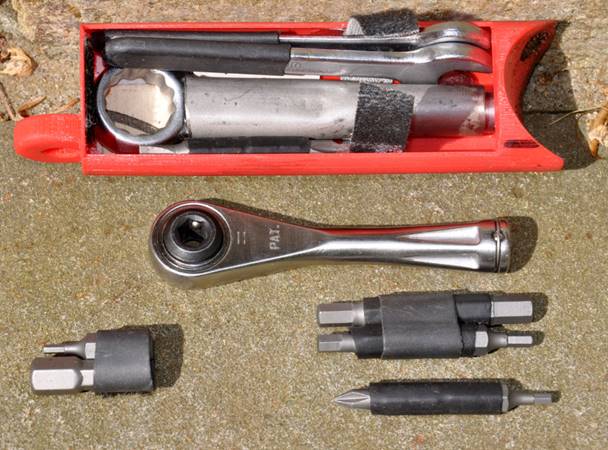
The second solution became possible by using a 3D printed
frame tray
https://www.thingiverse.com/thing:3218448

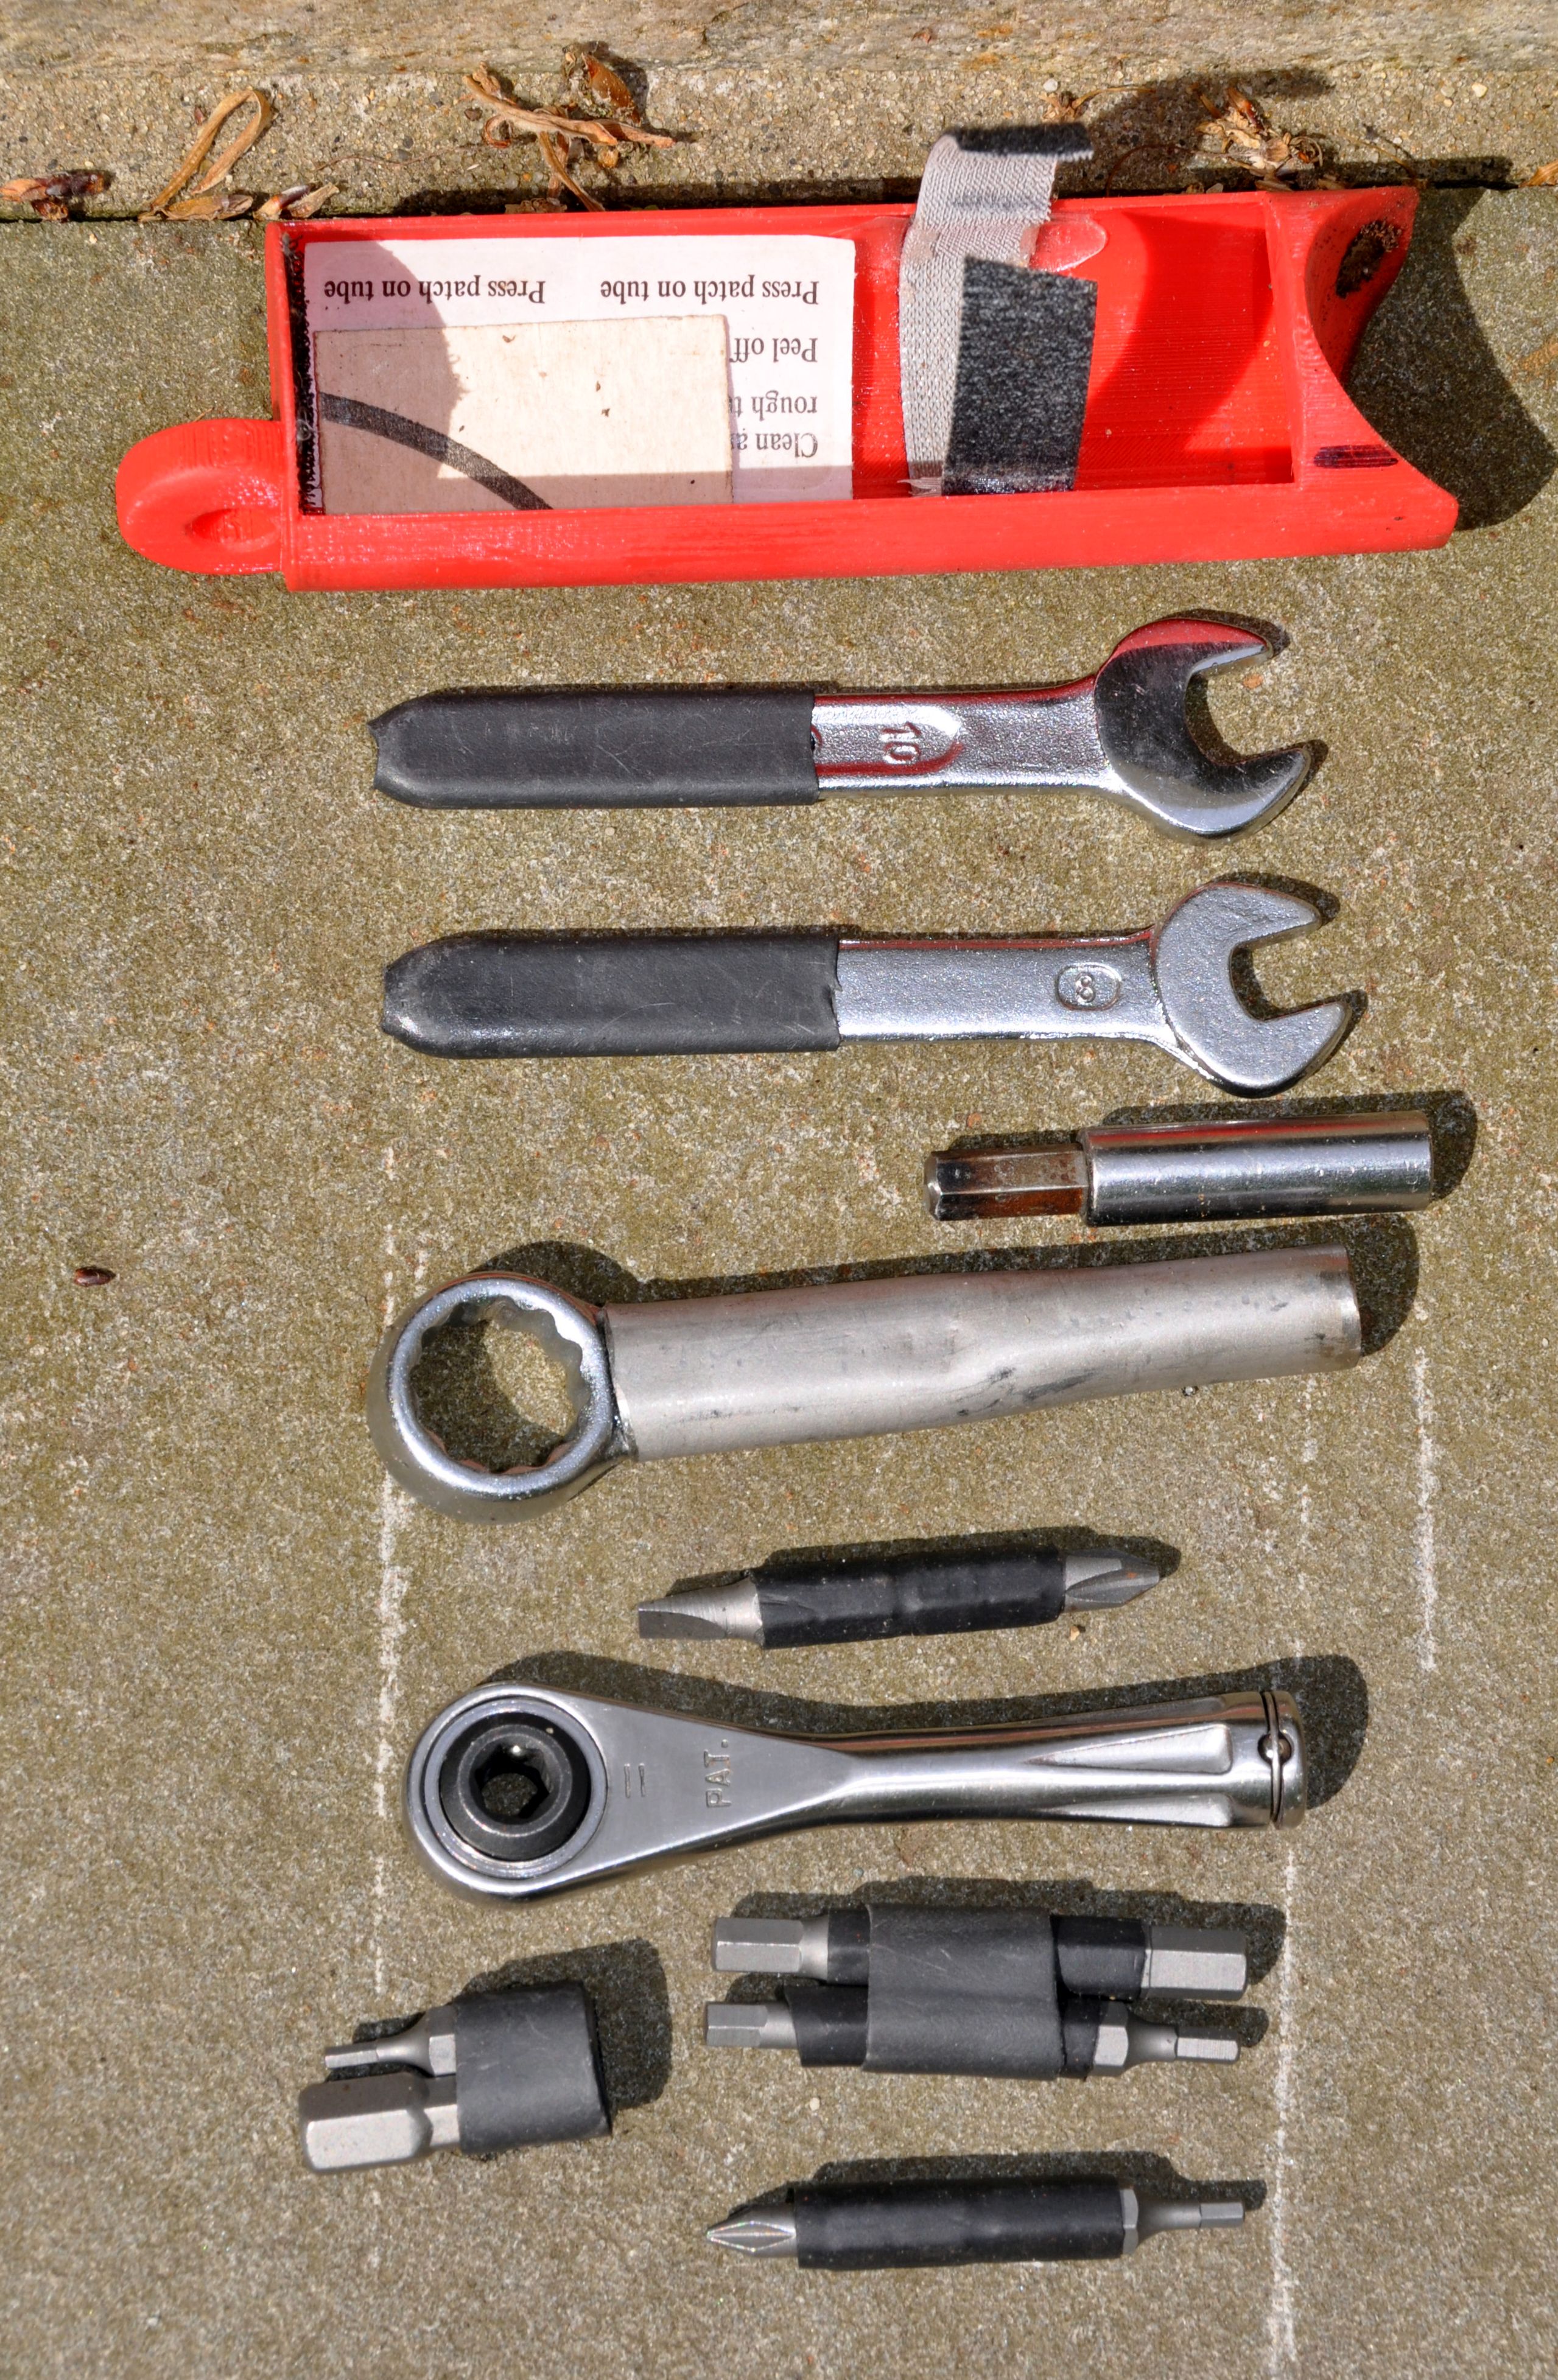
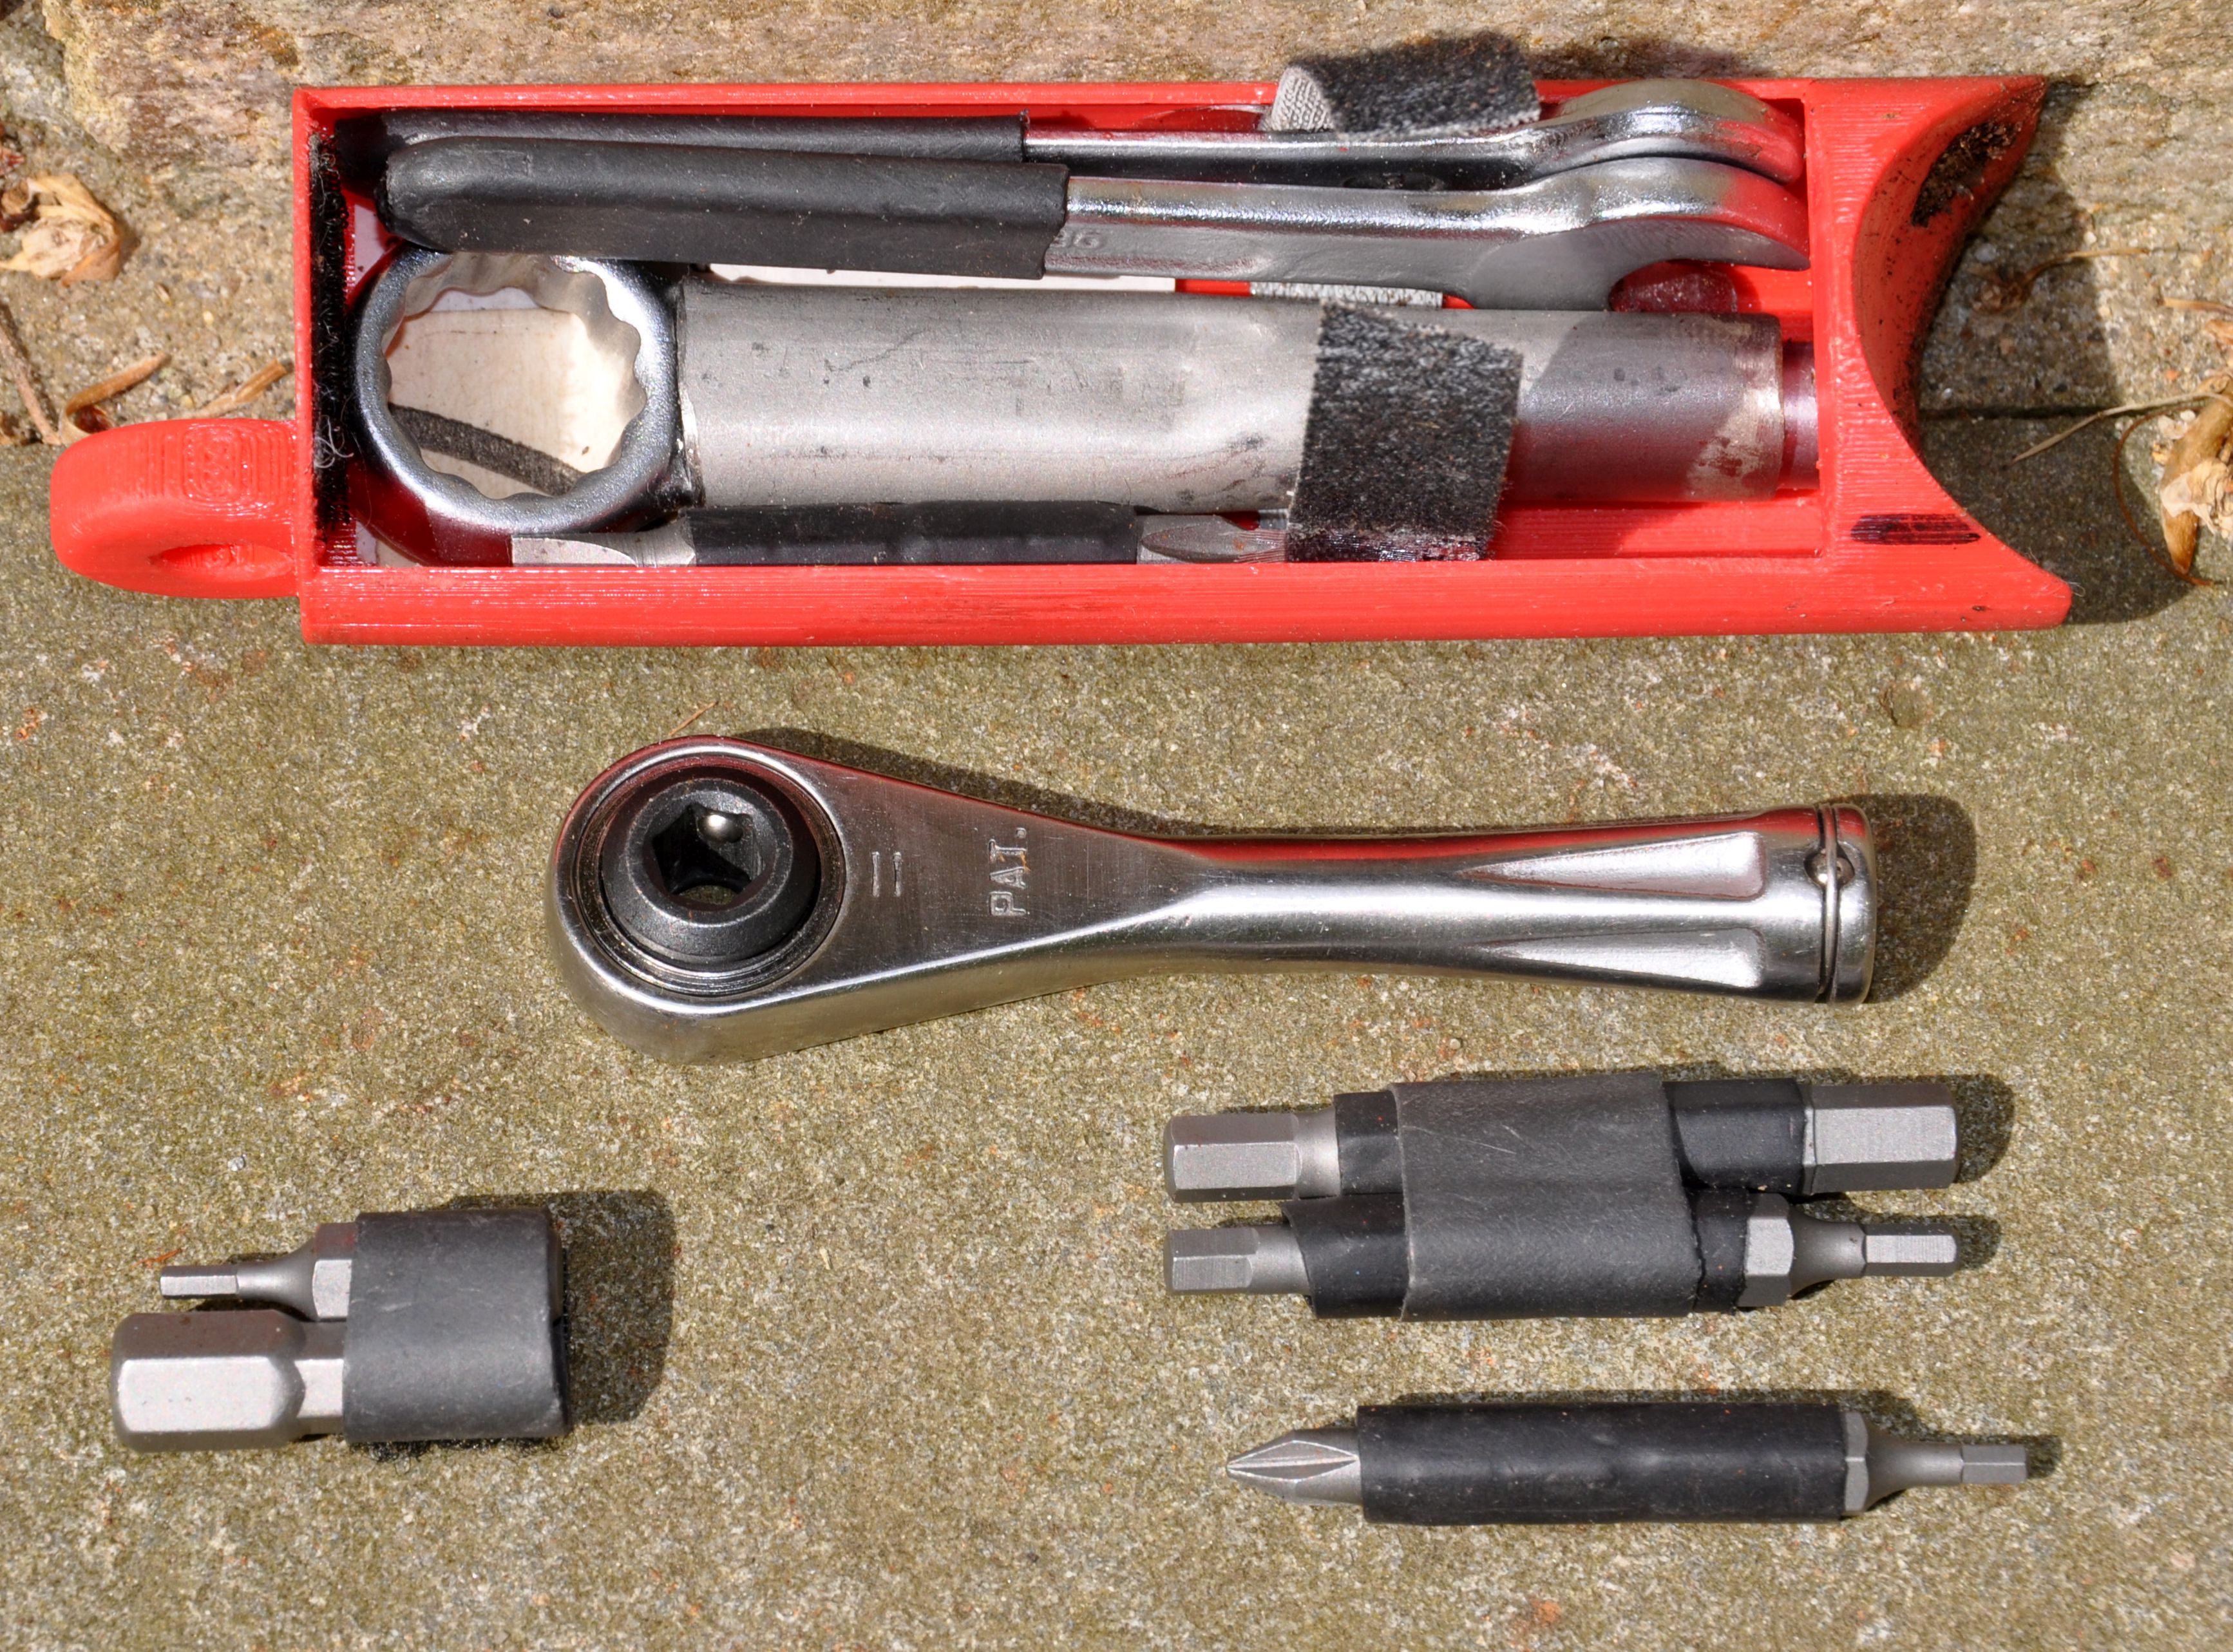
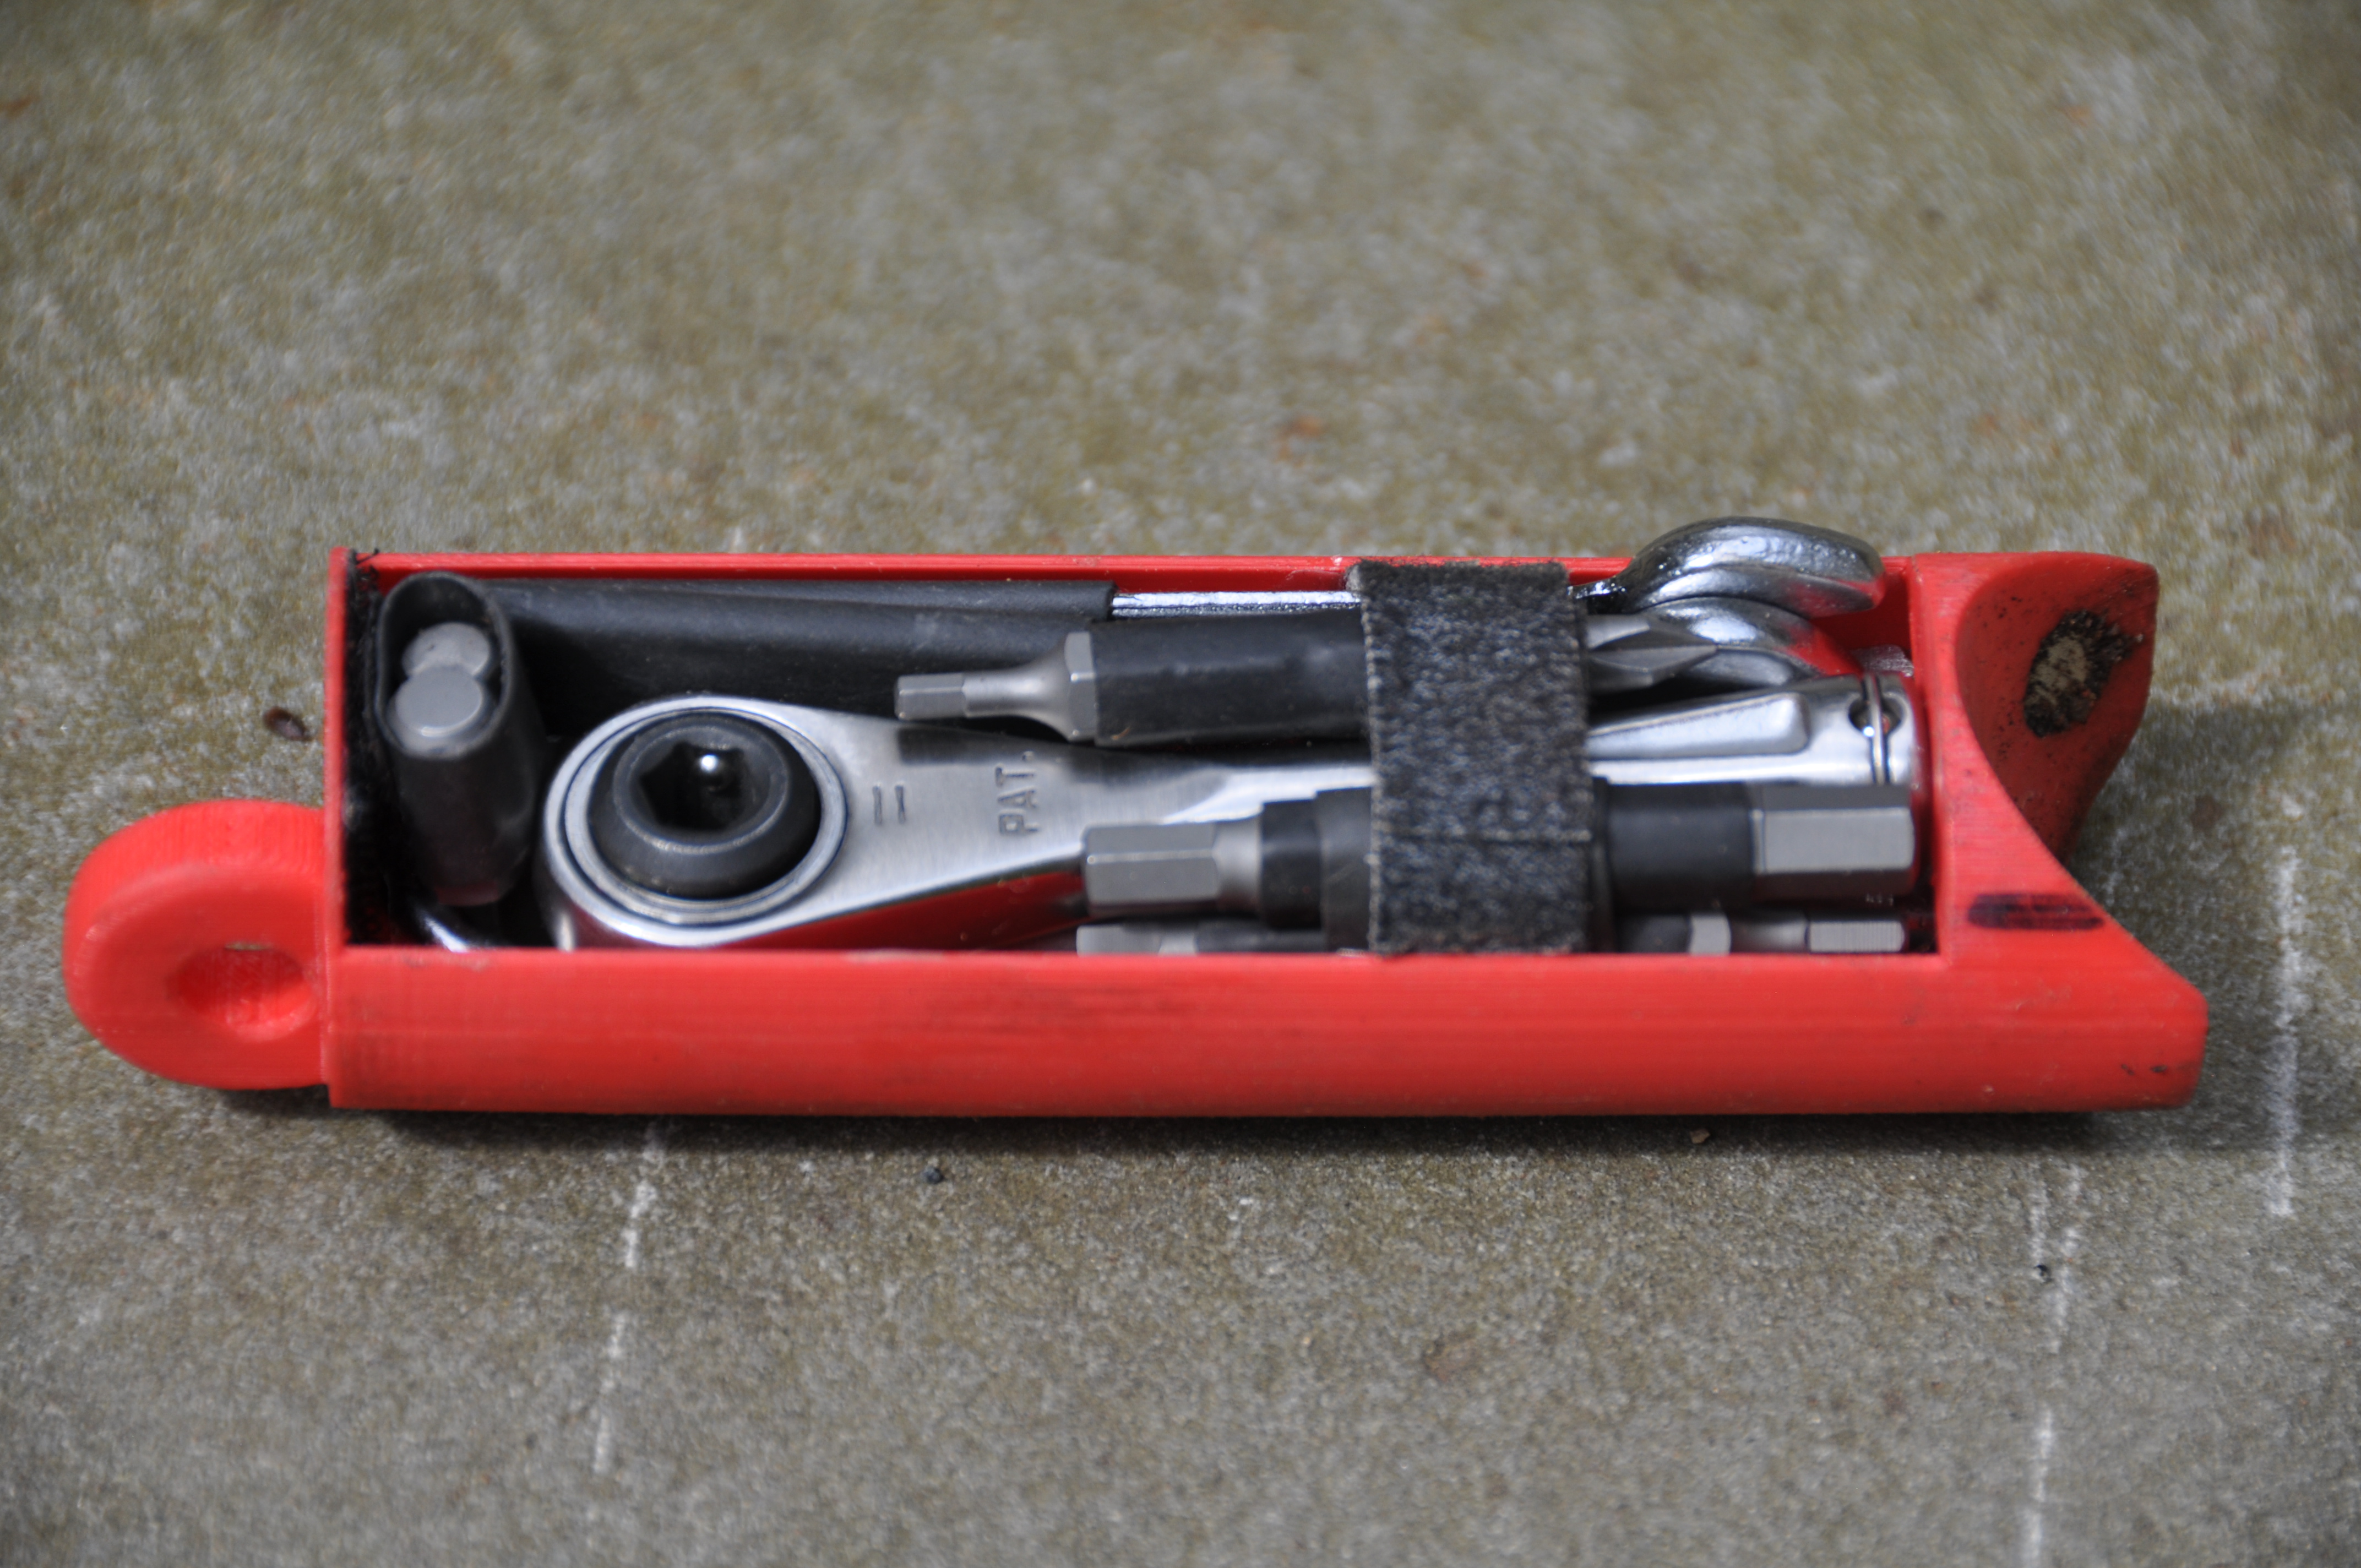
I managed to create a toolkit which fits completely into the tray. This is for me the ultimate Brompton toolkit.
Parts list:
3D printed frame tray: https://www.thingiverse.com/thing:3218448
1/4 inch drive ratchet, bought from https://www.amazon.com/gp/product/B01BUJXQJ6
Bits: flat blade, Phillips #1 and 2, hex 2, 2.5, 3, 4, 5, 6, 8 mm (held together in pairs with shrink tubing)
Hex bit extension: https://www.amazon.com/IIT-64510-Magnetic-Extensions-3-Piece/dp/B004V3TQP2
8 mm and 10 mm open end wrench (cut to size with Dremel tool) and shrink wrapped at the end, serve as tire levers
Update: They don’t work so well as tire levers. I have now added two plastic tire levers tugged under the spare tube.
15 mm box wrench (cut to size with Dremel tool)
½ “ tube squashed as a coupling piece between the 15 mm box wrench and the hex bit extension
Tire patch and sand paper
The box wrench can be exteneded with the ratchet using the hex bit extension as a coupling piece.

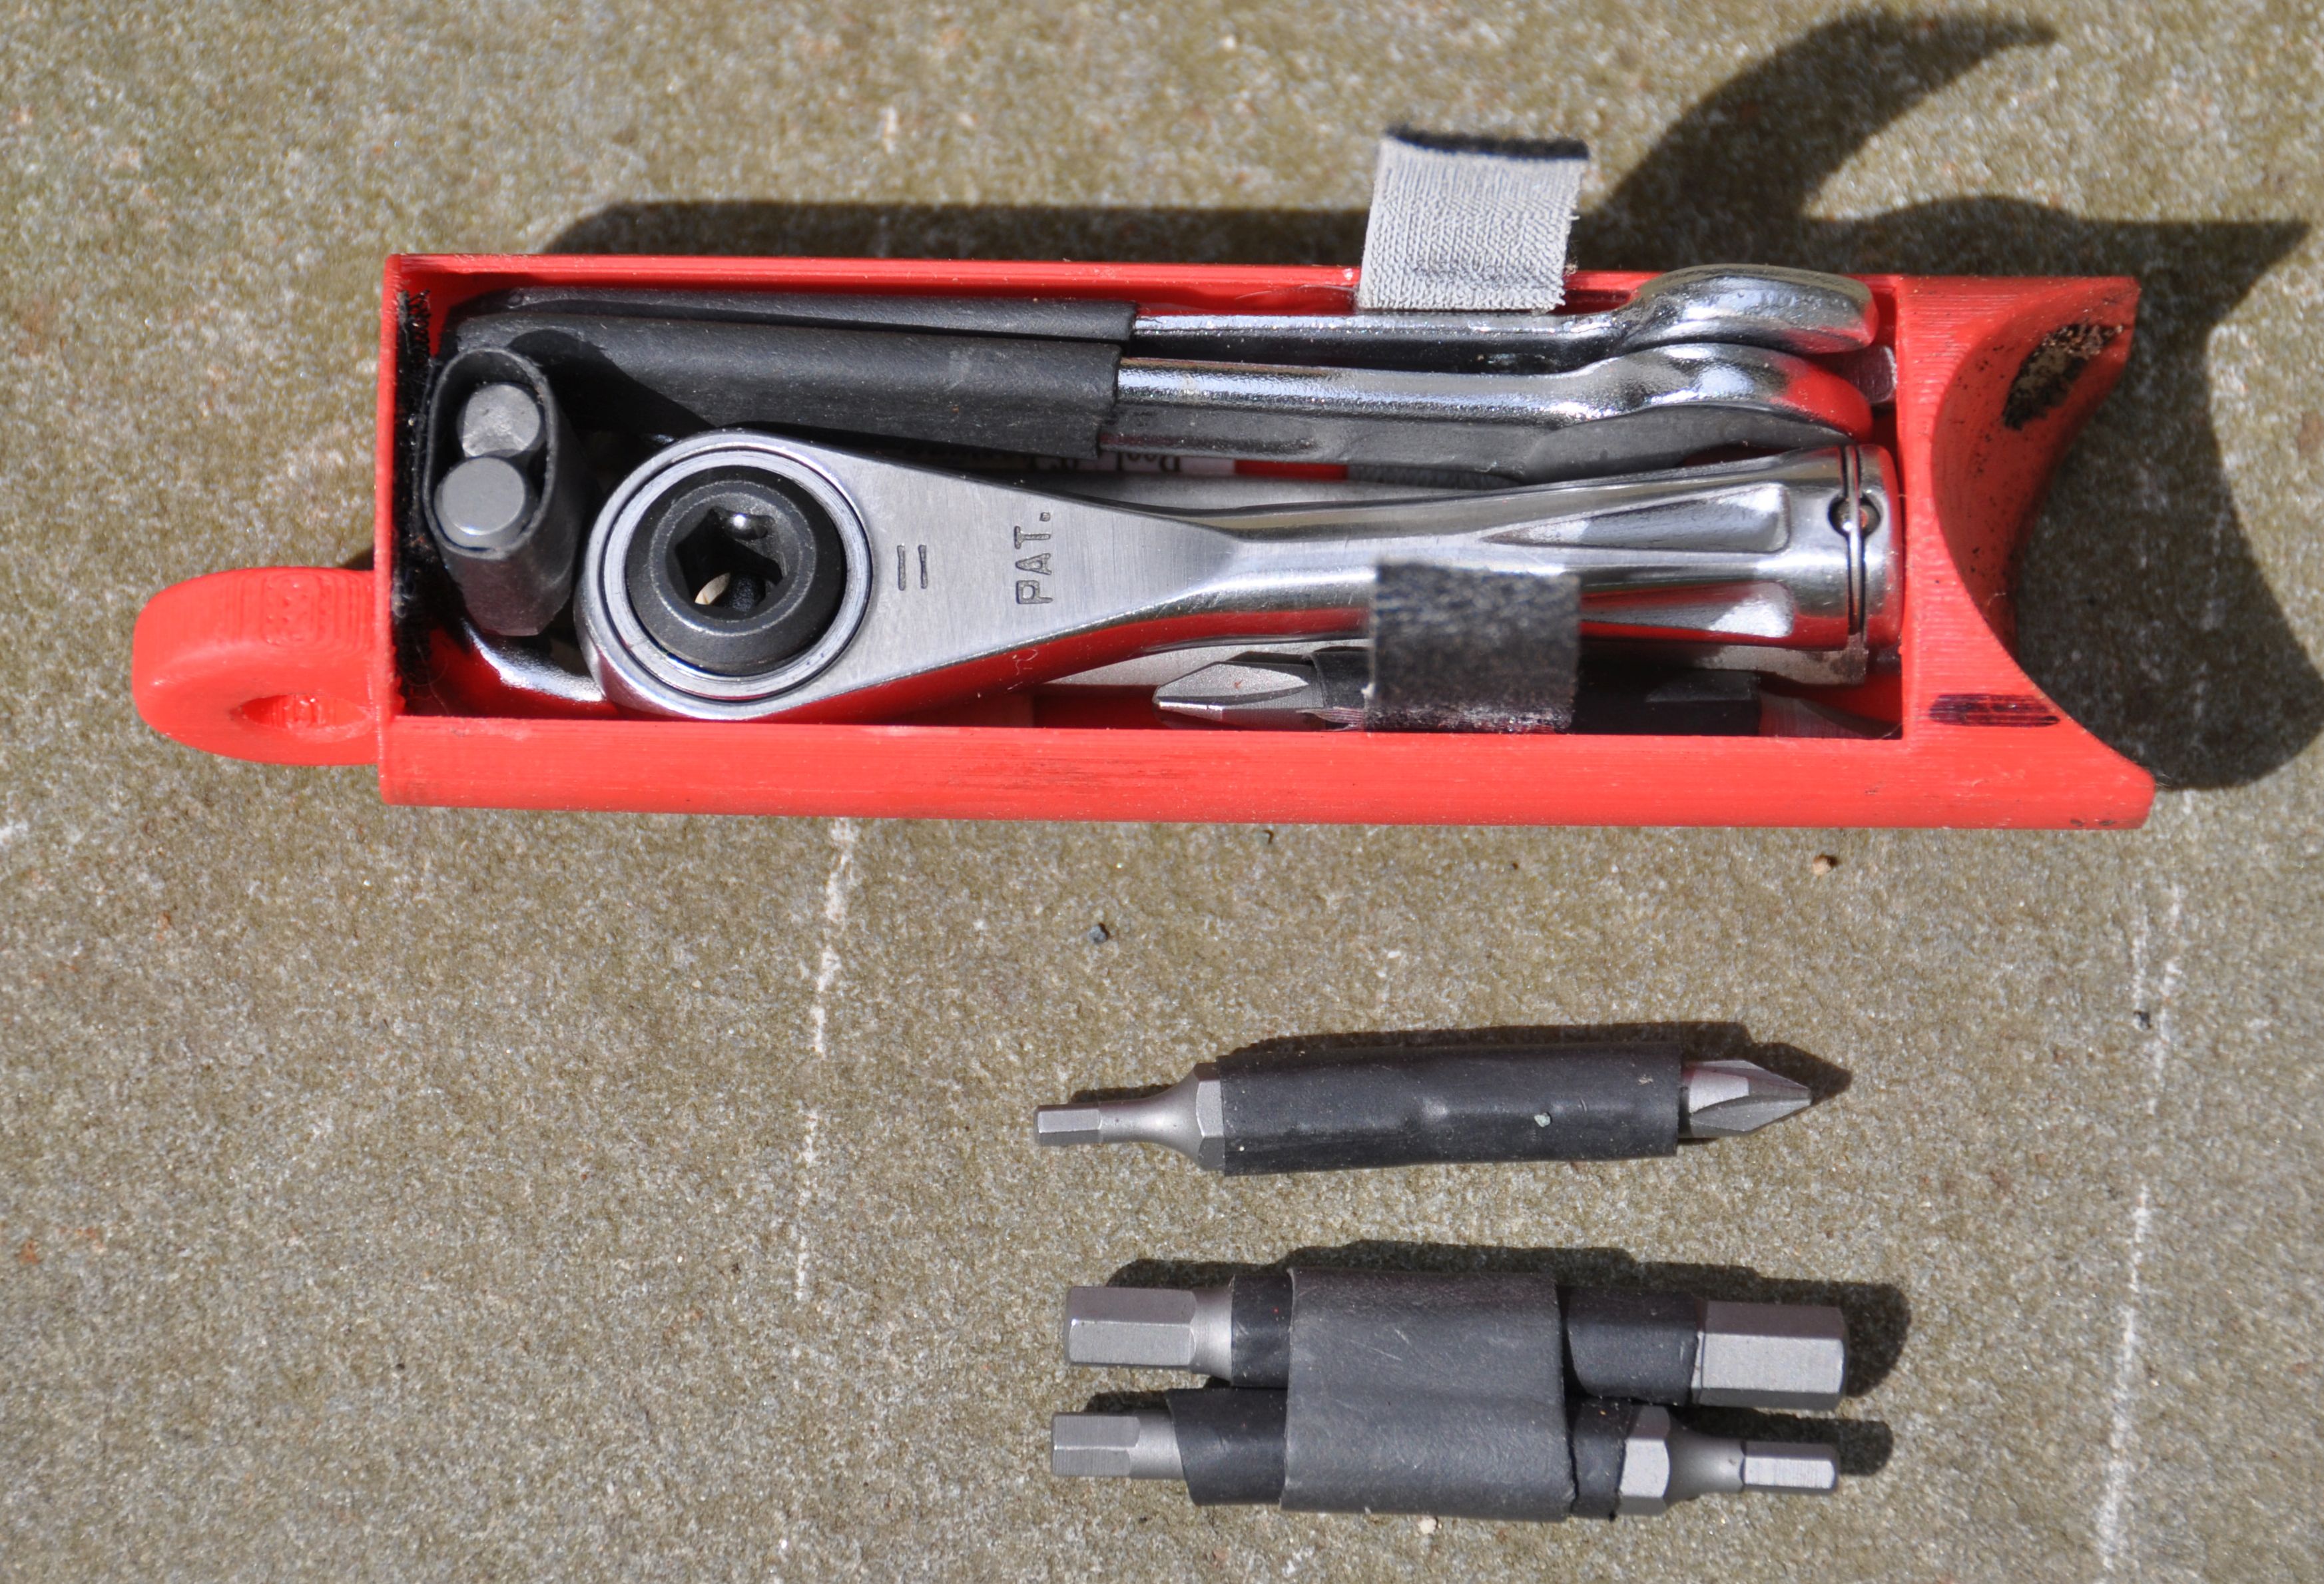
I have not noticed any rattling. The tray is a tight fit in the frame, and it is held by two magnets at the end. The tools are strapped down in the tray by Velcro. To make sure metal cannot touch metal, I glued a piece of plastic (from a milk container) into the top part of the frame tube. So if a tool would stand out a little bit from the tray, it would not scrape against the tubing.
Note: I have added a spoke wrench (a hex bit with a 3.2 mm notch):
Advantages over the Brompton kit:
· Longer 15 mm wrench
· 8 and 10 mm open end wrenches which are more versatile than box wrenches
· Extra bits (Phillips #1, 8 mm hex)
· Customizable and easy to replace parts
· Match color to the frame
· Costs: frame tray (3D printed) $ 10, three wrenches $ 10, ratchet and bits $ 15 – 25.
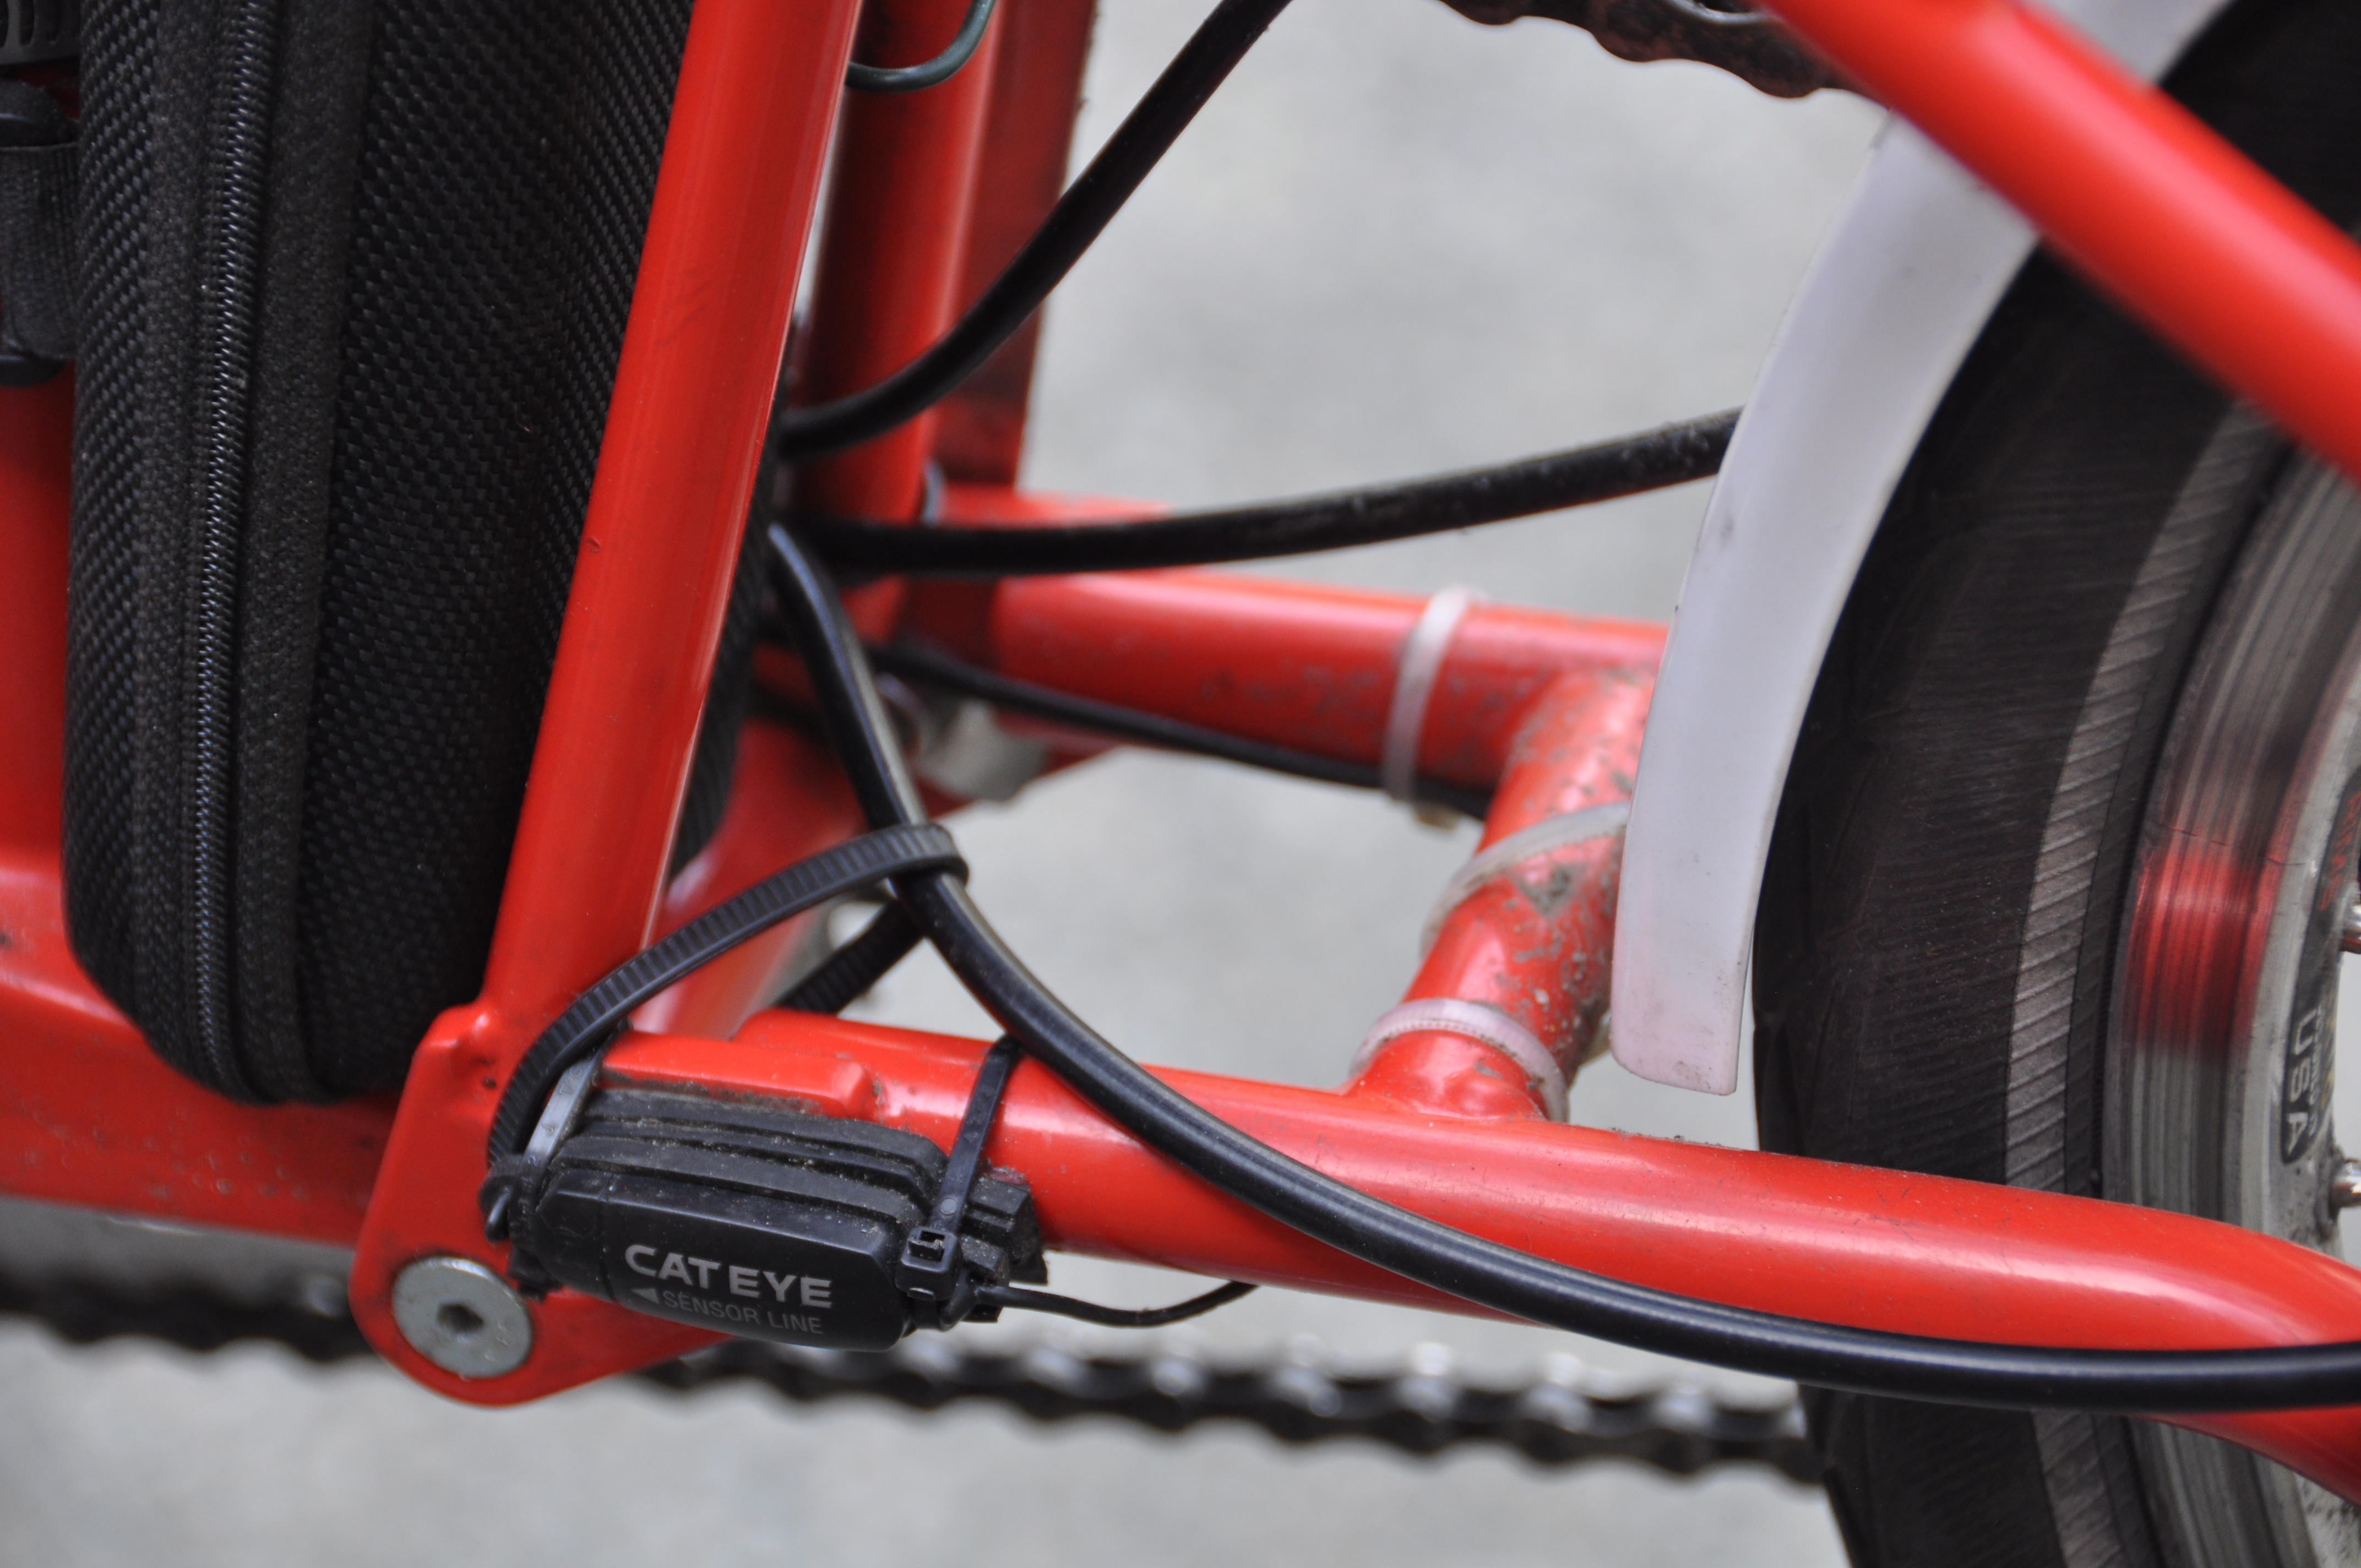
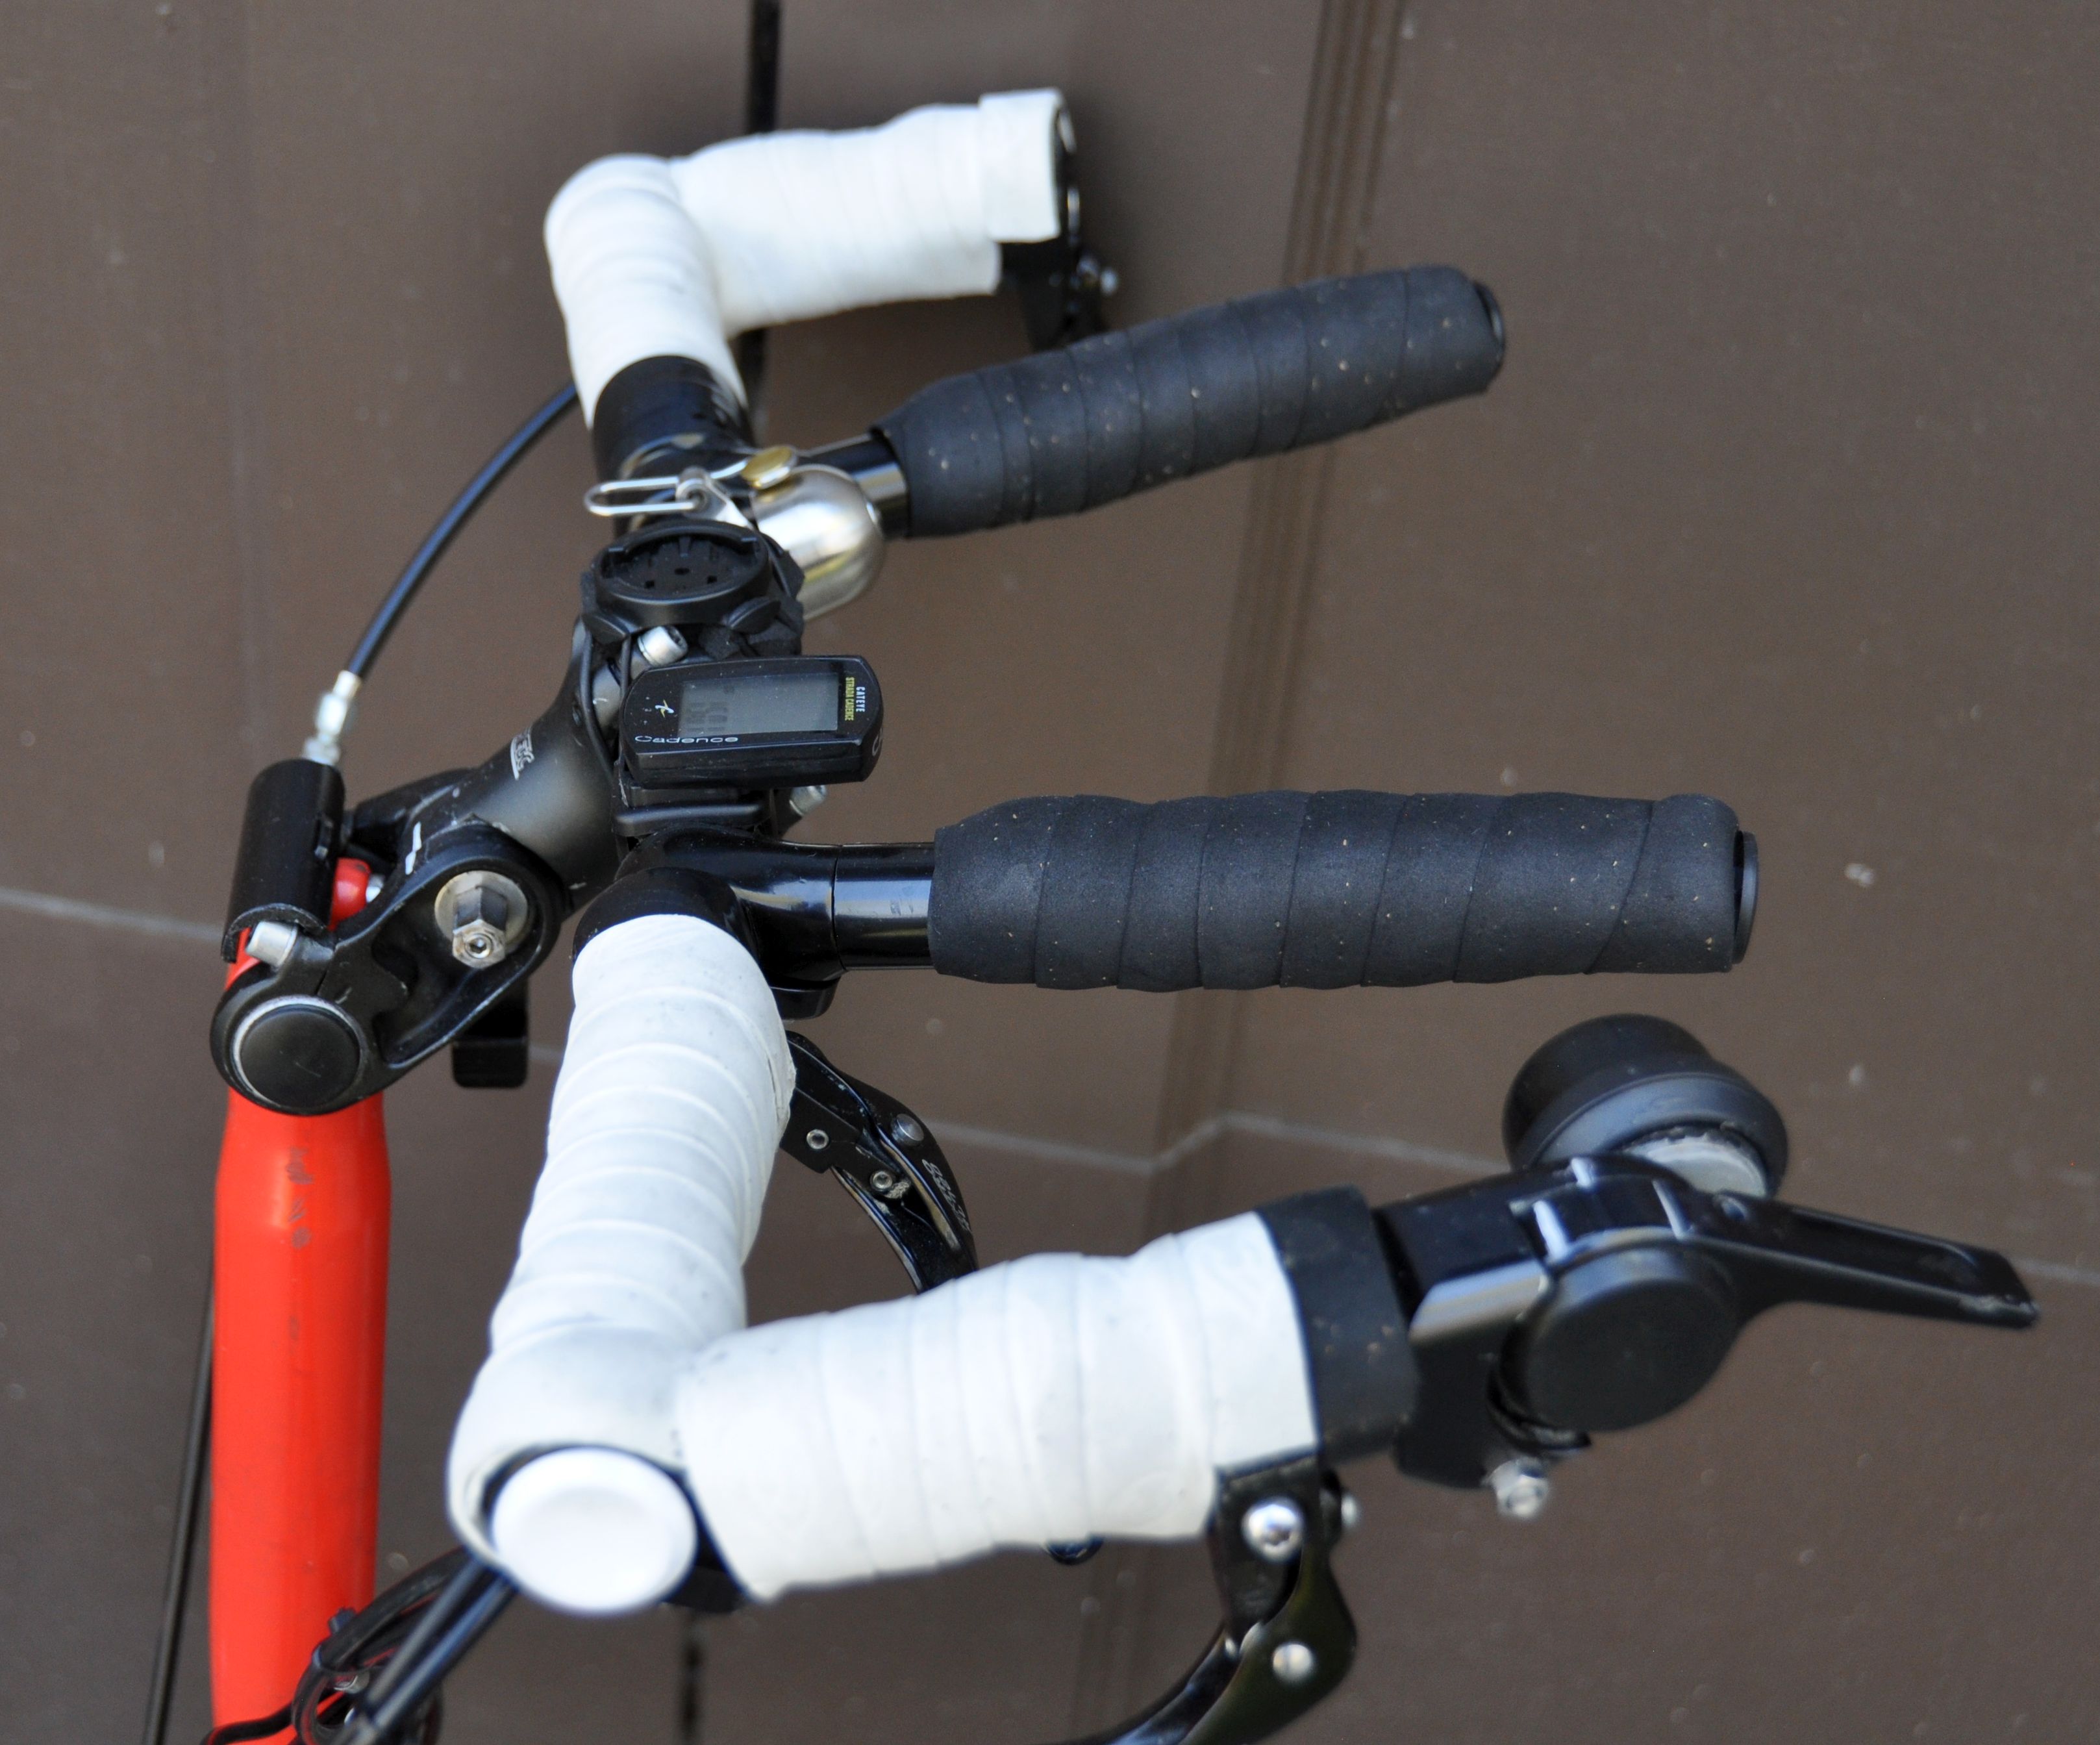
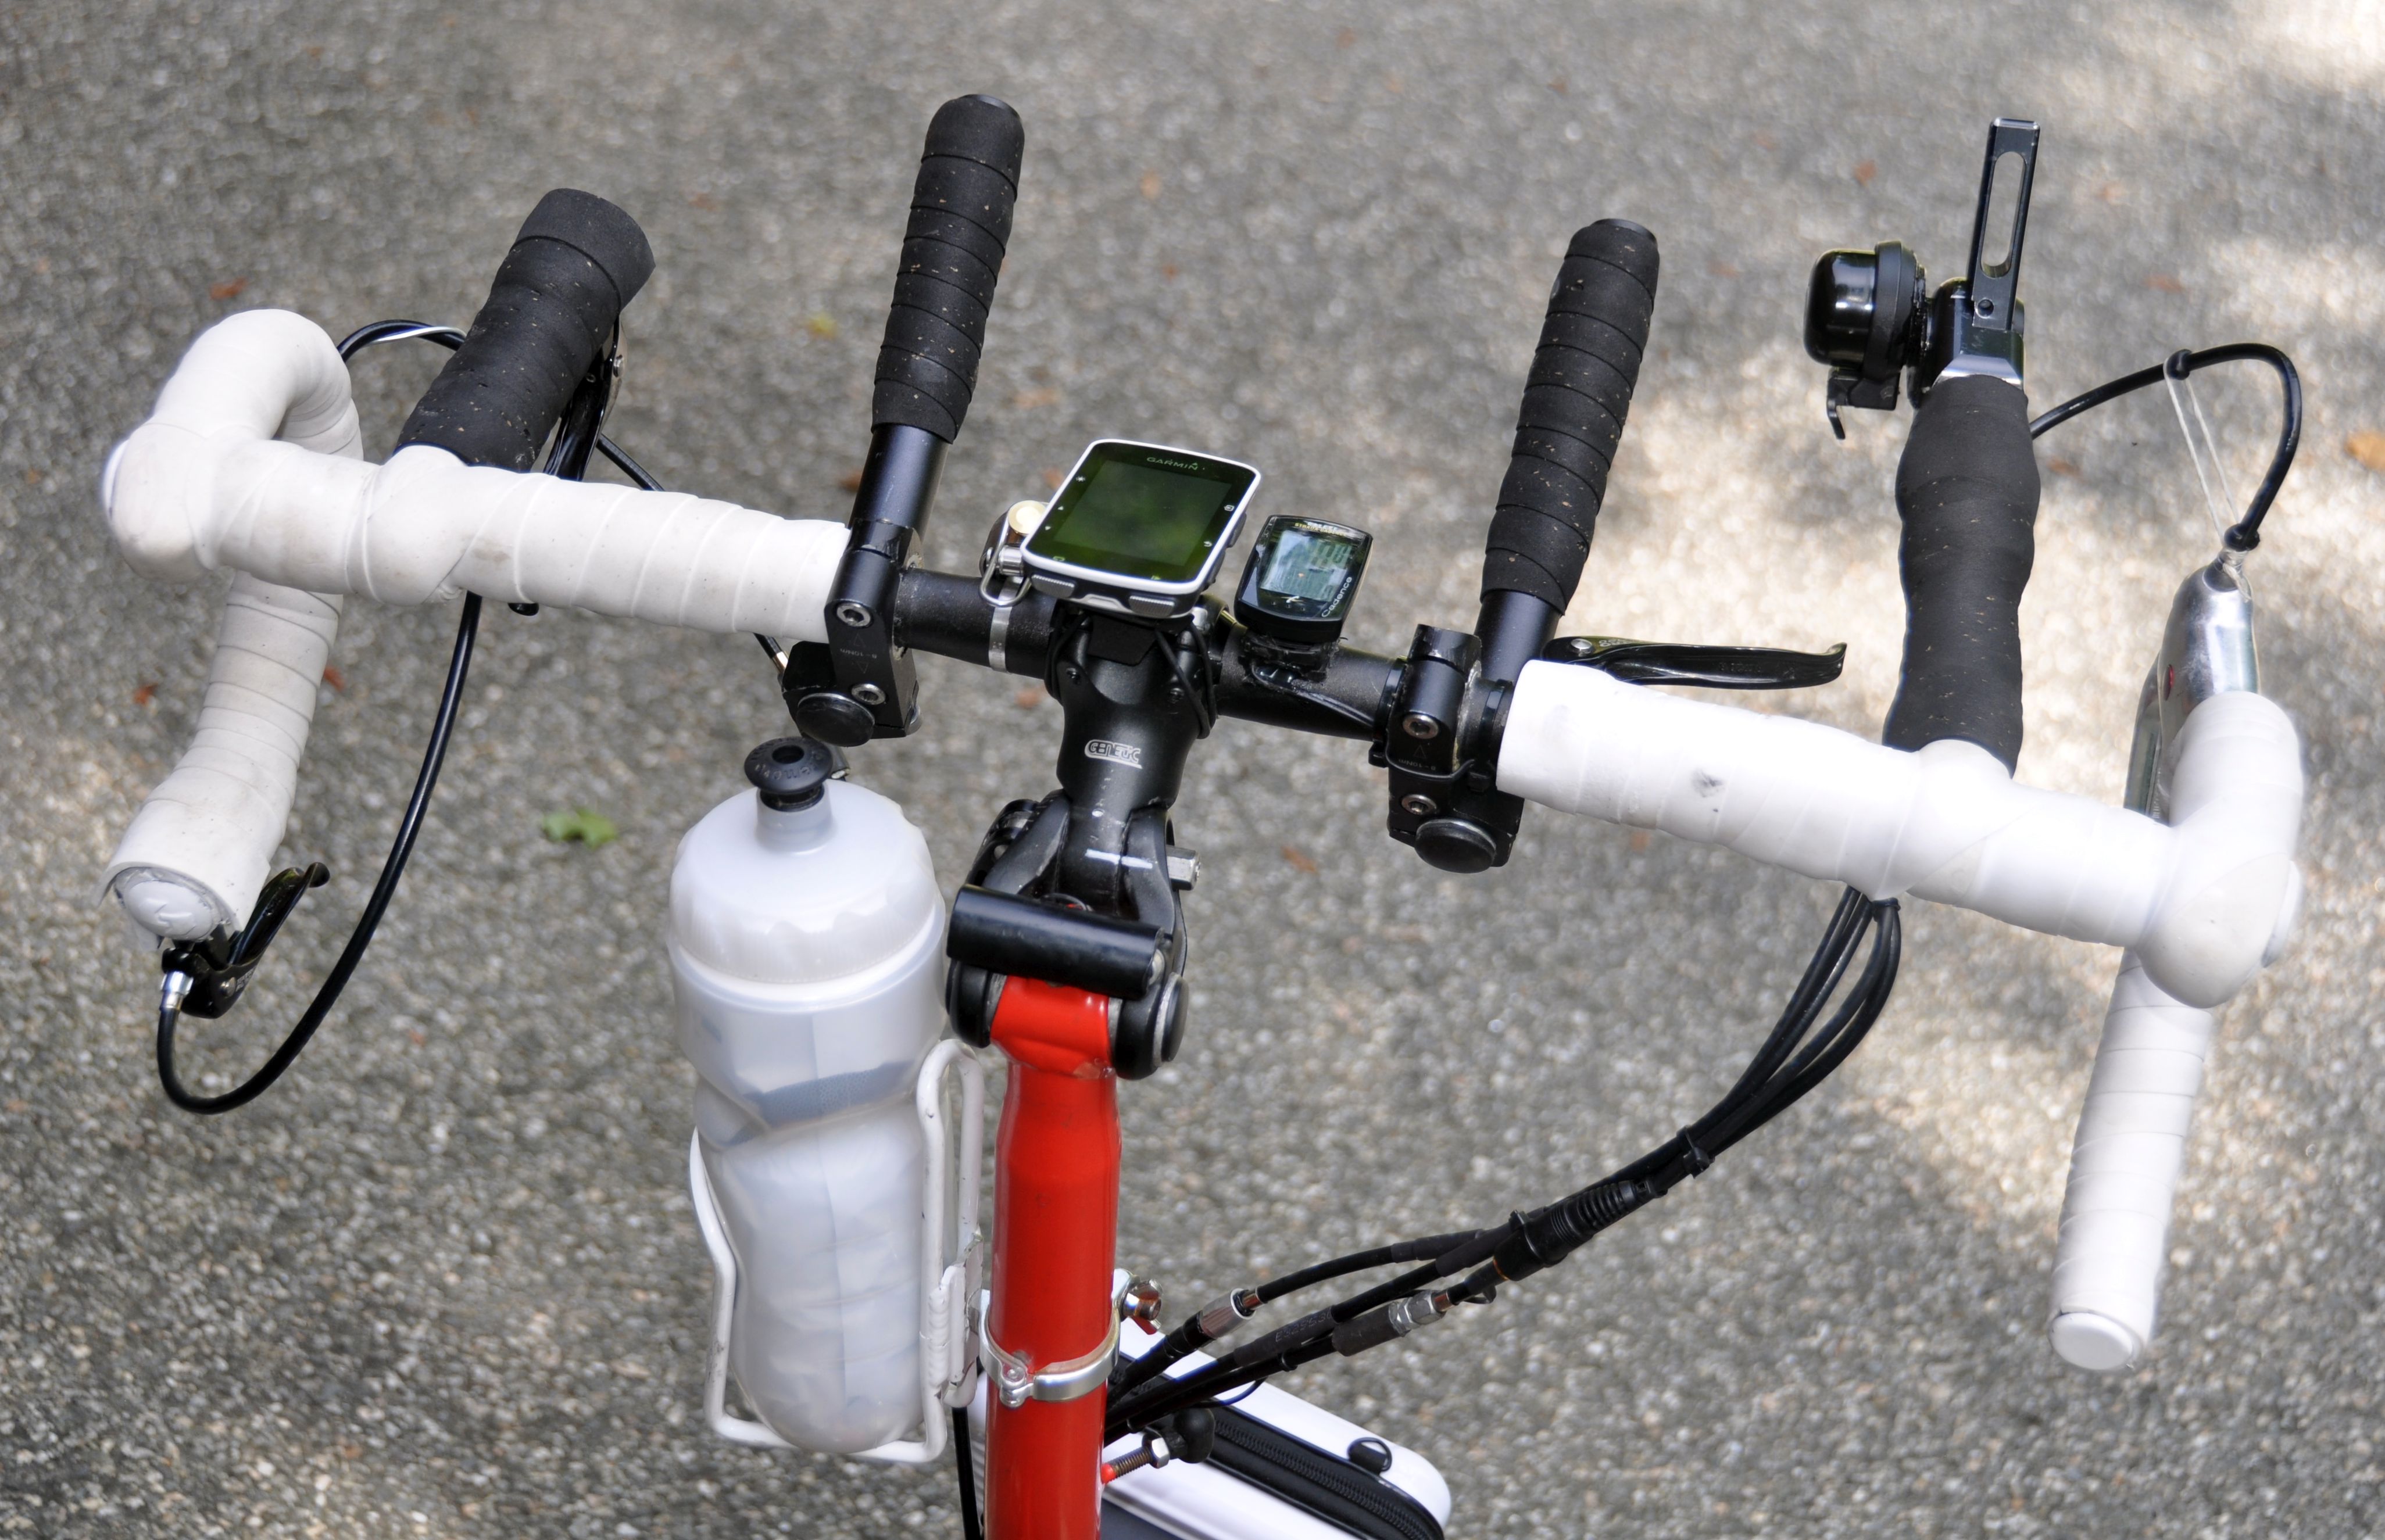
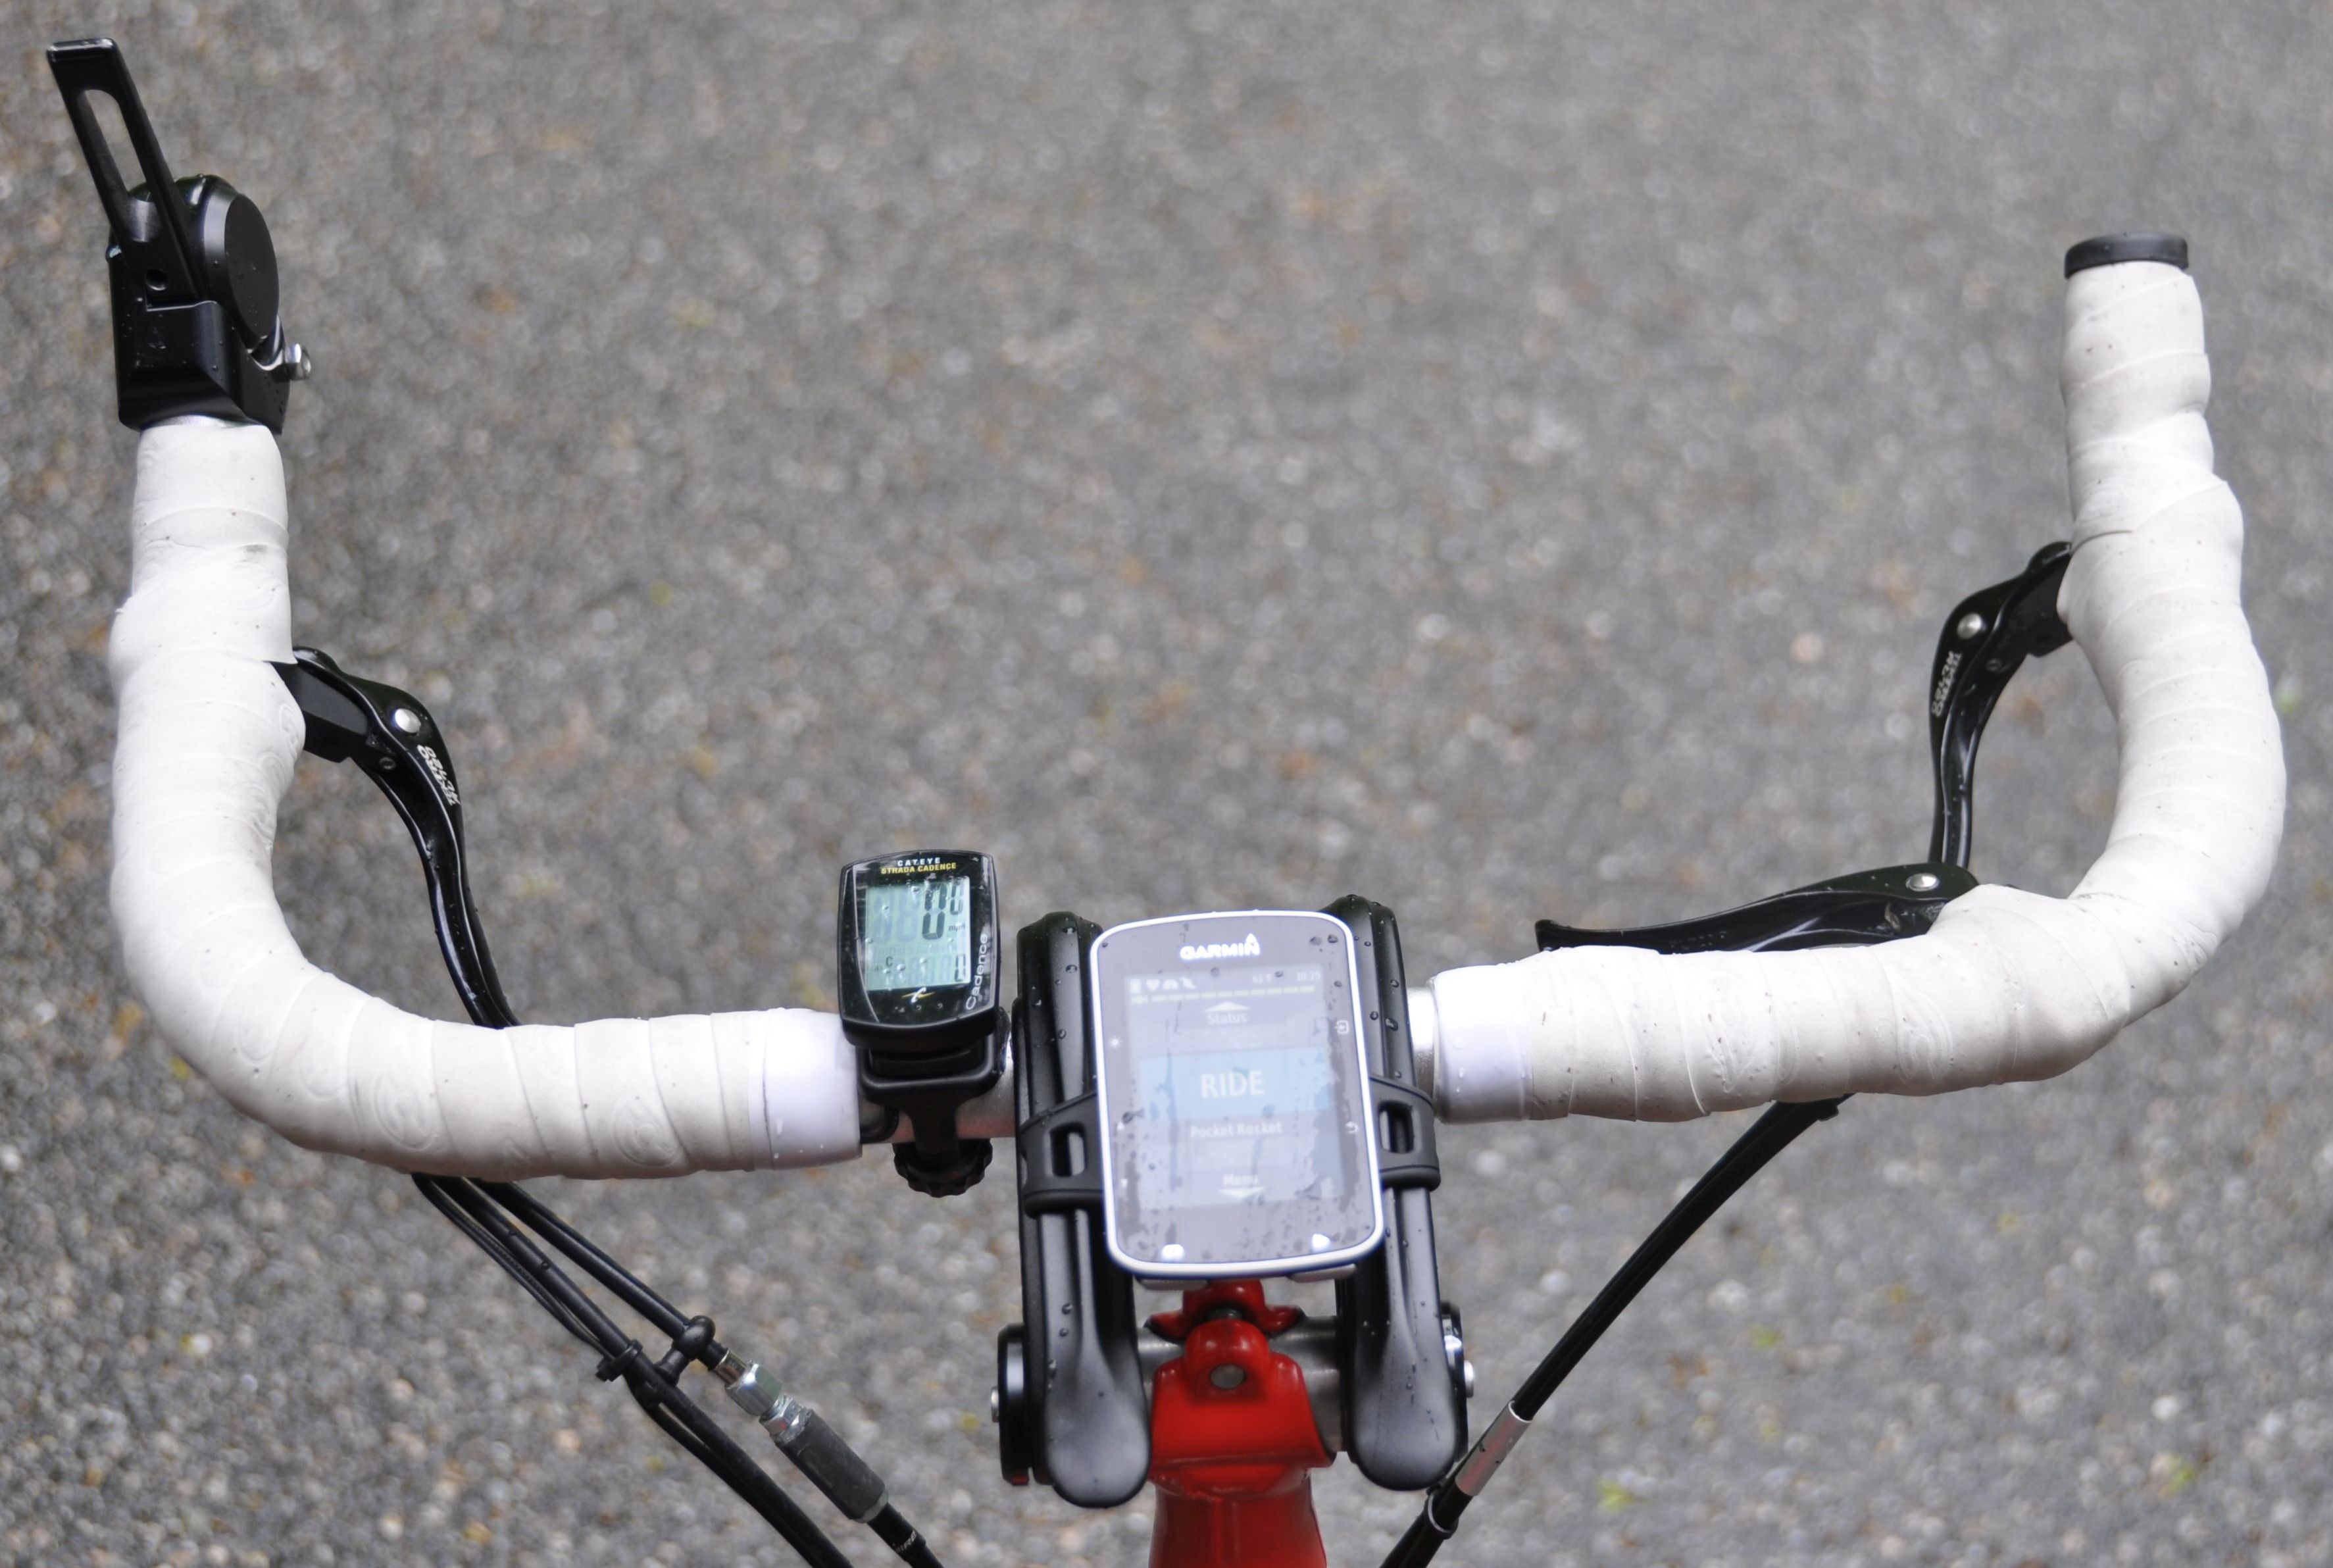
Speedometer Back to top
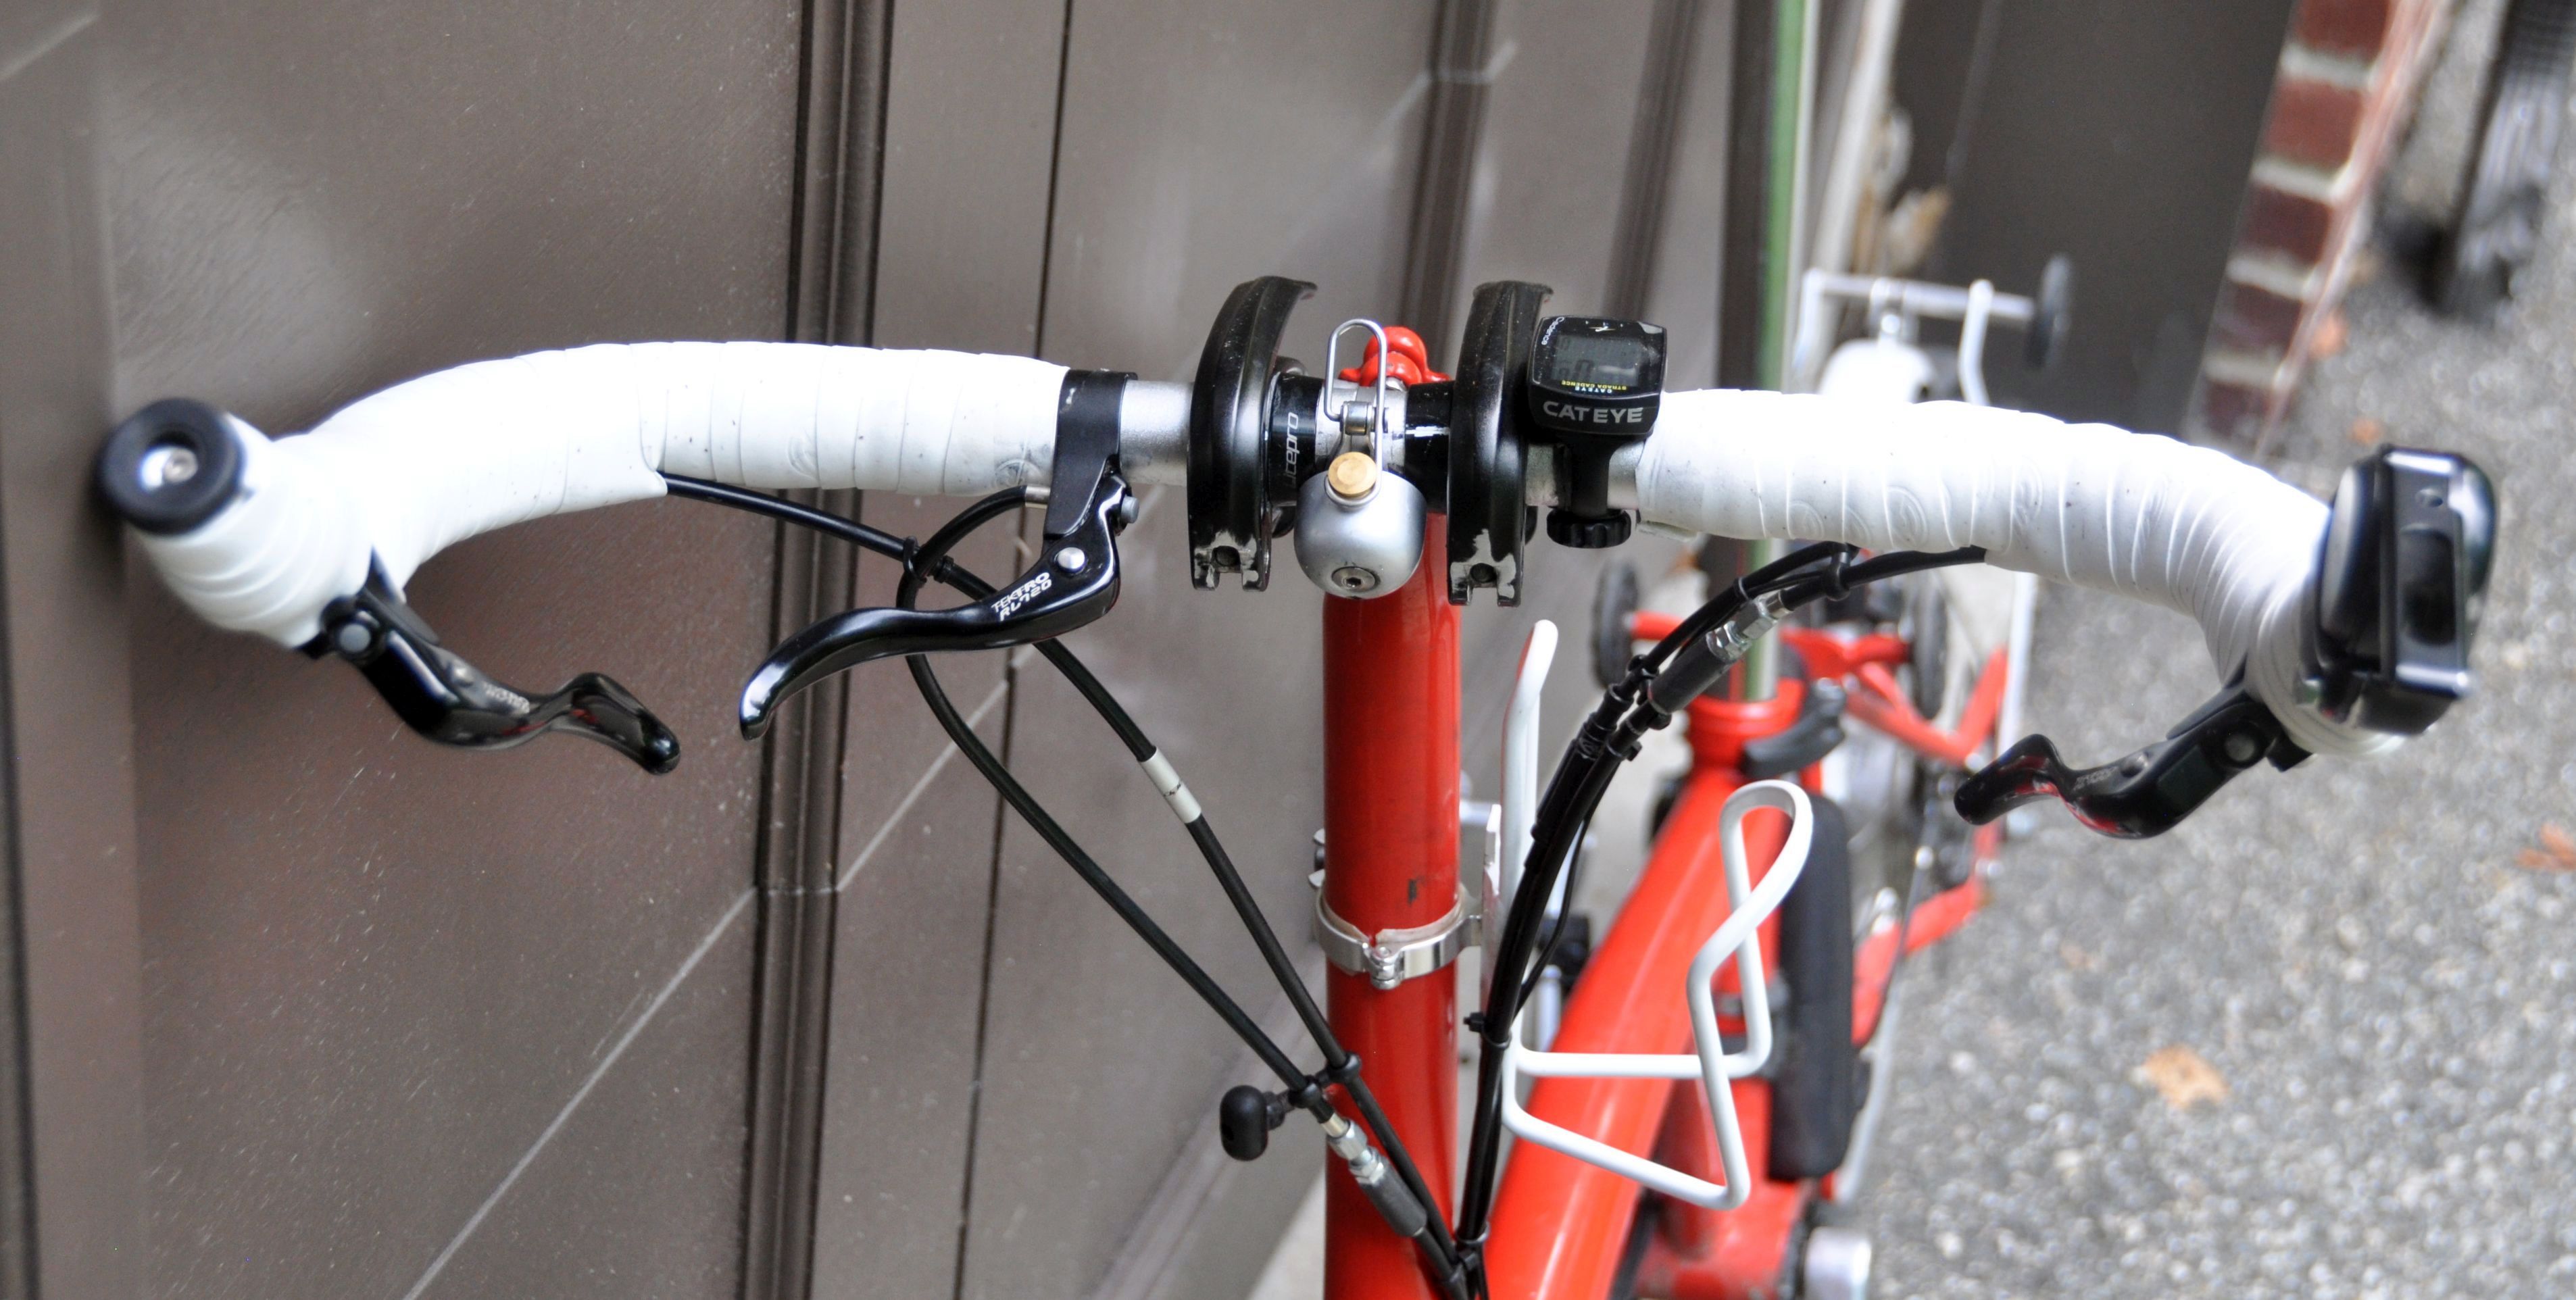
I have permanently installed a wired speedometer, Cateye Strada Cadence. I like those, since they are small and the battery lasts a whole year. I use a GPS device (Garmin) only when I am going on a bike tour. The Cateye has speed and cadence. The speed sensor is on the rear wheel. I had to extend the wires by cutting the wires and connecting them by soldering extra pieces of wire between them. Make sure you use highly flexible wire, on my other bikes I had wires broken by frequent bending.
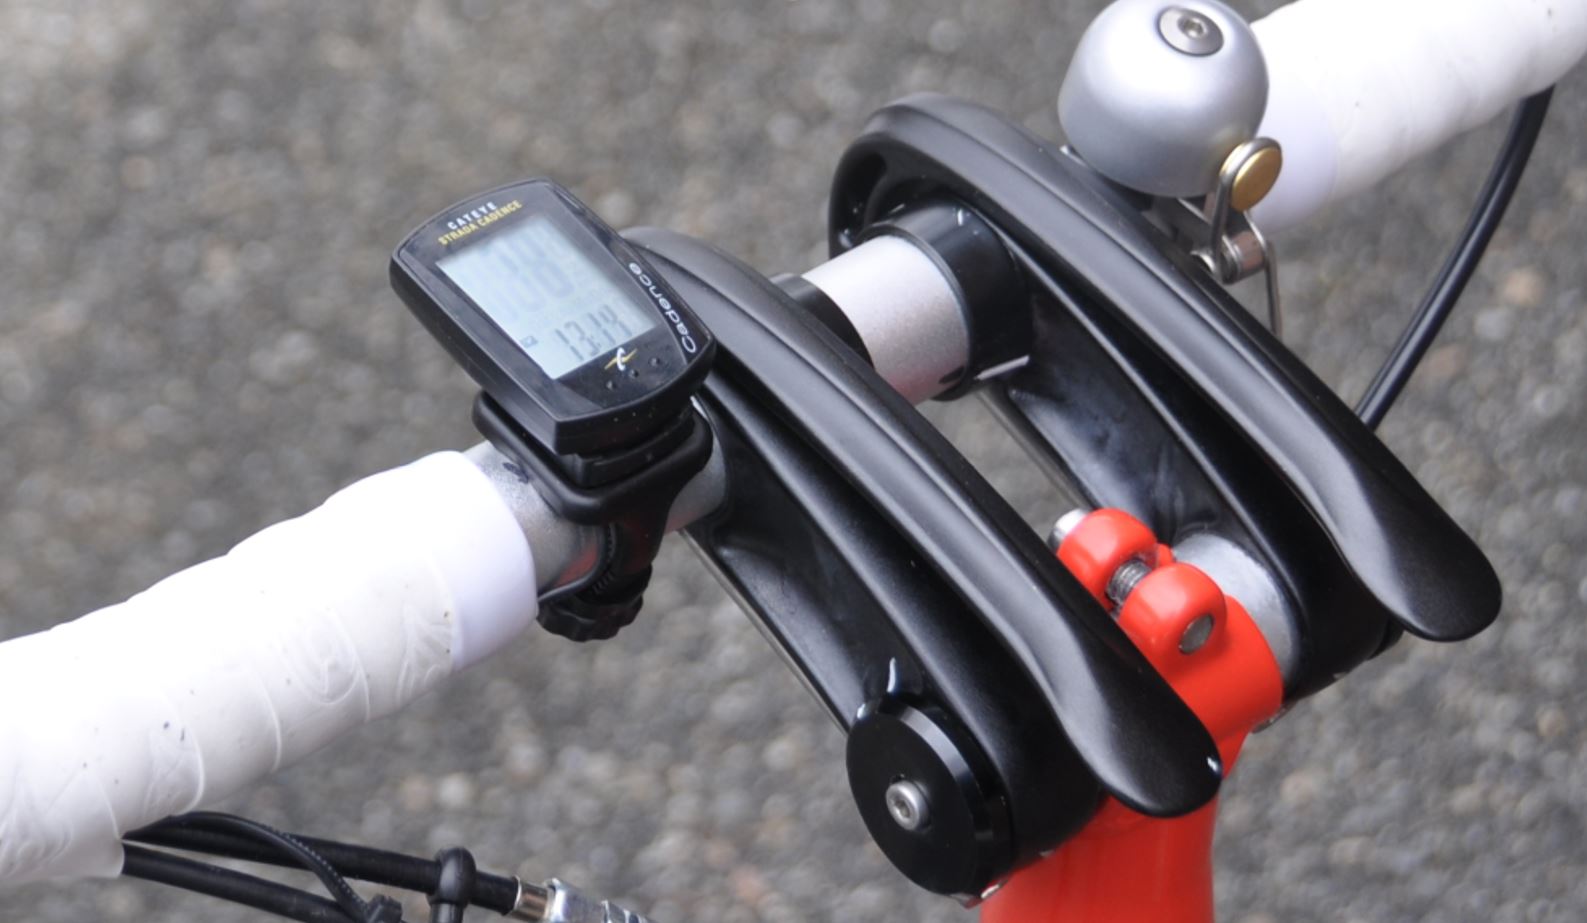

Bell Back to top
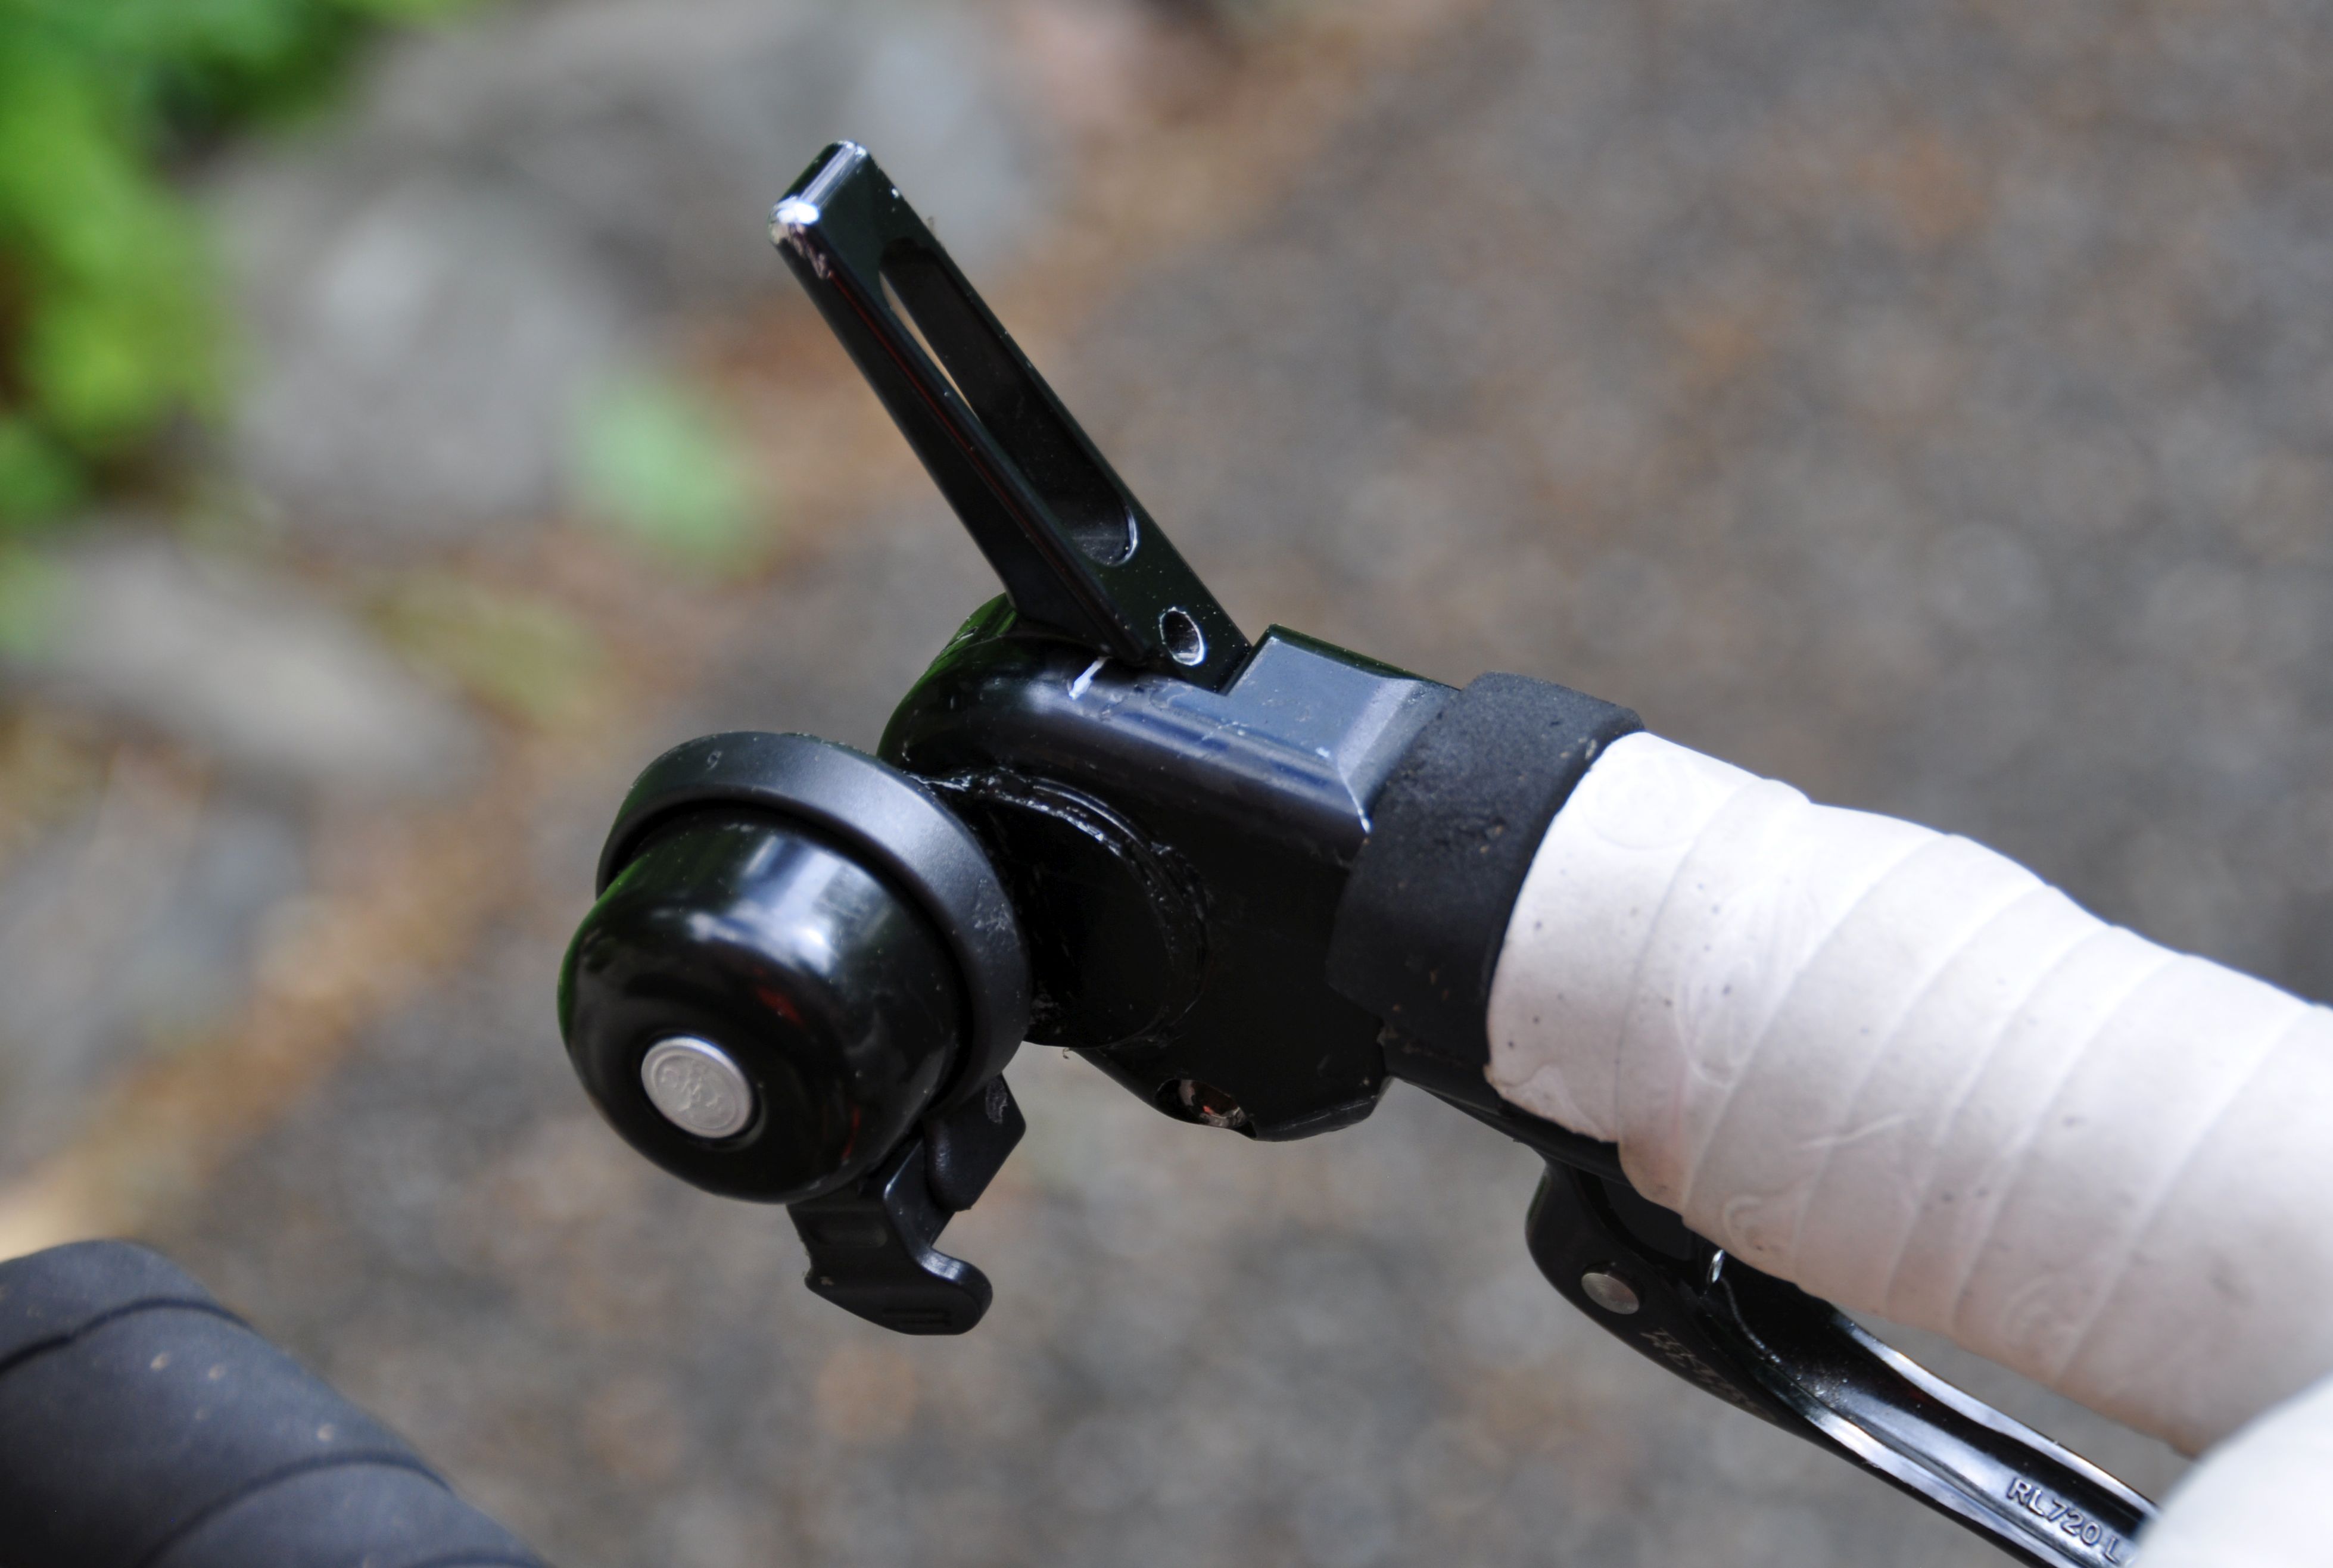
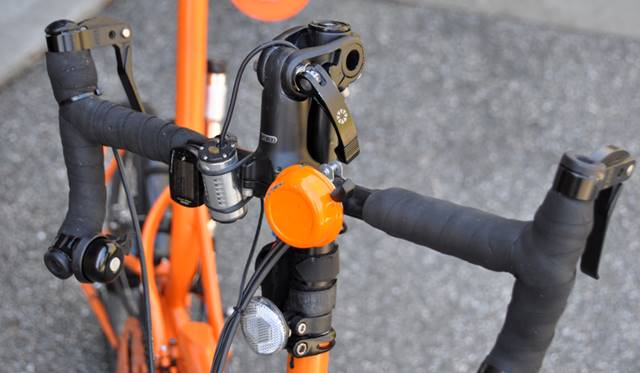
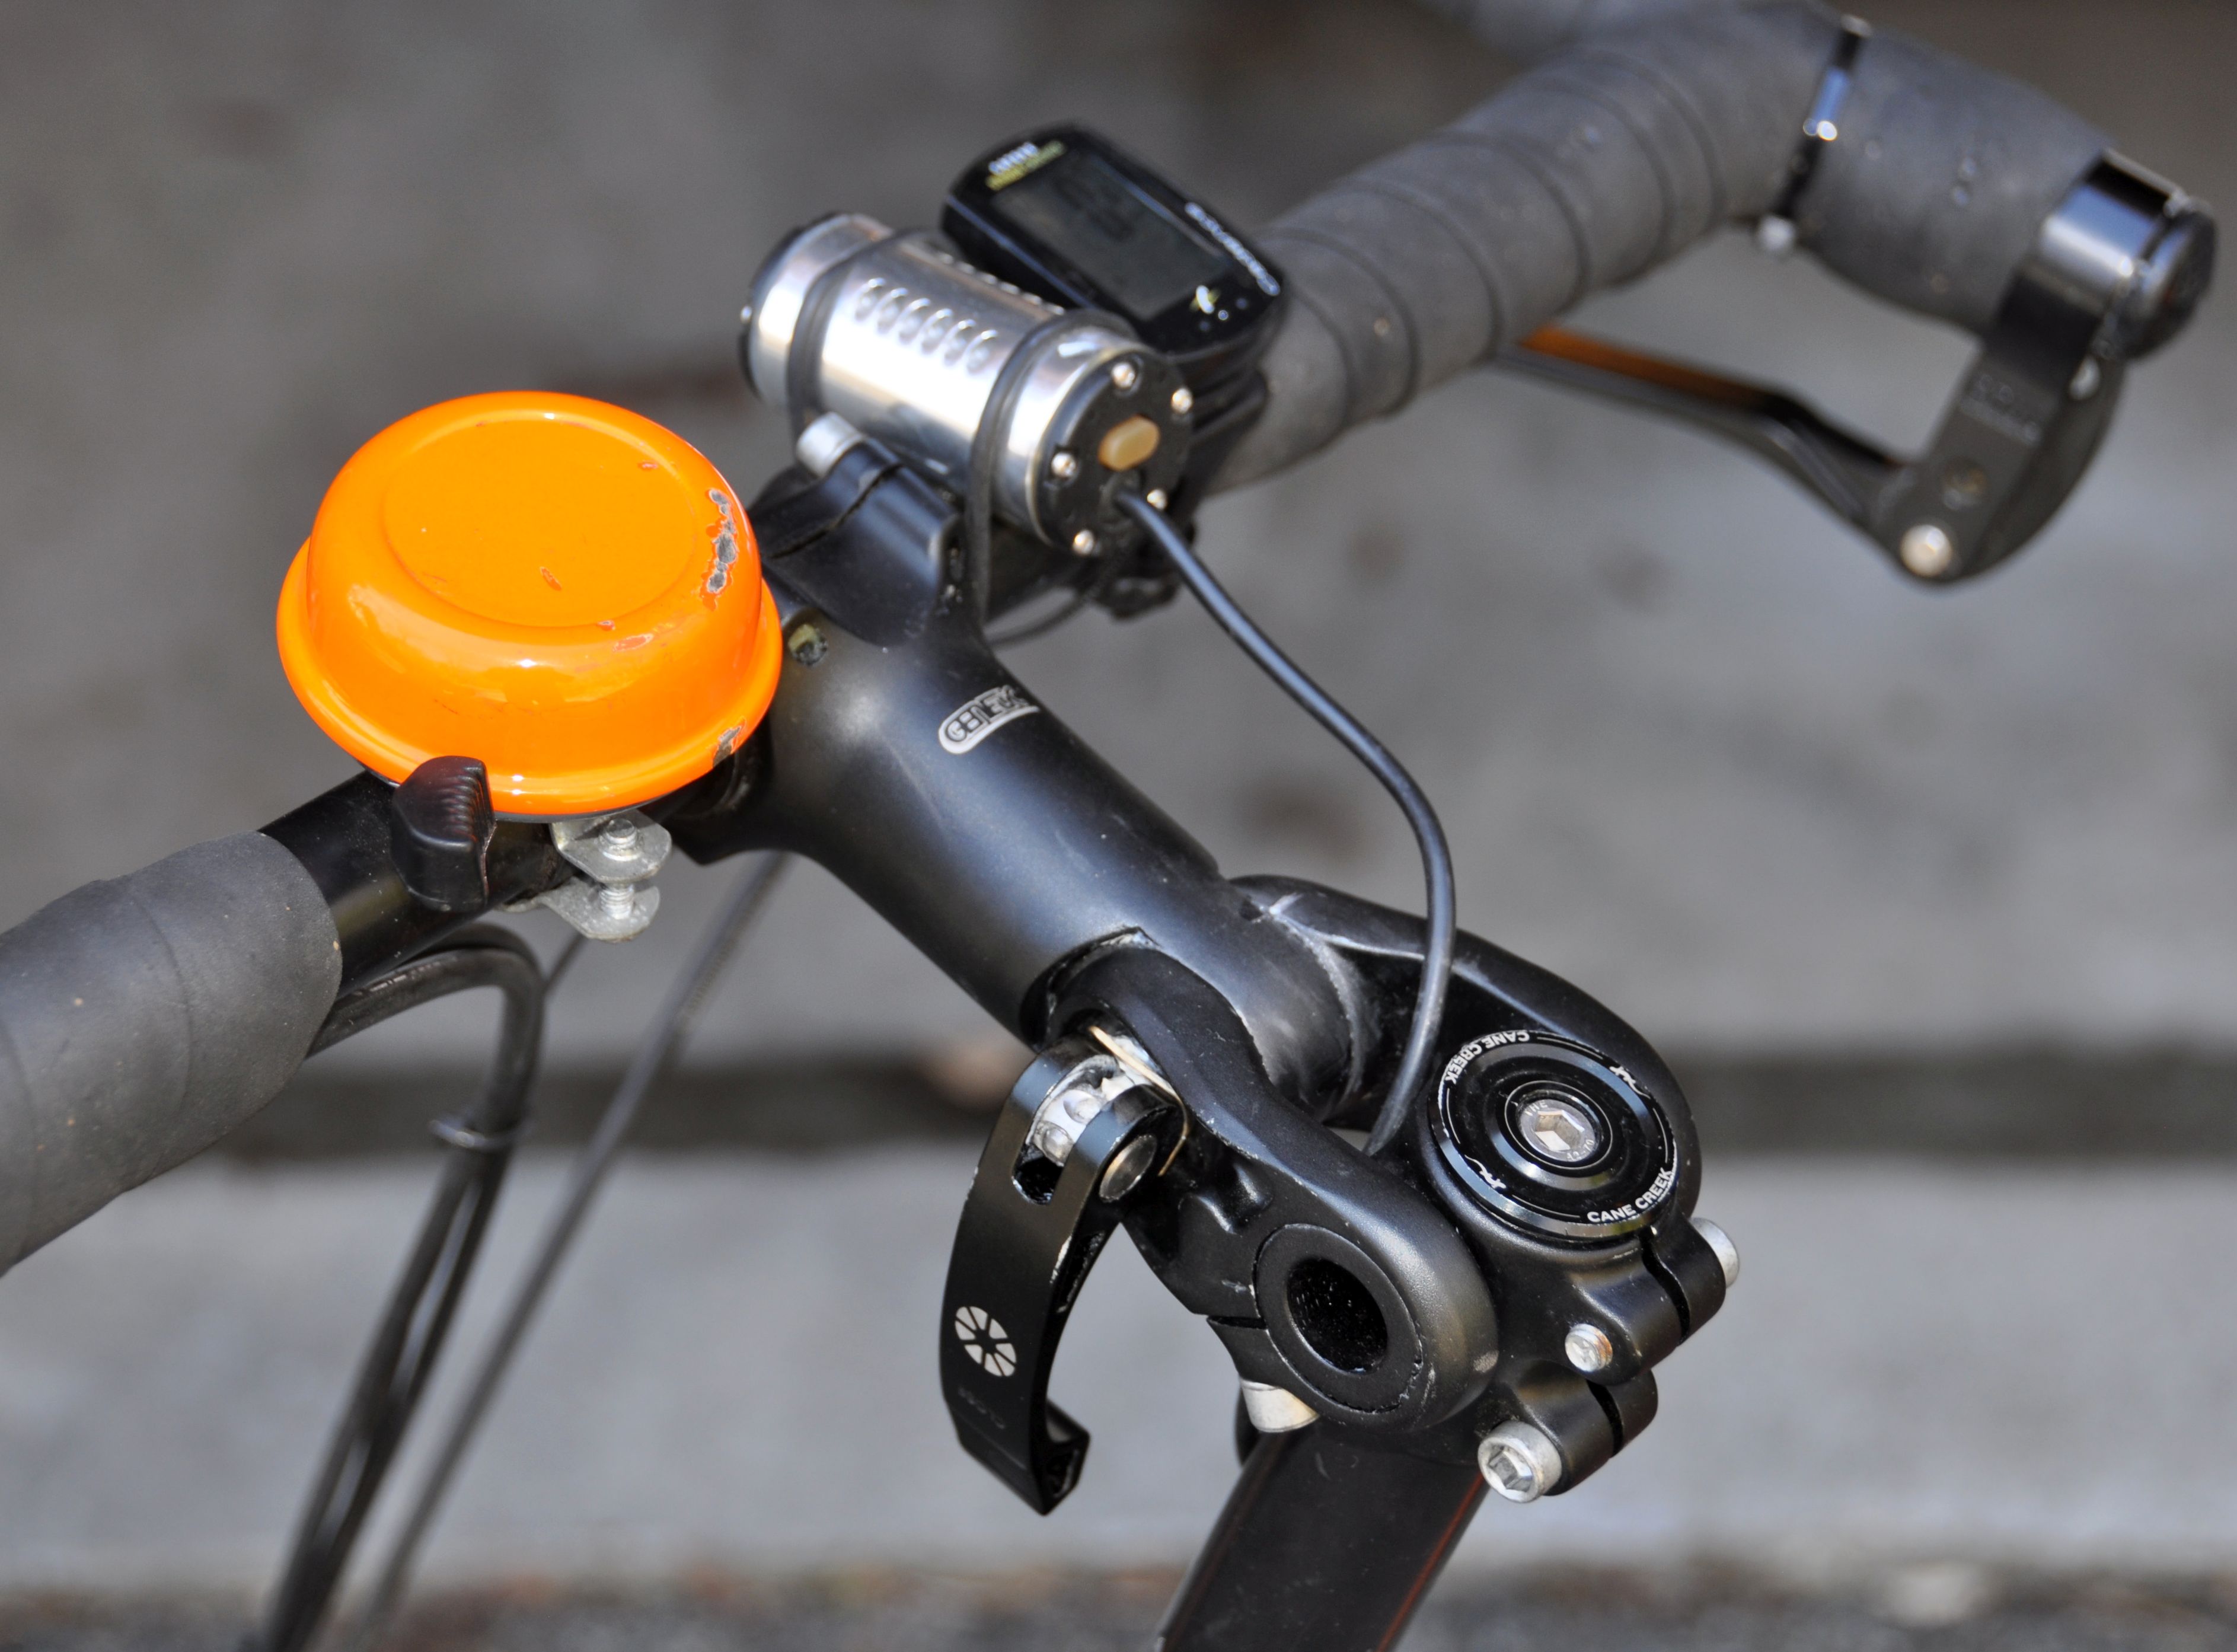
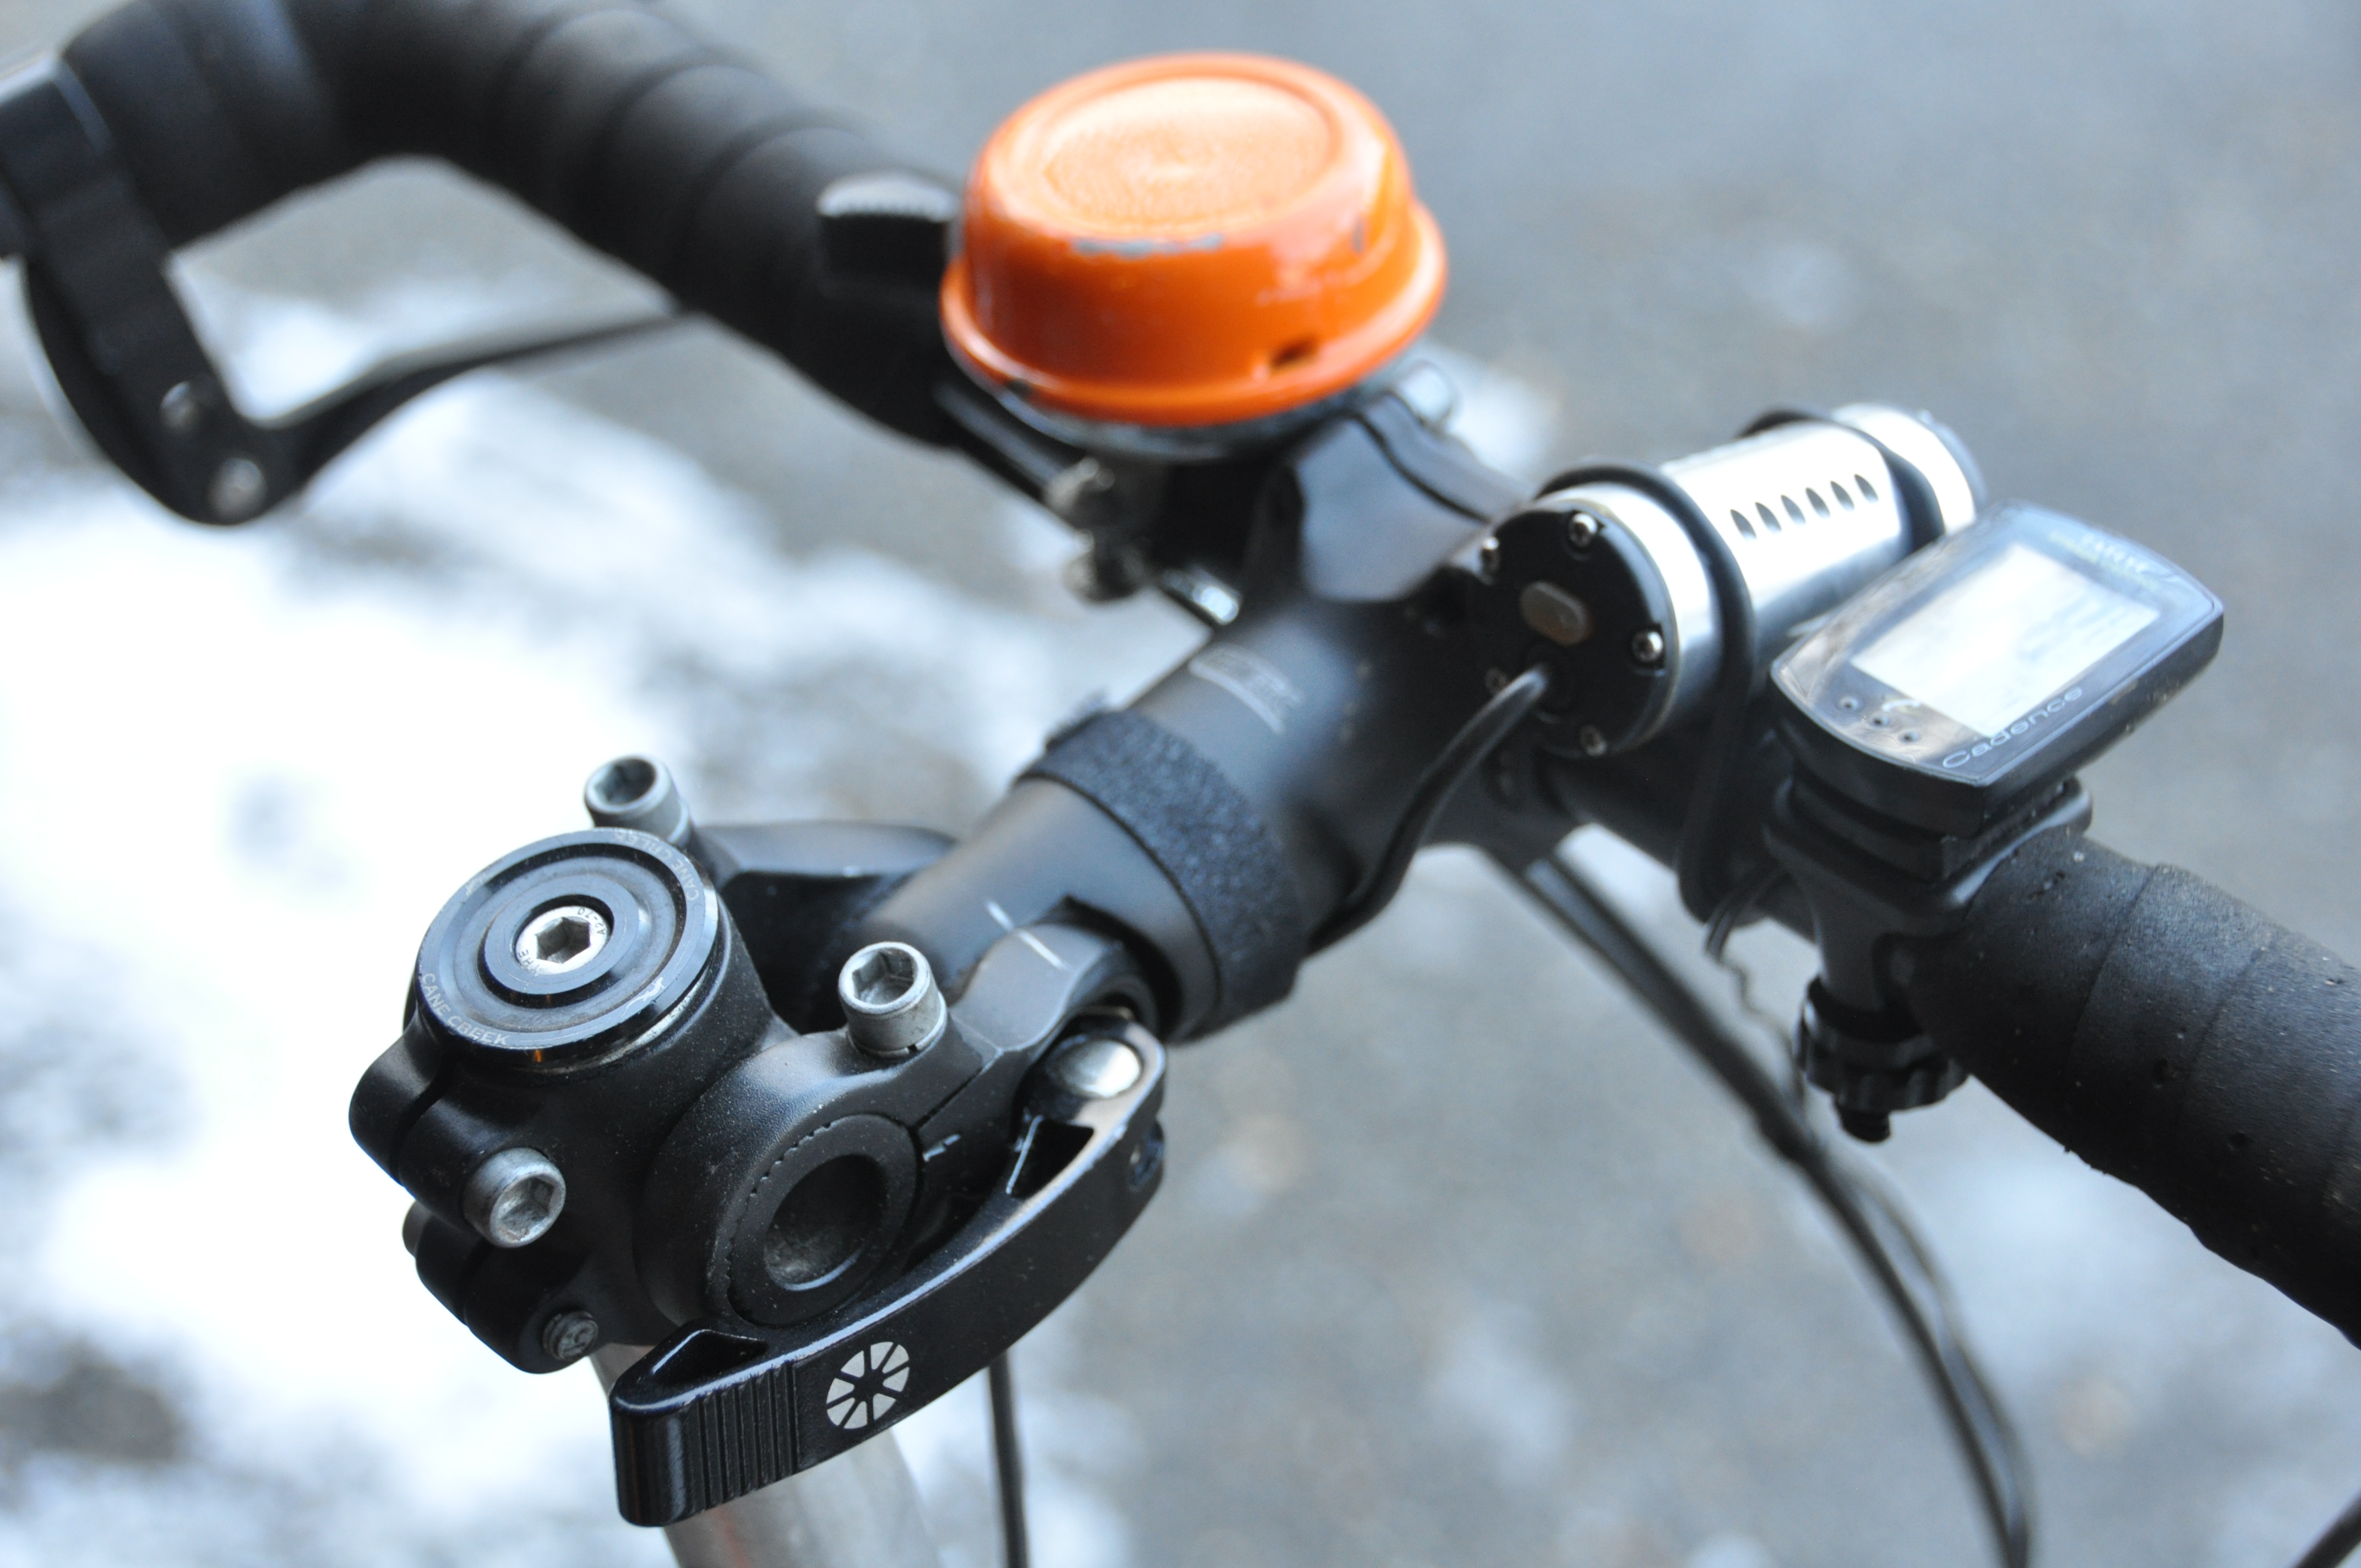
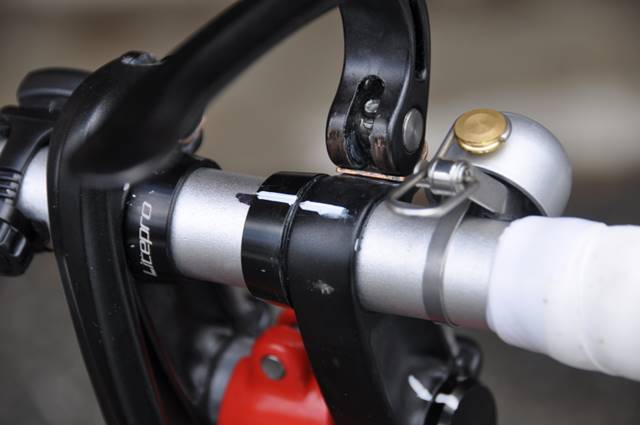
I use two bells: A Spur Cycle on the straight part of the handlebar, and an Incredibell Adjustabell2 glued (Shoe Goo) to the JTek shifter – easier to reach when I am grabbing the bar ends (what I do most of the time). Update: I have now removed the Incredibell. It can’t be operated well with winter gloves, and I also wanted to get a smoother look.
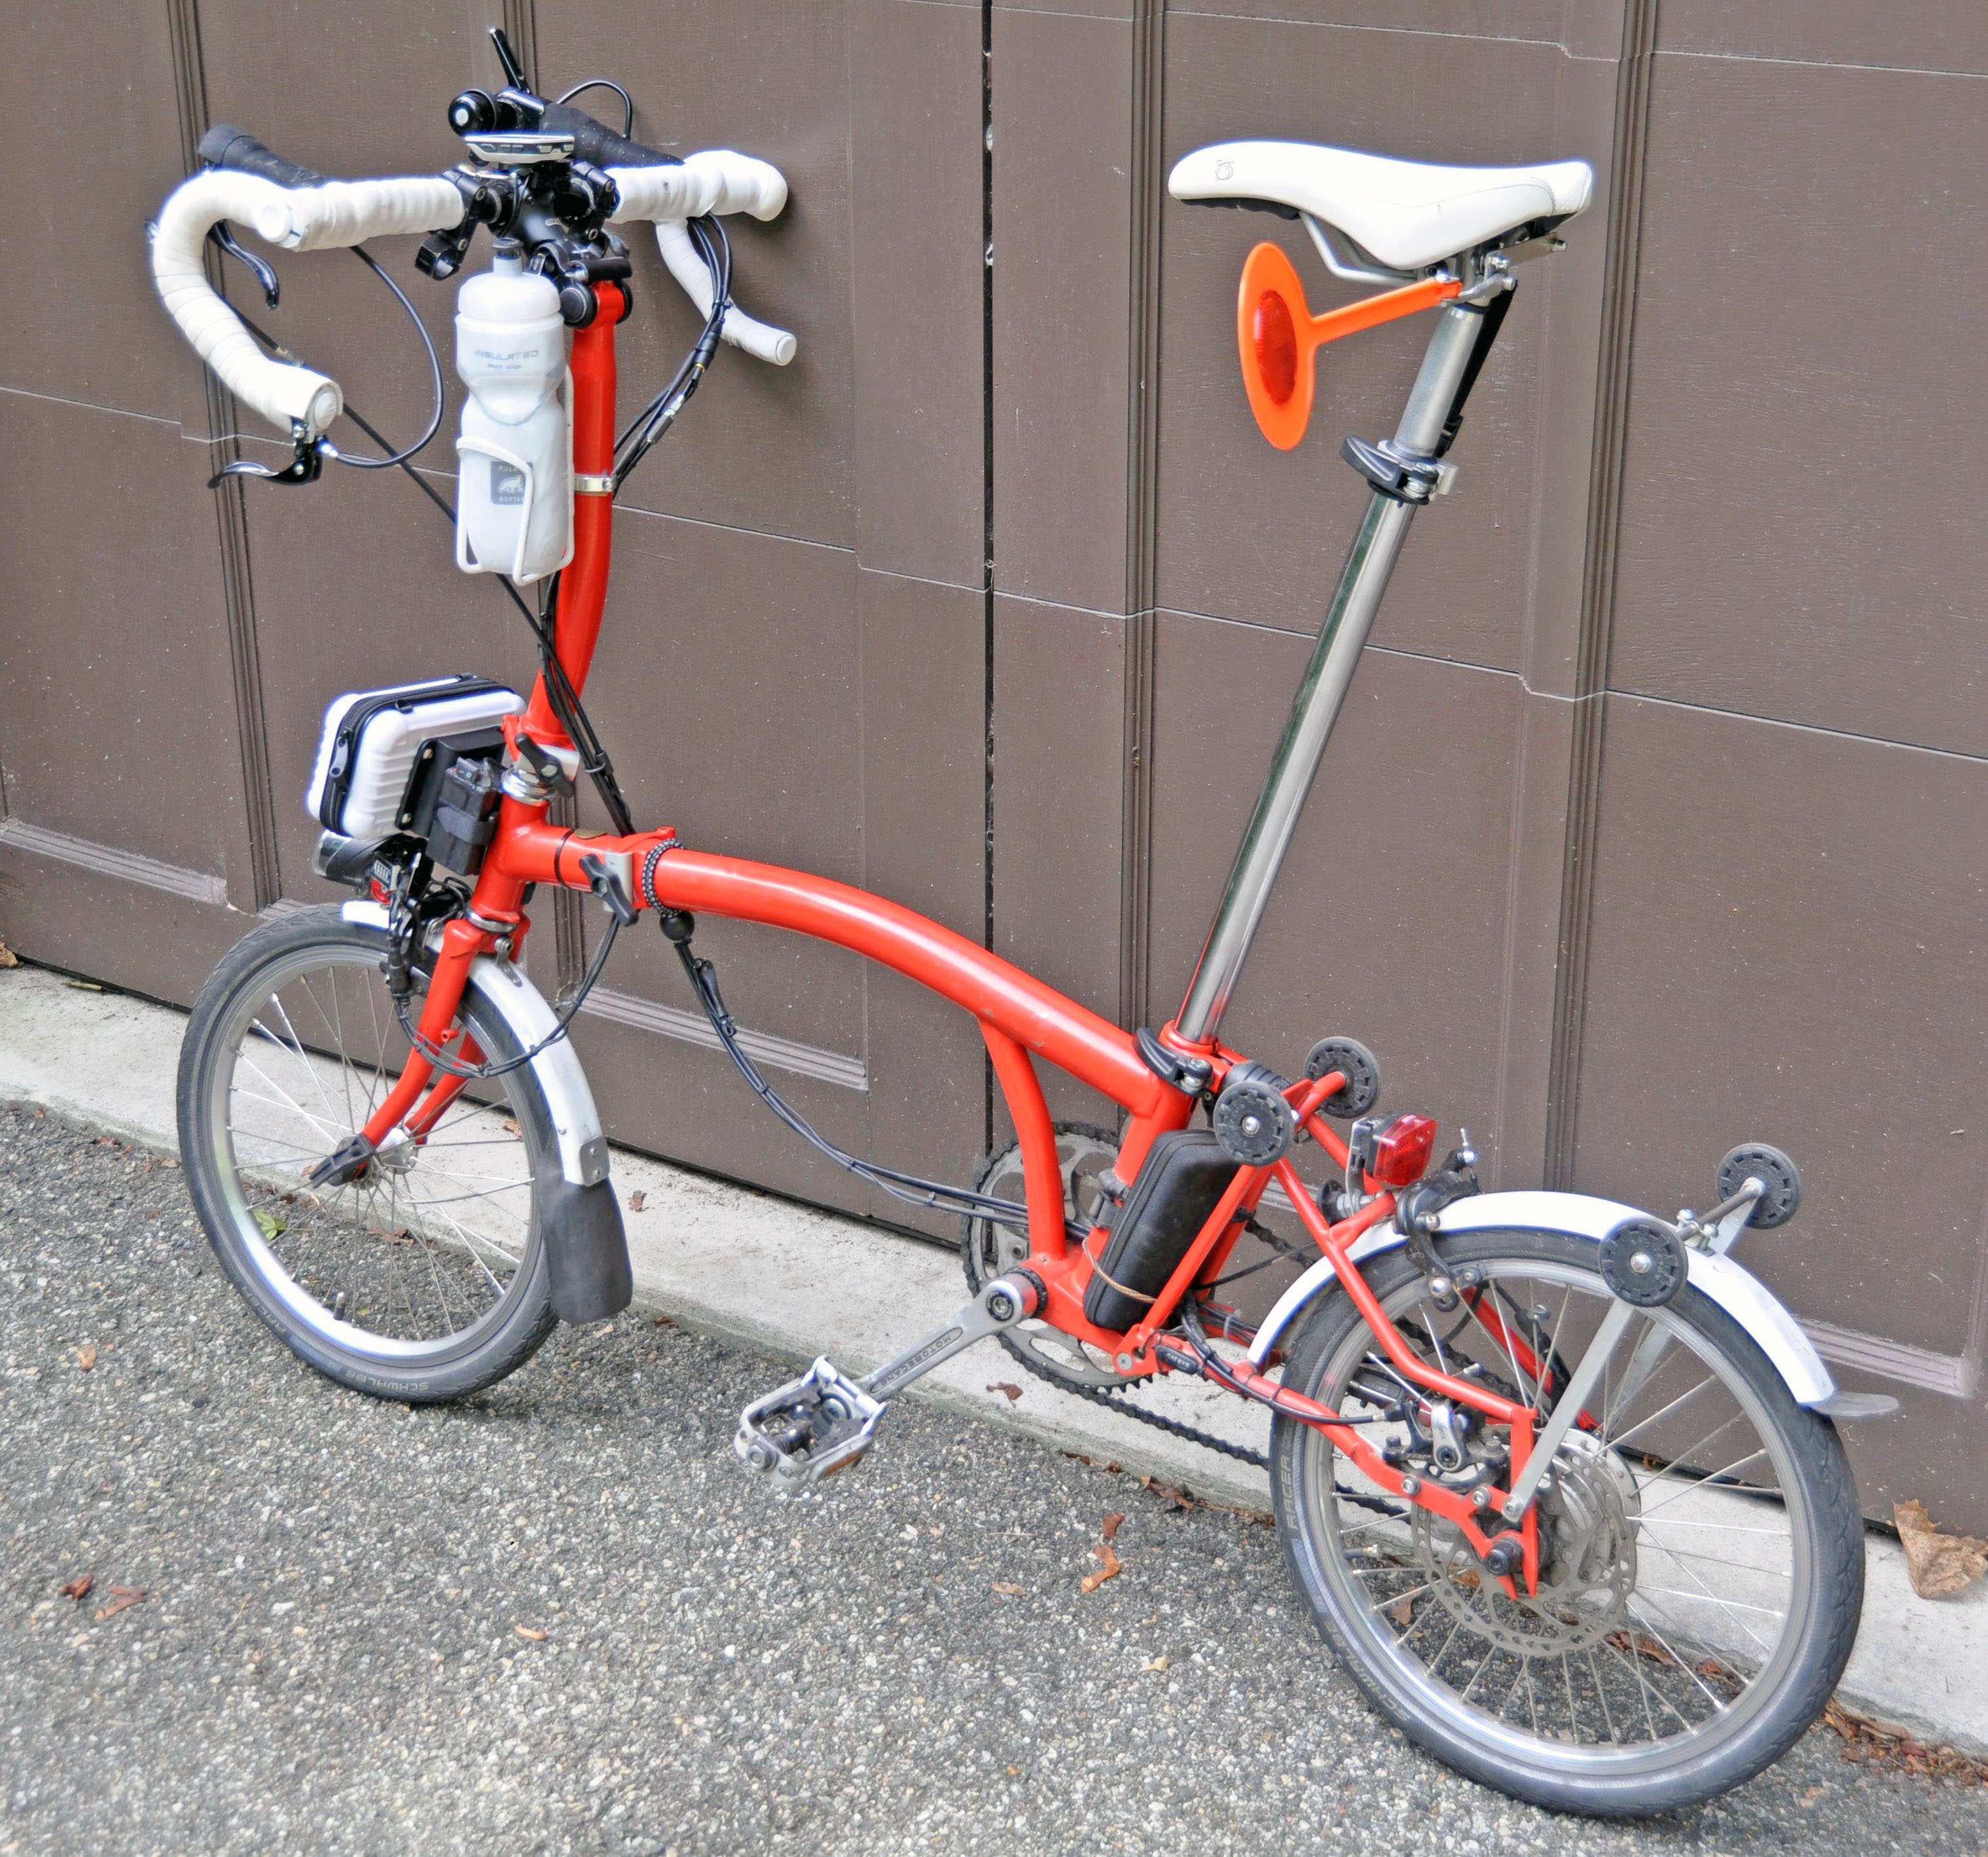
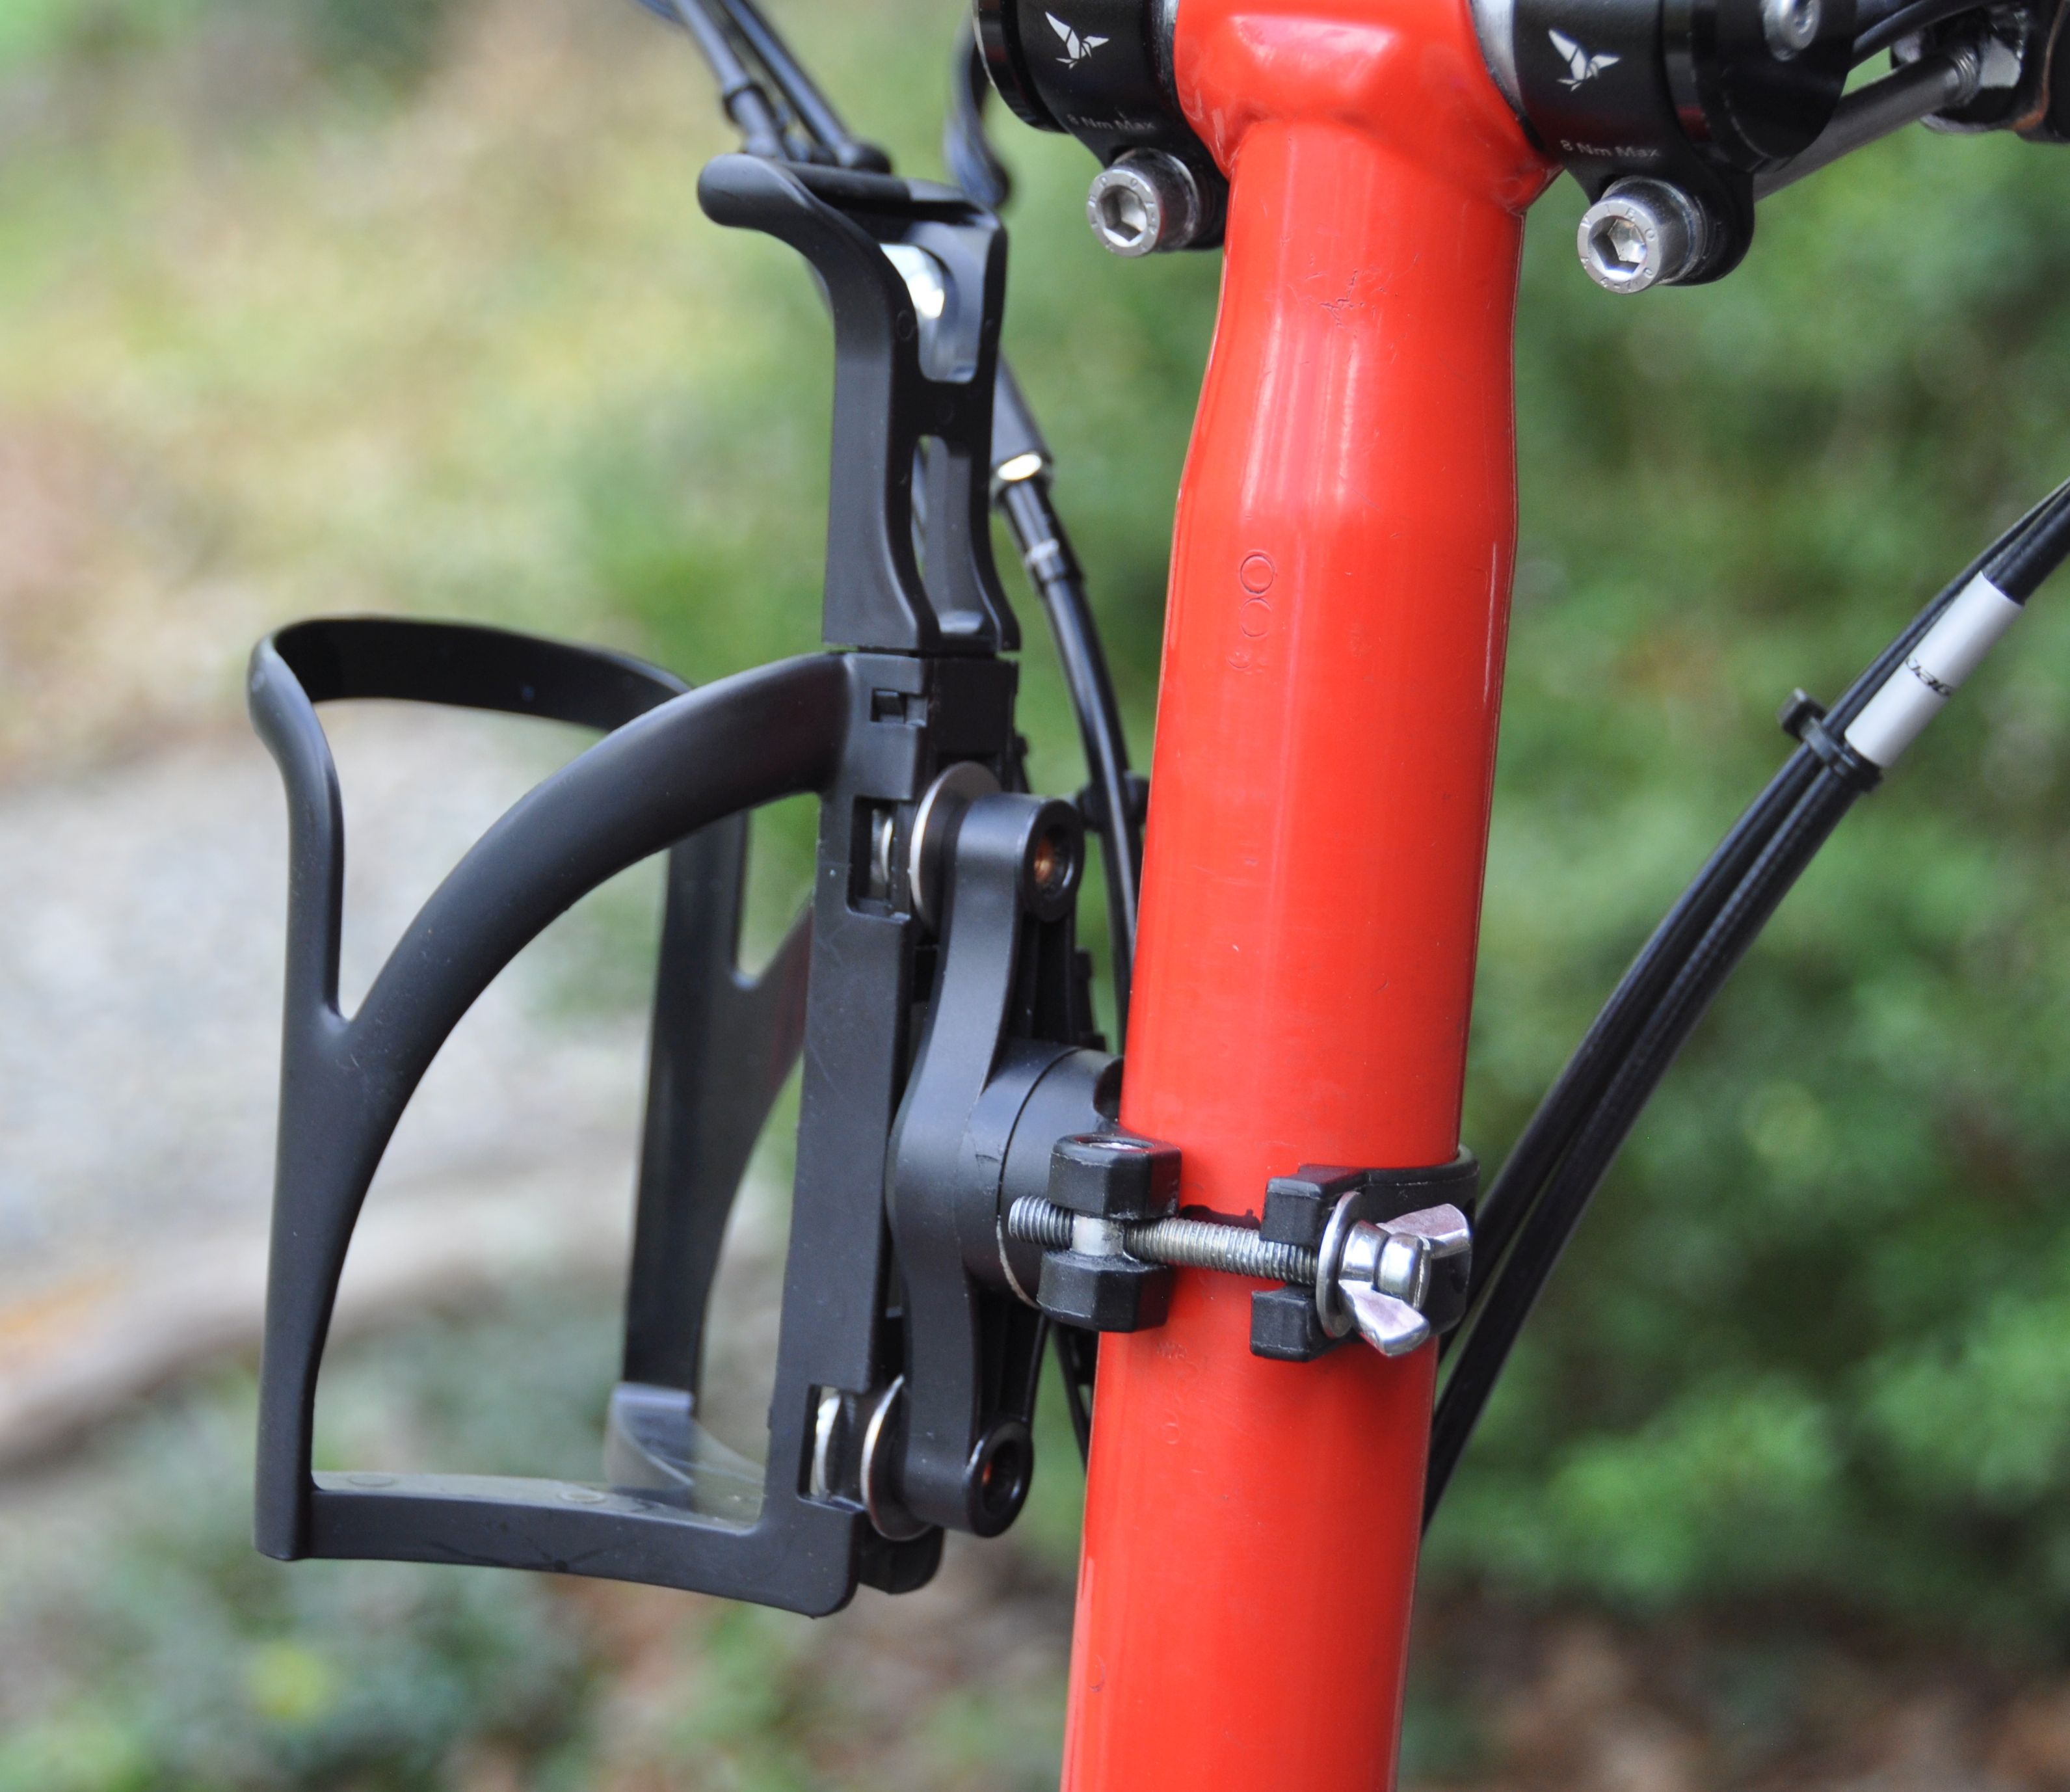
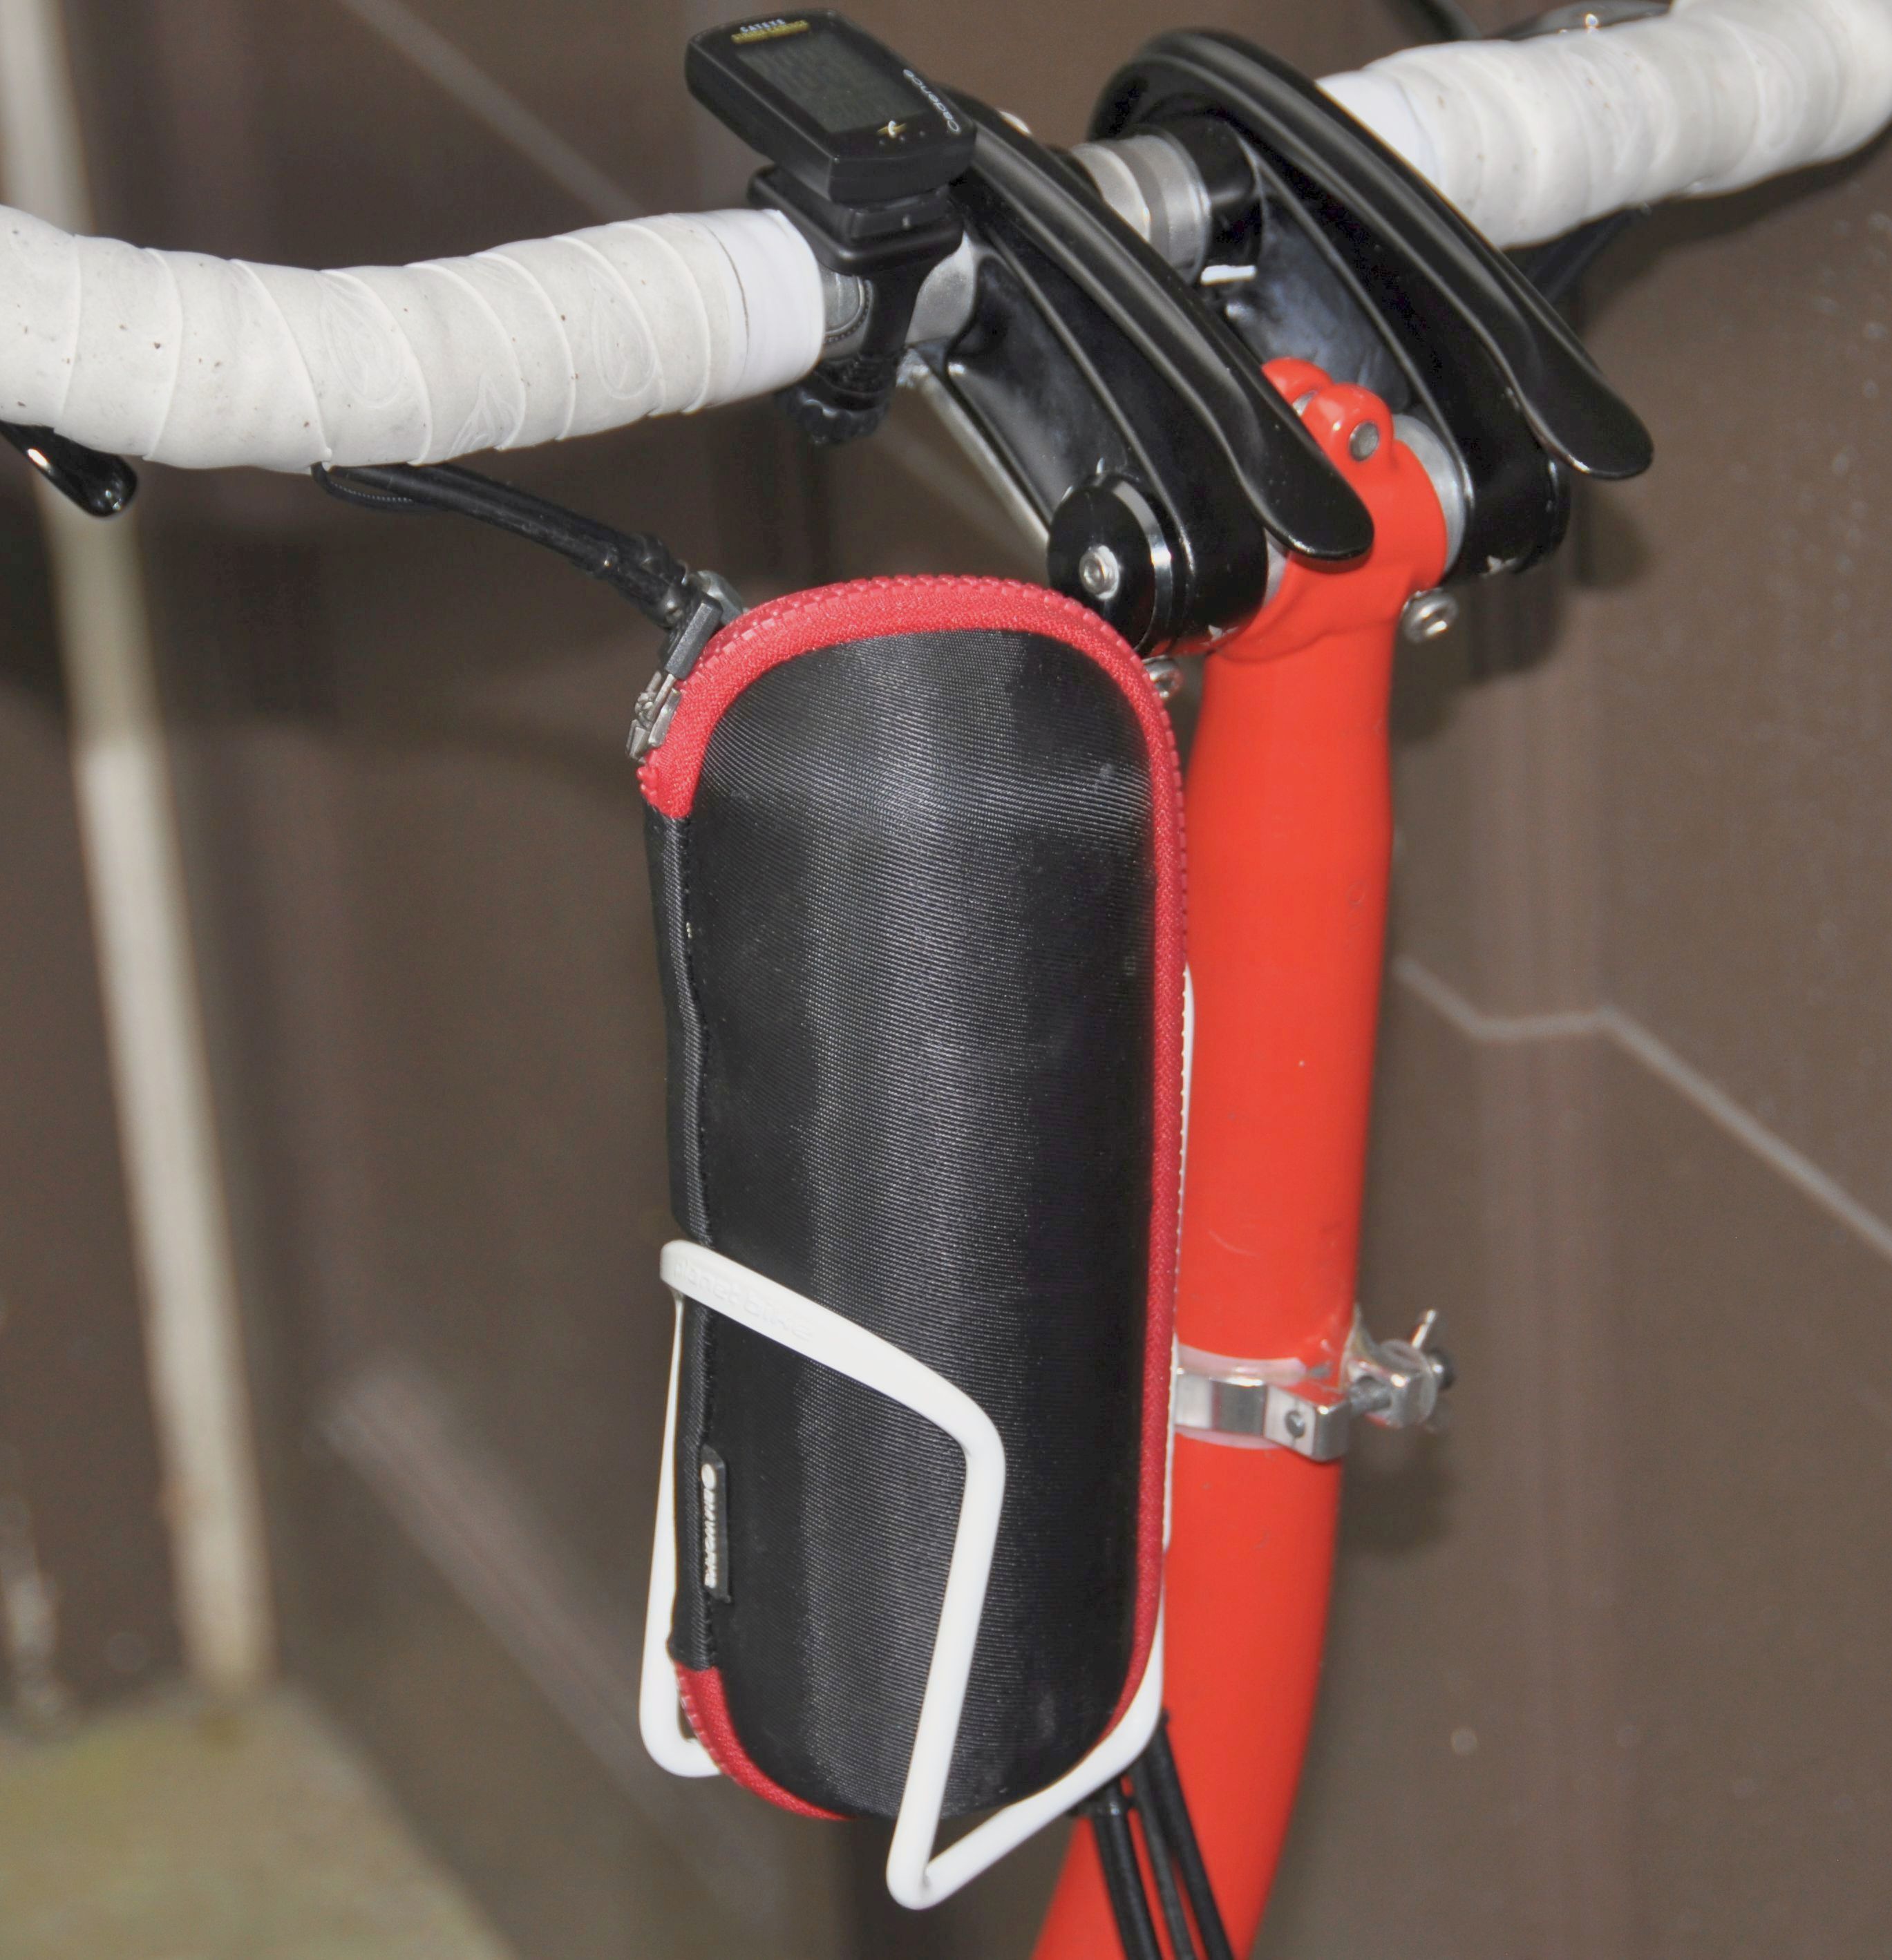
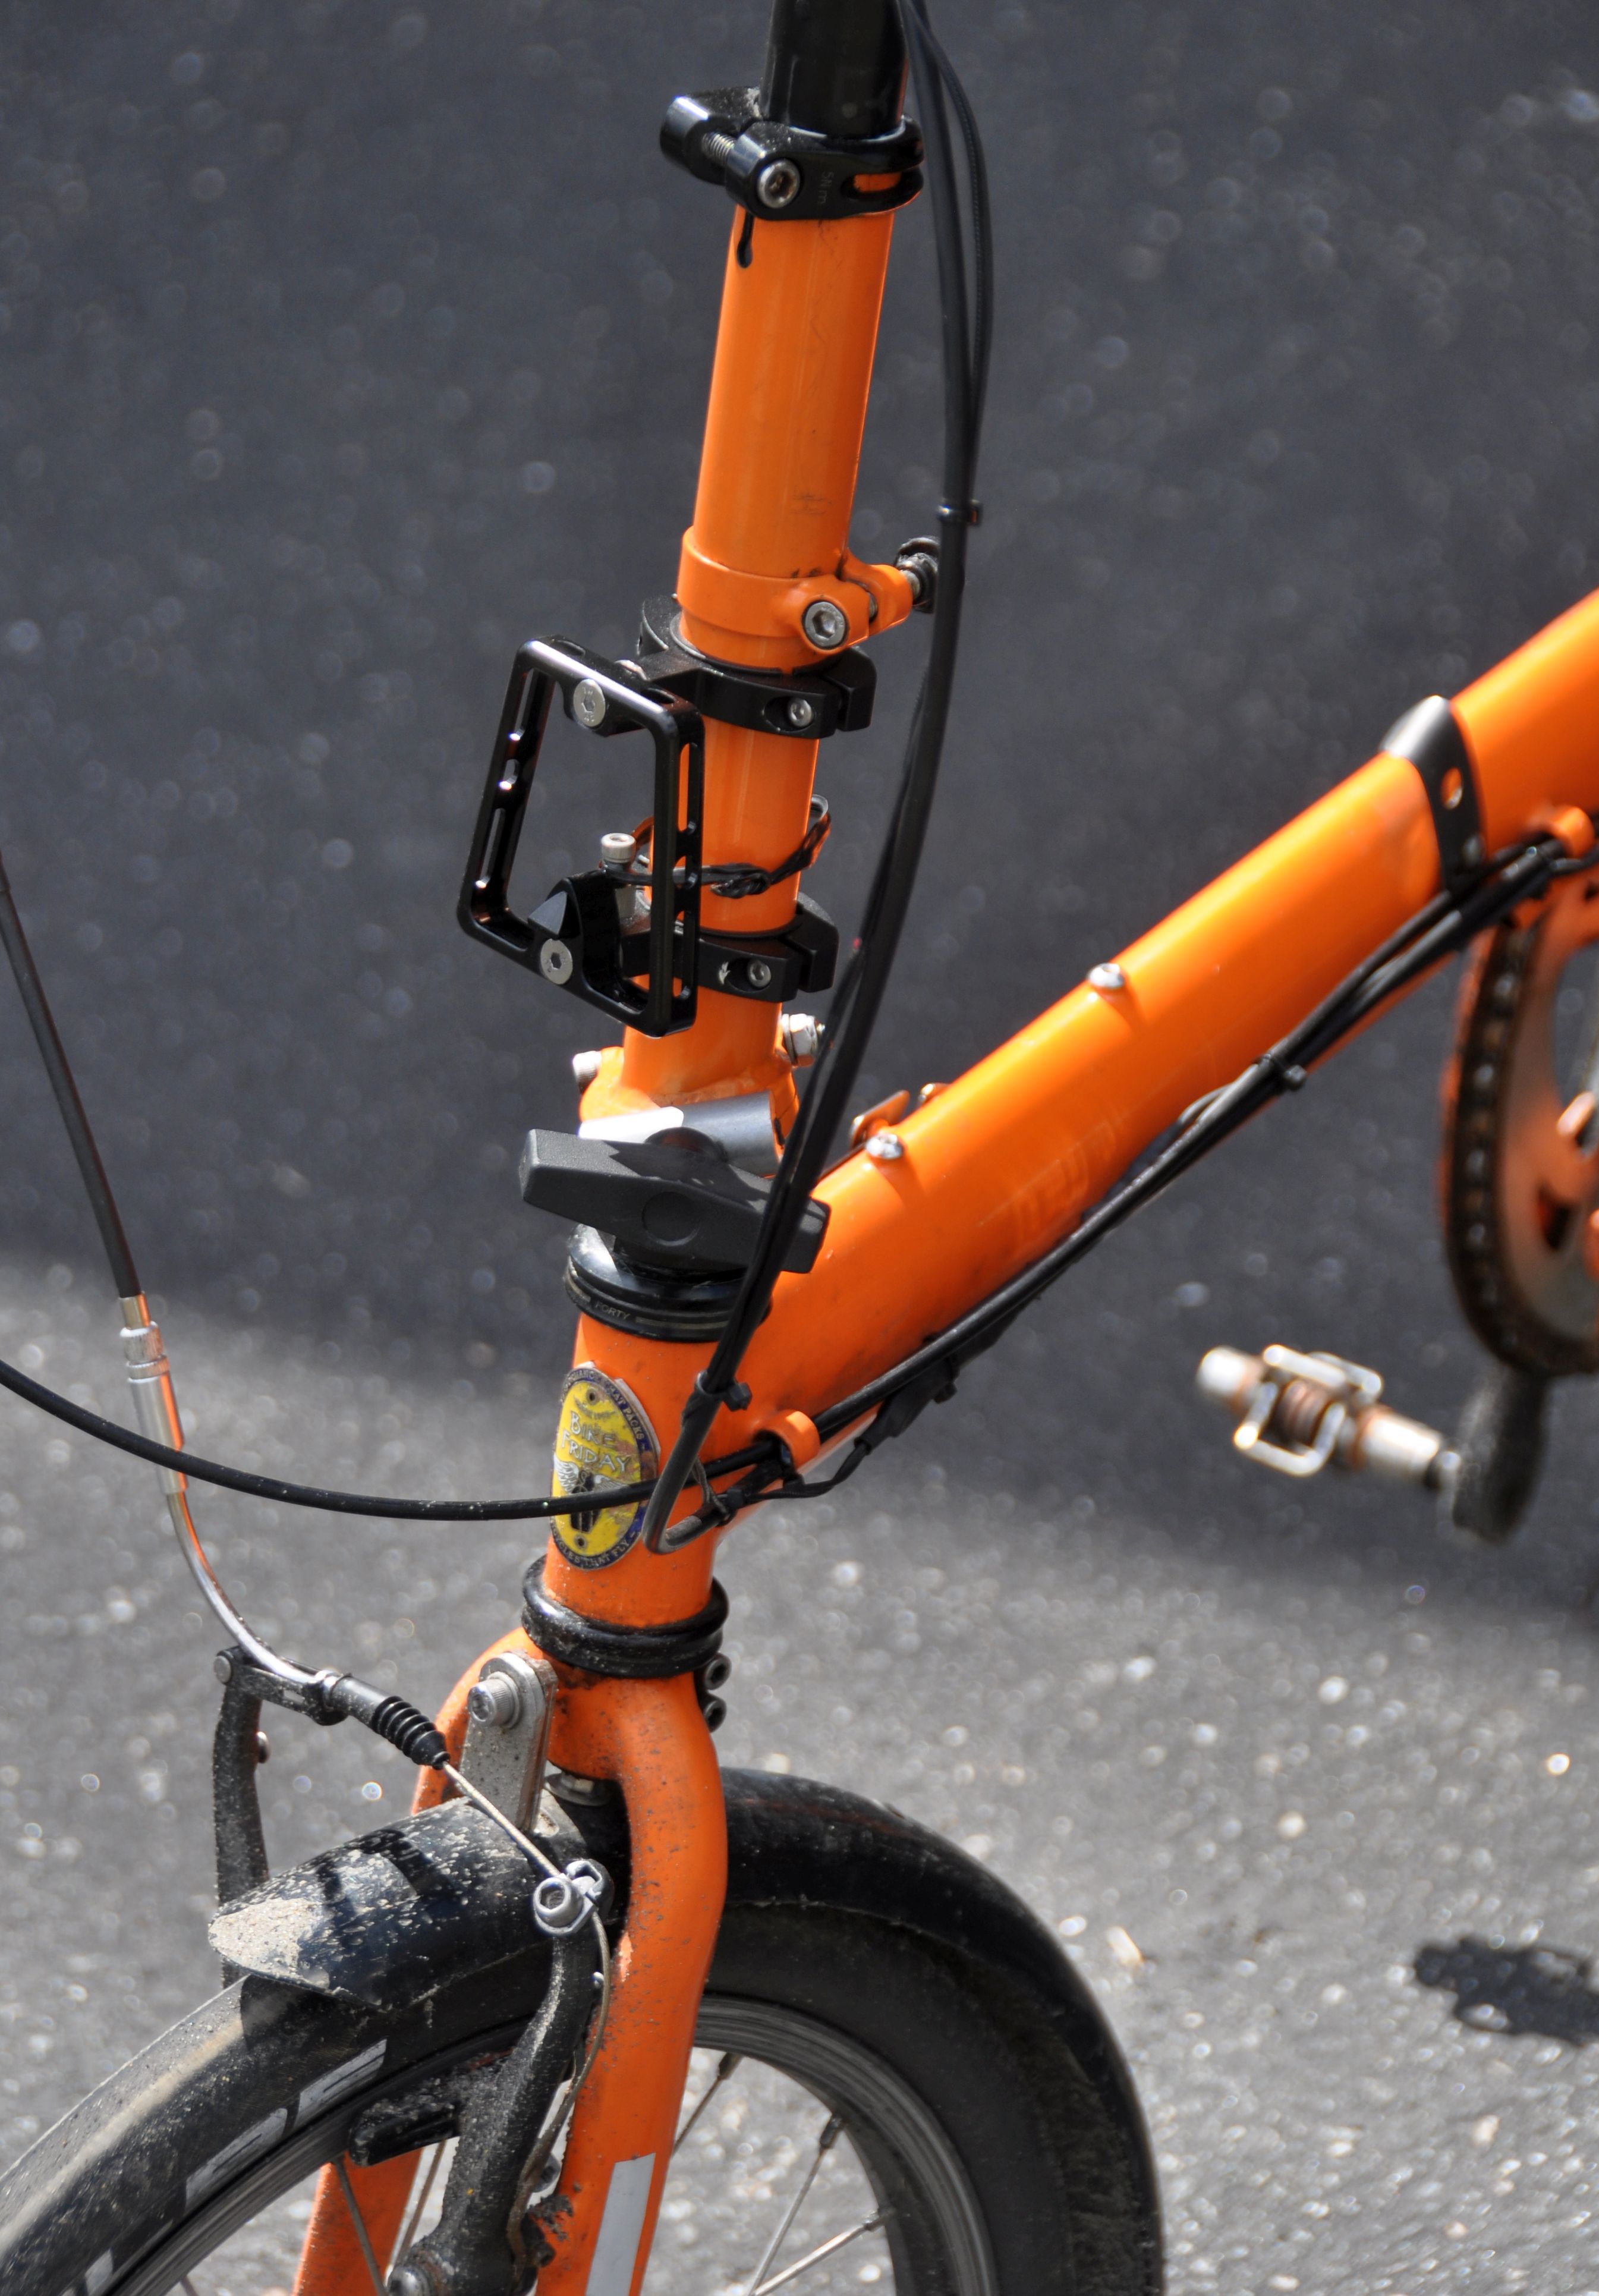
Bottle cage Back to top
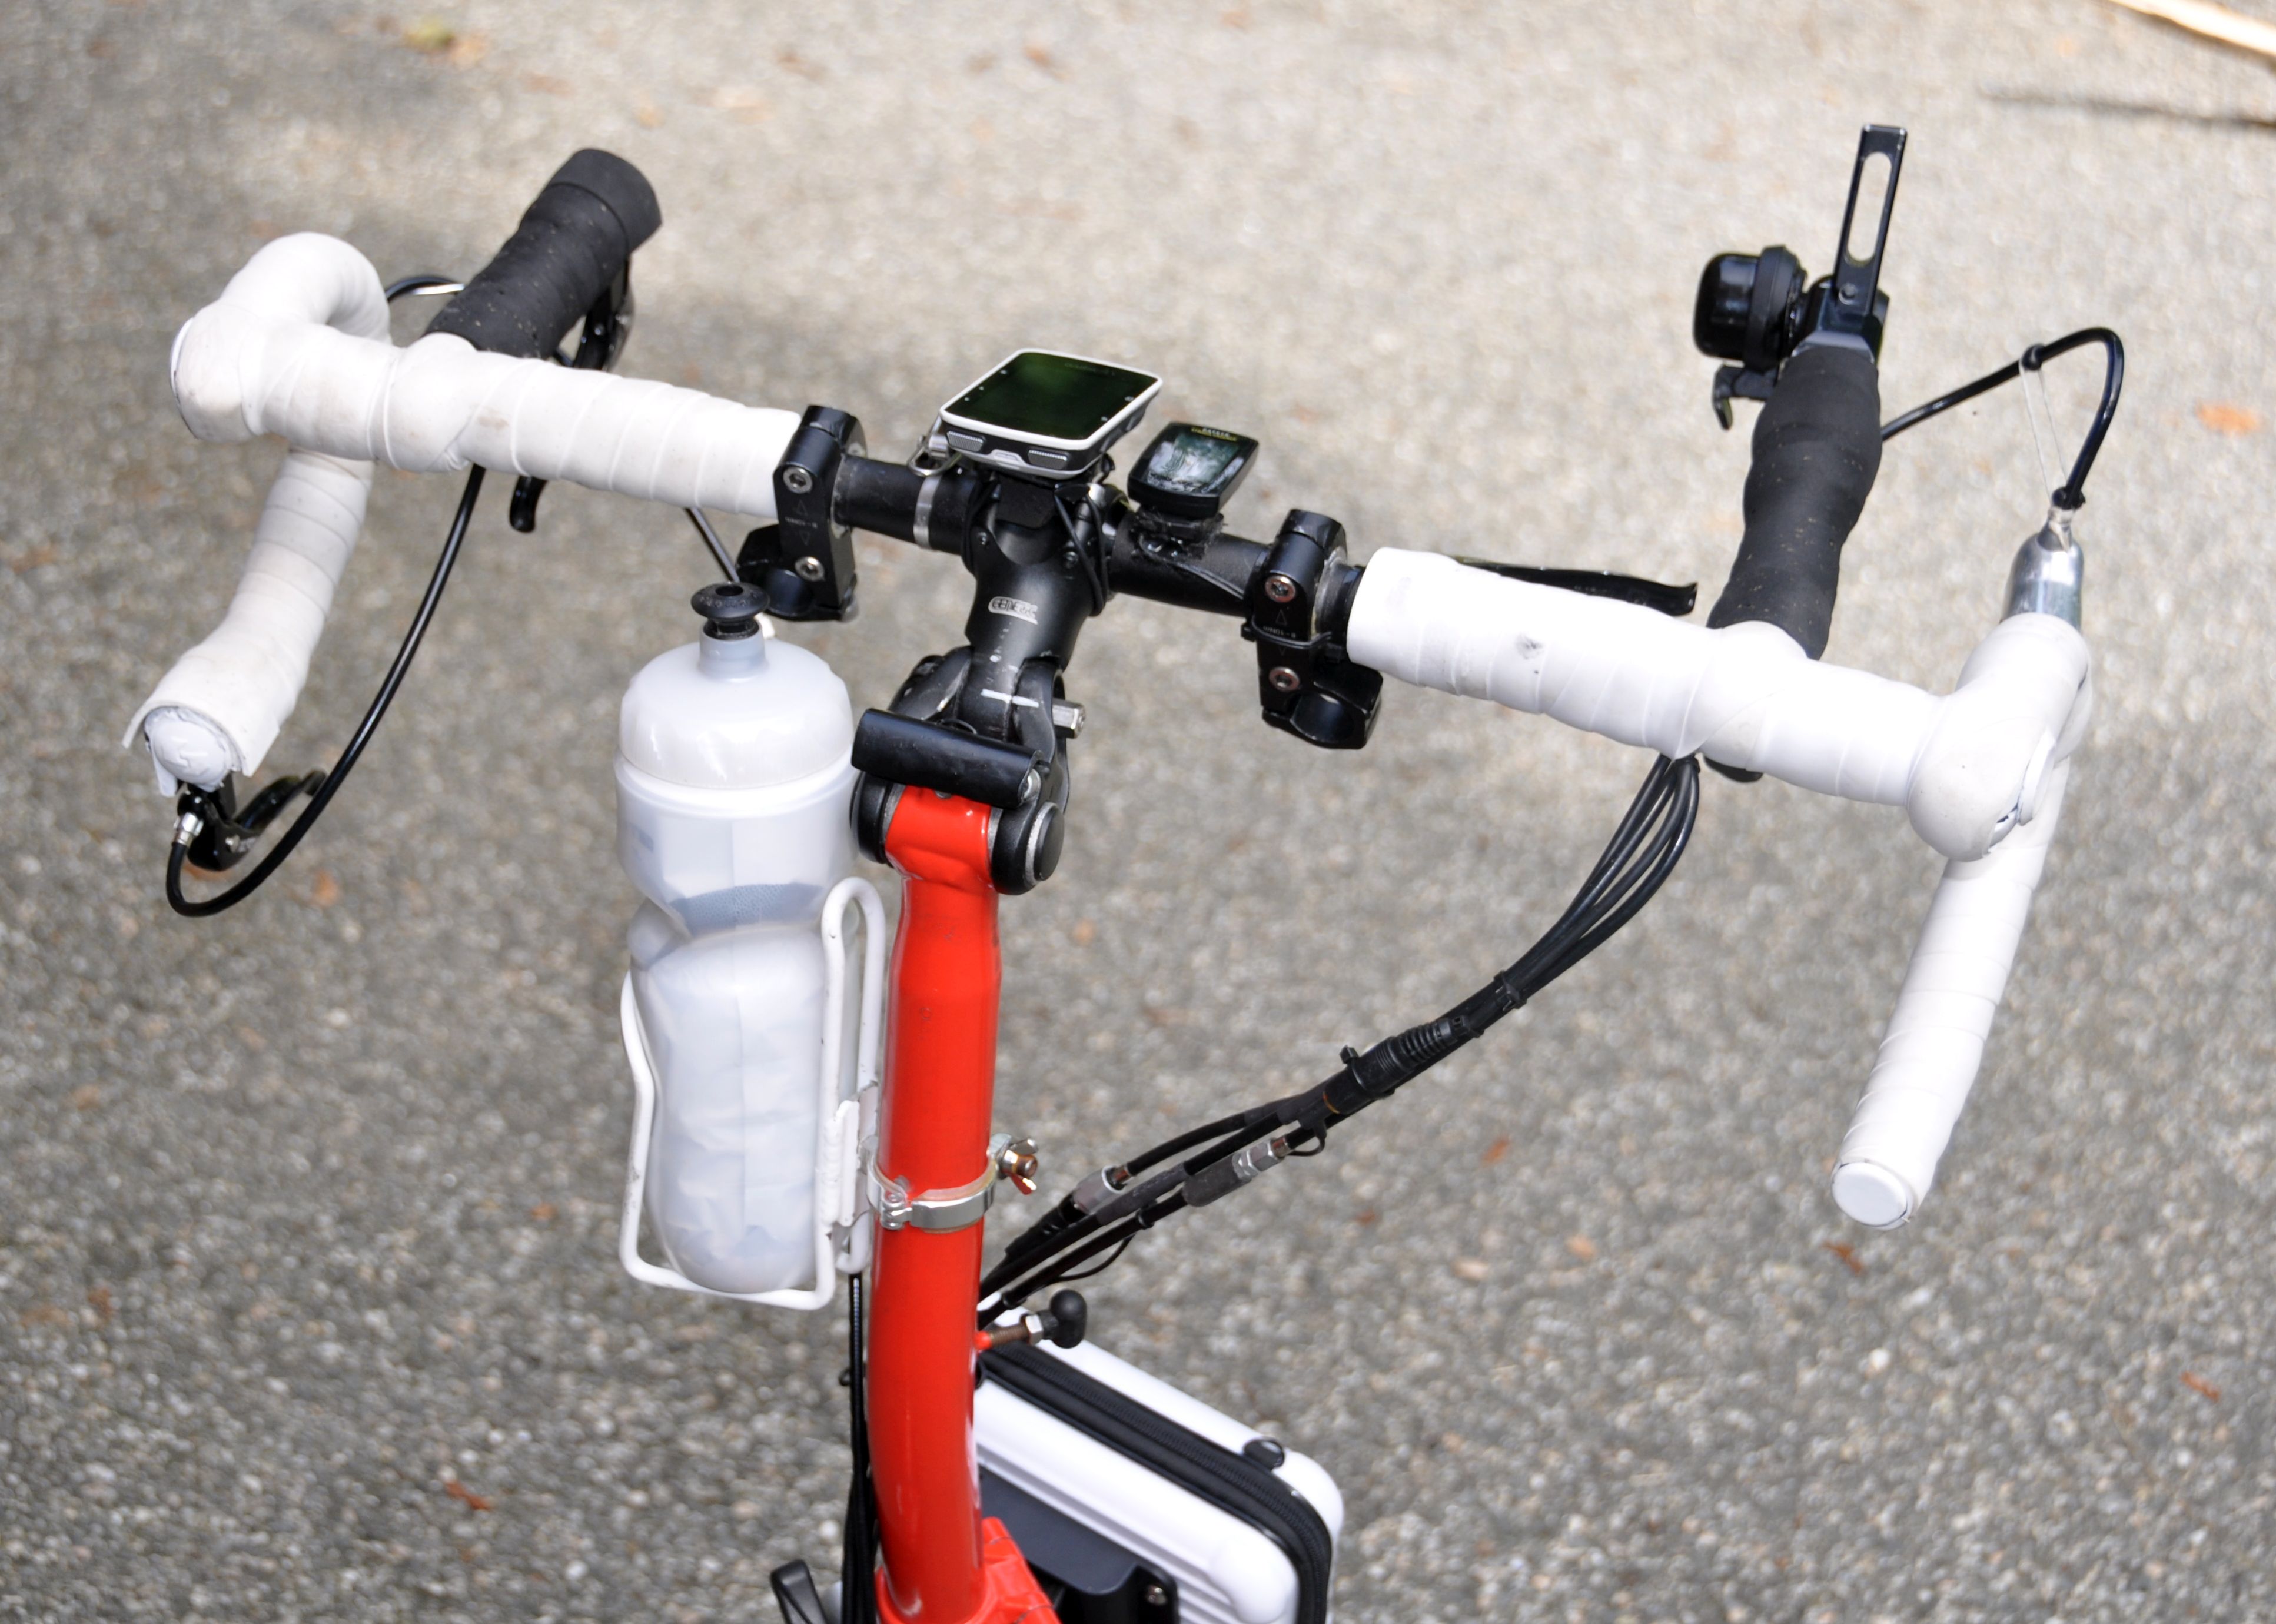
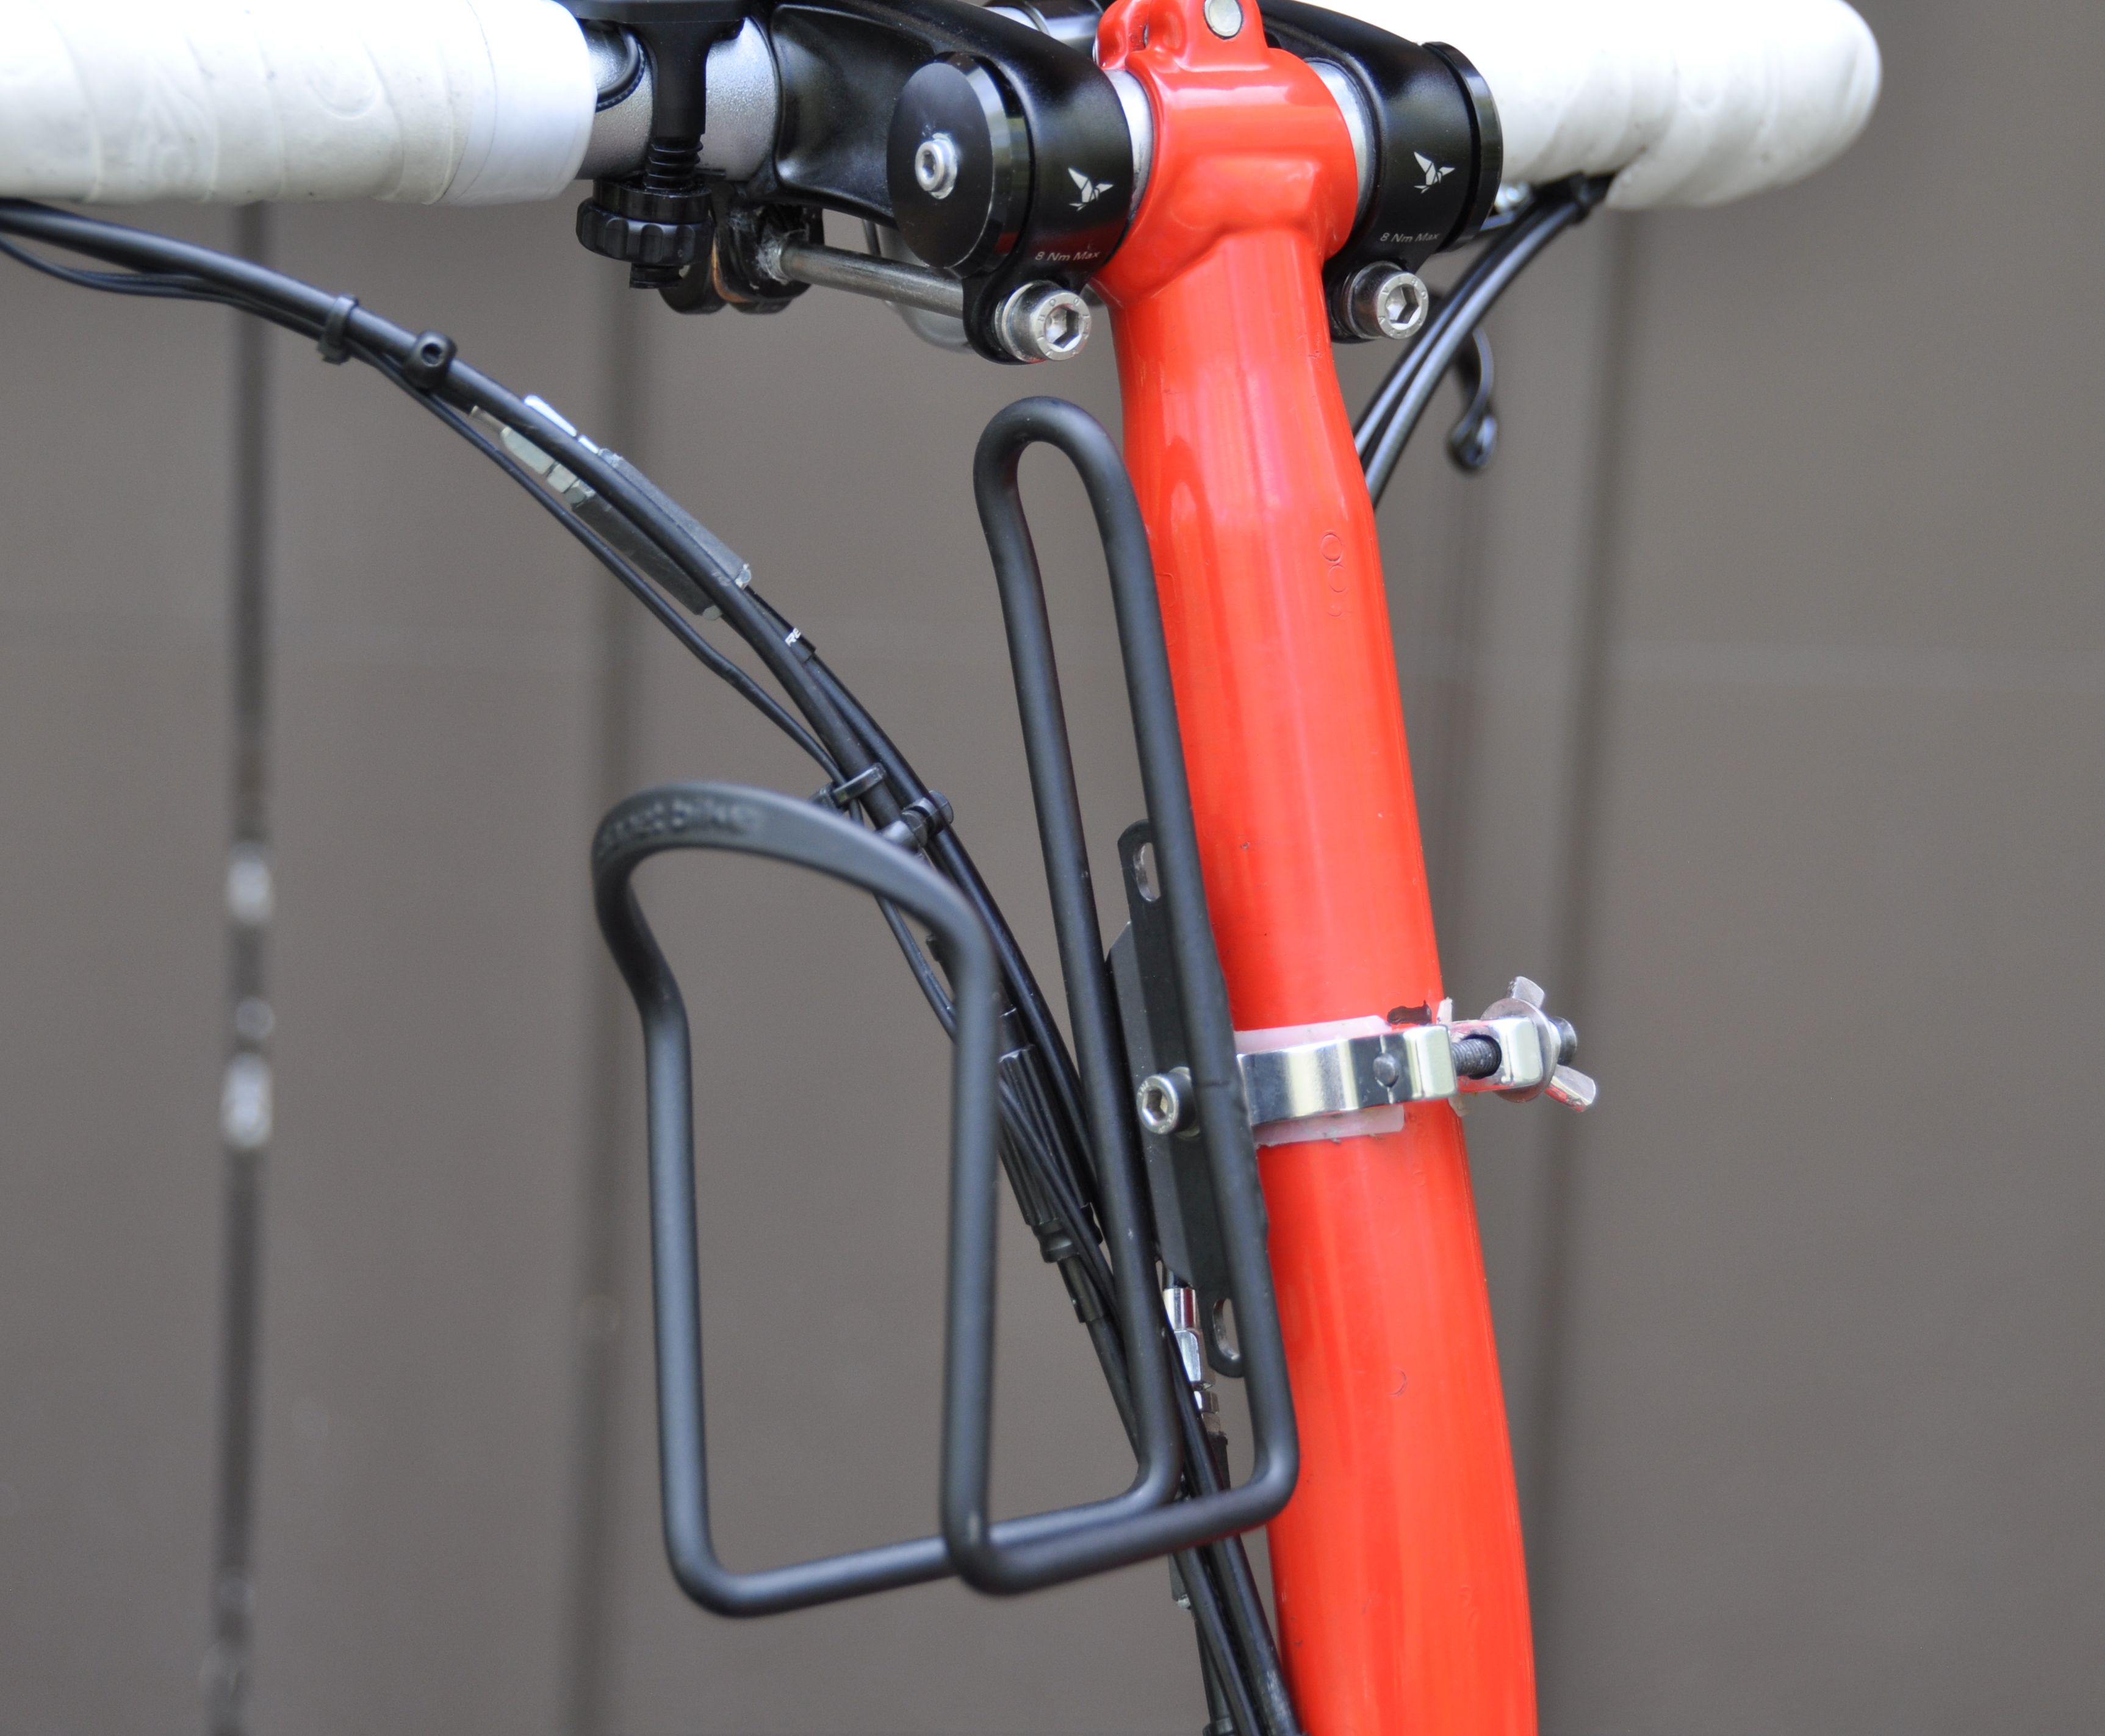
On all my bikes, I like to have a rigidly mounted bottle cage. However, this is difficult on the Brompton due to the fold. In my view, the only suitable place is to the left side of the stem. The bottle cage is not interfering with the fold, you can even leave a water bottle, accessory bag or a rolled up DIMPA bag and fold the bike.
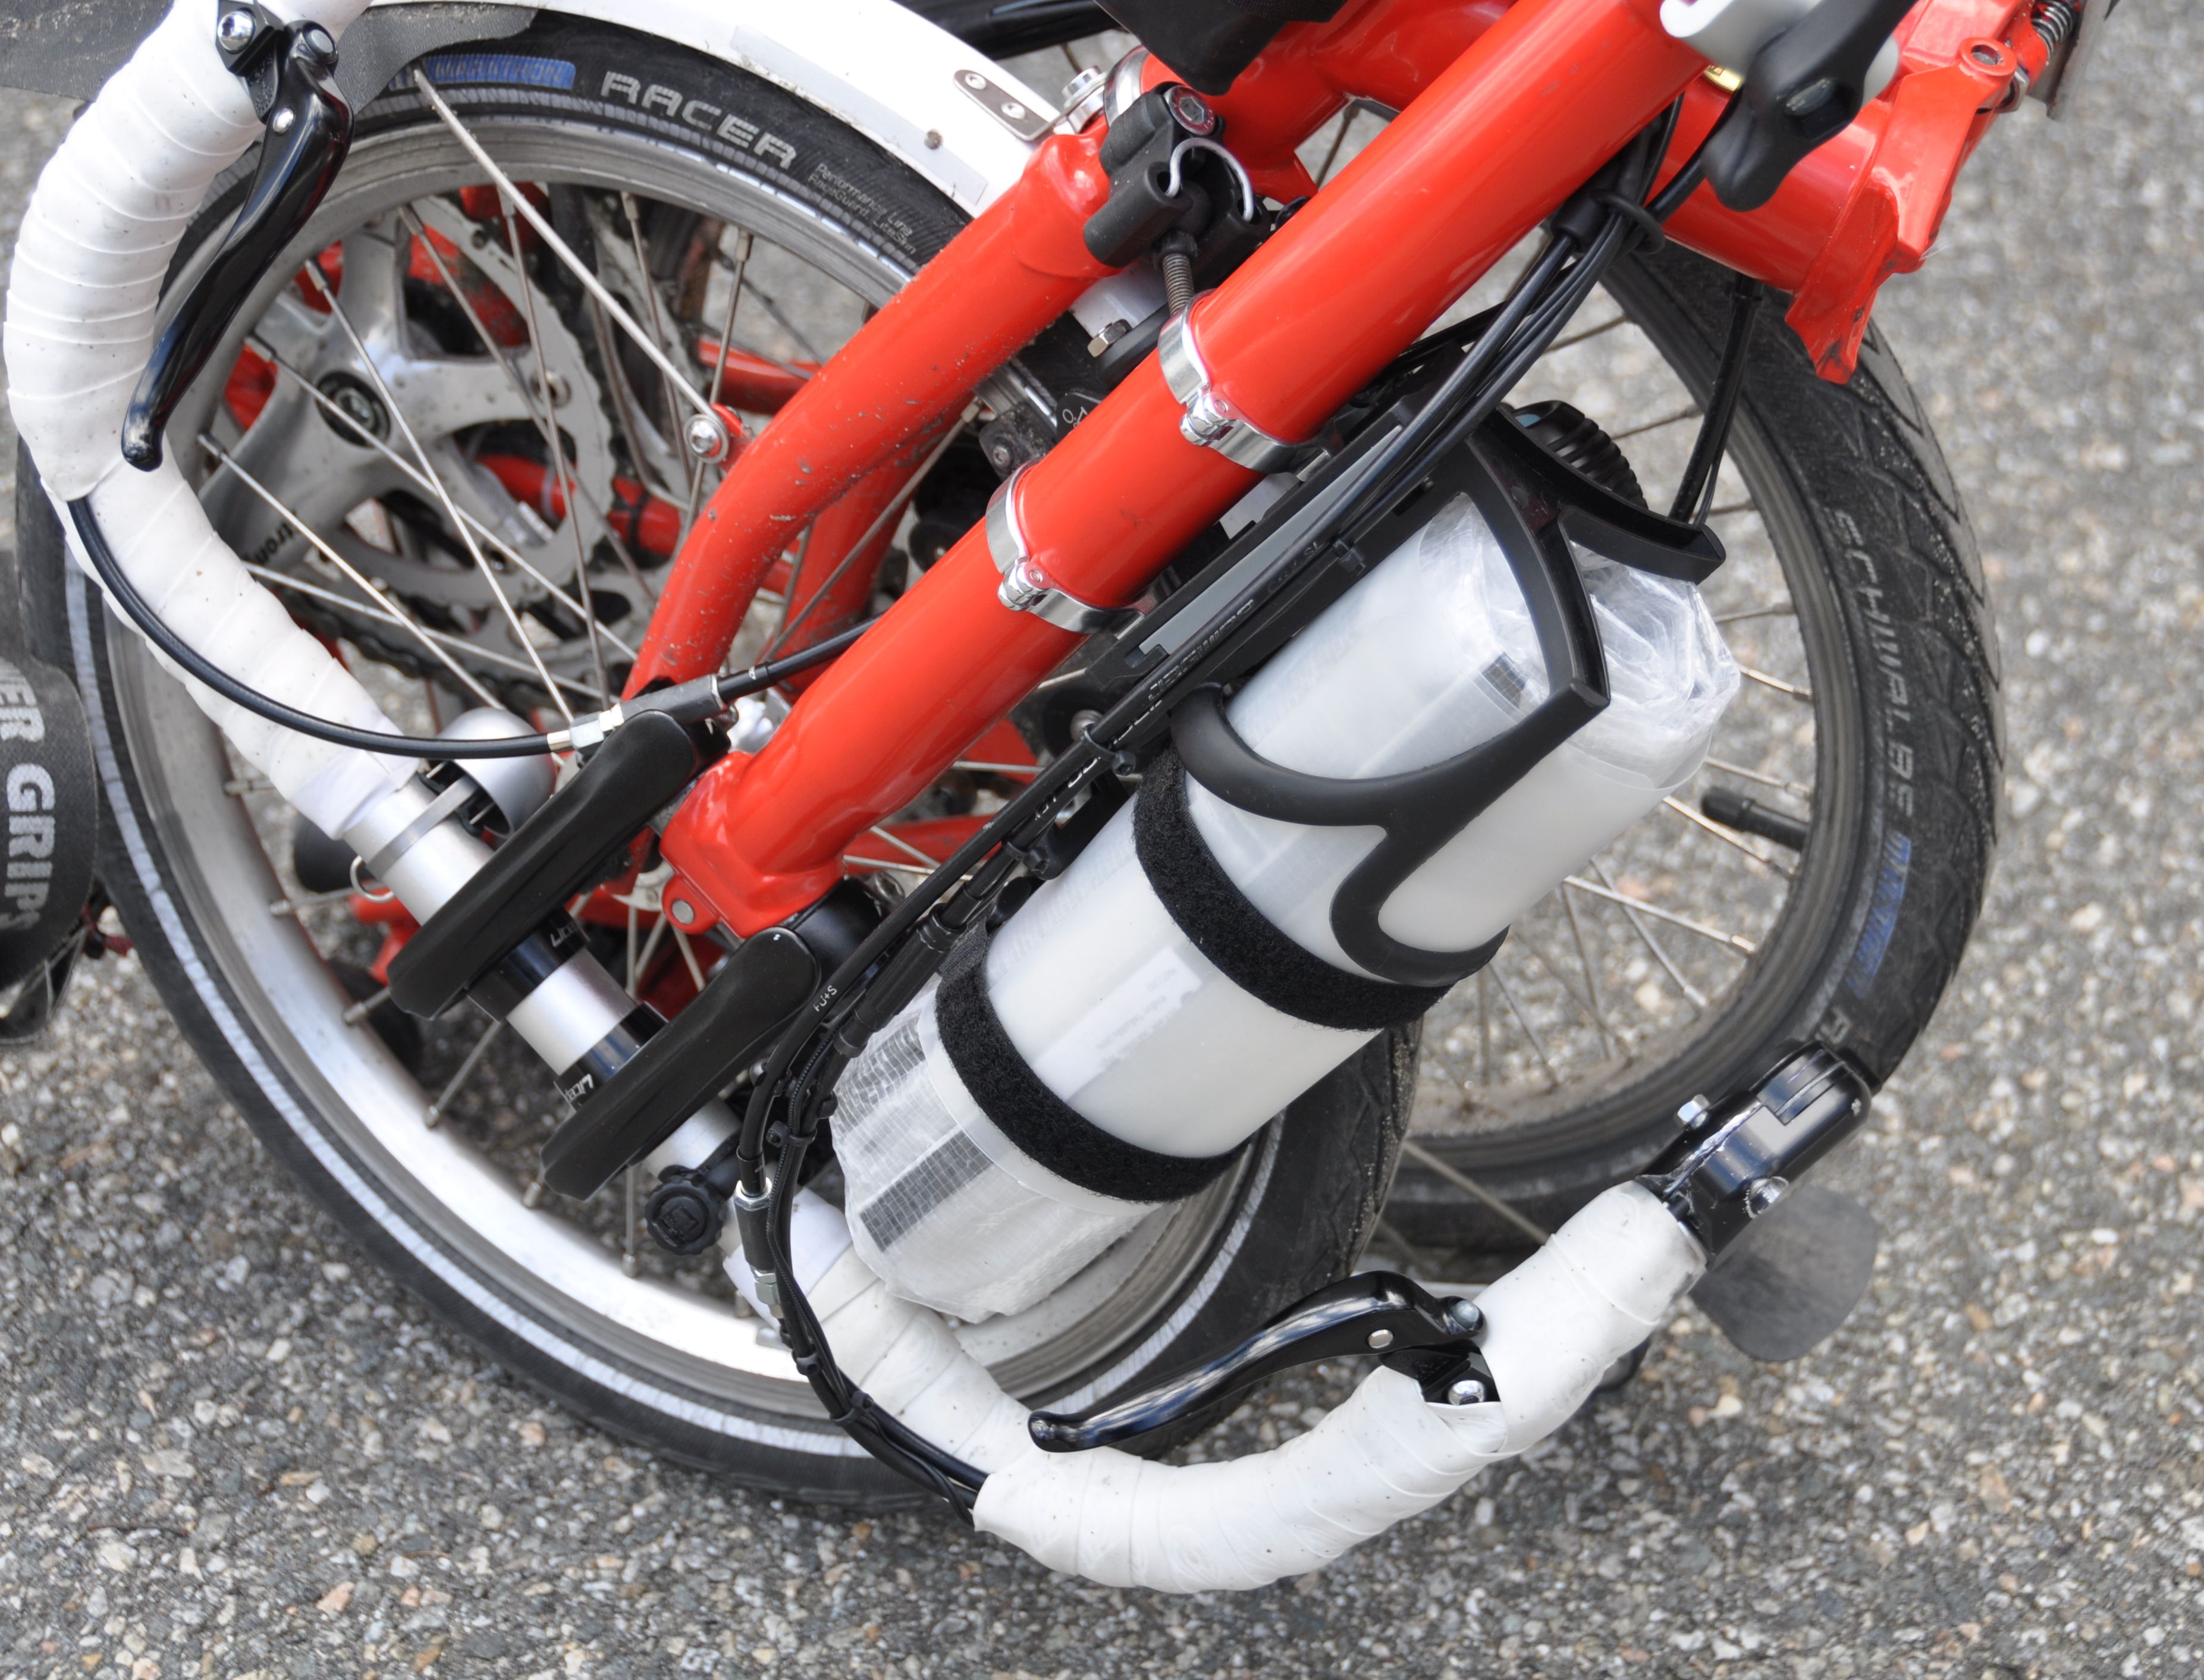
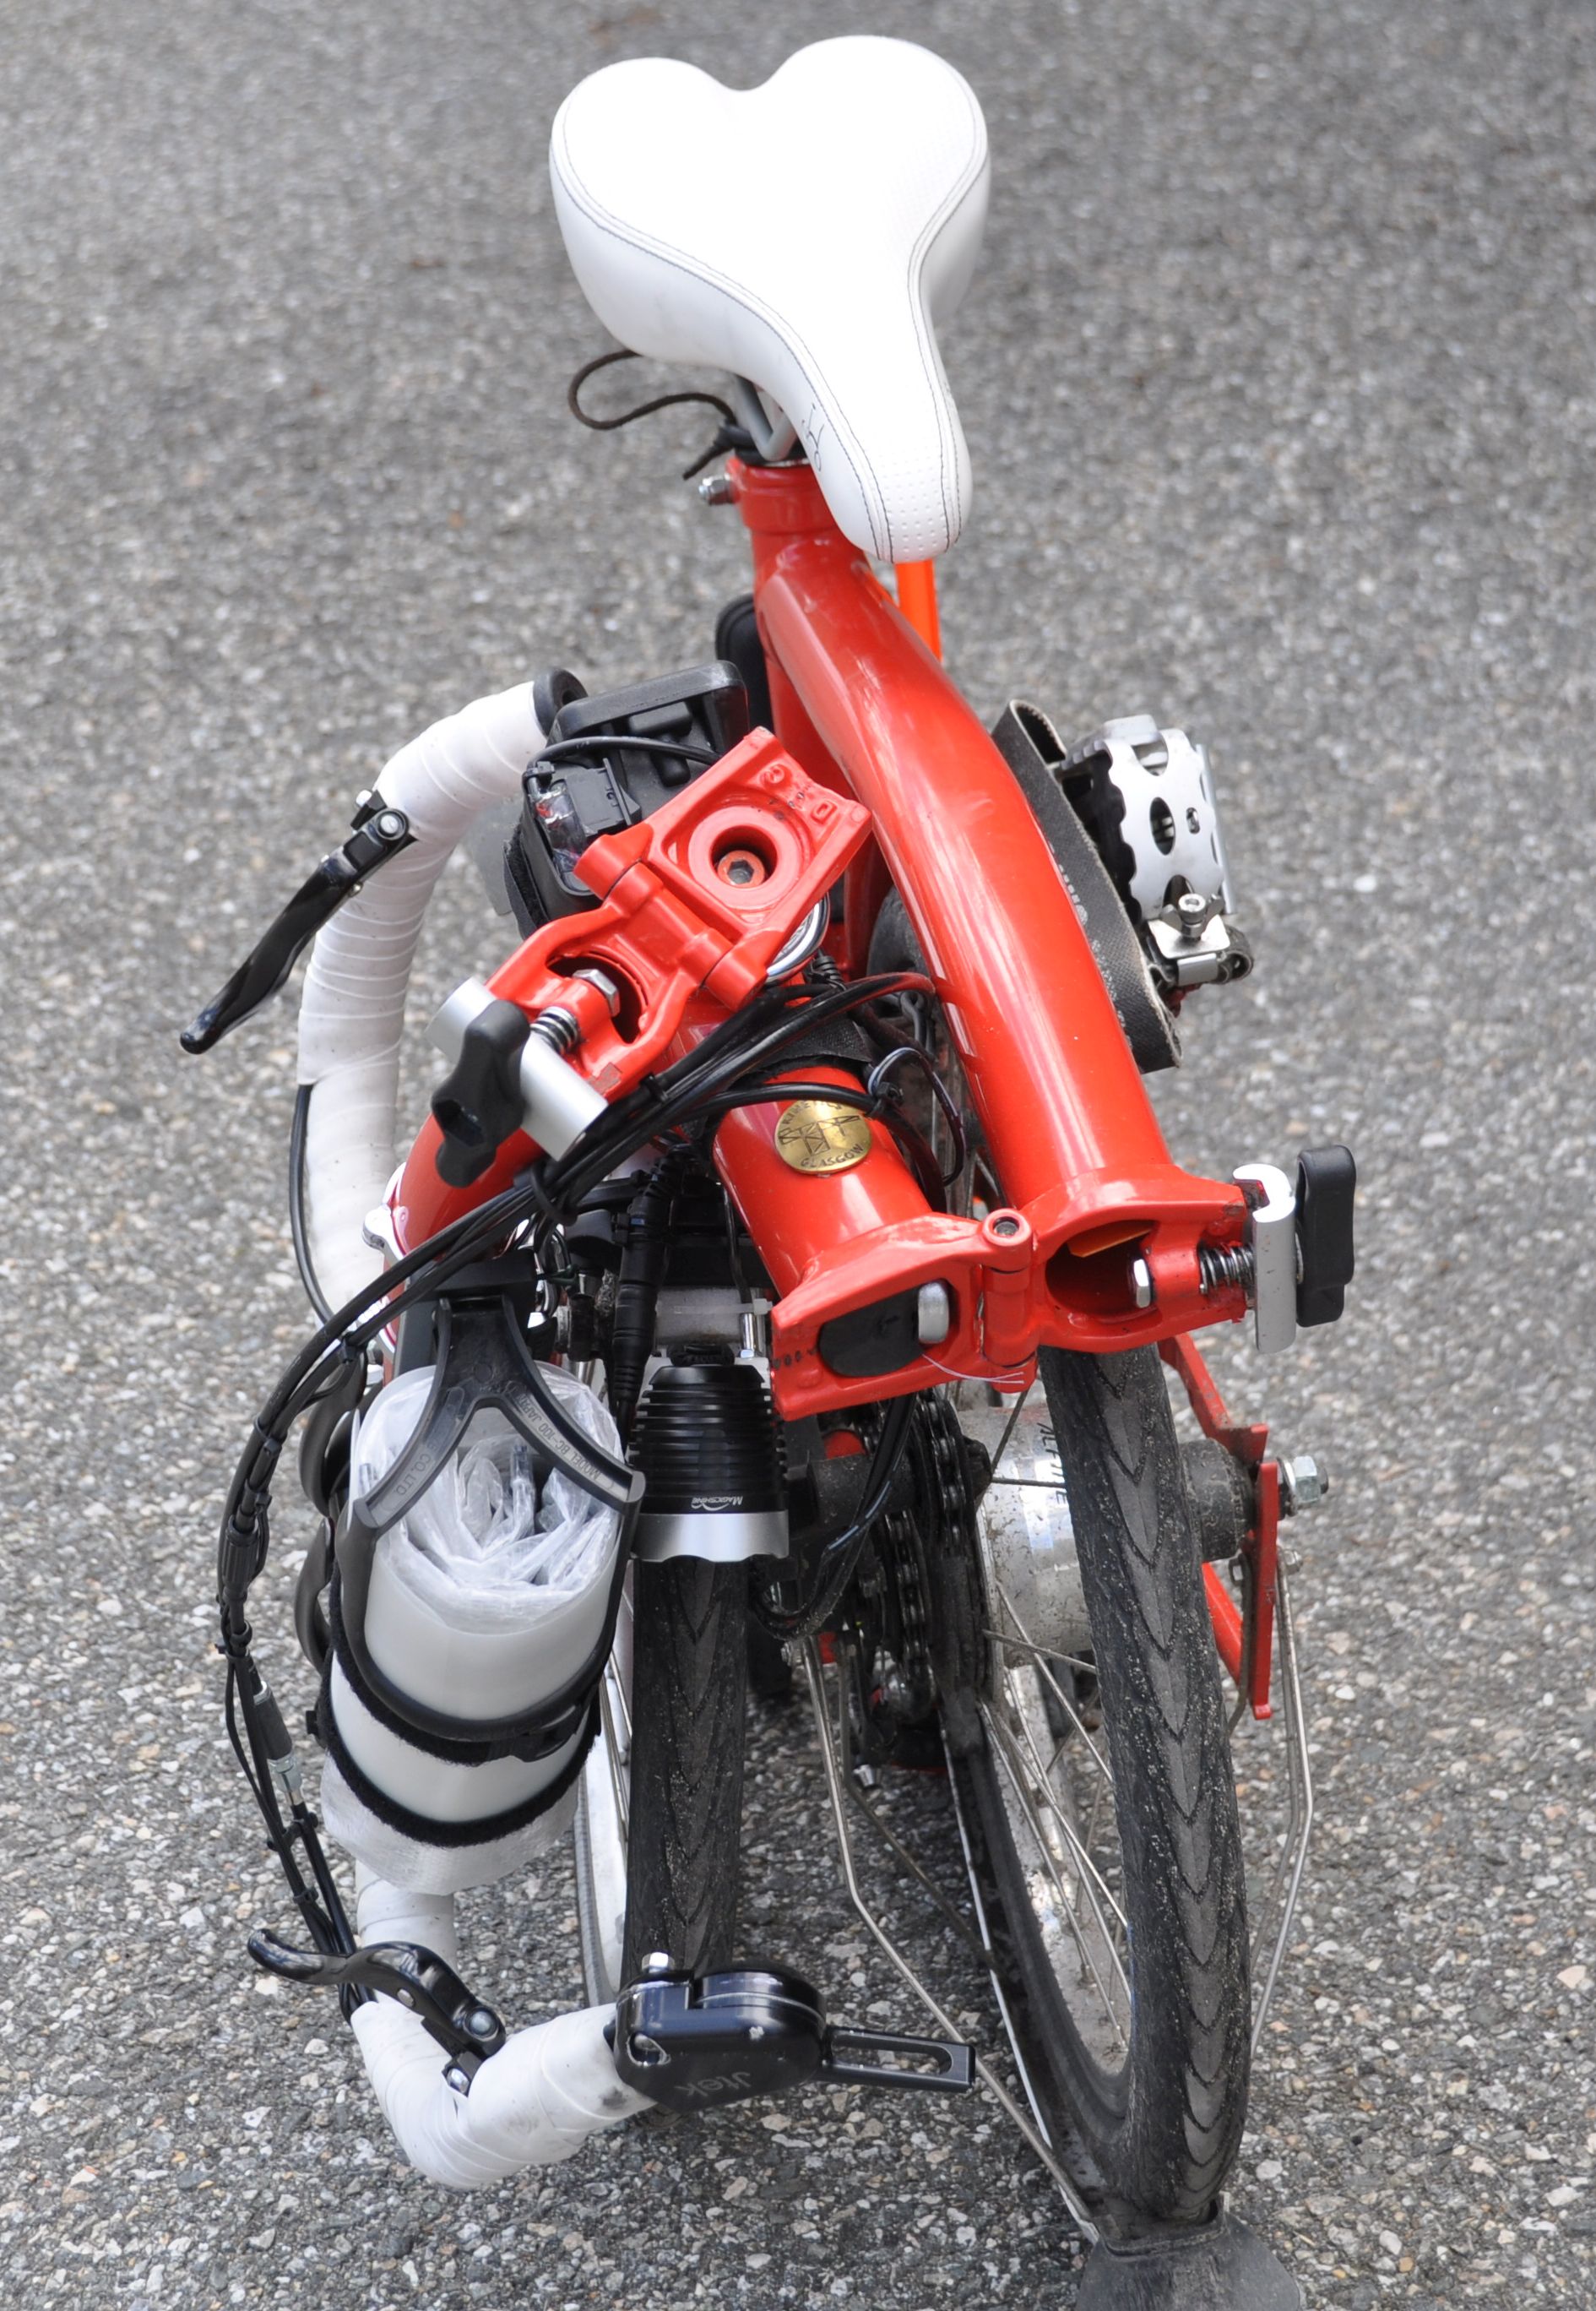
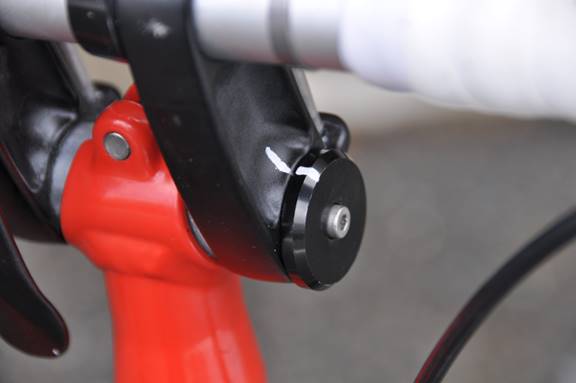
(1) My favorite solution is to use a simple clamp (Chain Reaction Cycles) and mount a Planet Bike metal bottle cage directly --- very minimalistic, very small gap to the stem (modifications done: drill central hole in bottle cage, replace Allen screw by screw with wingnut, enlarge the screw hole with a file, protect paint by gluing a piece of a plastic milk container to the clamp). Since the bottle cage is held by only one screw, I use thread locker. I can highly recommend this solution.
I leave the cage permanently mounted. It doesn't interfere with the fold for my S type stem), and also works with a Brompton shoulder bag. For a larger bag (e.g. T bag), the mount has to be removed or rotated (but then stands out when the bike is folded).

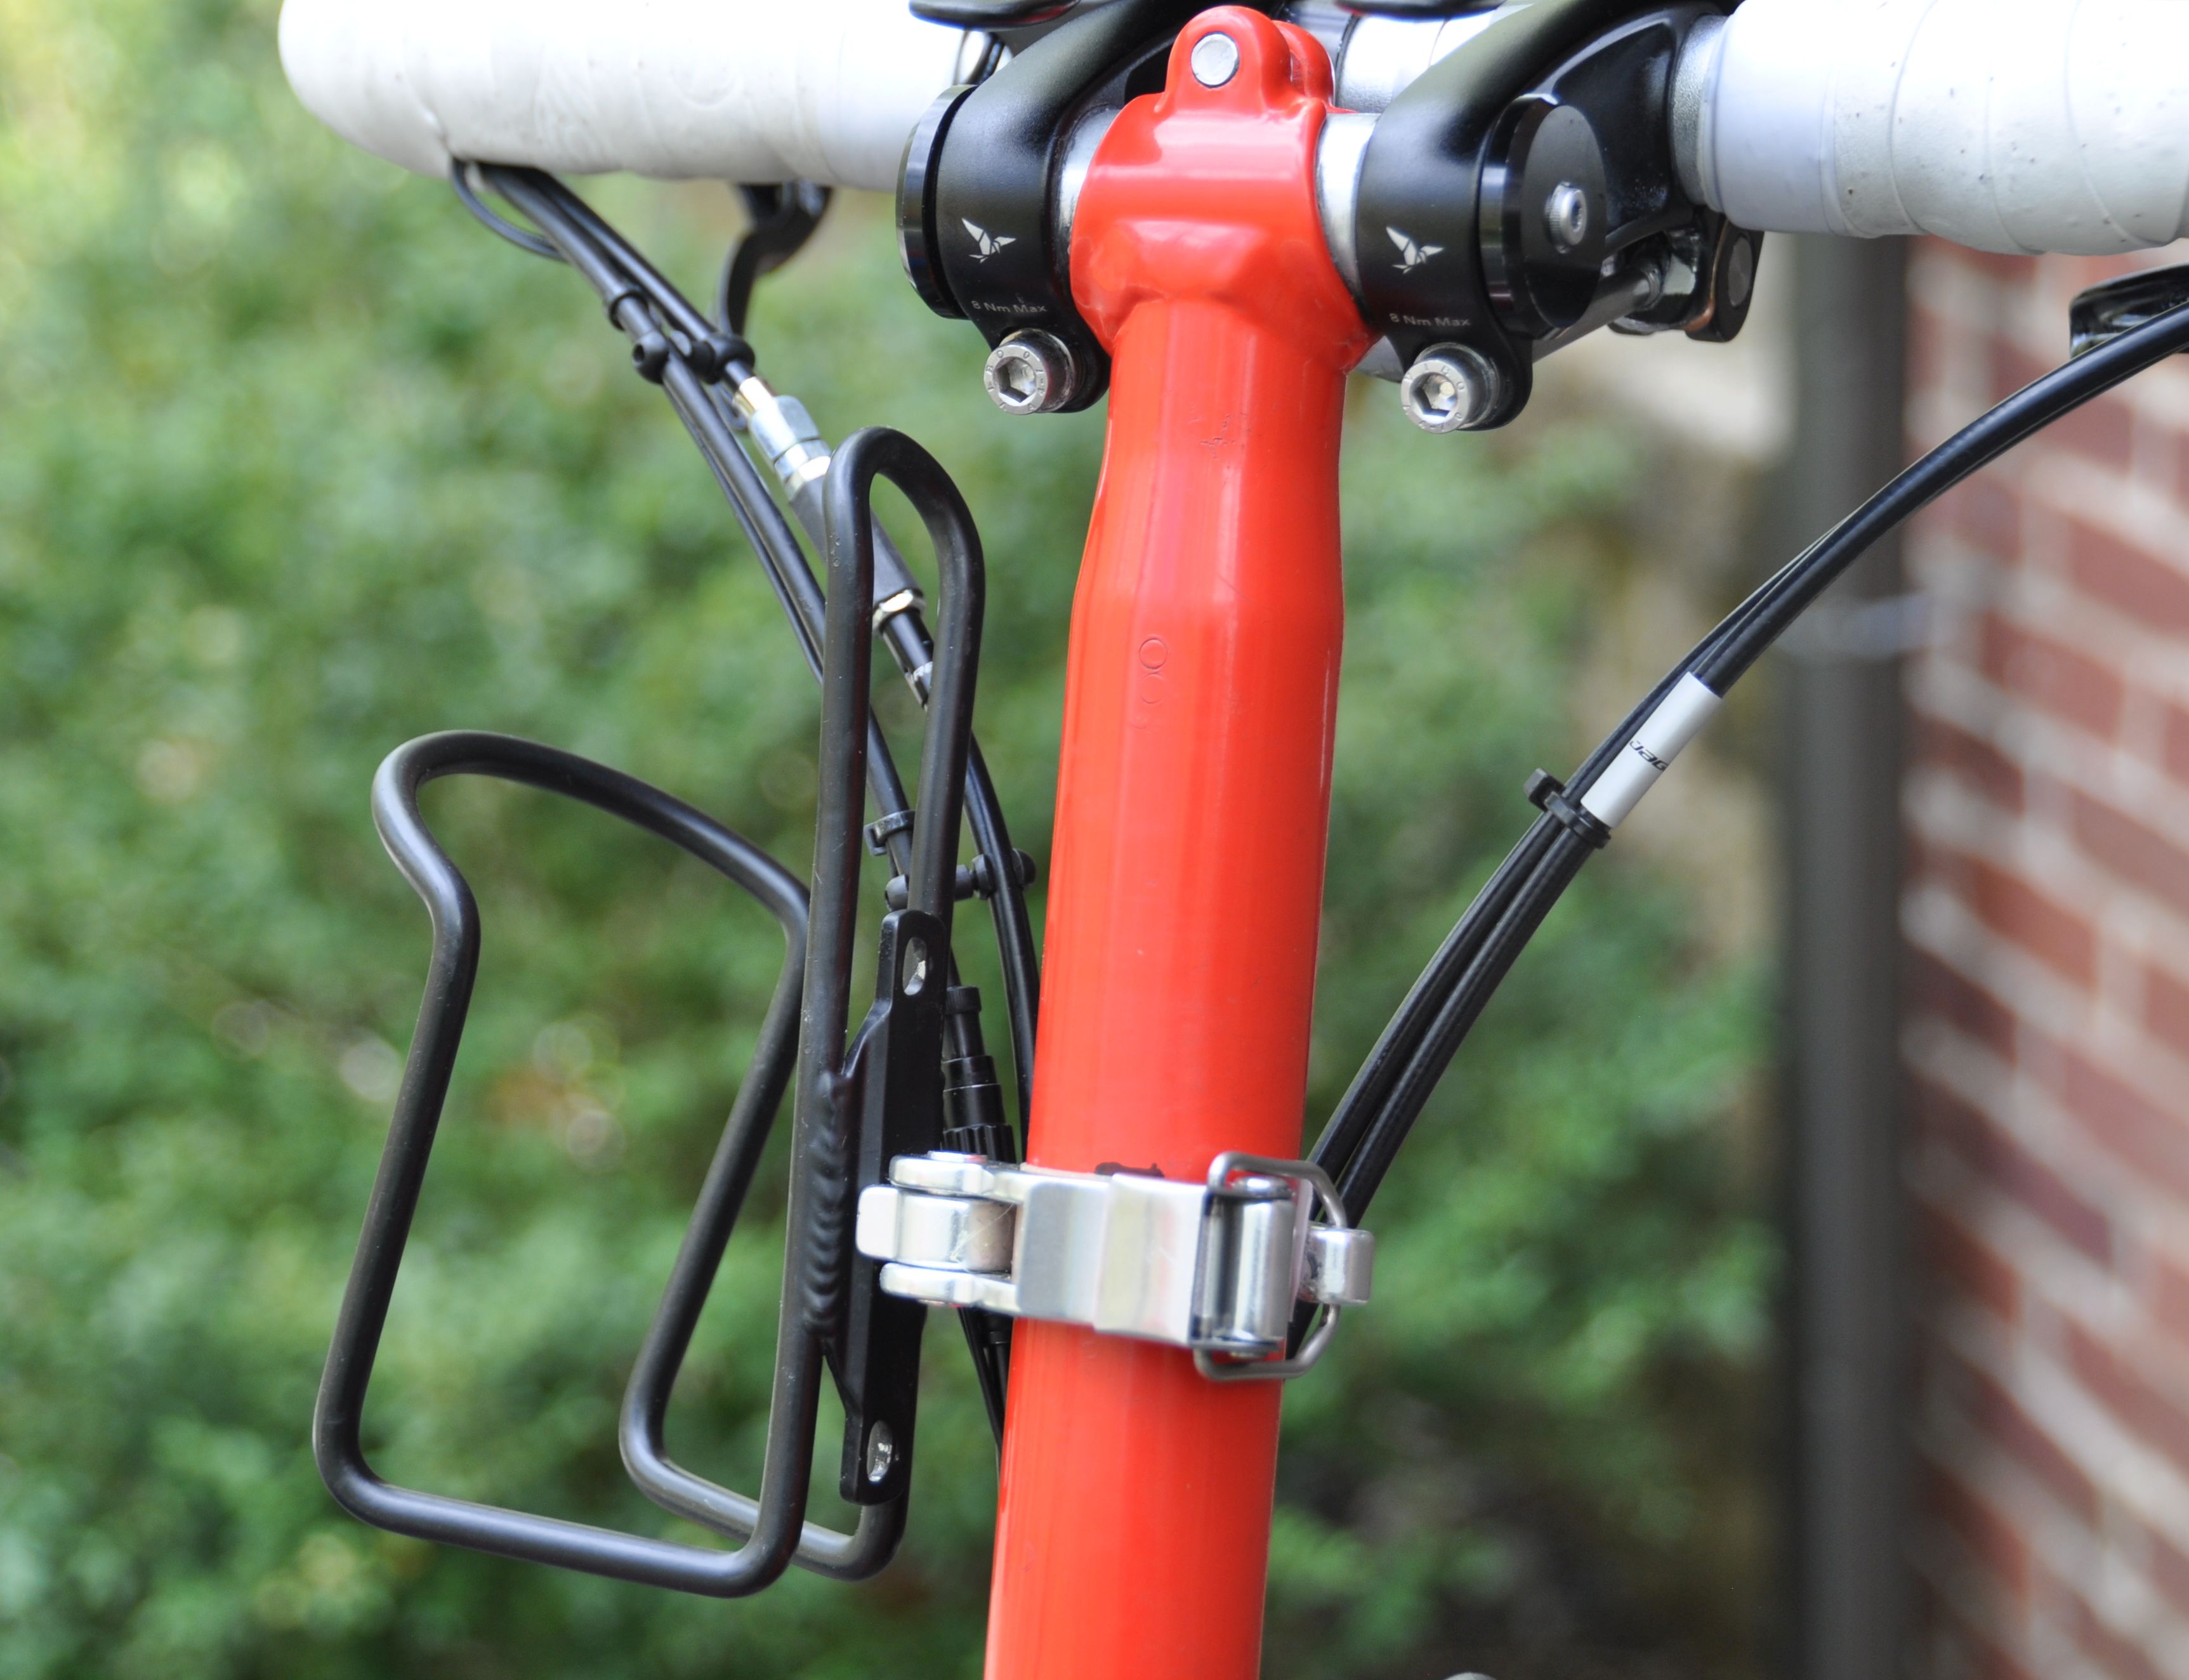
(2) The Minoura quick release clamp is also quite nice. I bought the bottle cage mount, but removed the ugly hardware to attach the bottle cage and used only the quick release clamp (modifications done: drill central hole in bottle cage, protect paint by gluing a piece of a plastic milk container to the clamp). Since the bottle cage is held by only one screw, I use thread locker. I use this if I need a second water bottle cage (but have to take it off before folding the bike).
(3) Lixada bottle cage holder
https://www.amazon.com/Lixada-Multifunctional-Bicycle-Anodised-Handlebar/dp/B072ZLQKG1
and replaced the Allen screw with a screw with a wingnut. Similar to solution (1), but bulkier.
(4) A plastic quick release bottle cage mount also works:
https://www.amazon.com/gp/product/B07DYSNHGF
Amazon, $ 8.99
I exchanged the knurled knob by a seatpost quick release, and eliminated the two different orientations by gluing (more sturdy). Not a bad solution, but less sturdy and uglier (in my view) than the other options.
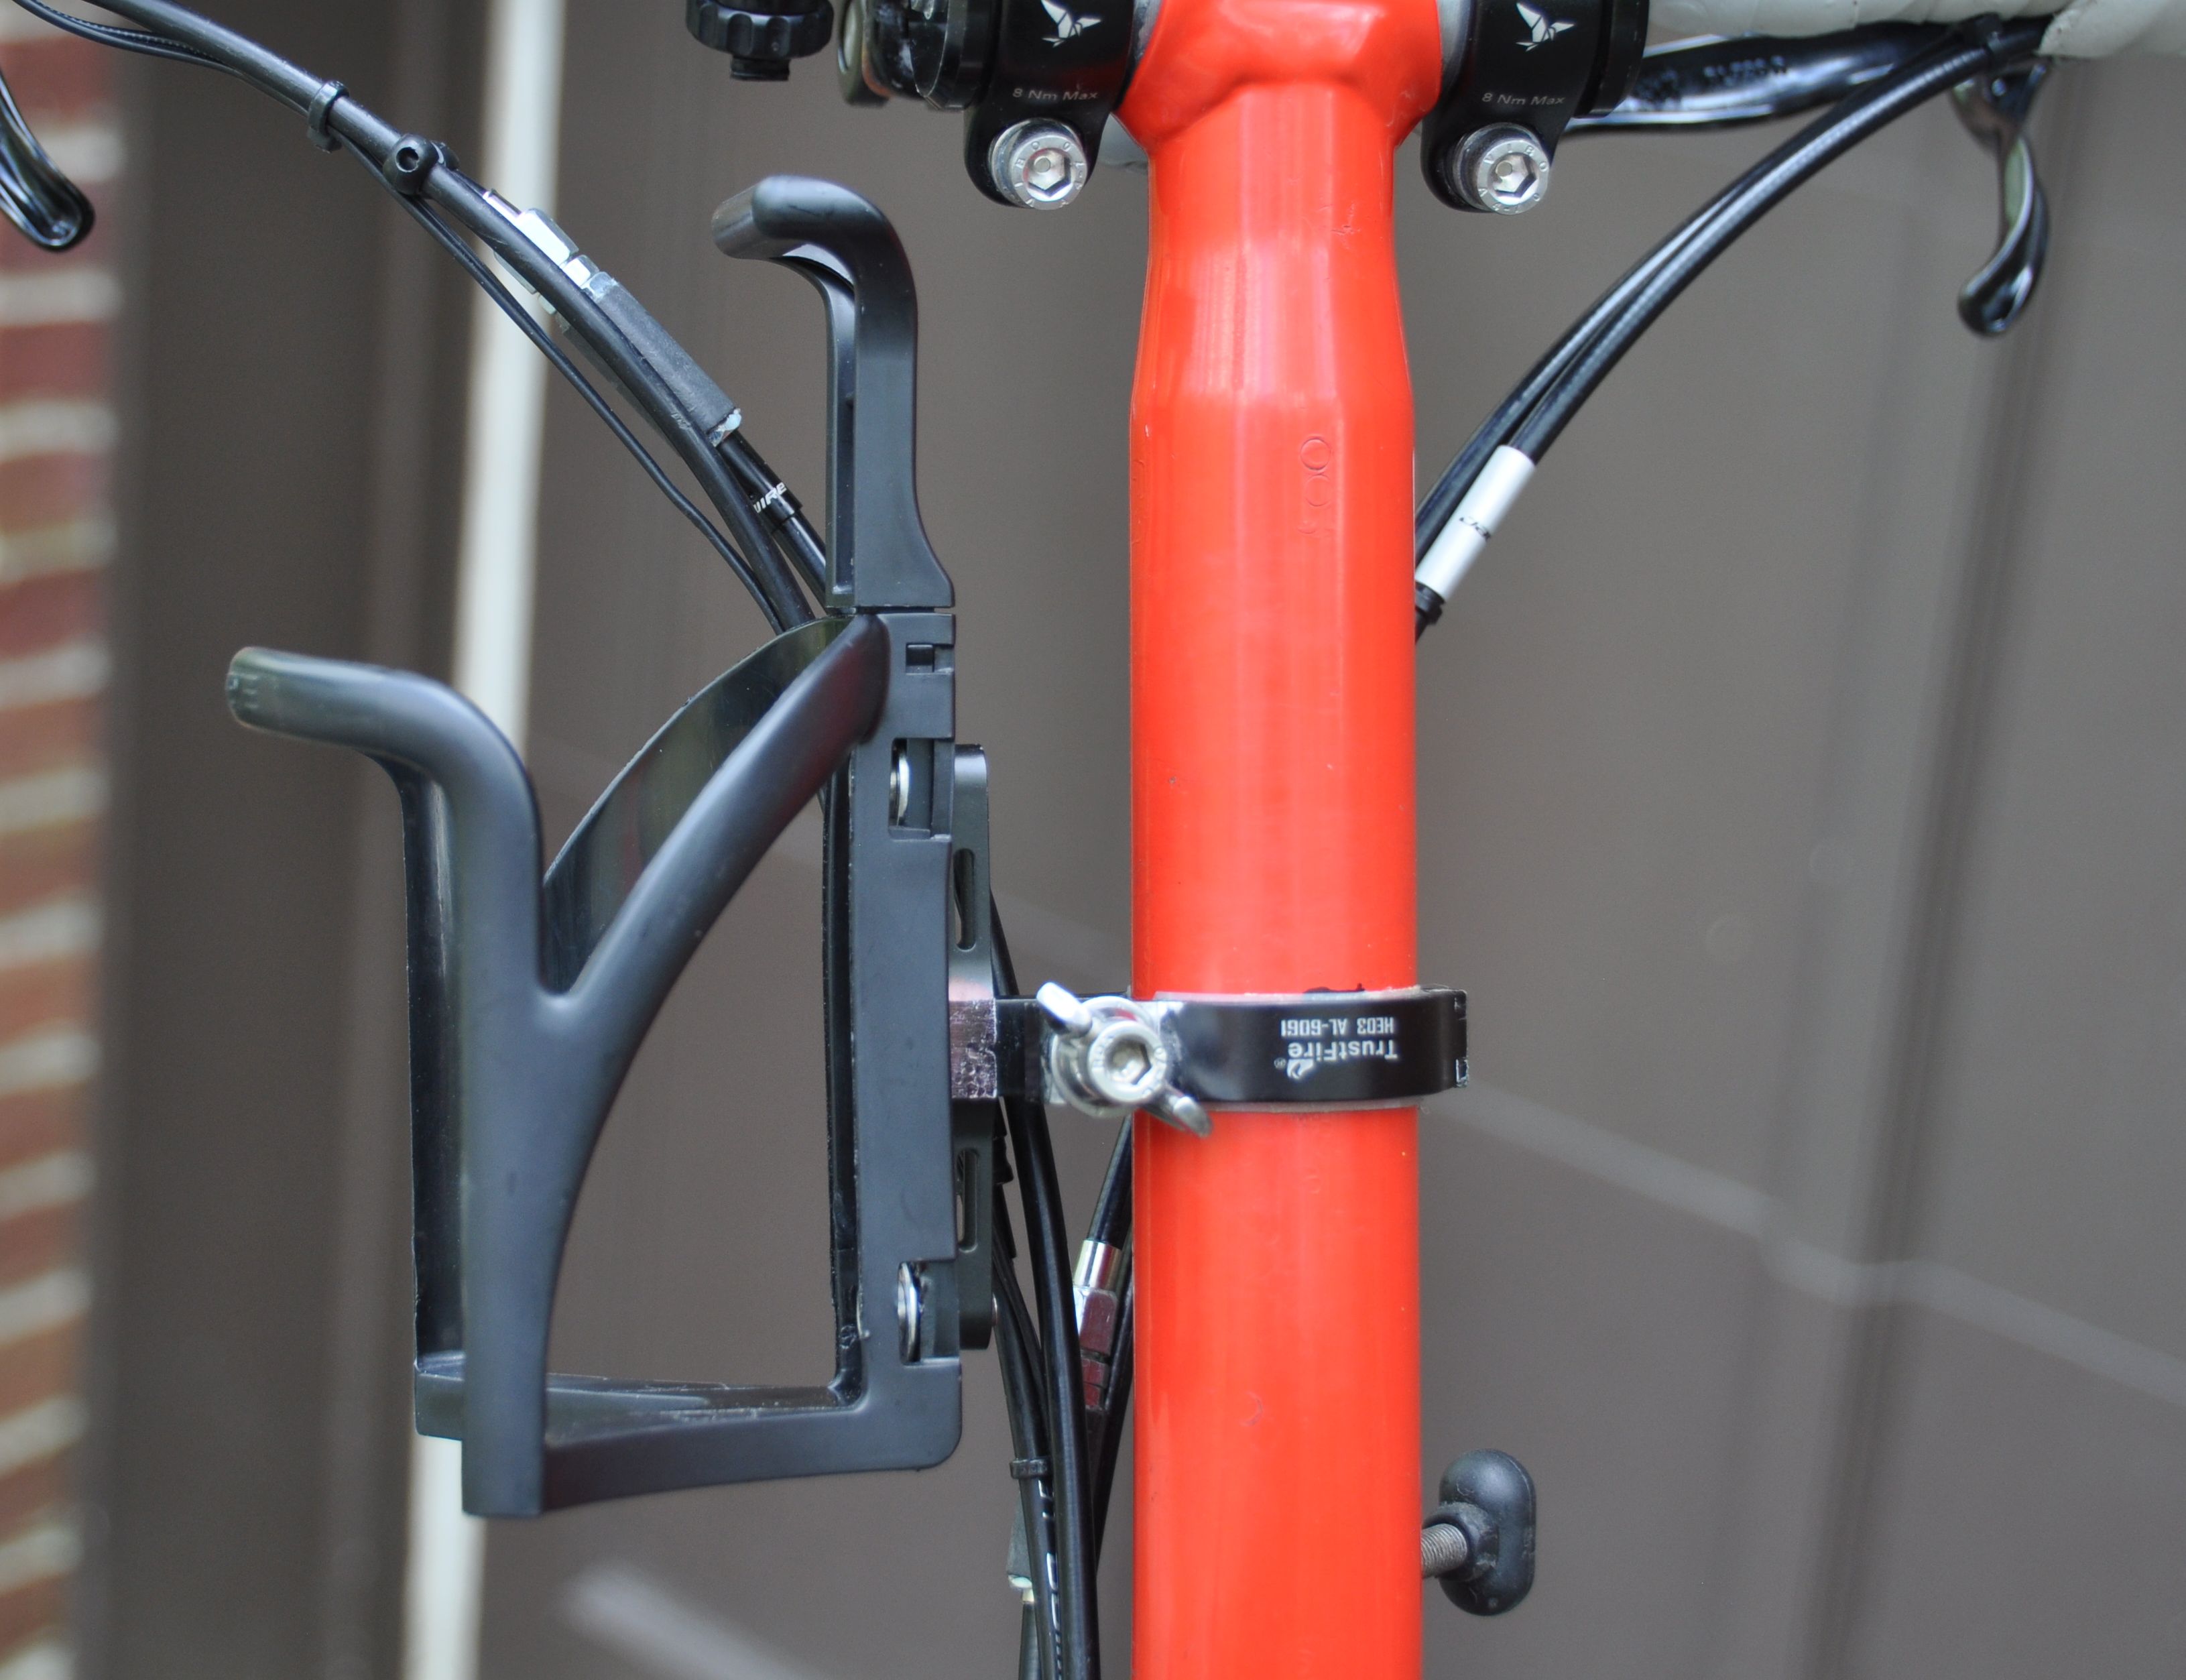
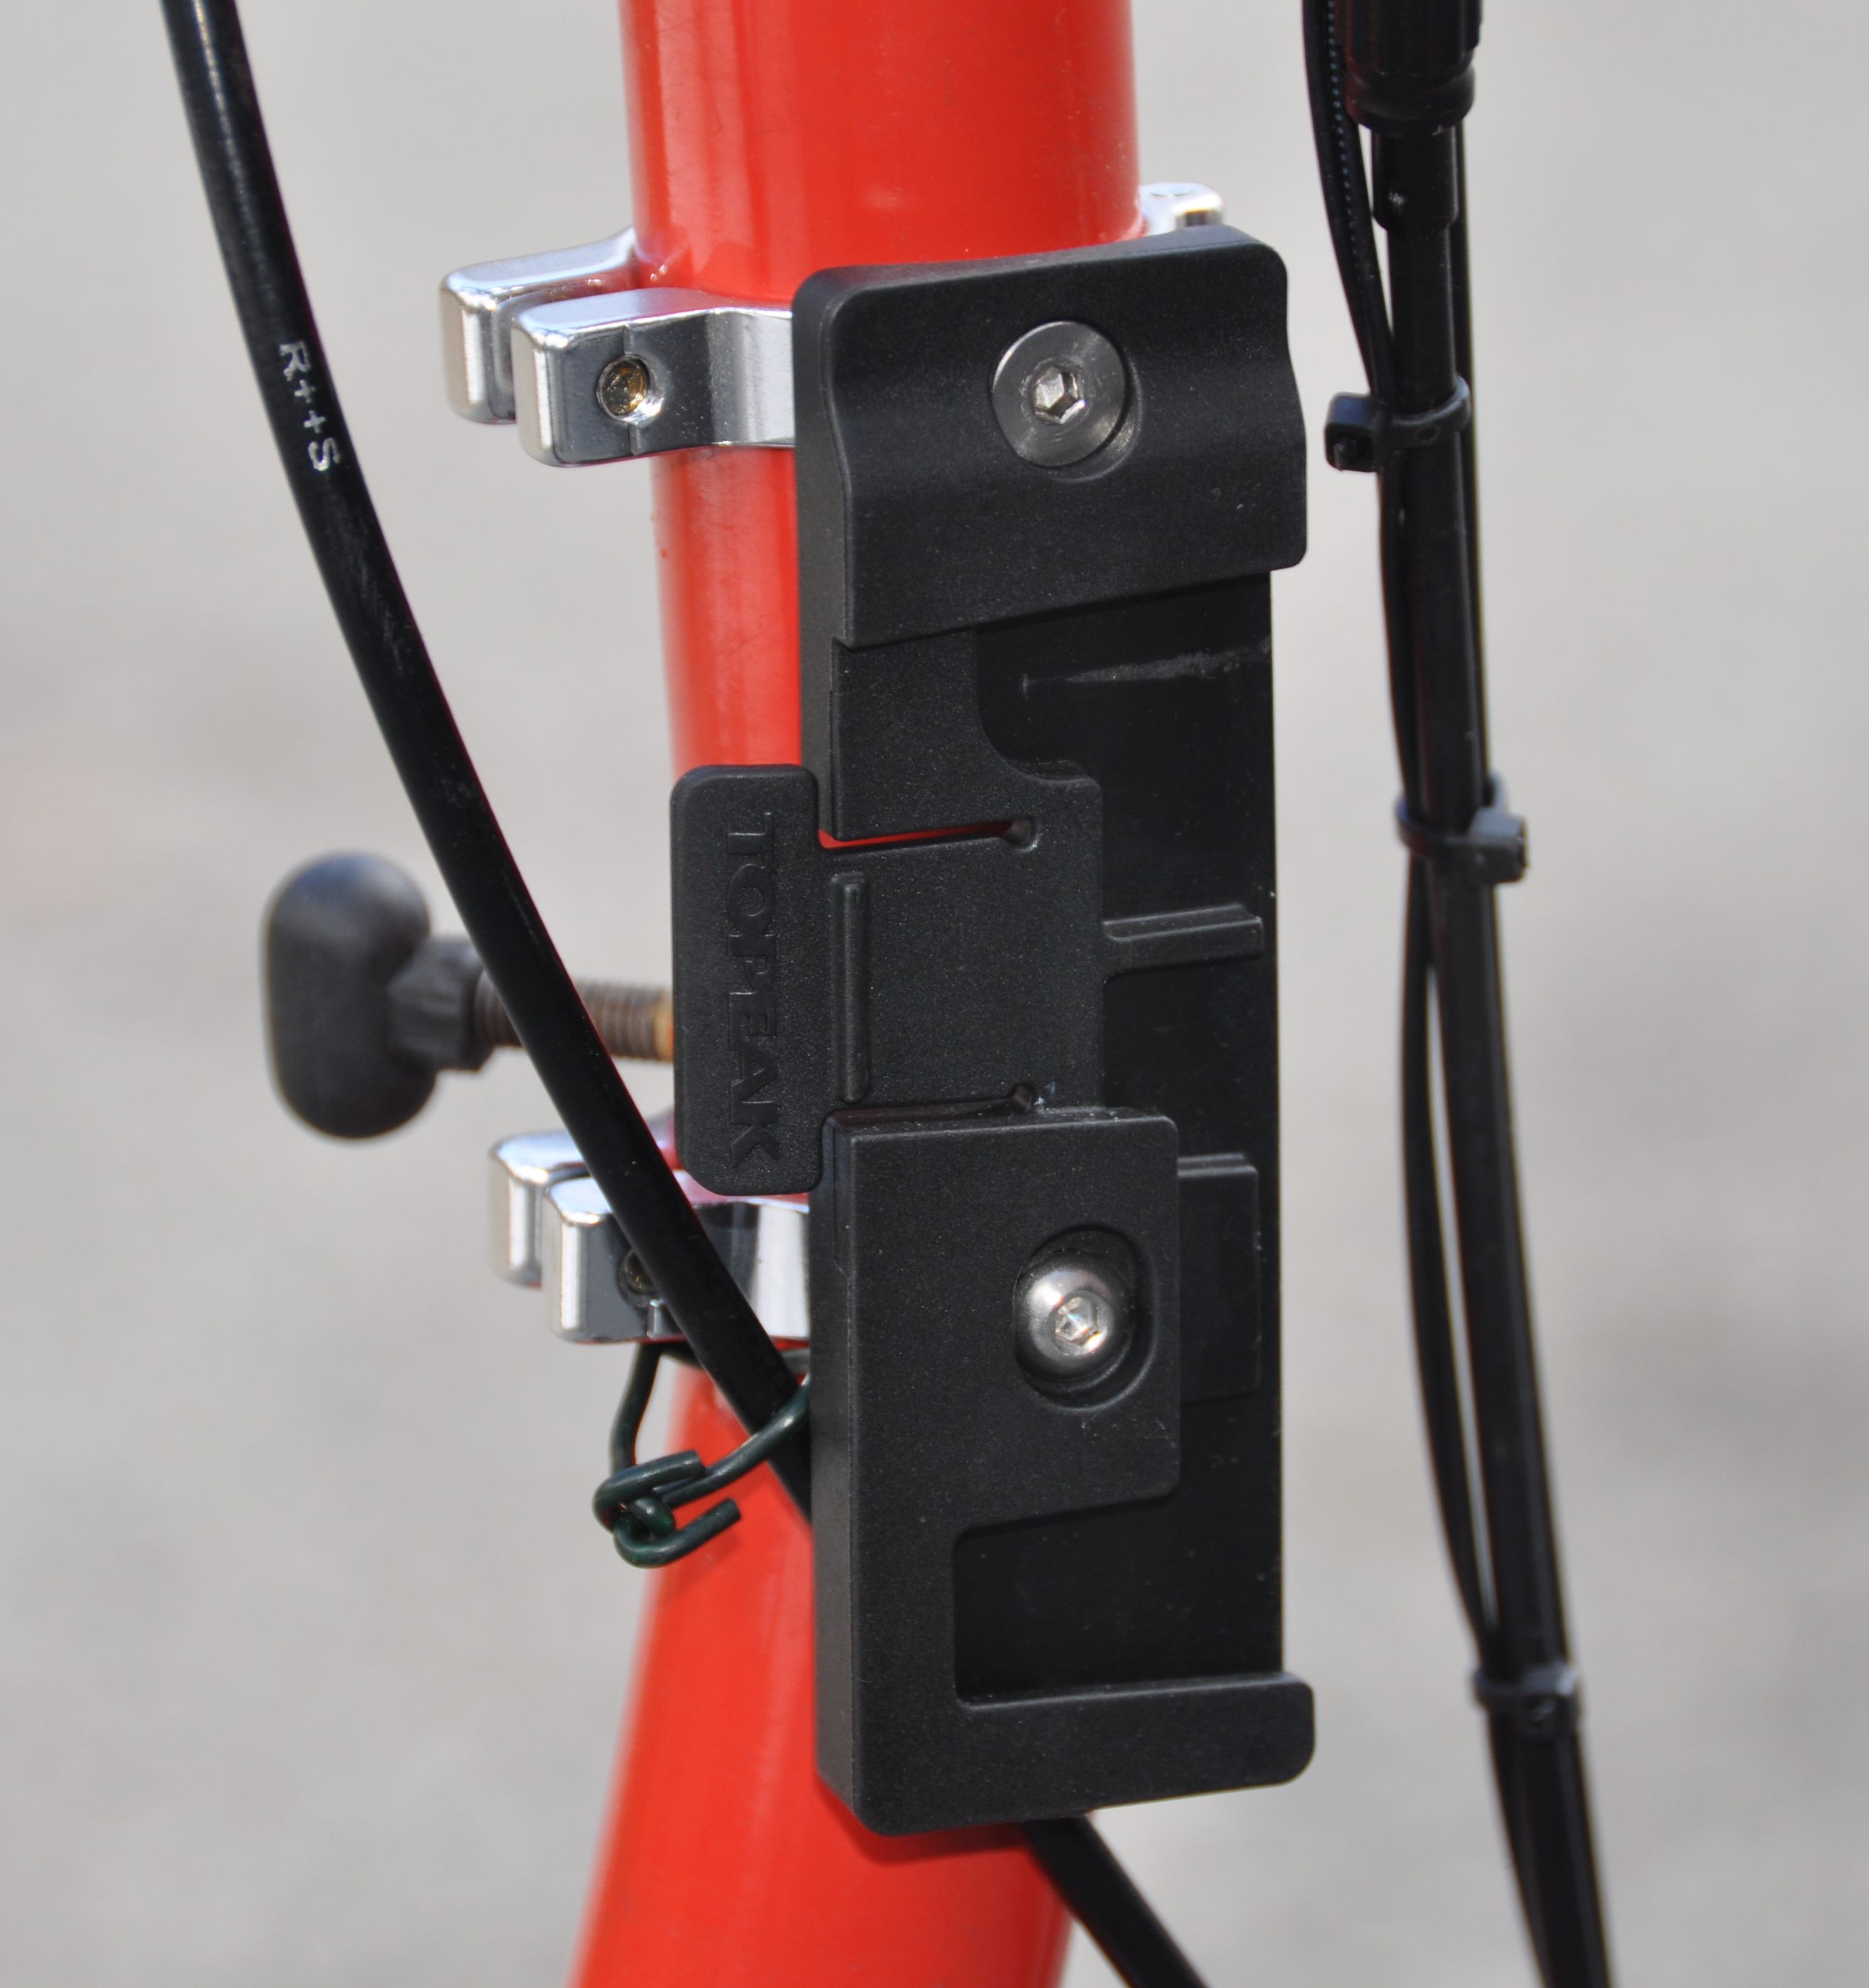
(5) TOPEAK quick release bottle cage mount ($ 7), mounted with simple clamps from Chain Reaction Cycles. I like that you can use a bottle cage and bottle of your choice, and that the mounting is very sturdy (compared to other systems, e.g. monkii cage, two-fish). I saw that Trek/Bontrager have a quick disconnect mount for water bottles, but it is expensive.
As a bottle cage, I use a Cateye, black plastic bike bottle cage (often used on Bike Fridays). It is sturdy, bends without braking and doesn't scratch paint.
I like the TOPEAK quick release bottle cage for its functionality. However, on the Brompton handlebar stem, it doesn’t look elegant when the cage is removed. I use it on my Bike Friday where it is less prominently visible.
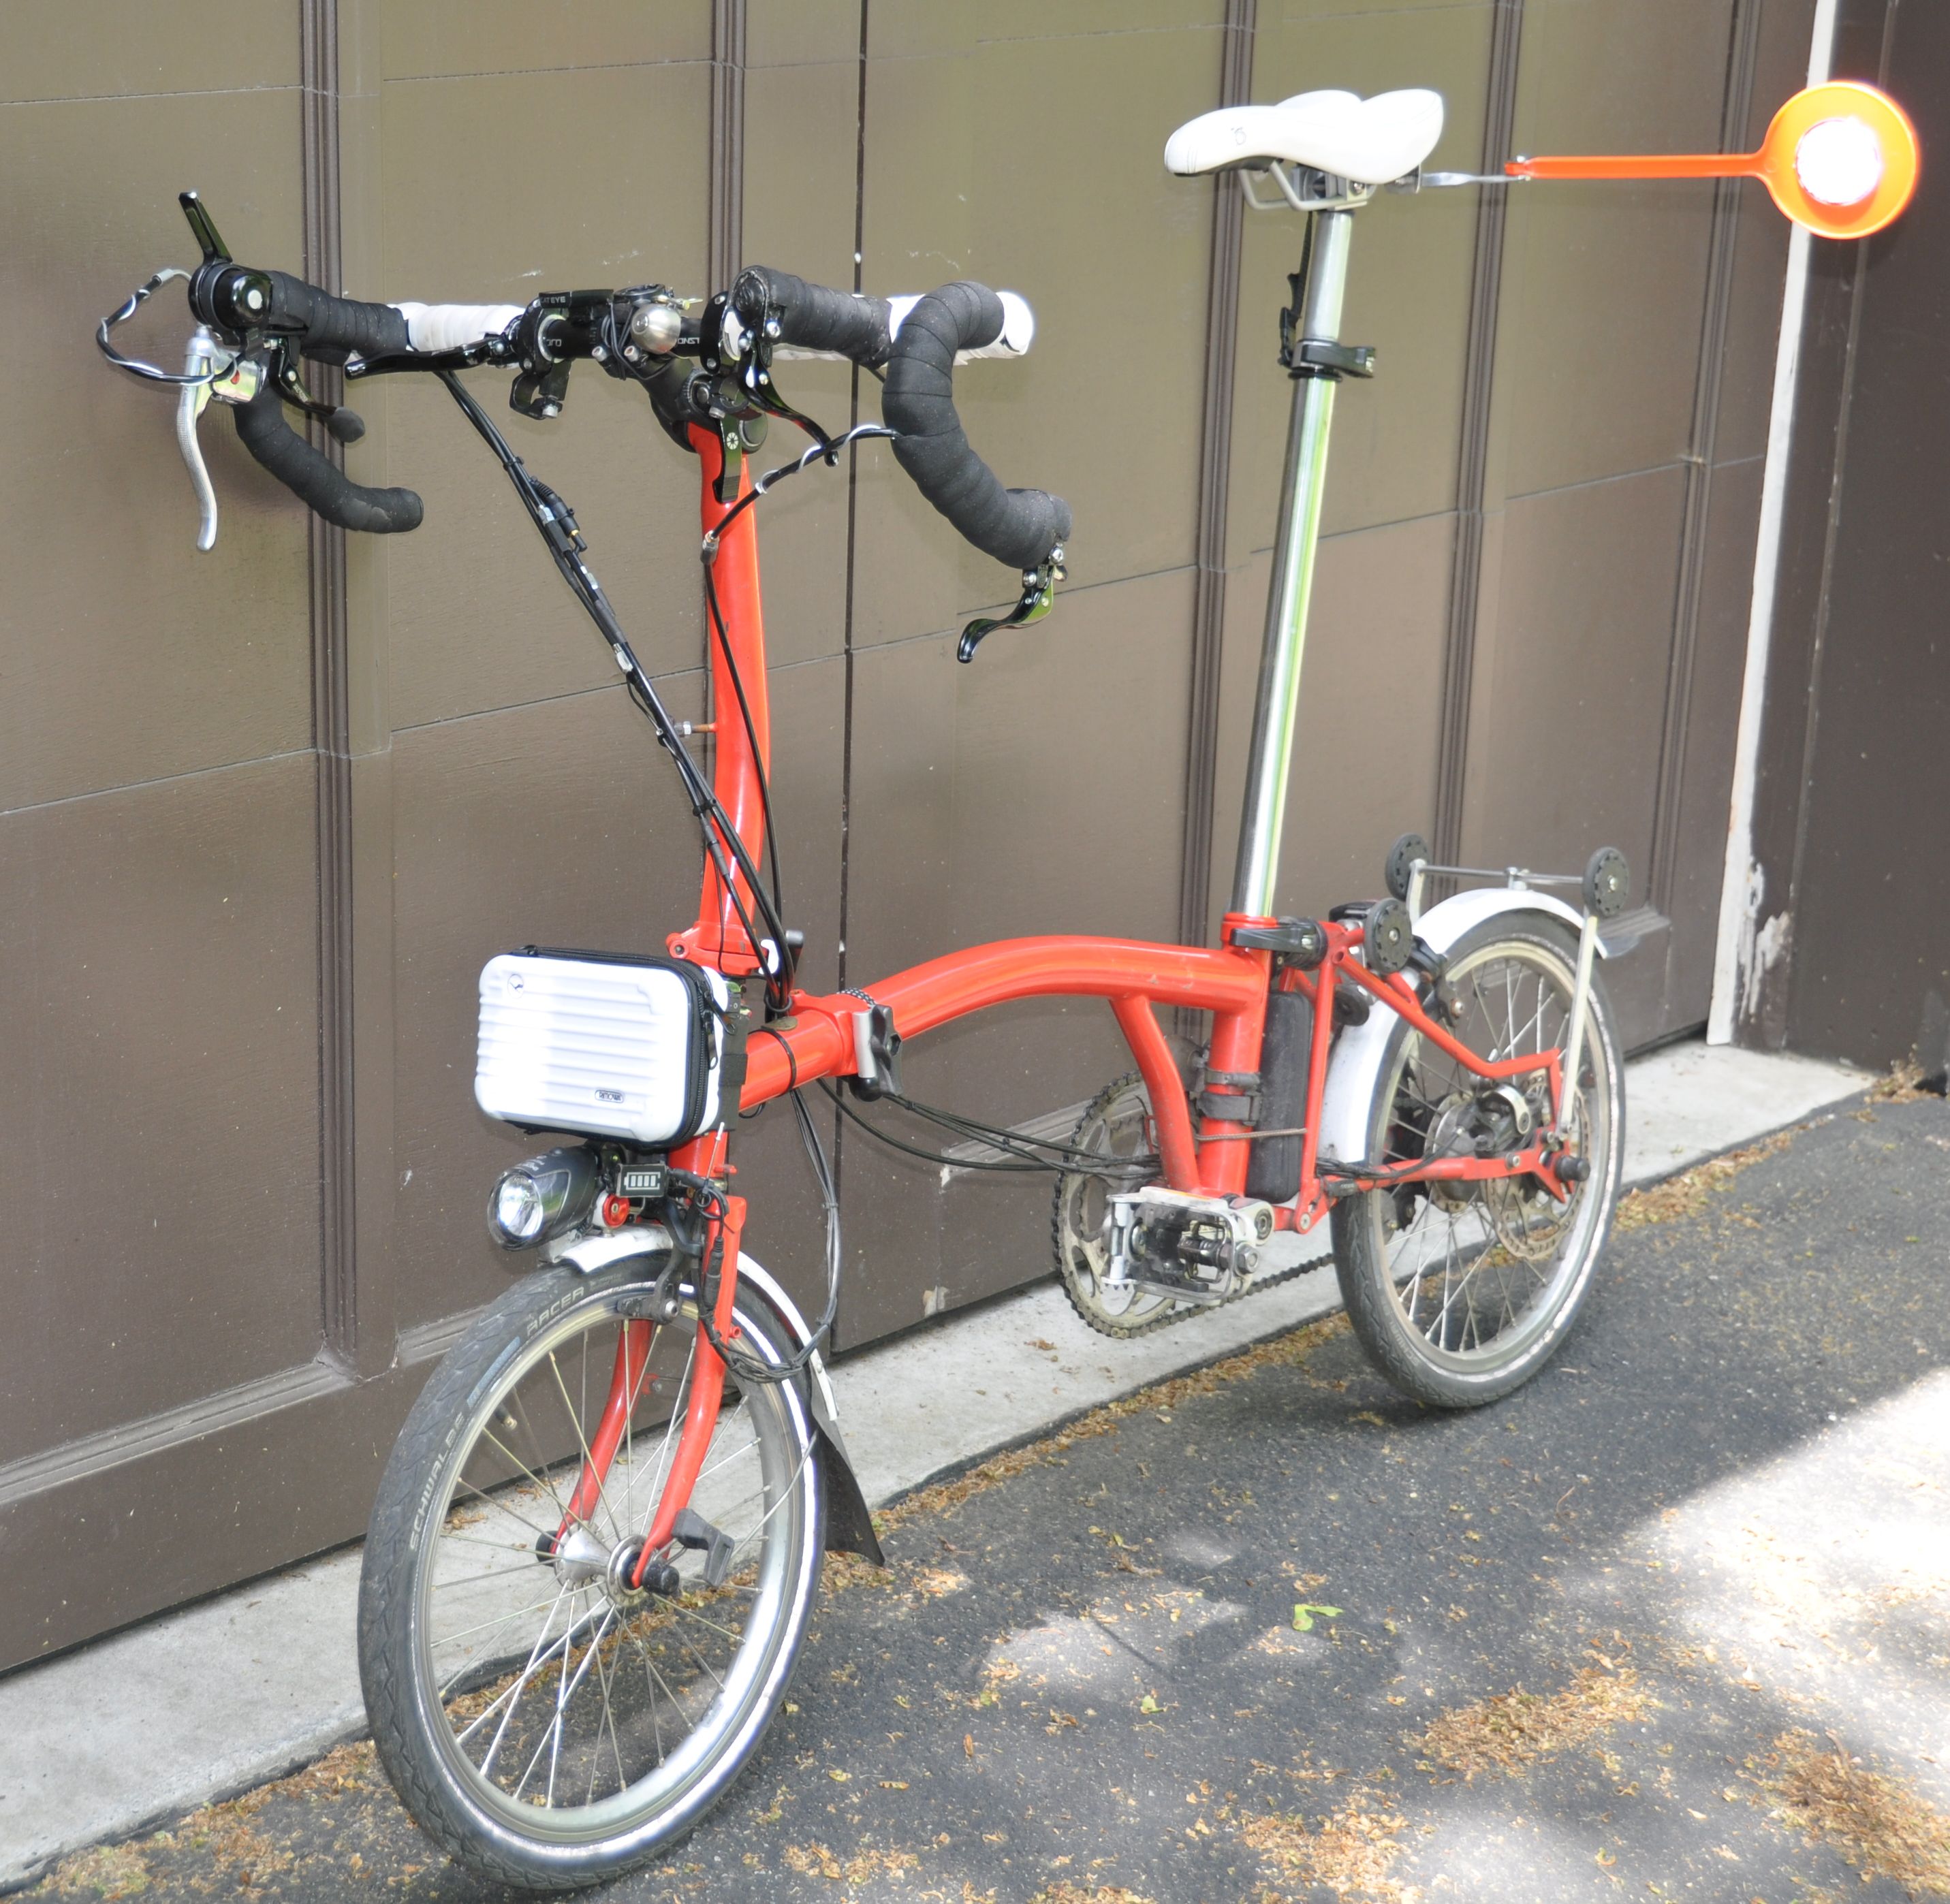
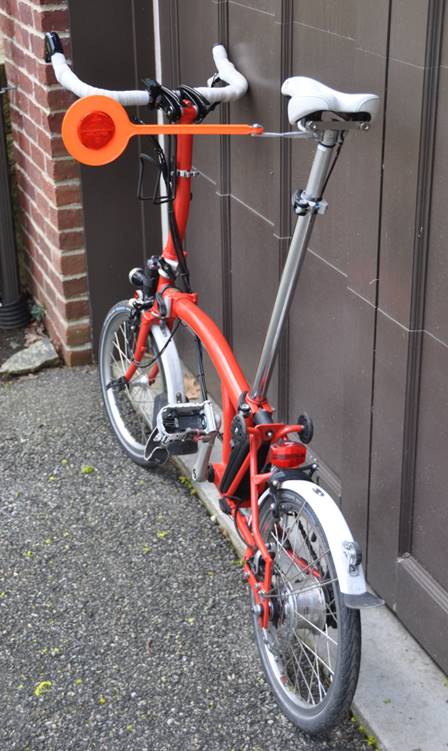
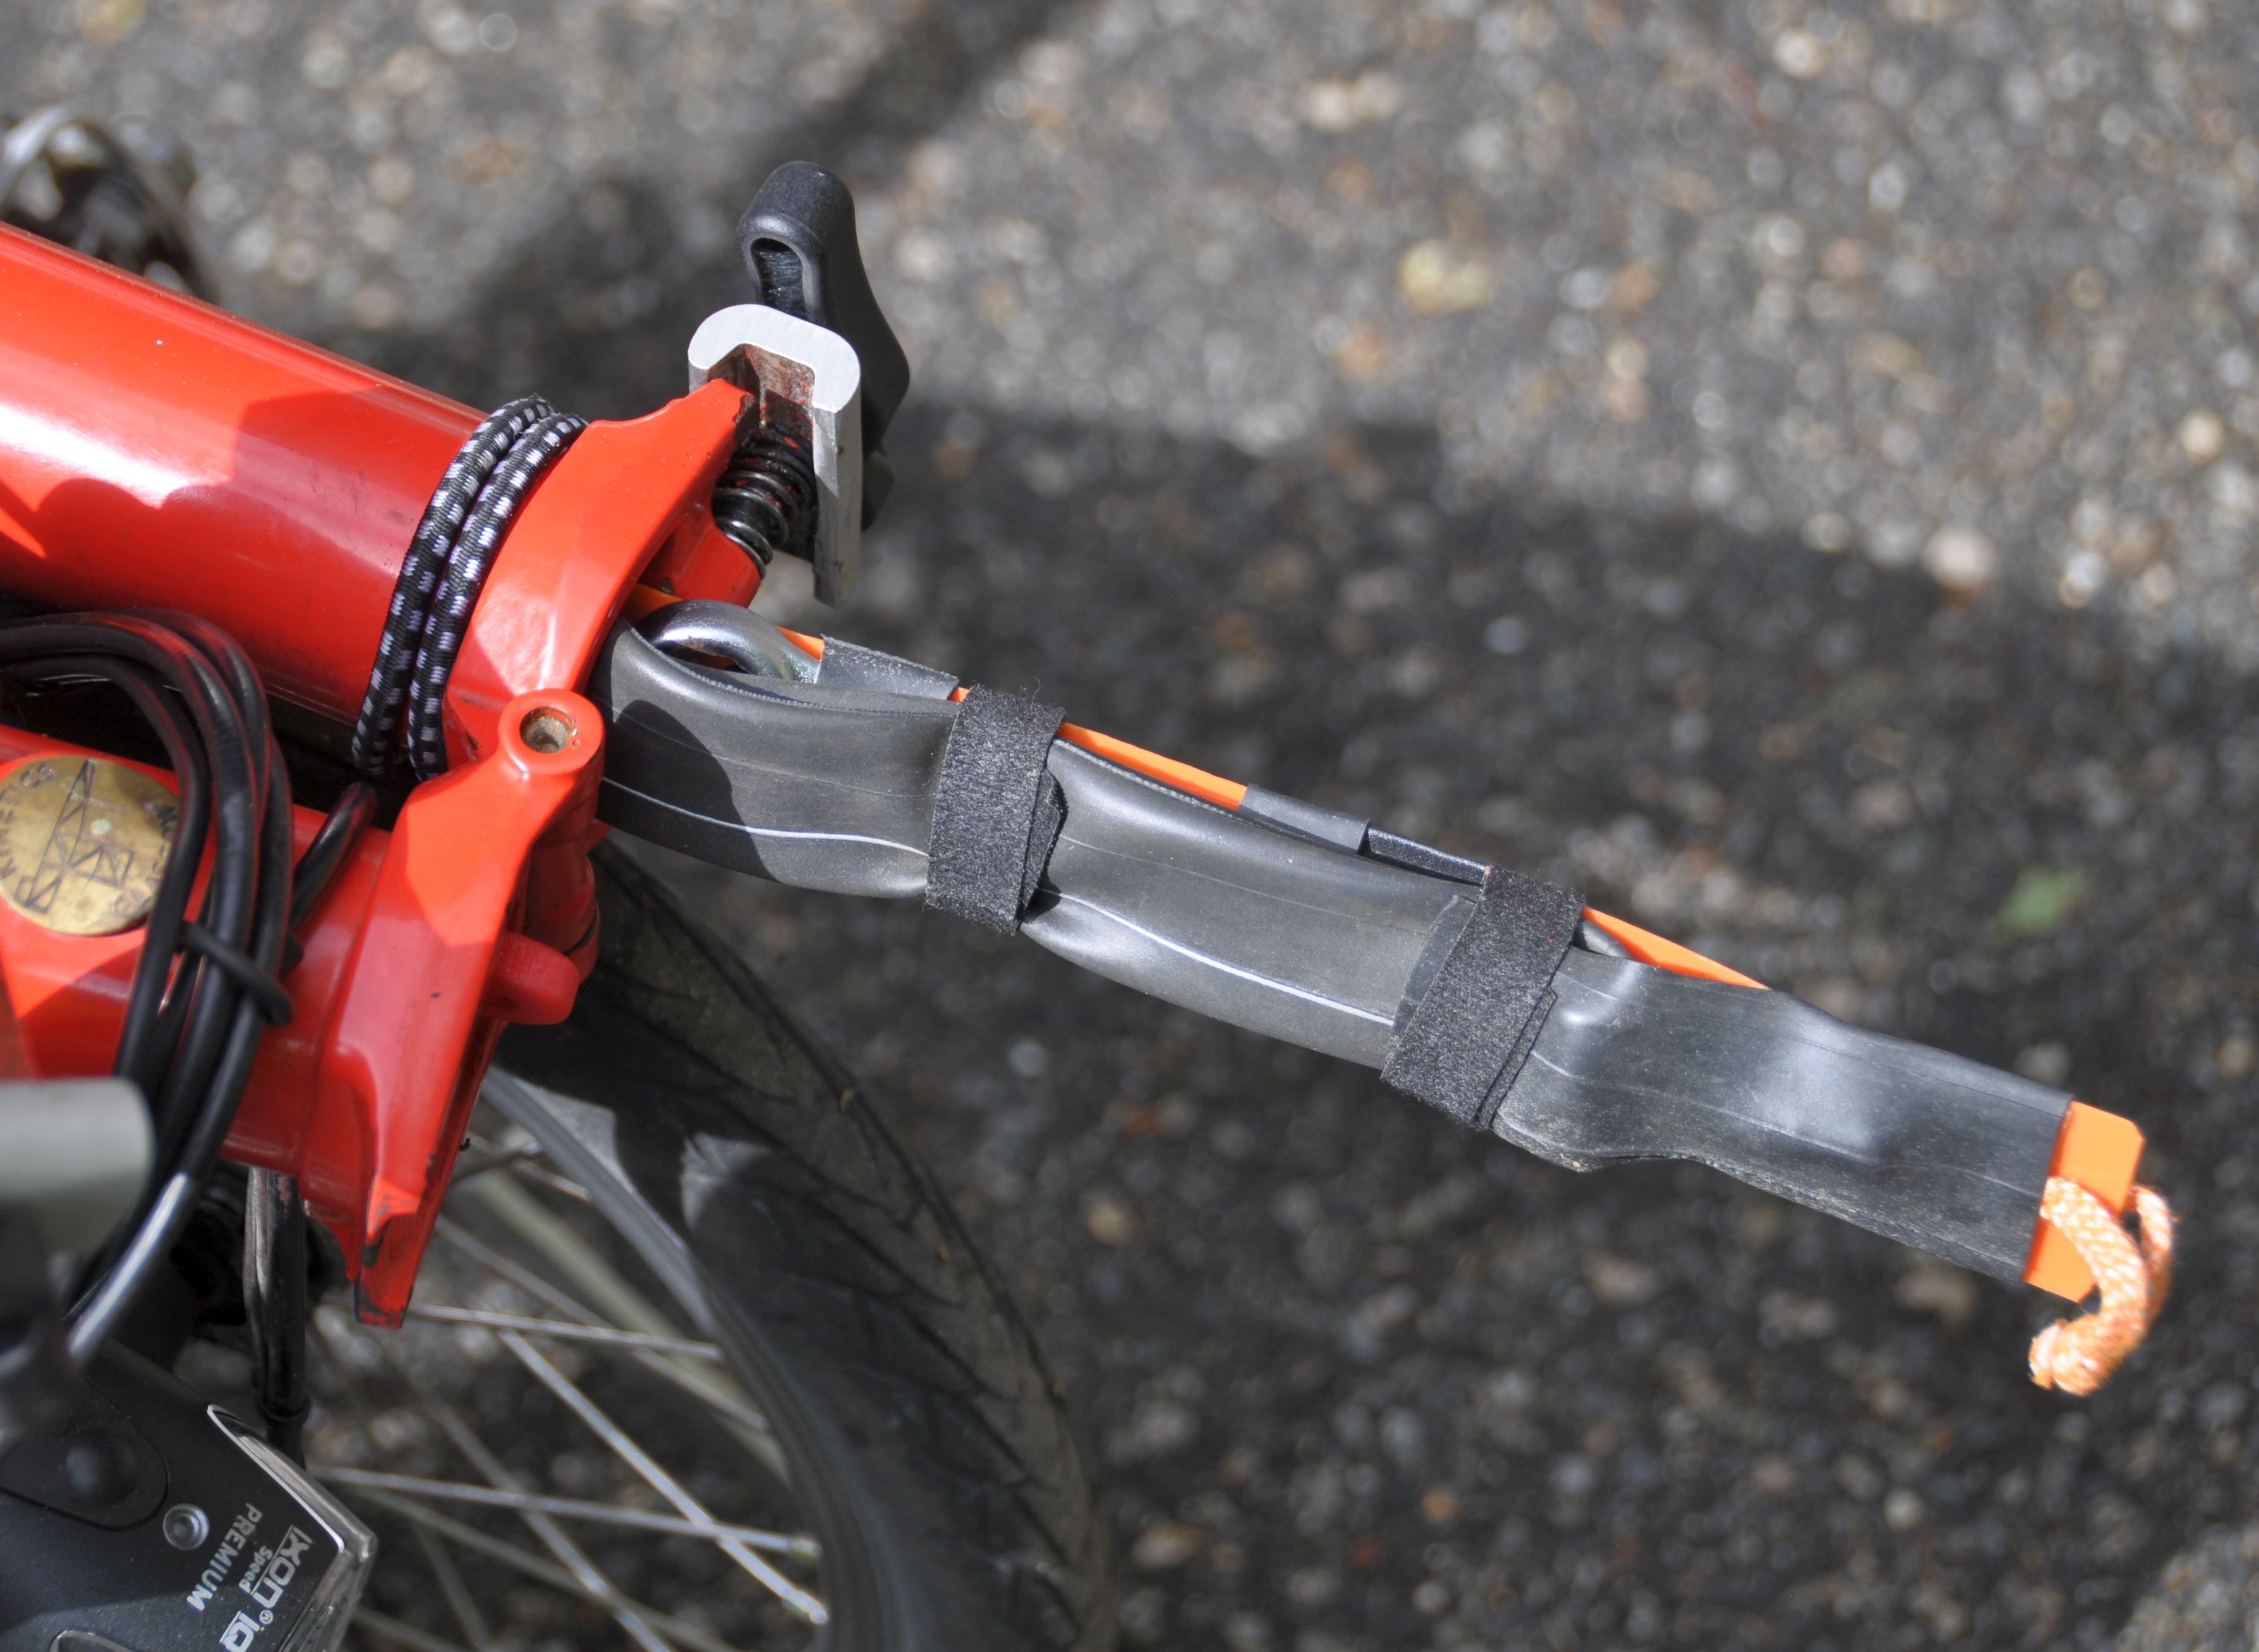
Warning flag Back to top
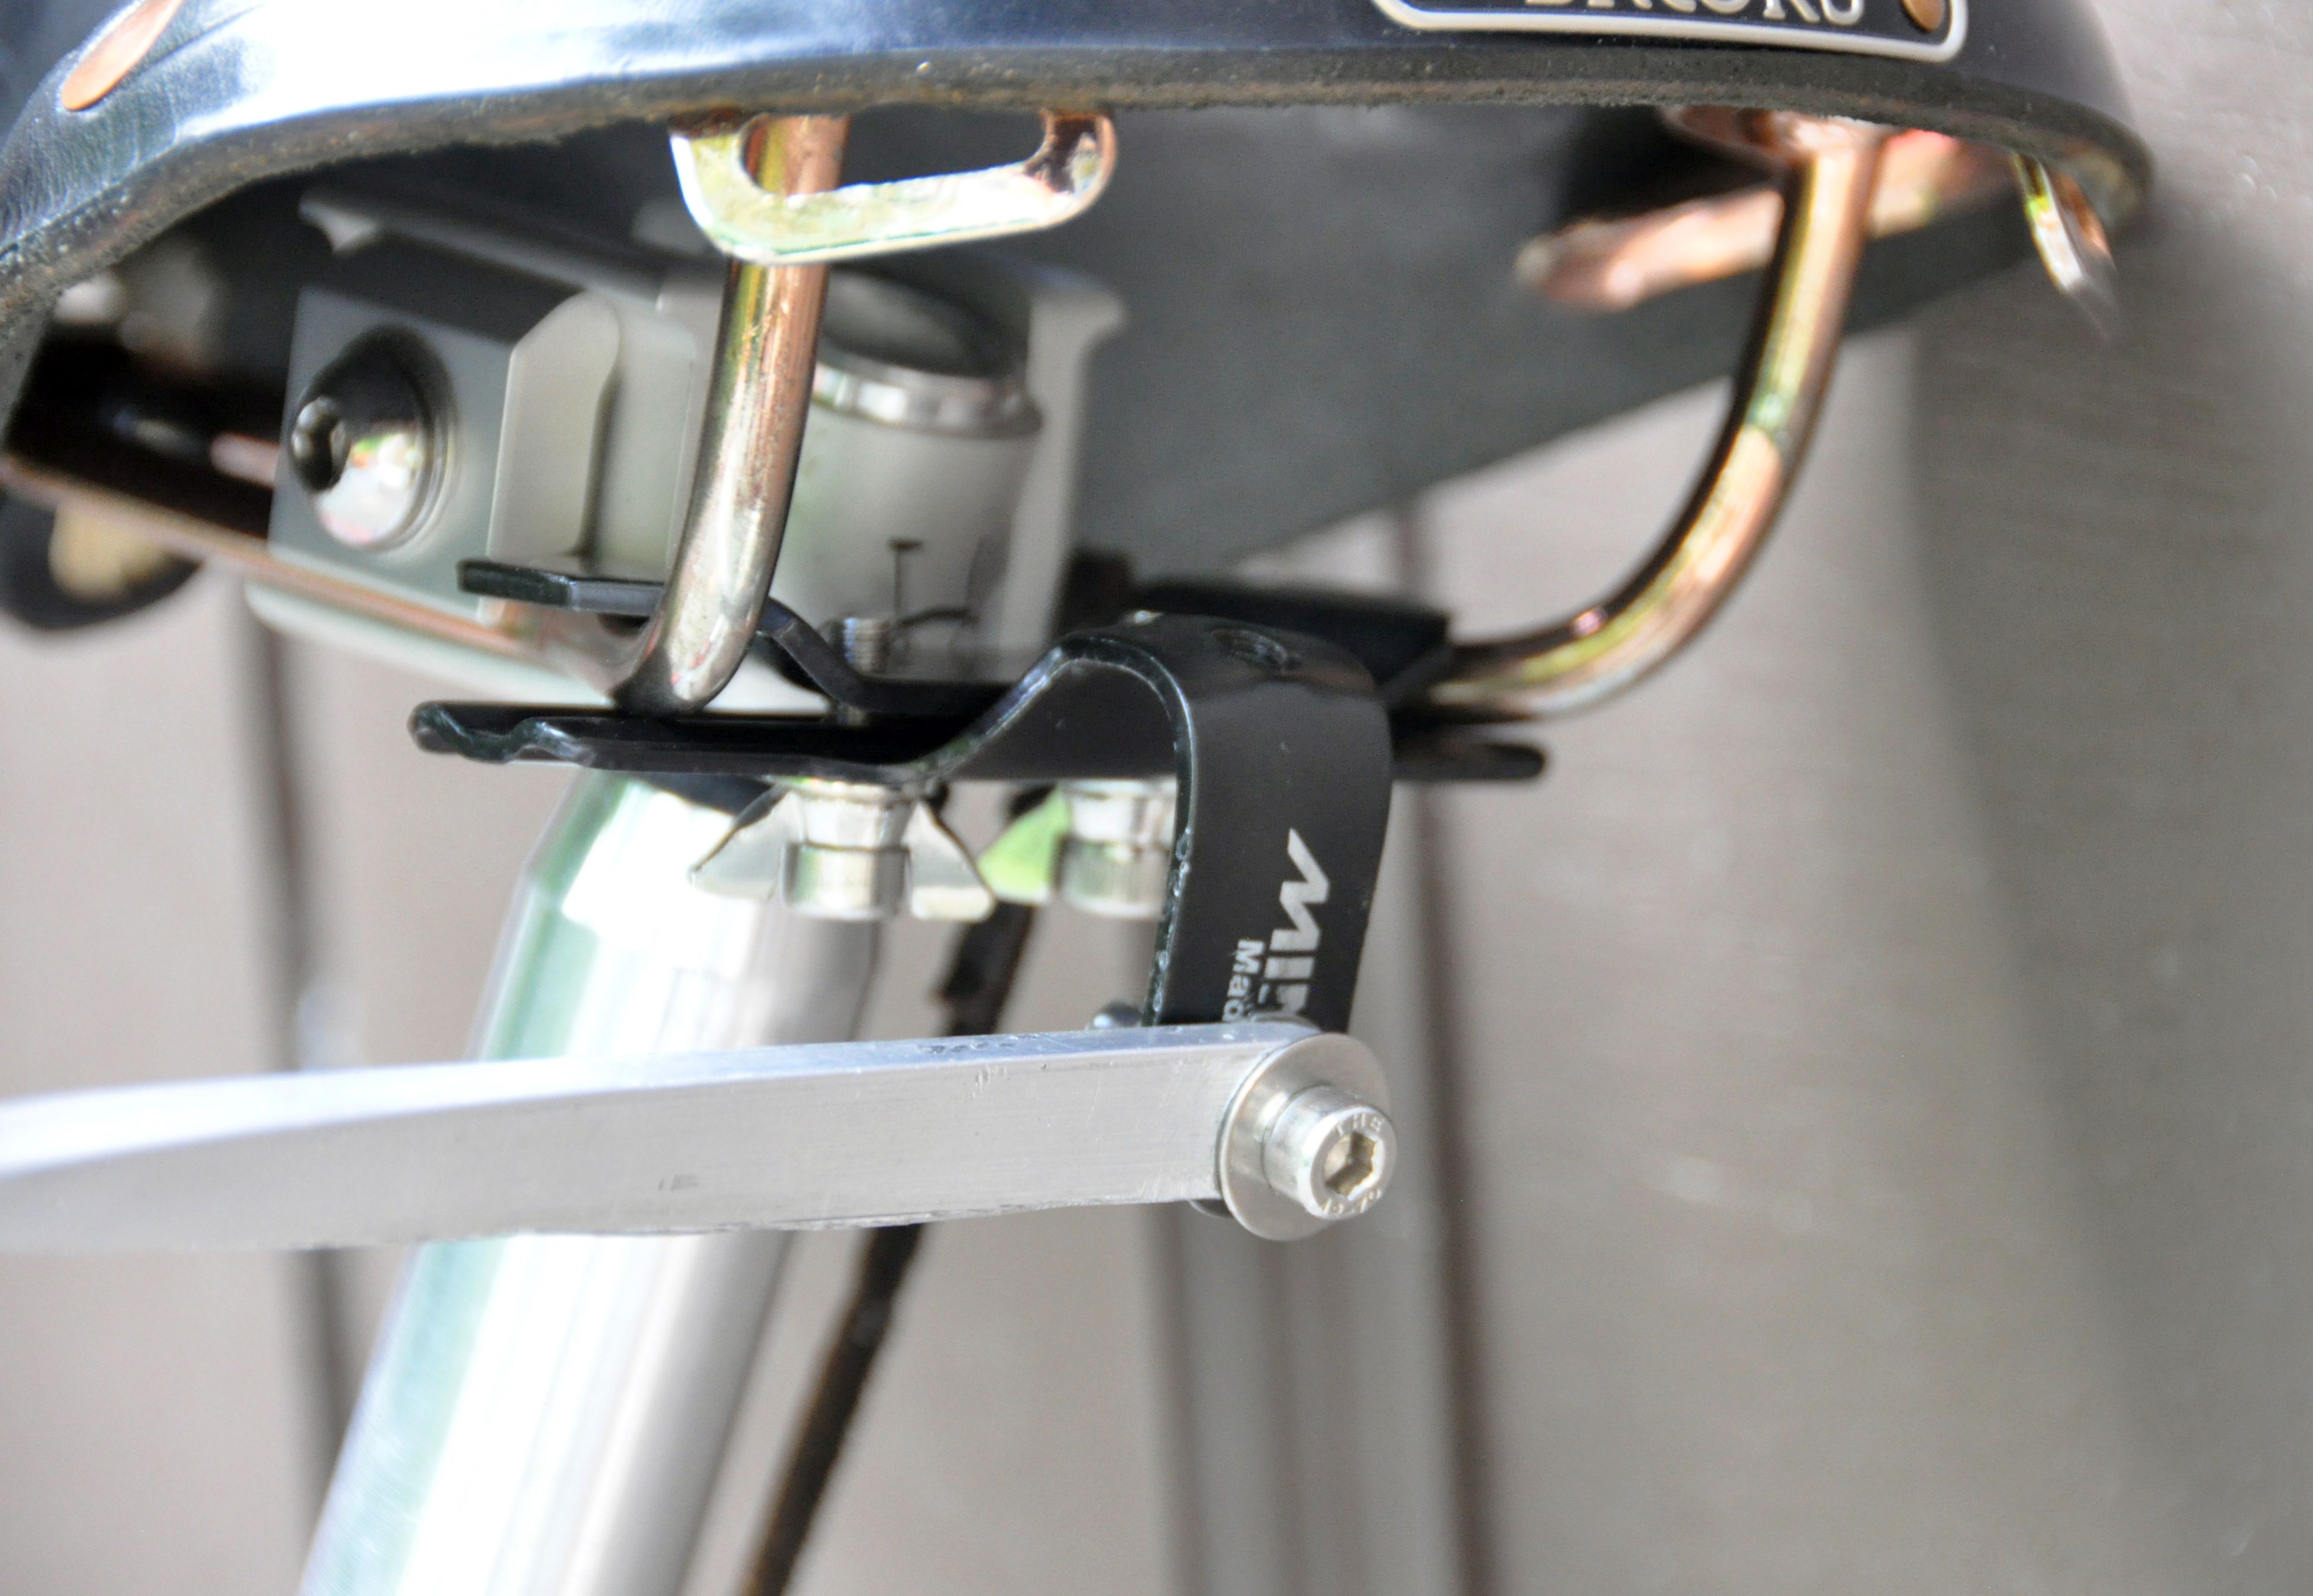
On all my bikes, I have those warning flags to make passing cars keep a minimum distance. These were very popular in Germany a while ago. This is how I mounted it on the Brompton, fully compatible with the fold.
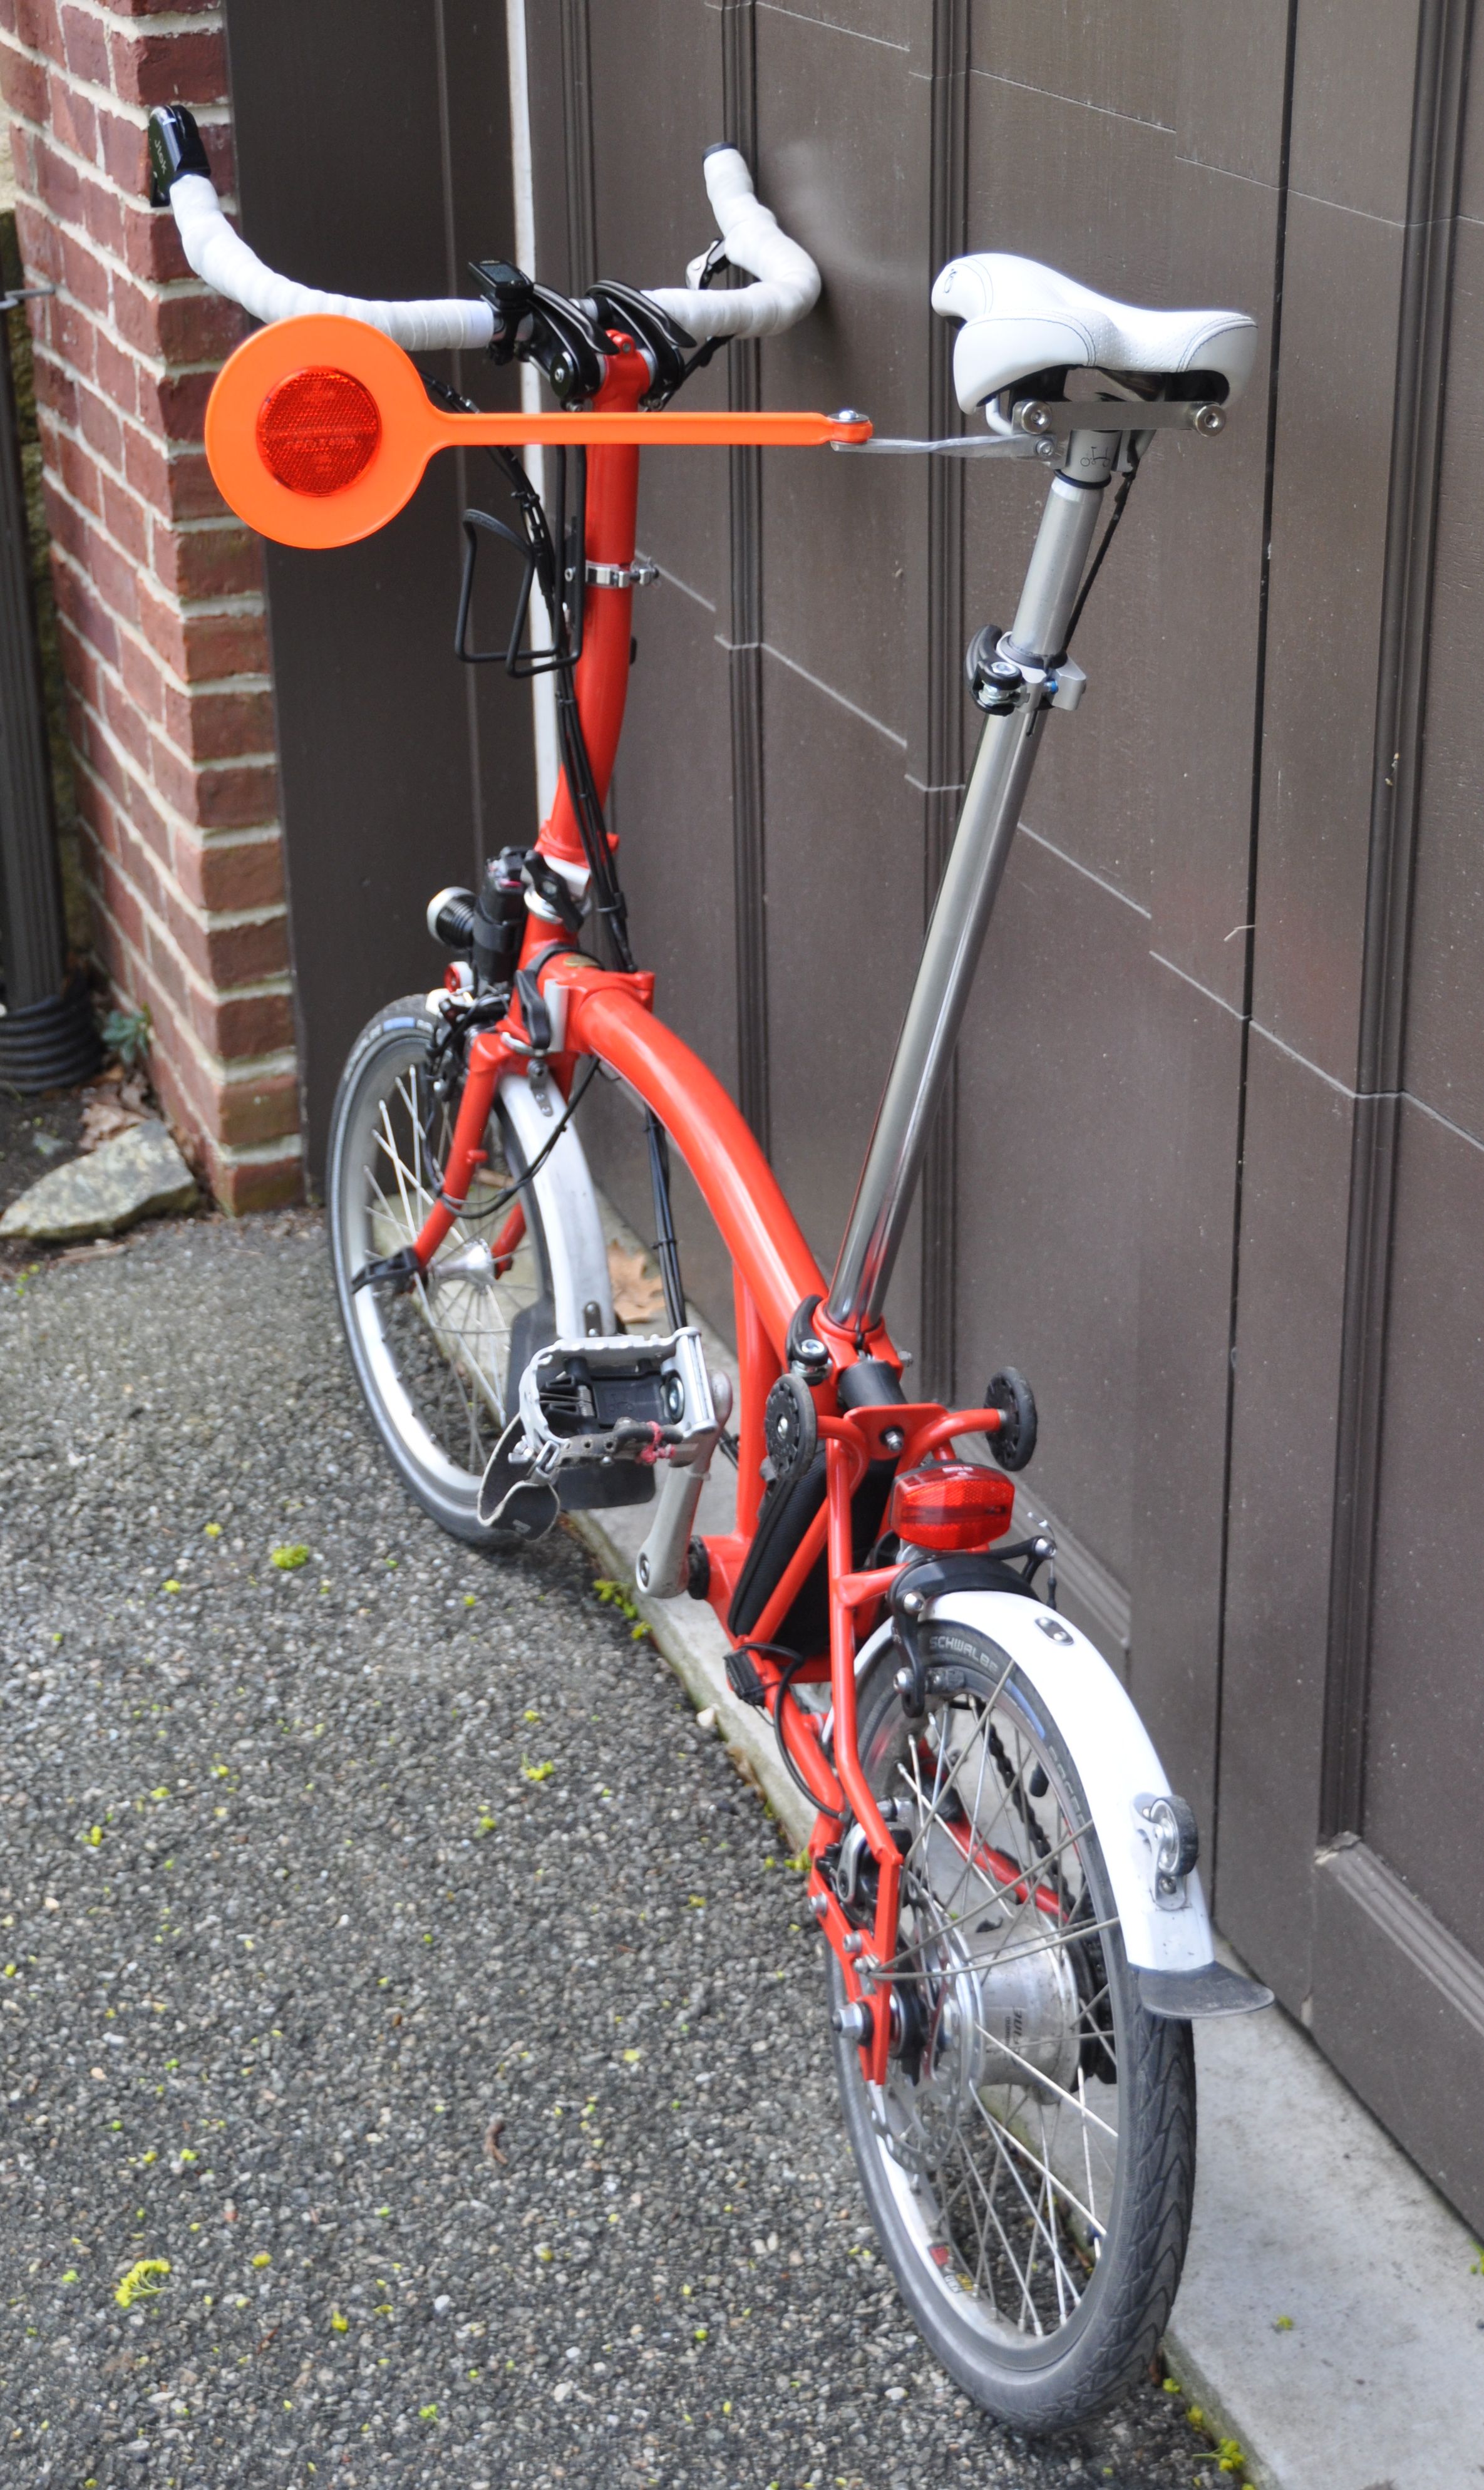
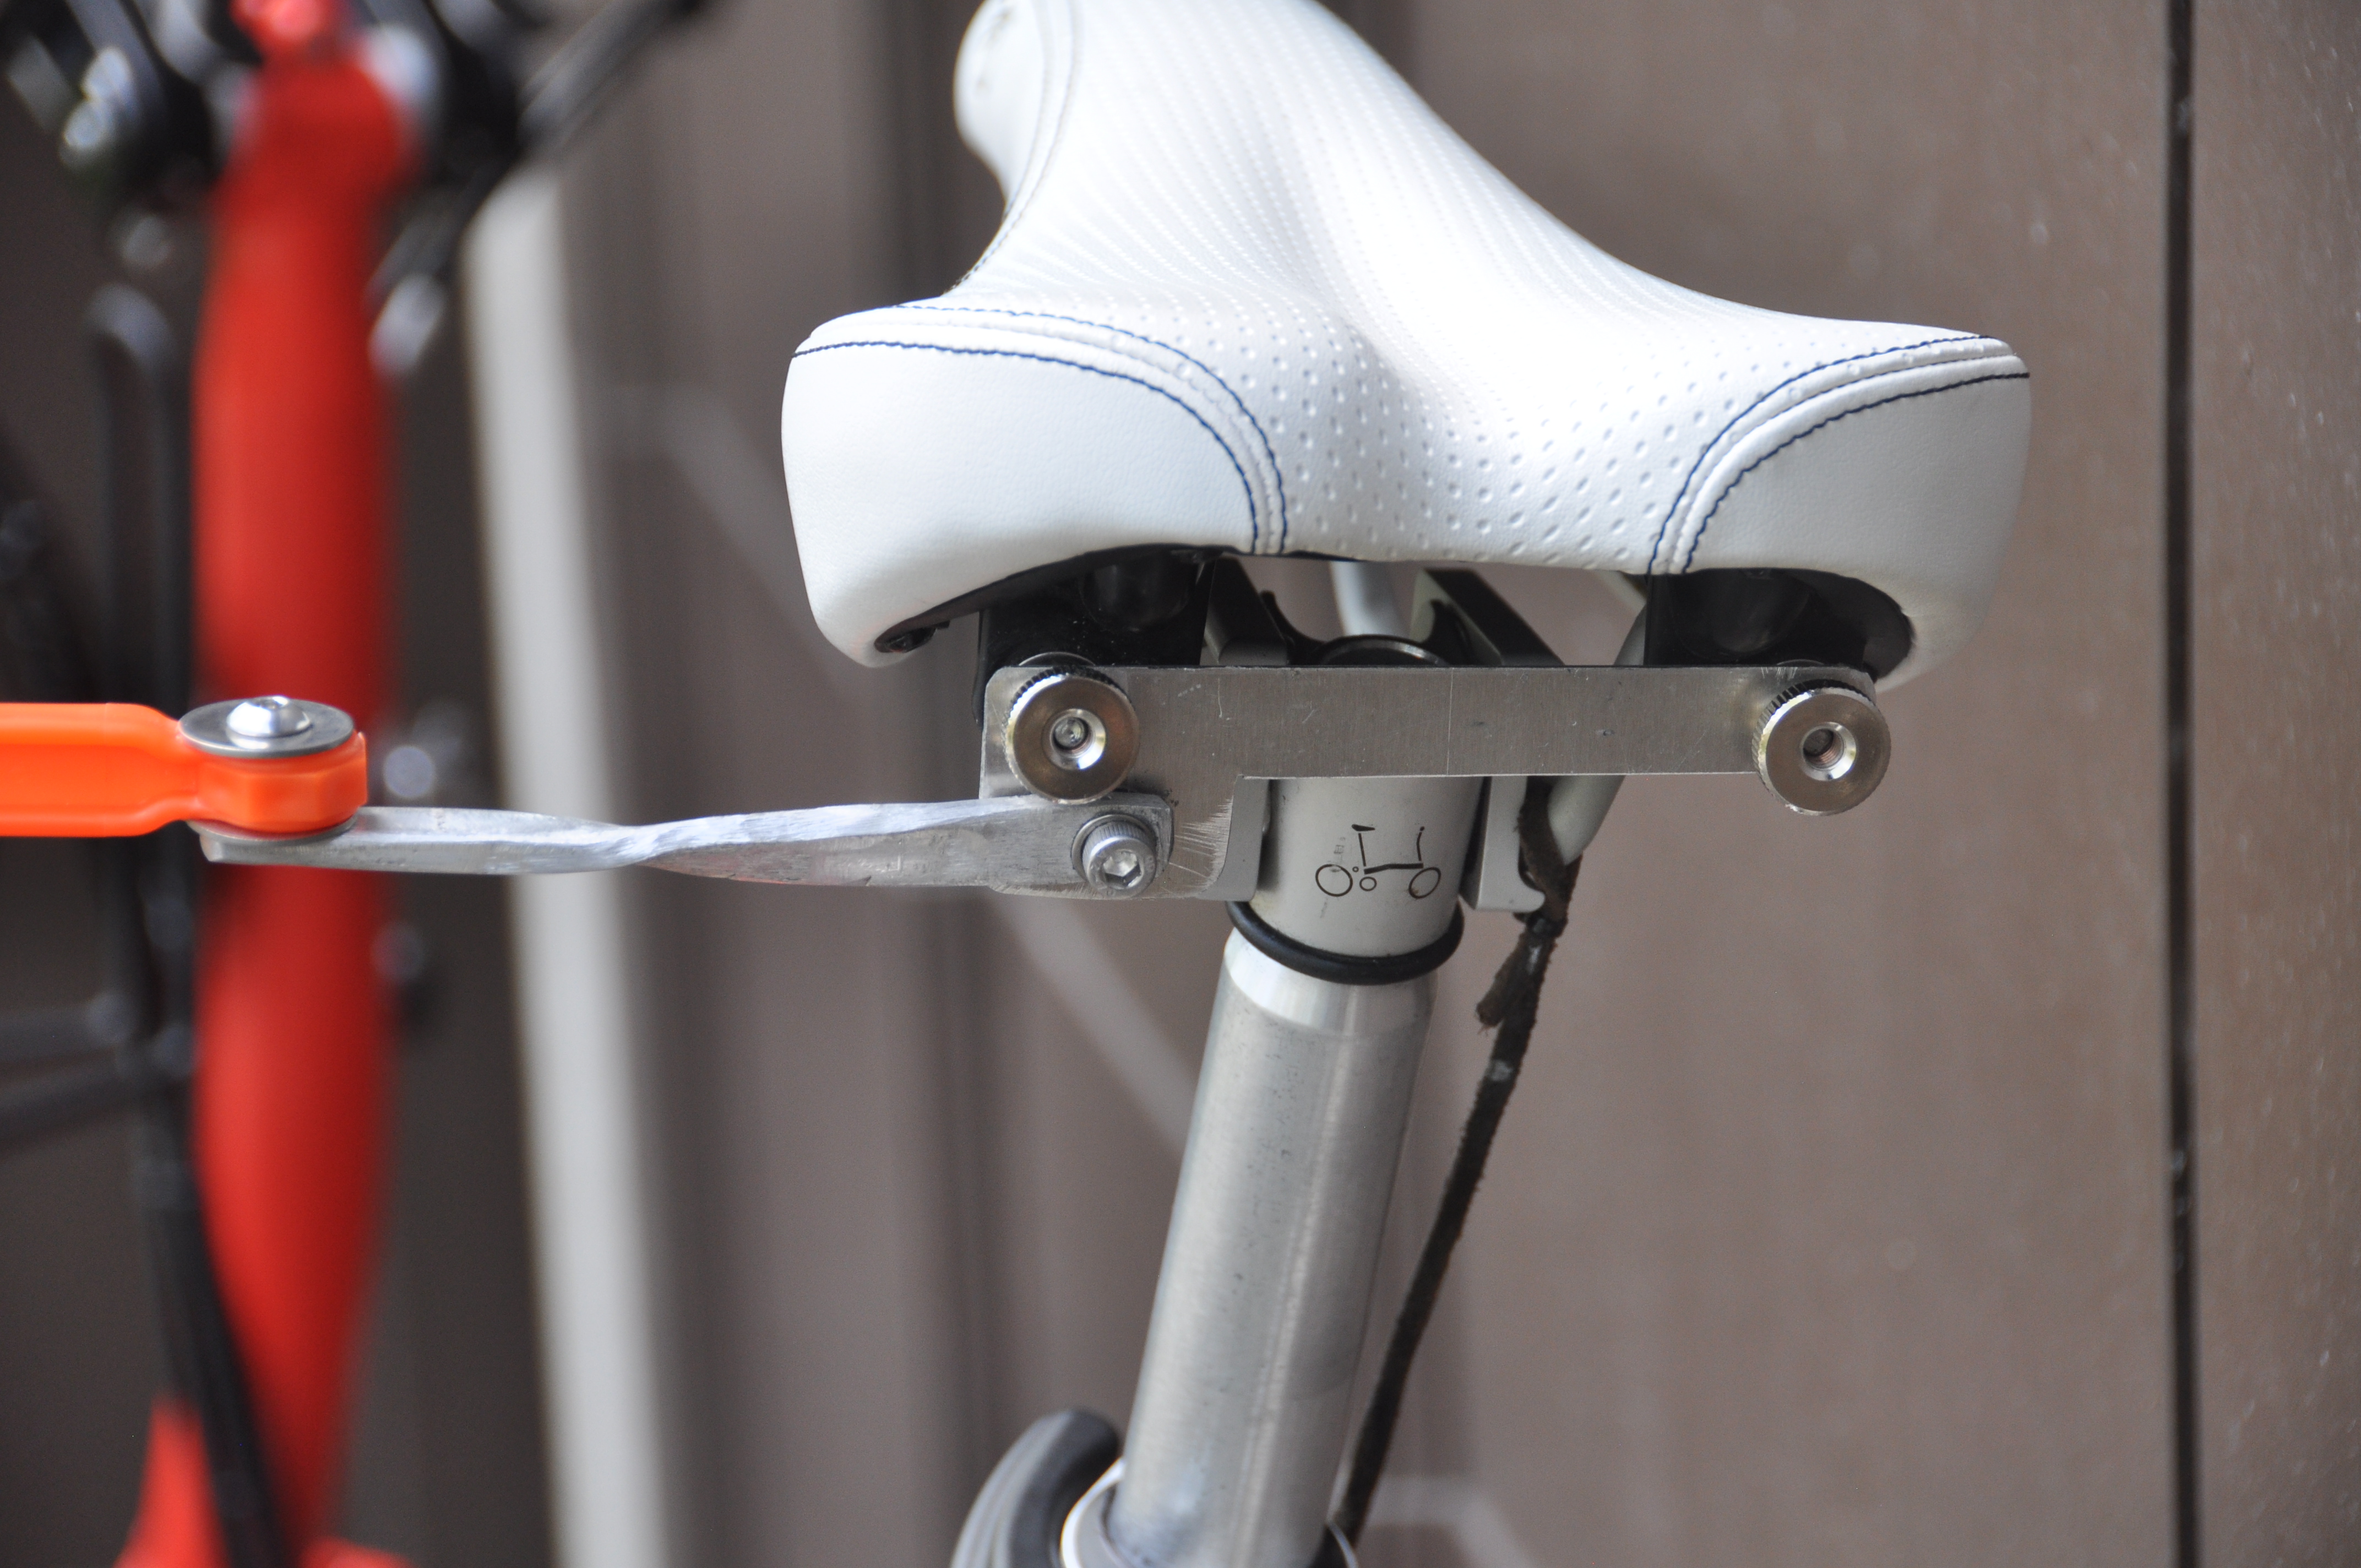
For the Brooks saddle, I modified a Minoura saddle-mount bottle cage bracket.

Tool case Back to top
I tried to find small bags which can be left on the Brompton without interfering with the fold or increasing the size of the folded bike. One is a sunglass case strapped to the seat tube, from Amazon, $ 10,
https://www.amazon.com/gp/product/B00HKRKCLI
This case carries a spare battery and some extra tools, and I leave it on the bike all the time. I had to cut down the rear triangle release lever by one cm. Another option is to turn the release lever around so that is points upward.
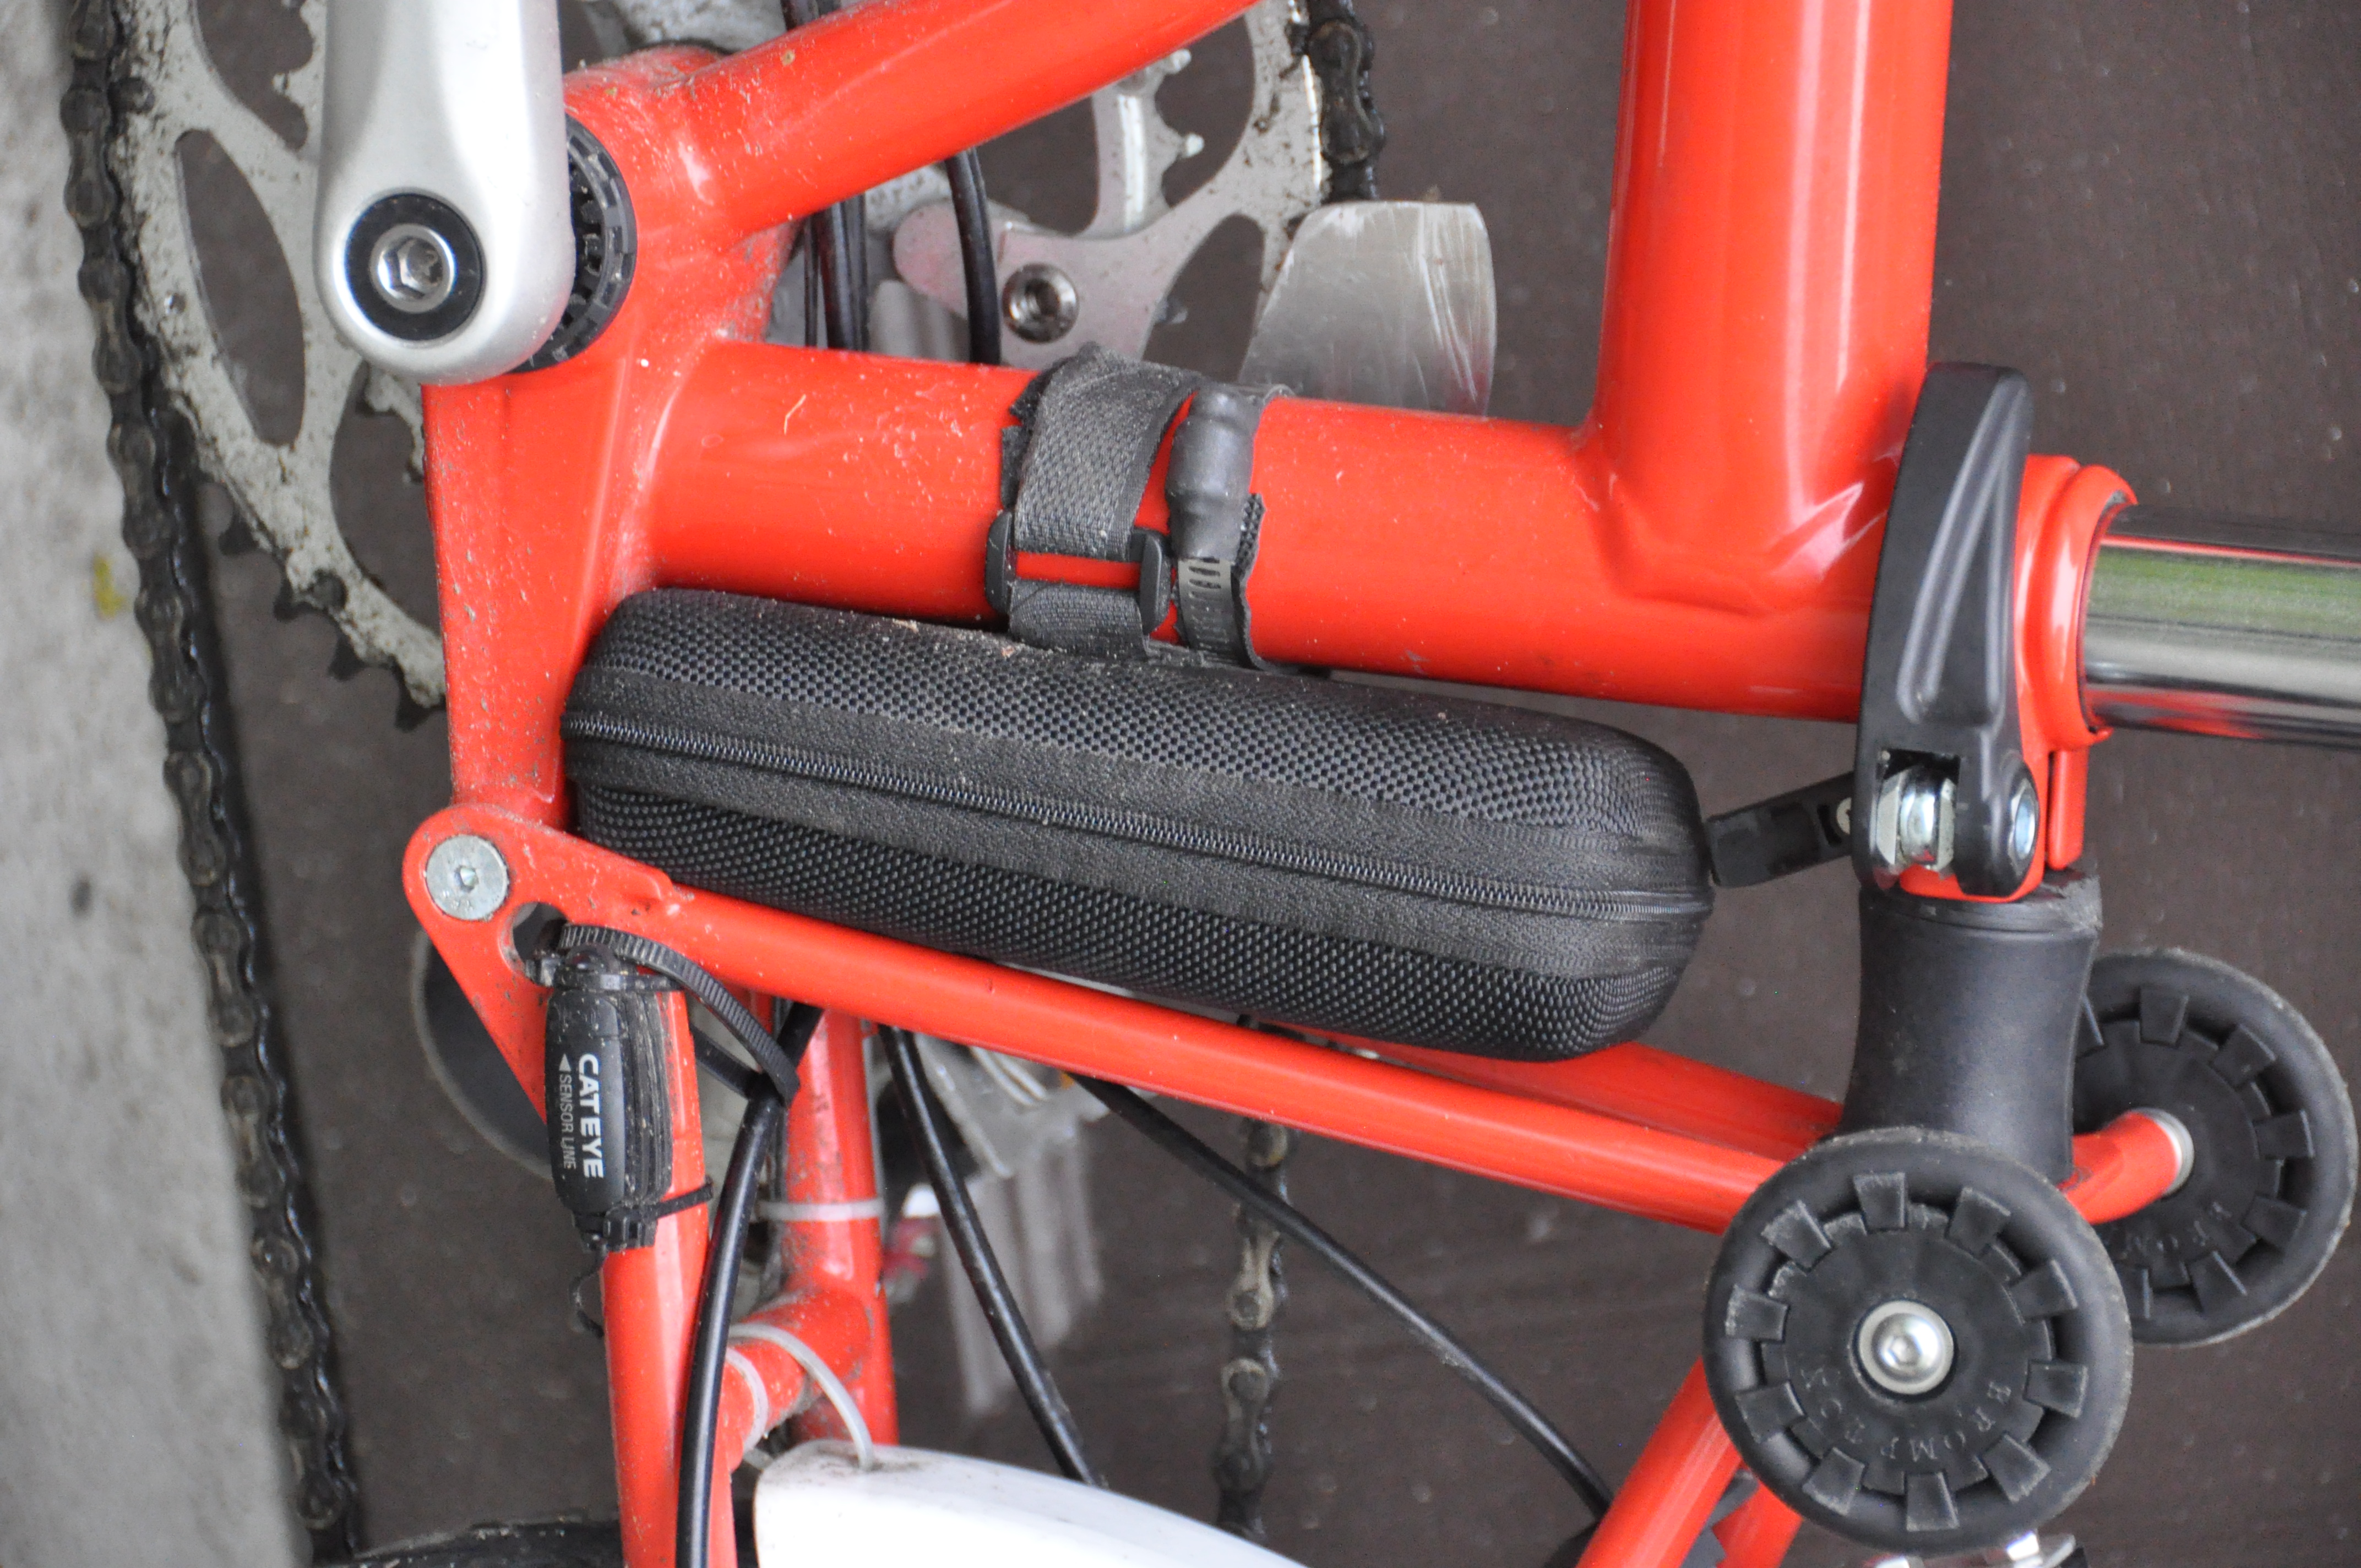
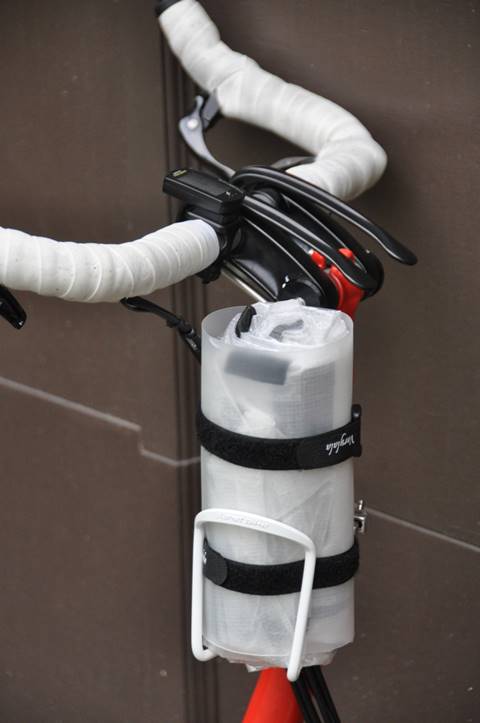
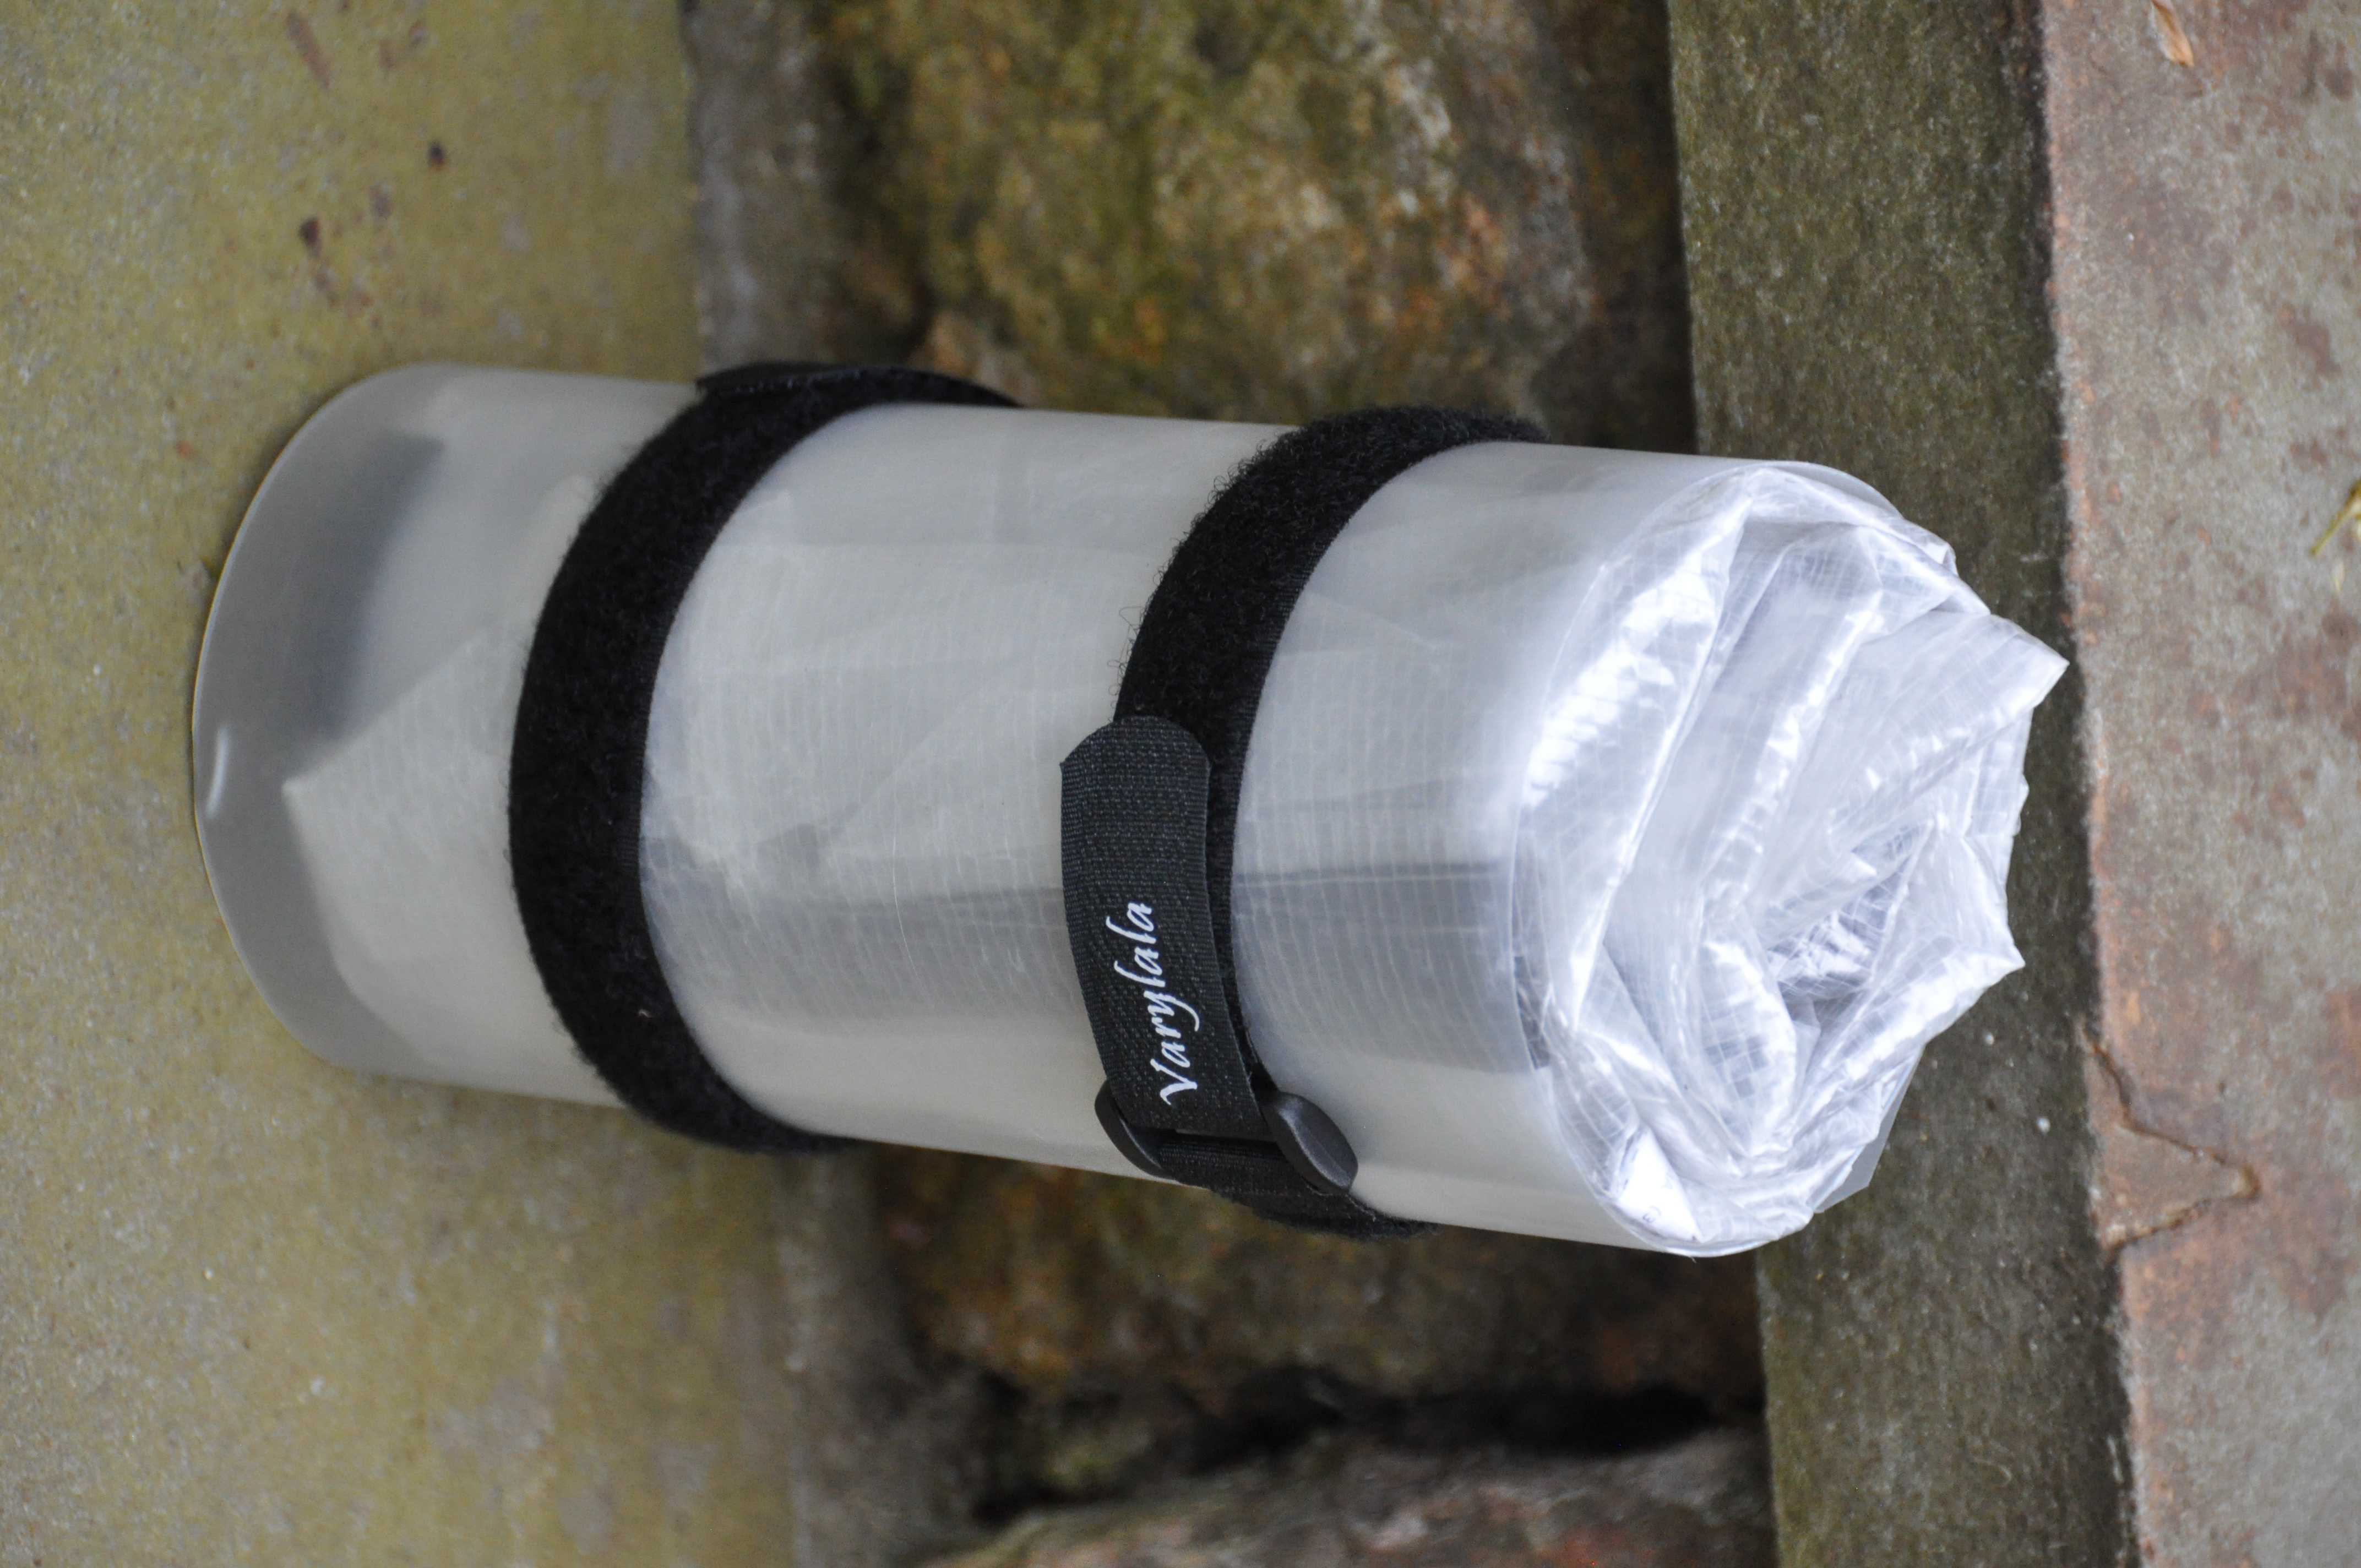
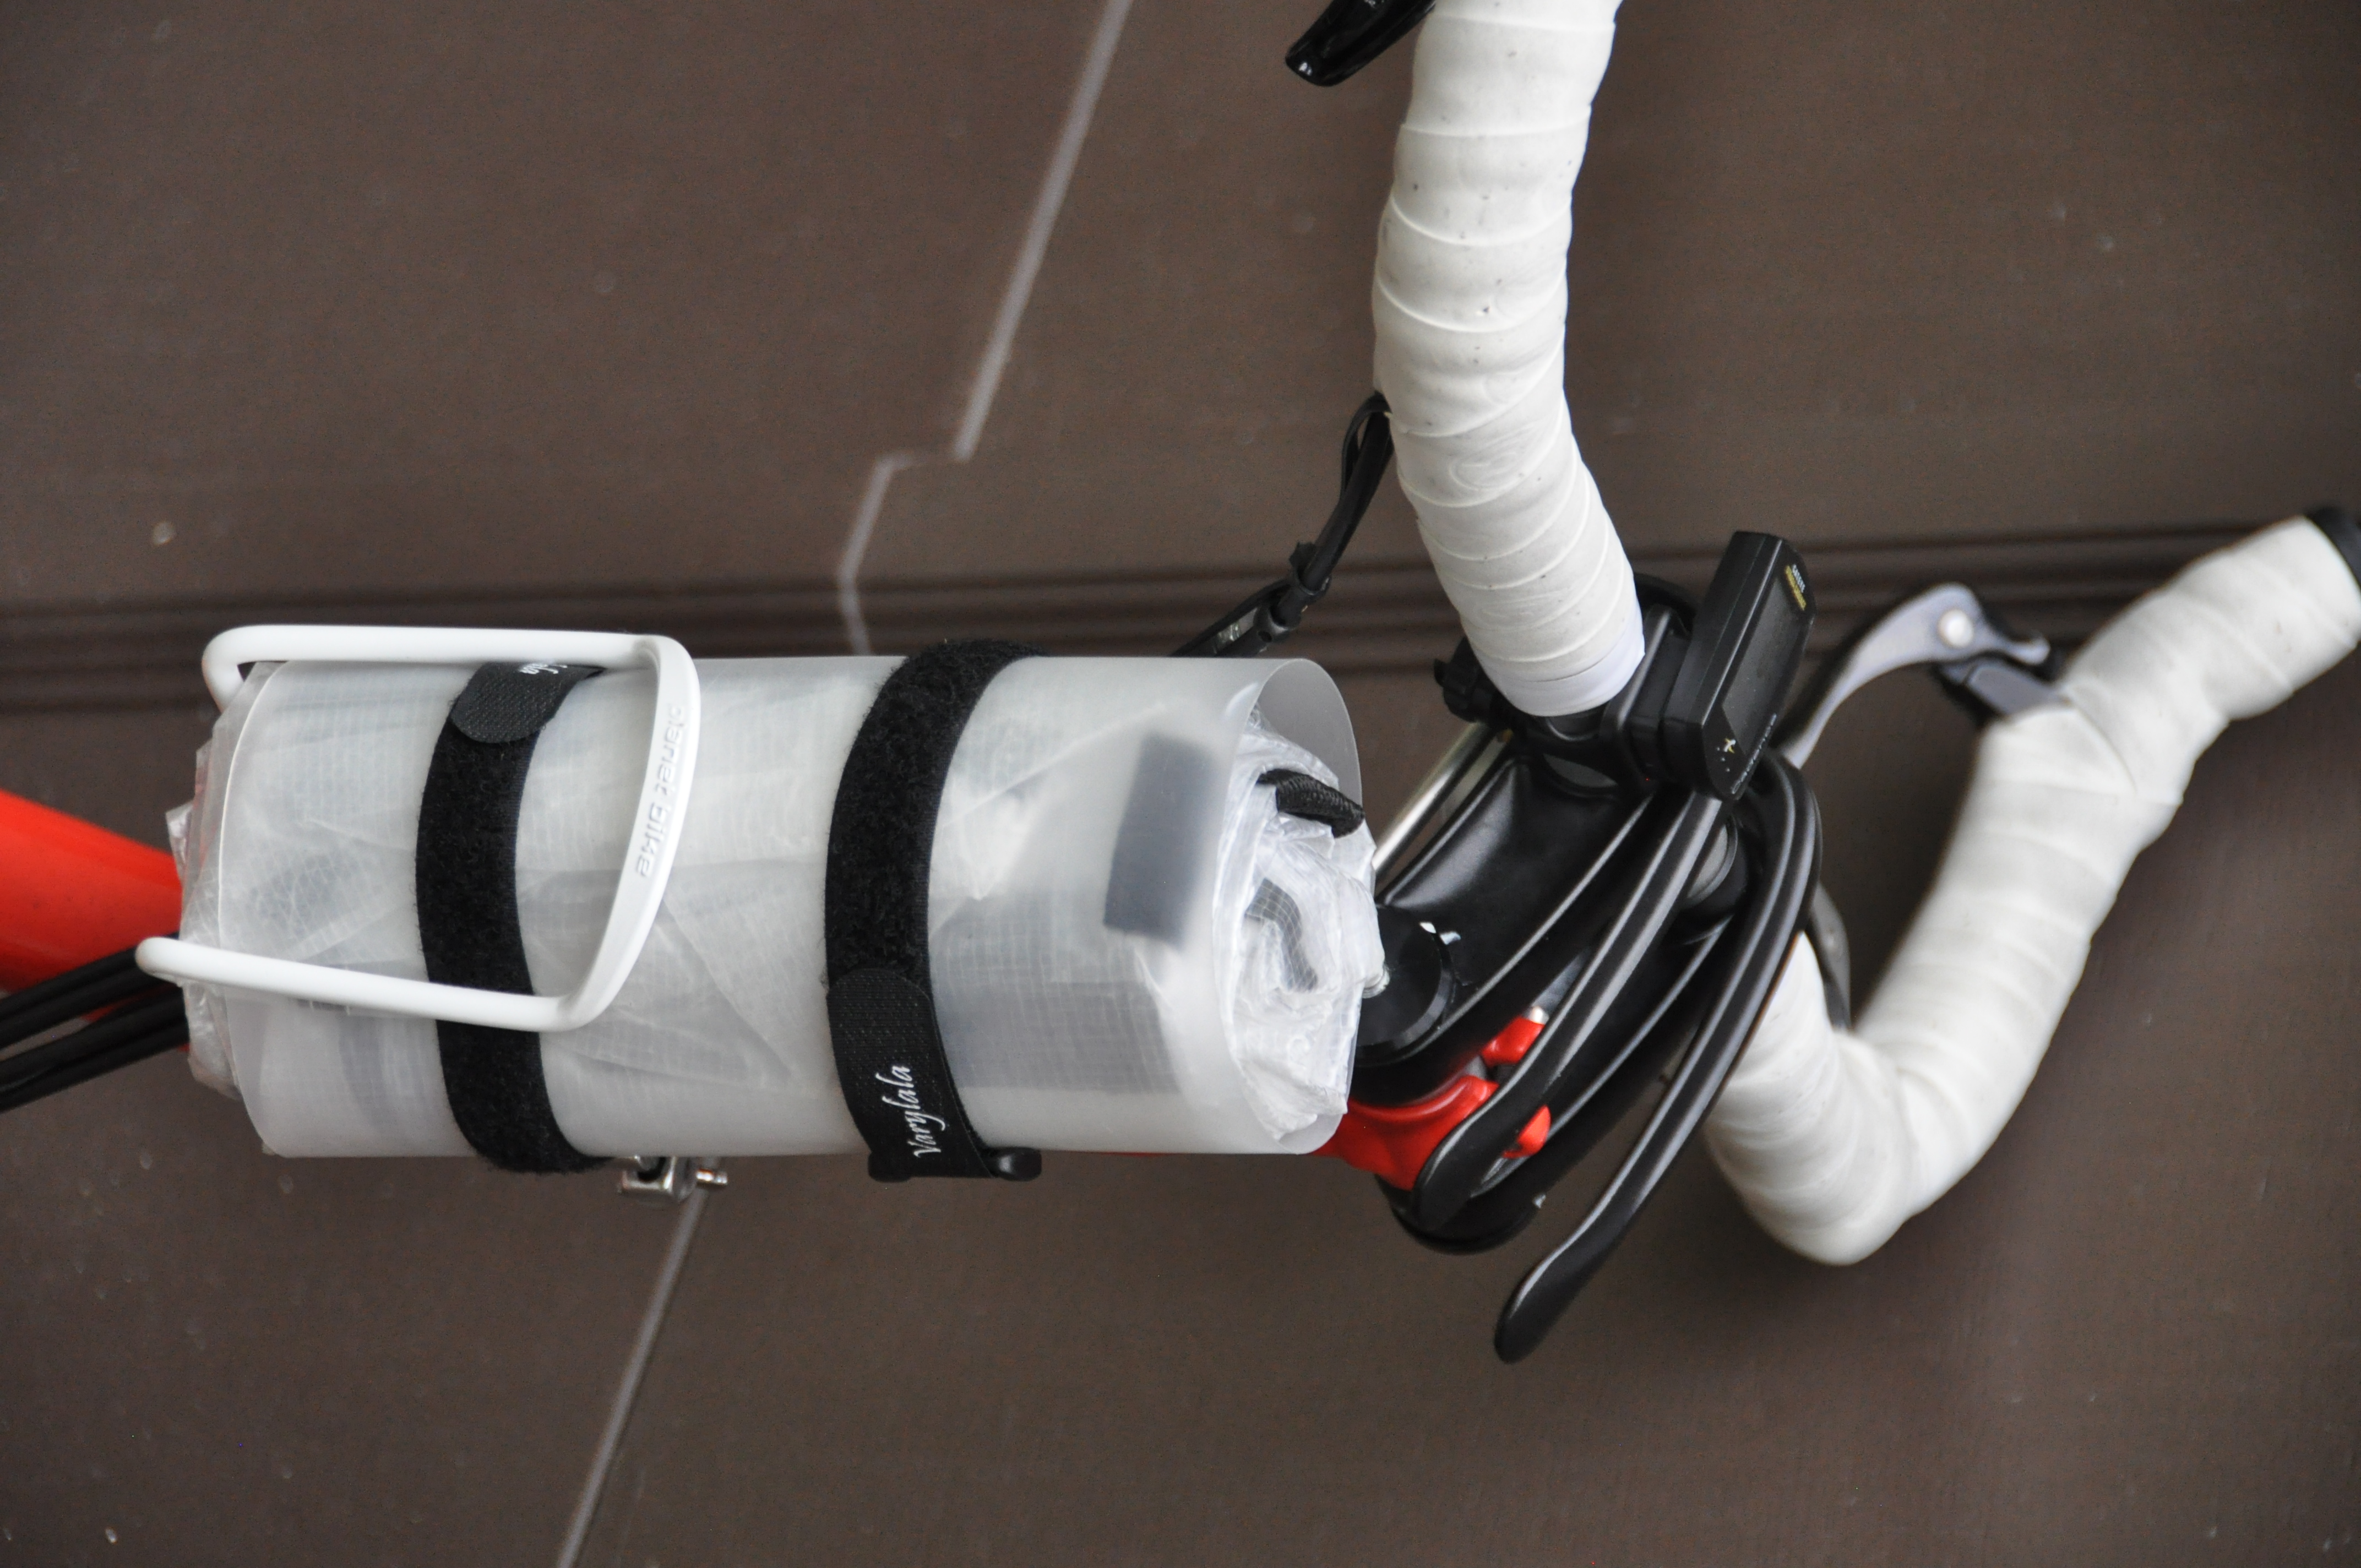
Bottle cage case Back to top
I tried to find small bags which can be left on the Brompton without interfering with the fold or increasing the size of the folded bike. One option is a case held in a bottle cage (which is permanently attached to my bike).
Dimpa bag Back to top
The Dimpa bag (from Ikea, nice to carry the bike or cover is when you take is into a restaurant or hotel) can be left on the bike, even when folded, using a bottle cage.
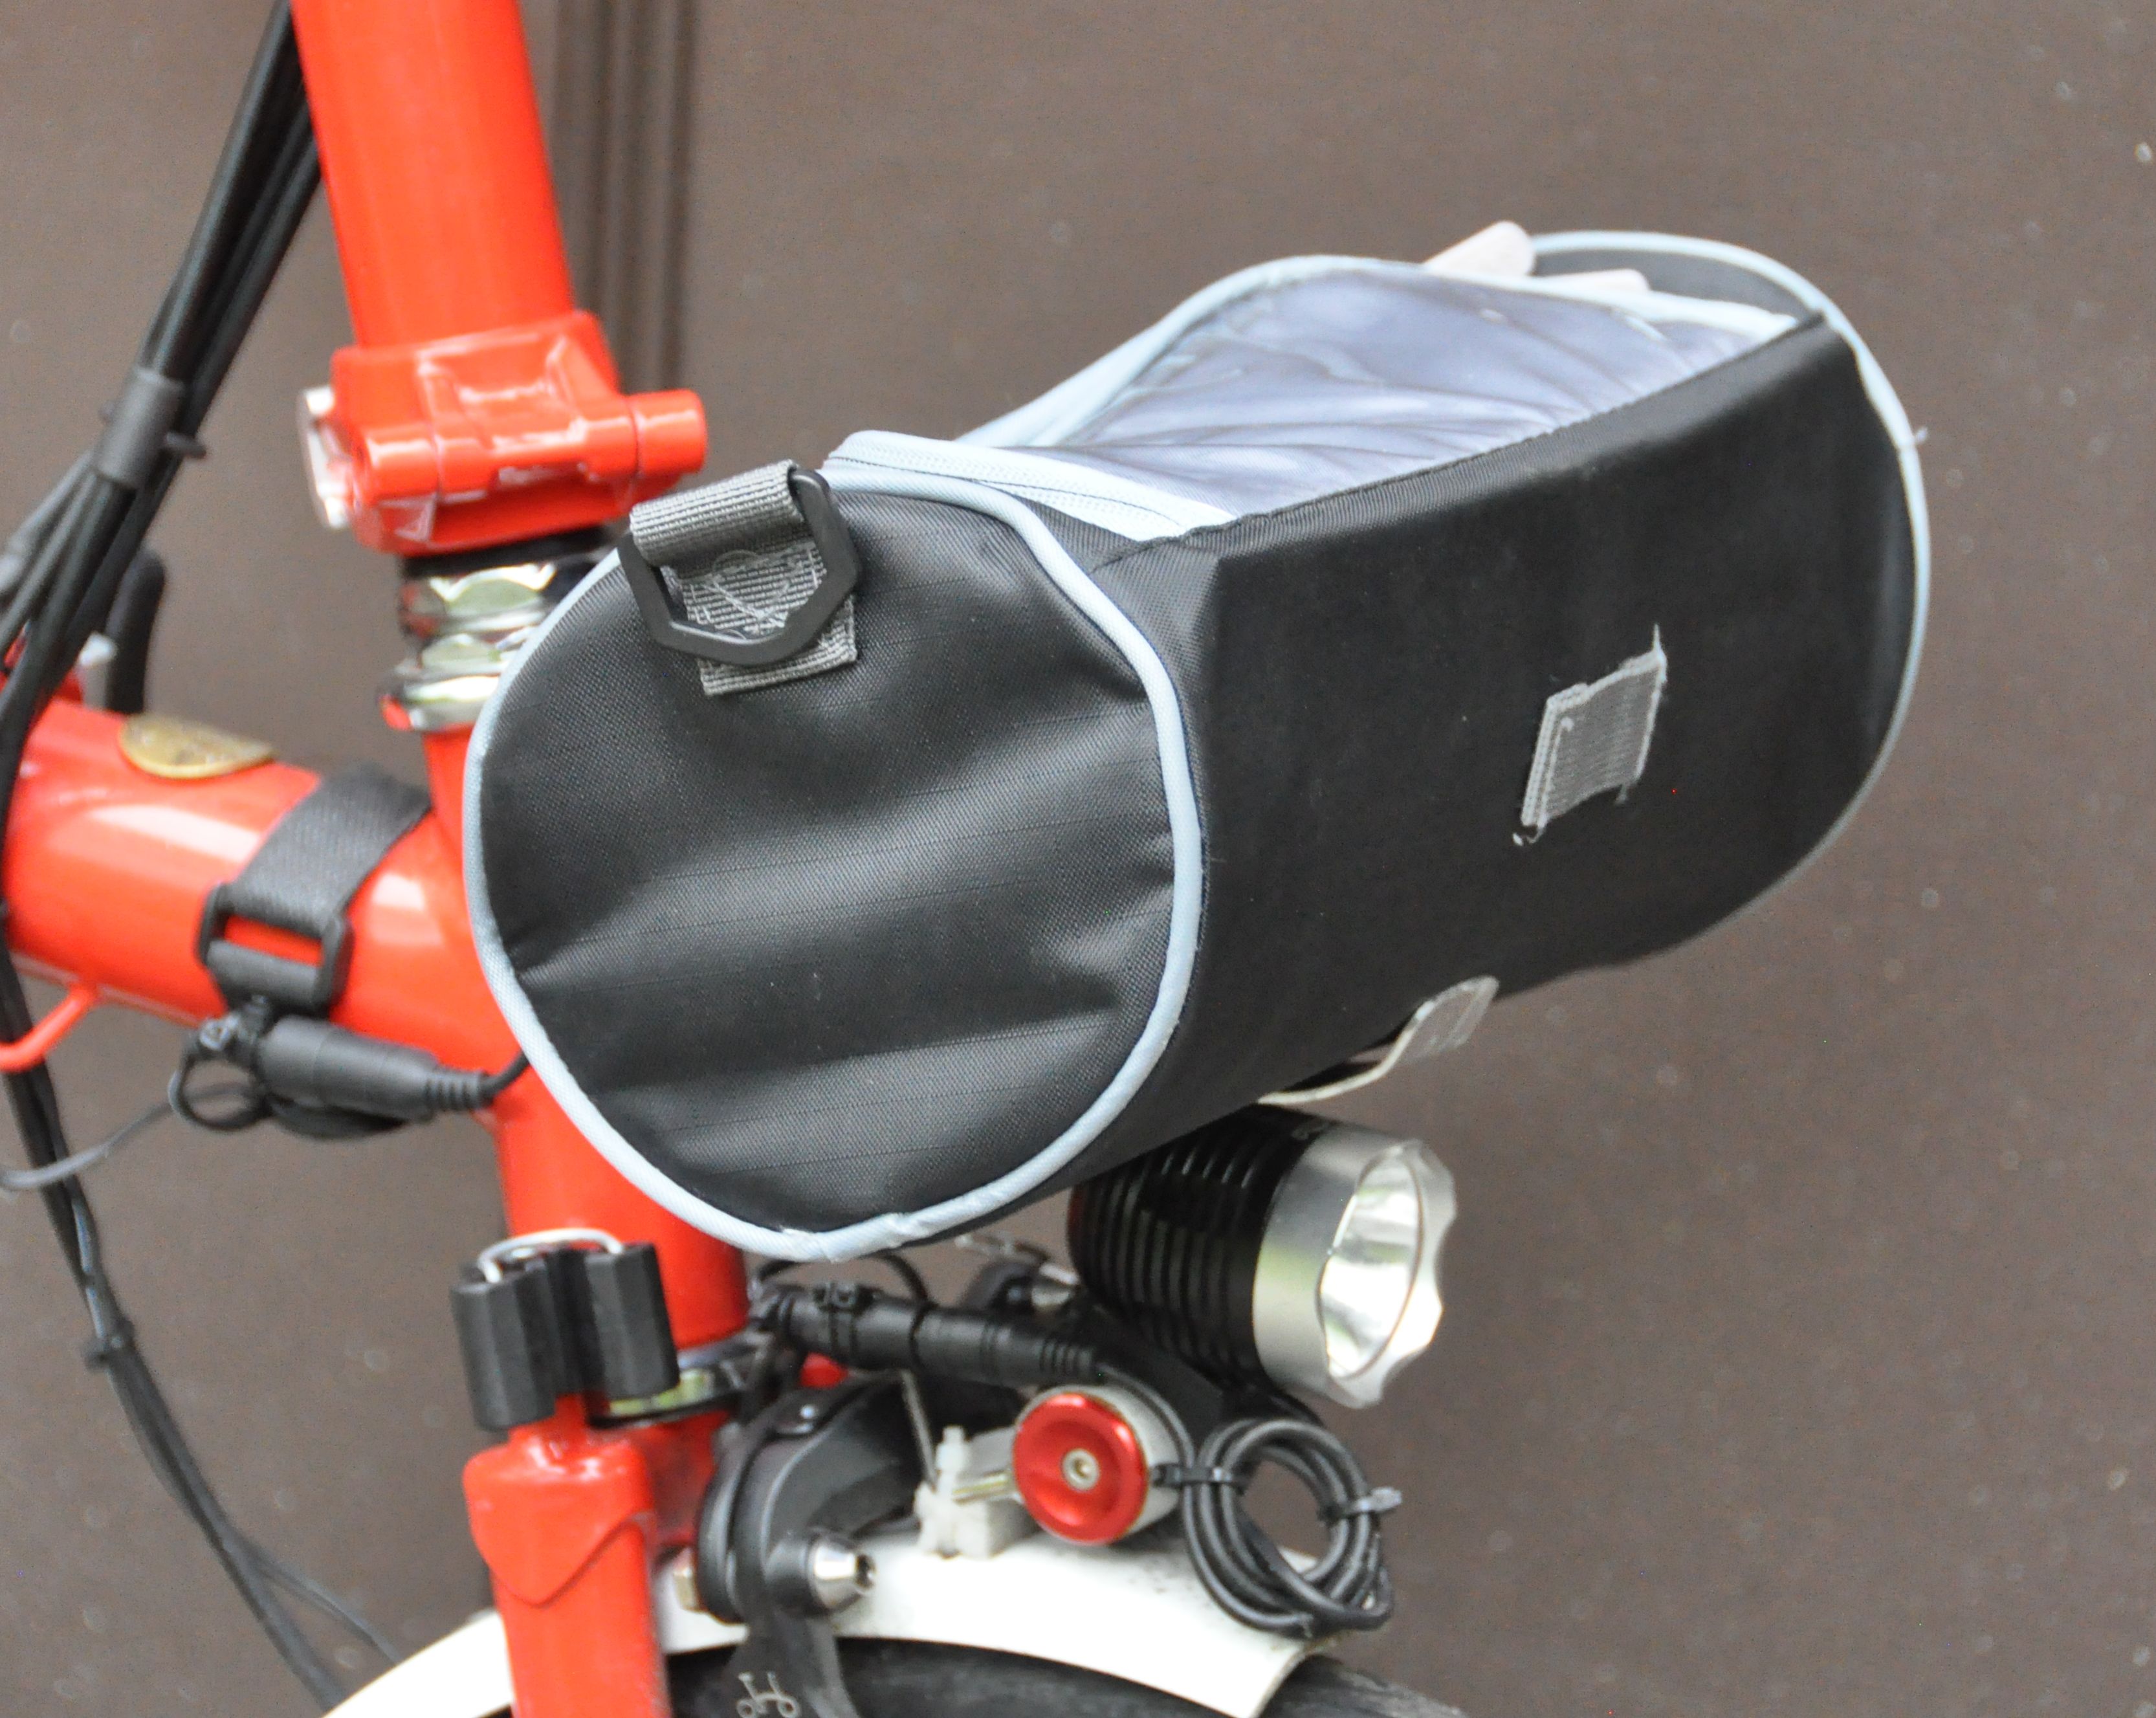
Small clip-on bag Back to top
I tried to find small bags which can be left on the Brompton
without interfering with the fold or substantially increasing the size of the
folded bike. One option is a mall handlebar bag with a carrier block adapter.
As long as the bag is shorter than 10 inches and has a diameter of less than 5
inches, it will not substantially increase the size of the fold. There are
many small handlebar bags of similar size, and I modified one from Amazon, $11,
https://www.amazon.com/gp/product/B078LN97ZD
with a carrier block adapter.

Brompton bags Back to top
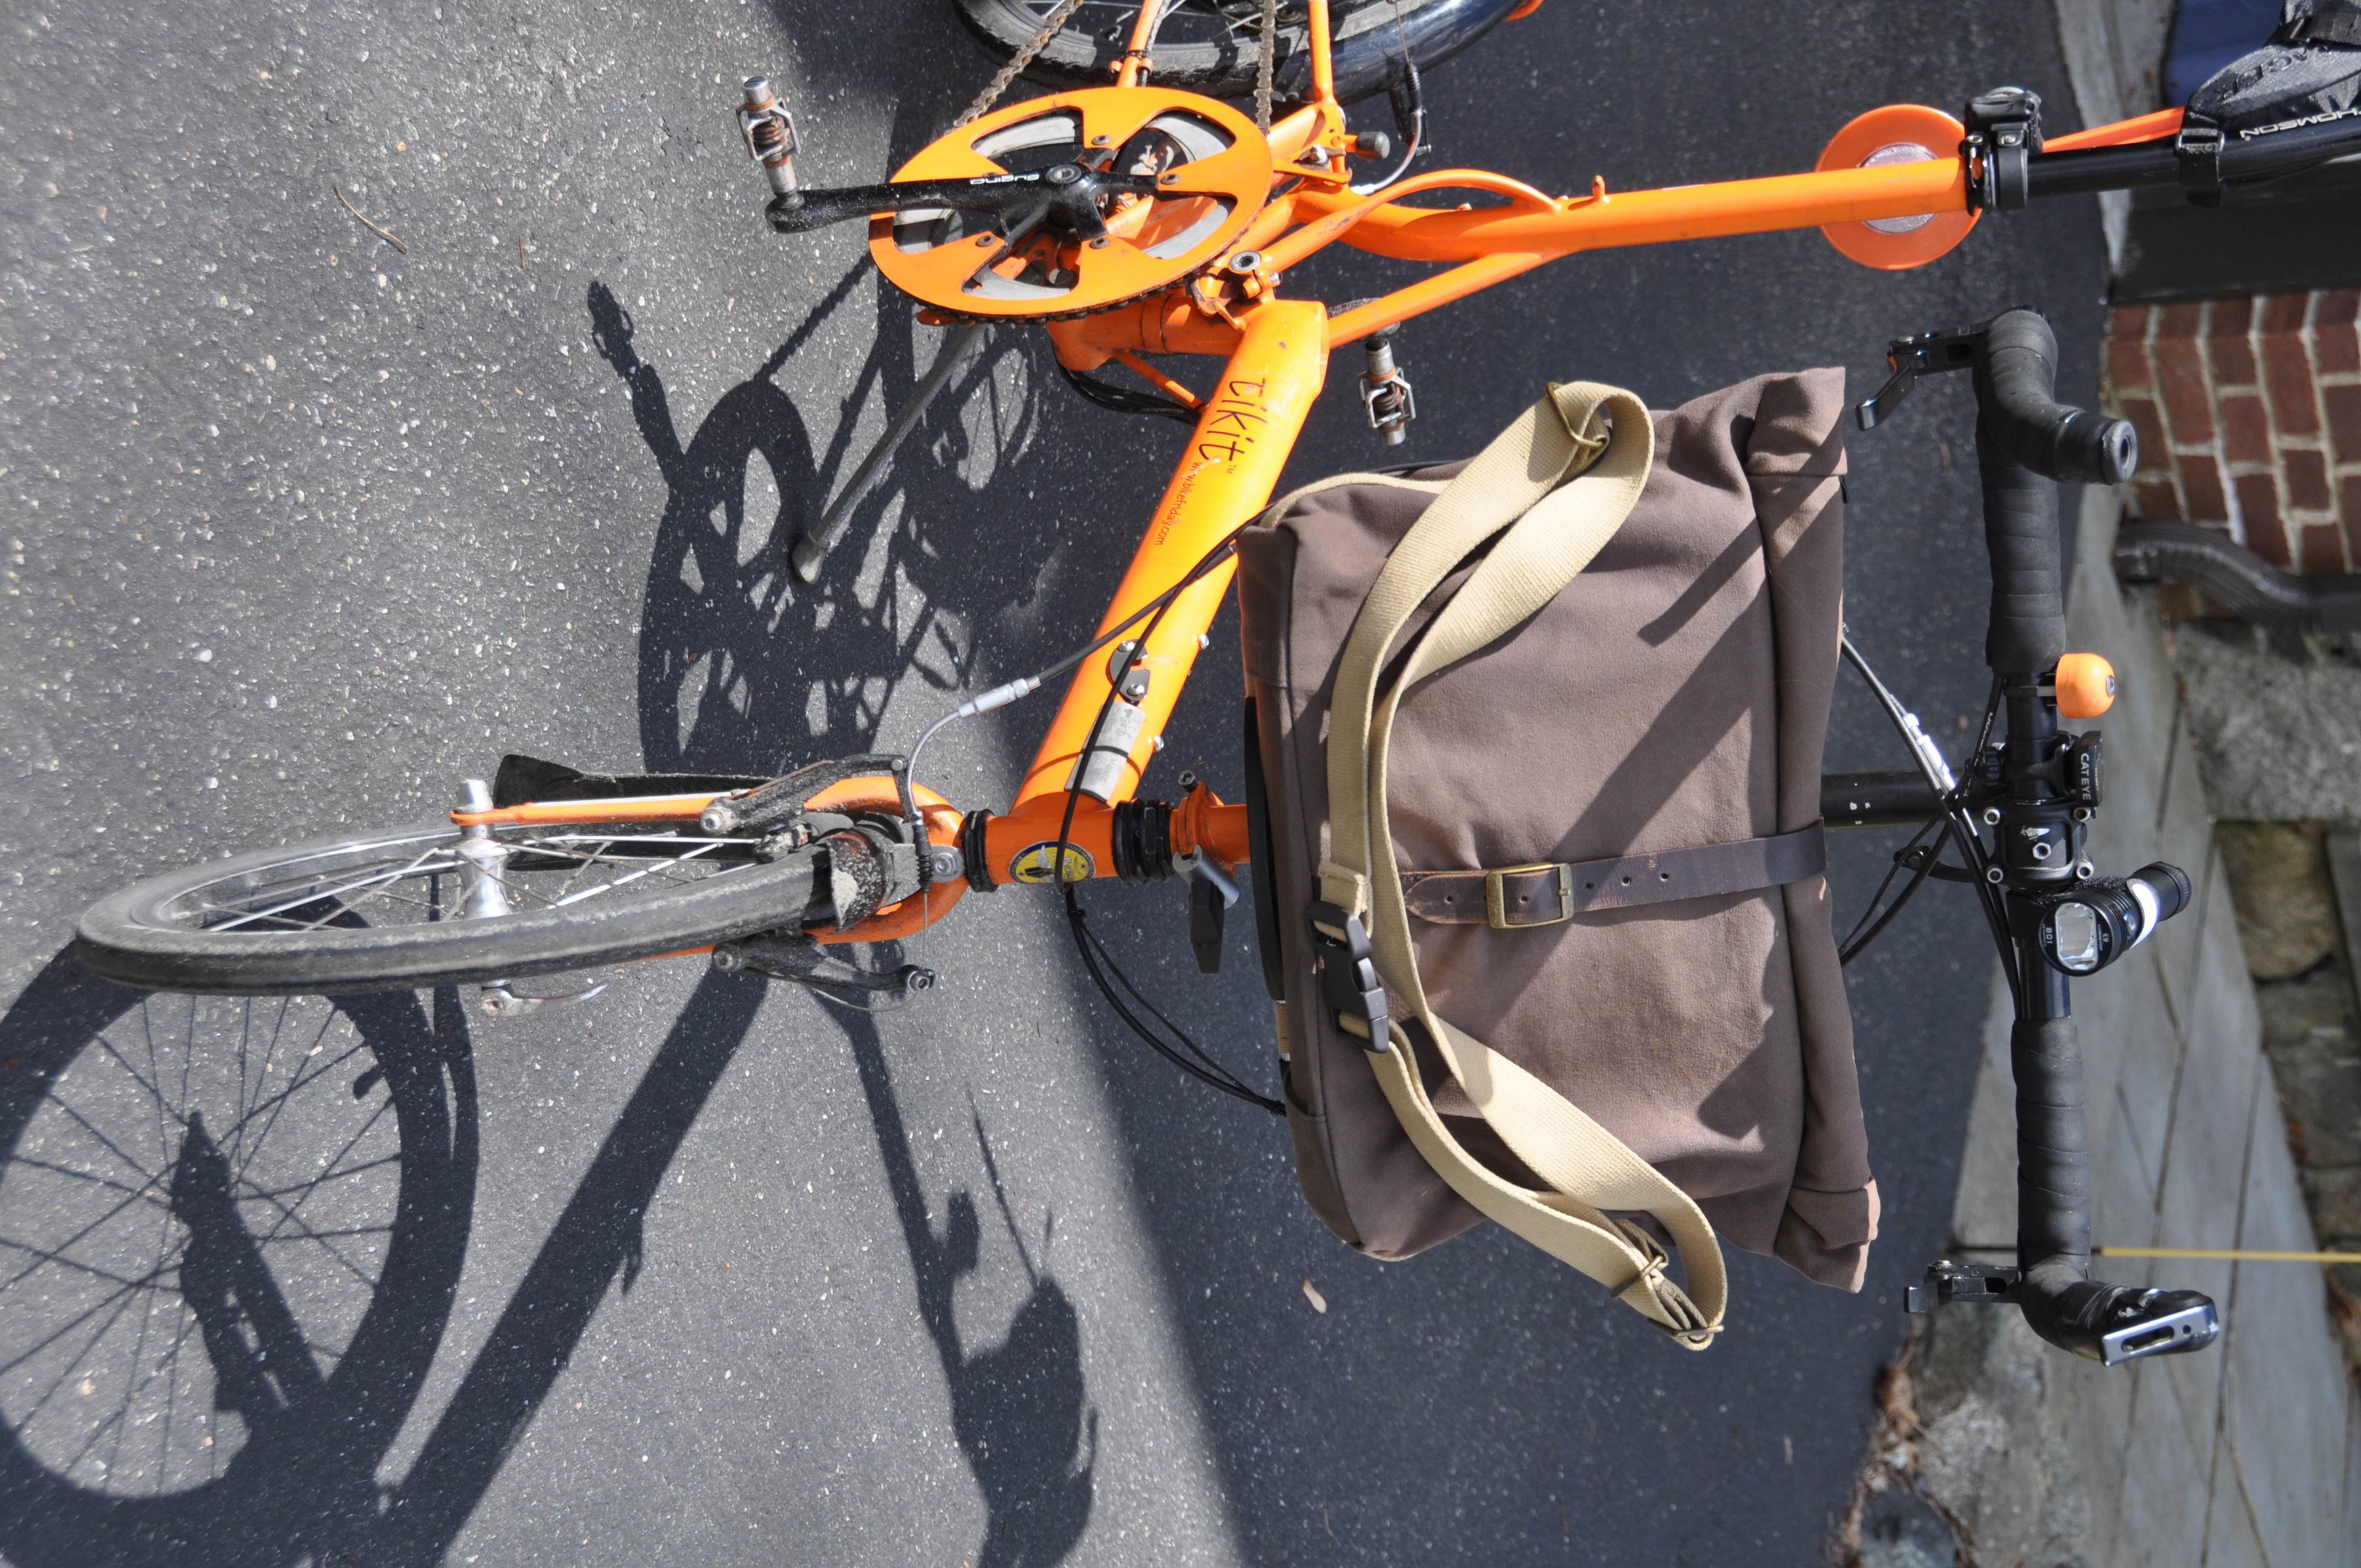
I have the T bag and the waxed canvas rolltop shoulder bag, and like both of them. They are well-designed bags!
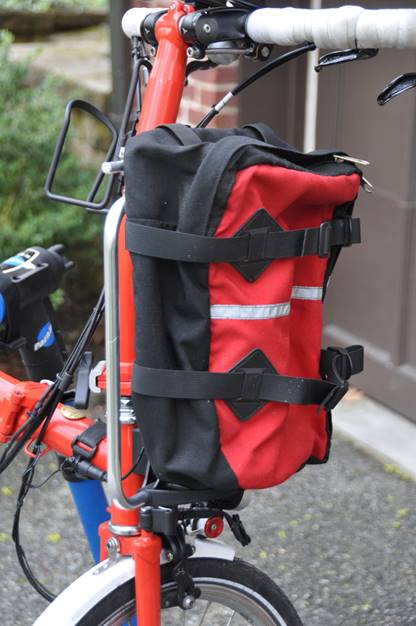
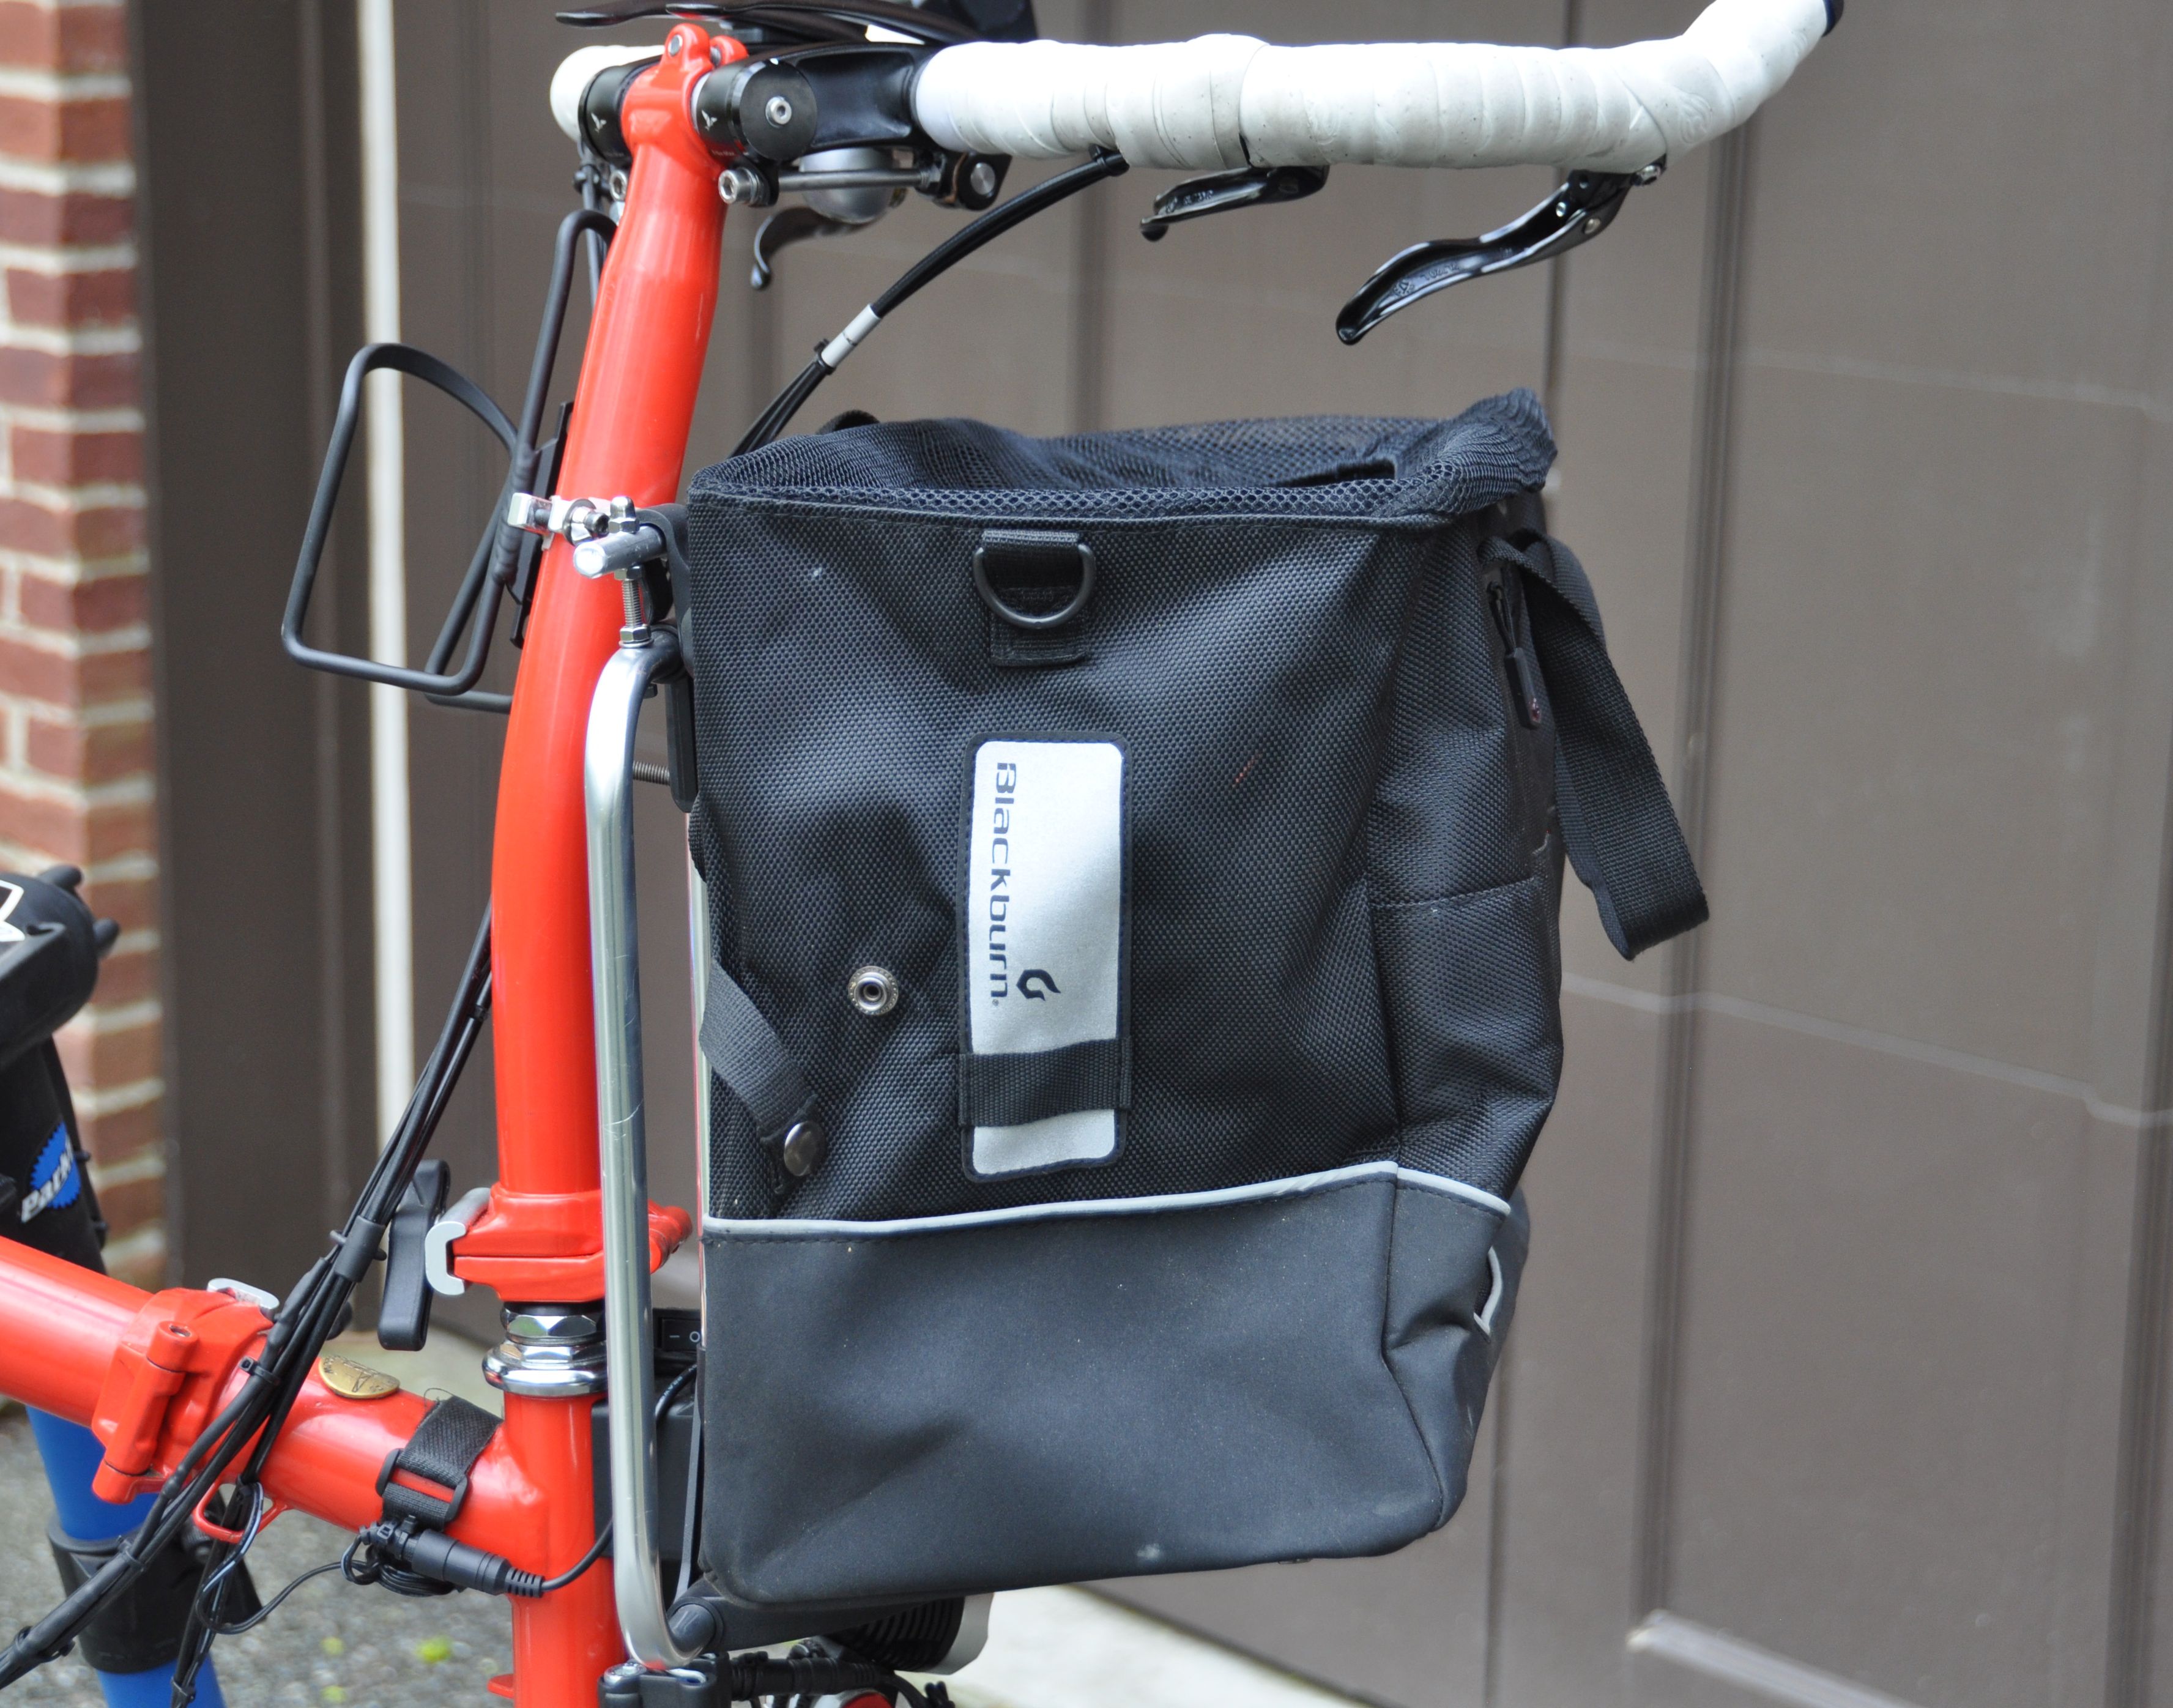
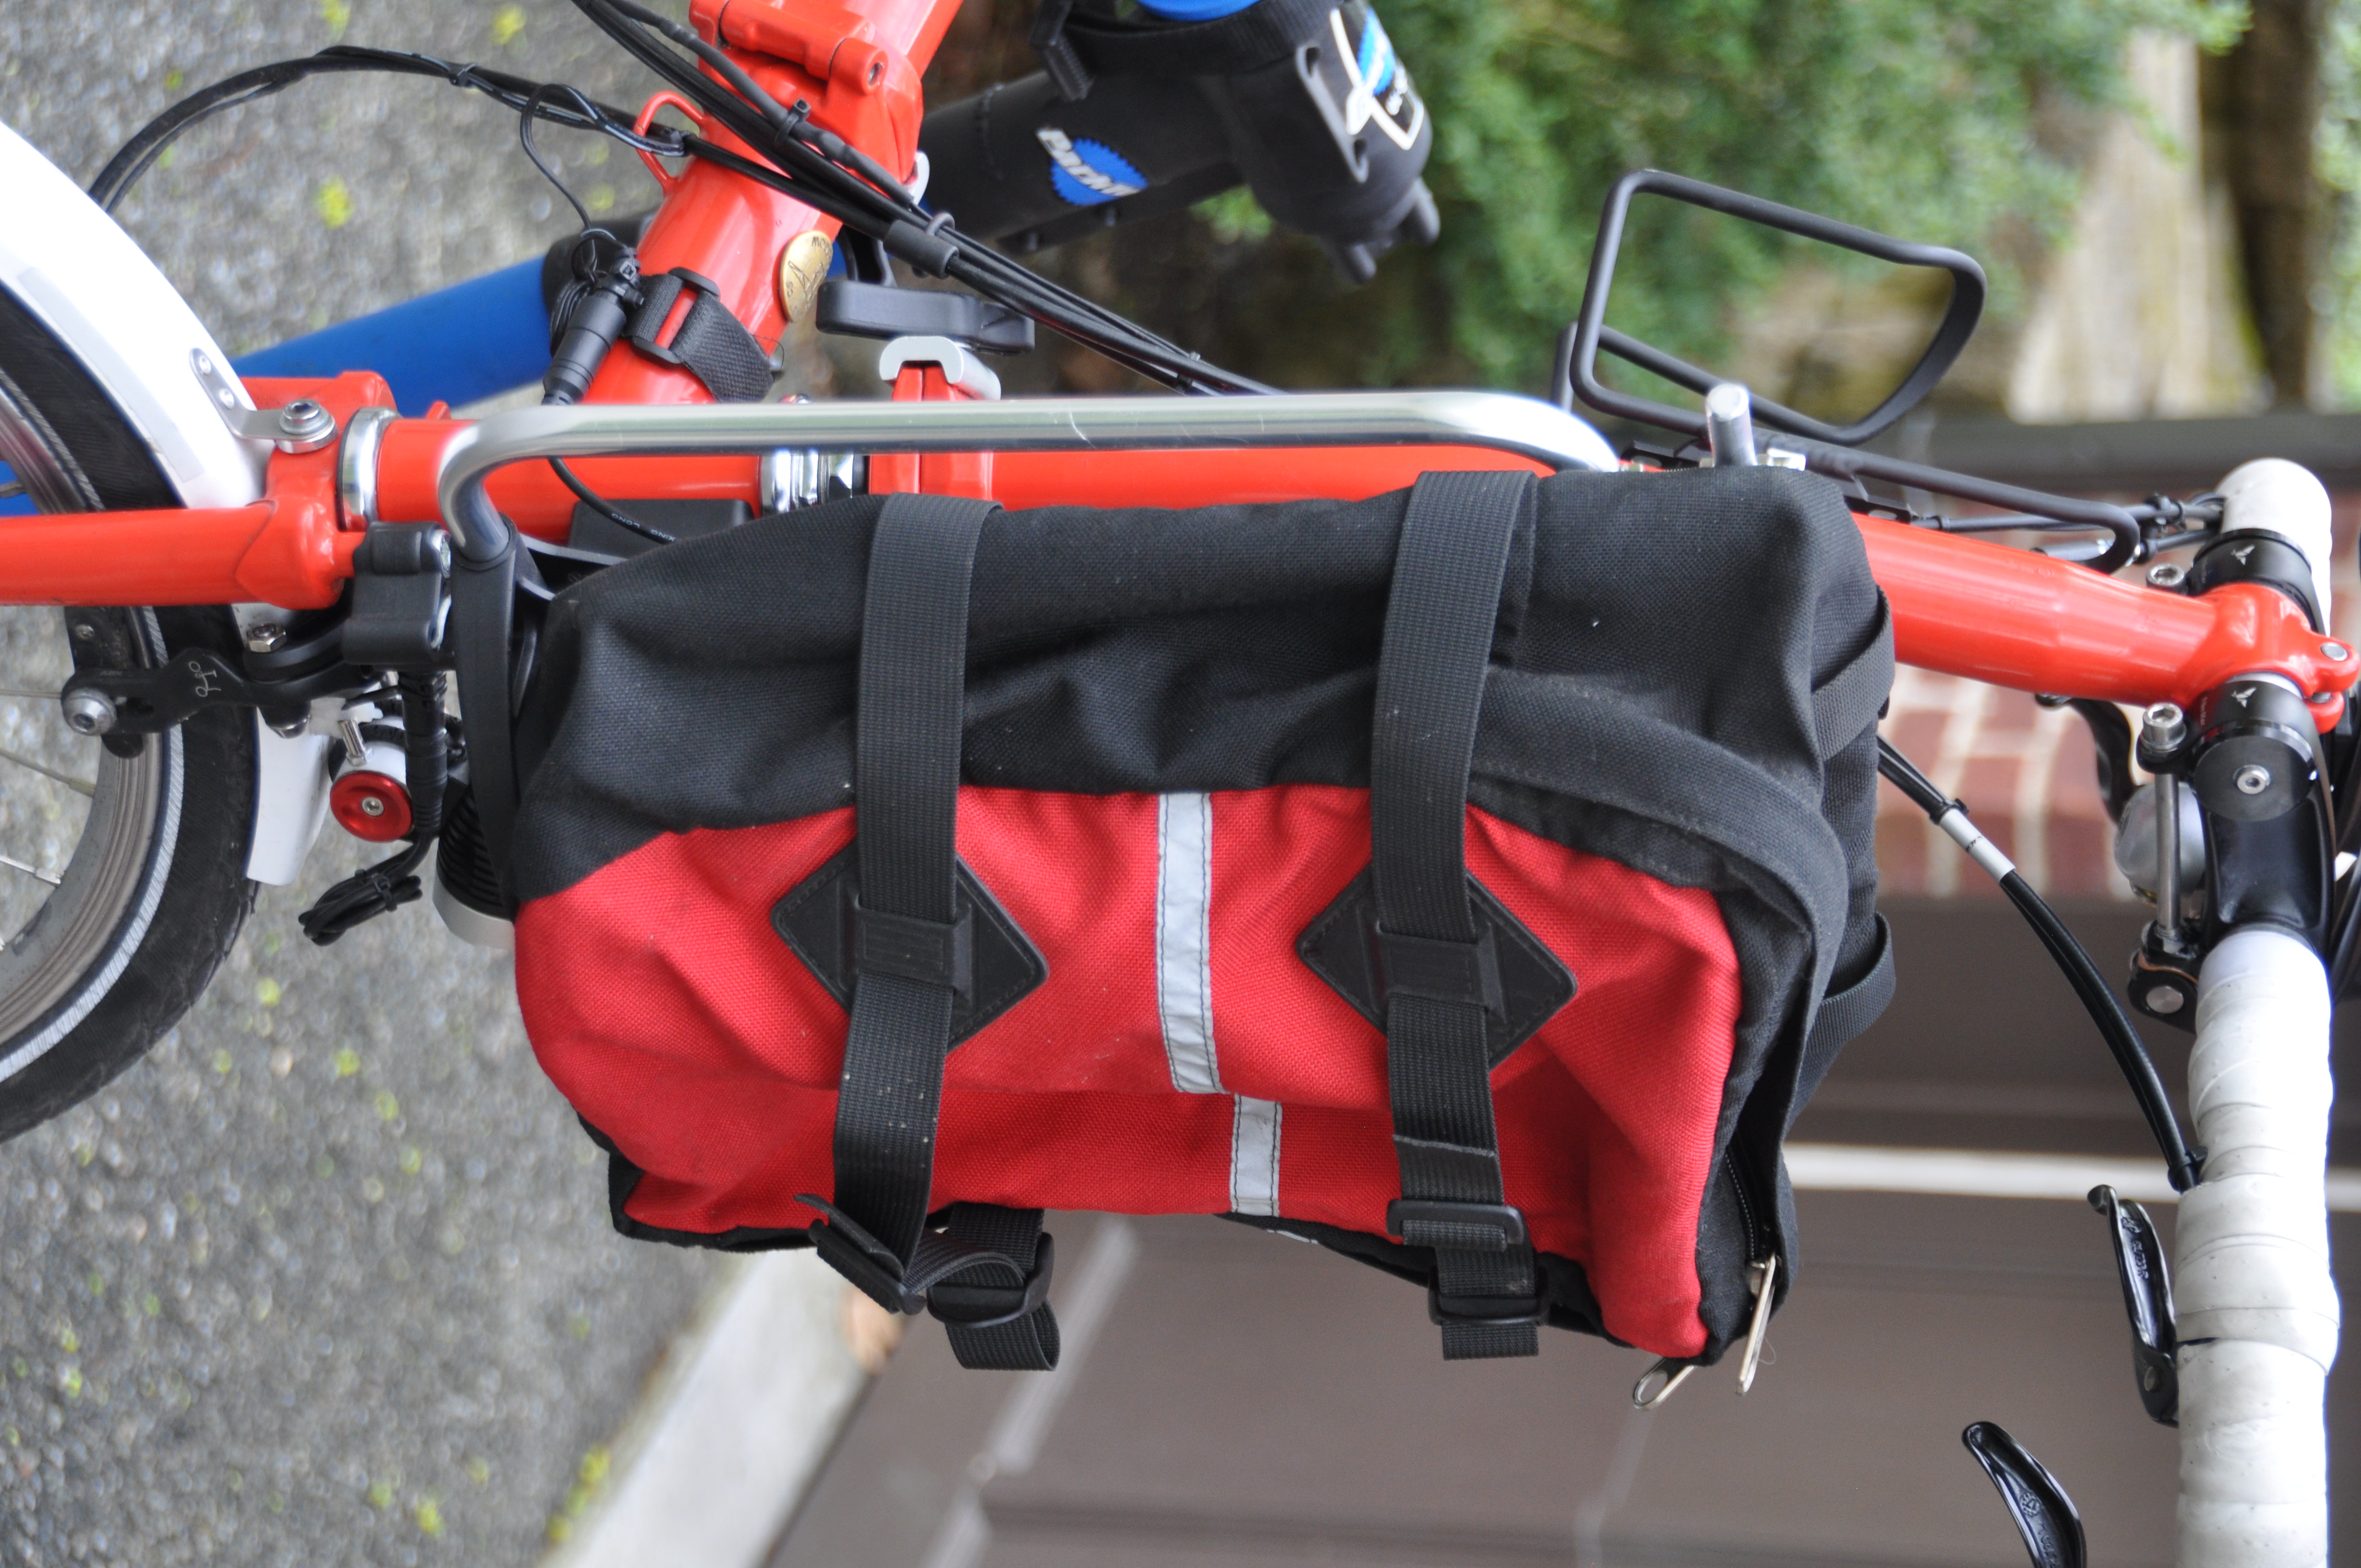
Front pannier Back to top
I have used the Brompton carrier block adapter to mount non-Brompton bike bags. There is a big difference between available adapters. I first got adapters via eBay from lamkevin123, Australia. They are 3D printed. When I mounted them, they cracked easily along the print direction (but I could glue the crack). The adapter has a lot of play on the Brompton carrier block, which is acceptable for small bags, but not for a bigger bag. The adapter from AGEKUSL is much more stable and made of thicker material (I assume it is injection molded), and it has no play --- it fits as well as original Brompton bags. It makes a big difference in stability for larger bags like this front pannier.
Added:
I received an improved 3D printed adapter from lamkevin123. This one is much better than the previous version. I like the larger holes (M5) and the wider spacing. The crisscross pattern should avoid cracks (but I didn't do any tests ...). The new adapter has no play and should hold bags well. I don’t like the embedded M5 nuts – they can be pulled out. Therefore, I would use longer screws and add a washer and a nut or acorn nut. In conclusion, the new version has all the functionality of the molded AGEKUSL adapter. Aesthetically, I like the smoother finish of the molded adapter.


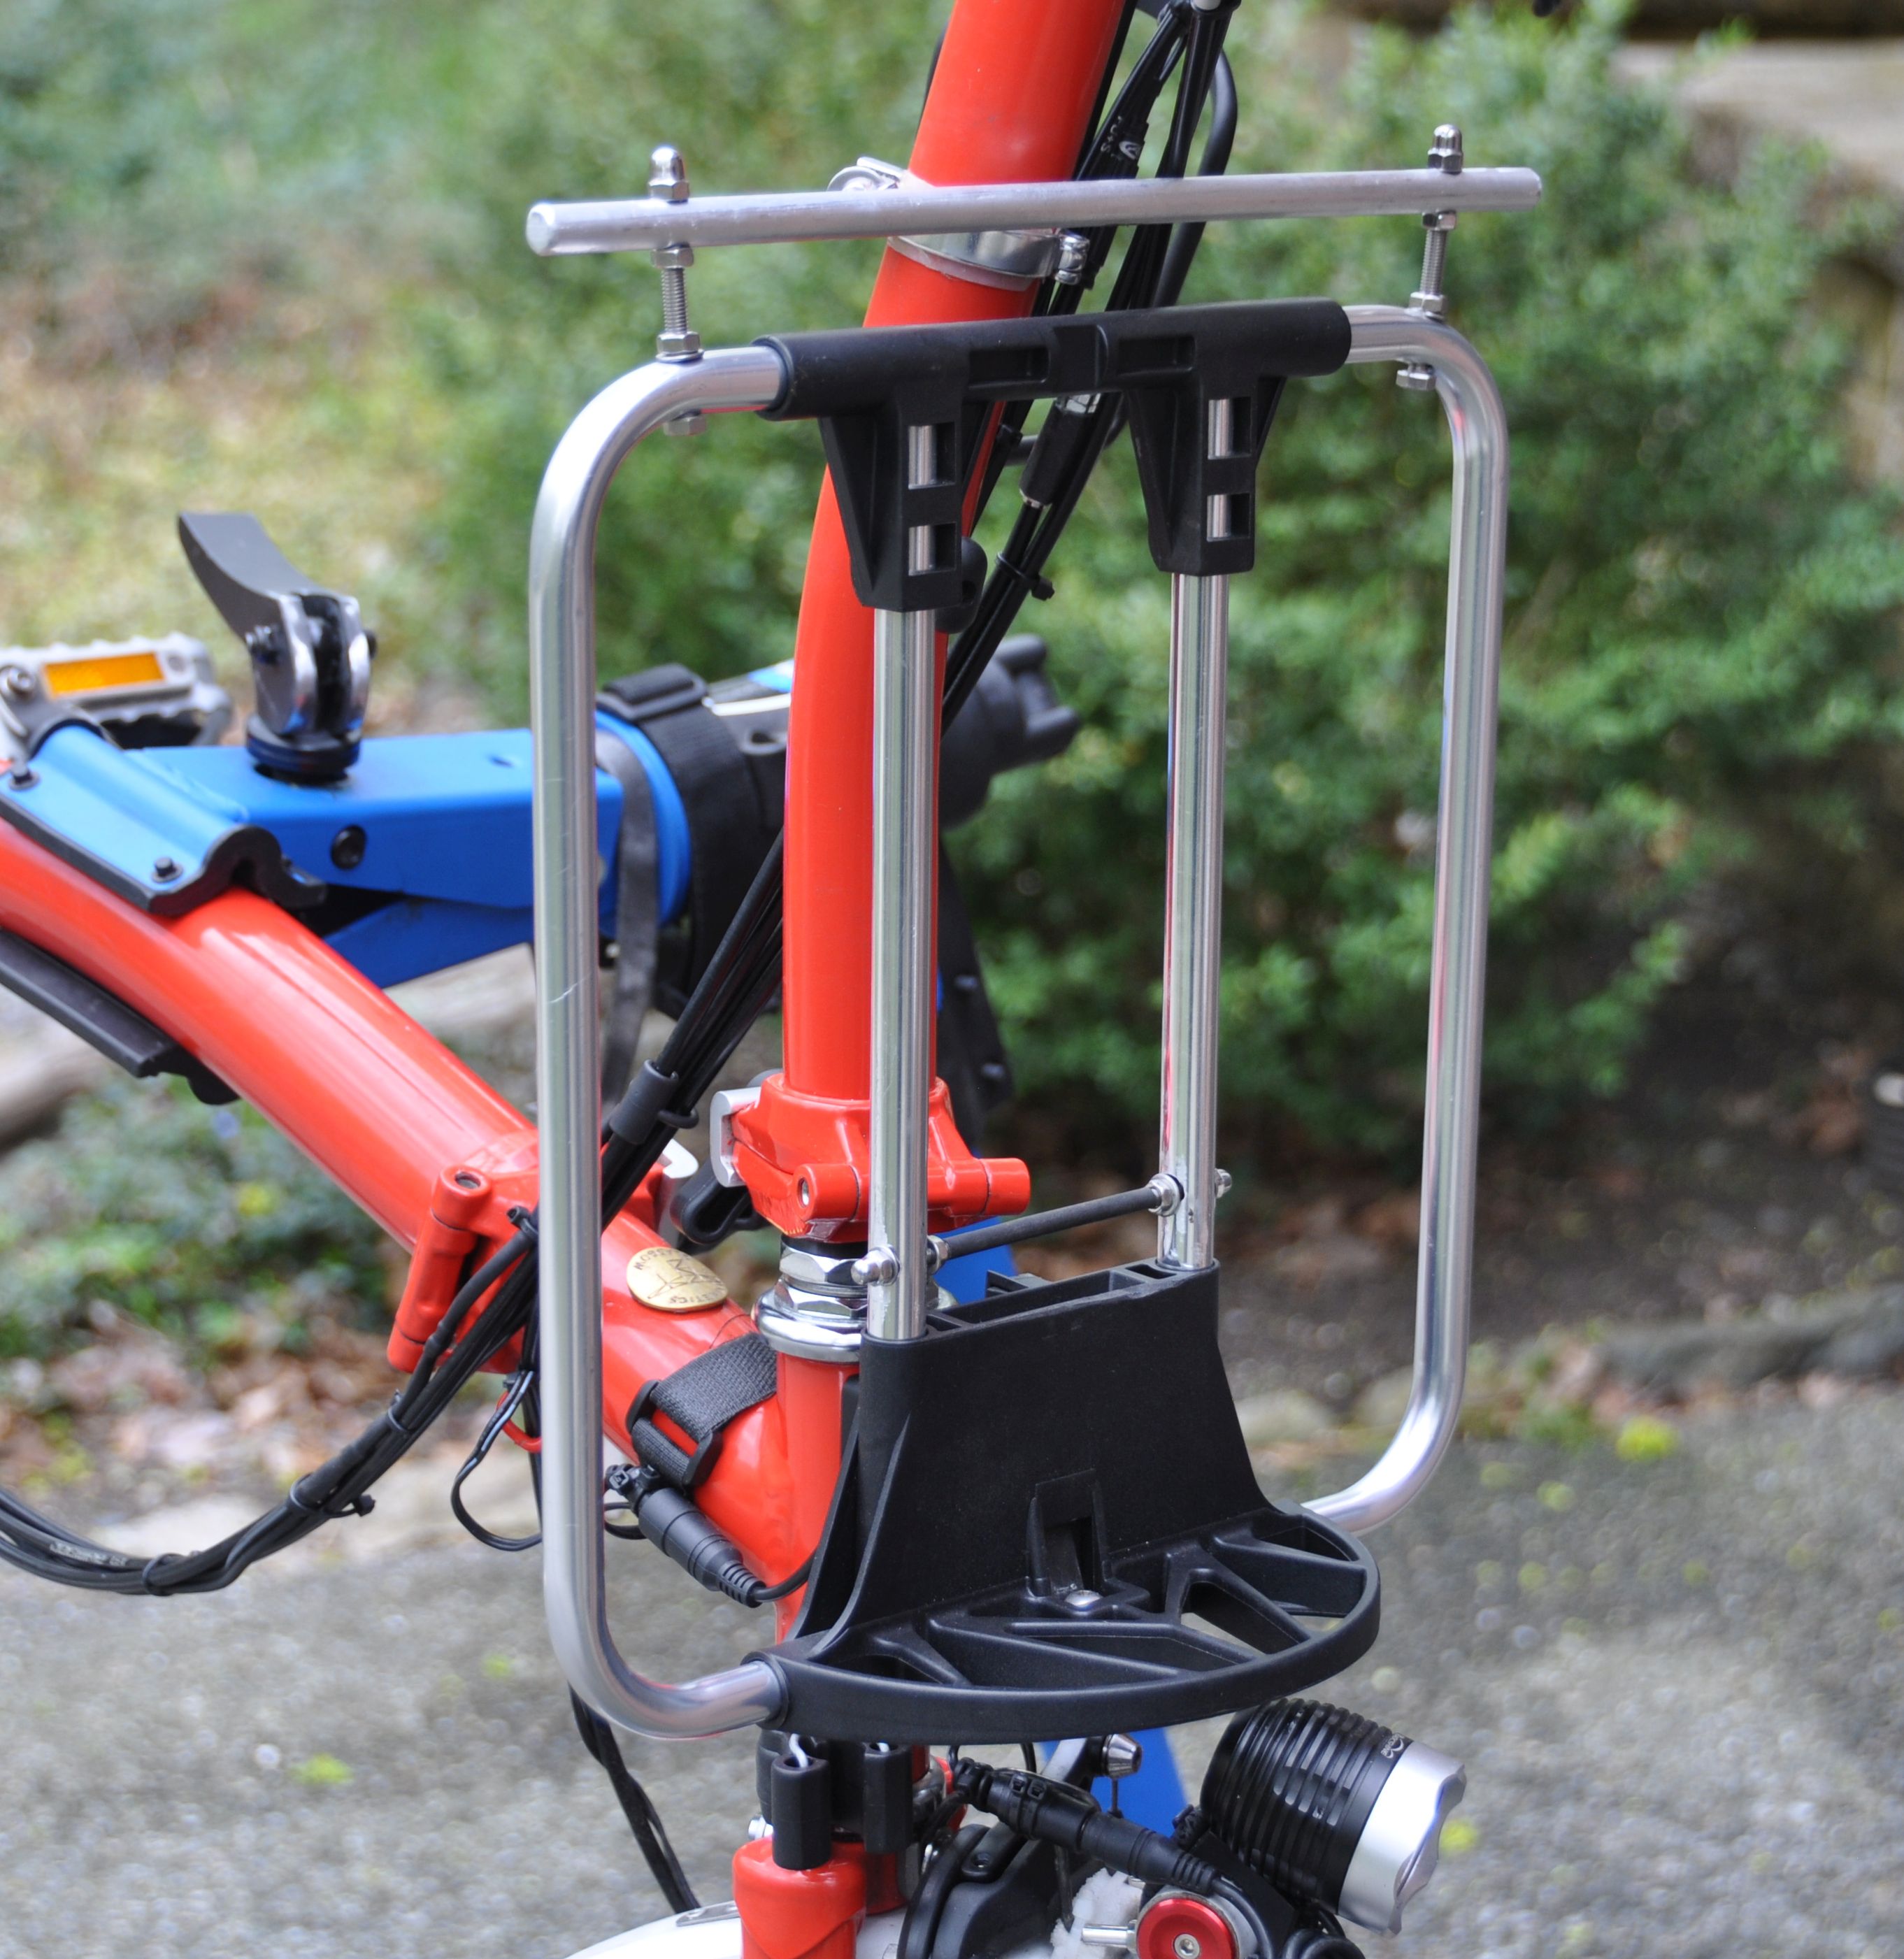
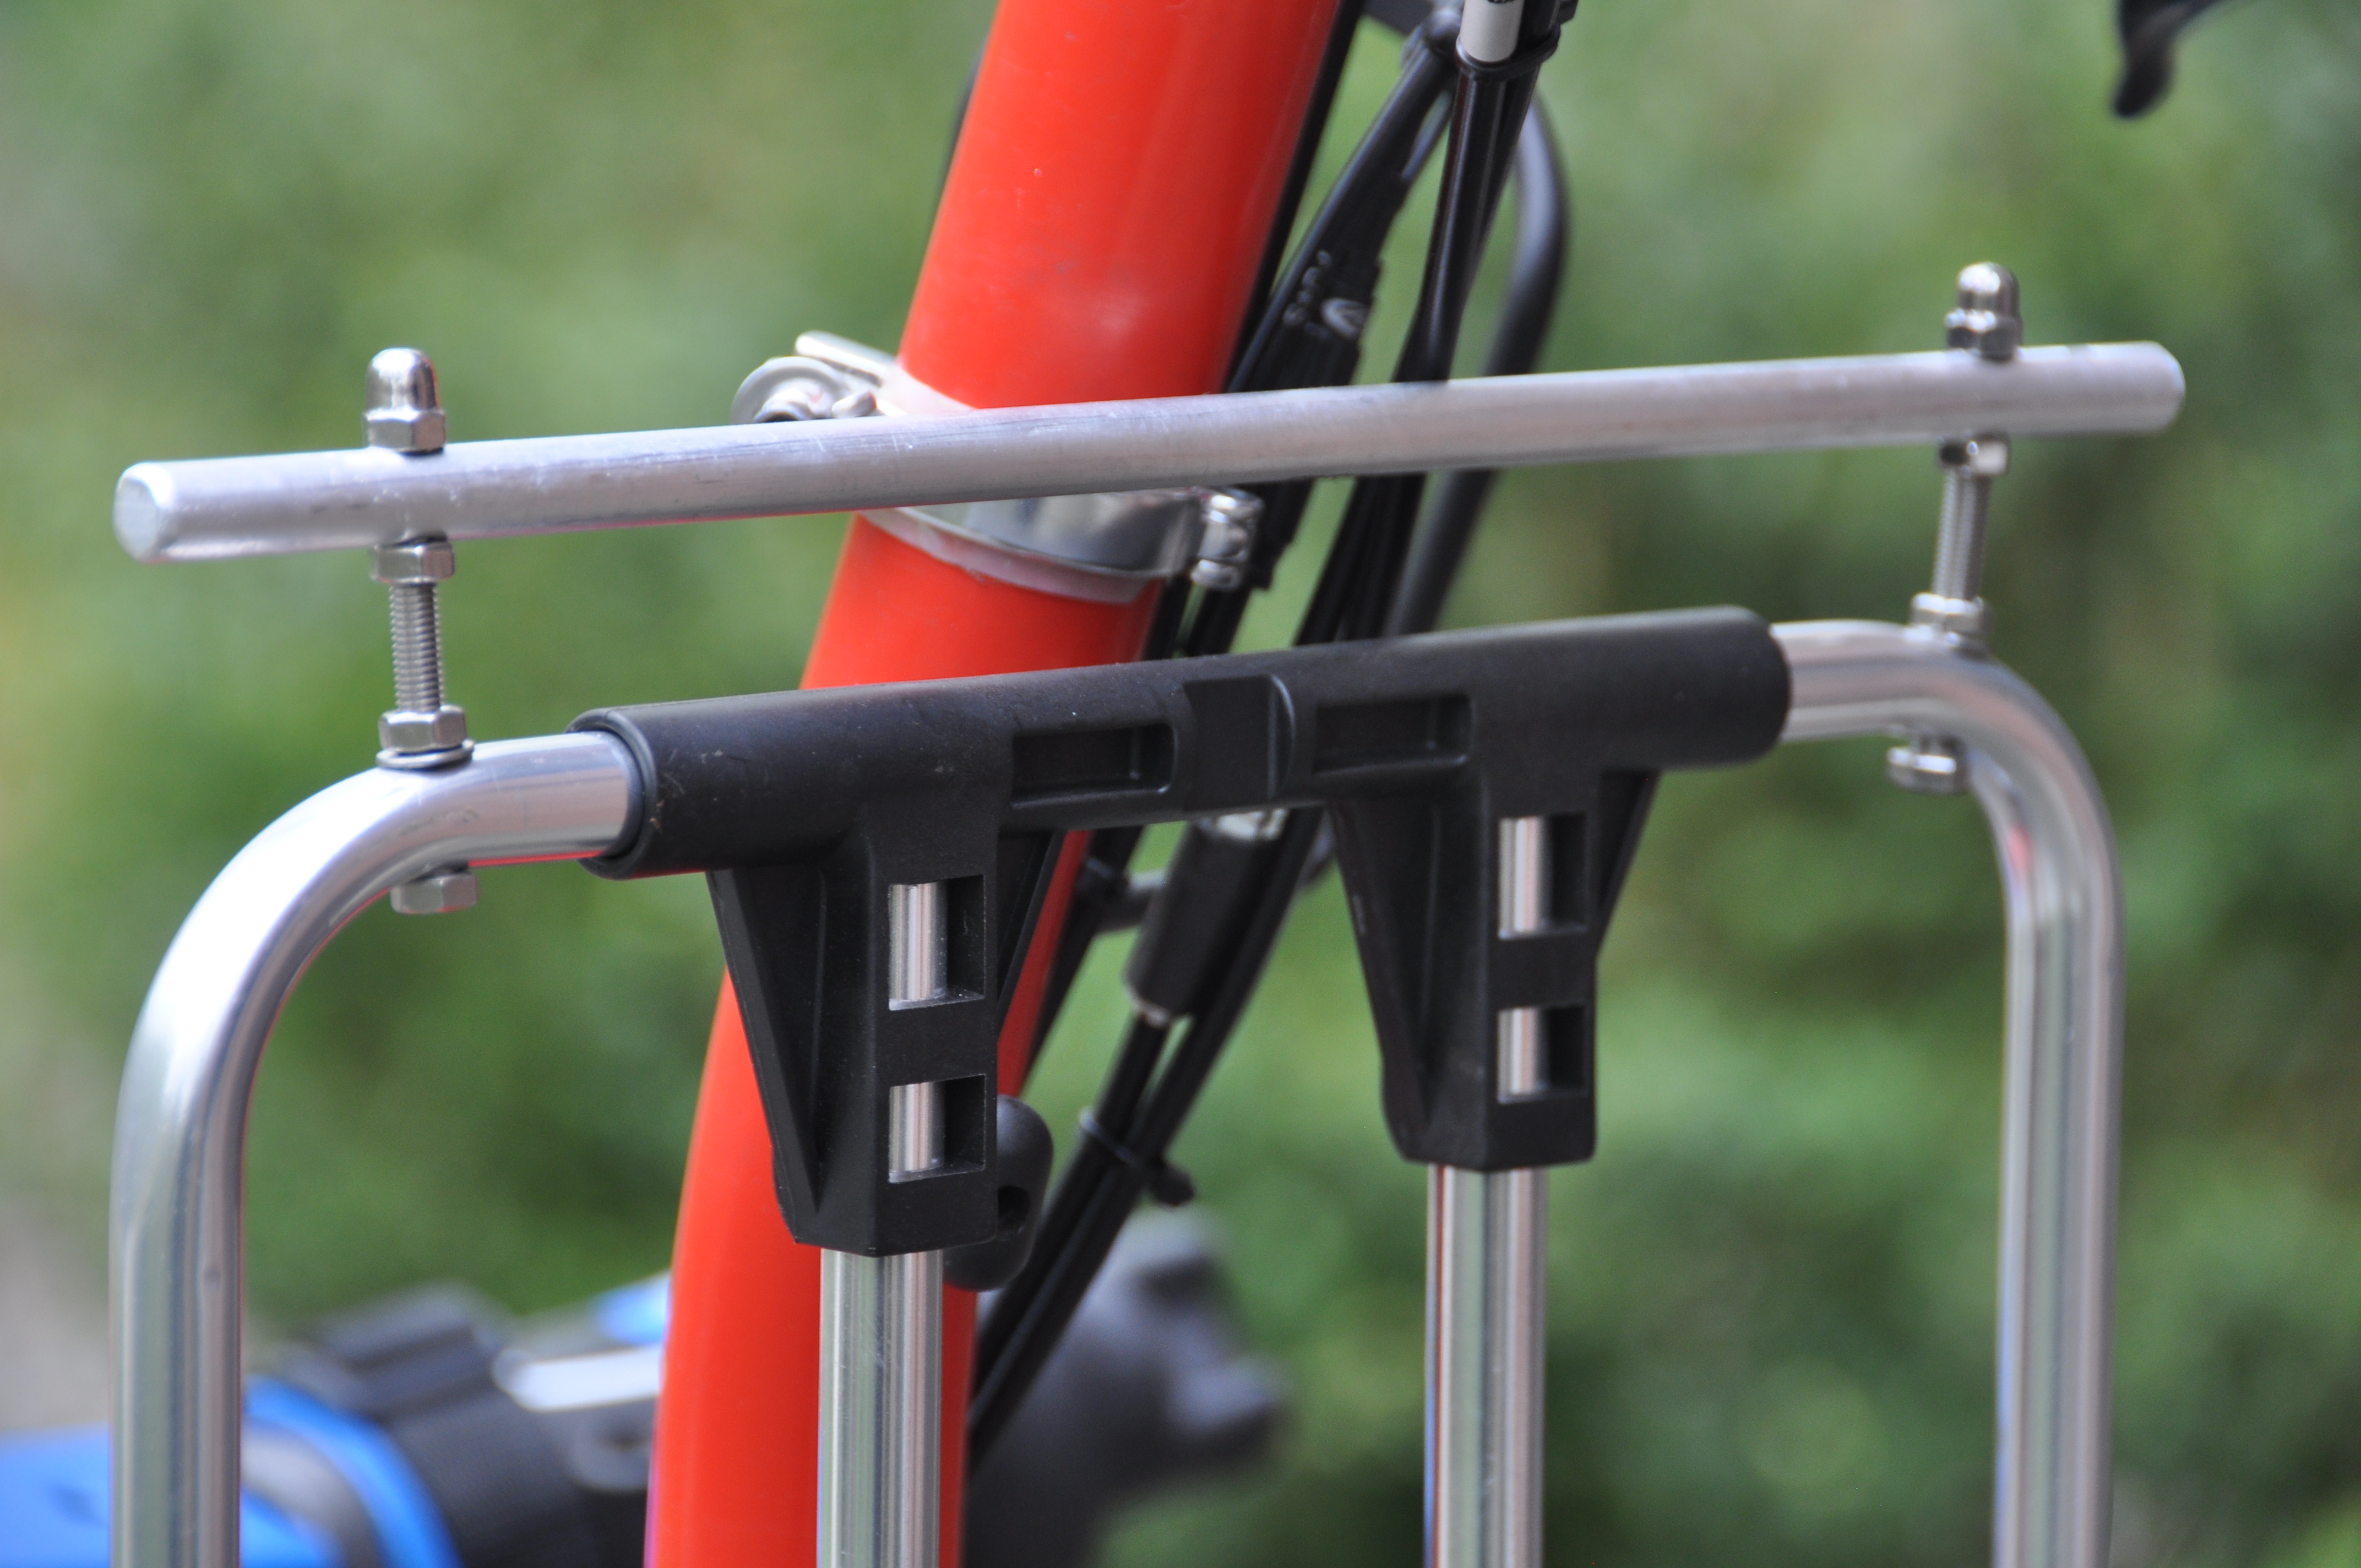
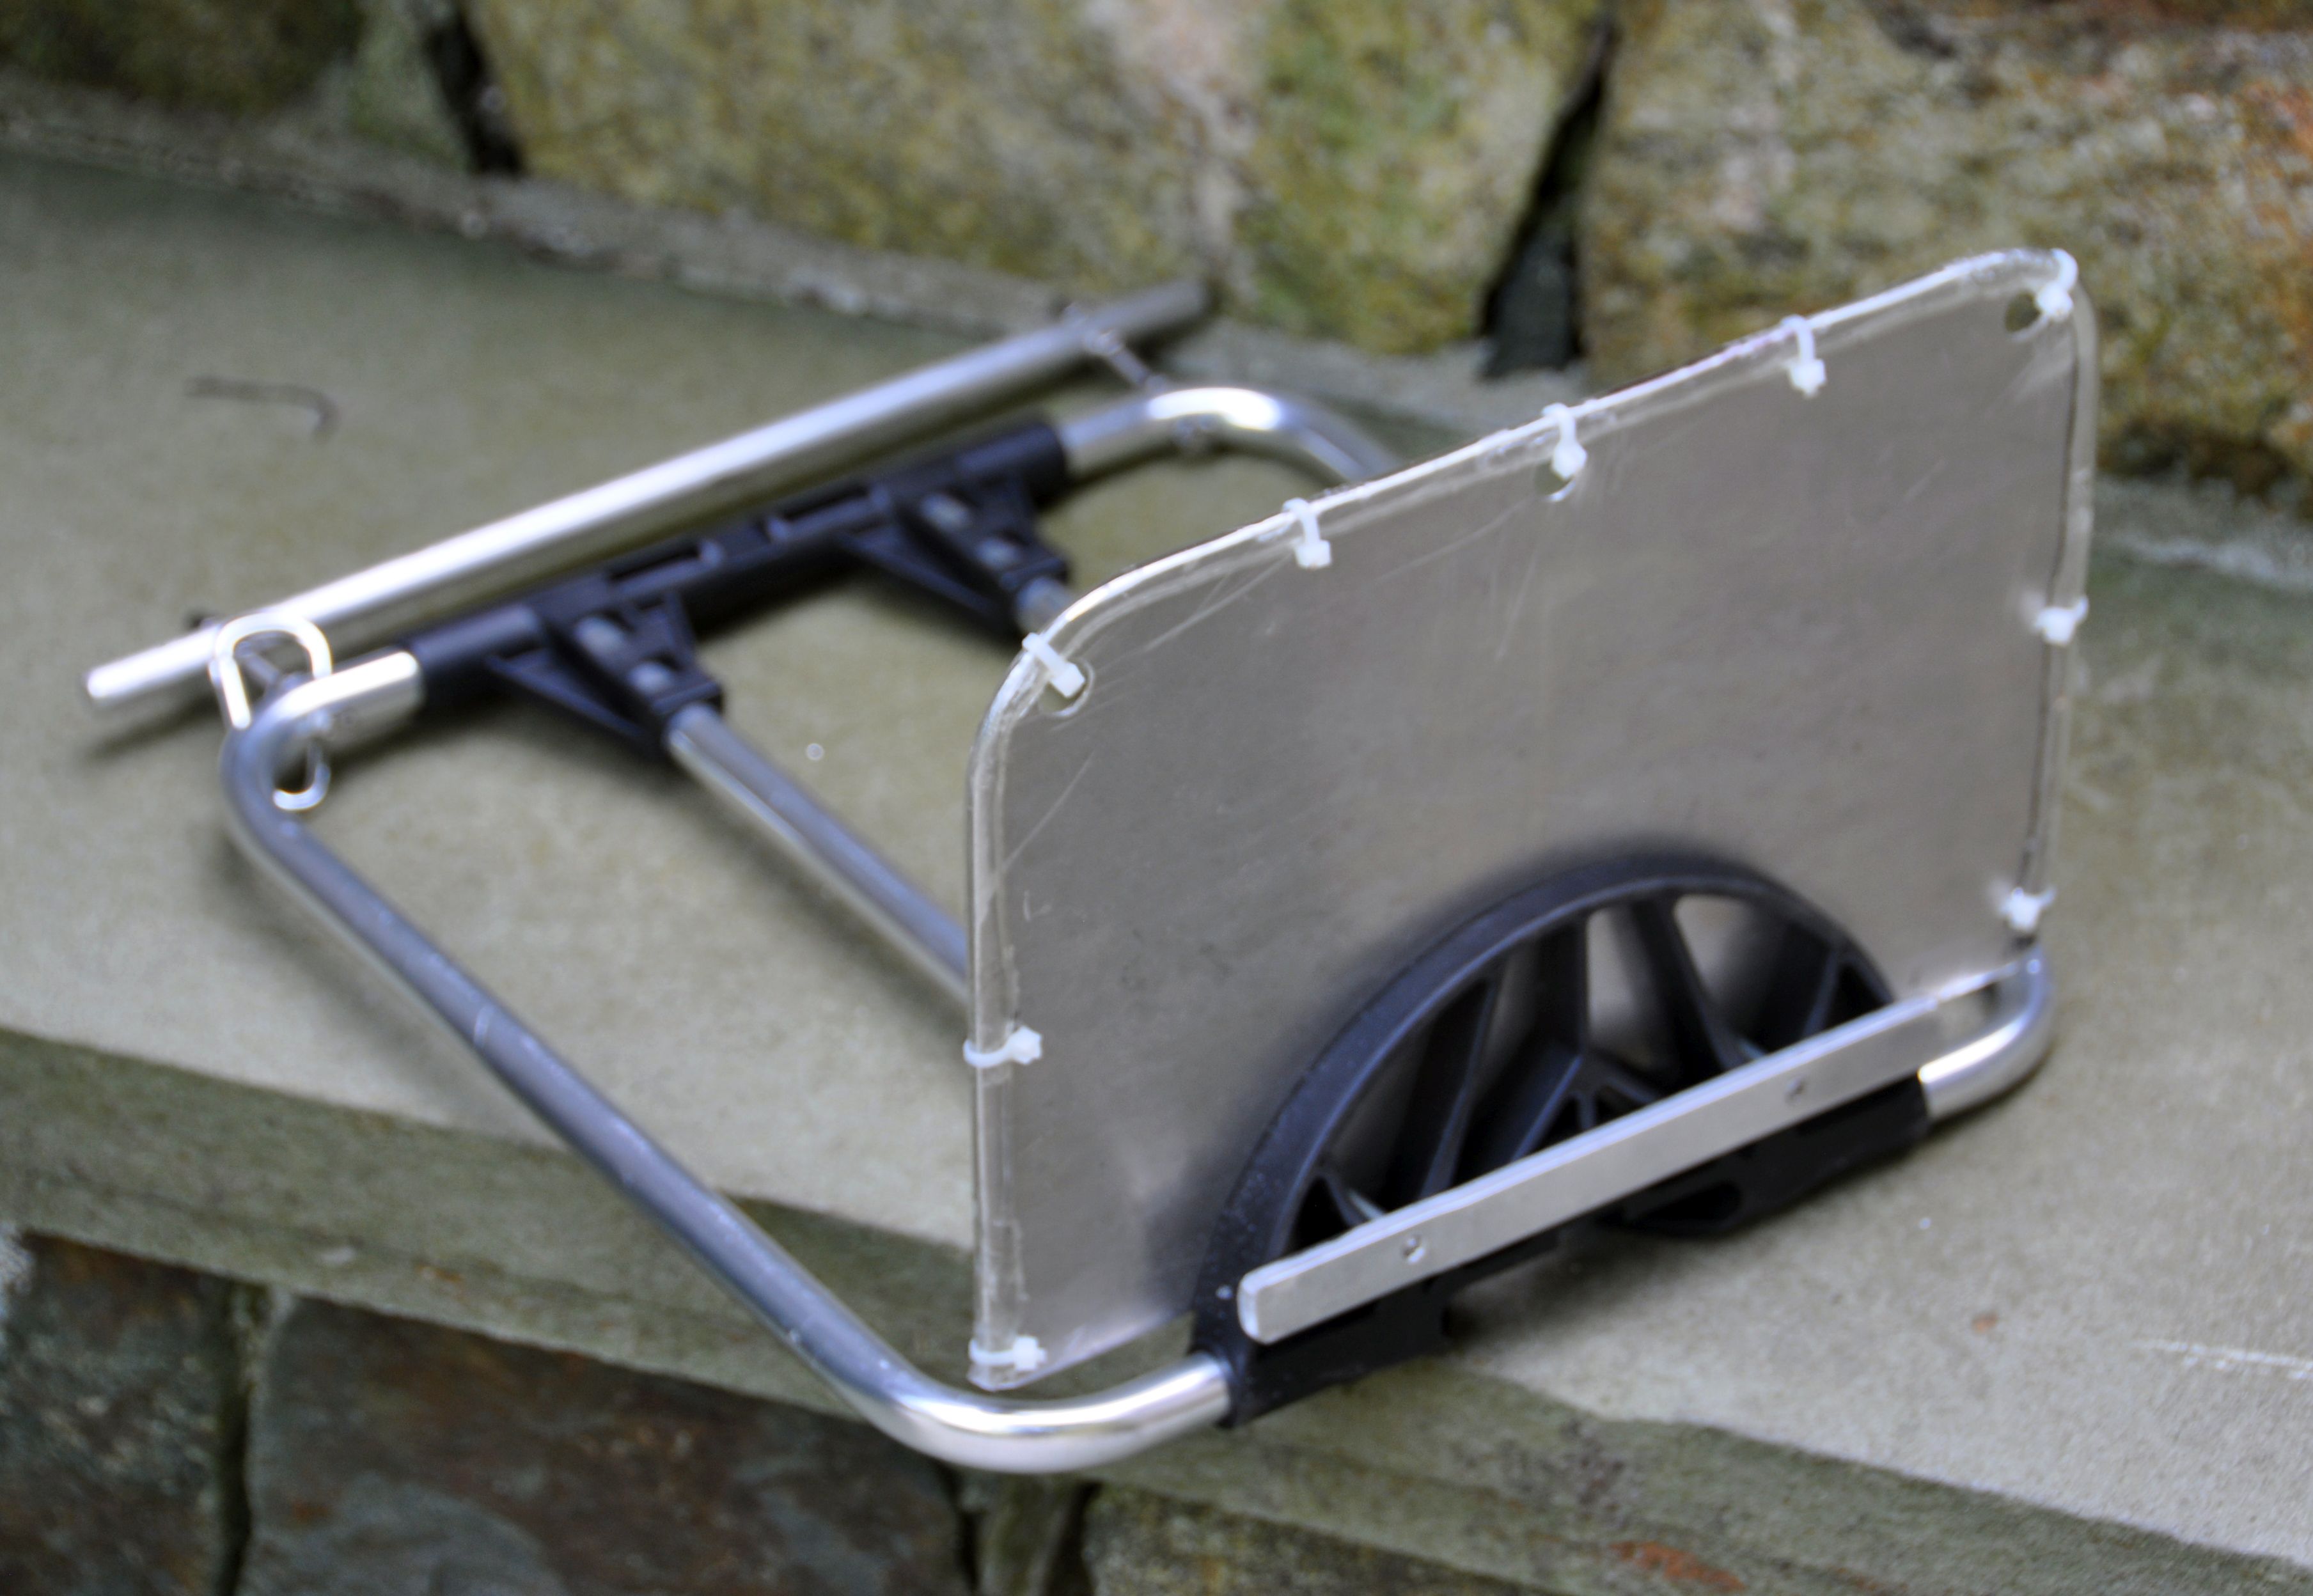
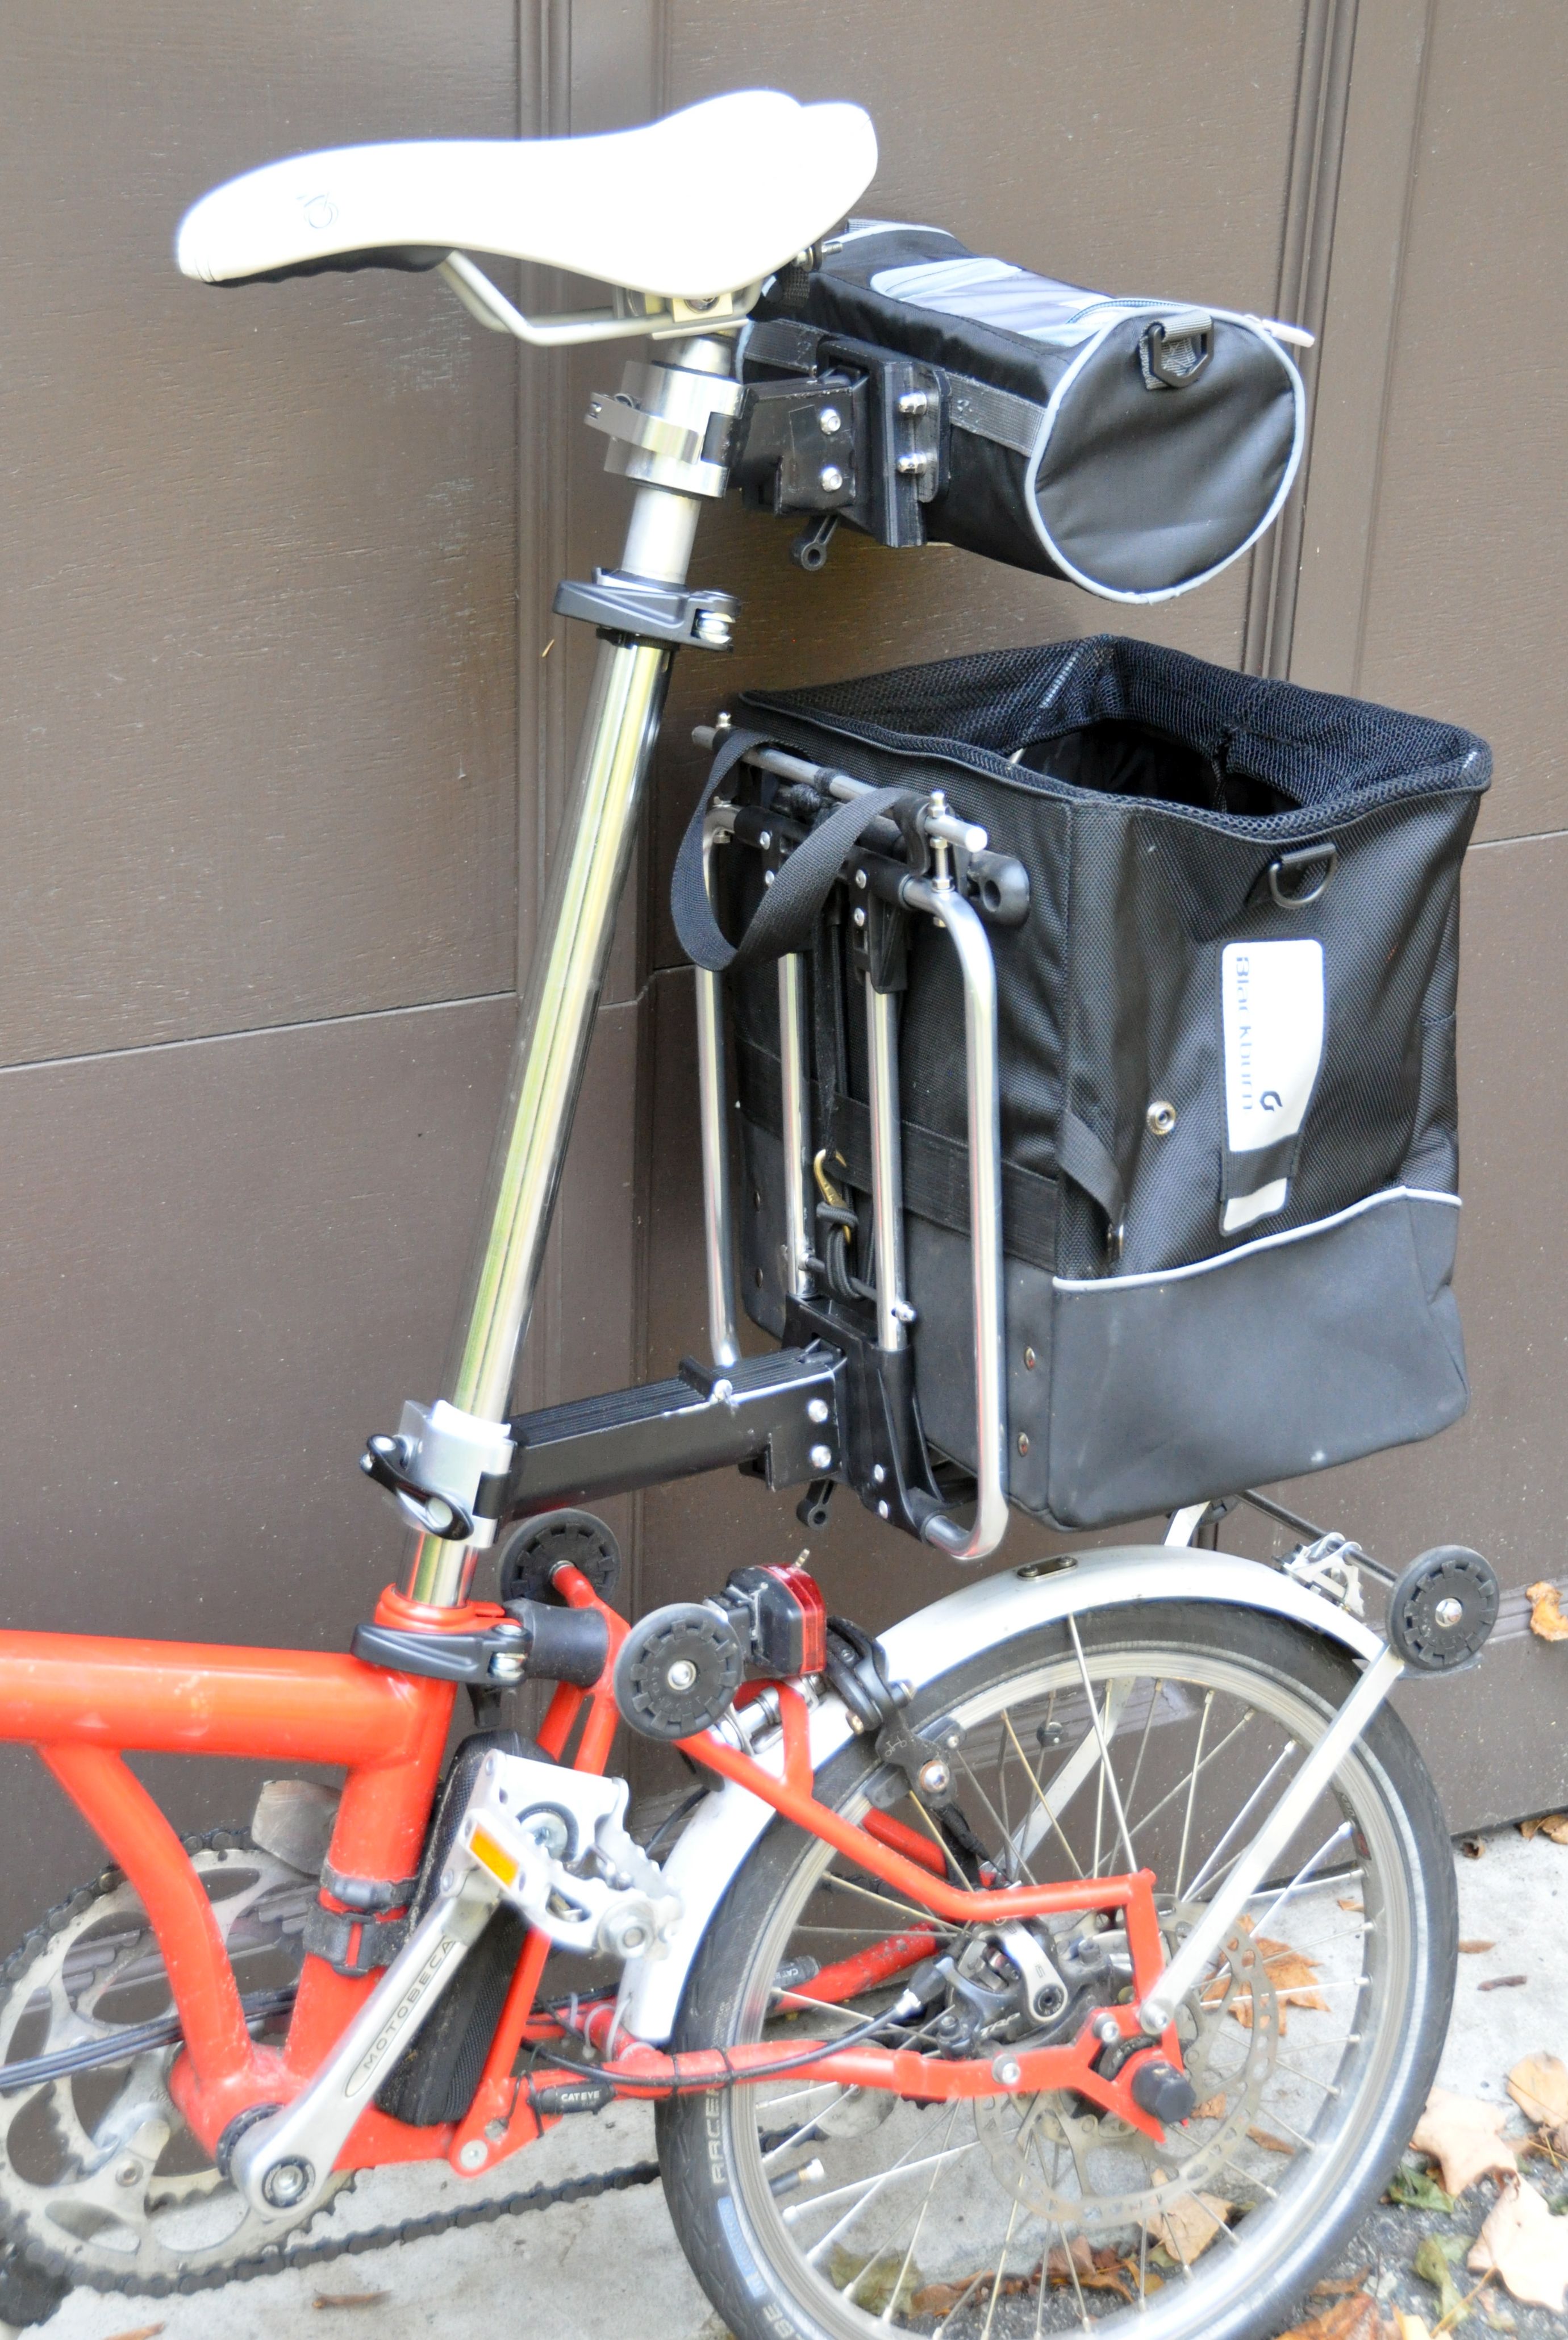
Modified luggage frame Back to top
I wanted to use some older bags from other bikes on the Brompton. They were attached with hooks to the front or rear rack. I got a Brompton luggage frame (the "Tote bag" version, which is as tall as the T or C bag version, but narrower and without handle). I needed extra height, so I added an aluminum rod on the top. For securing the bags, I added a piece of threaded rod and covered it with shrink tubing. Now I can mount various bags - I am showing a big Blackburn shopping basket and a front pannier.


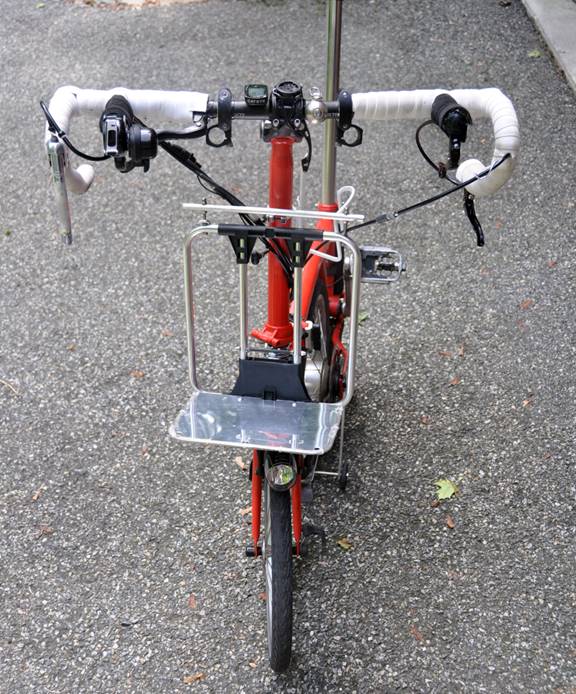
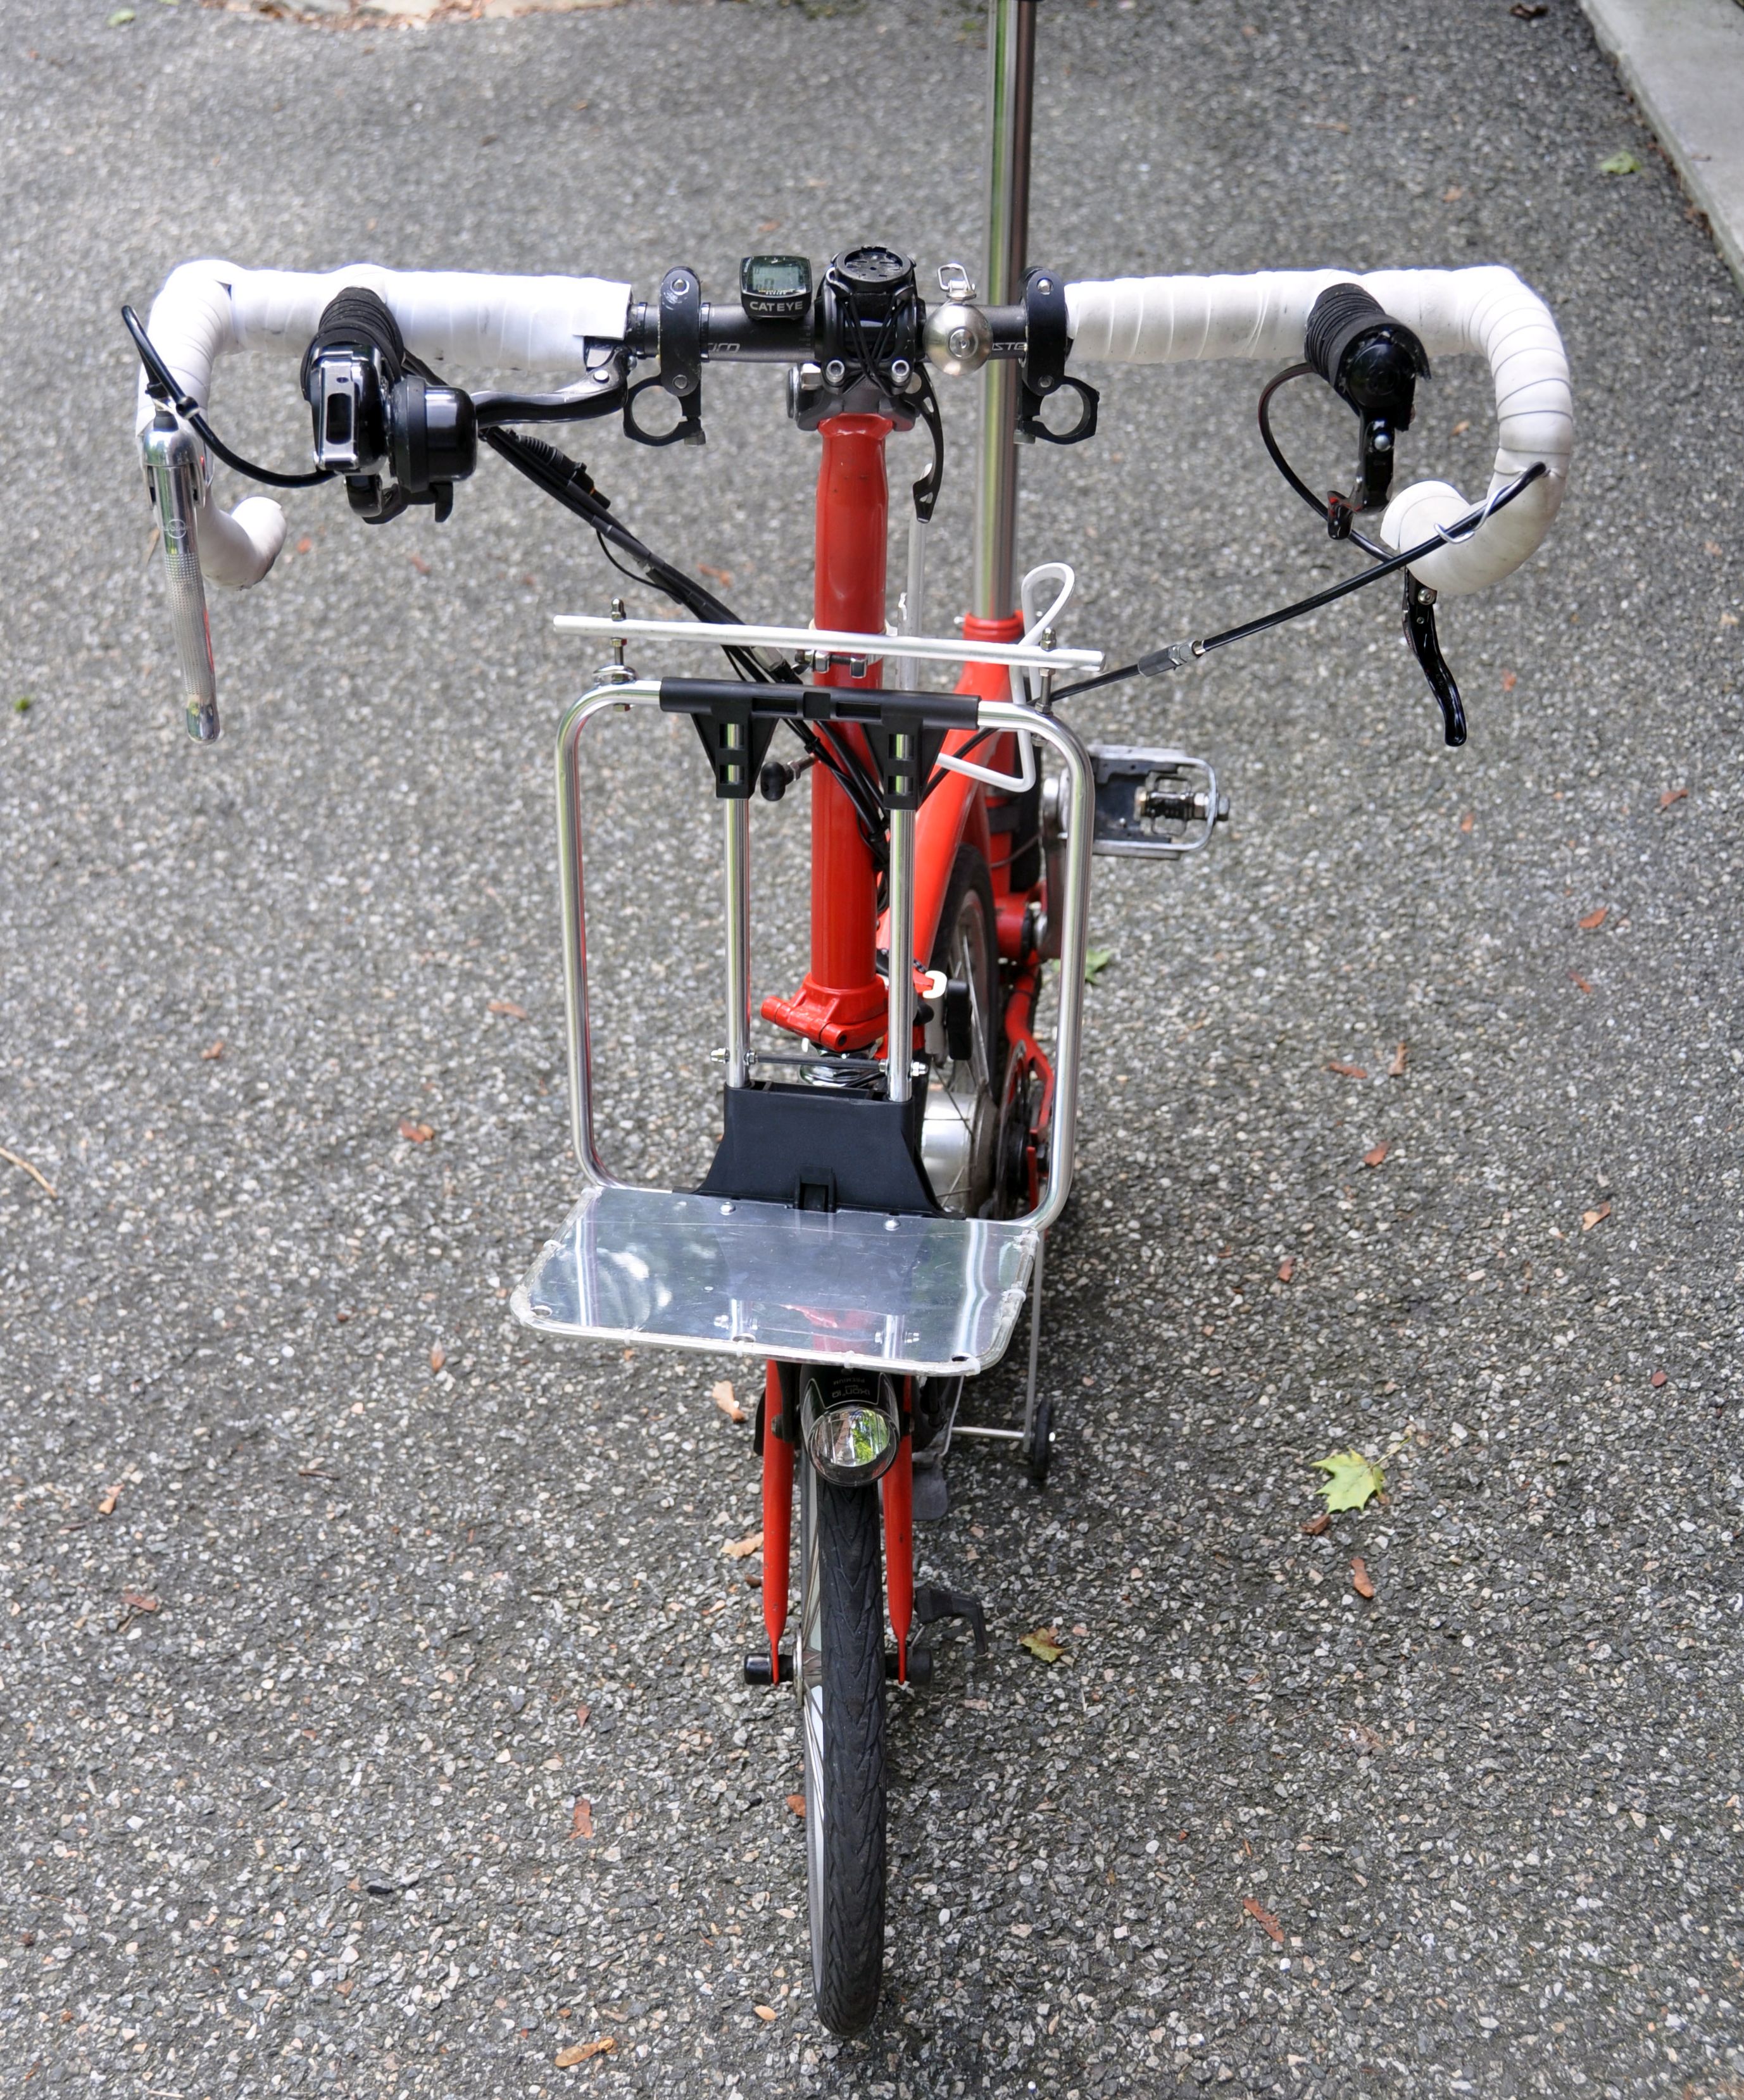
Front rack Back to top
The Brompton luggage frame can be used as a front rack, after adding a supporting platform. Mine is cut from 1/16 “ aluminum. The edge is protected by a piece of vinyl tubing, cut open and attached with glue and zip ties. The luggage frame is the tote bag version.

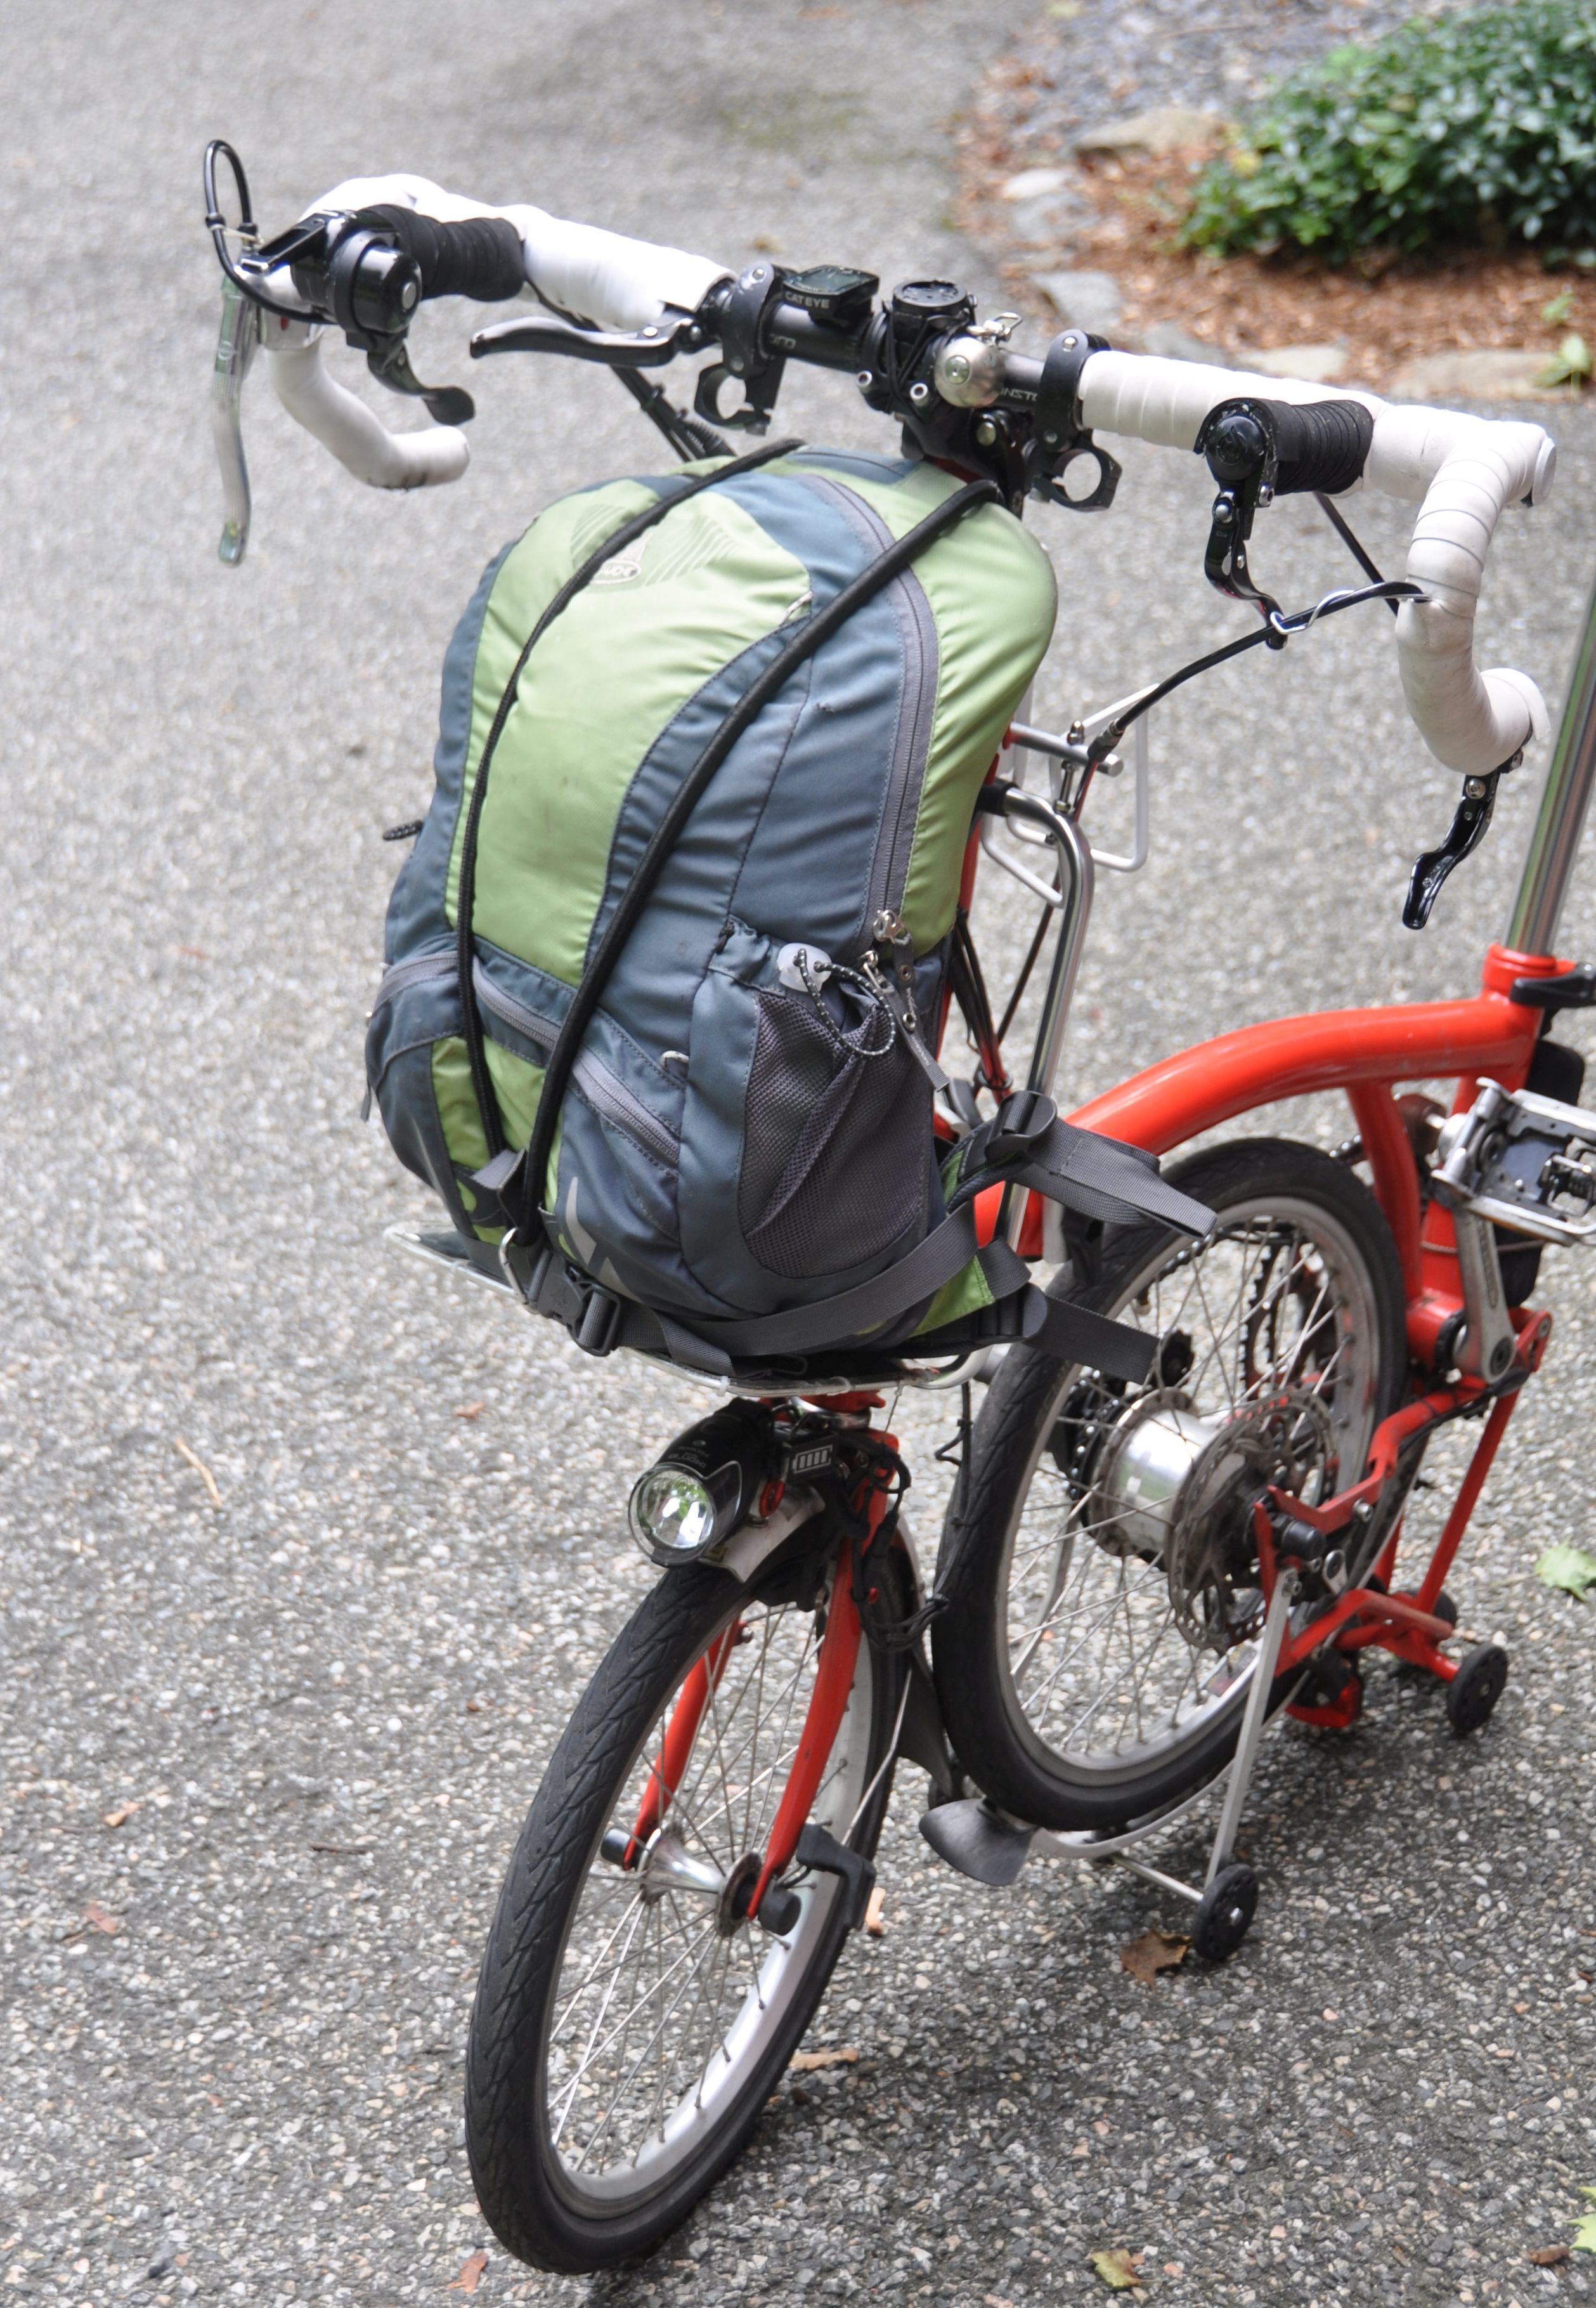
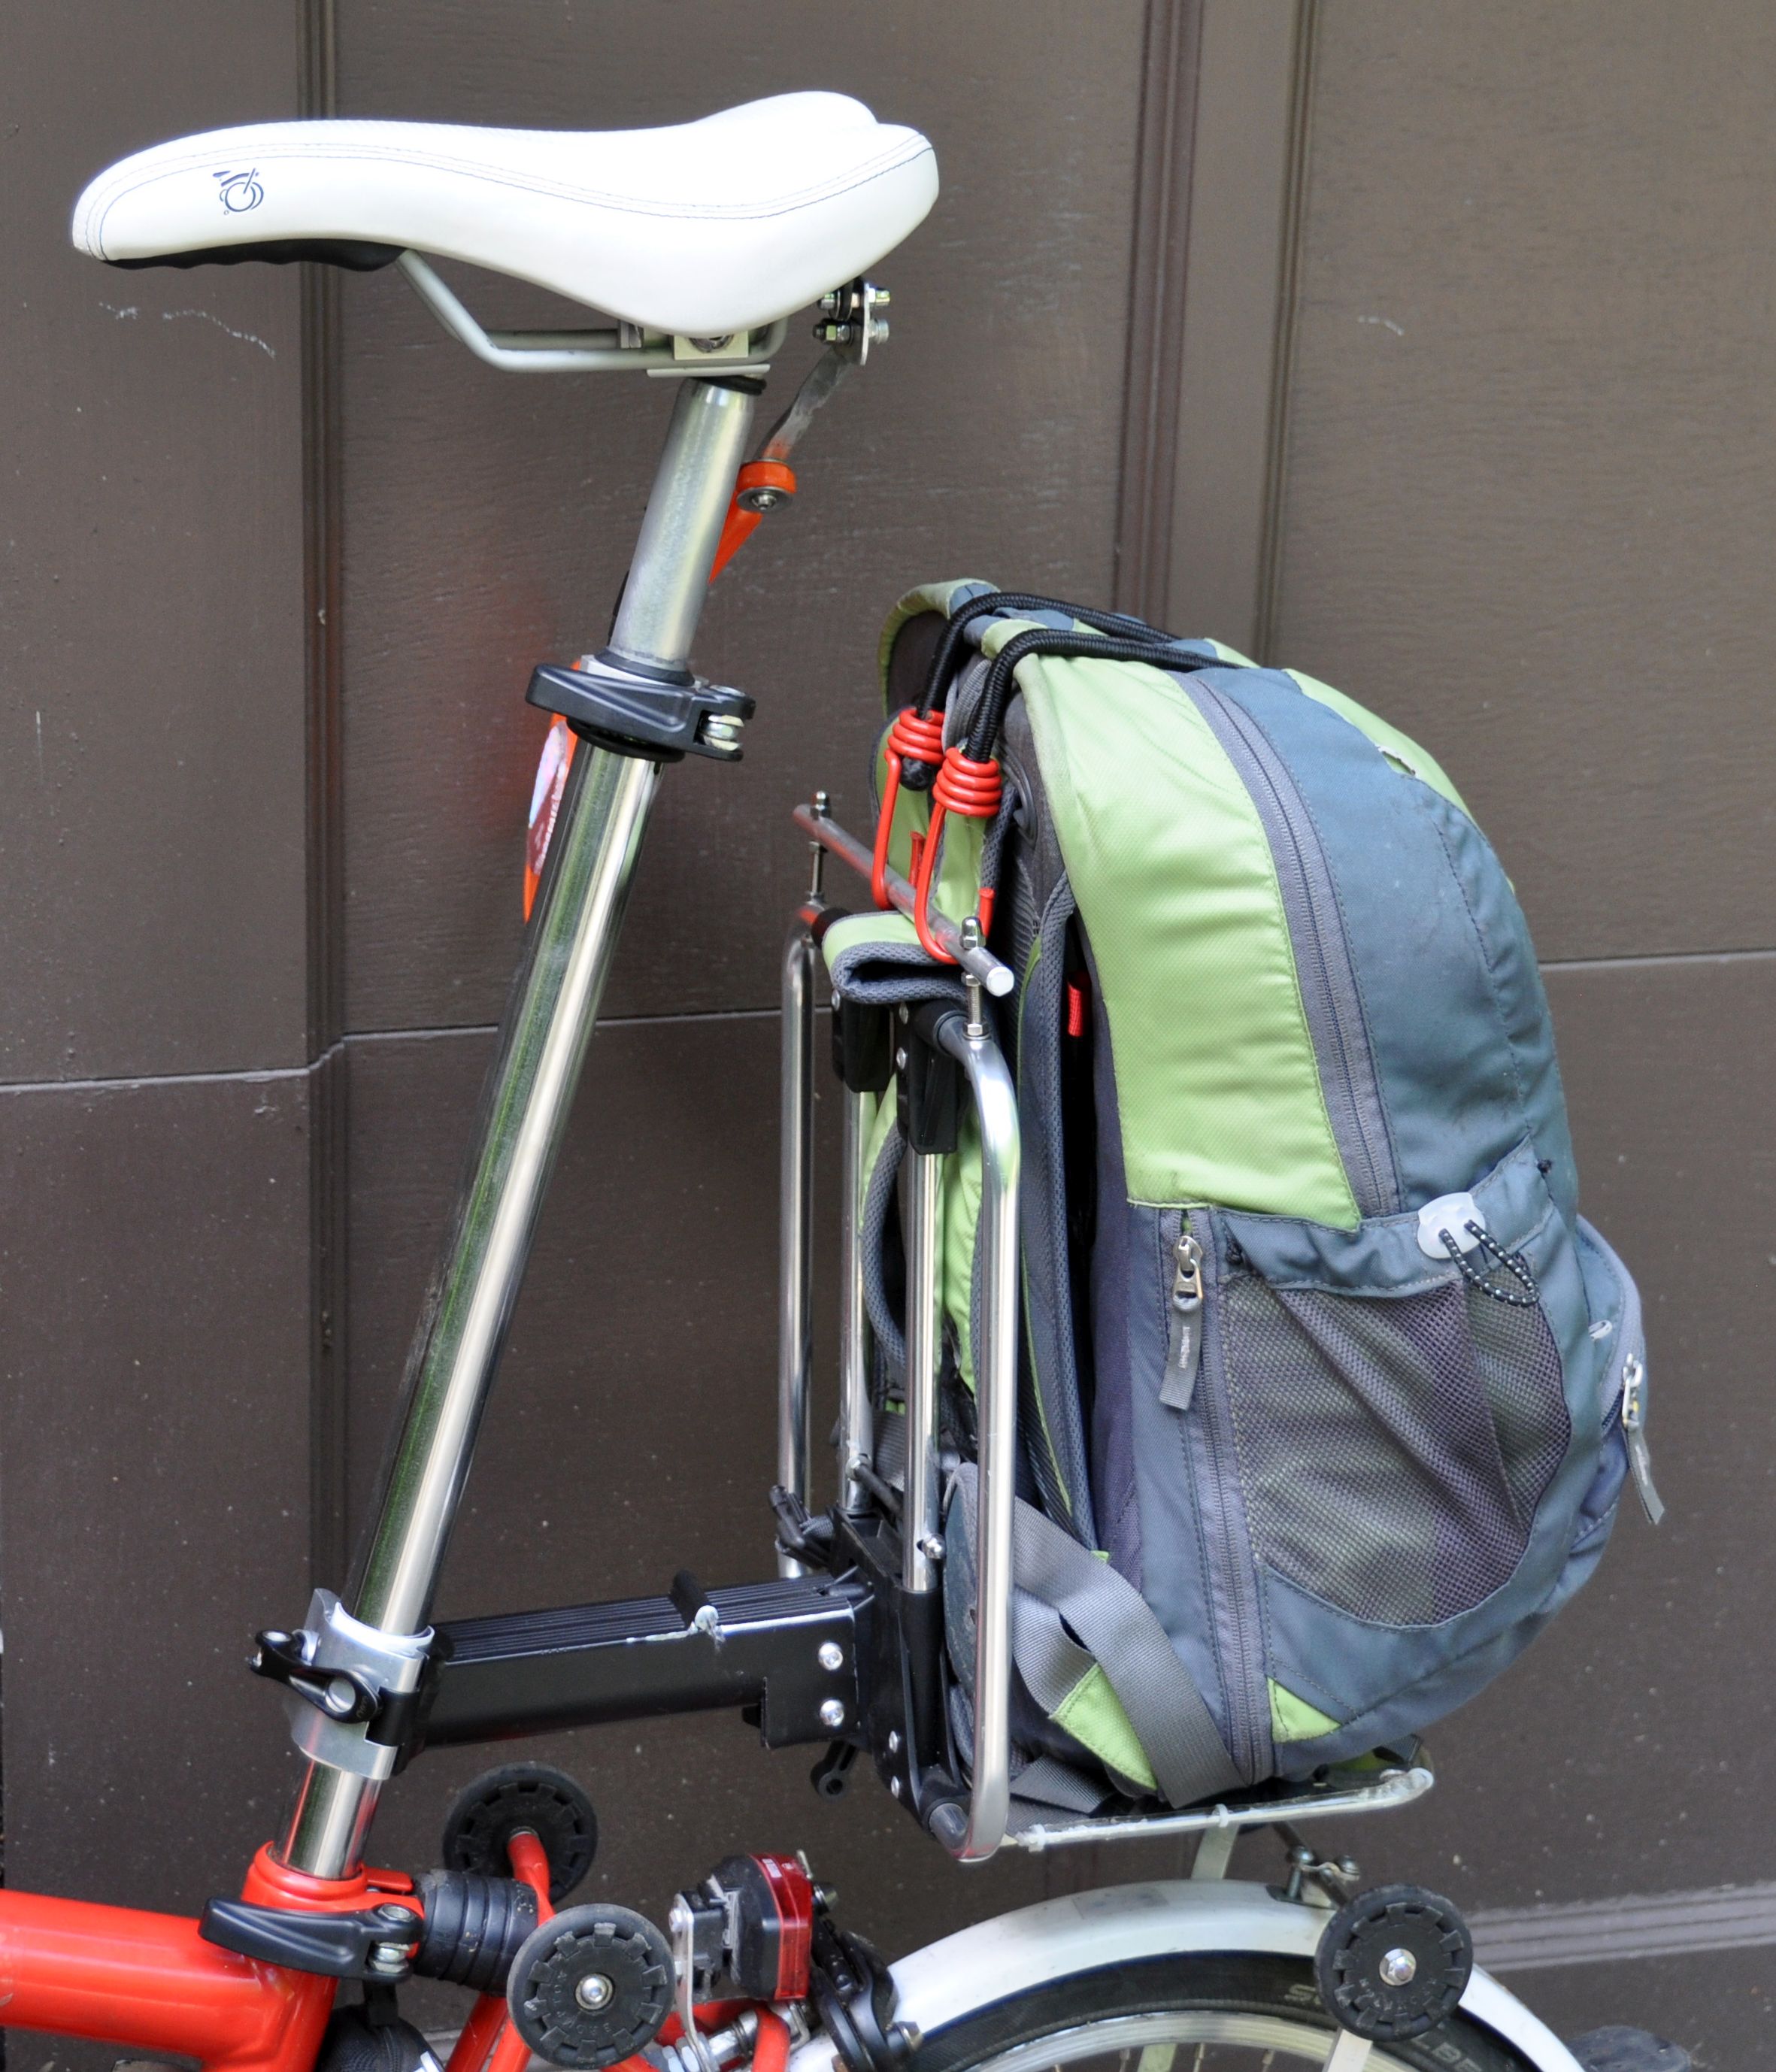
Using a seatpost mount for Brompton carrier block, the frame turns into a nice rear rack for a backpack:

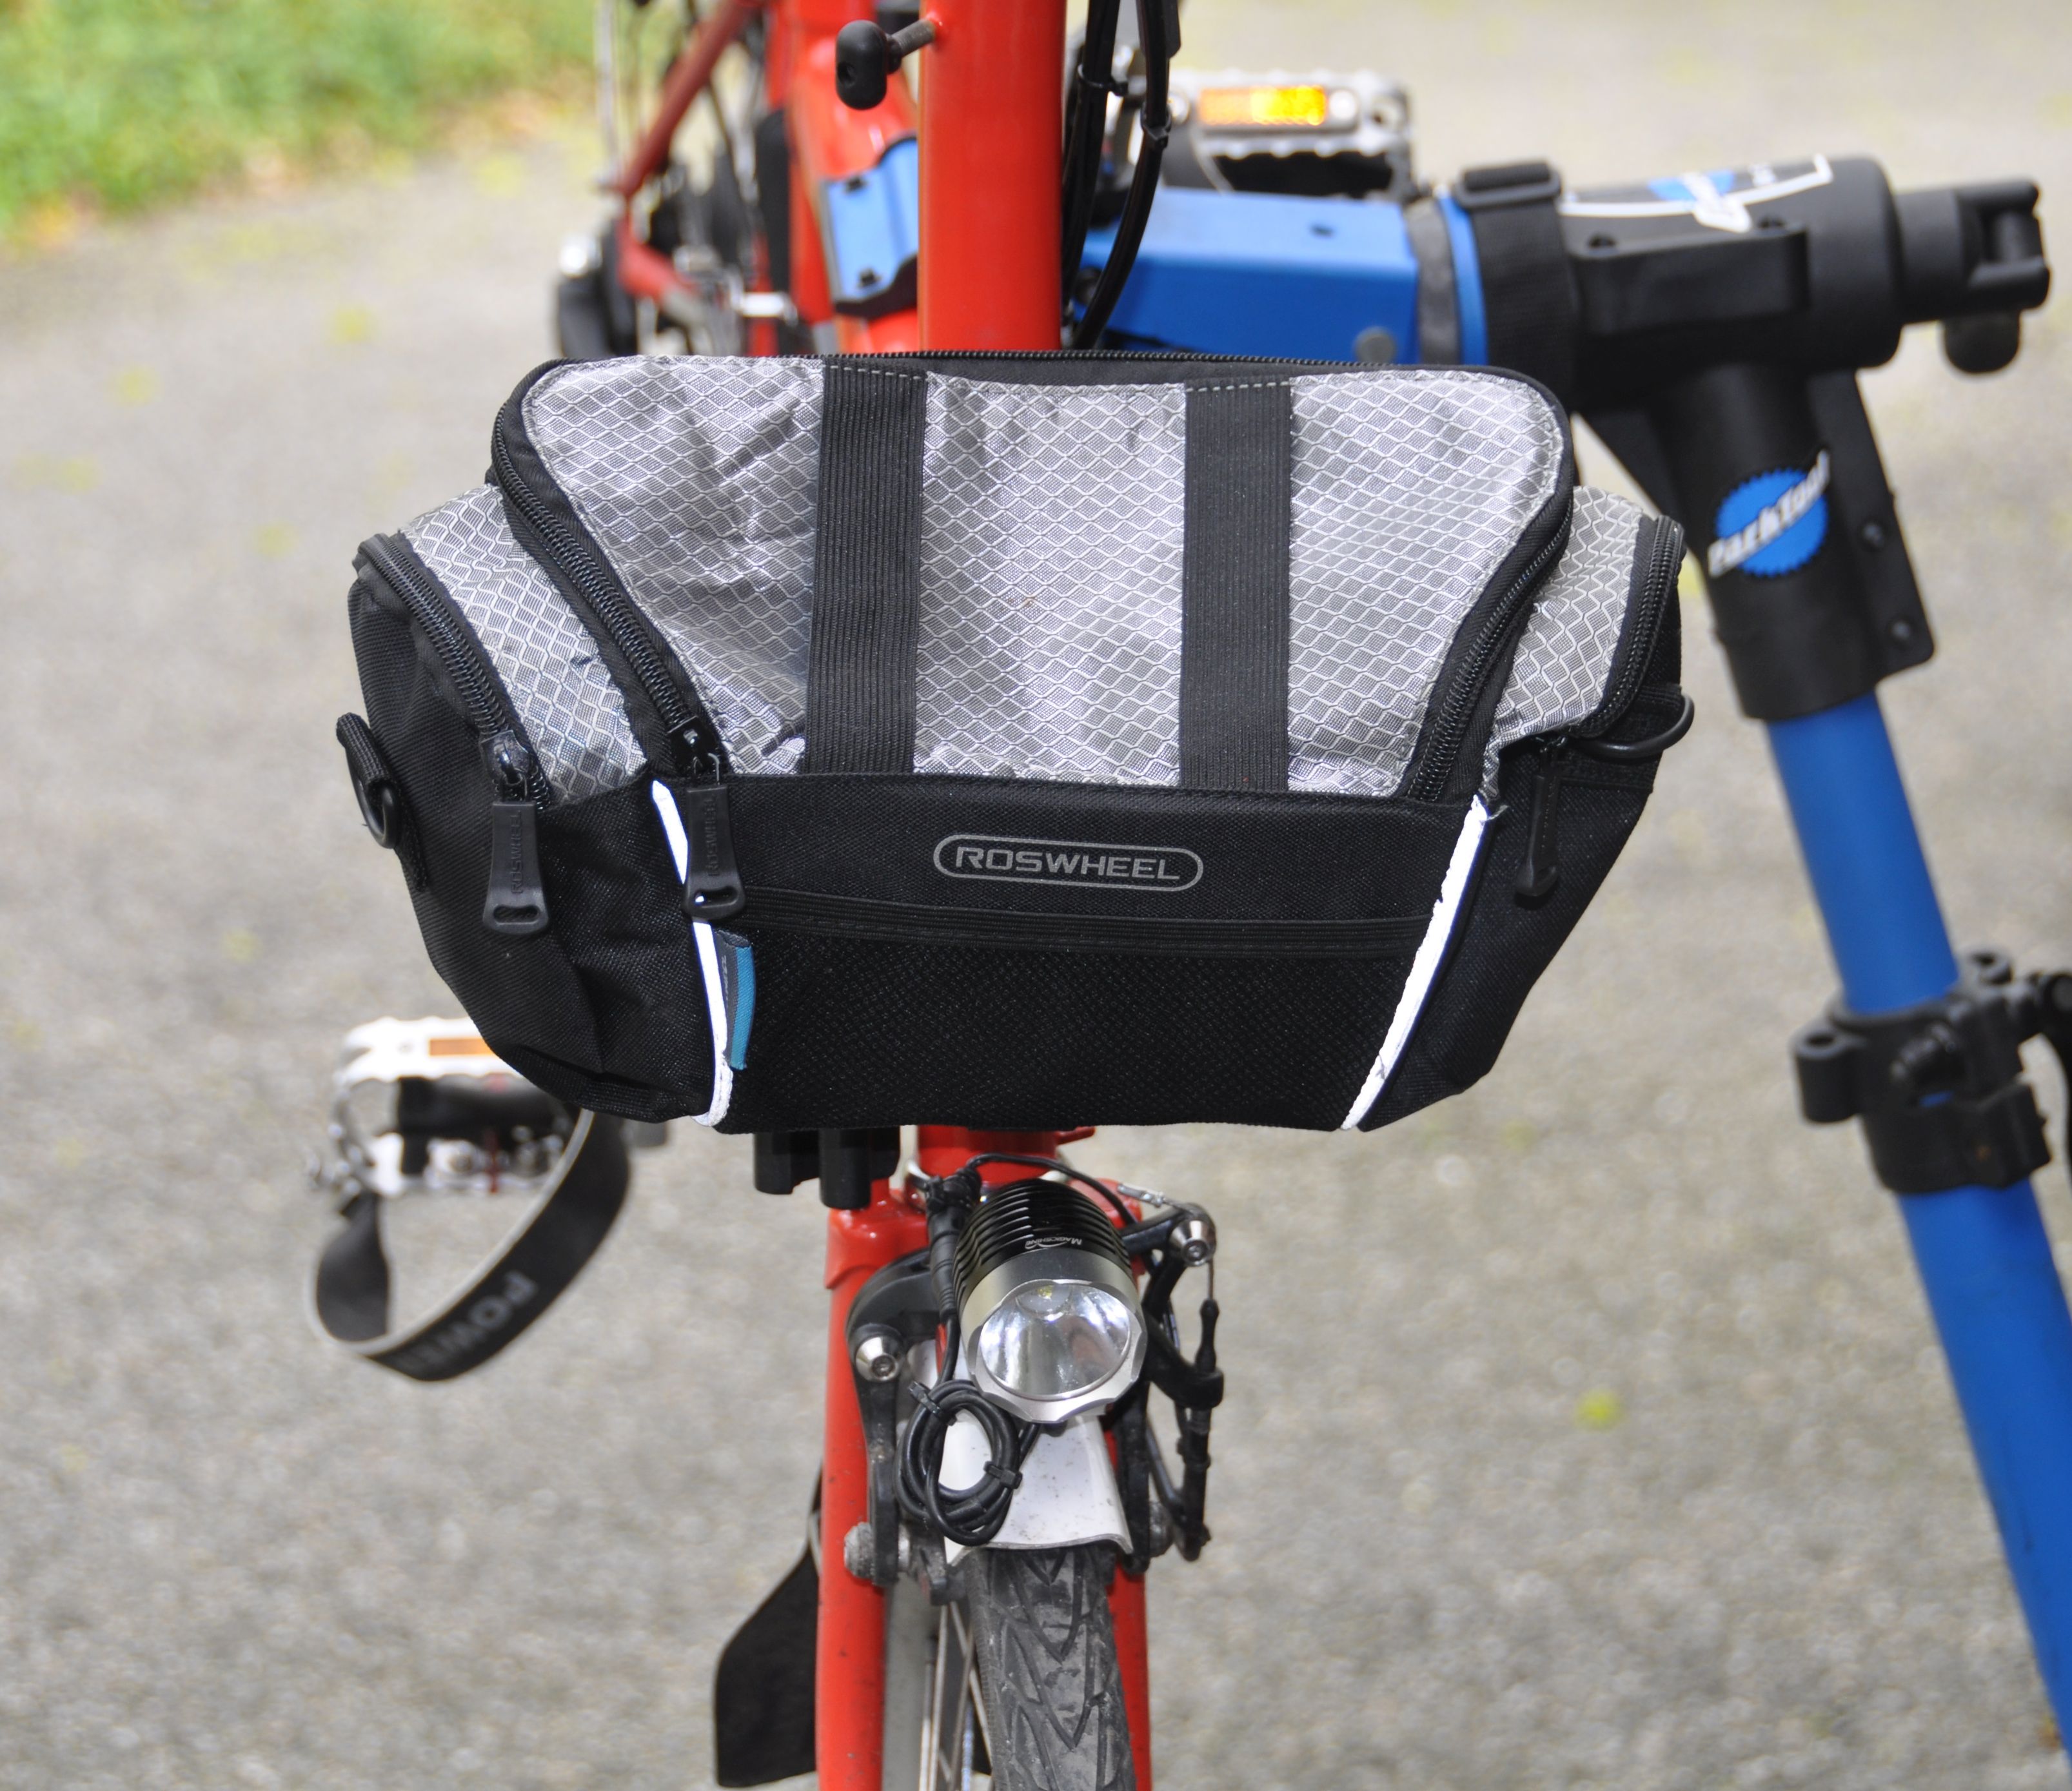
Handlebar bags Back to top
For day touring, I wanted a light bag, about 10 l. From Amazon, I got the Schwinn Expanded Bicycle Handlebar Bag for $ 13. It has some stiffener inside. I mounted a Brompton carrier block adapter, which worked pretty well. However, the bag sagged down too much (which may not be a problem if you don't have front lights mounted above the front brake). A piece of aluminum sheet metal (1/16 " thick) solved the problem. An inexpensive nice light bag, medium size!

Here is another bag which is smaller. The original stiffener was sufficient.
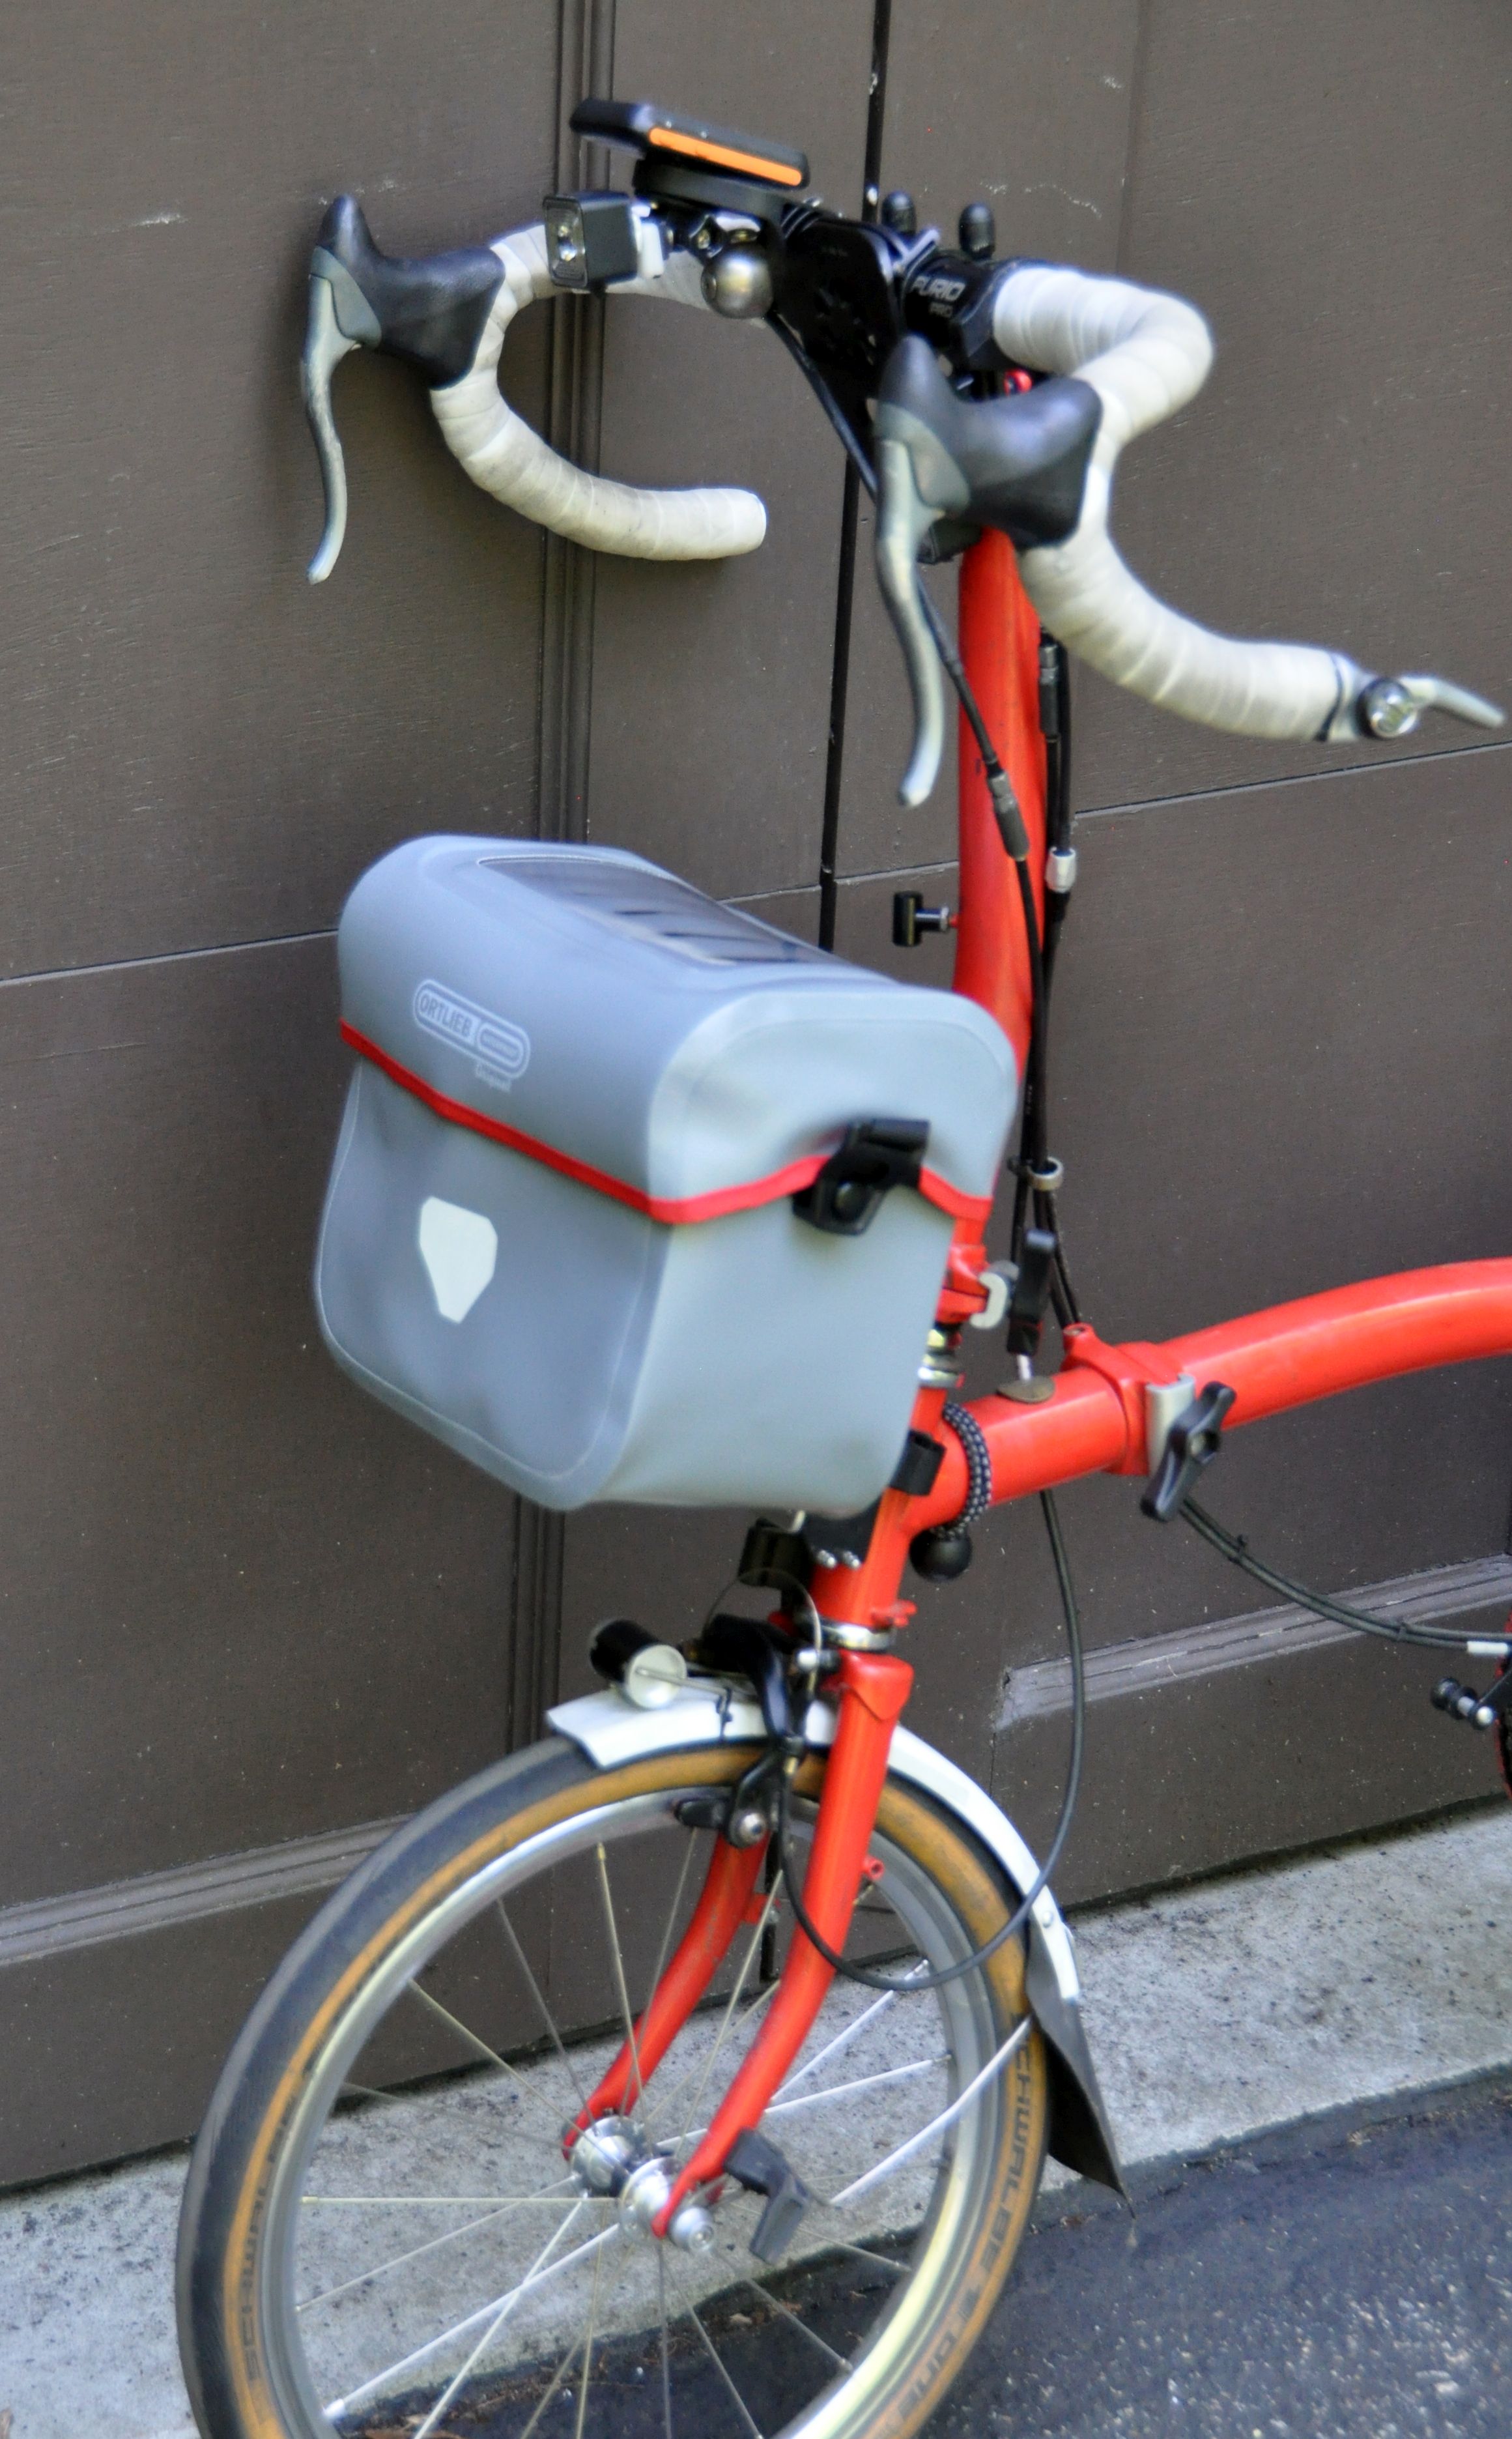
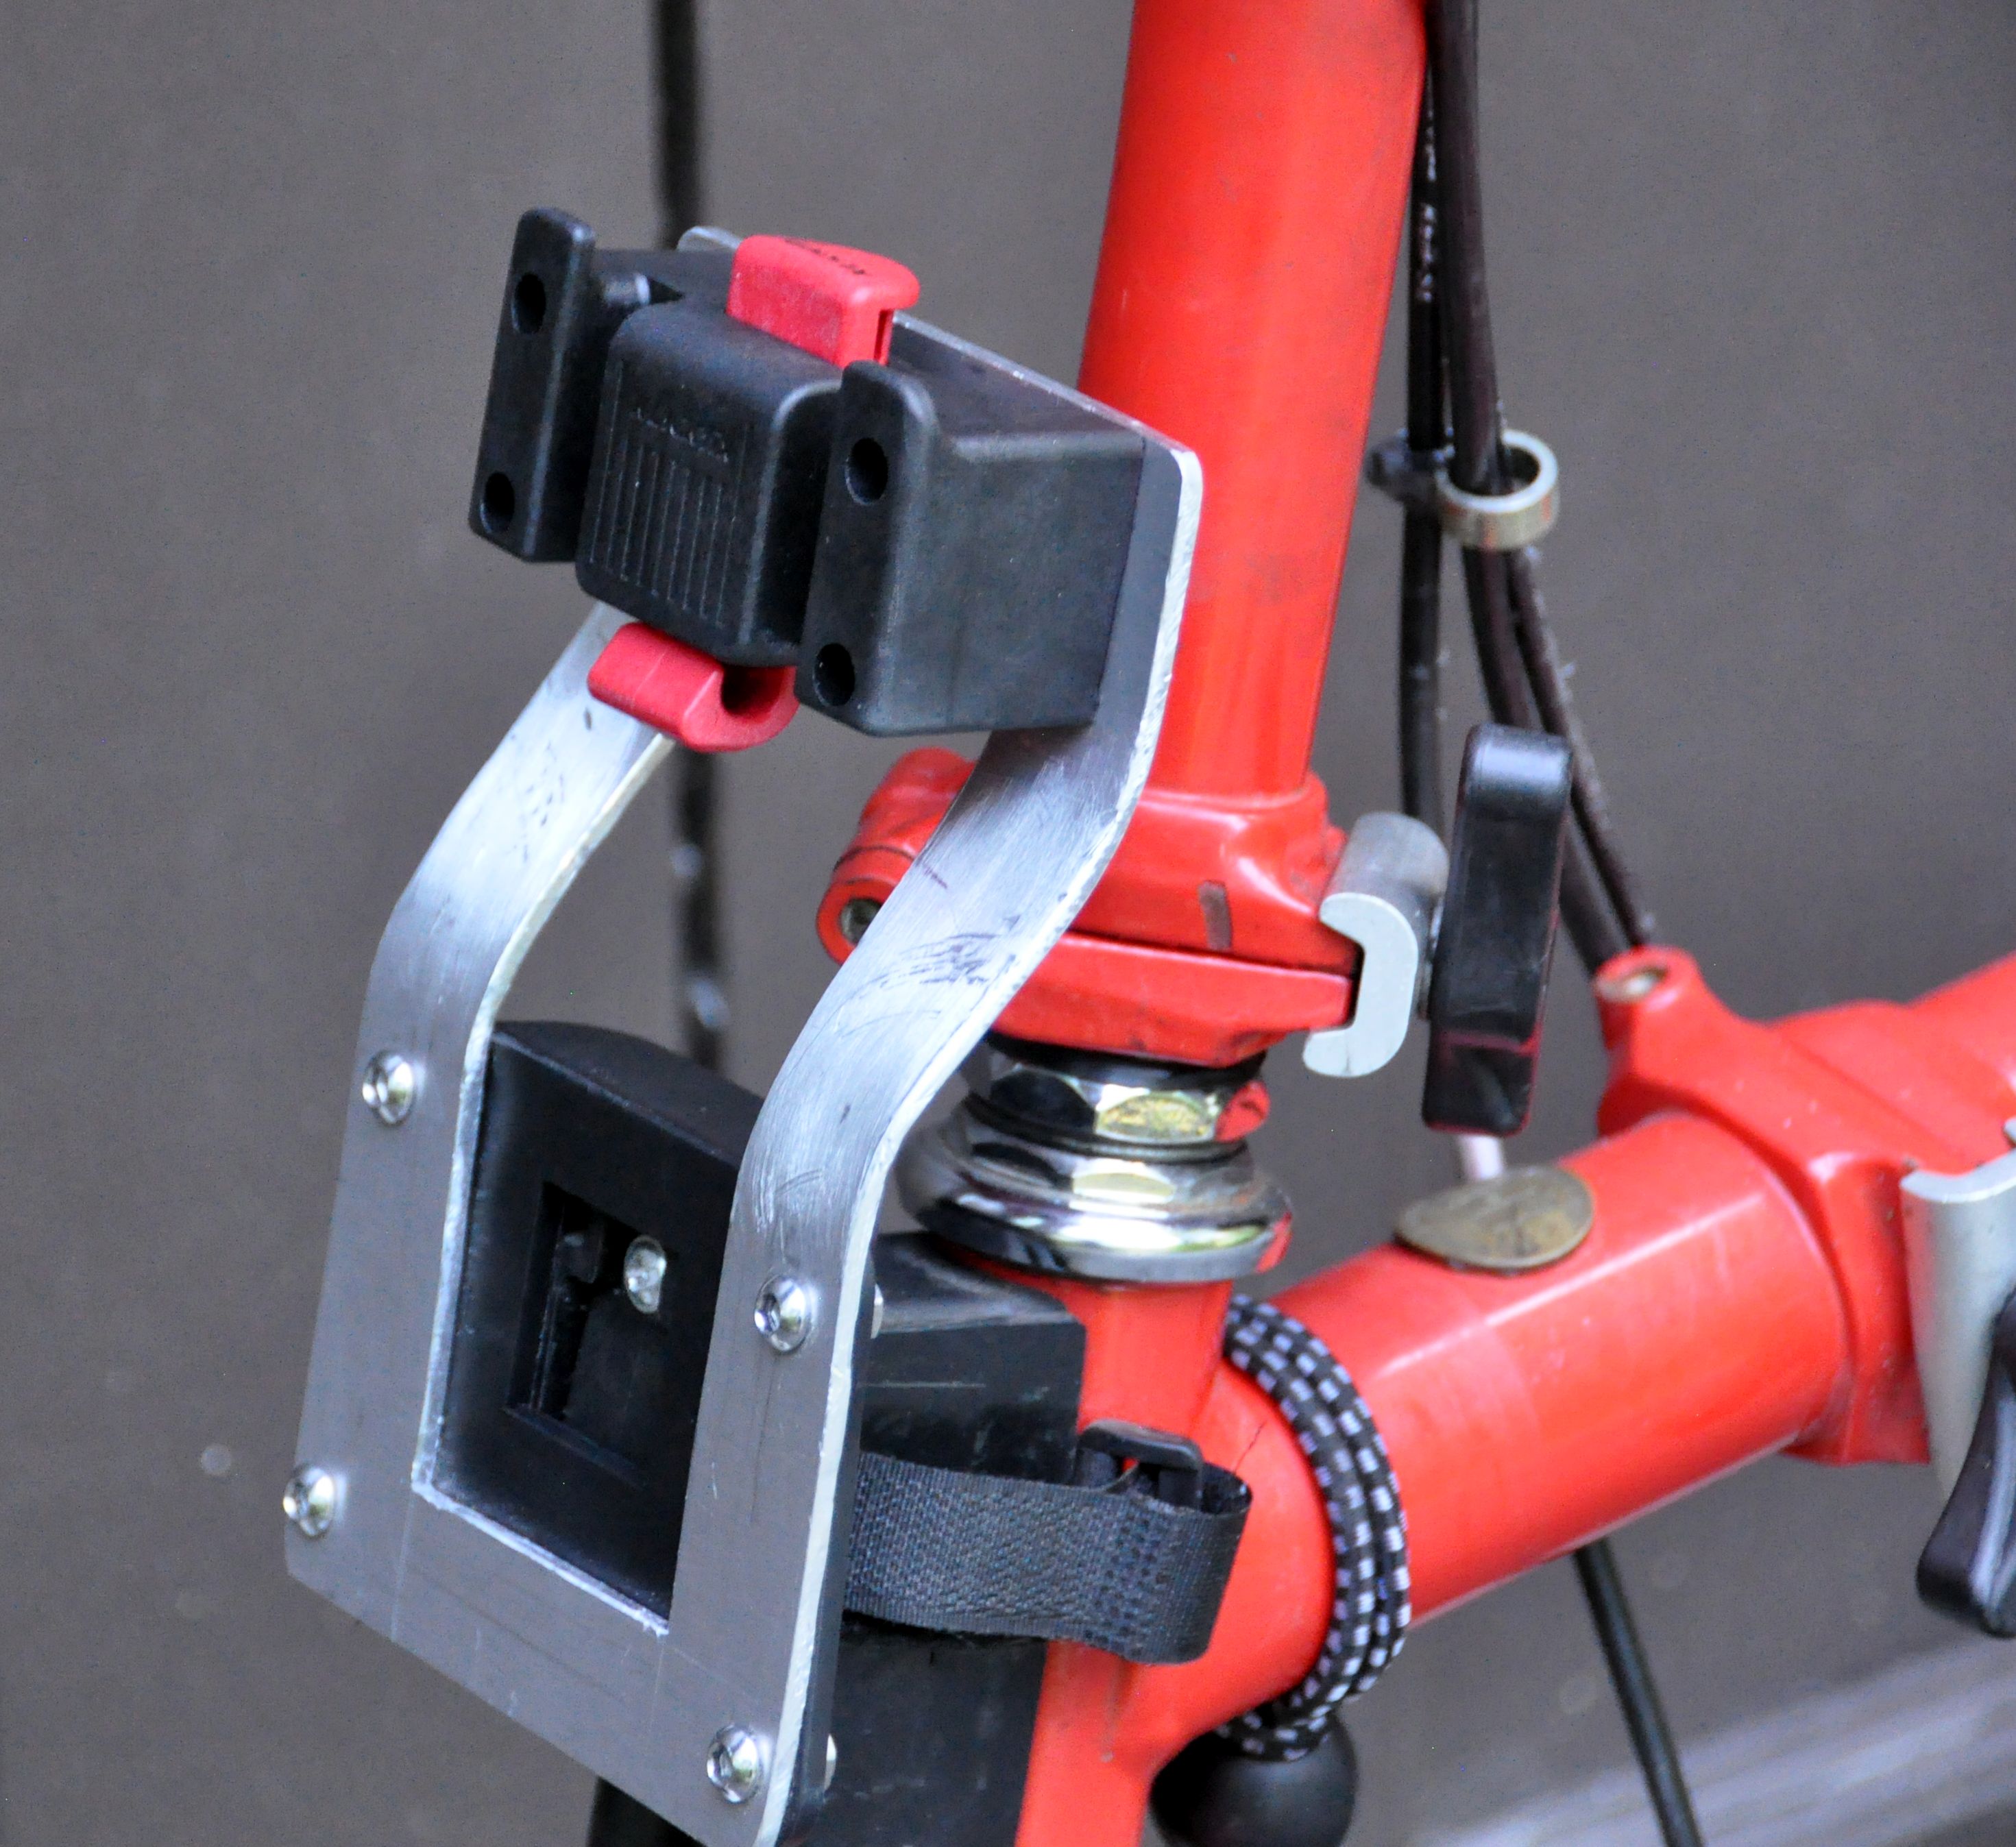
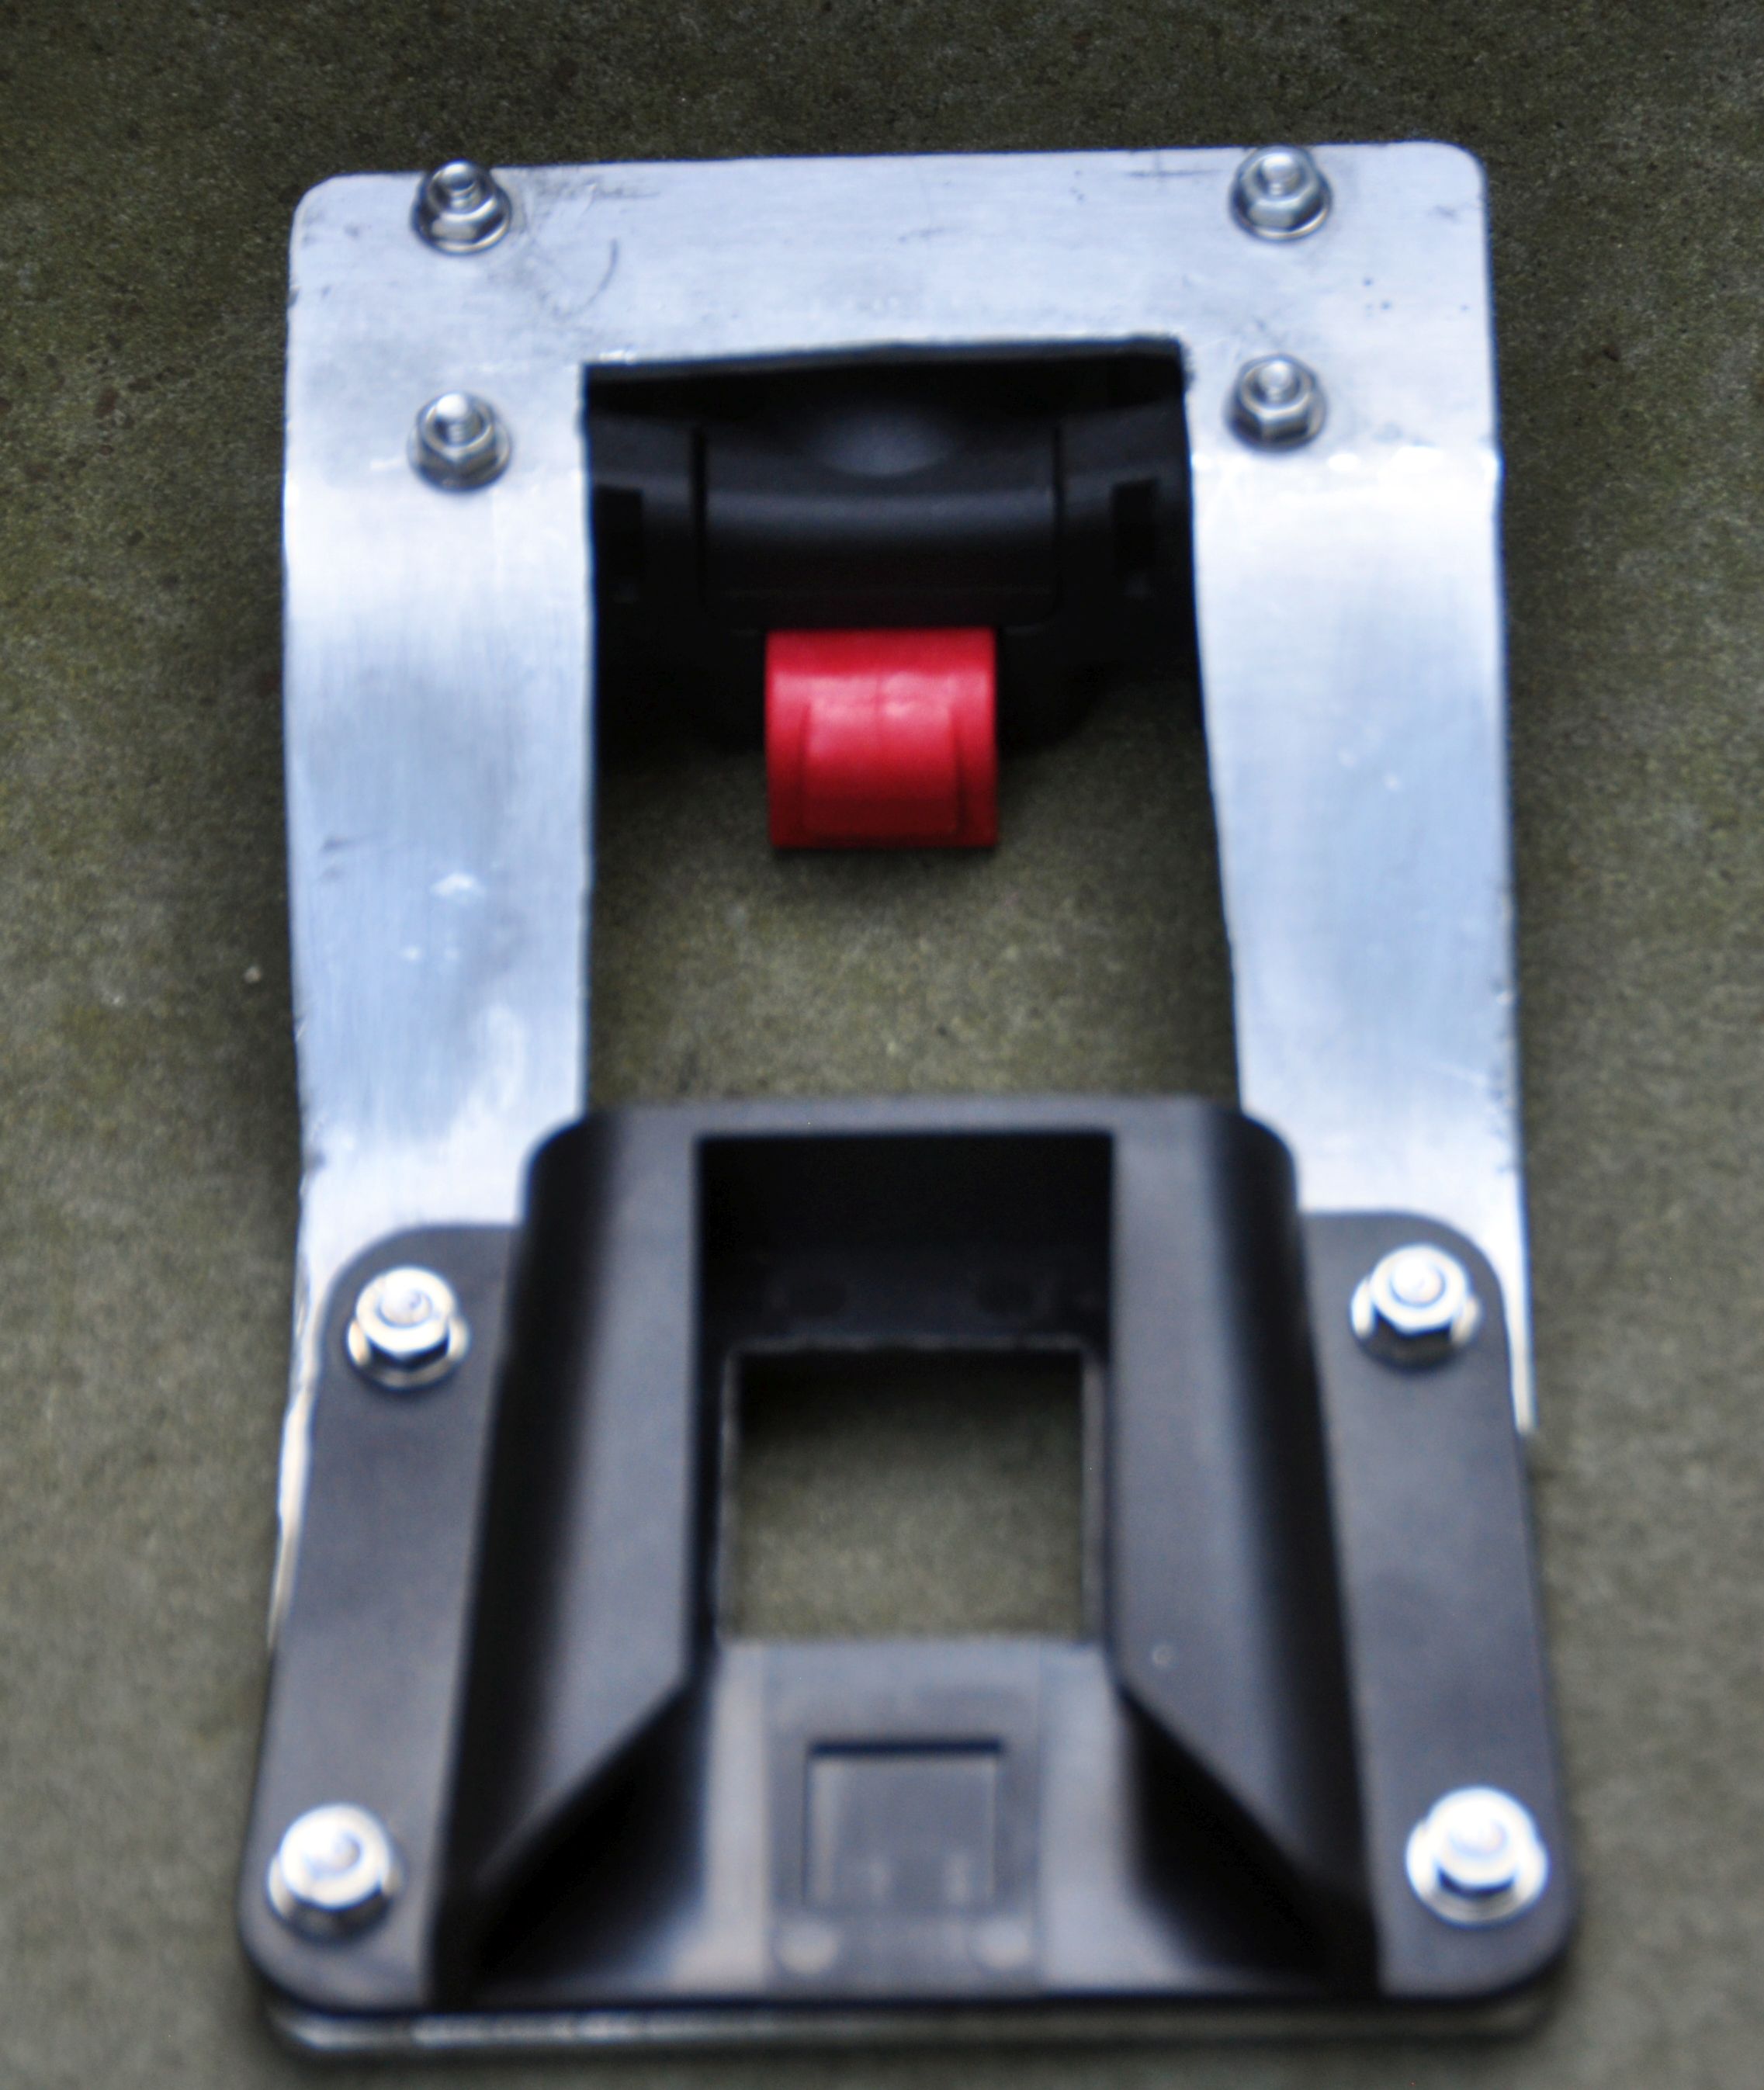
Adapter for Ortlieb Handlebar Bag (Klickfix) Back to top
People have developed already several solutions for this, and here is my design. It is a real hack --- tools used are hacksaw, metal jigsaw, vise, hand drill, files. The aluminium sheet is 1/8 " thick. The klickfix mount is standard, shortened with a hacksaw. With this, and by bending the aluminum backwards, the bag is aligned with the Brompton carrier block and does not stand out, as in previous designs.

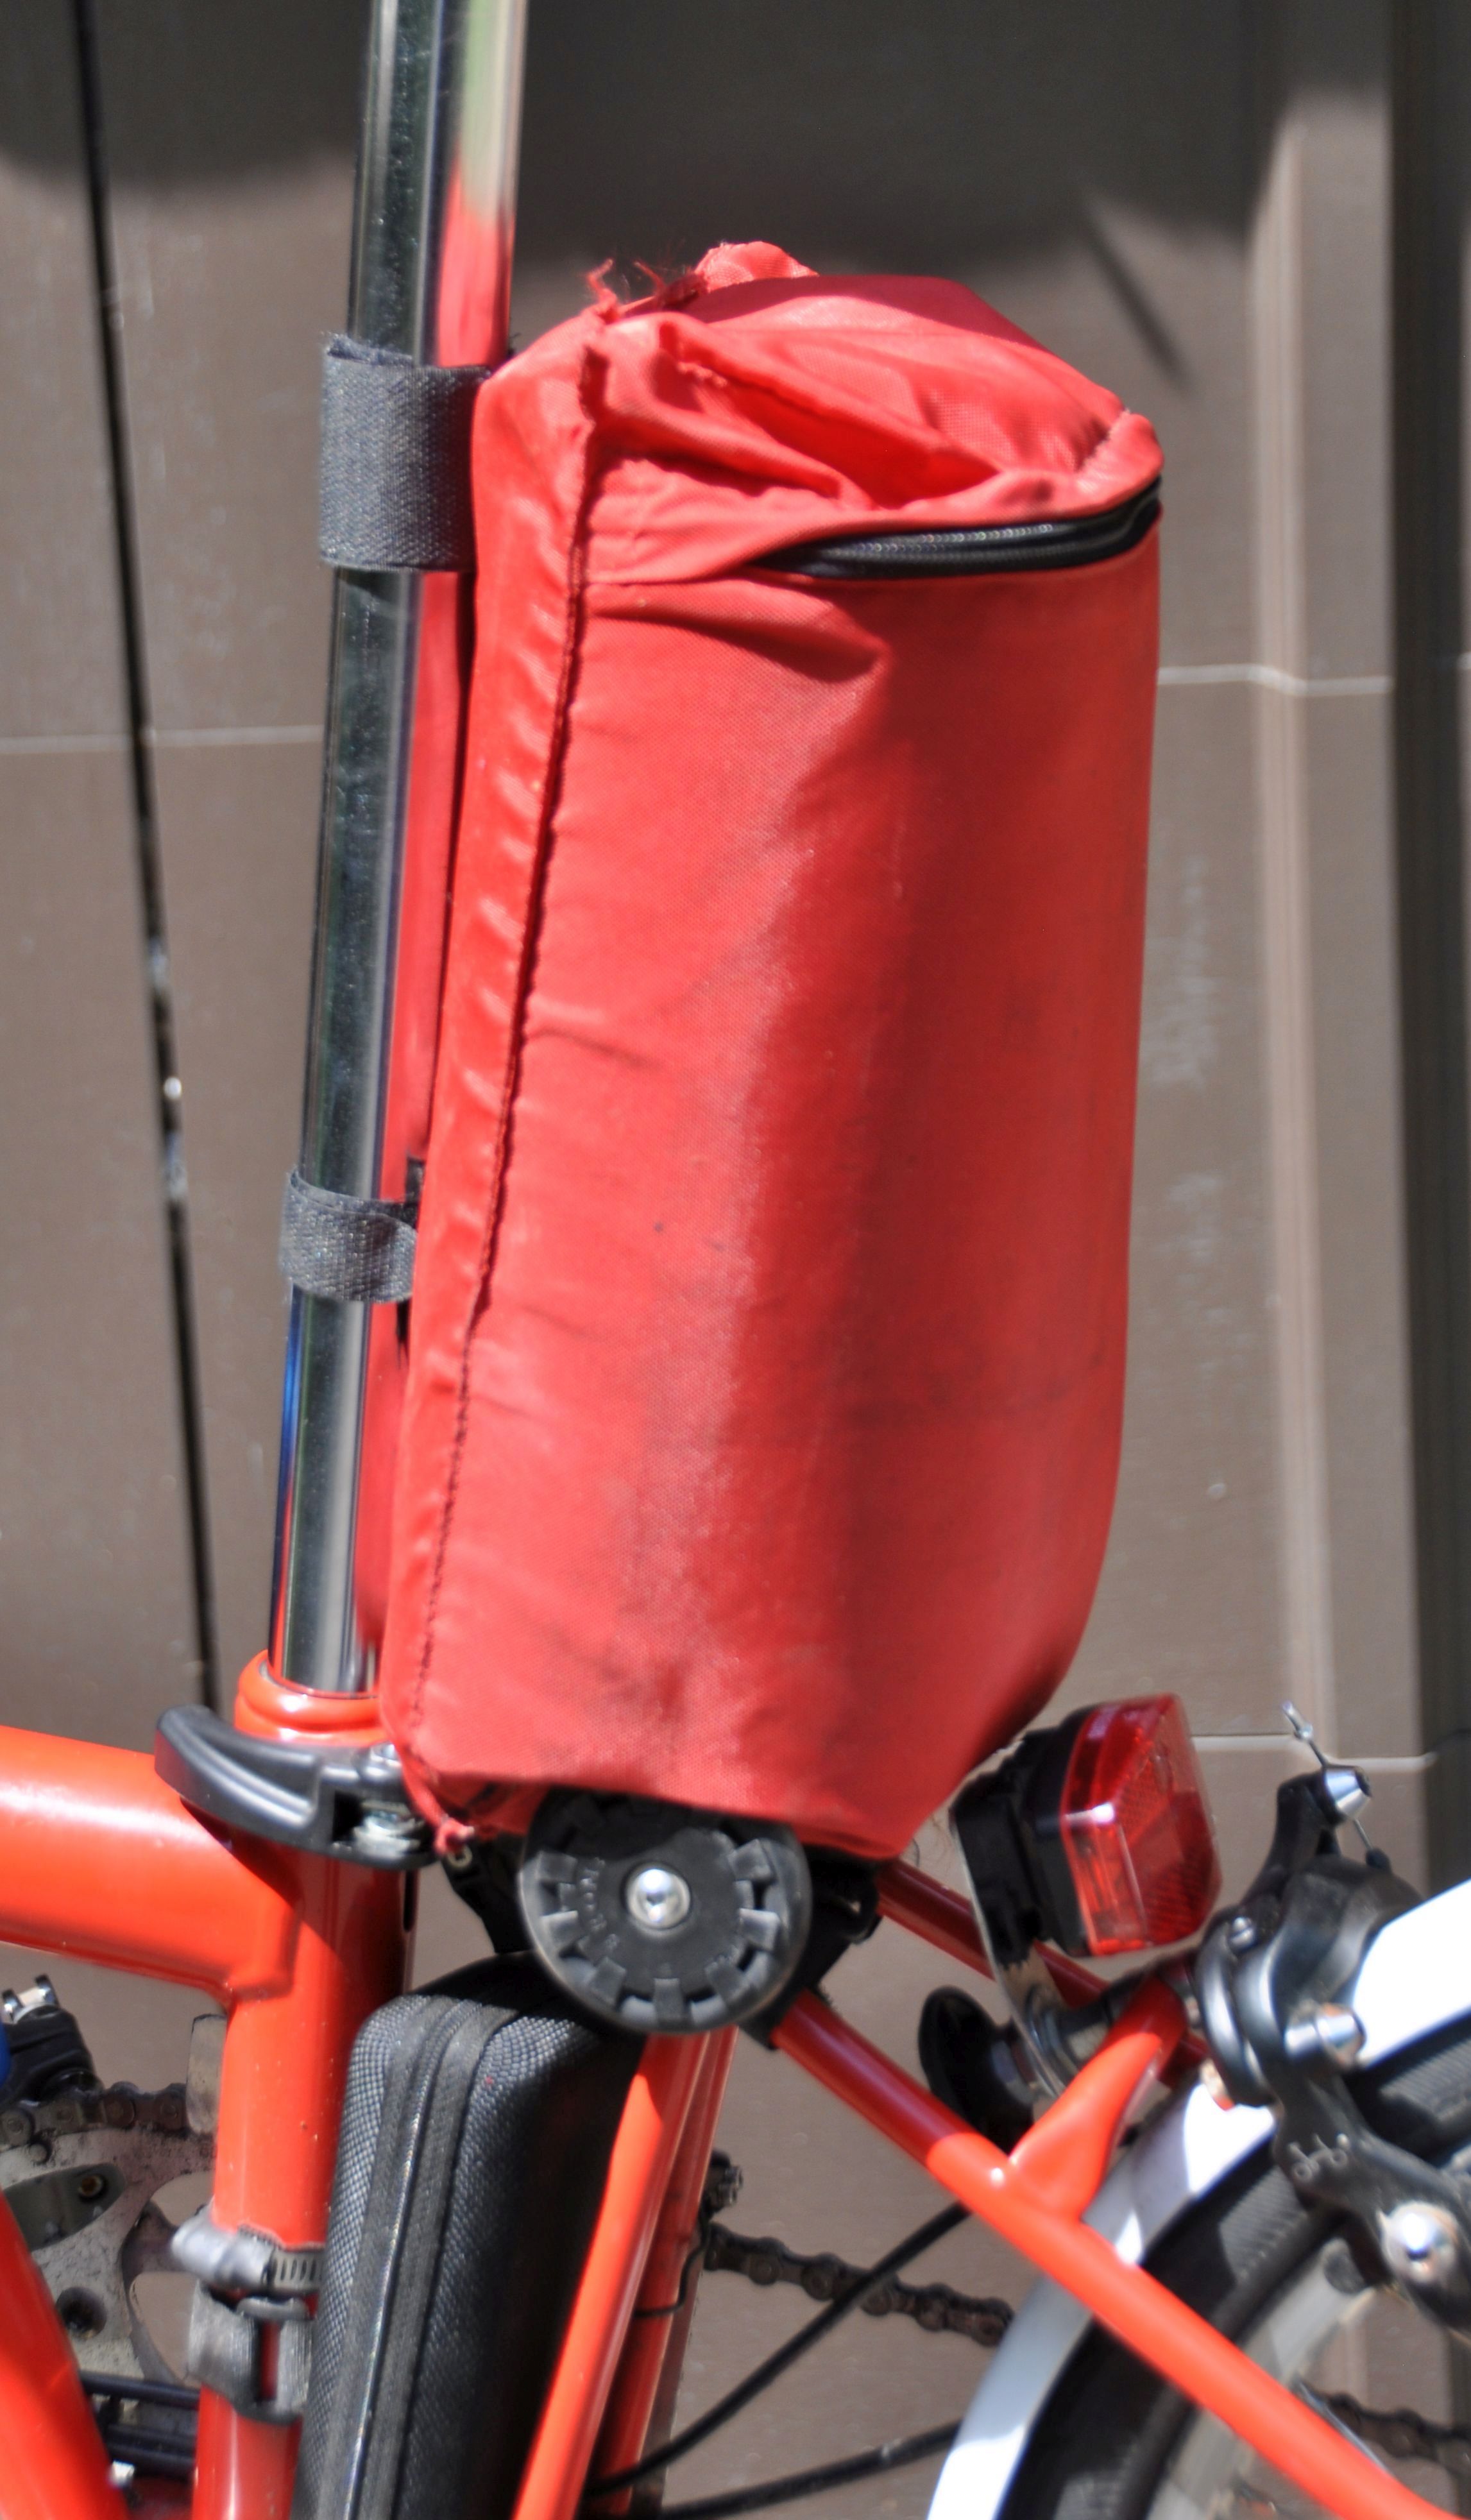
Seatpost bag Back to top
A nice pouch, attached to the seatpost with Velcro. It is very light, and can carry rain gear or warm clothes. The pouch used to be a removable side pocket for a backpack.

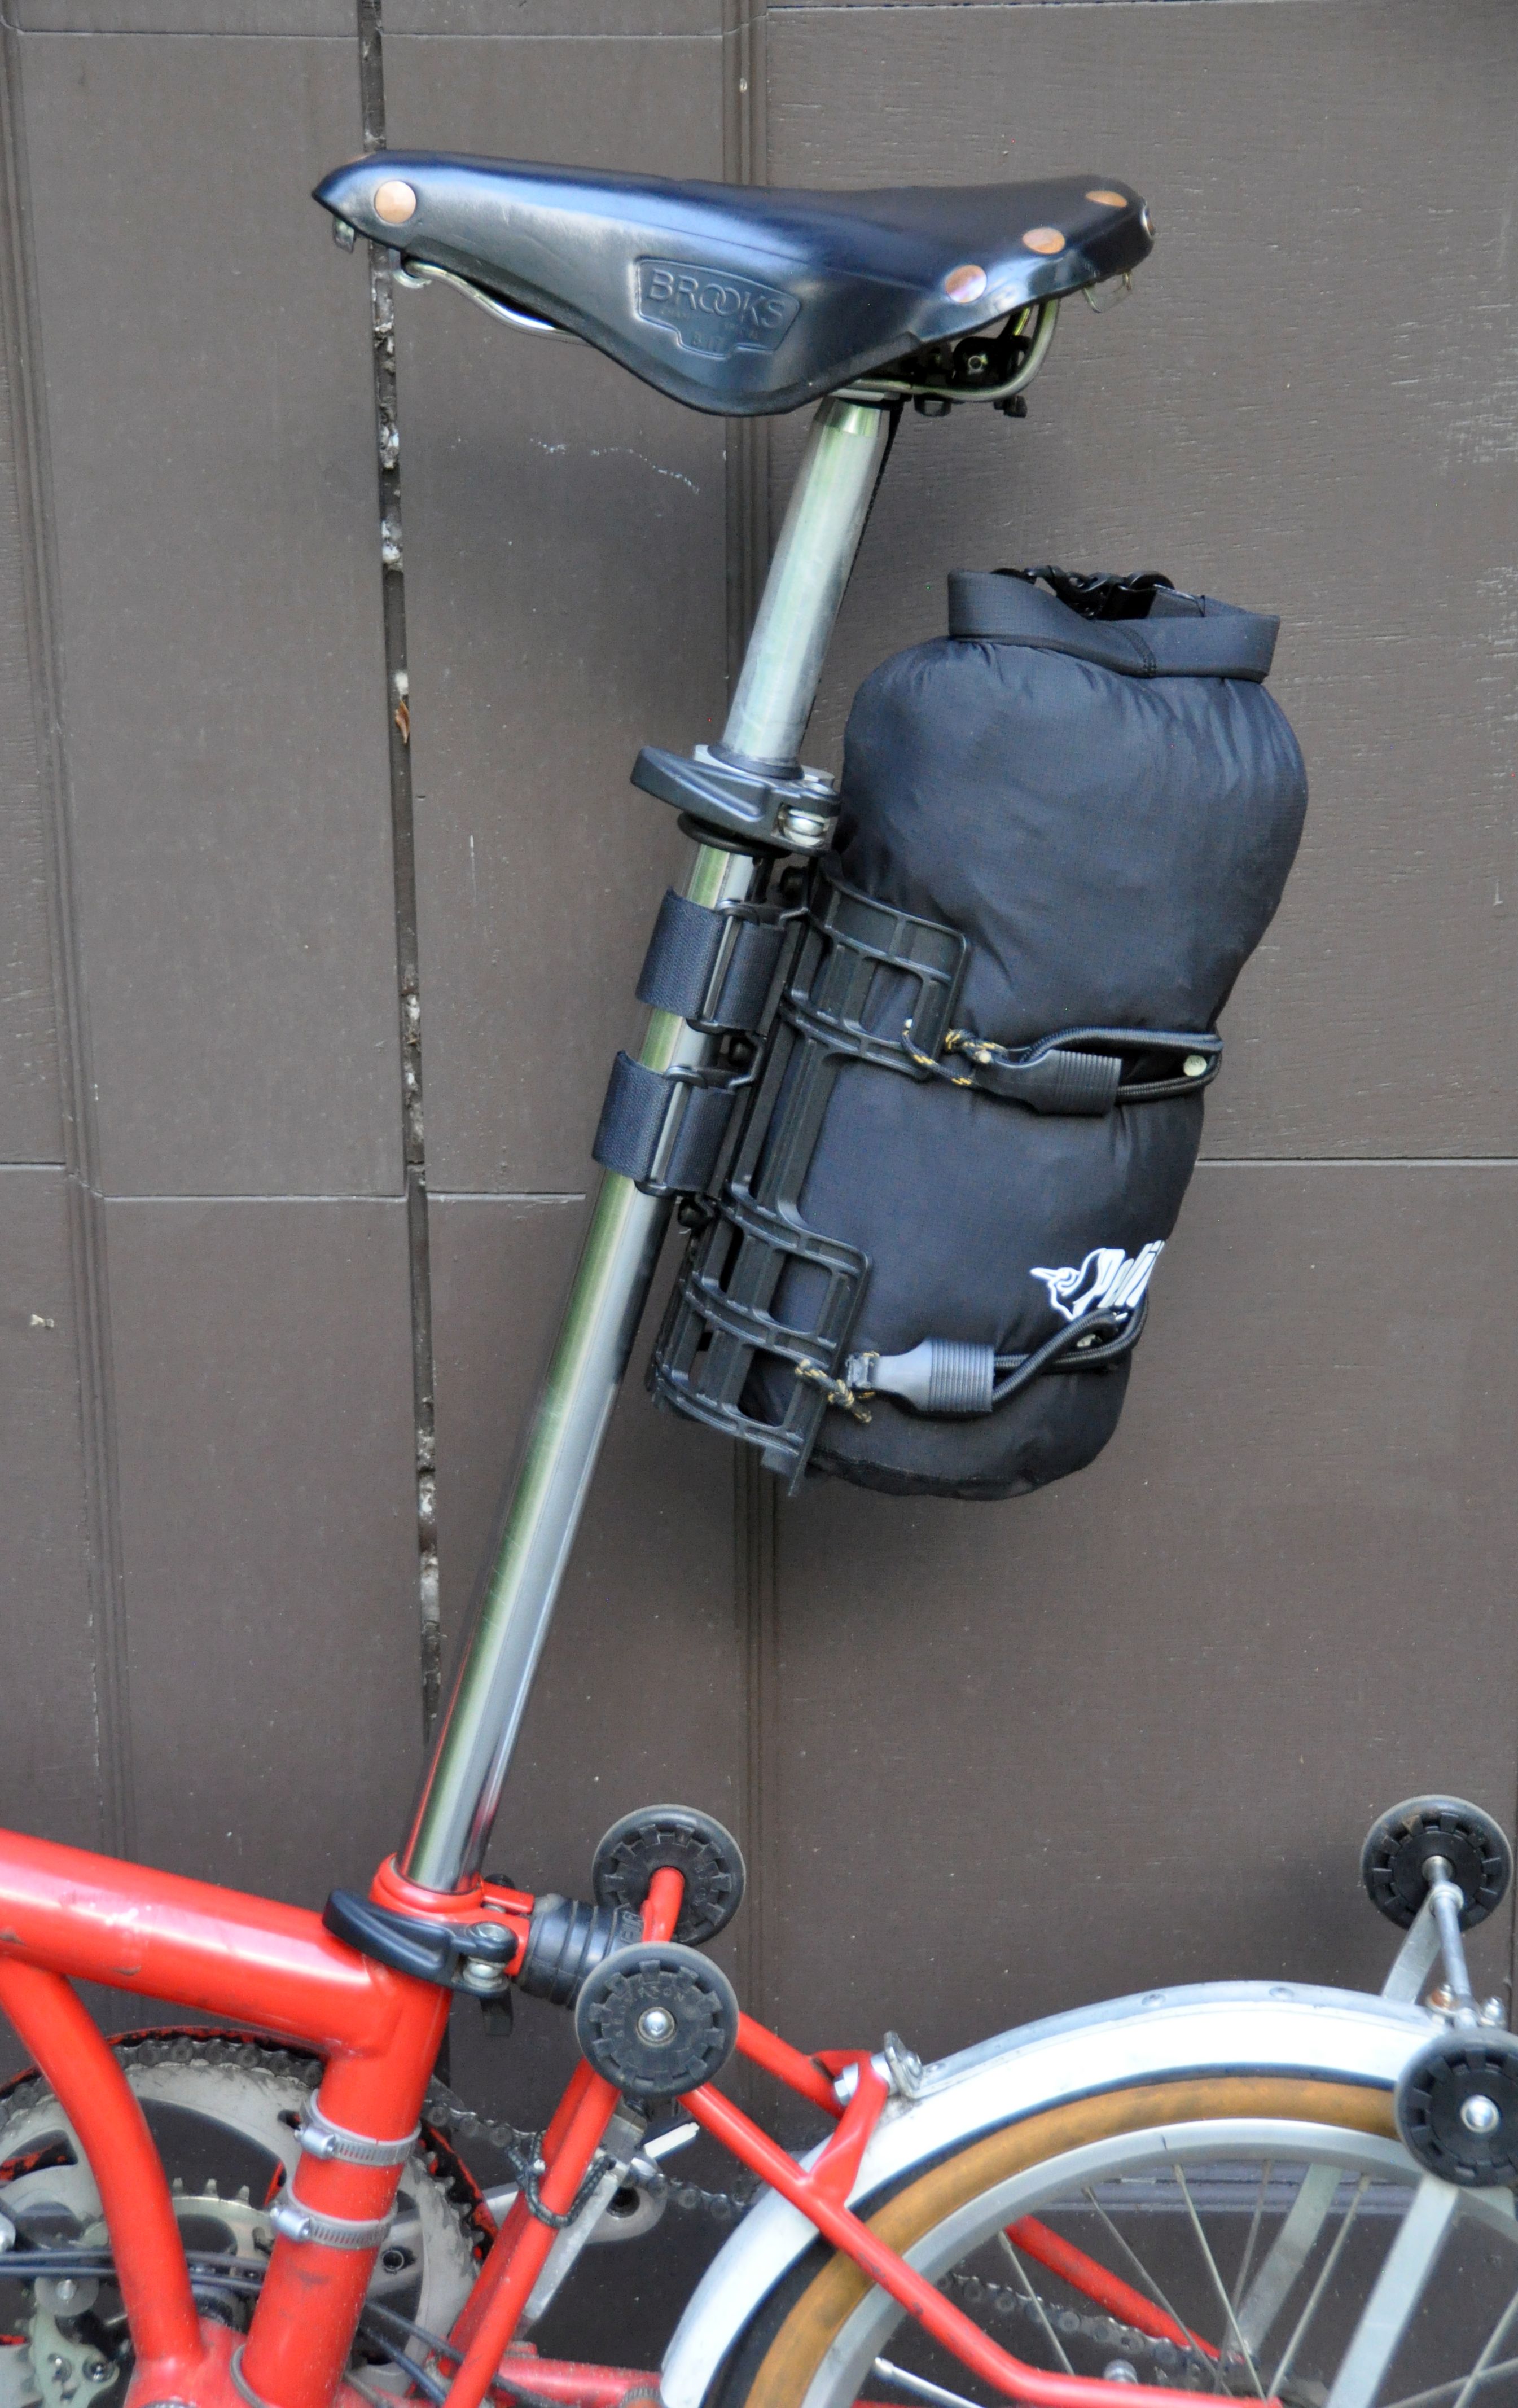
I now use a solution with a Dry Bag:
I found a versatile solution how to attach a 5 liter bag to the seatpost. Since I don't have a rear rack, I need this when my front bag is too small, and I don't want to use the monstrous T bag. I am using a 5 l dry bag, held by a cargo cage (e.g. TOPEAK VersaCage), and attach it to the seatpost with Two Fish Quick Cage 3 Bolt Adapter. A nice feature is that this can be used also on my other bikes.
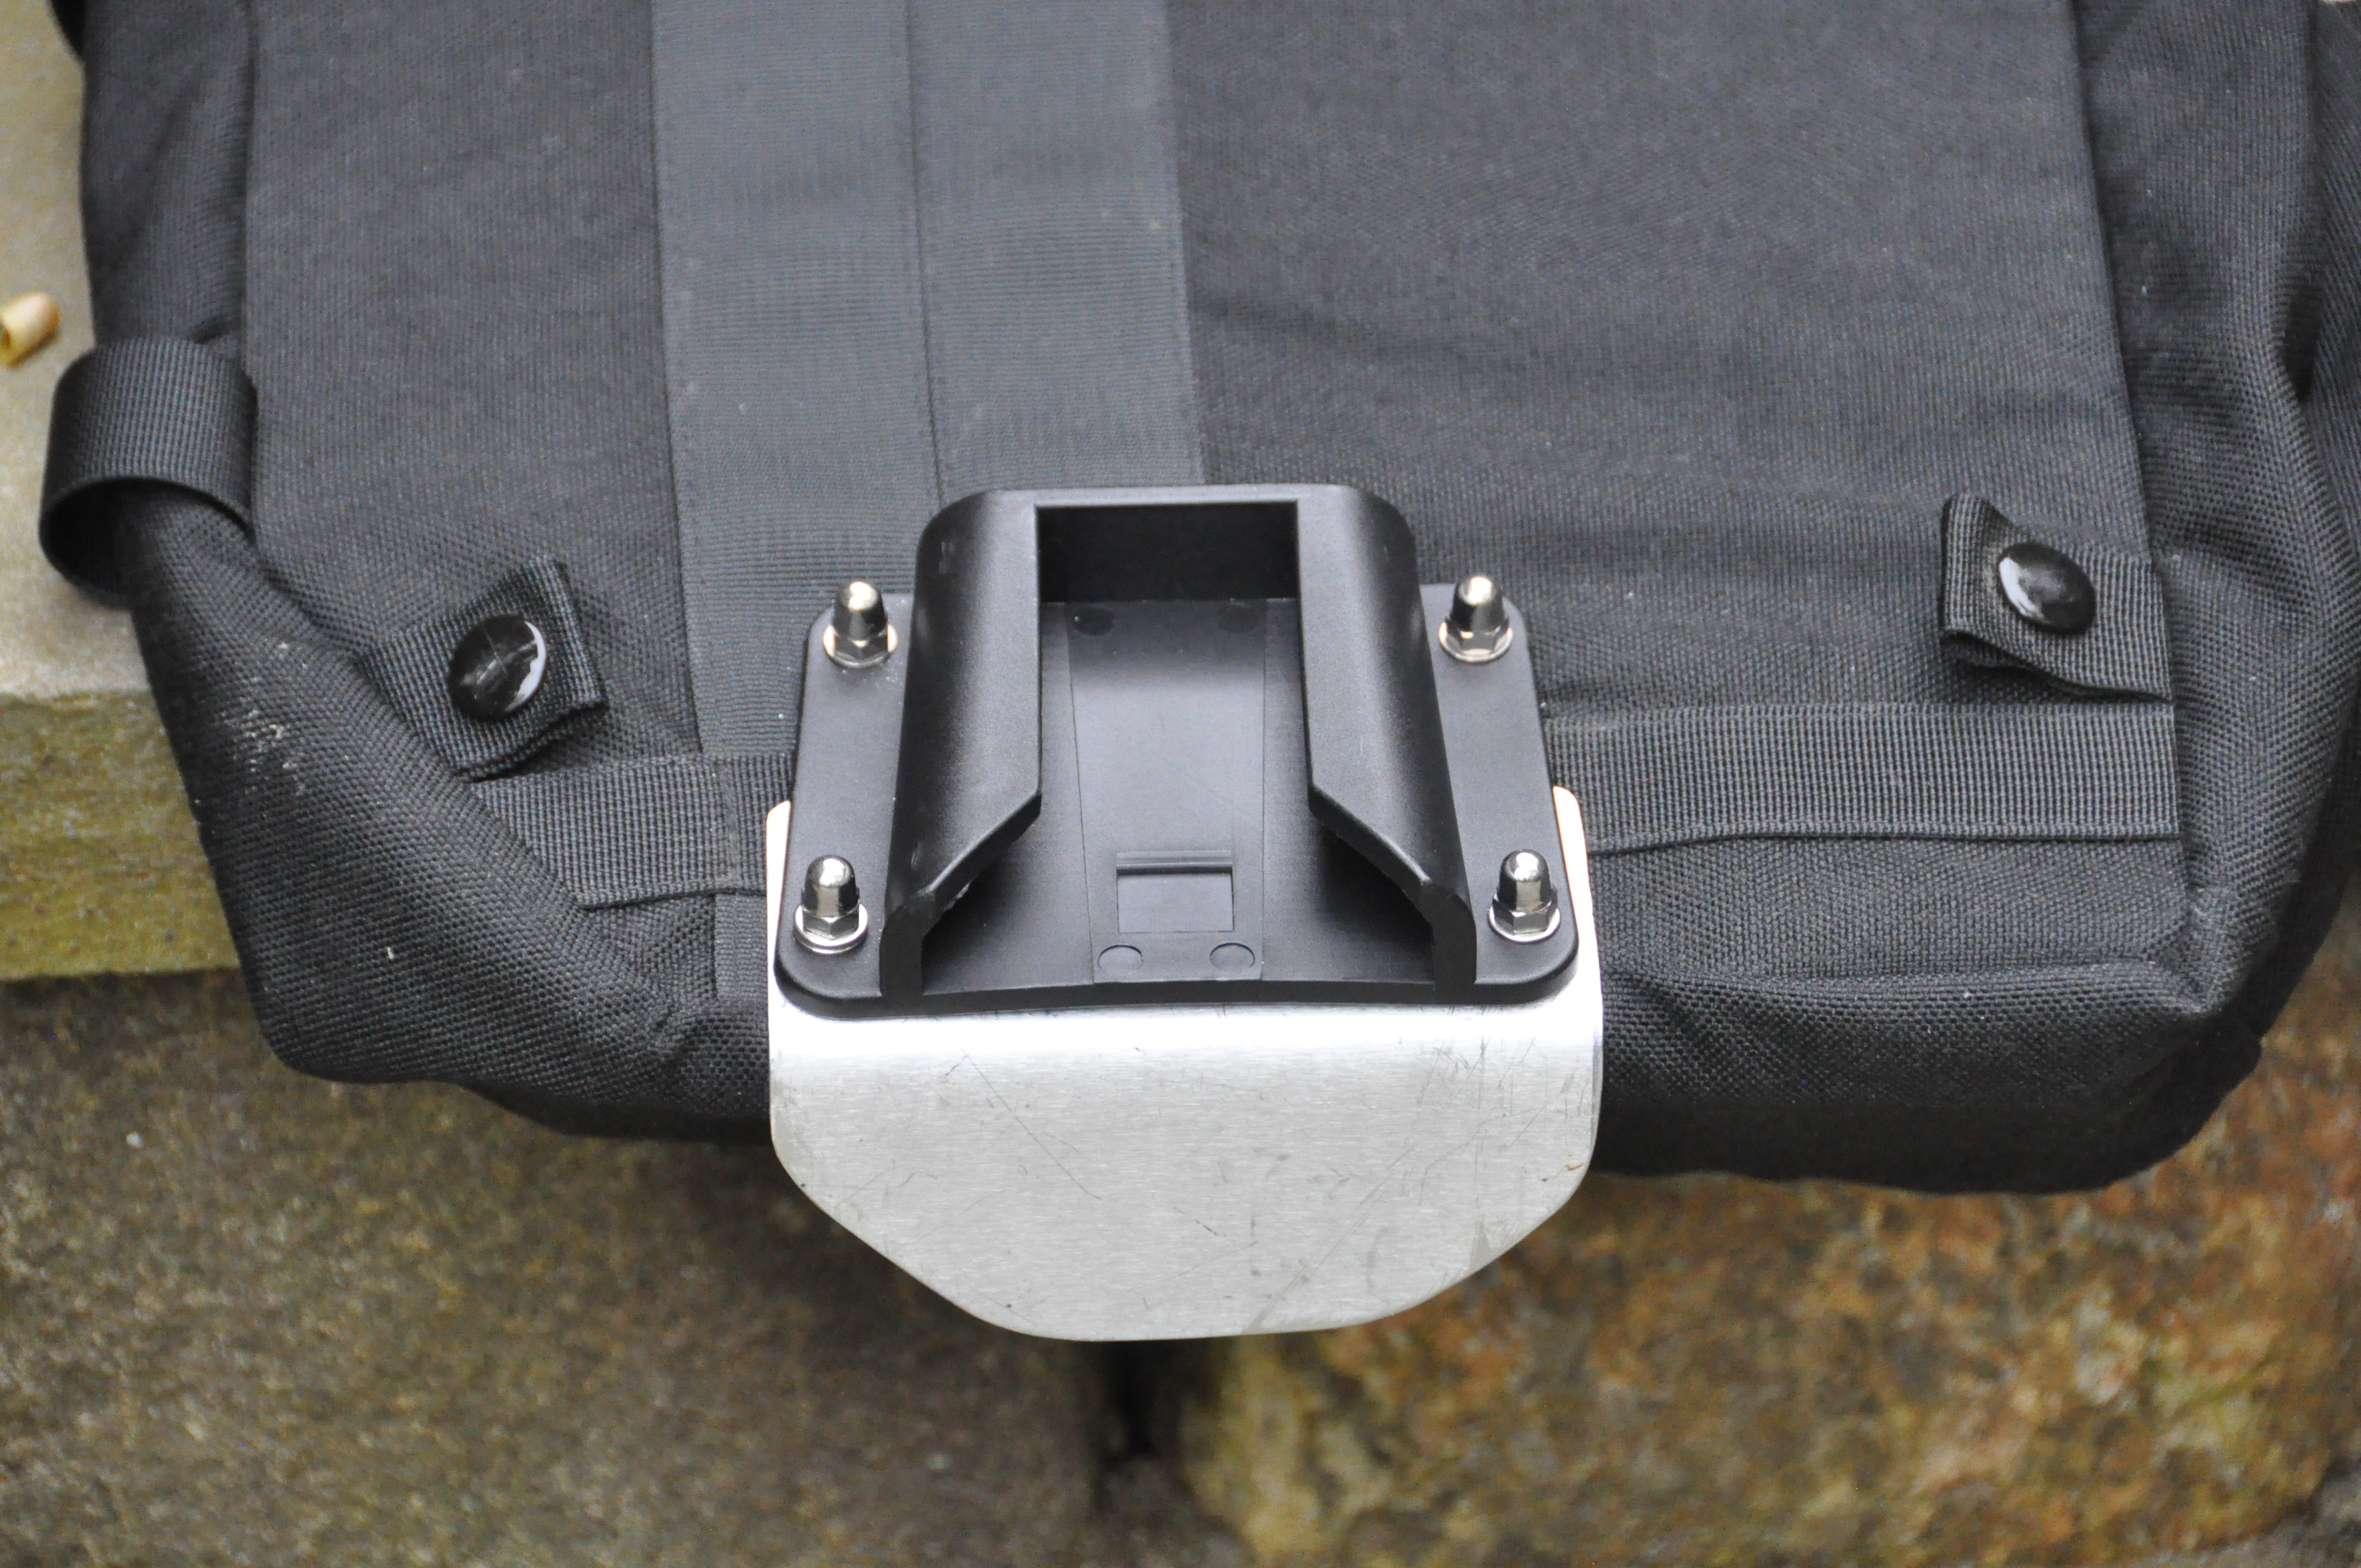
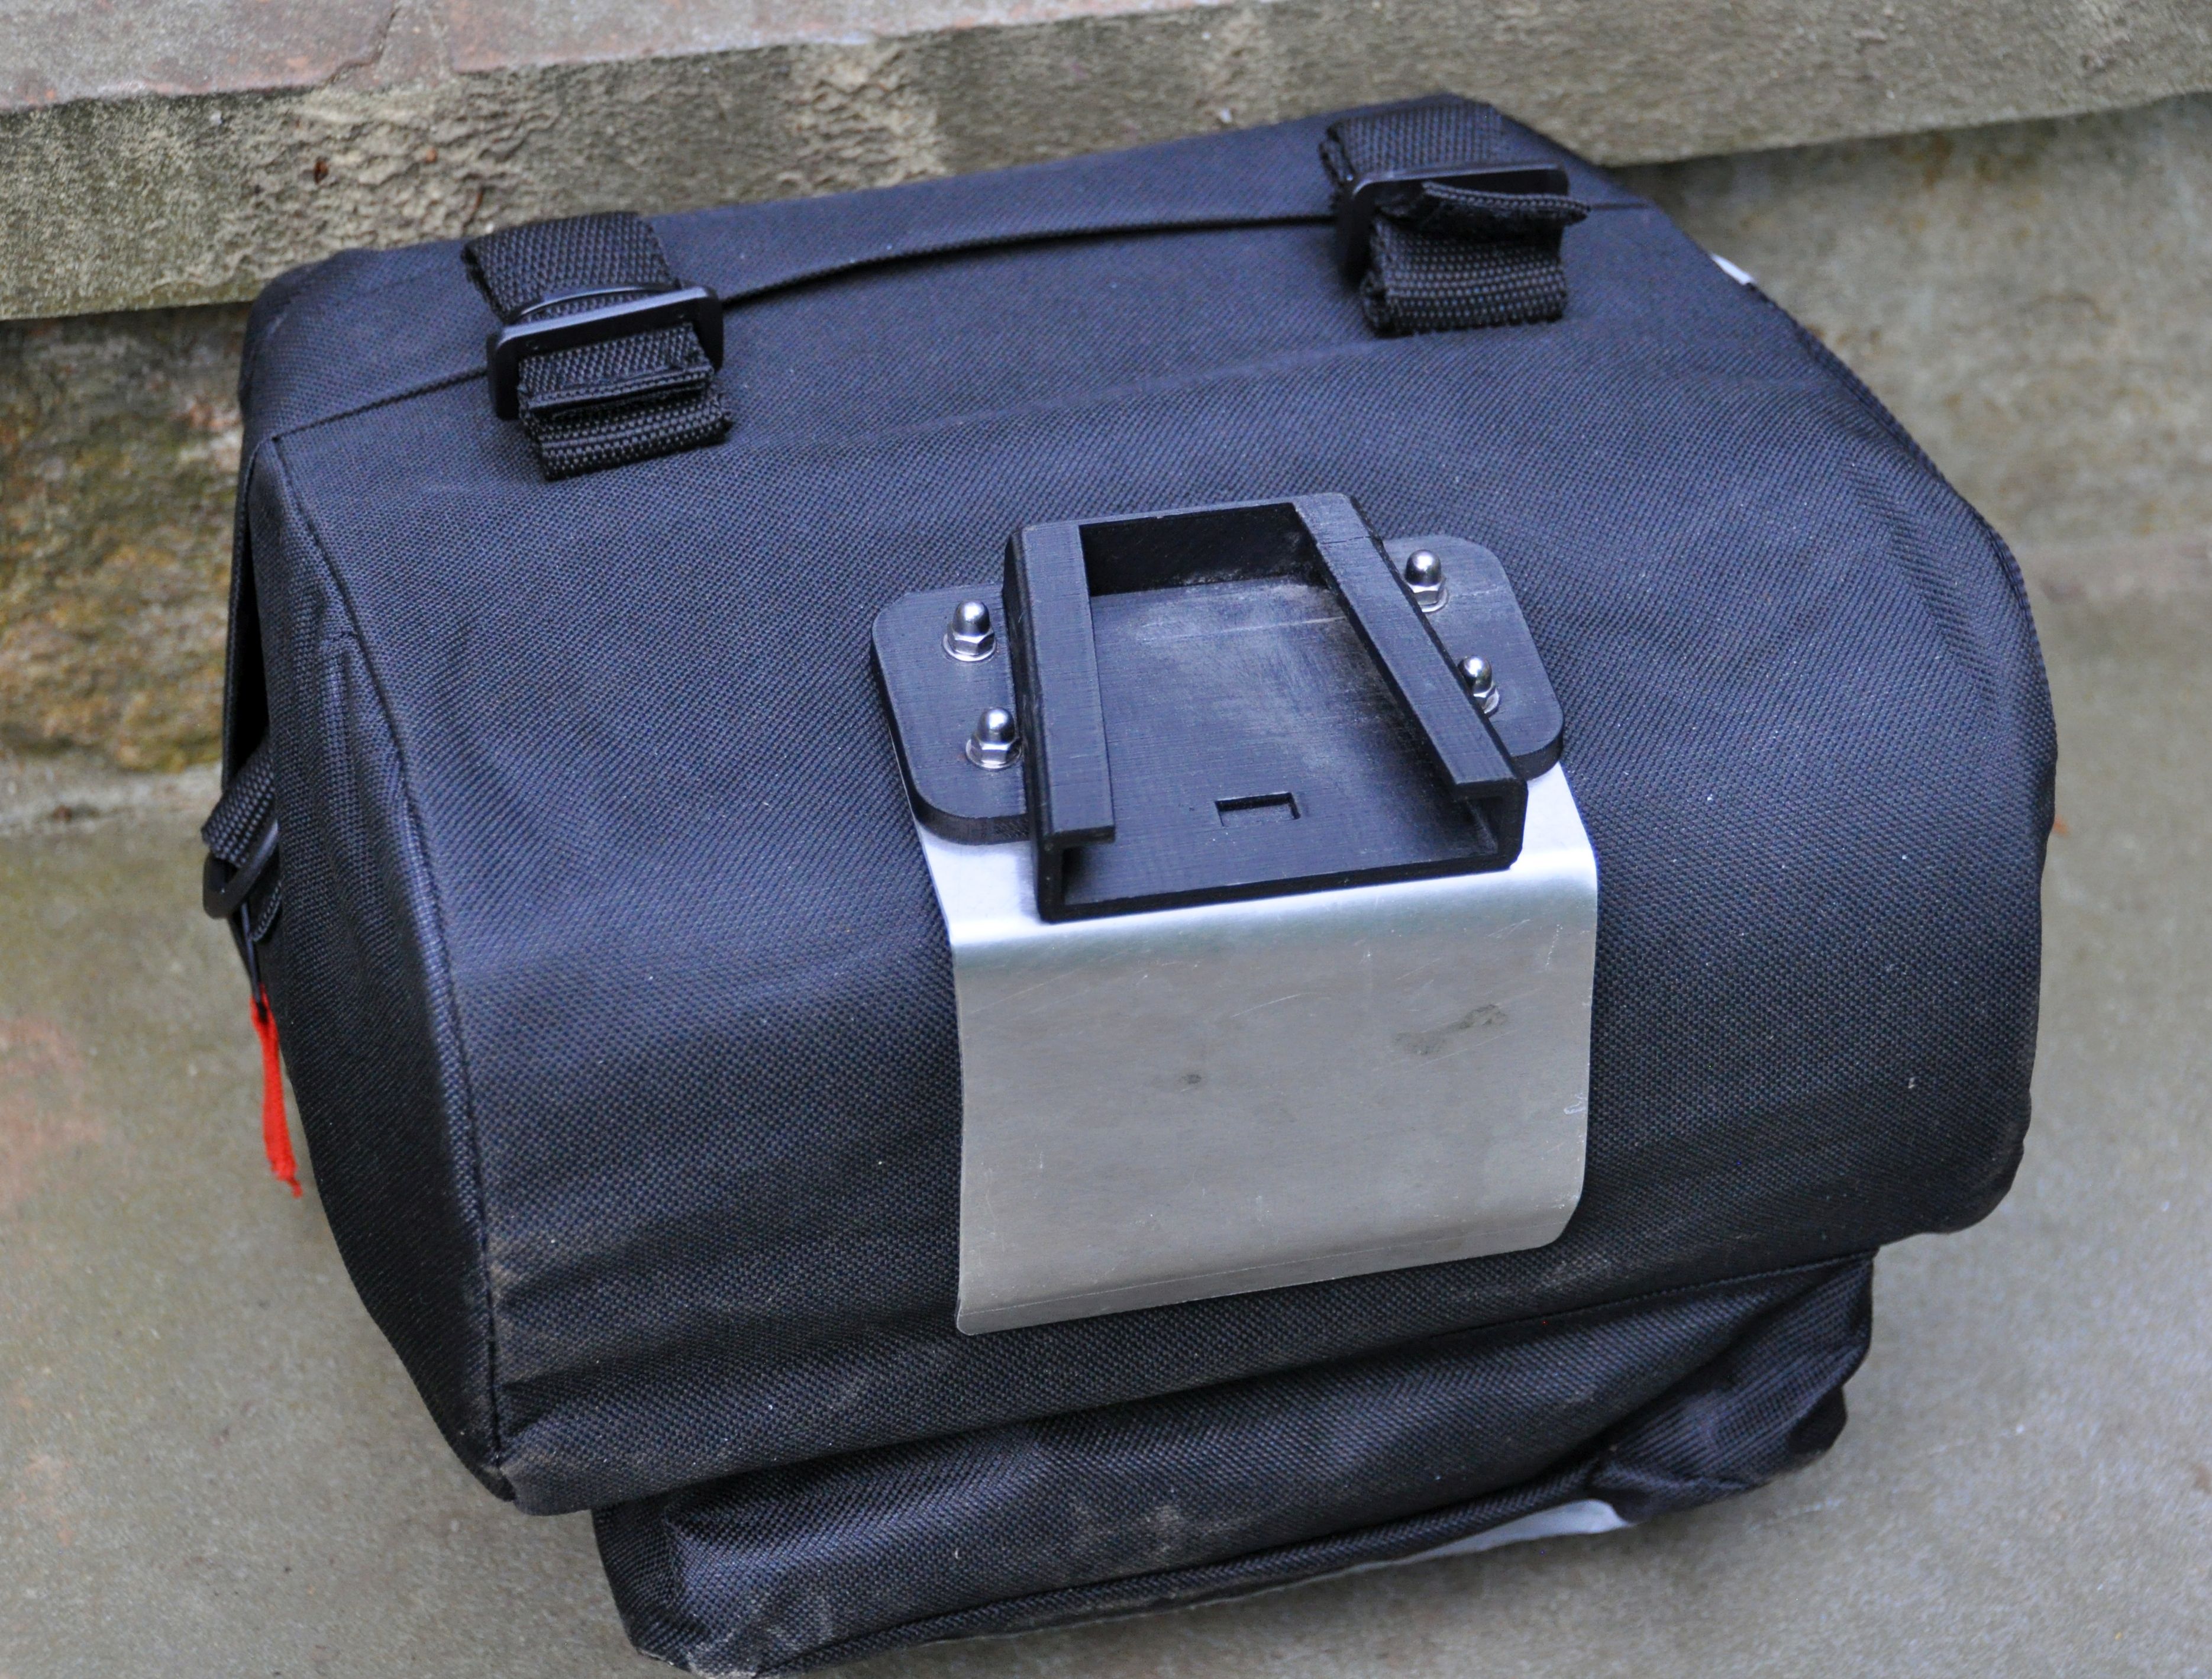
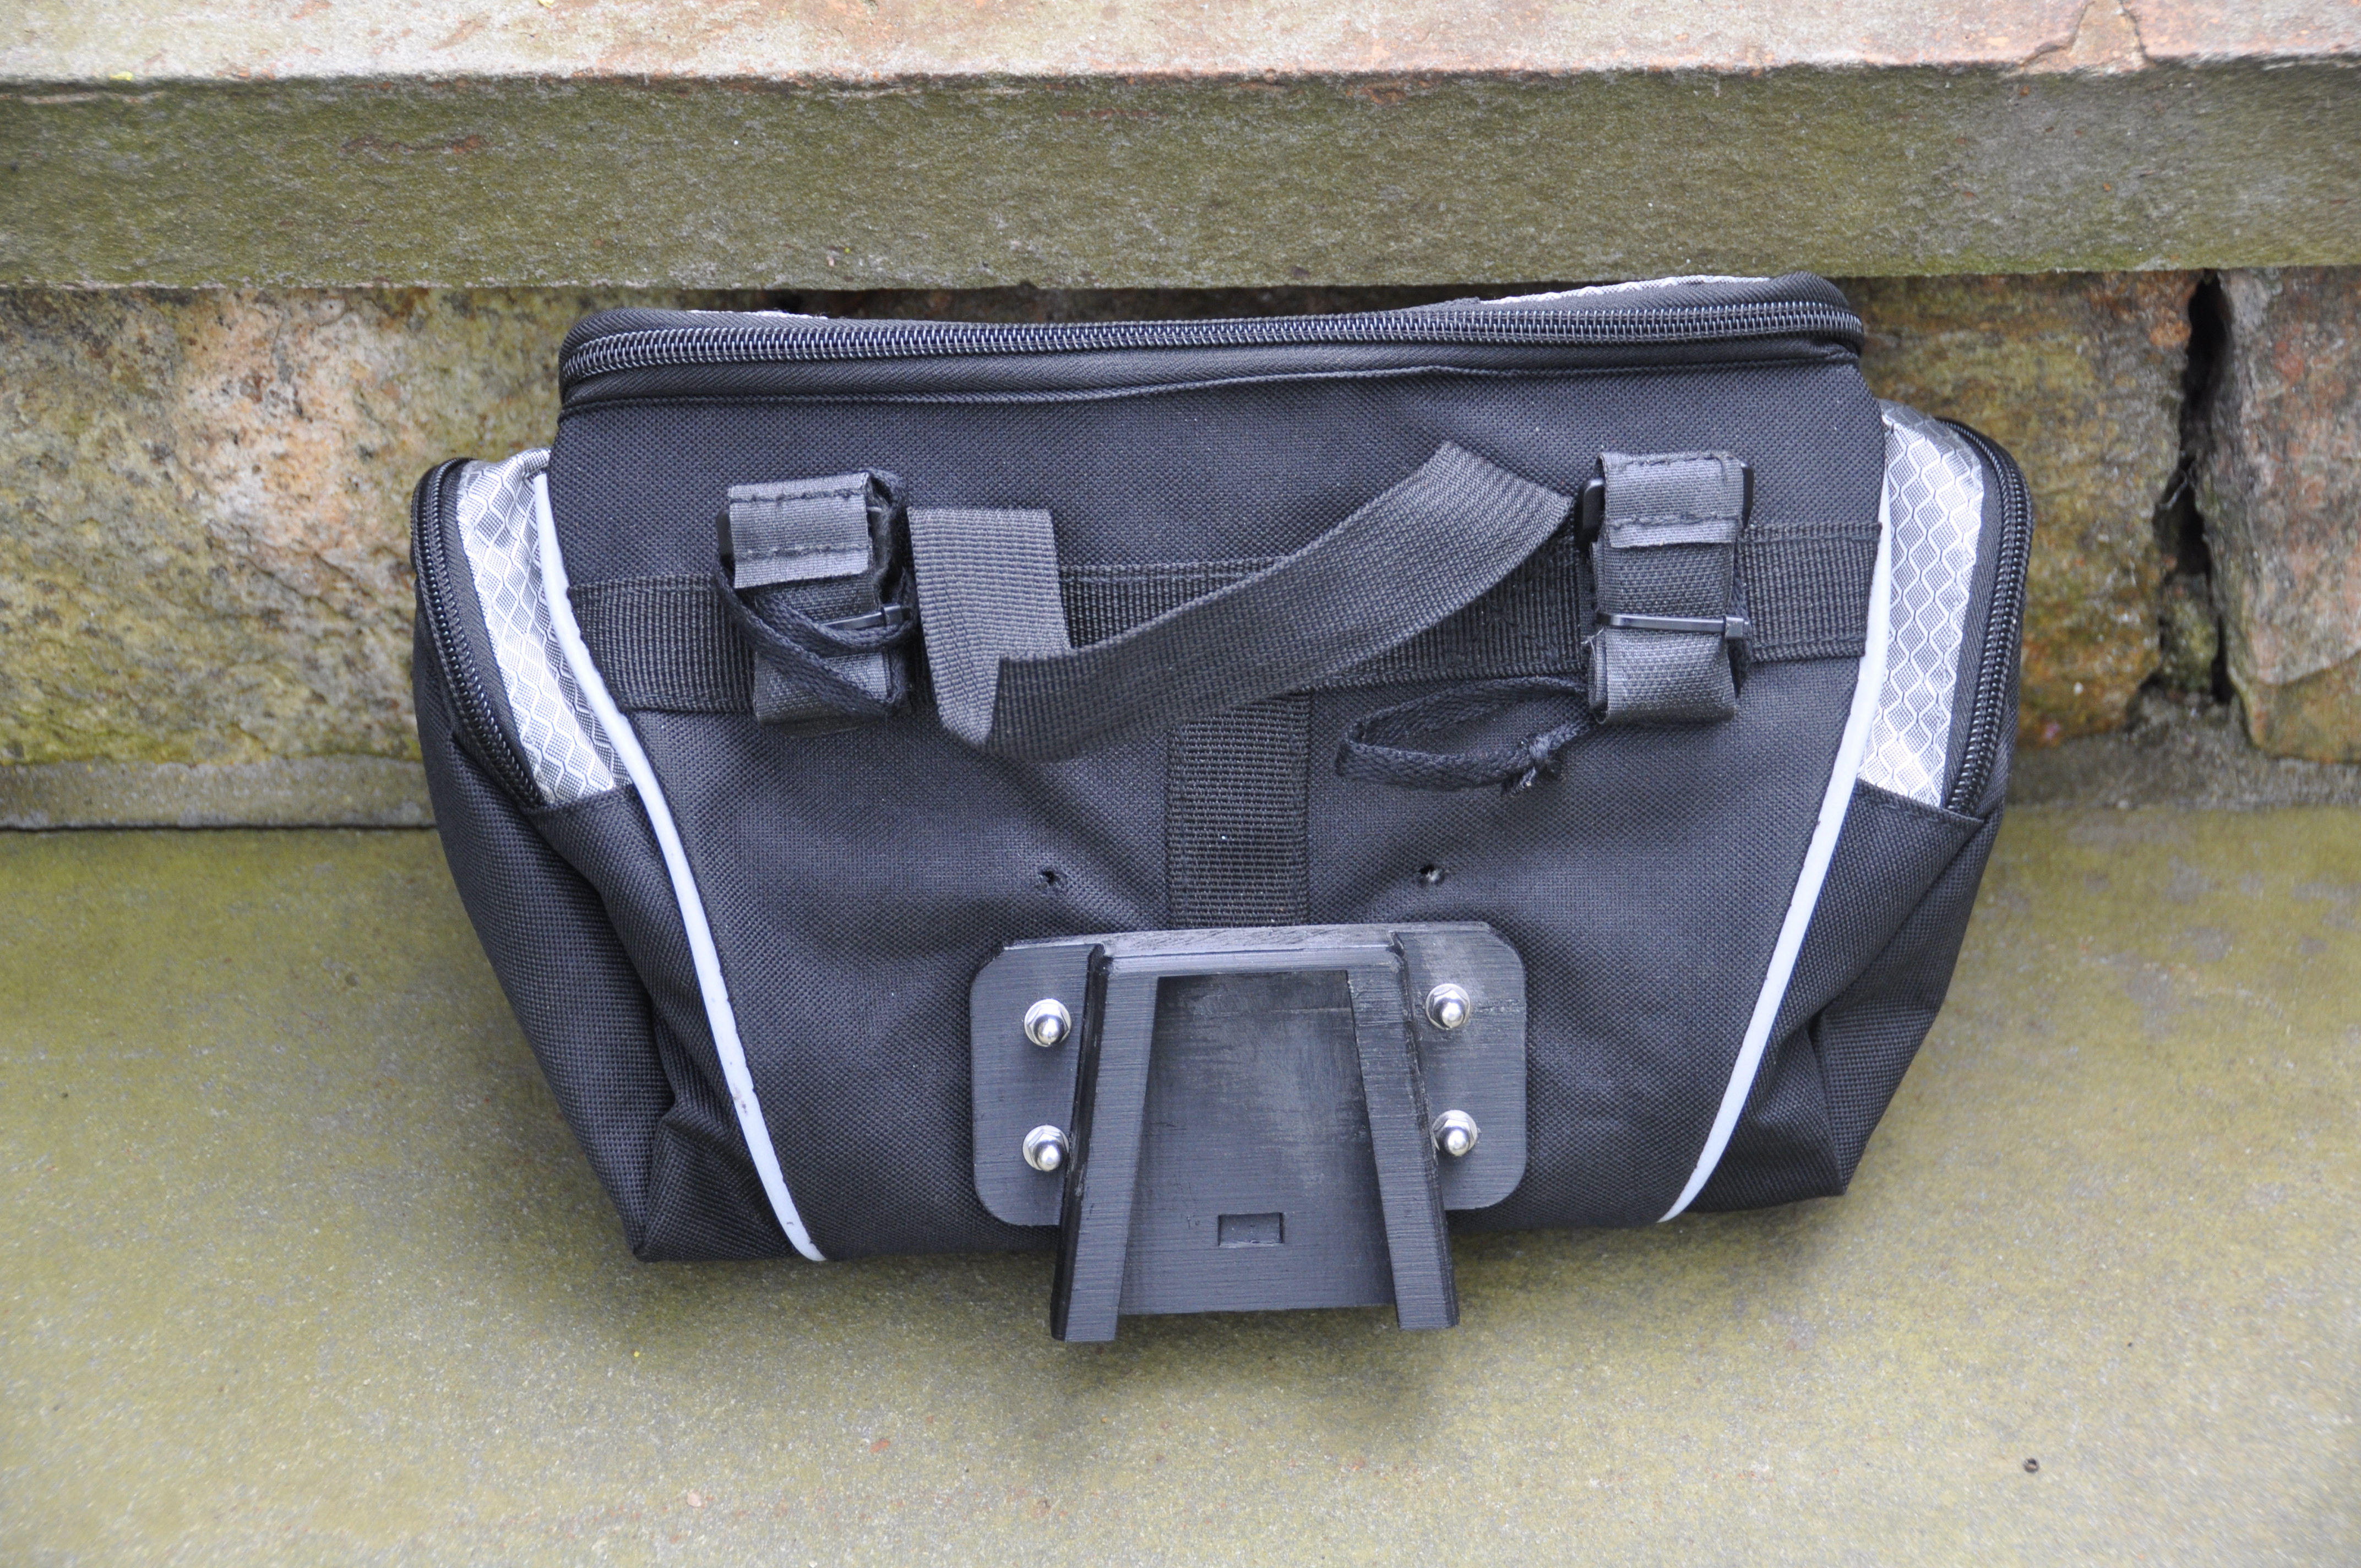
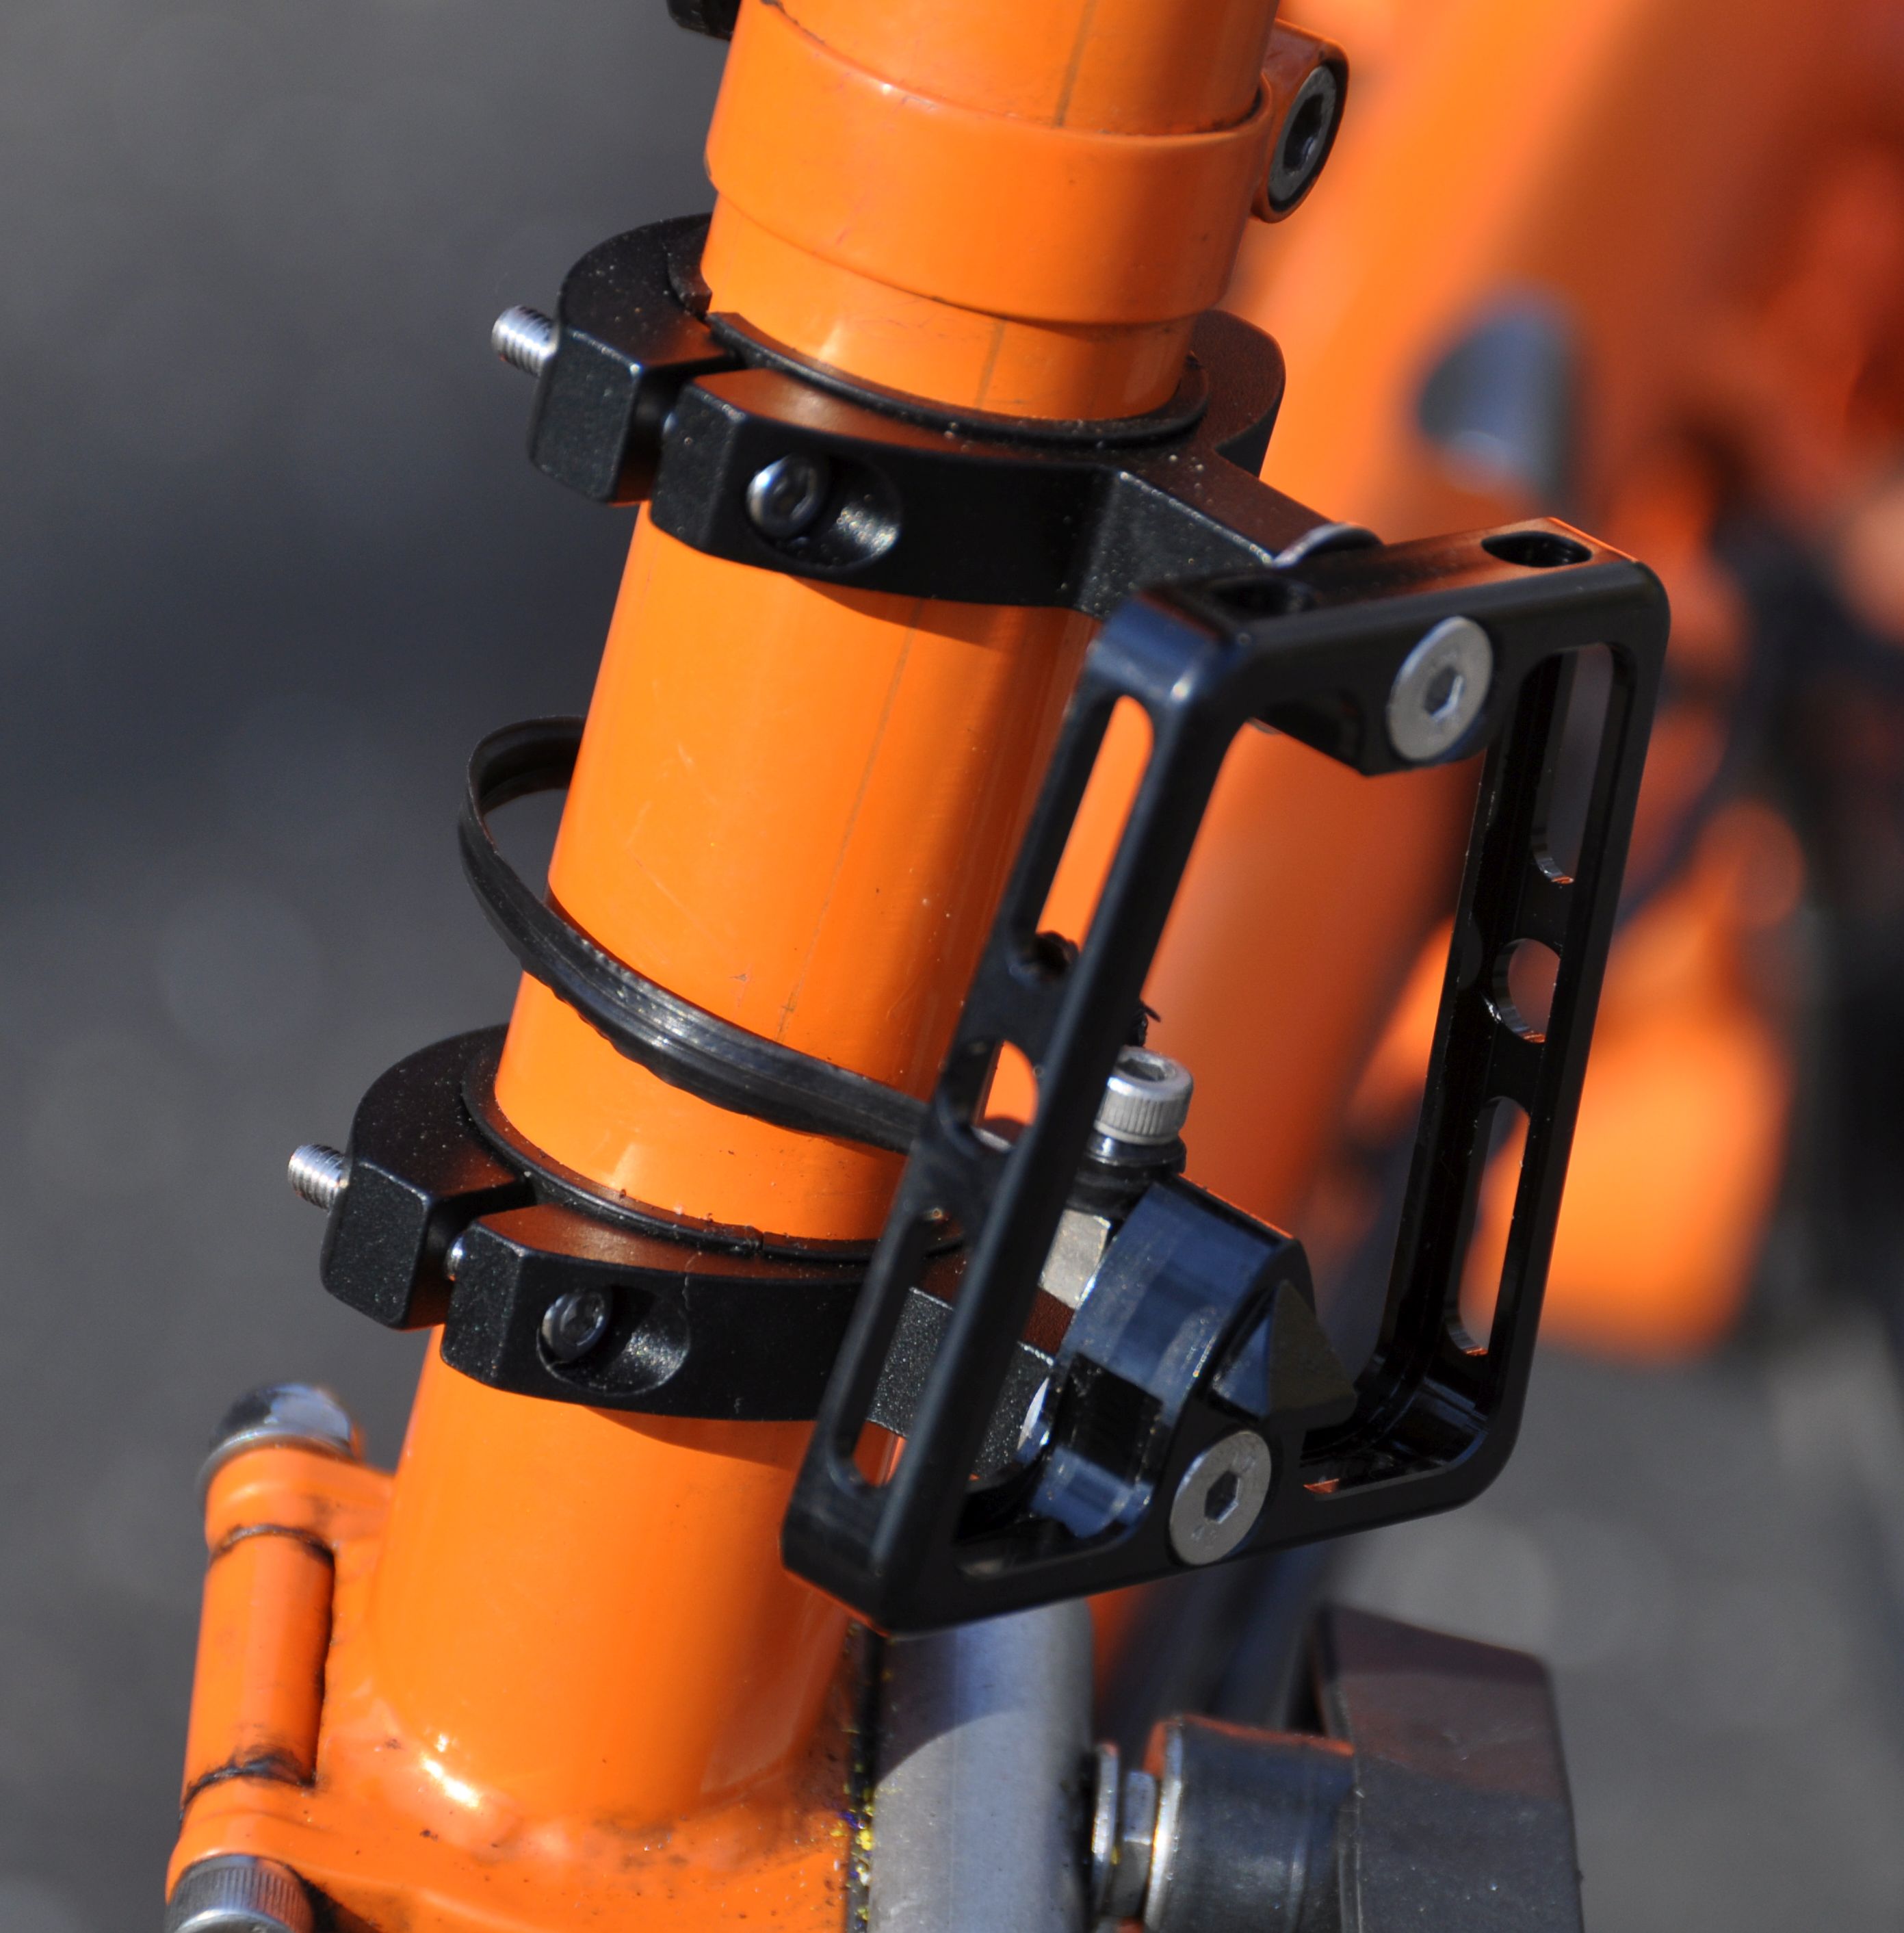
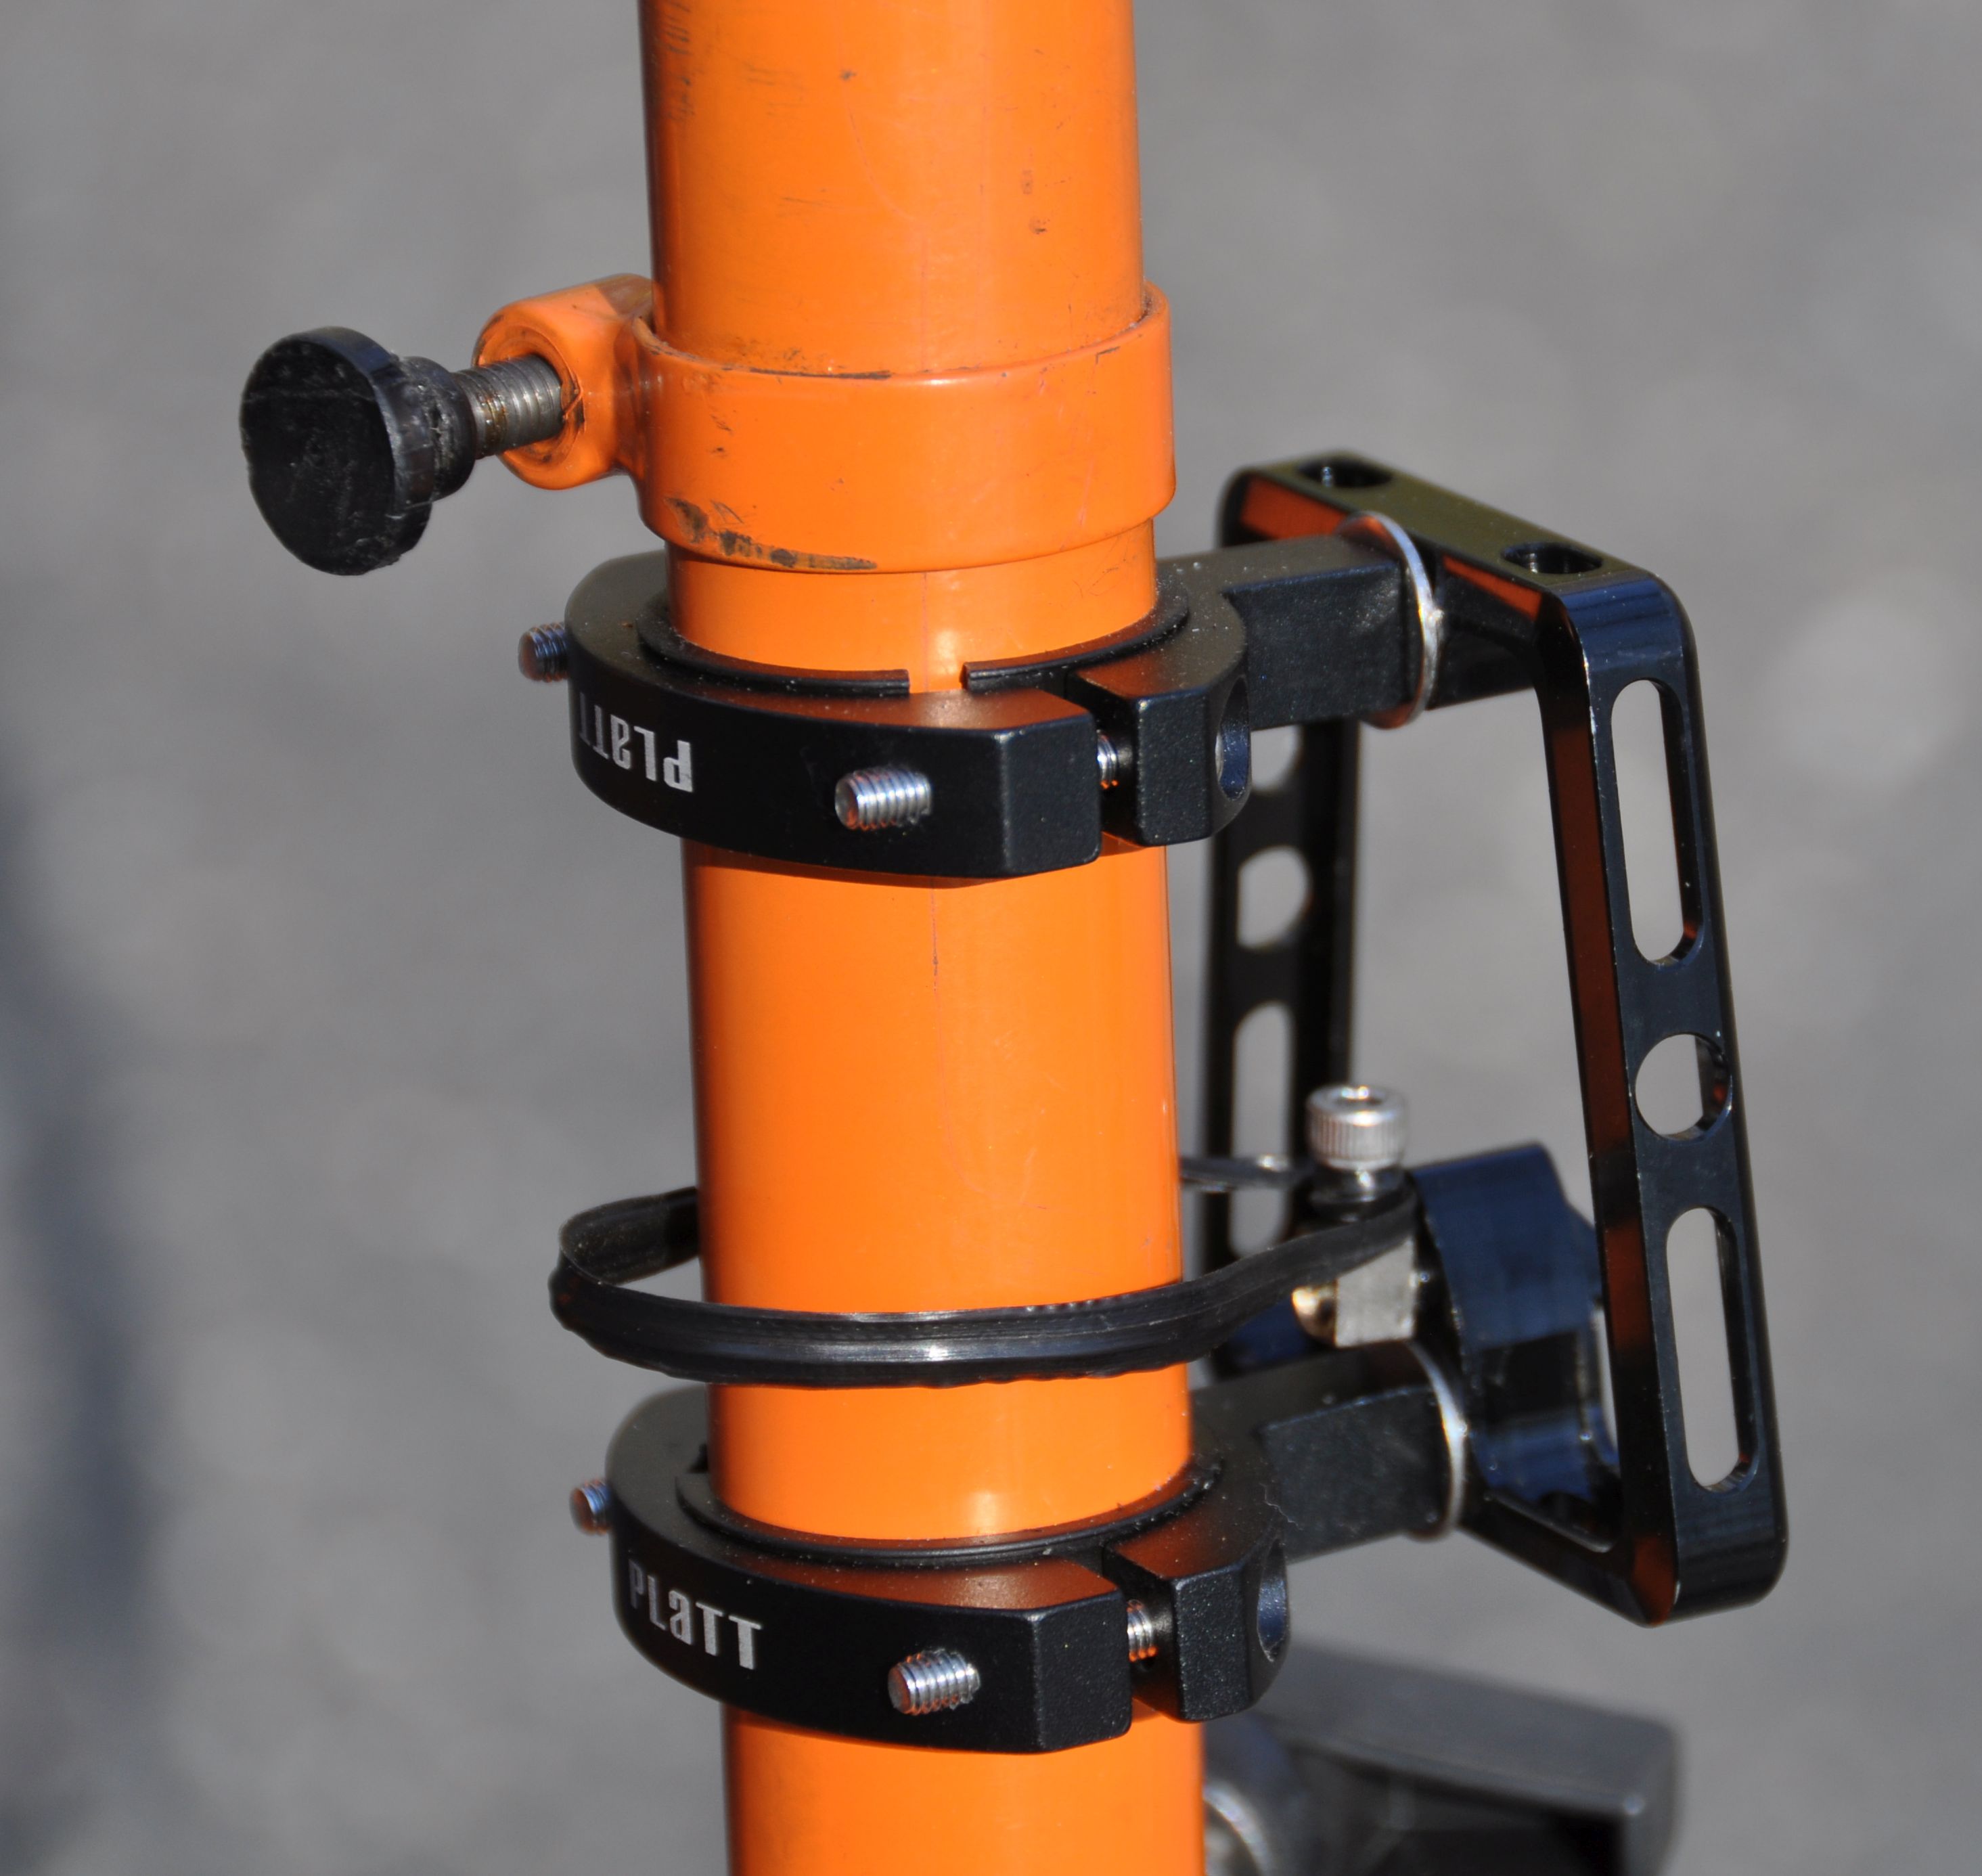
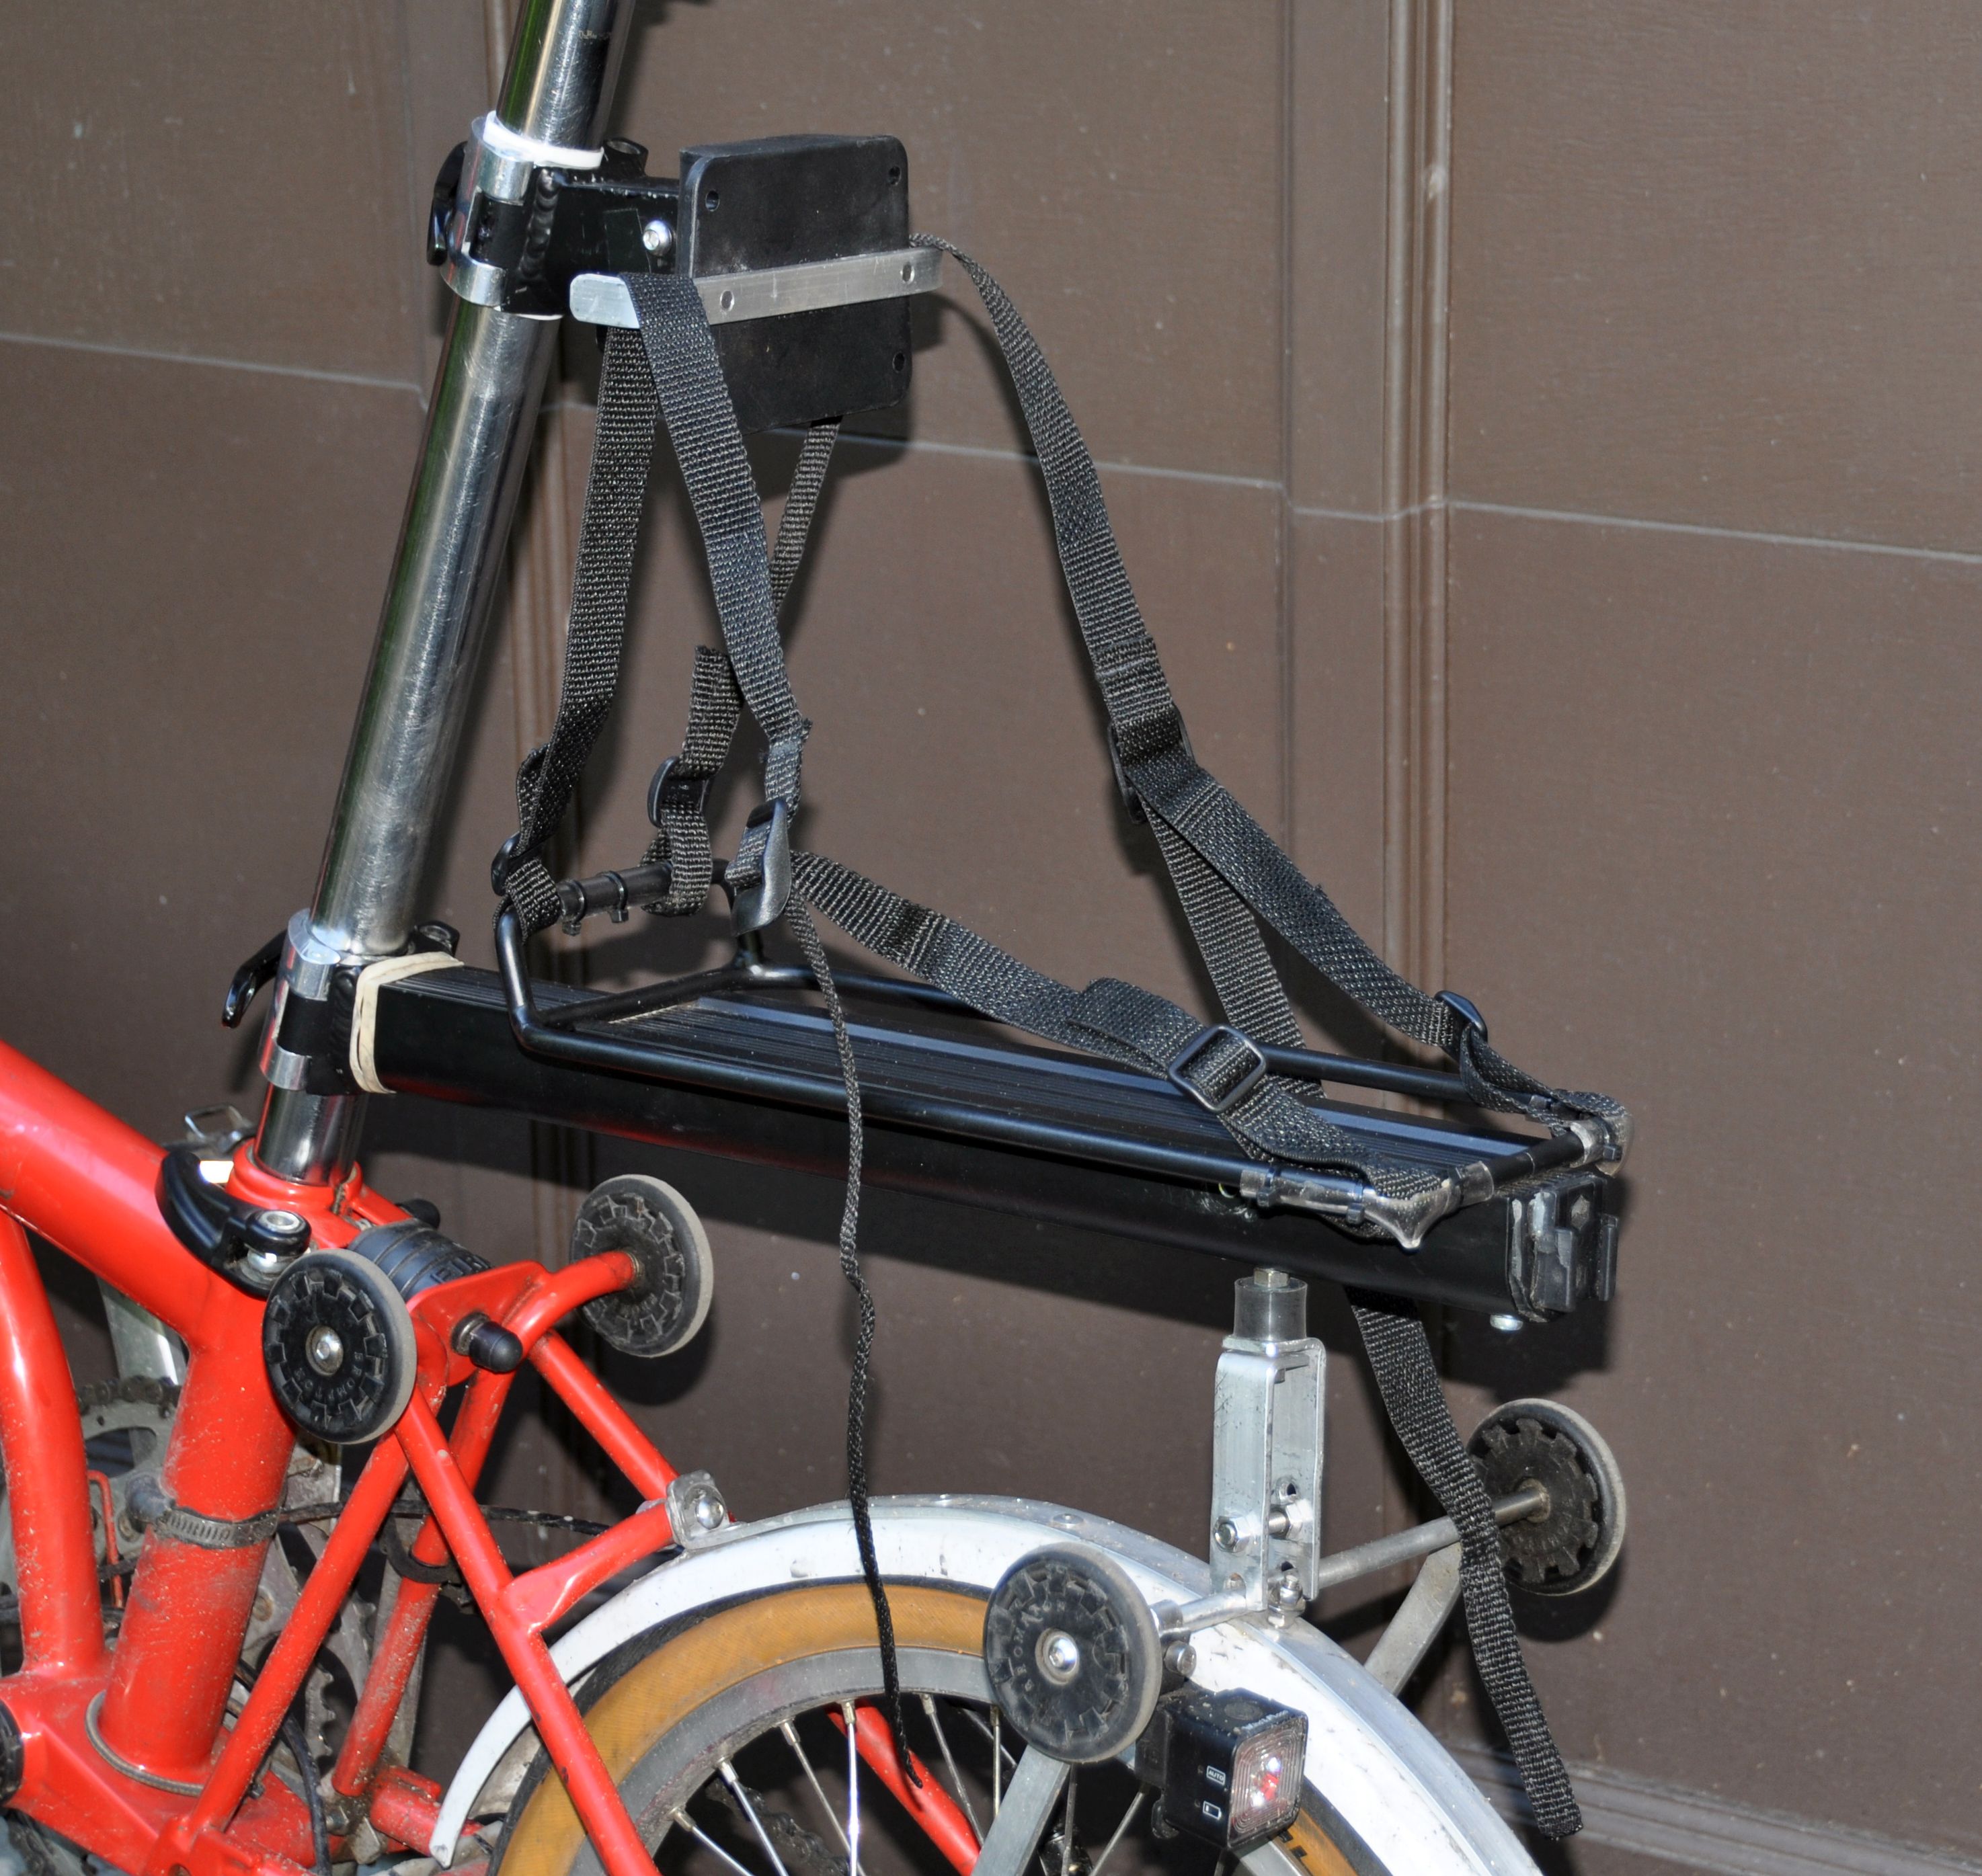
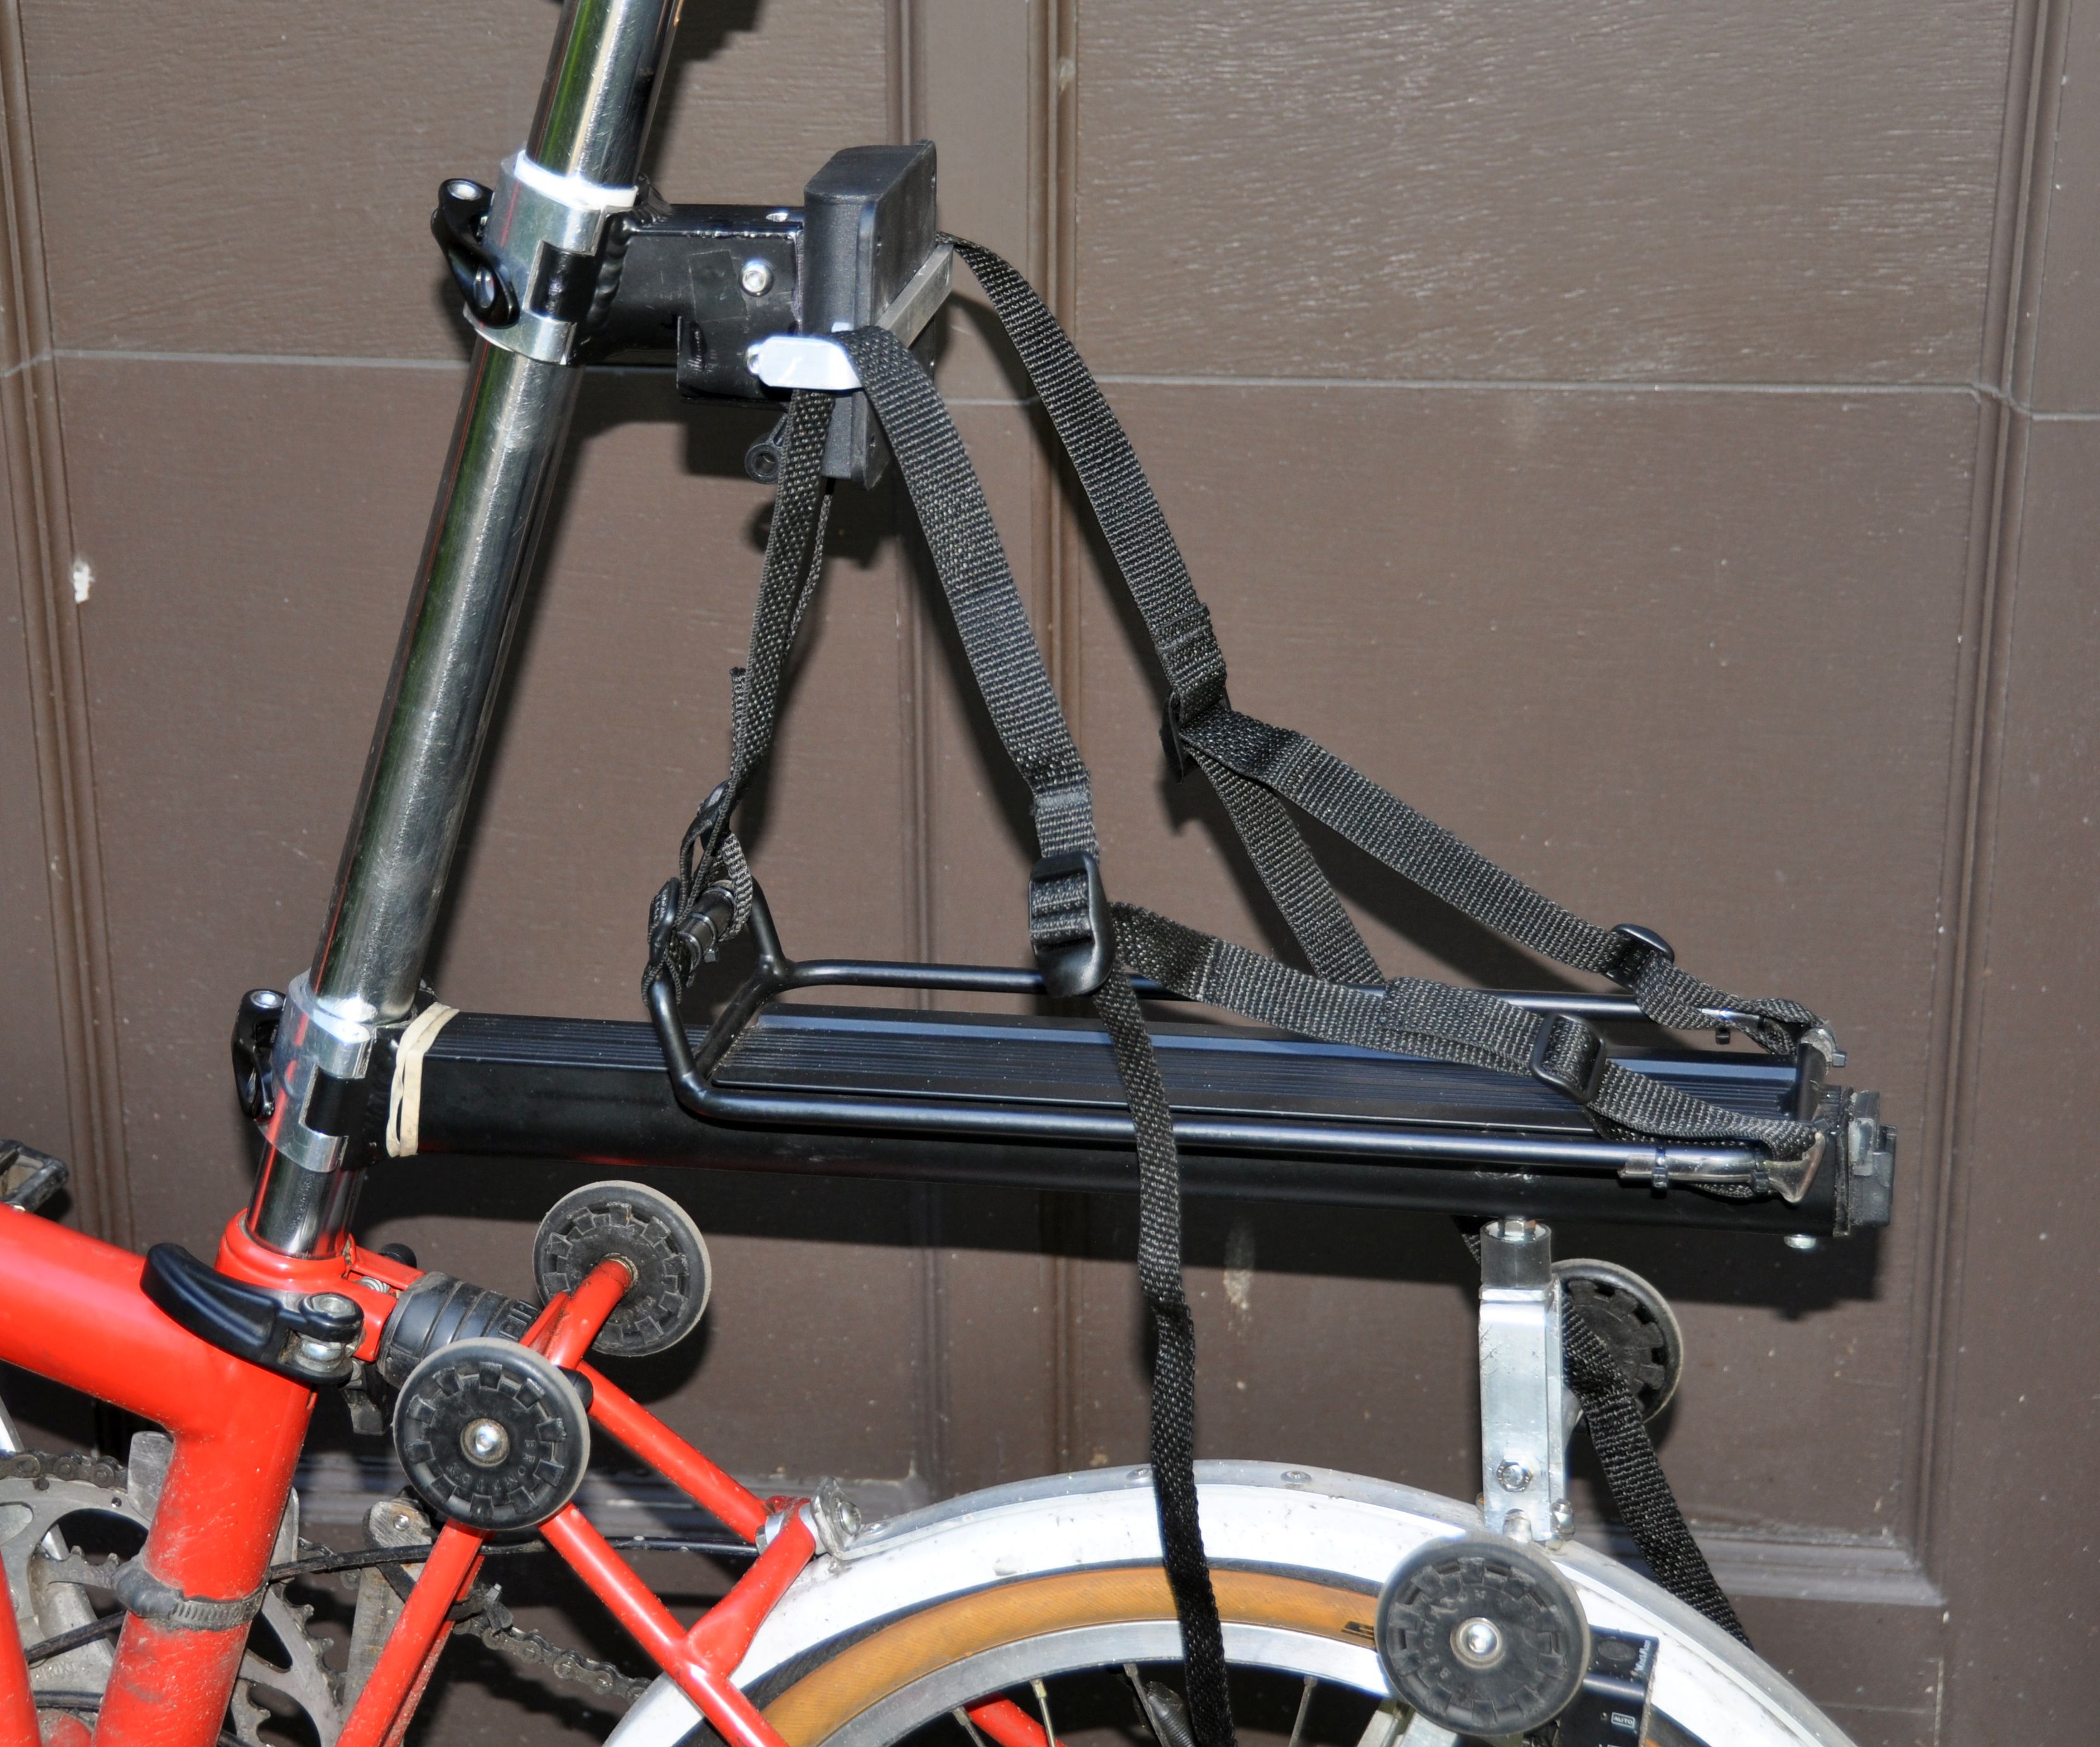
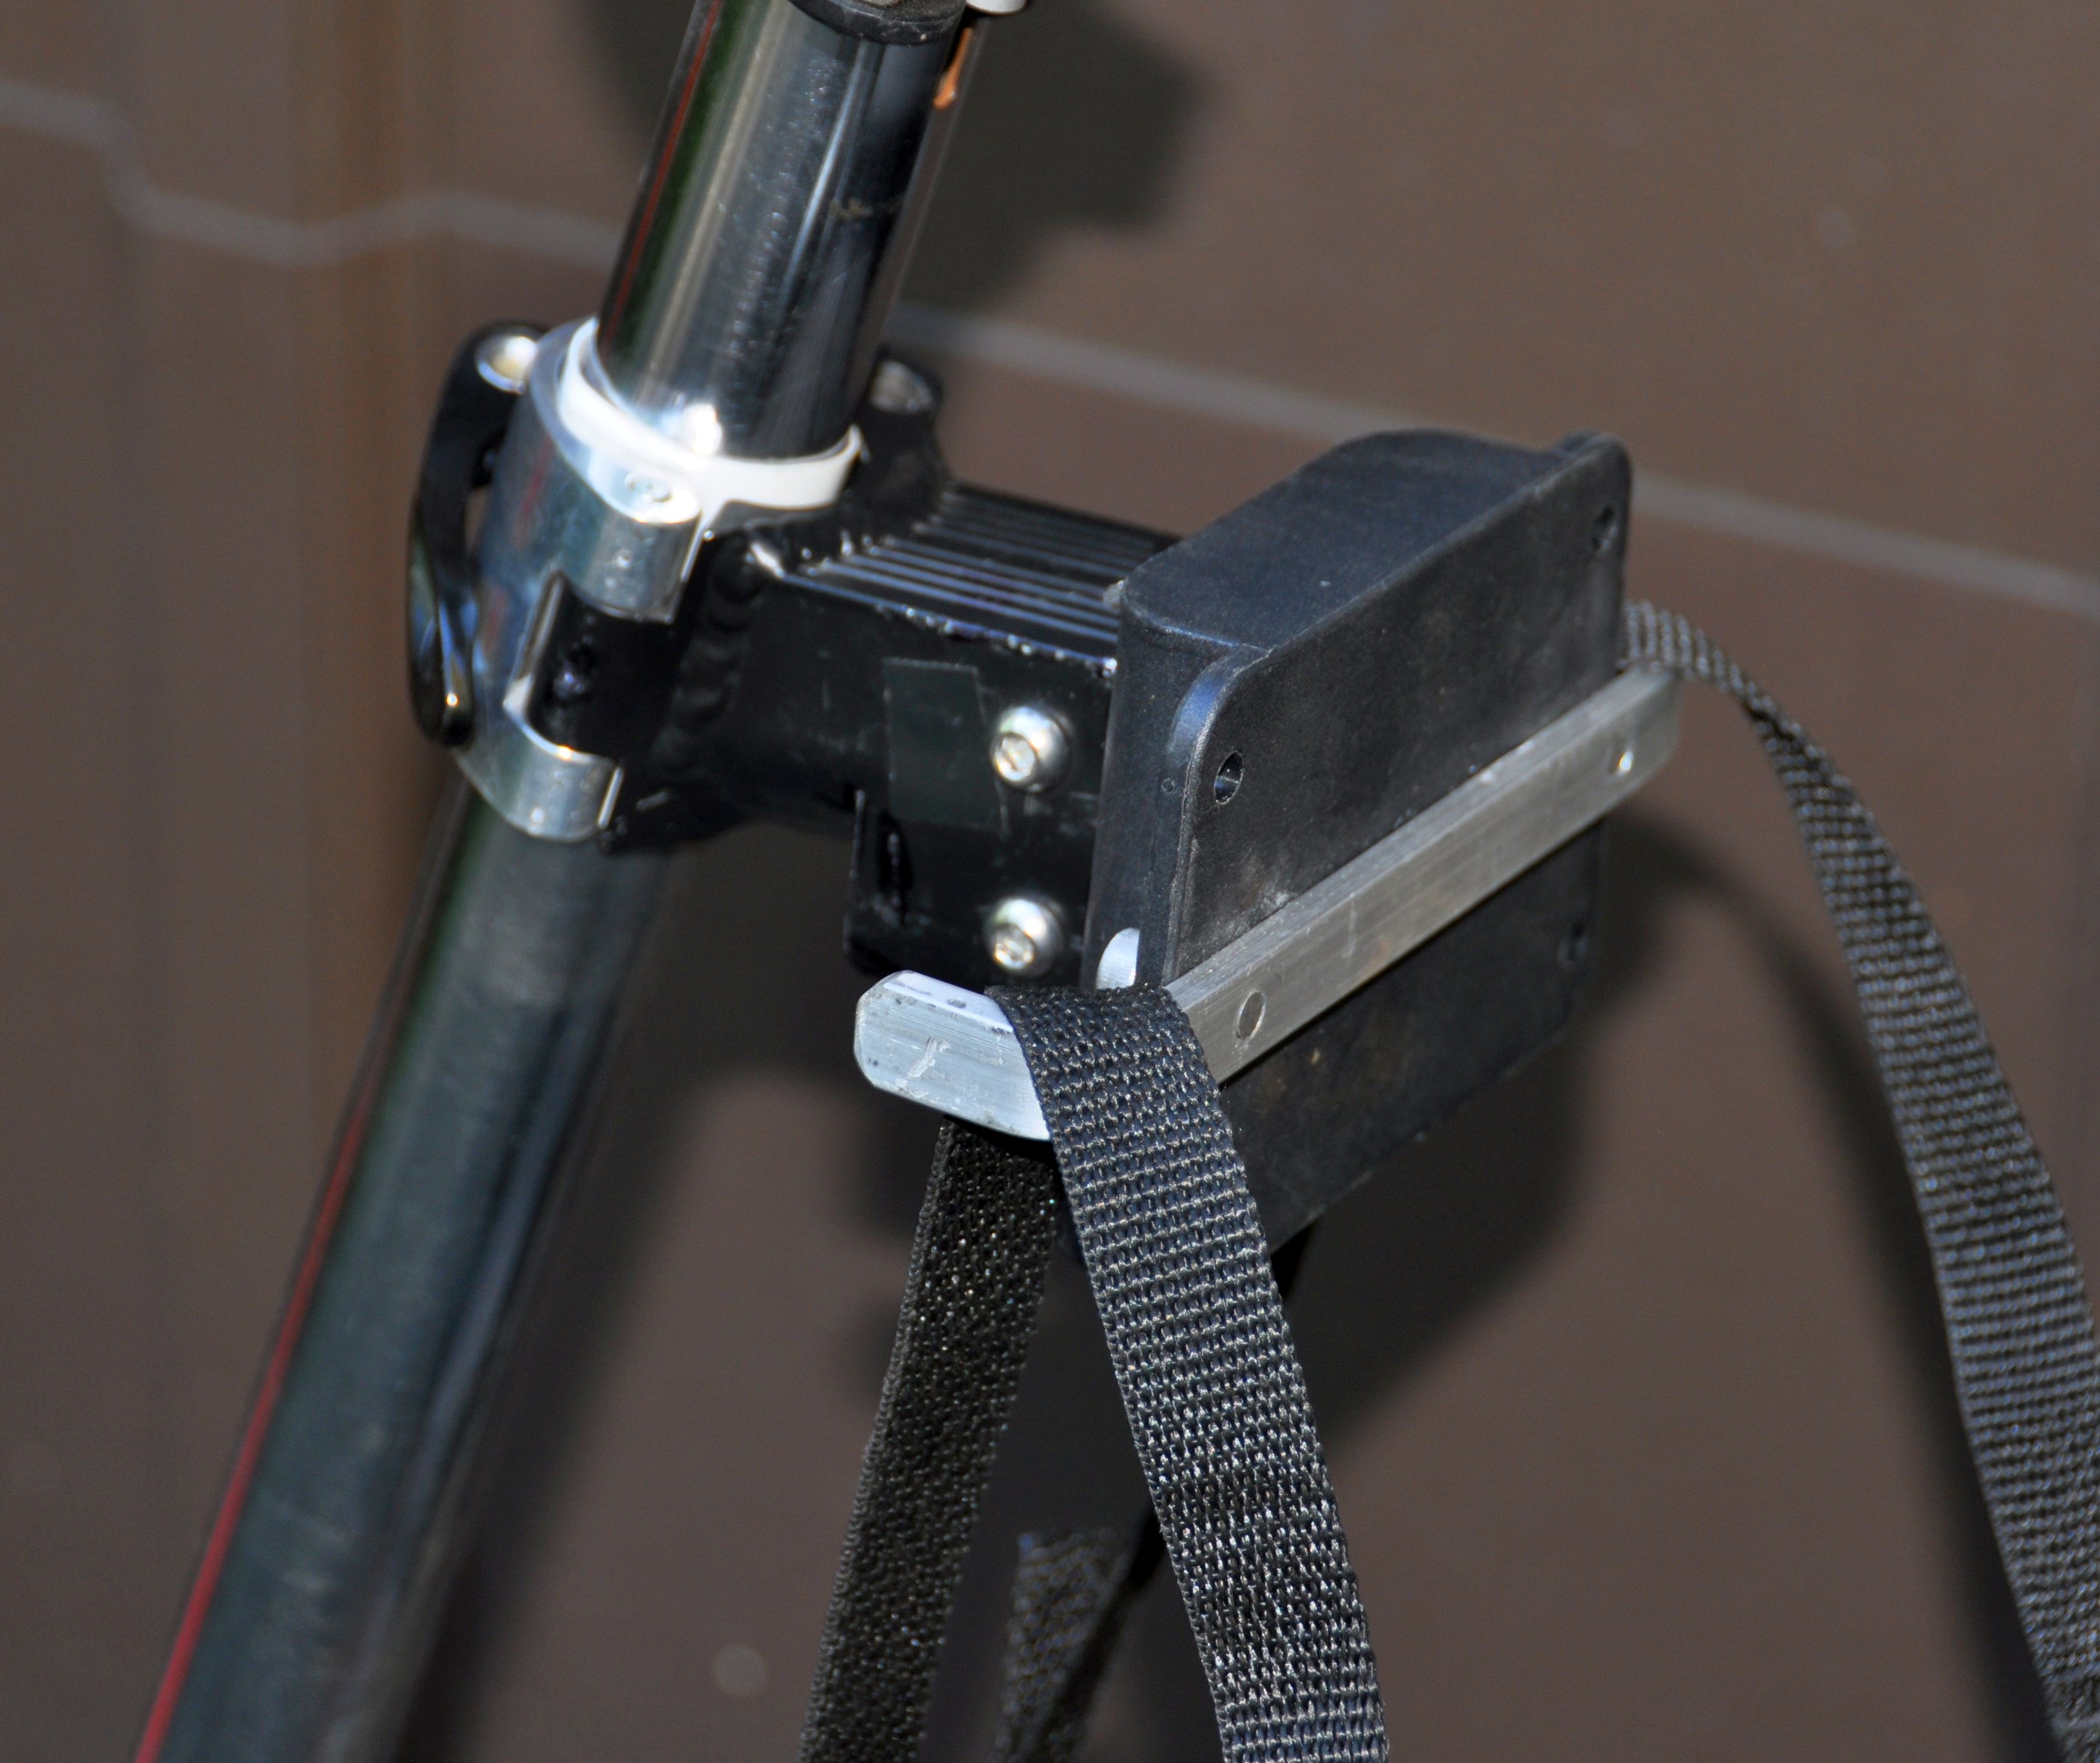
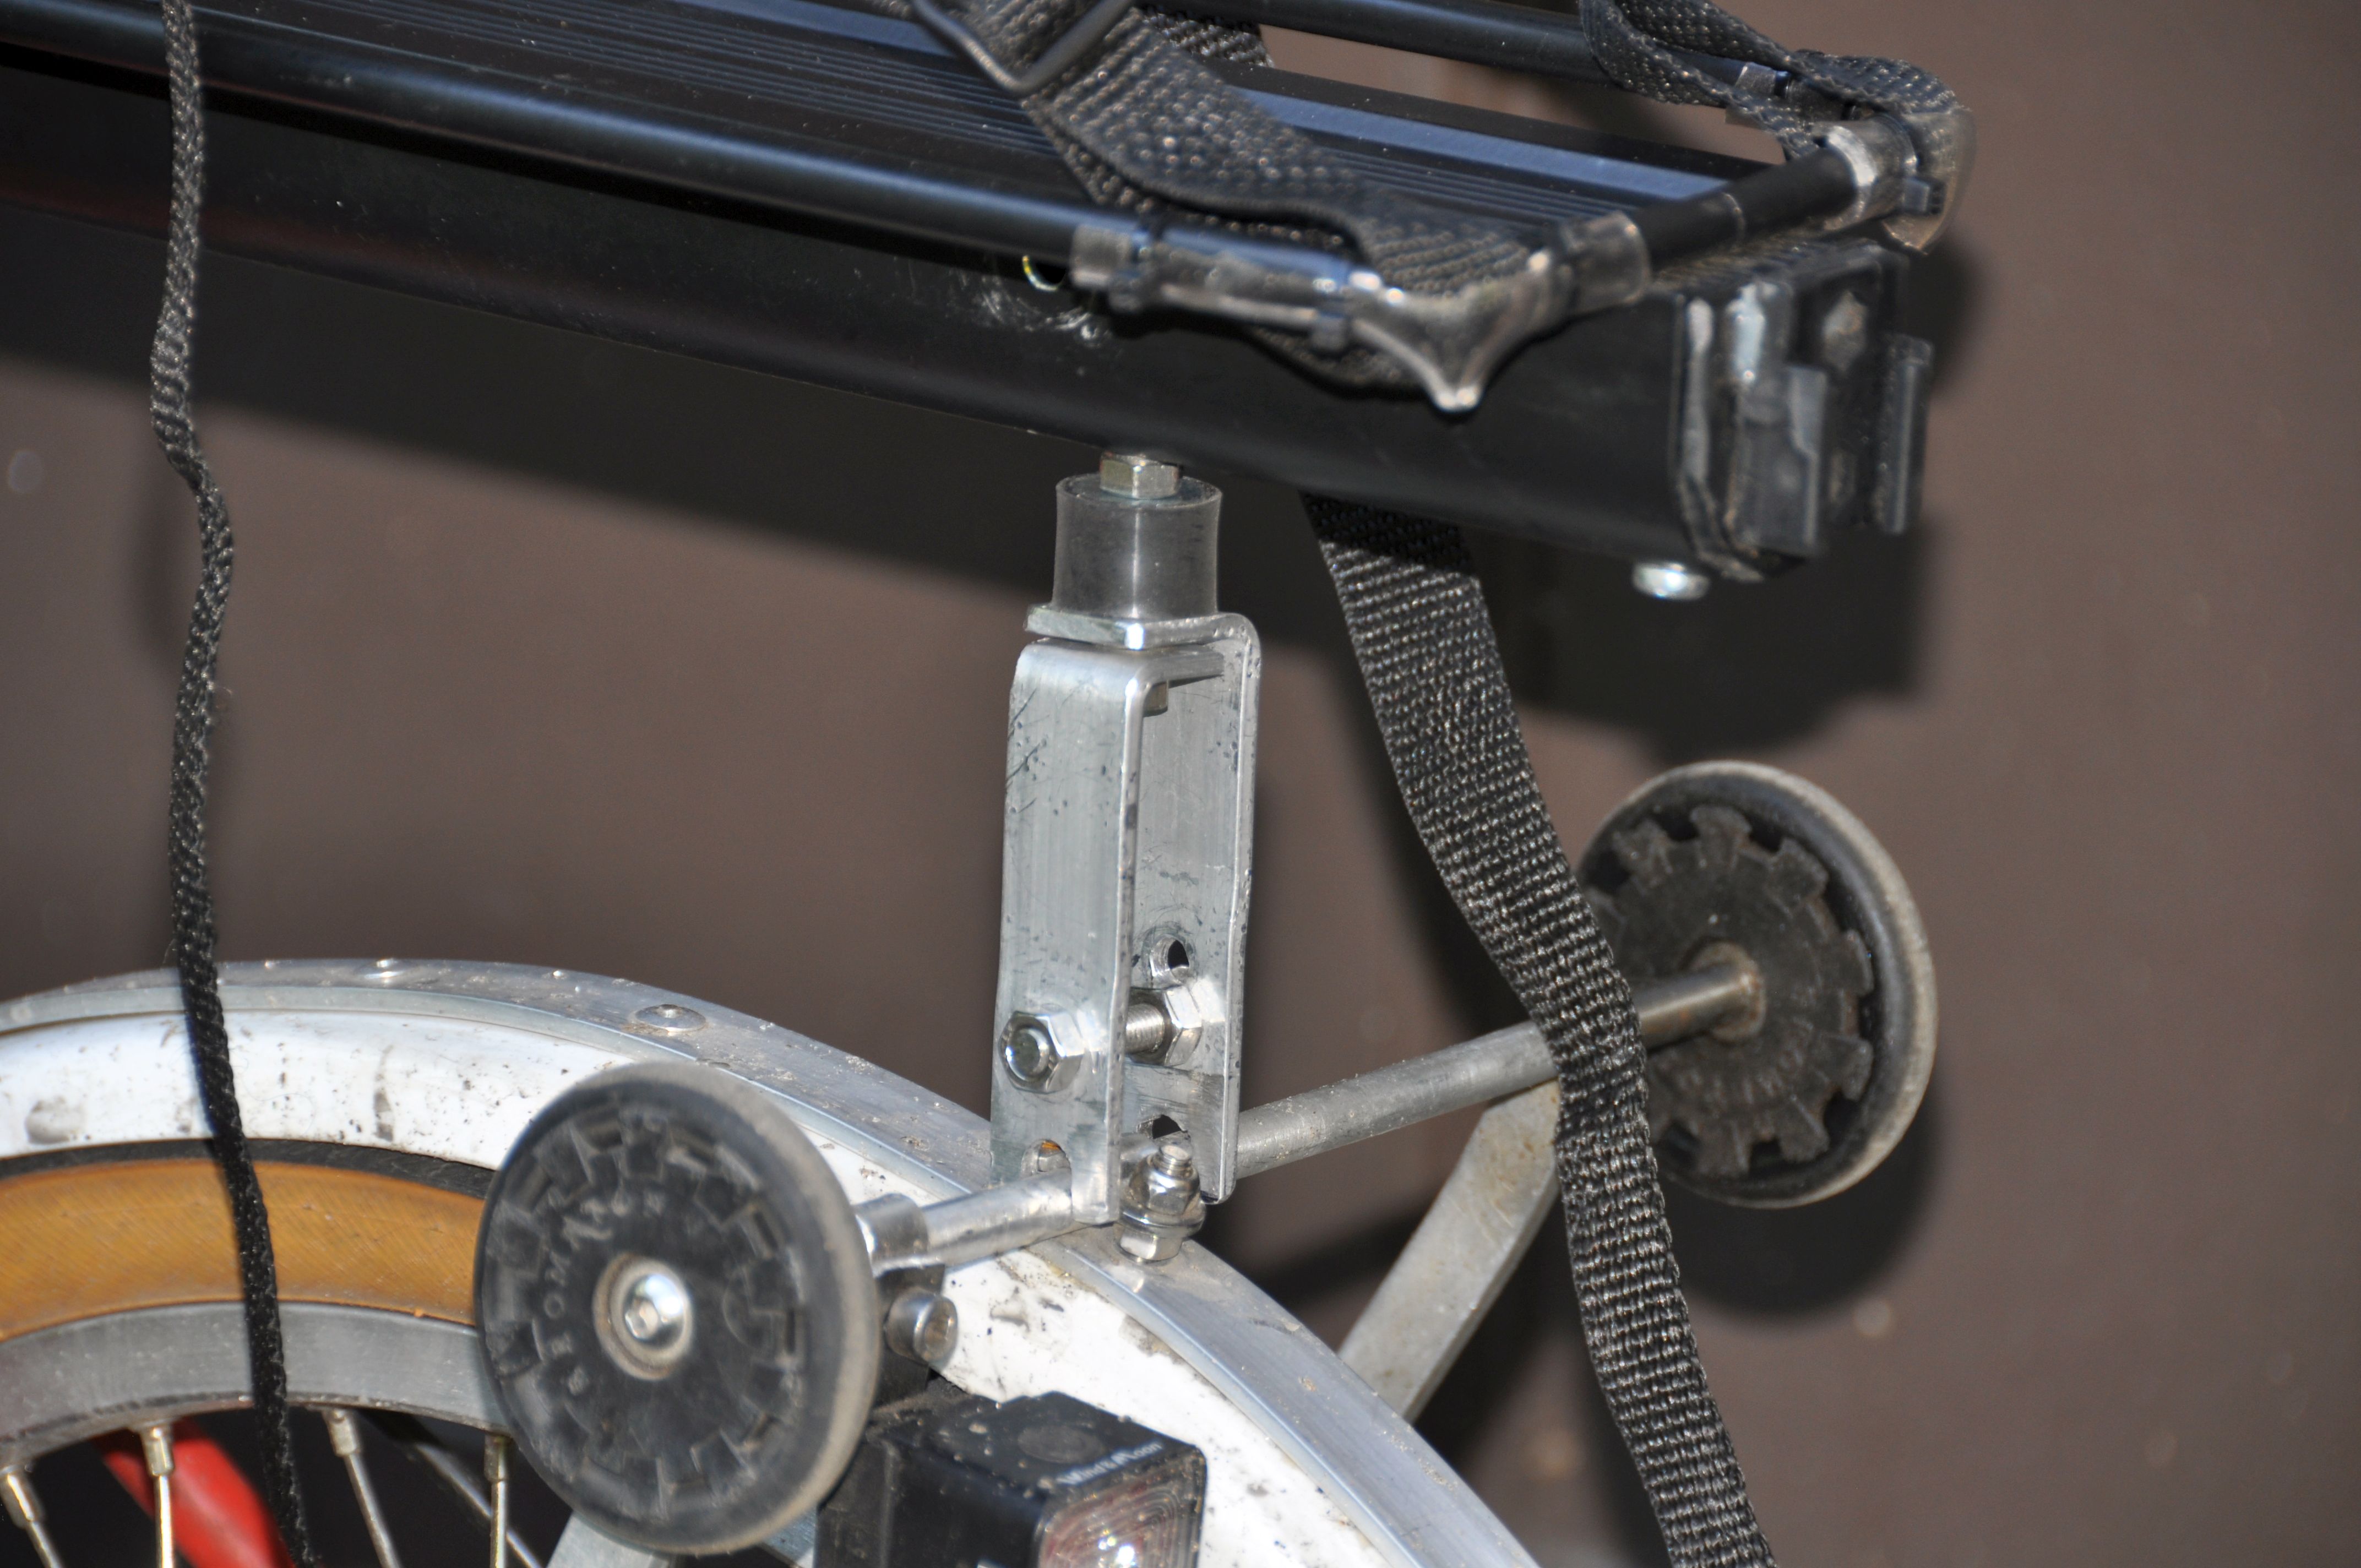
Seatpost mount for Brompton carrier block Back to top
The Brompton carrier block system is very nice, bags can simply be clicked in and out. You may want to have the same convenience for a bag at the rear of the bike. So I built a seatpost mount for the Brompton carrier block.
A good starting point is a quick release clamp on rack – available for USD 10-20. I used some older ones and don’t remember where I got them from. With a hacksaw and by drilling a few holes, you can attach the carrier block. I have two versions: a short one for mounting smaller bags close to the saddle, and a longer one for bigger bags which should be mounted low, but then they need heel clearance. It is good if the rack has a rectangular profile which can be easily bolted to the carrier block.


Carrier block for other bikes Back to top
I want to use my Brompton bags on a Bike Friday Tikit. Here is how I mounted a Brompton carrier block. I used two bottle cage clamps
https://www.amazon.com/dp/B09JBJ7M9Q
and the front part of an aluminum third party carrier block
https://www.ebay.com/itm/353876863230
for an elegant and very compact solution.

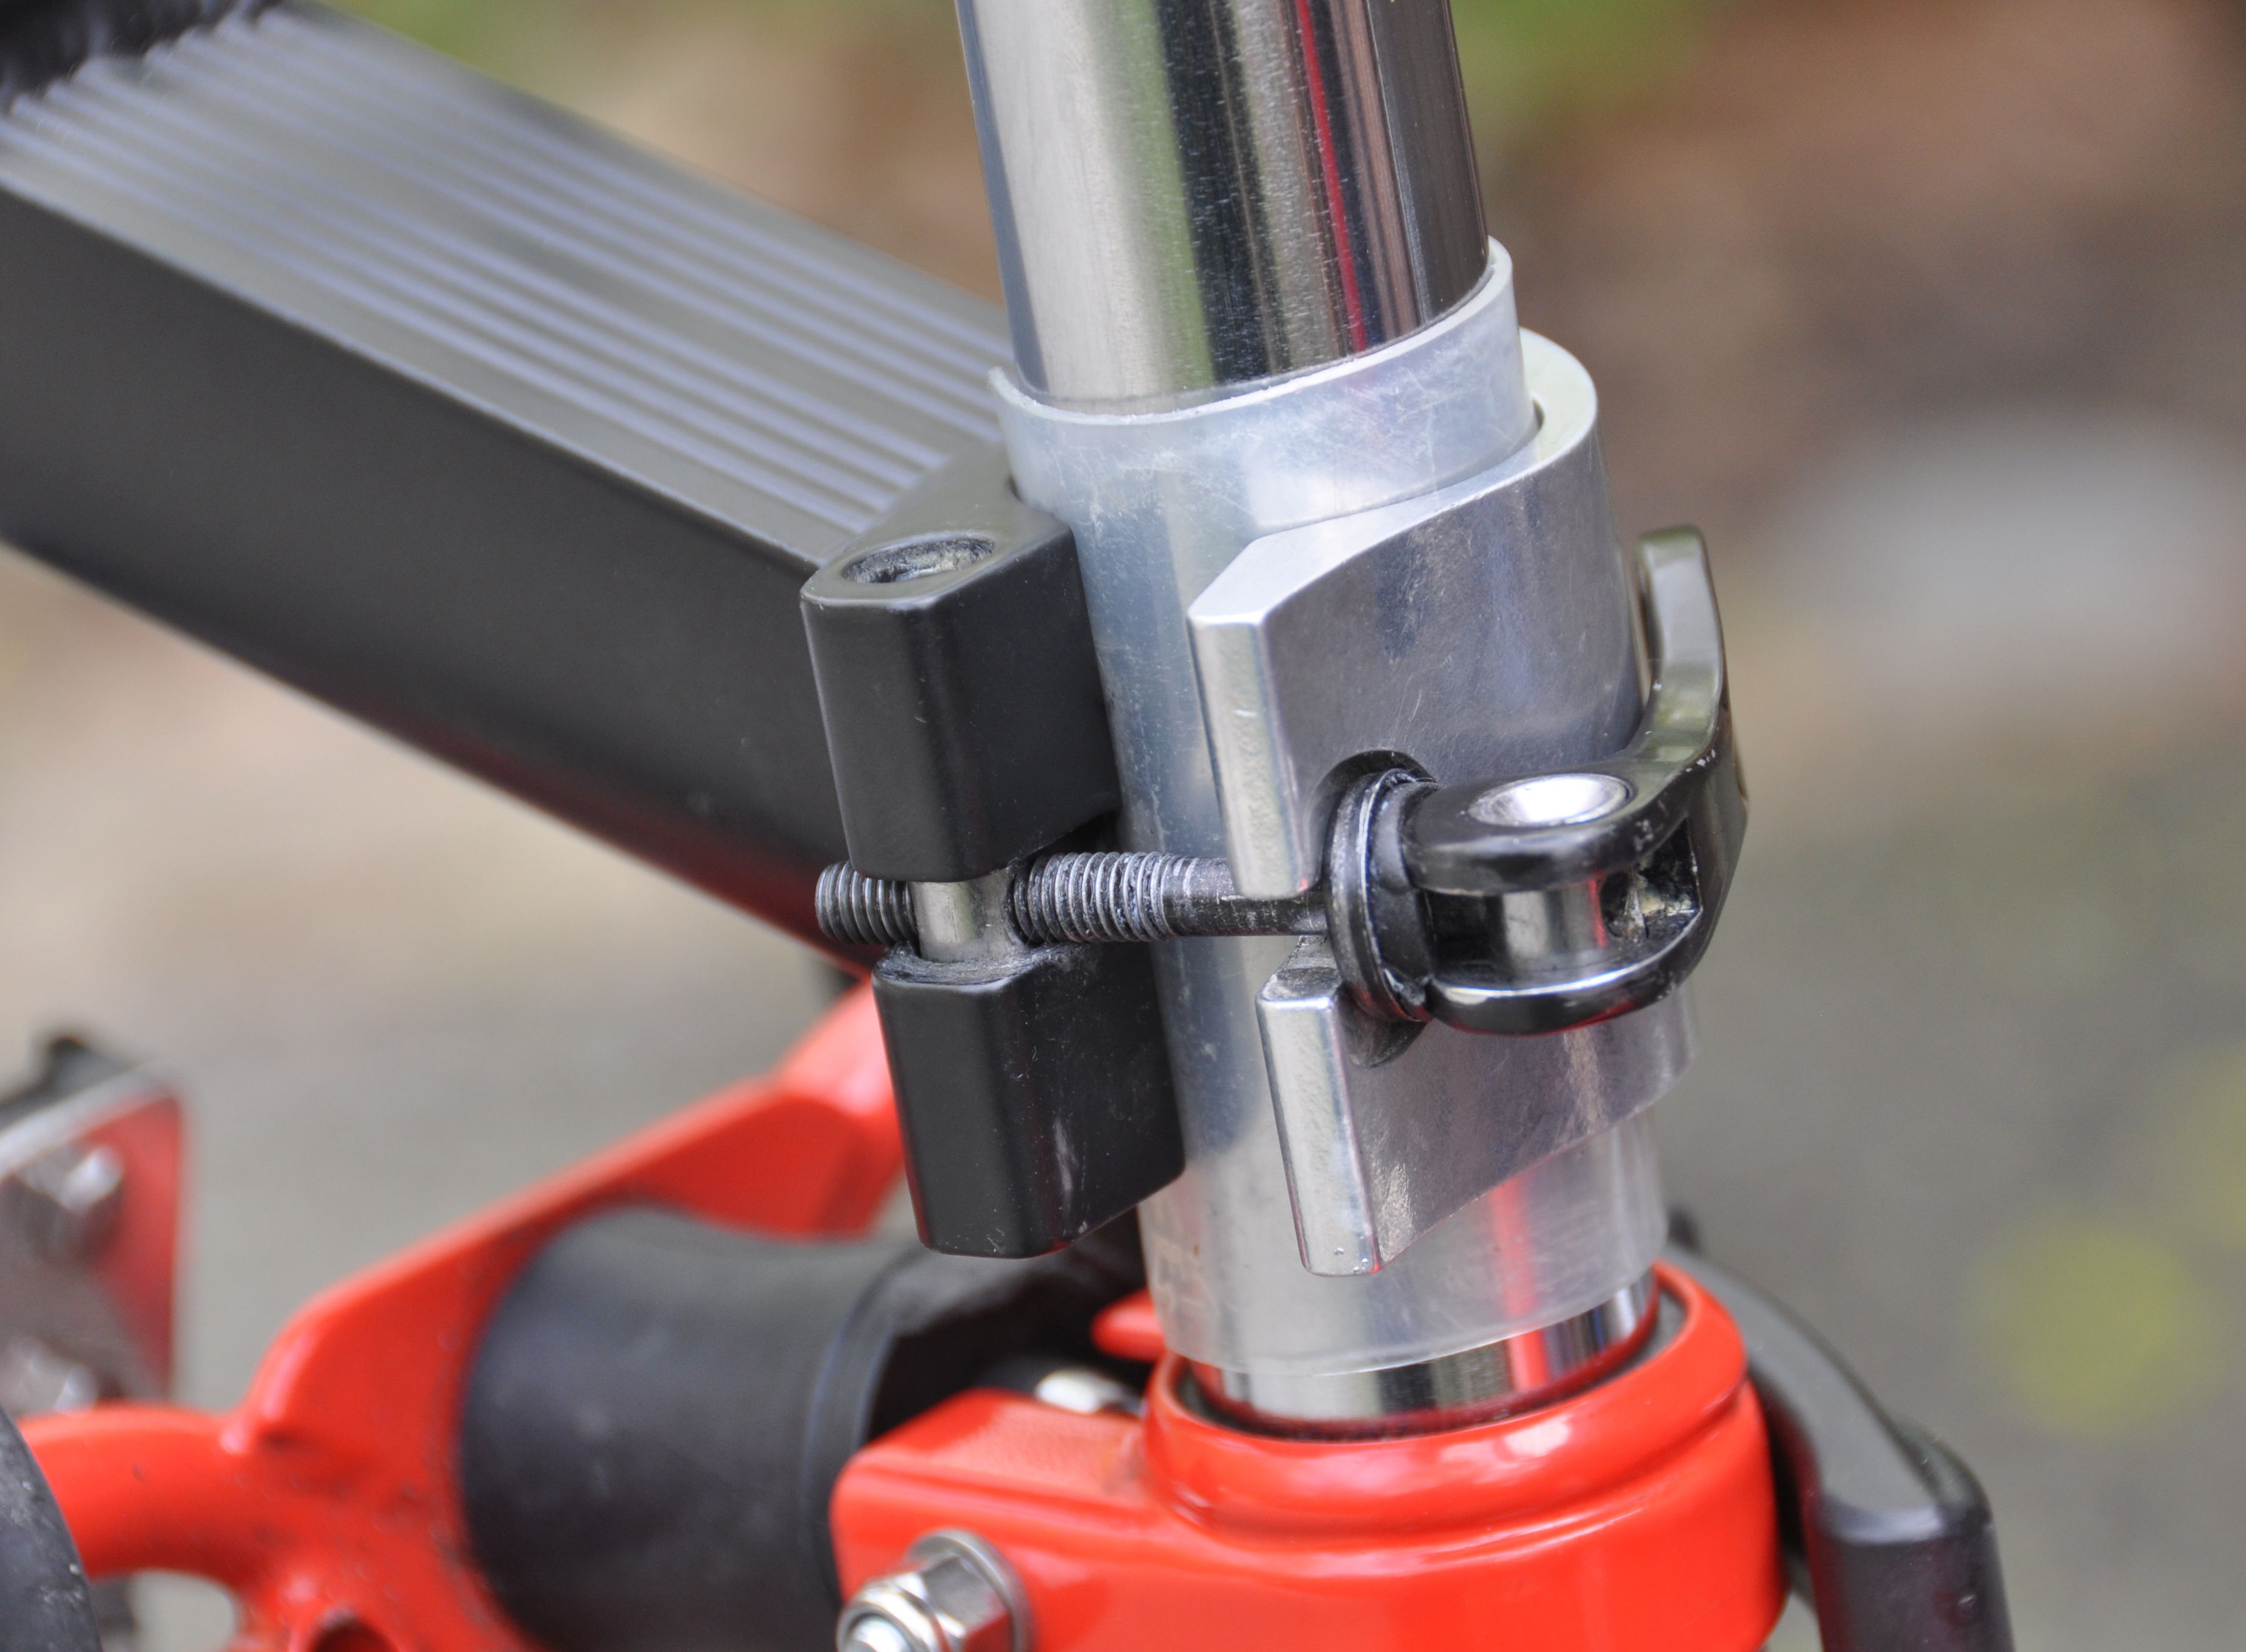
Rear rack Back to top
I used this clamp-on rack on older bikes, but it fits well on the Brompton. I modified the clamp using a seatpost clamp.

Update:
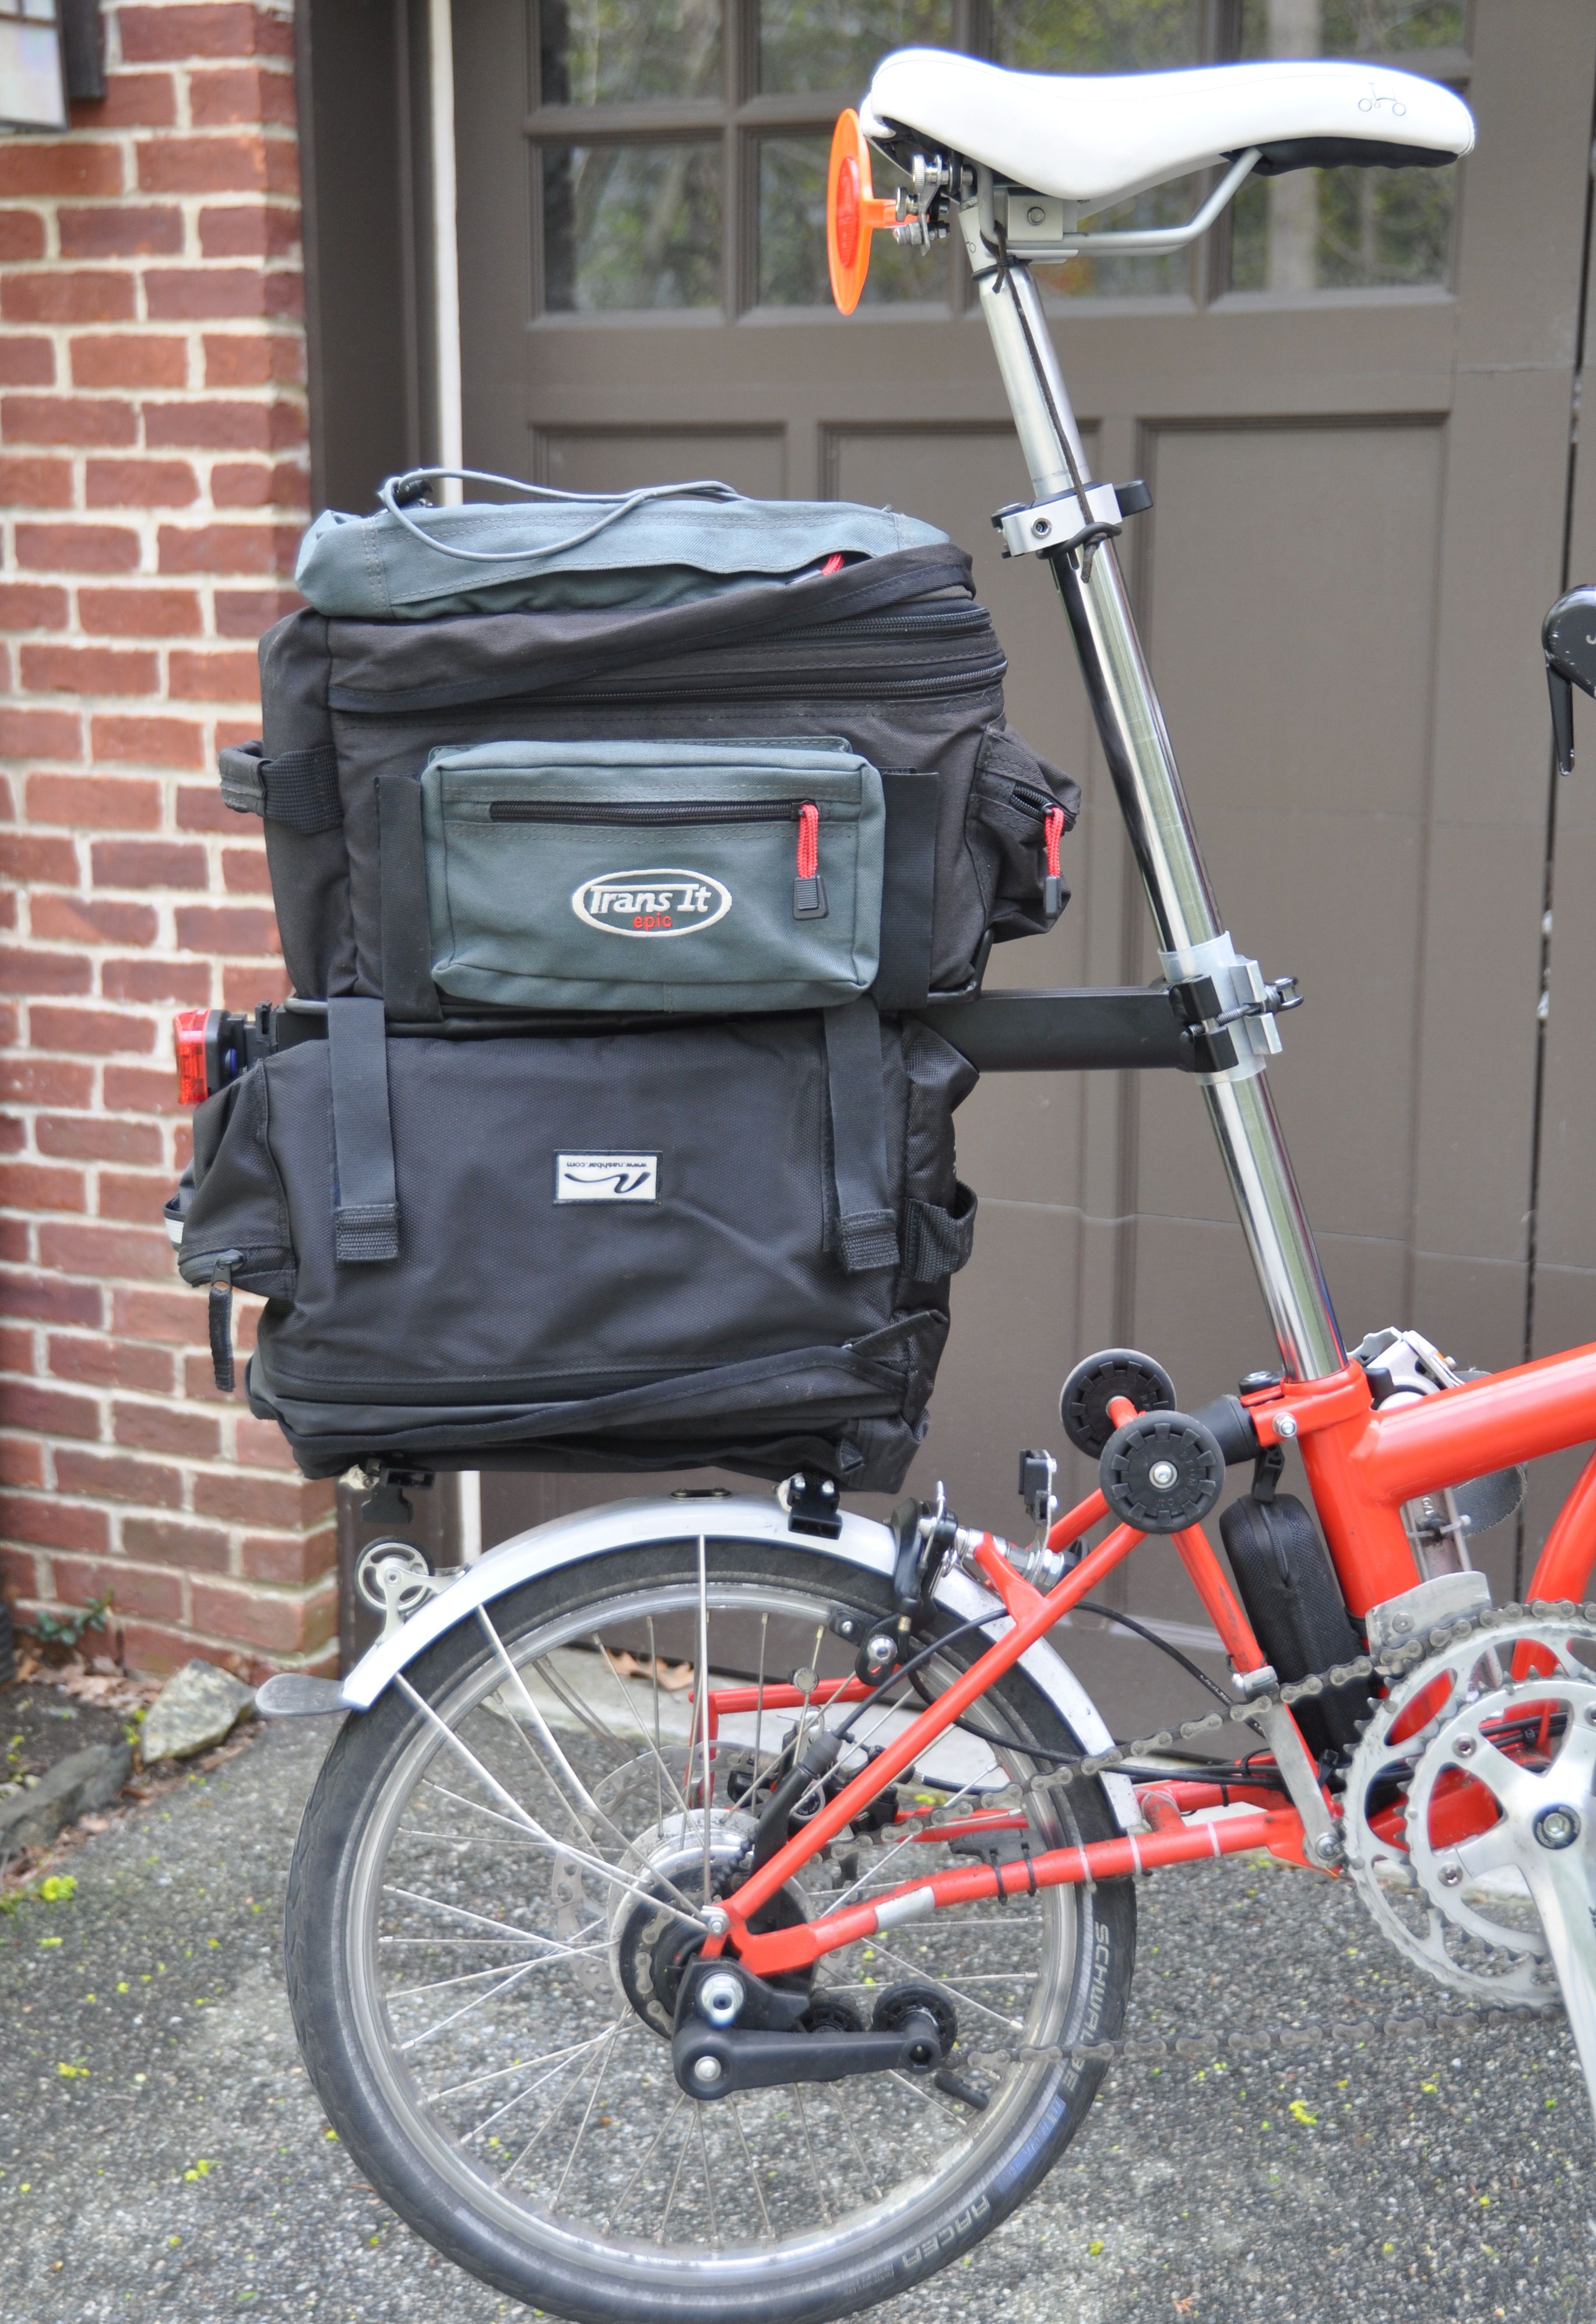
Rear rack solution
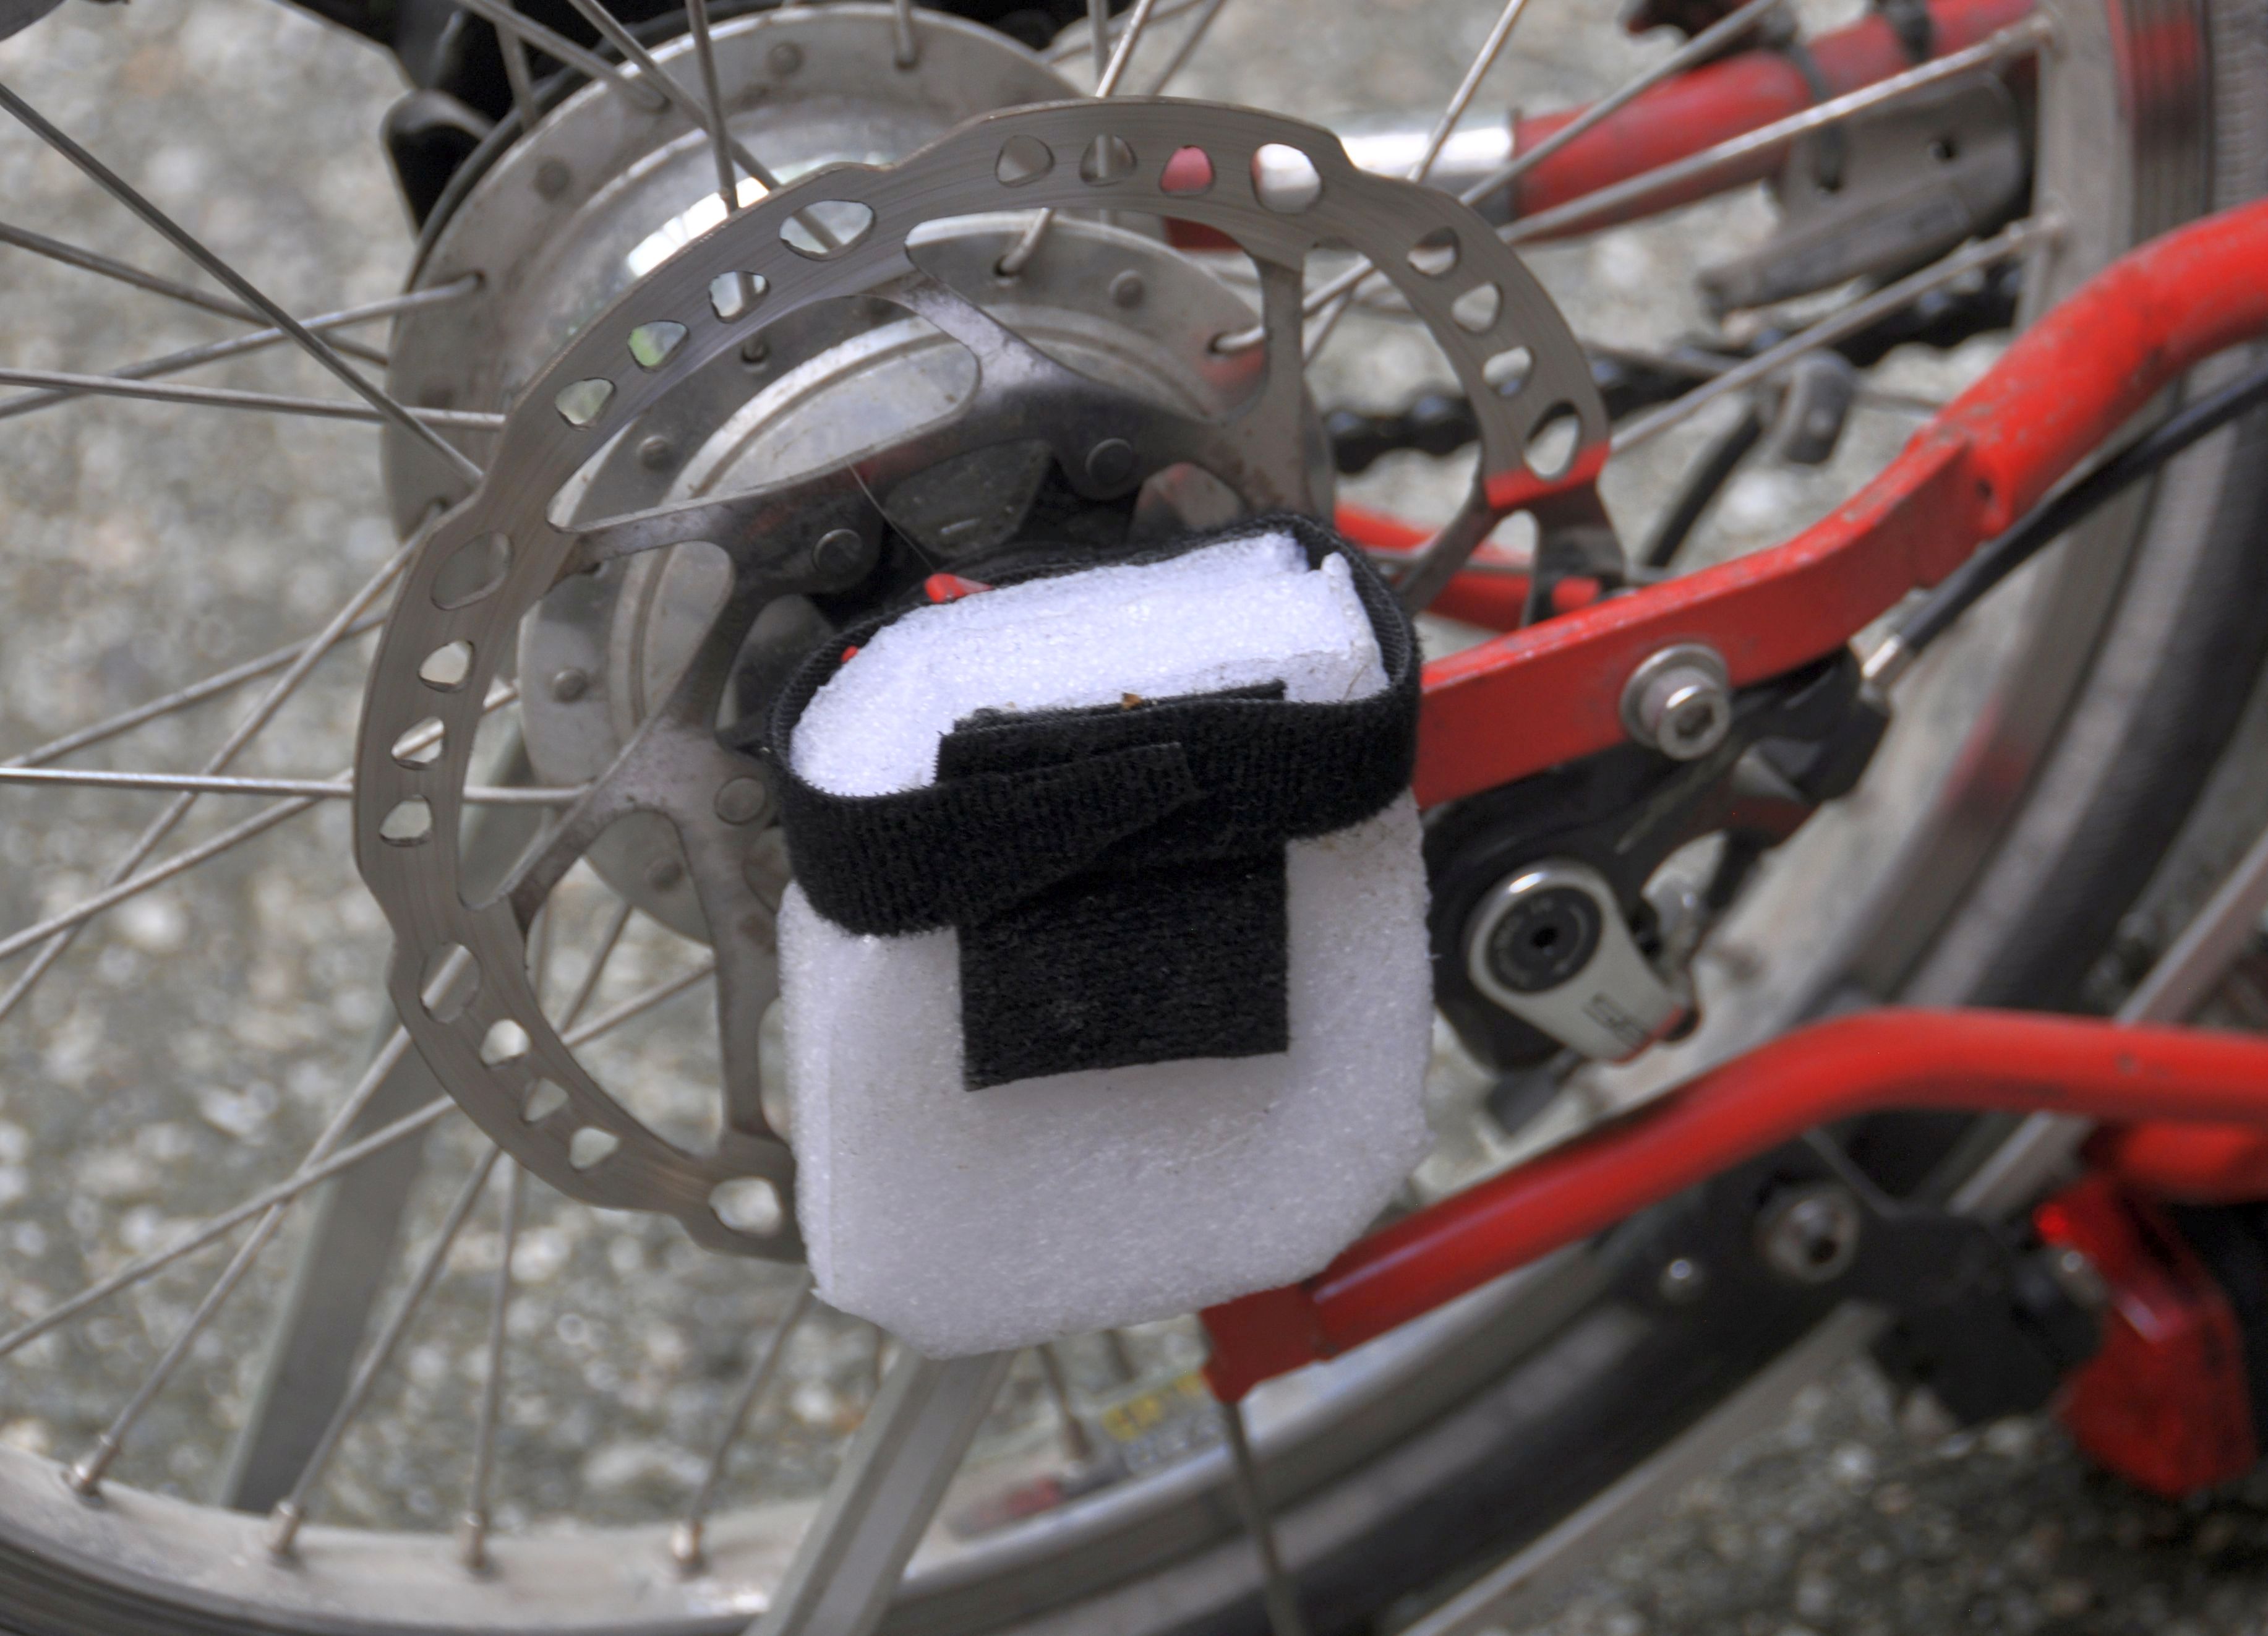
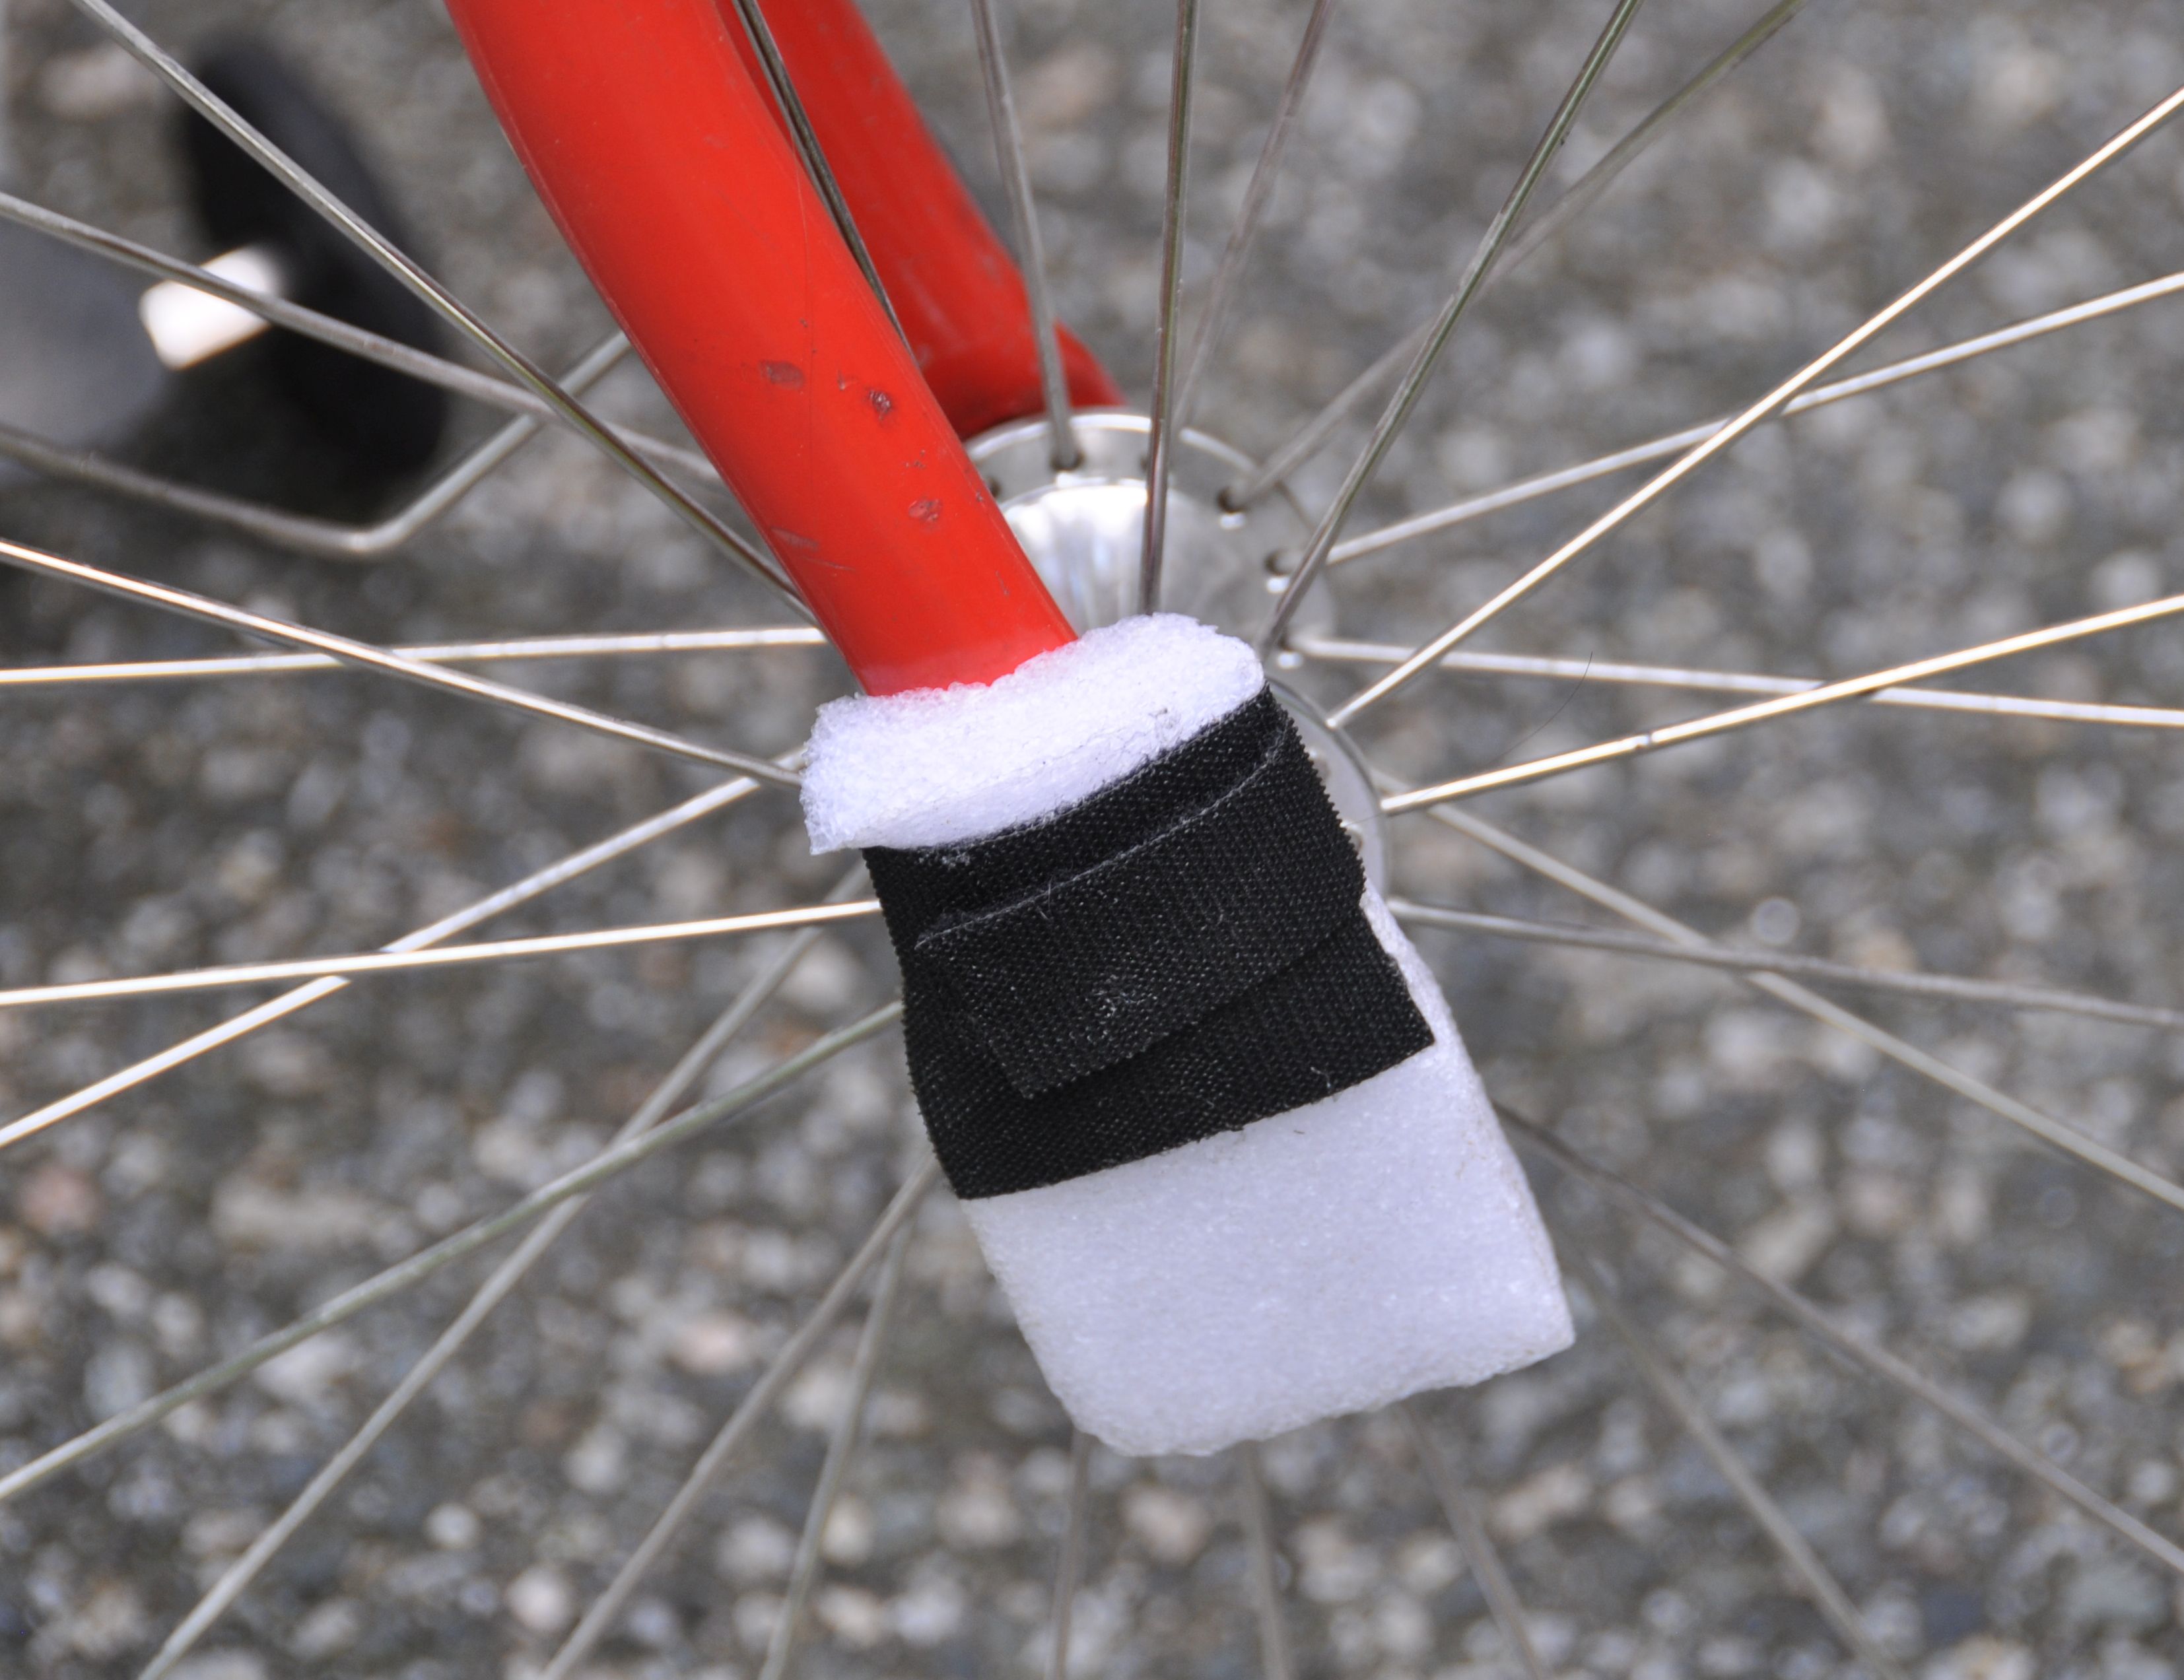
On a recent trip I had to carry camping gear and used a seatpost rack. Everything worked well. At first, the luggage on the rack easily moved sideways, but I solved this by adding a foam block strapped to the seatpost. I had to tighten the quick releases on the seatpost and the rack quite tightly to avoid slippage or rotation.
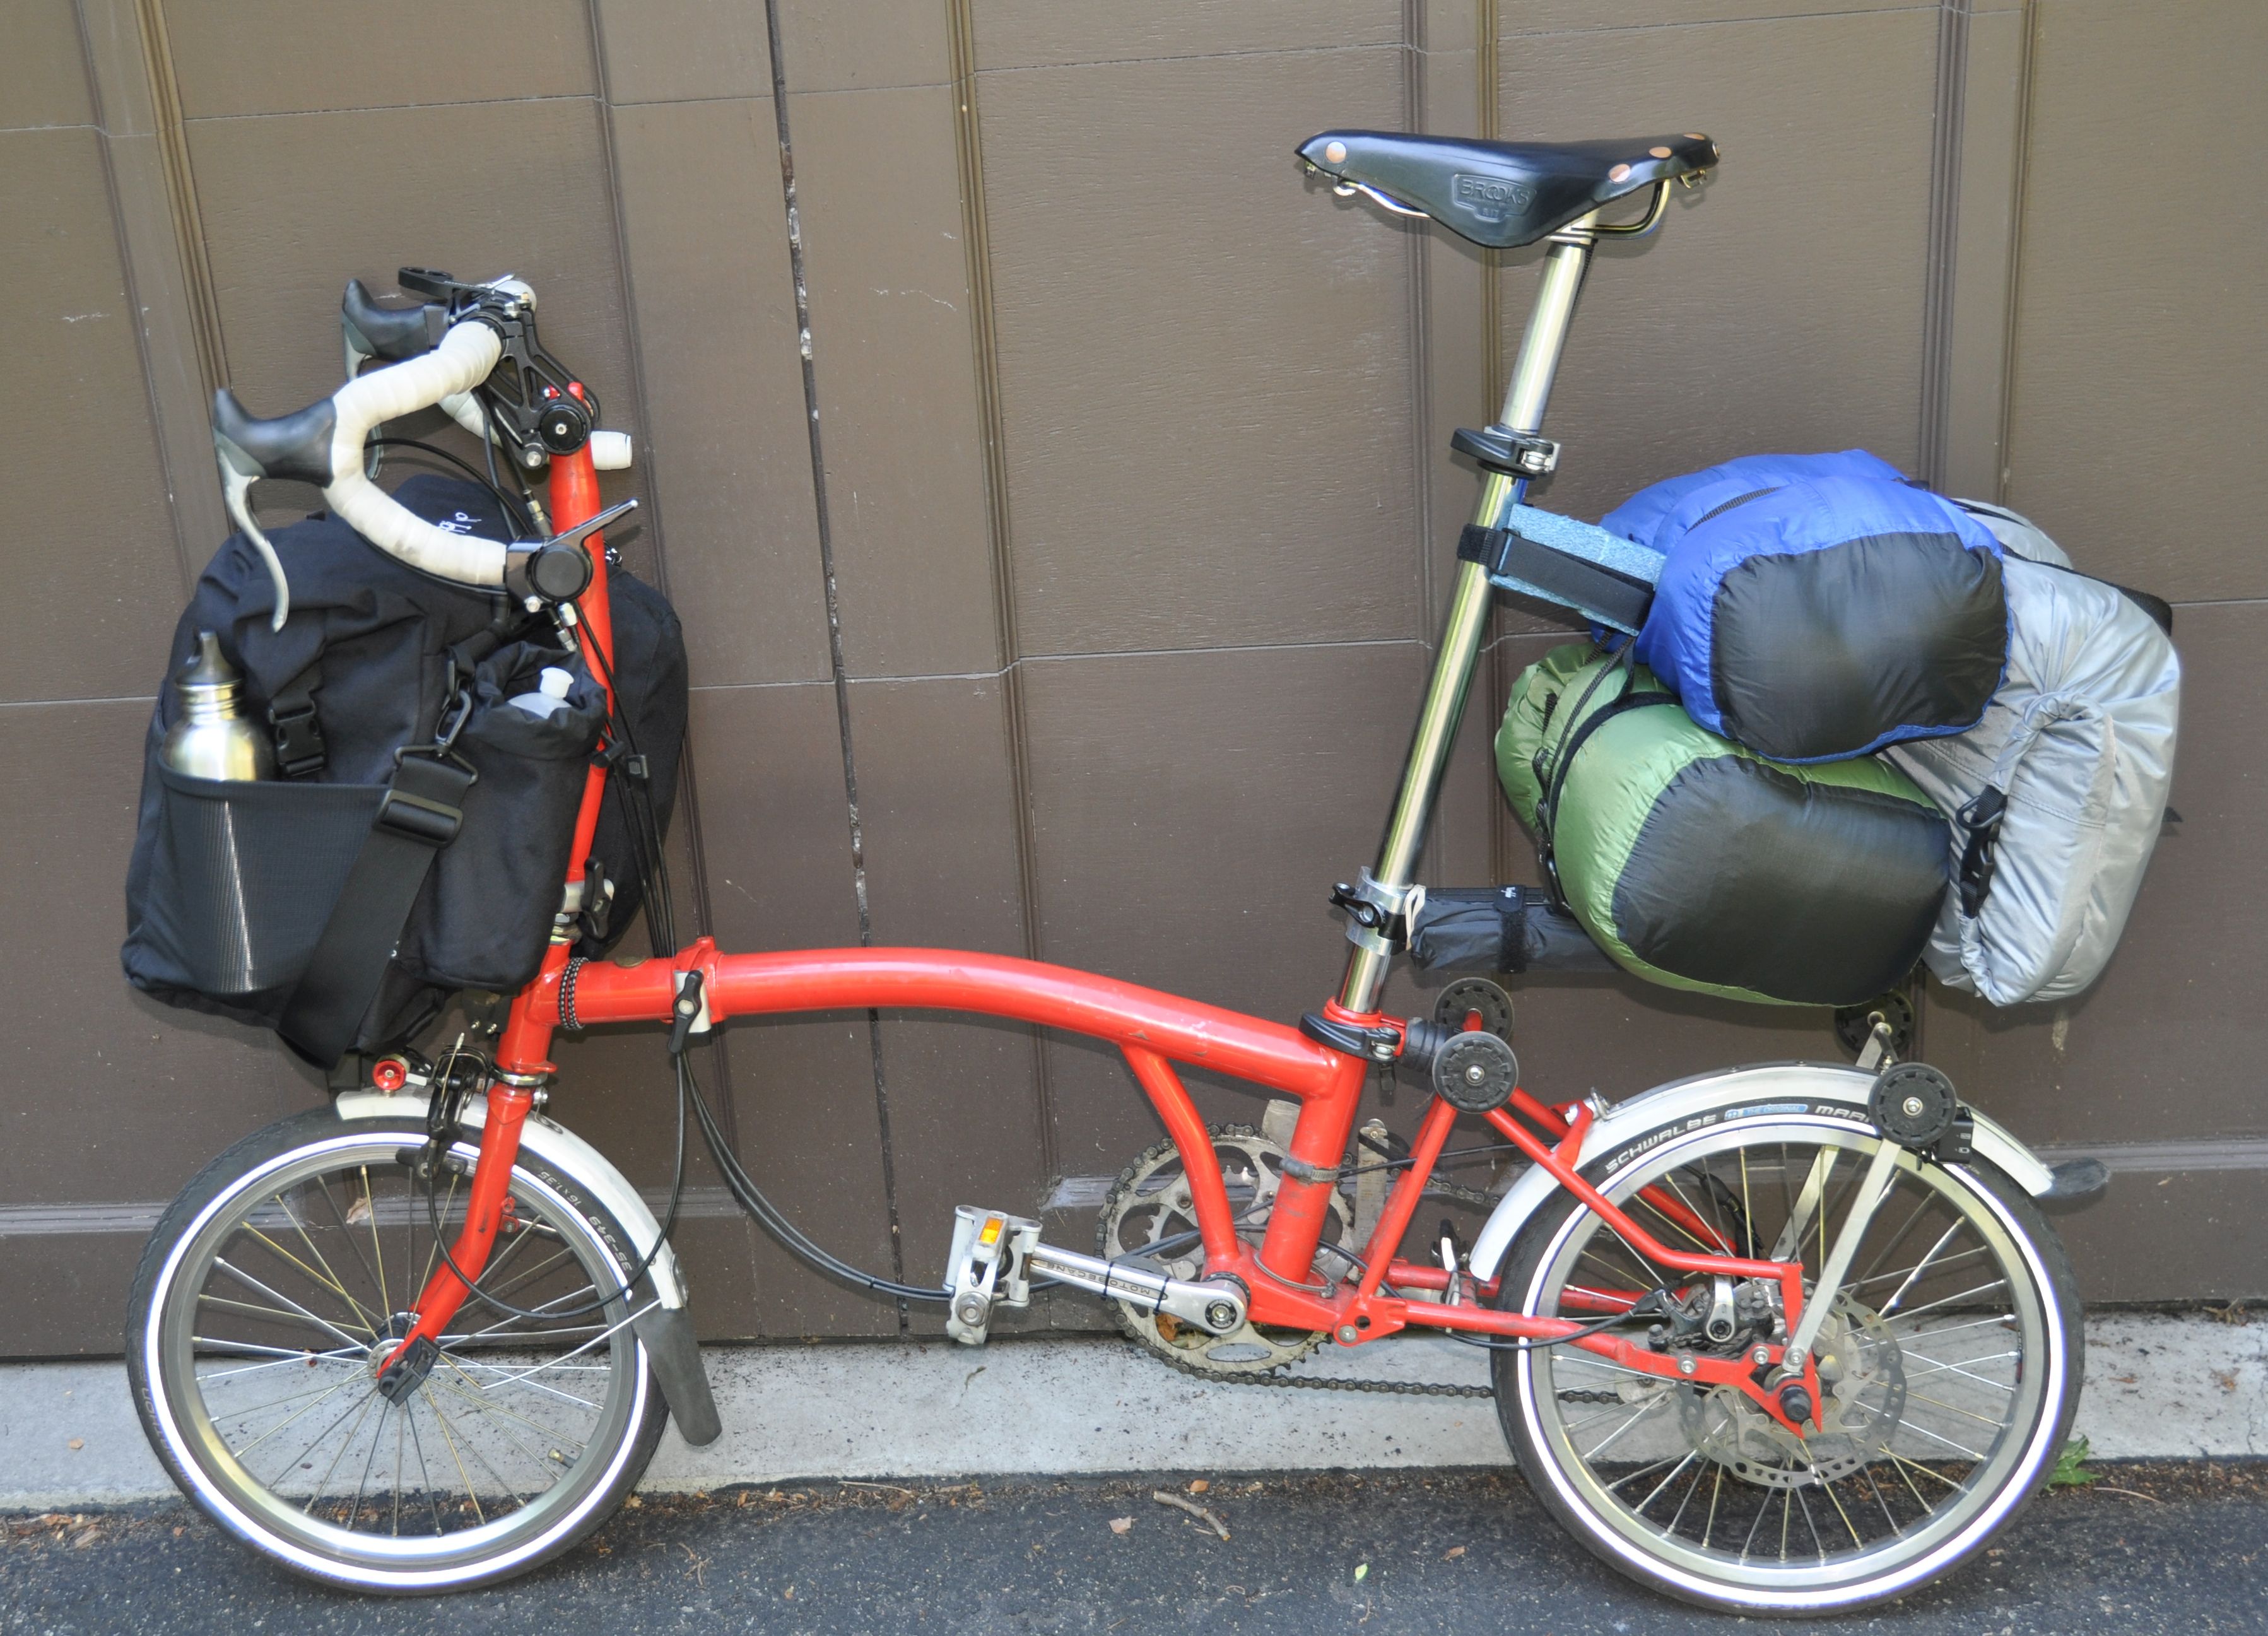
After the trip, I improved the setup: I added a brace for the seatpost rack which pushes on the fender stays. This supports some of the weight and provides lateral stability. Using a Brompton carrier block clamped to the seatpost, I added a point of support for the luggage which can be adjusted in height.
Carrying Bags for the Brompton Back to top
Dimpa bag
The IKEA Dimpa bag is very inexpensive and fits the Brompton perfectly. It is light and thin. When it is rolled up, it fits into a bottle cage or a bike shirt pocket. I use it when I travel and want to keep the Brompton in a hotel room.

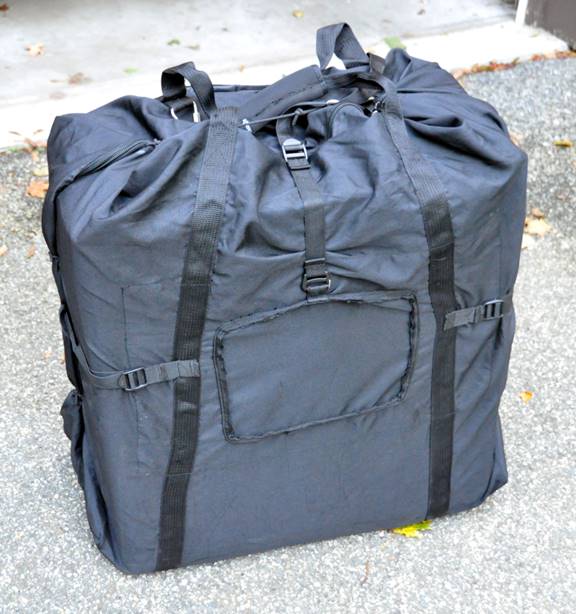
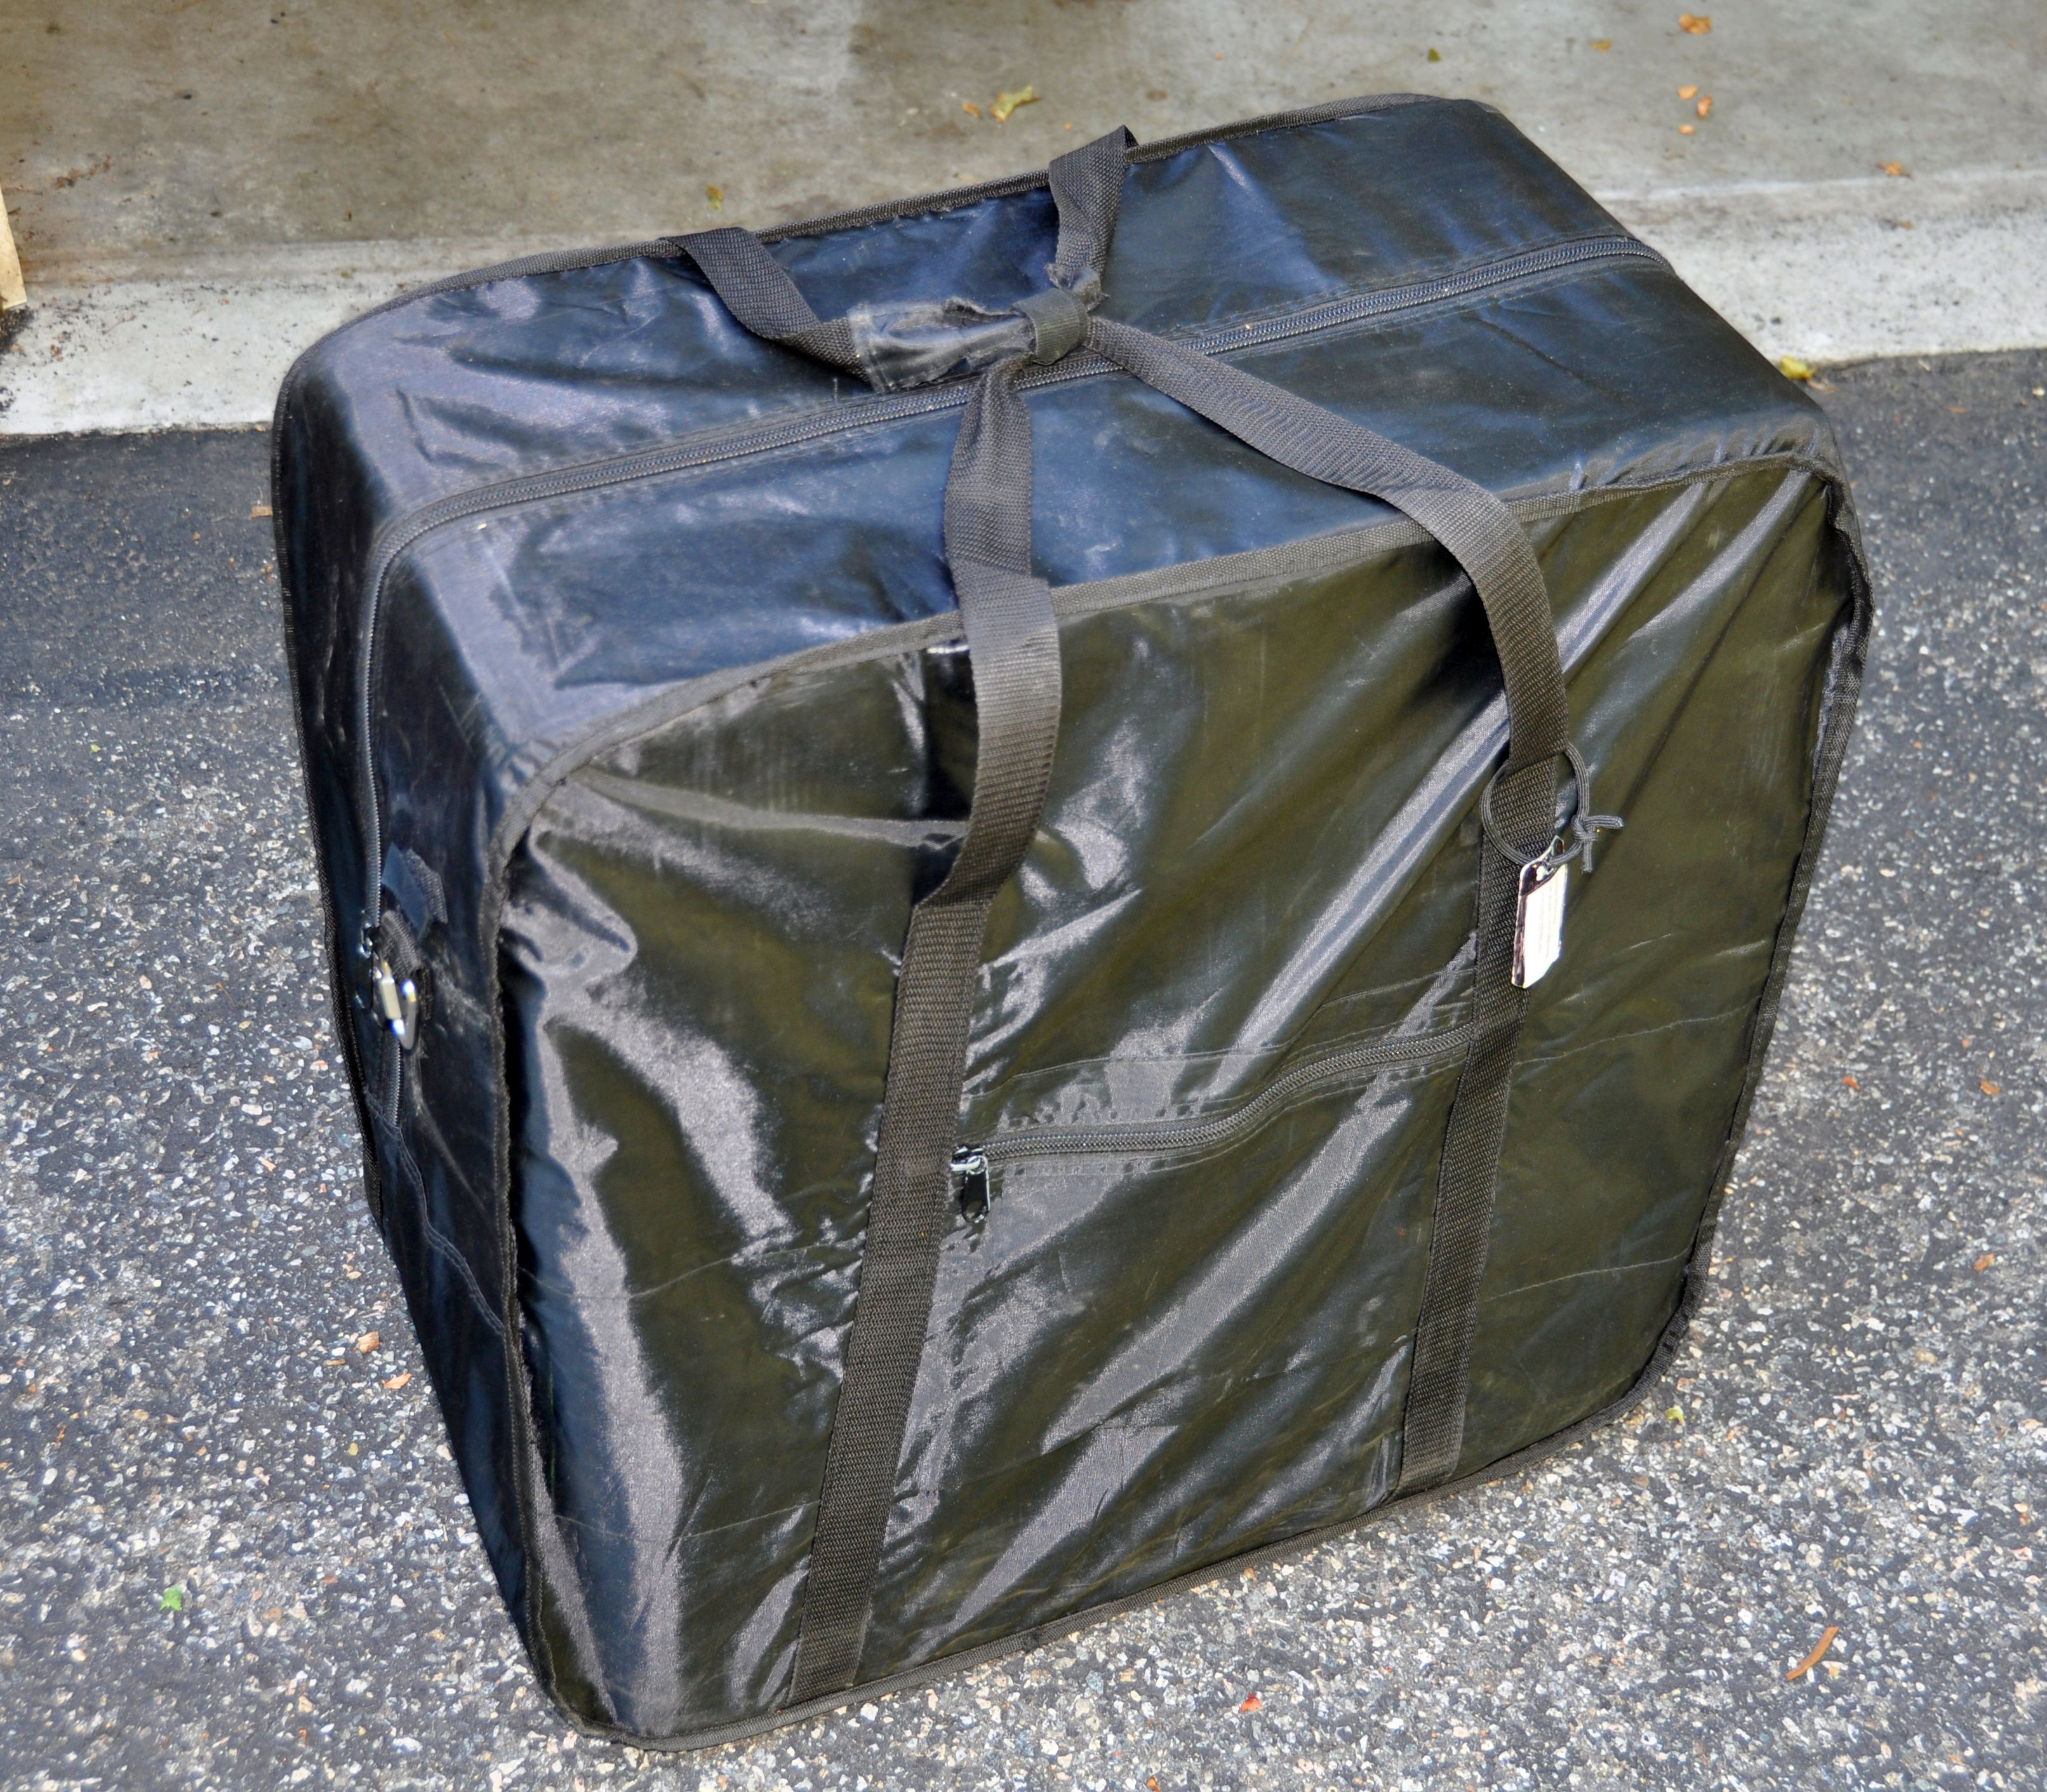
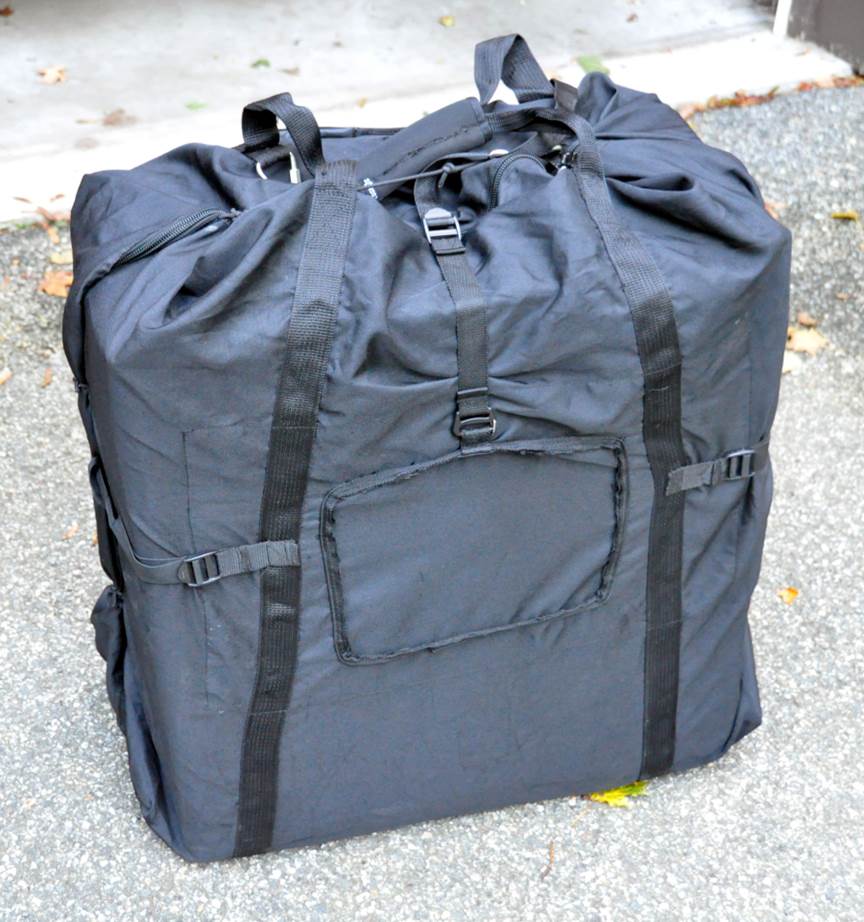
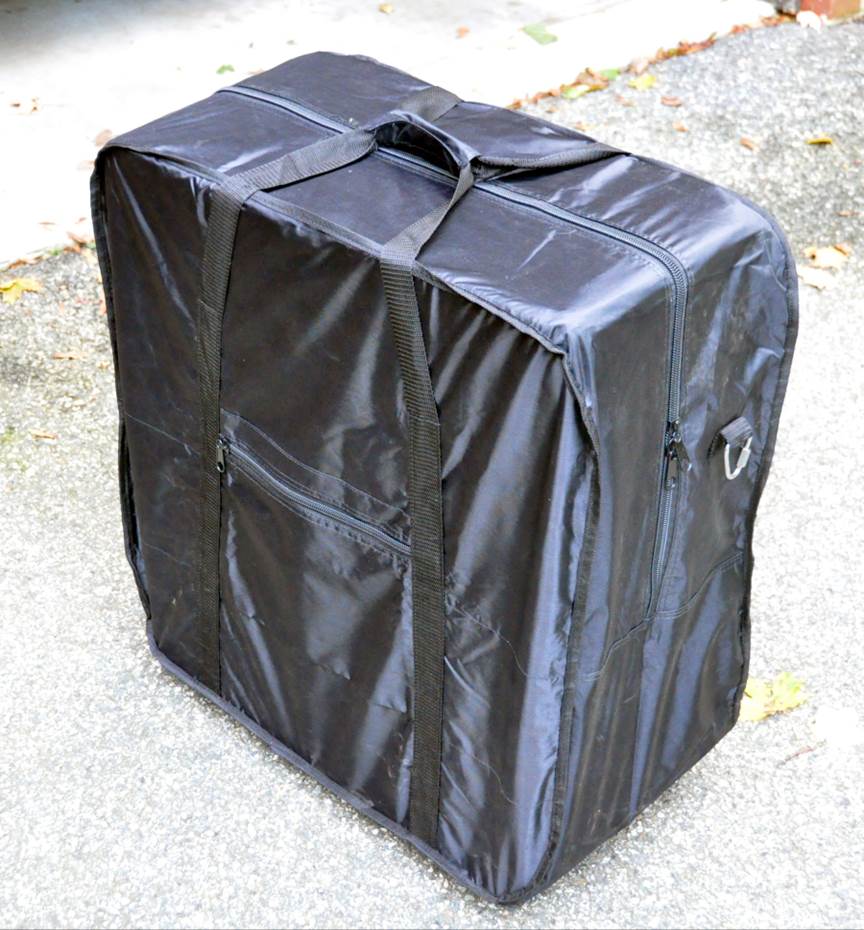
Bike Travel Carry Bag
The DIMPA bag is light and thin, and has to be handled carefully to make it last. Also, it has only carrying handles and no shoulder strap. That’s why I use a sturdier bag when the extra weight does not matter, e.g. when I transport the Brompton in a car and want to protect the bike and the car.
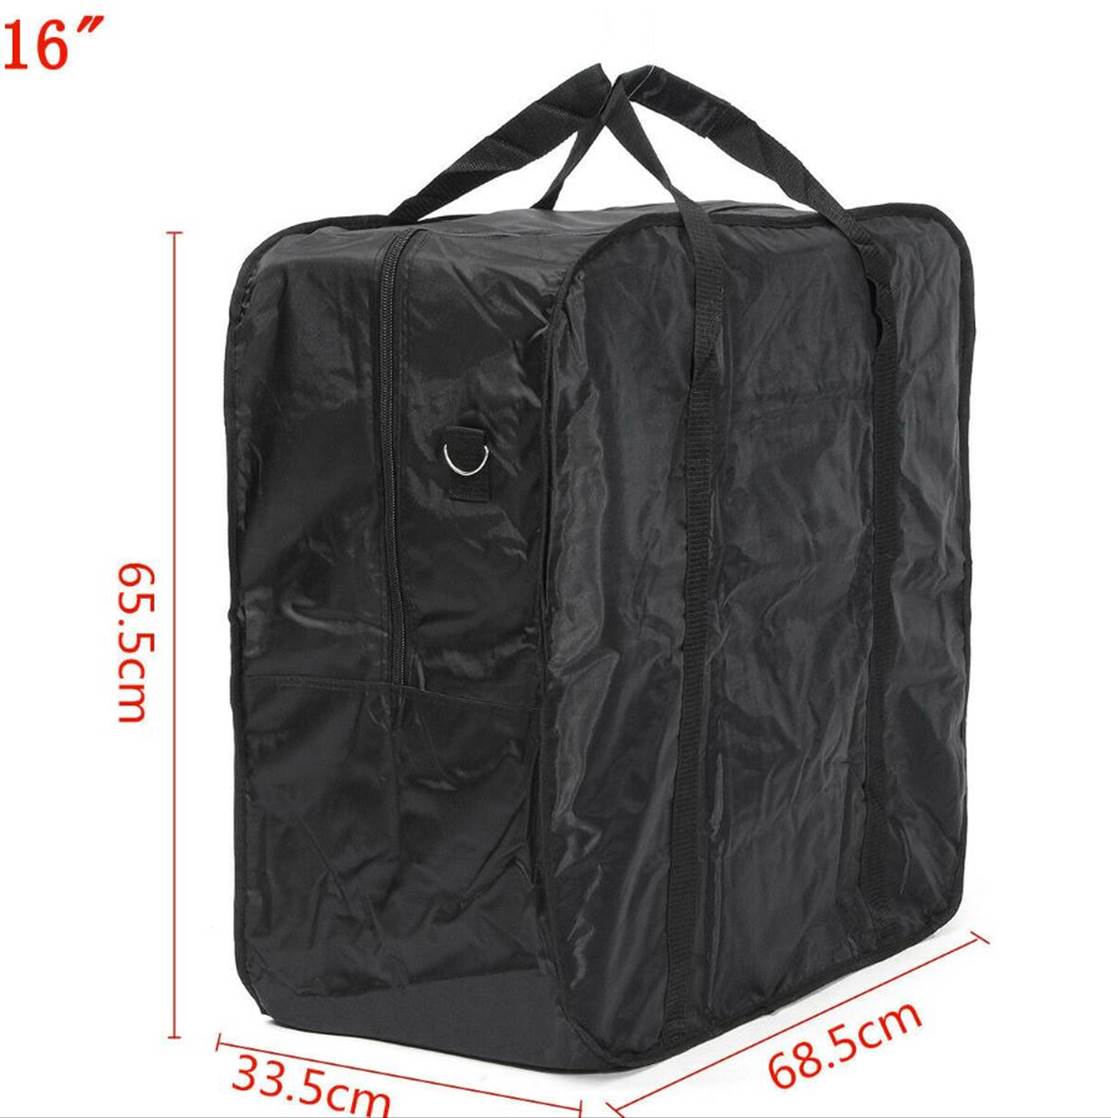
There are many inexpensive big carrying bags for folding bikes, but most of them are “one size fits all” for bikes from 14 to 20 inches. This means they are too large for the Brompton. Special “Brompton Carrying Bags” tend to be much more expensive, e.g. Radical Design Brompton Transport Bag from Perennial Cycle ($ 100), BW bag ($ 60-70, bikebag.com), Carradice bag ($ 100, Perennial Cycle).
I found a reasonable bag for $ 20. It comes in a 14-inch version and is sturdy:
https://www.ebay.com/itm/113685322828
However, the shoulder strap is too weak, and also the D ring attachment. I replaced both. The D ring was replaced by an M5 Delta Quick Link, https://amazon.com/gp/product/B07QDD96DX
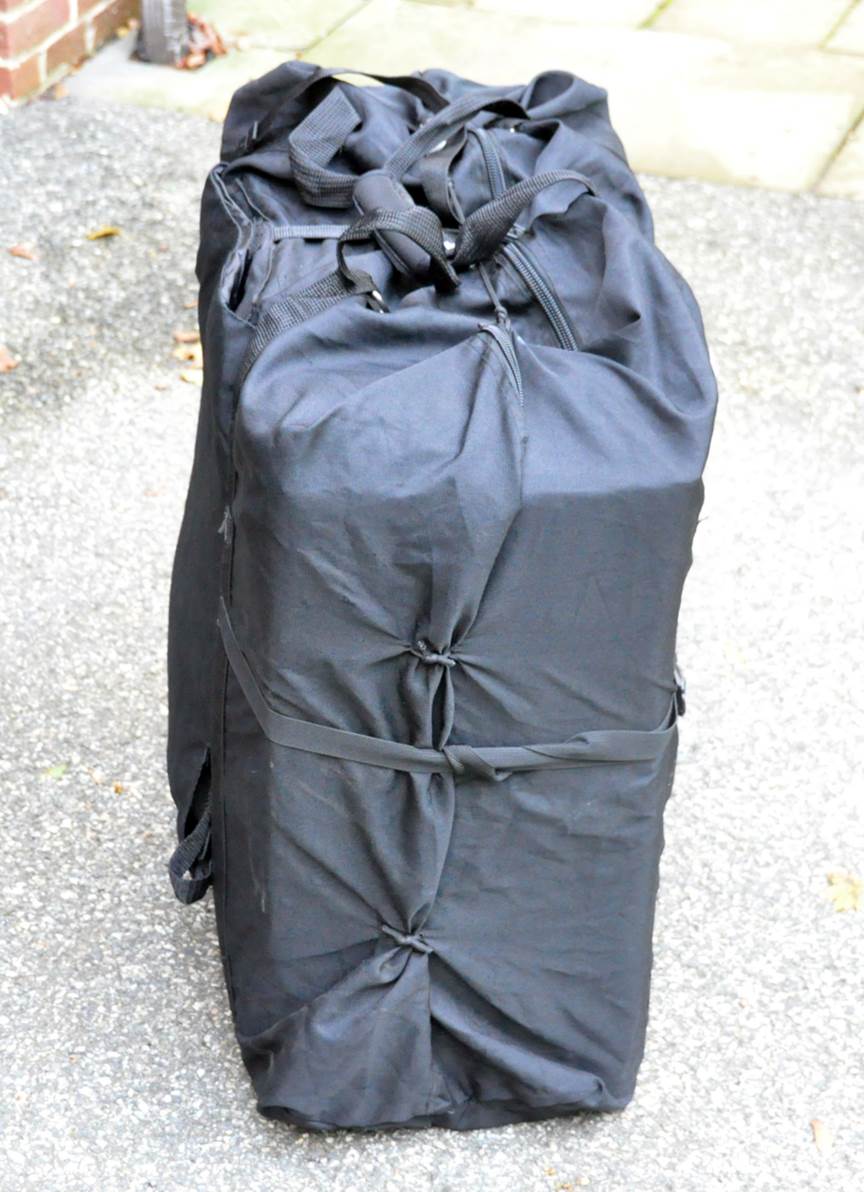
Here is a comparison between this bag and the DIMPA bag, when rolled up:
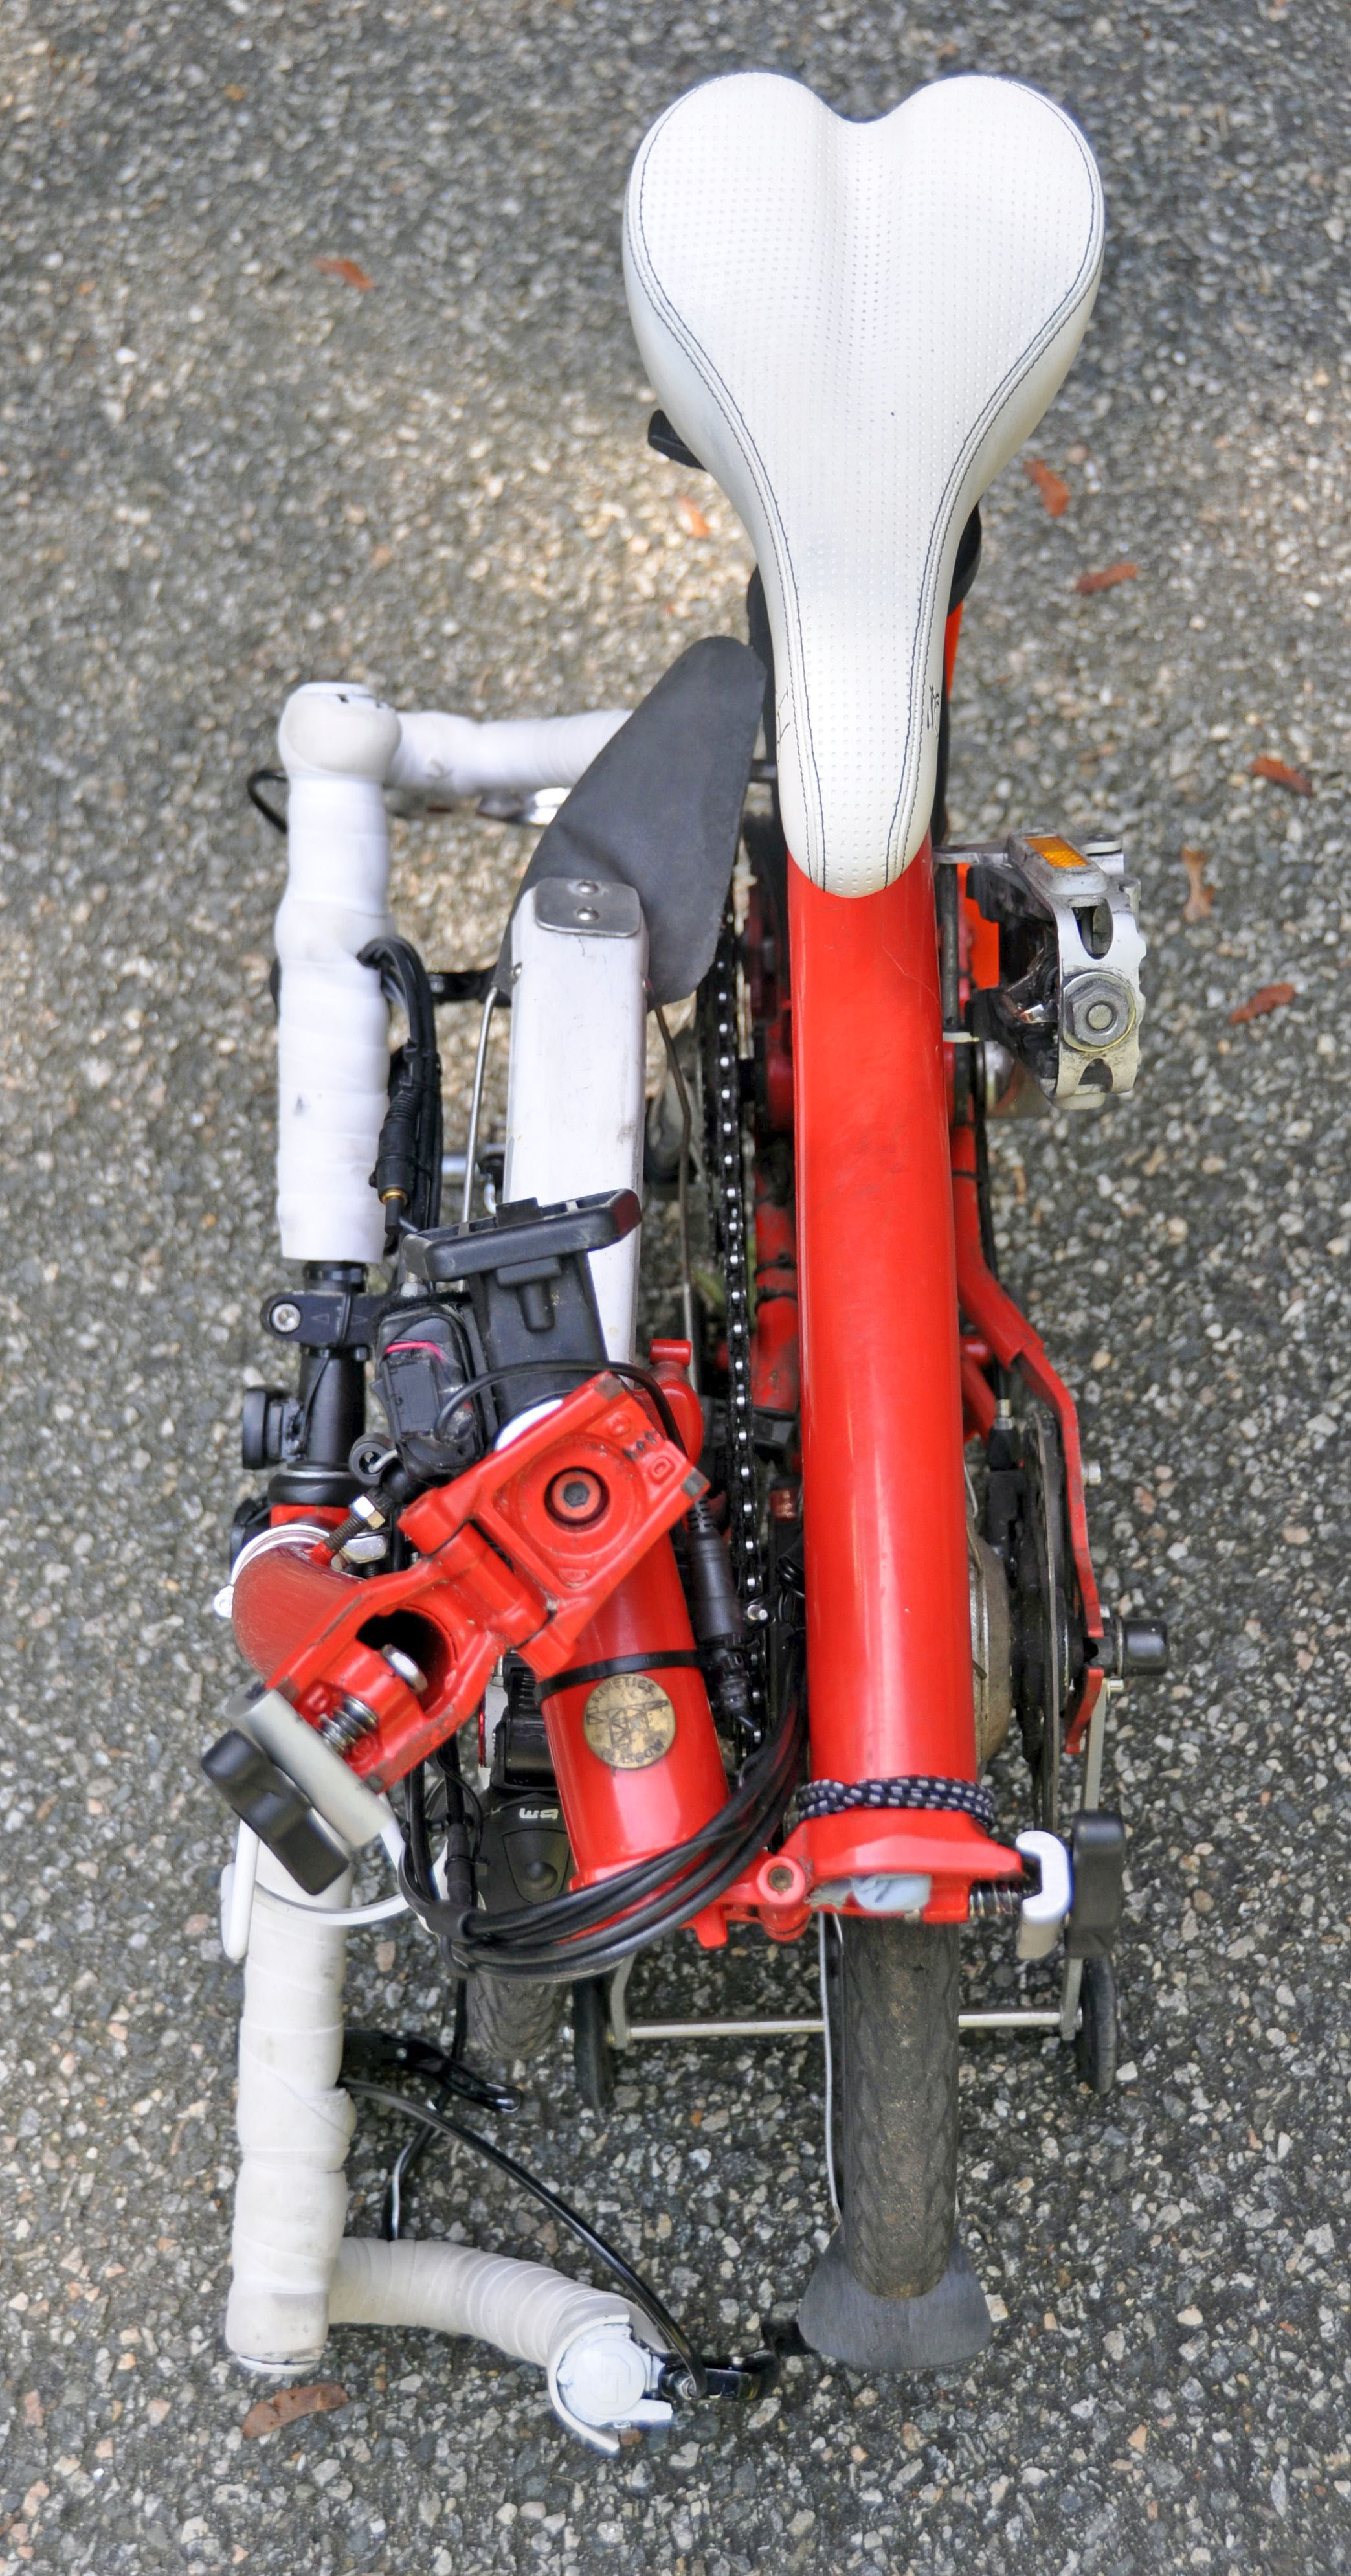
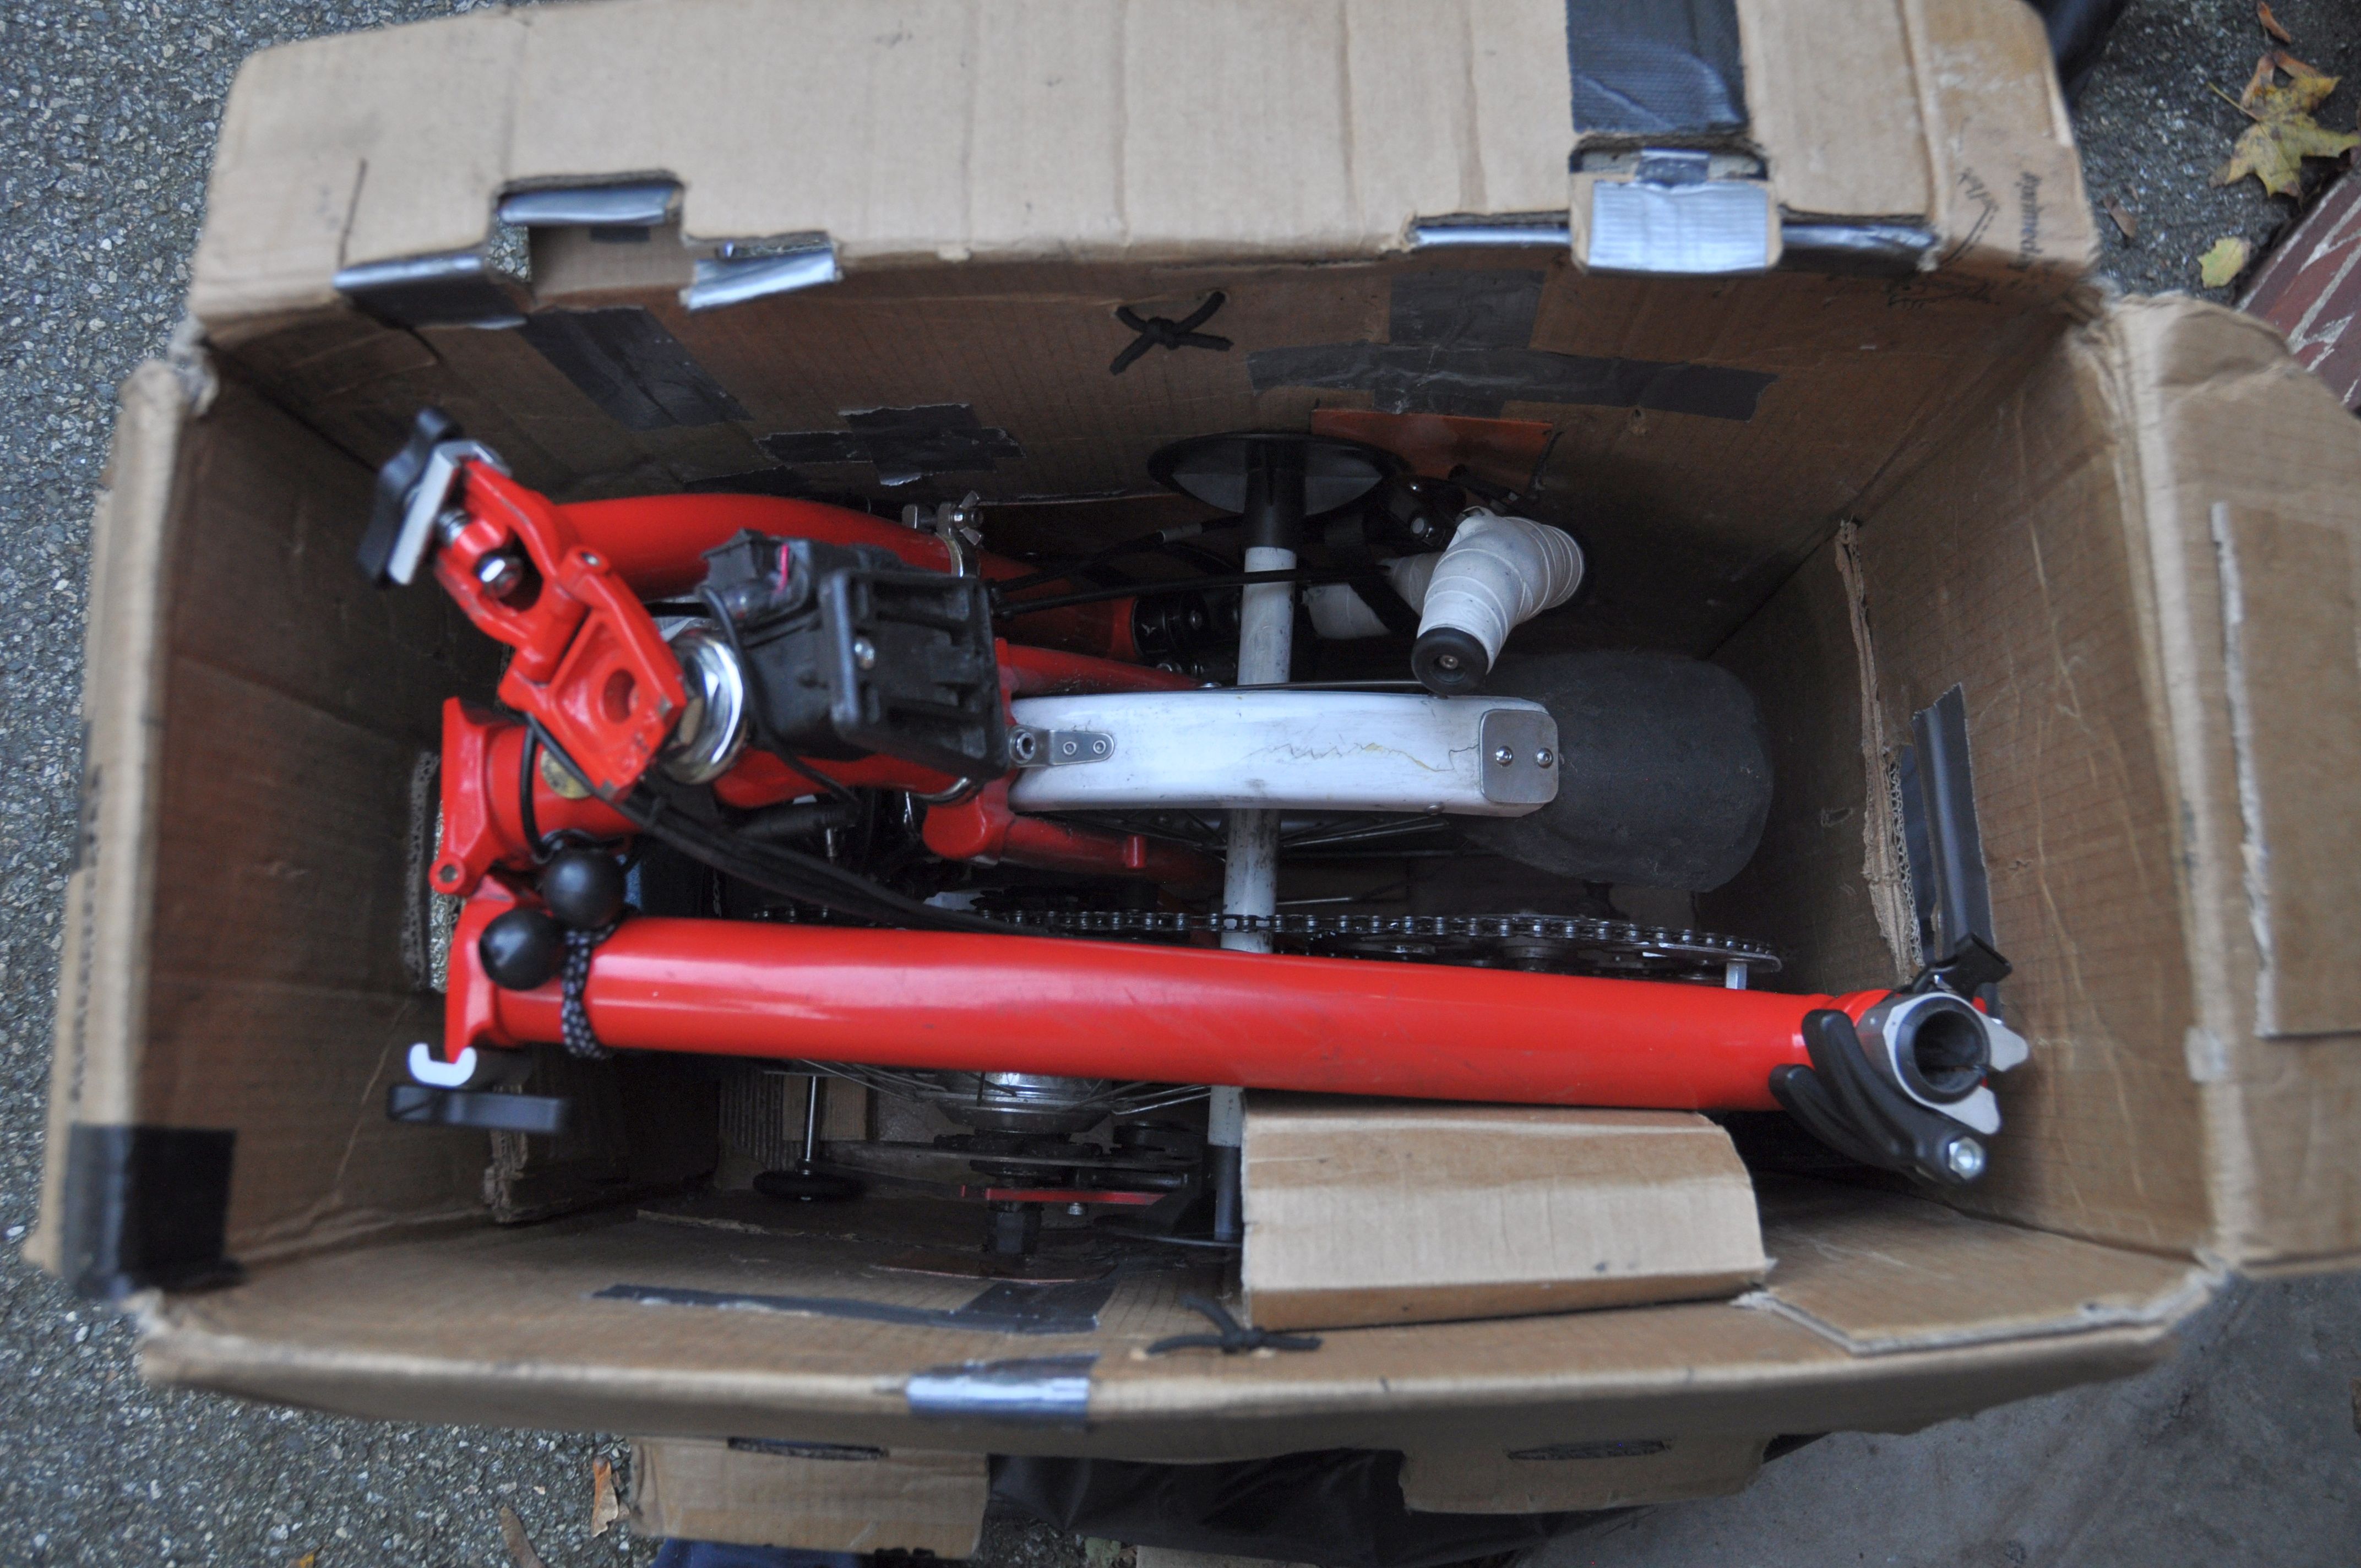
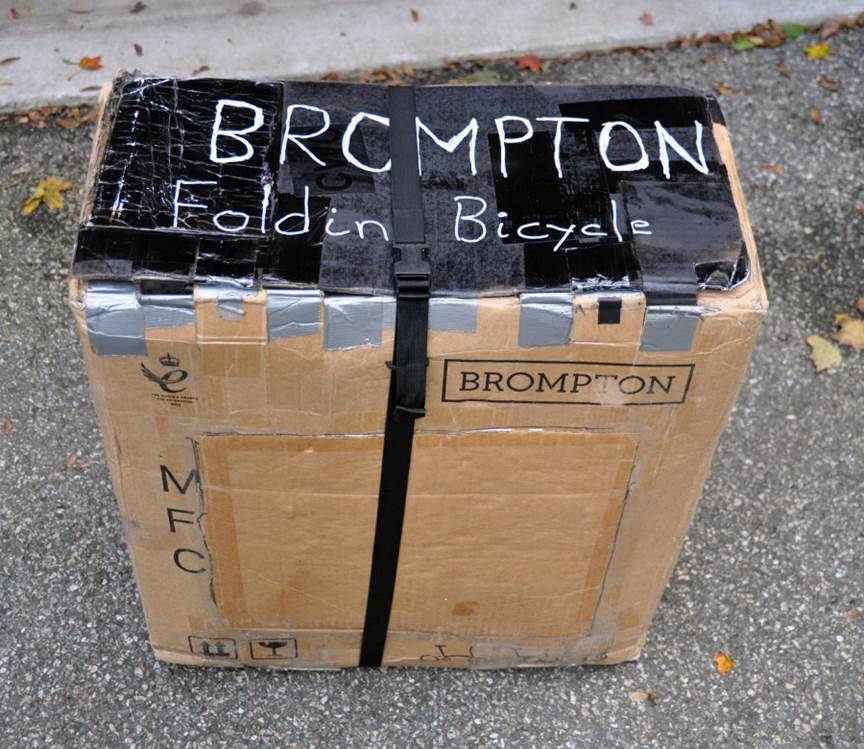
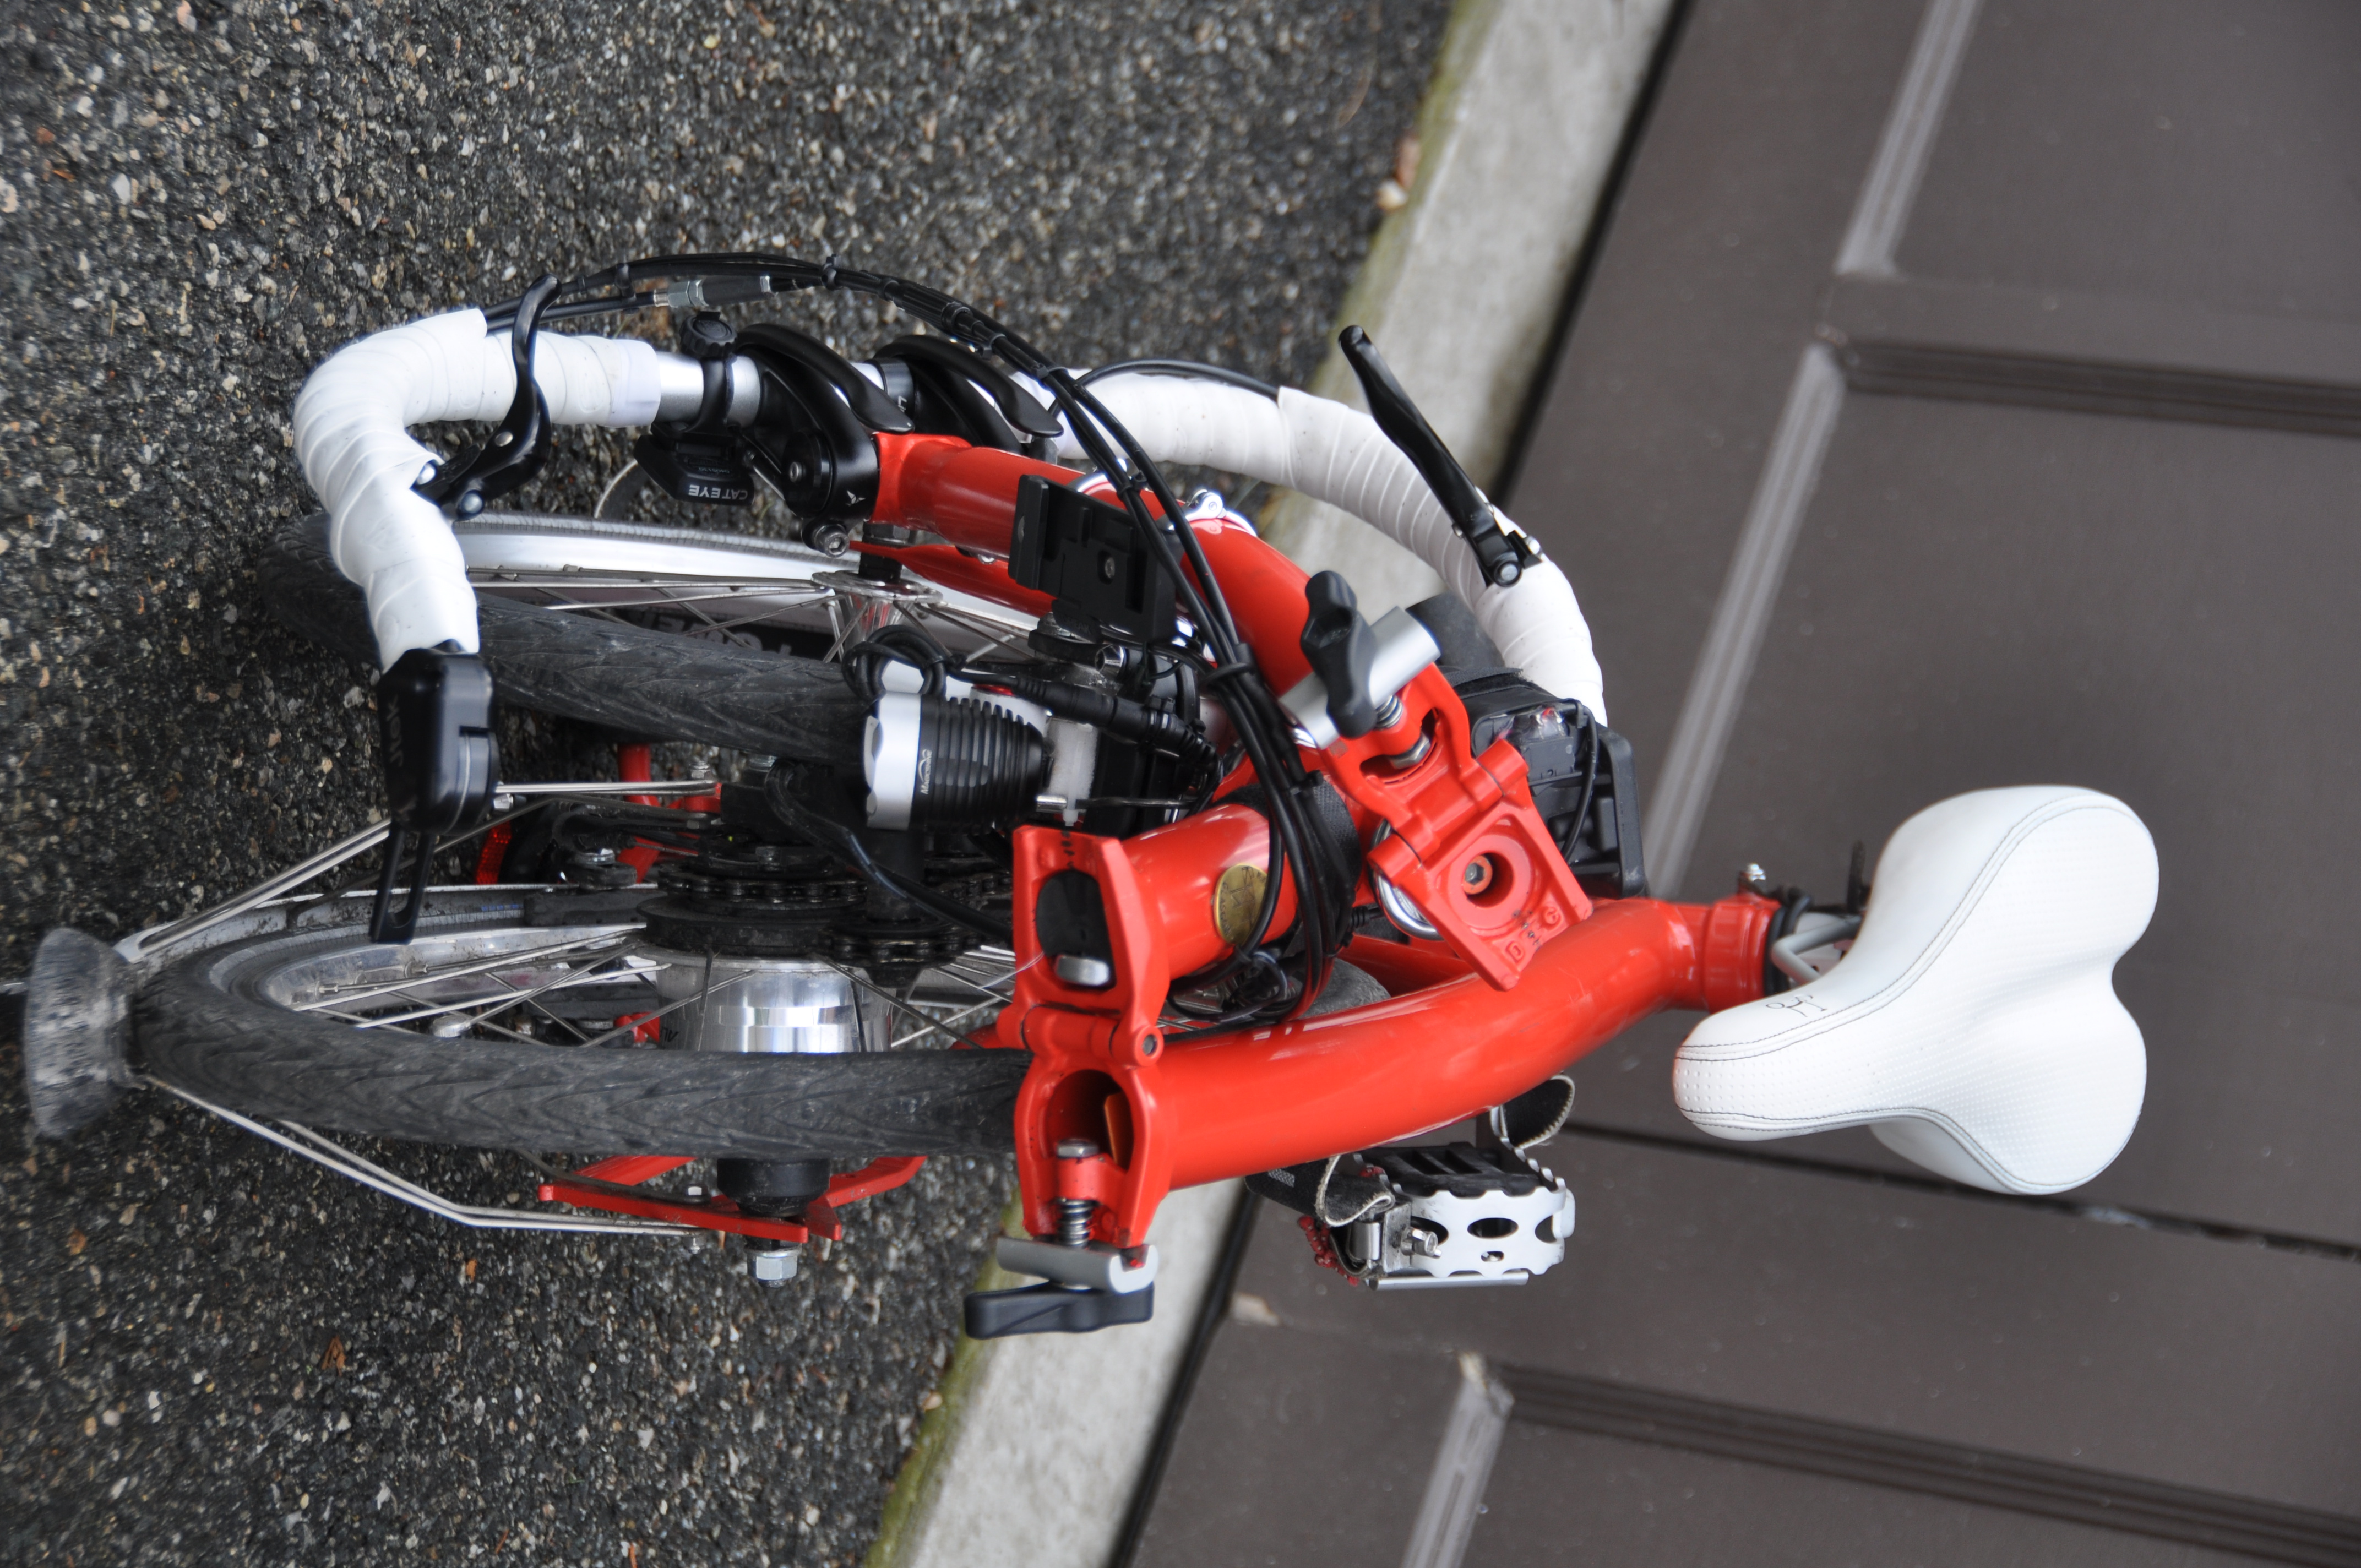
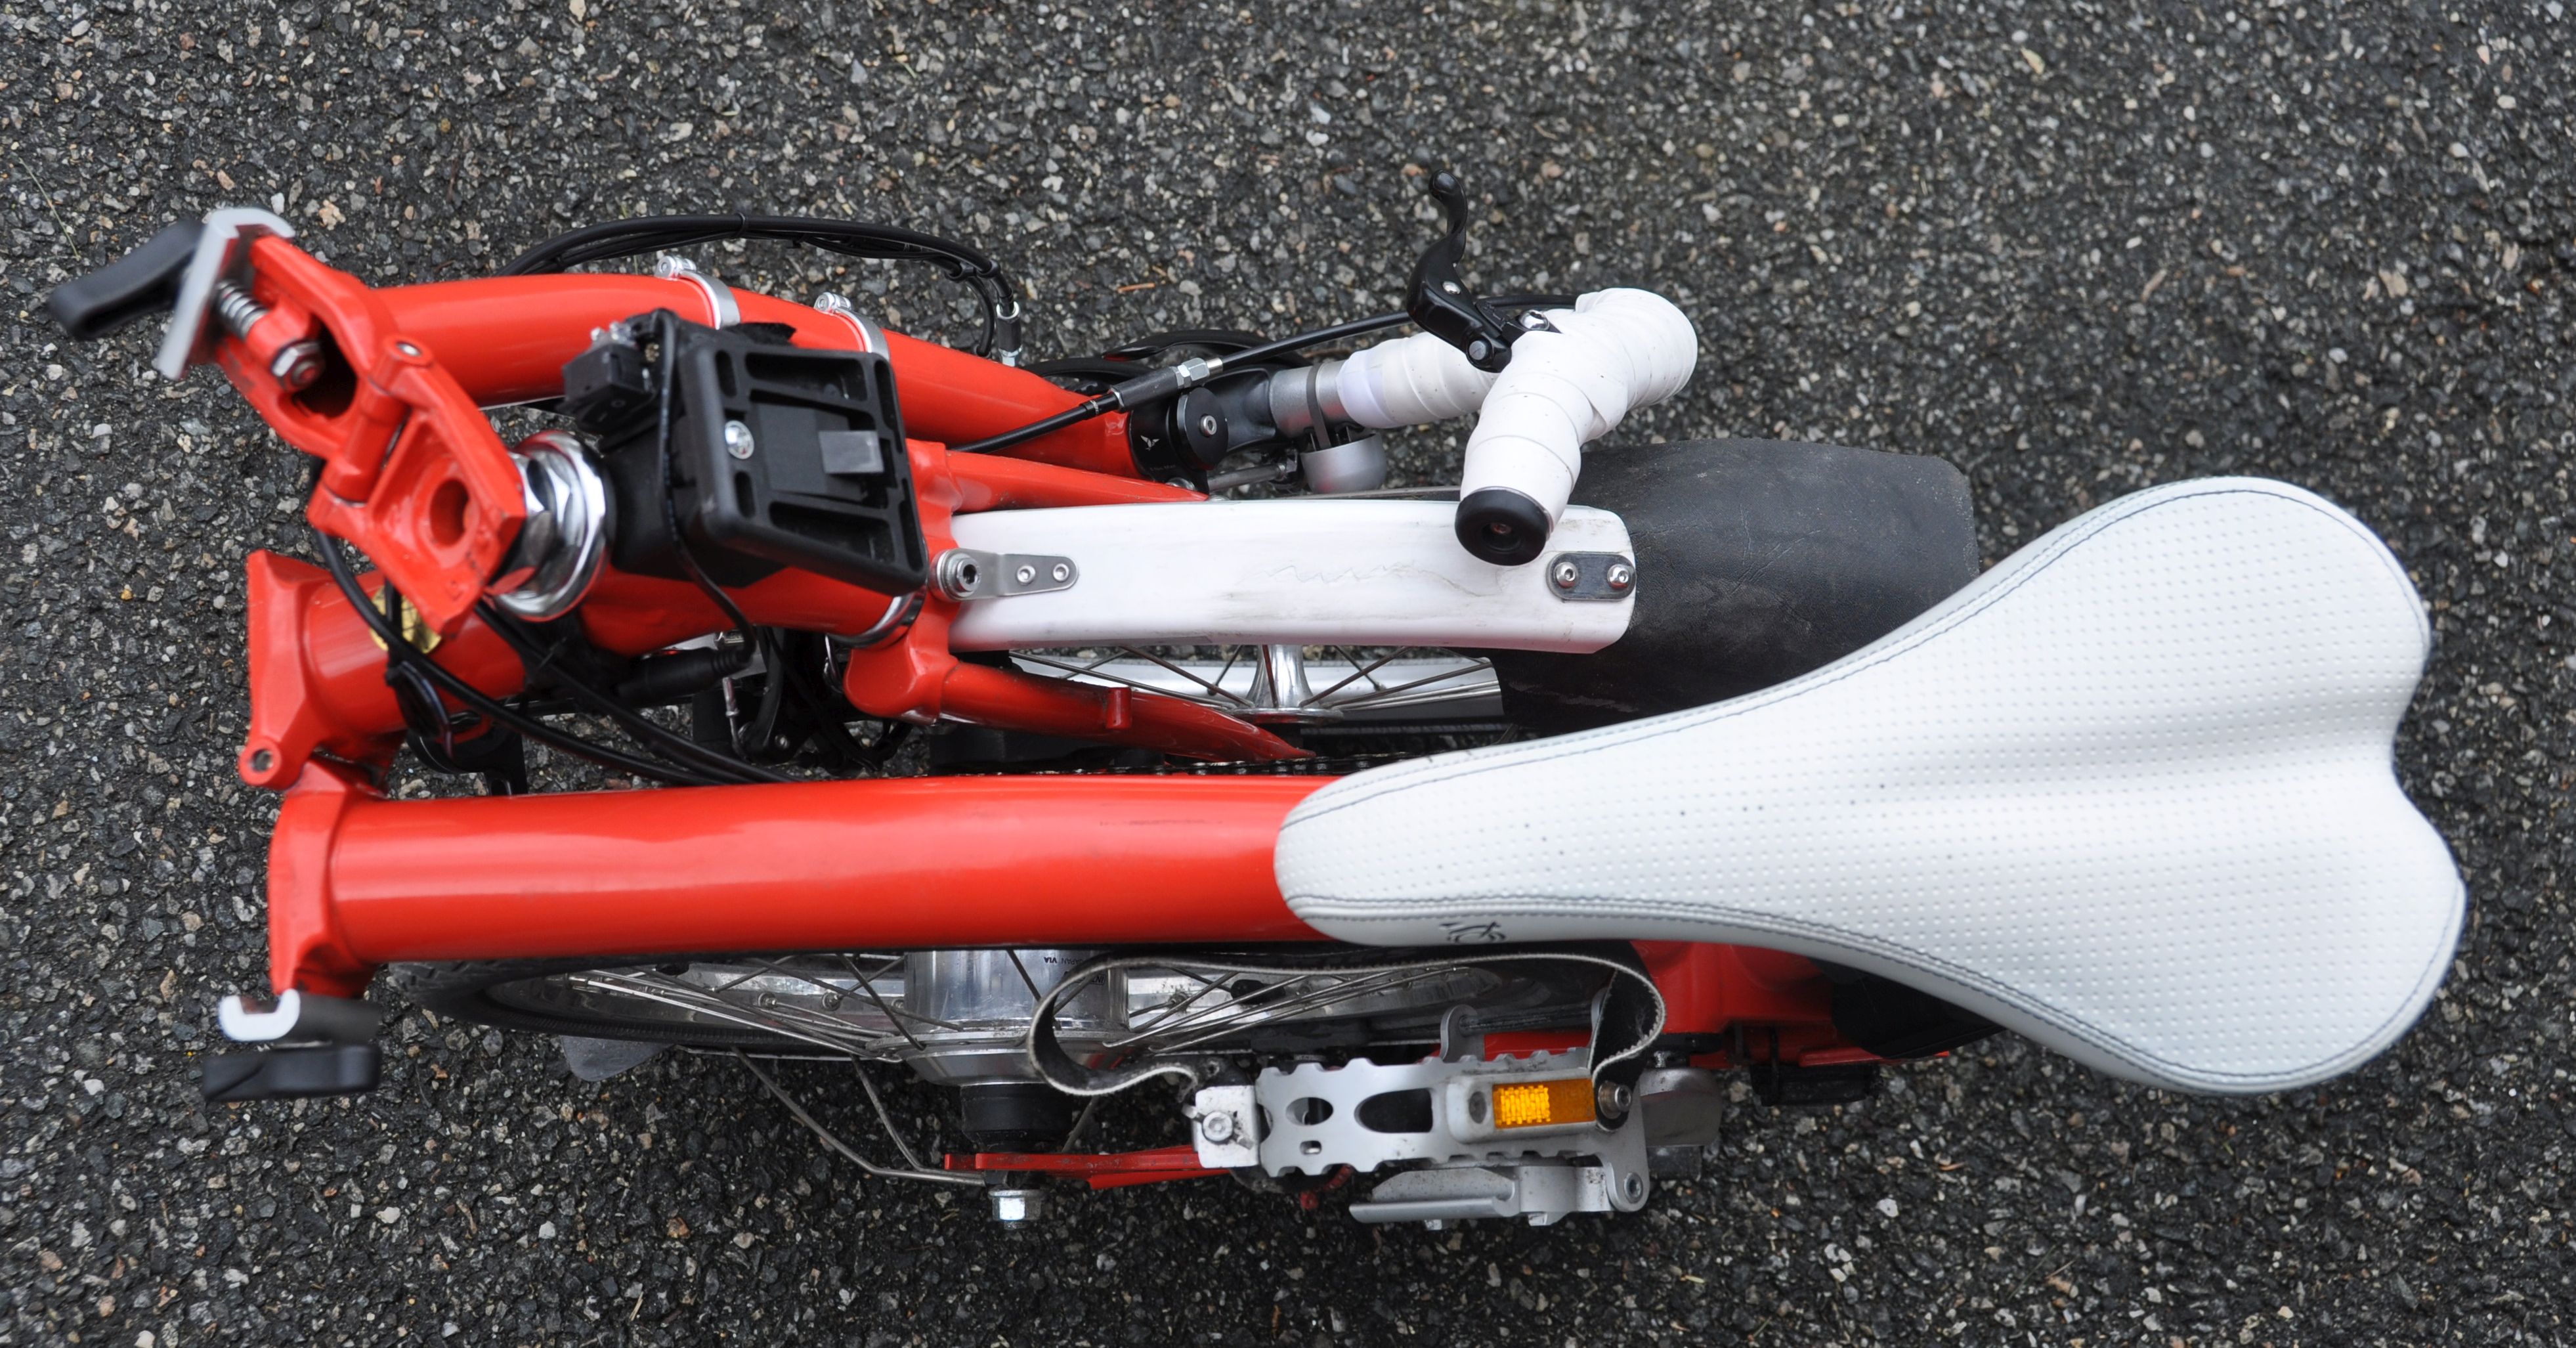
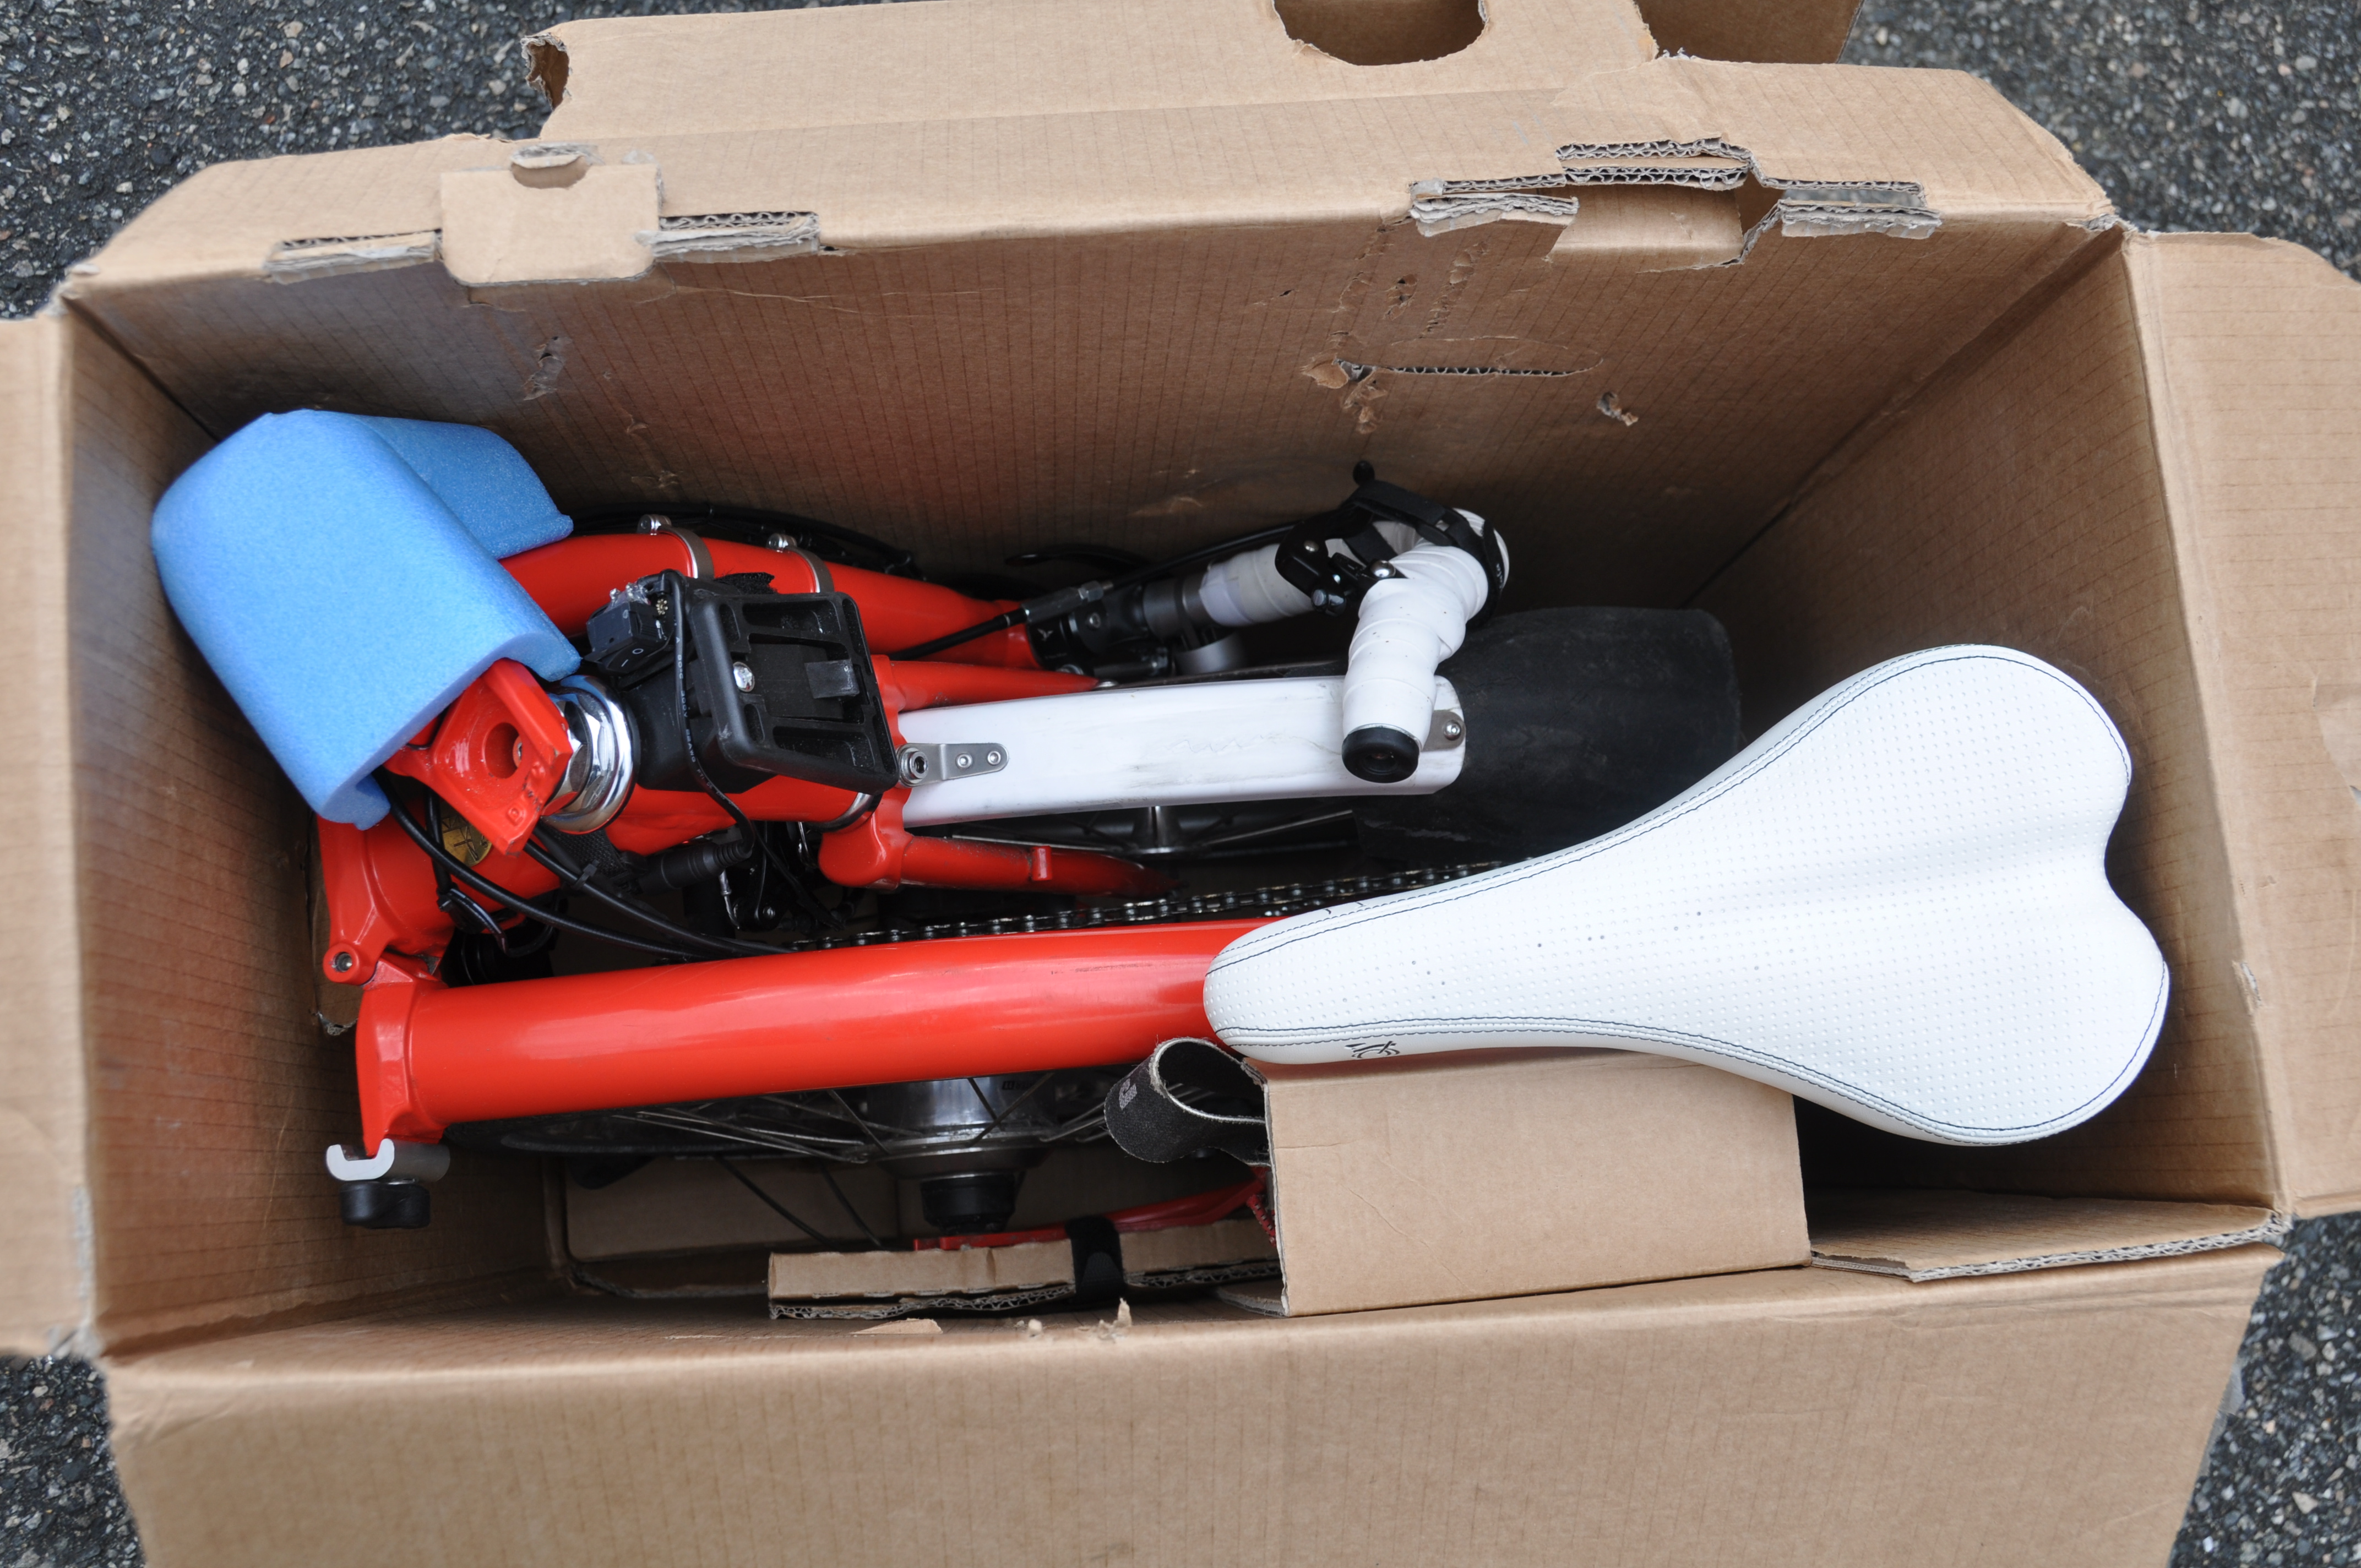
Packing the Brompton Back to top
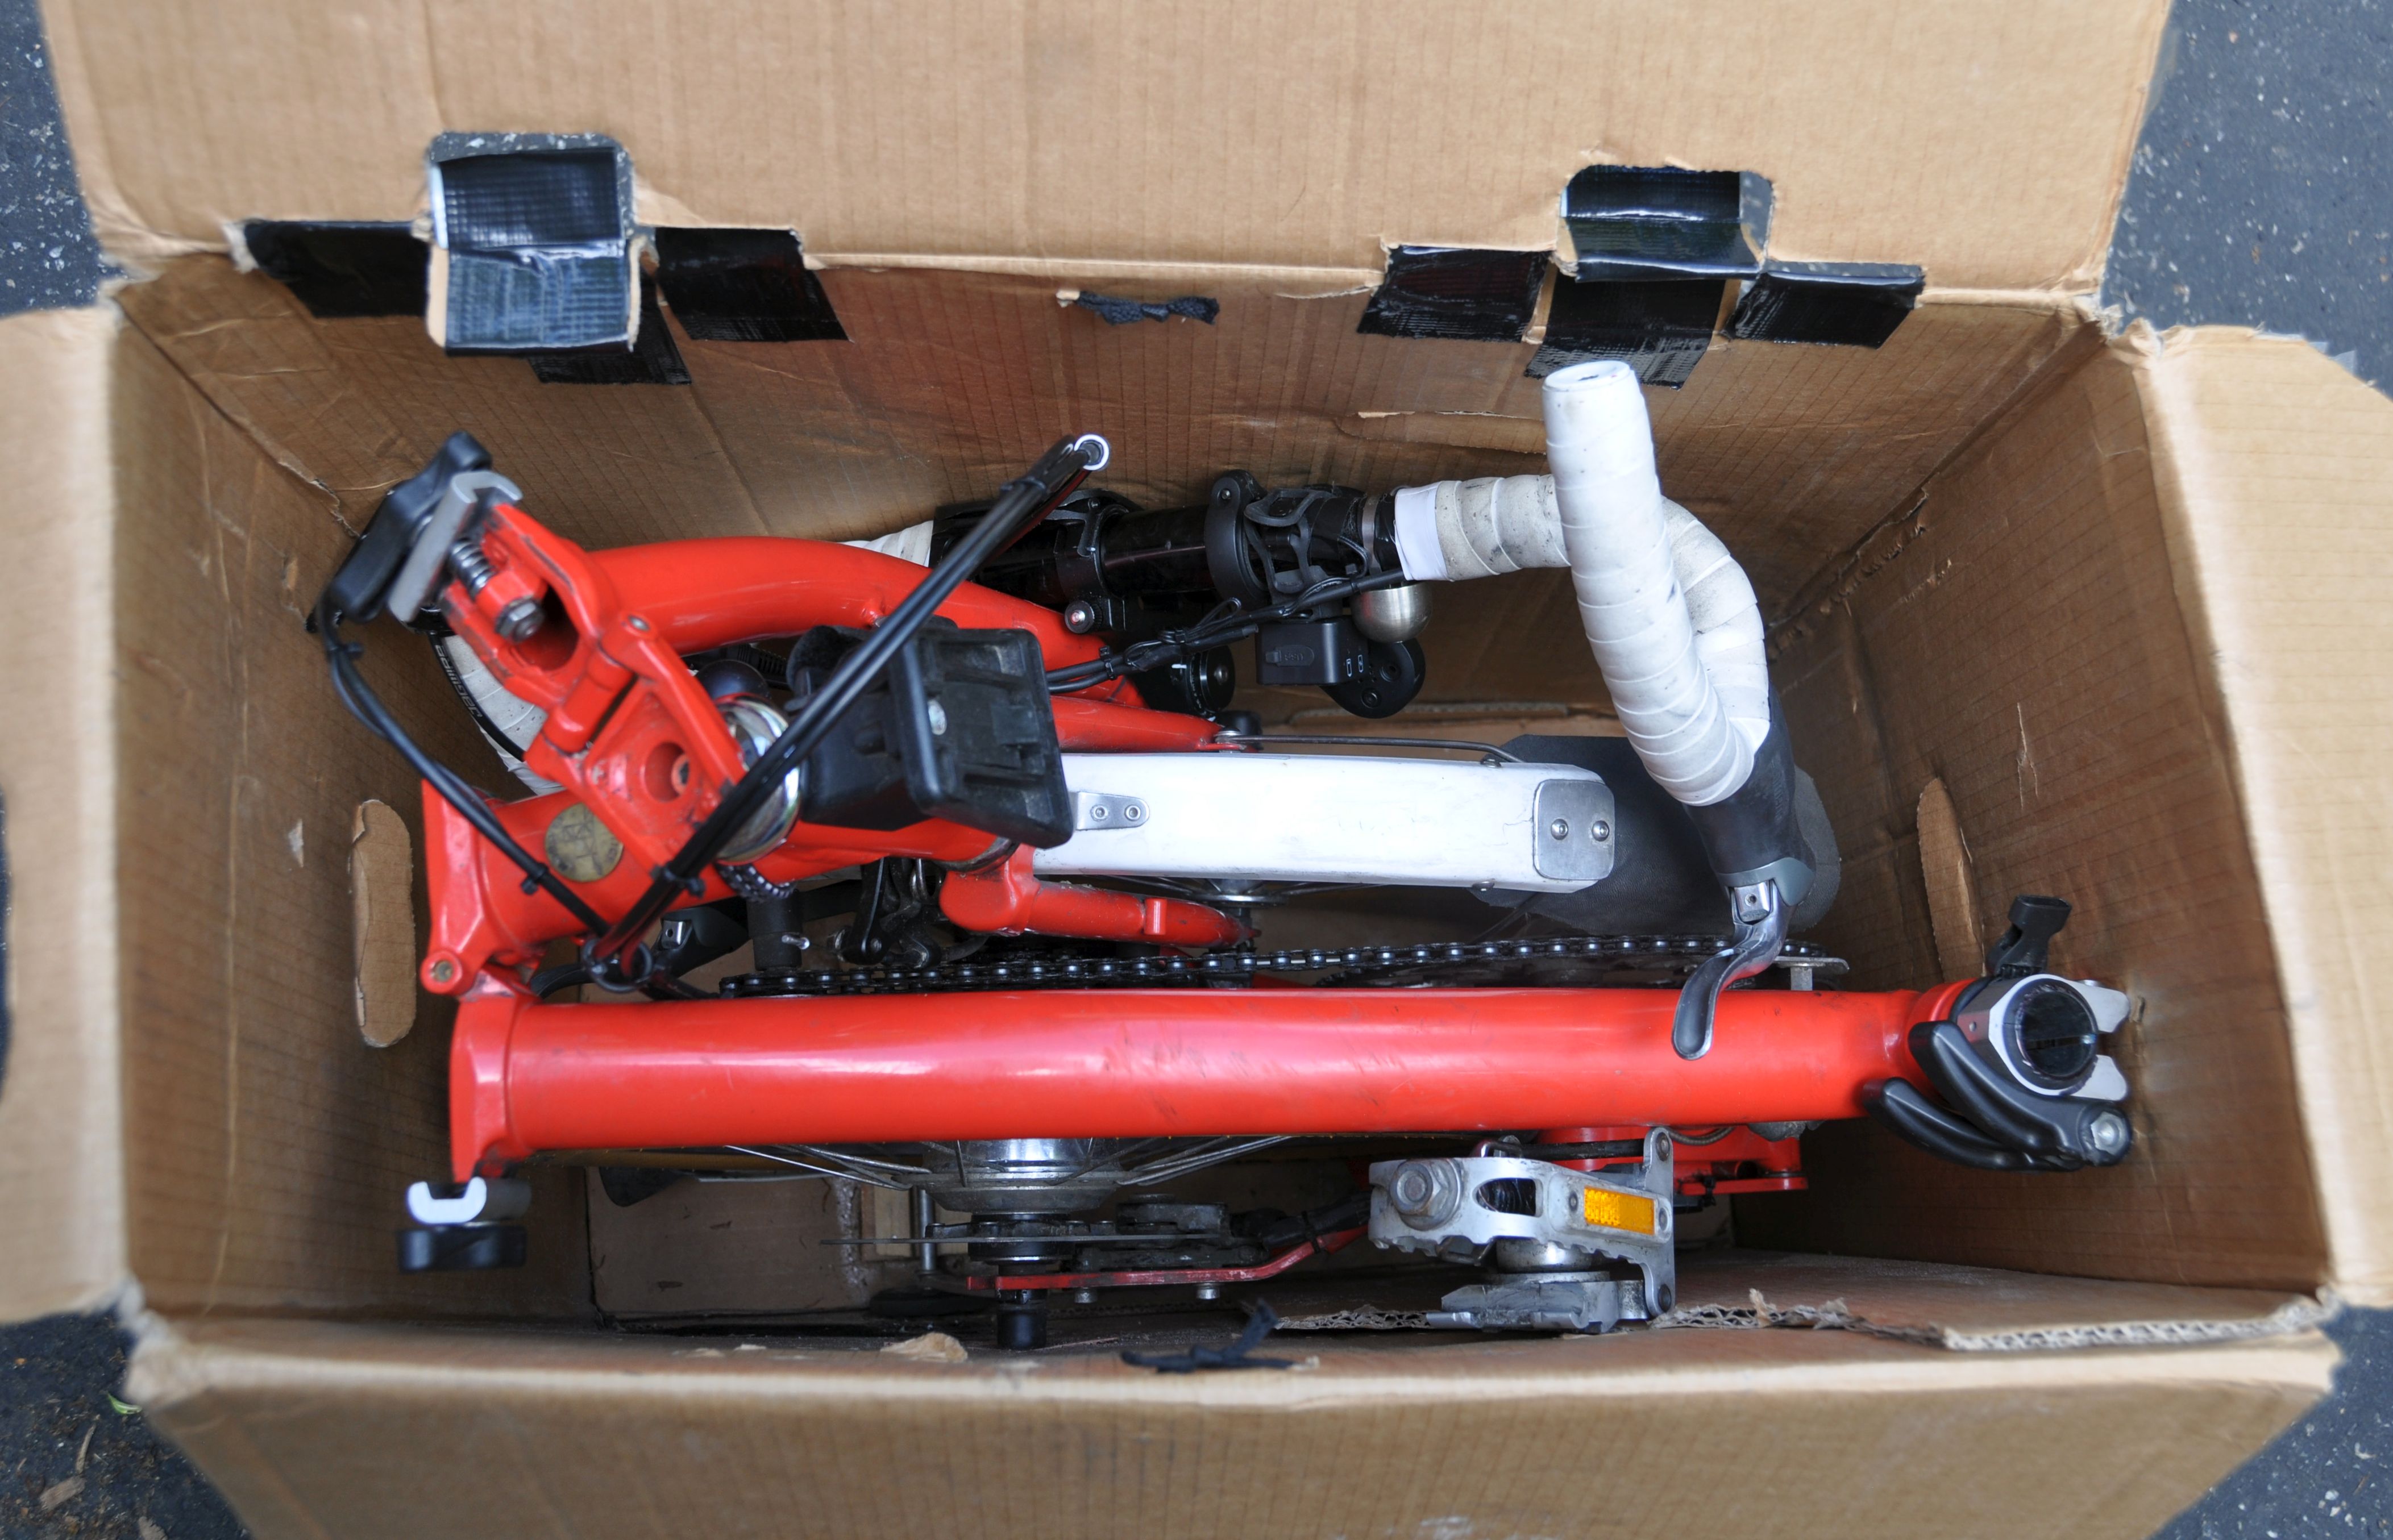
Using the Brompton card box for travel
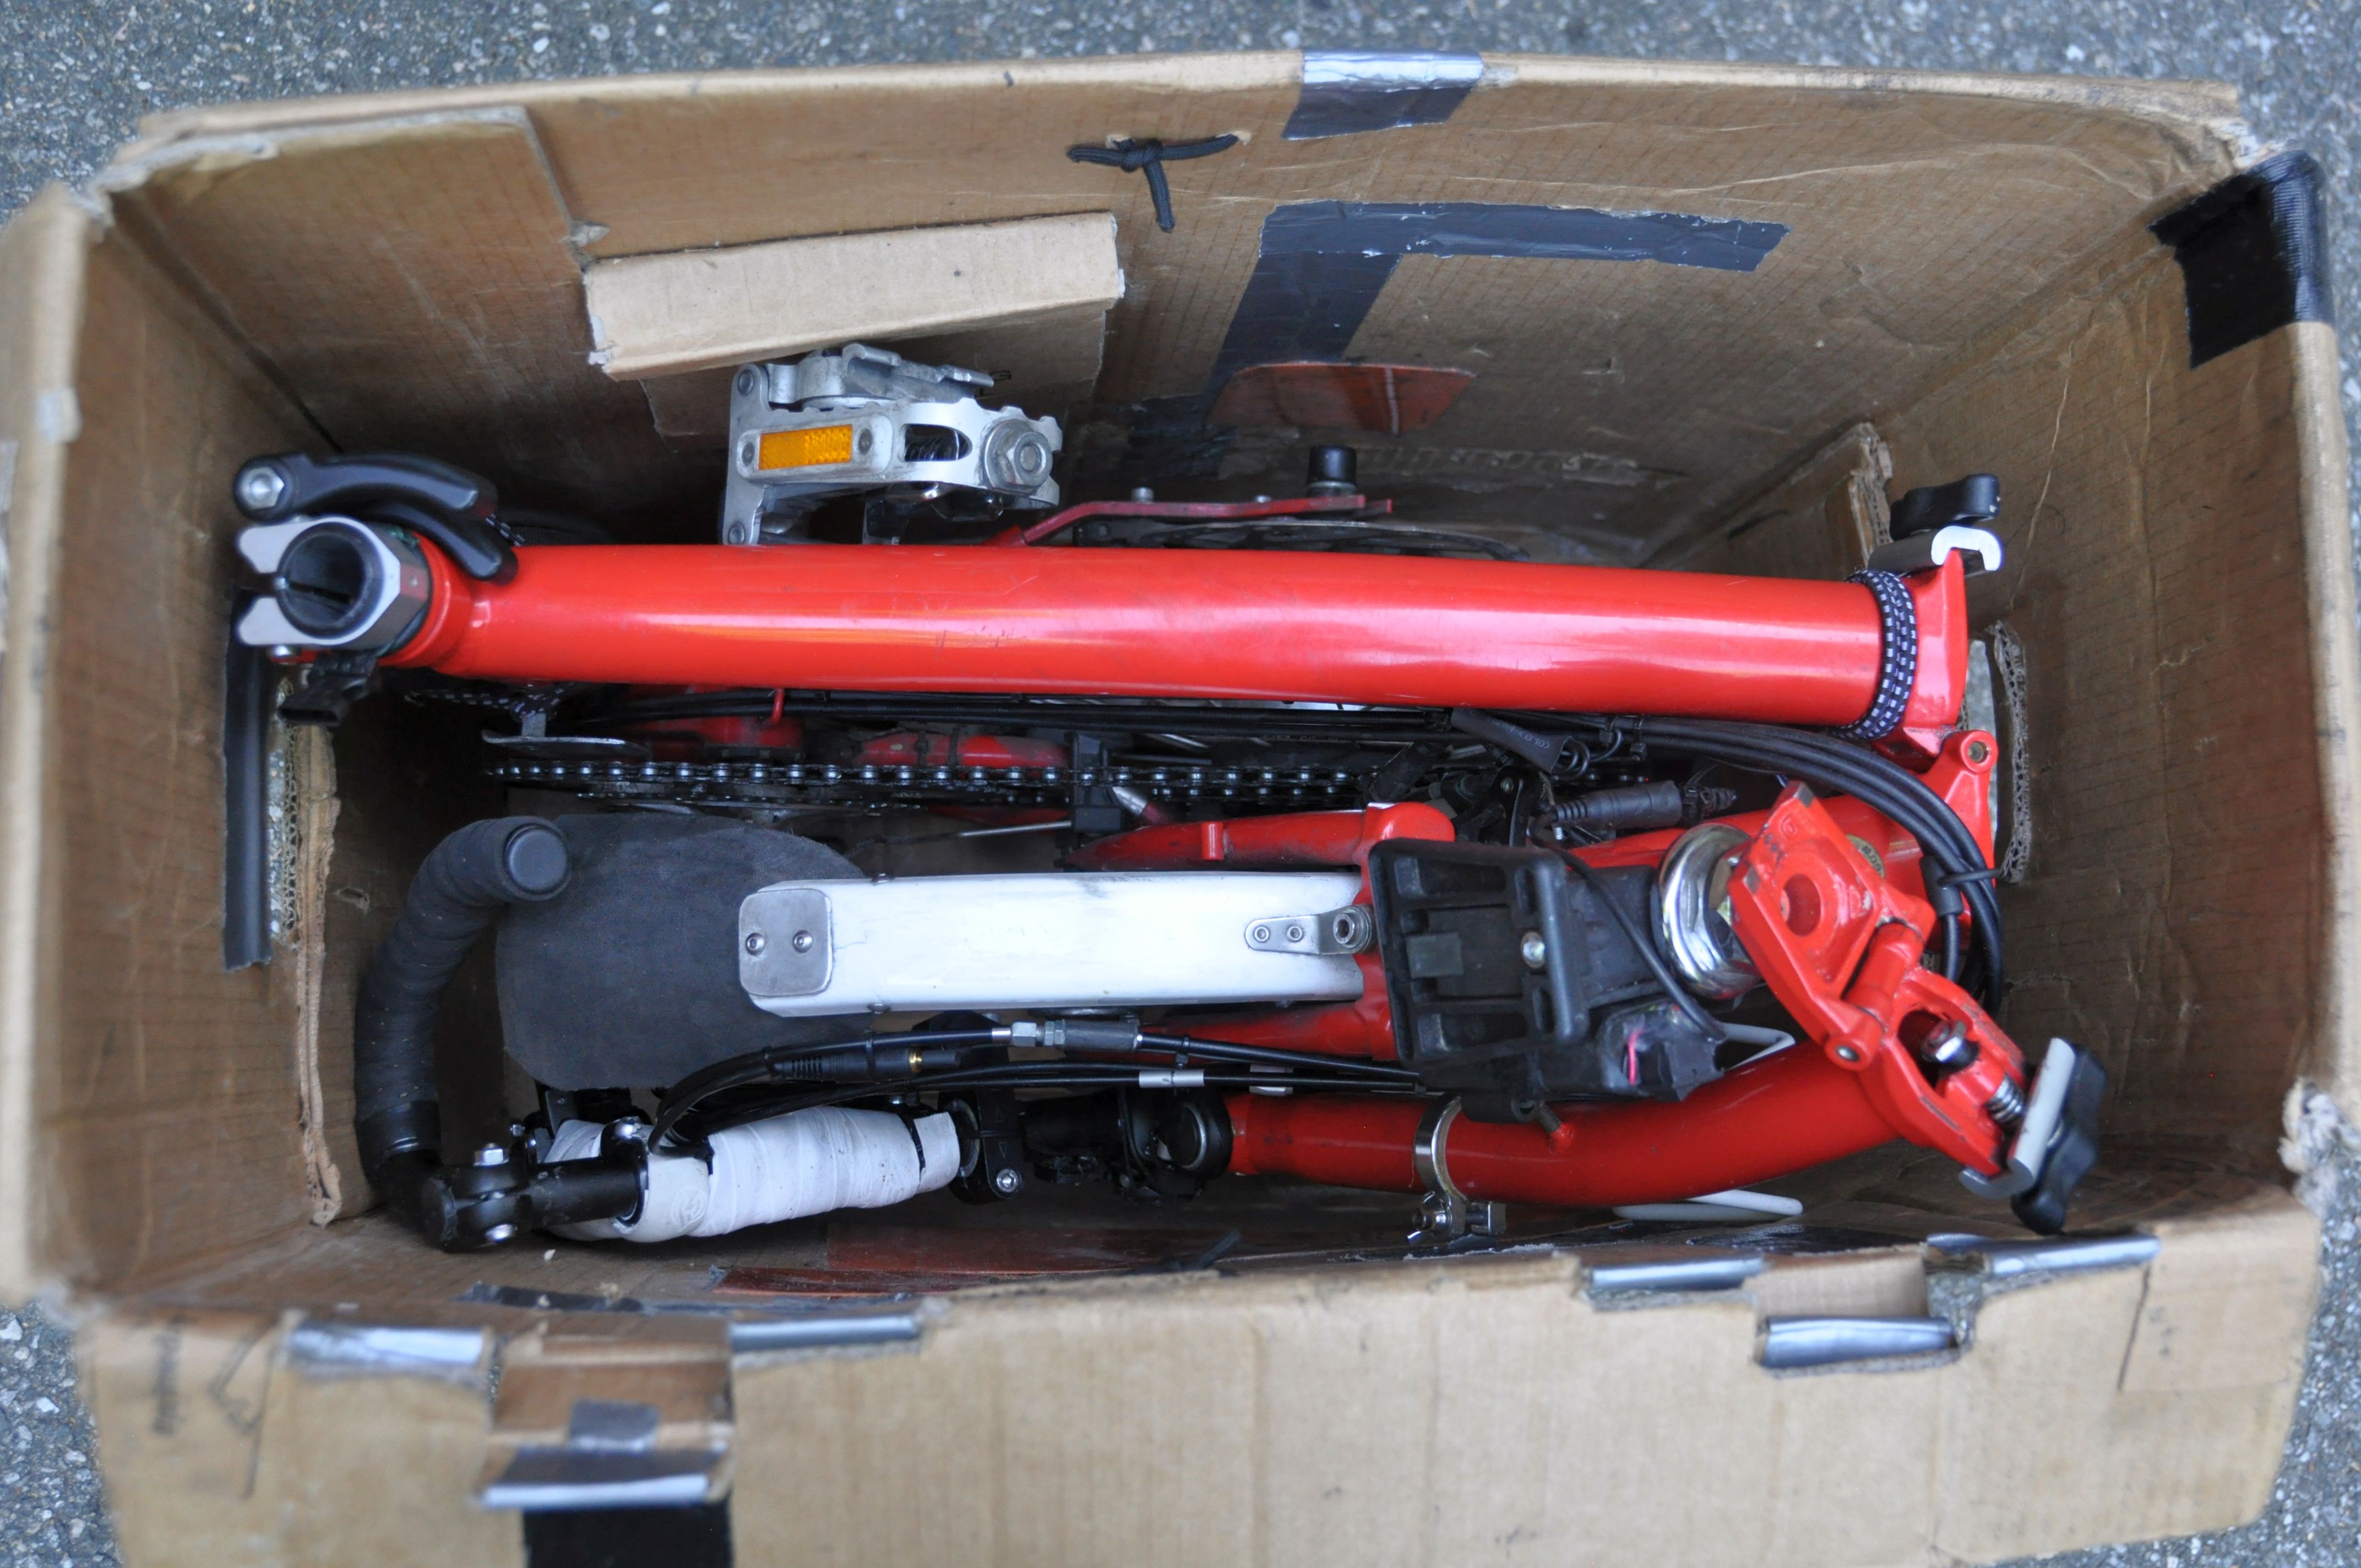
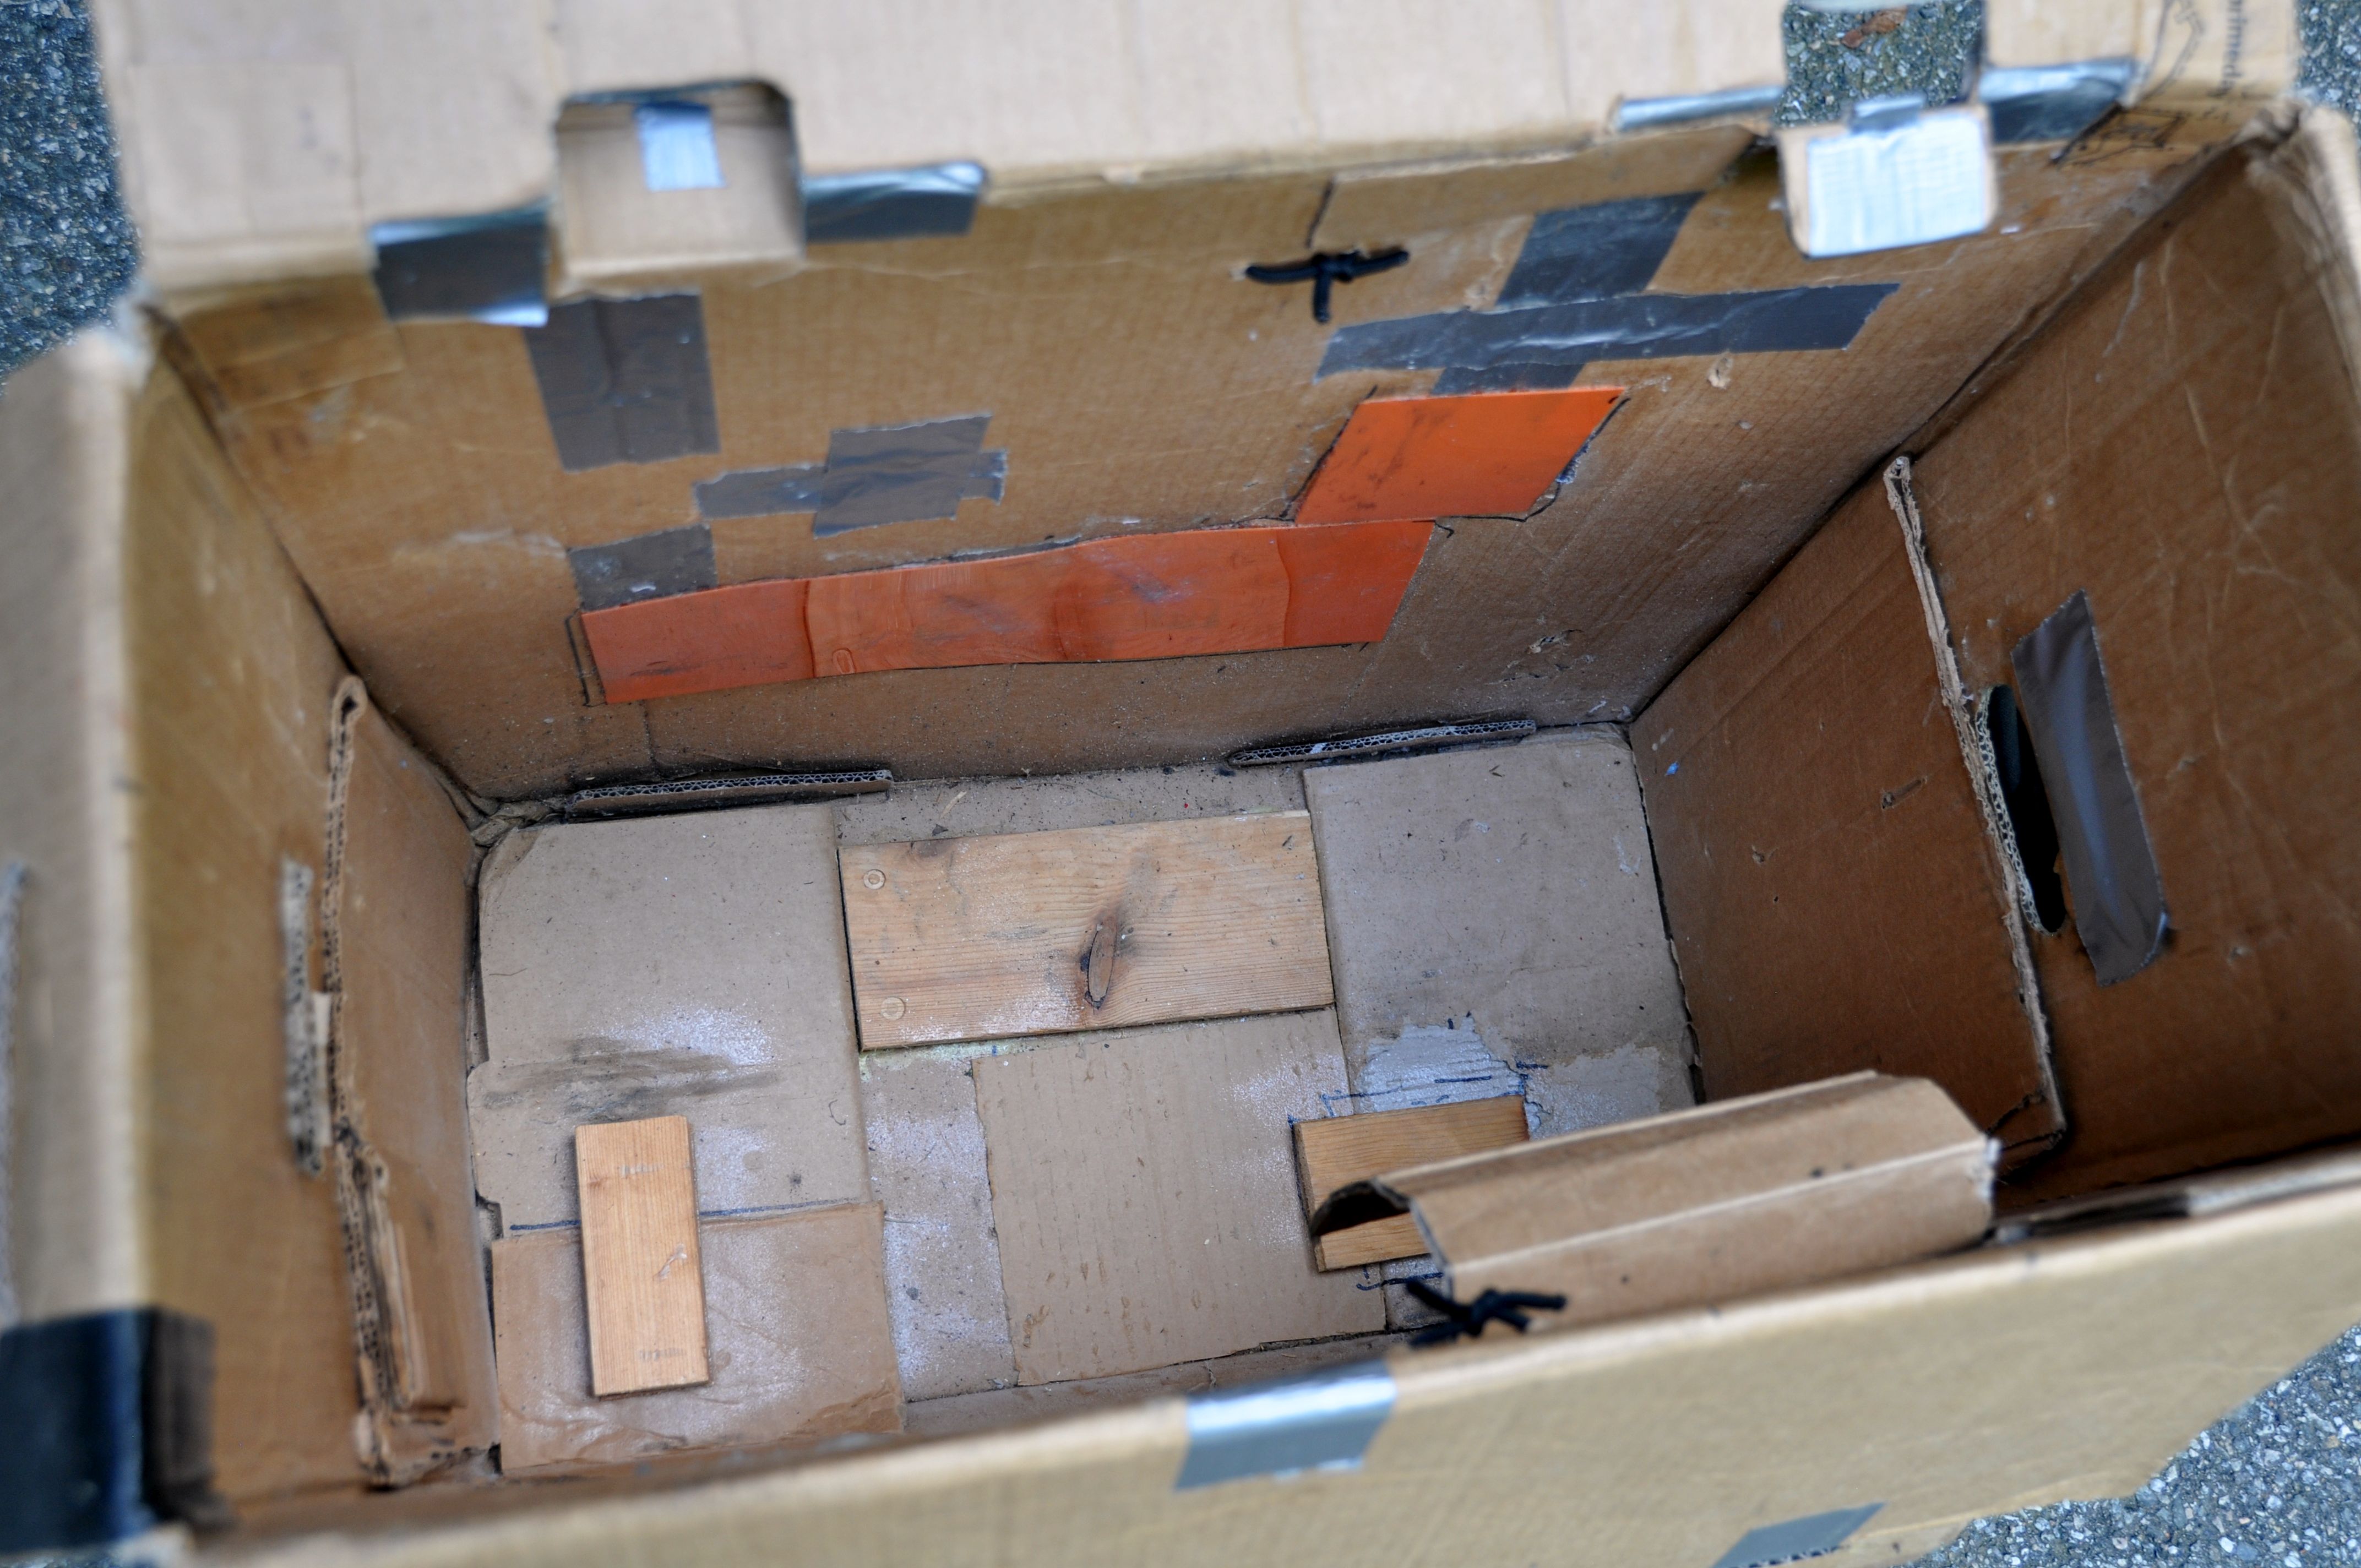
The Brompton card box protects the bike very well and is easy to repair and replace. I have improved the way how I use it. Here is the solution I have used for recent air travel:
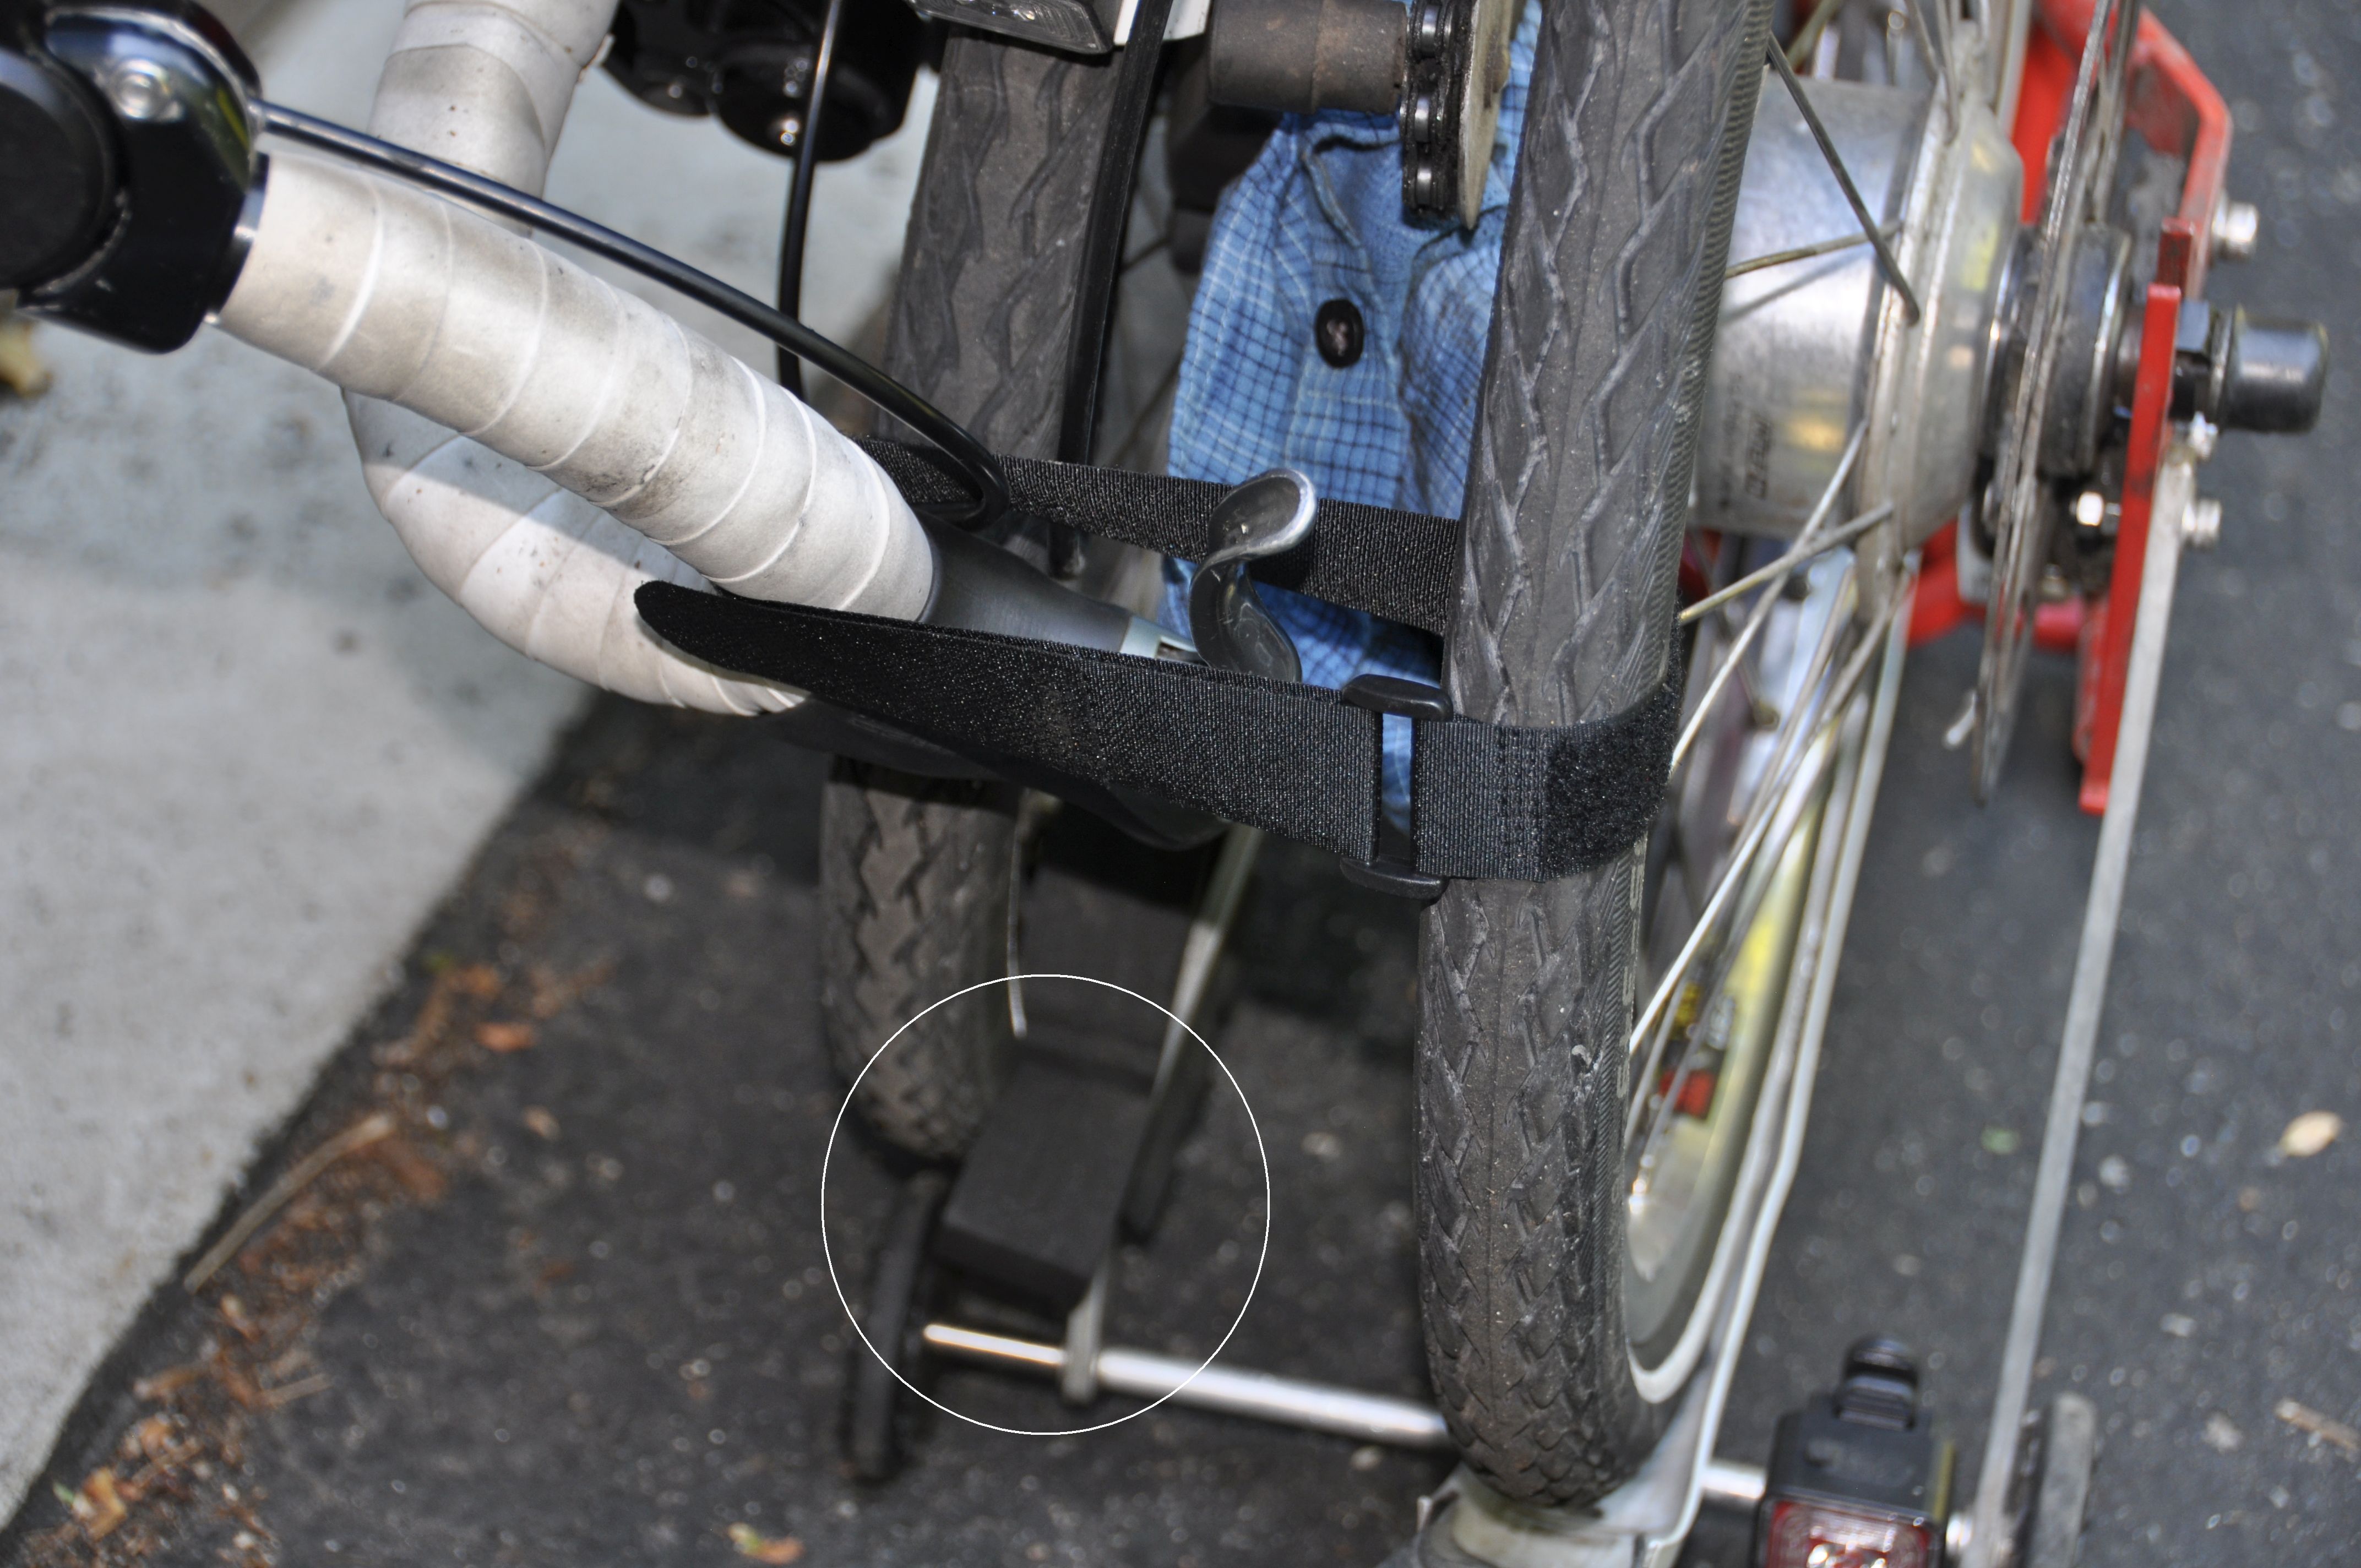
Modifications to the box: 1. Add wooden blocks at the bottom to support the seatpost, the front tire and the rear between the eazy wheels. I don't want the more fragile eazy wheels to take the full weight. 2. Protect the box with a piece of hard plastic against the rear axle nut (which could damage the box). 3. Add velcro and a strap to close the box.

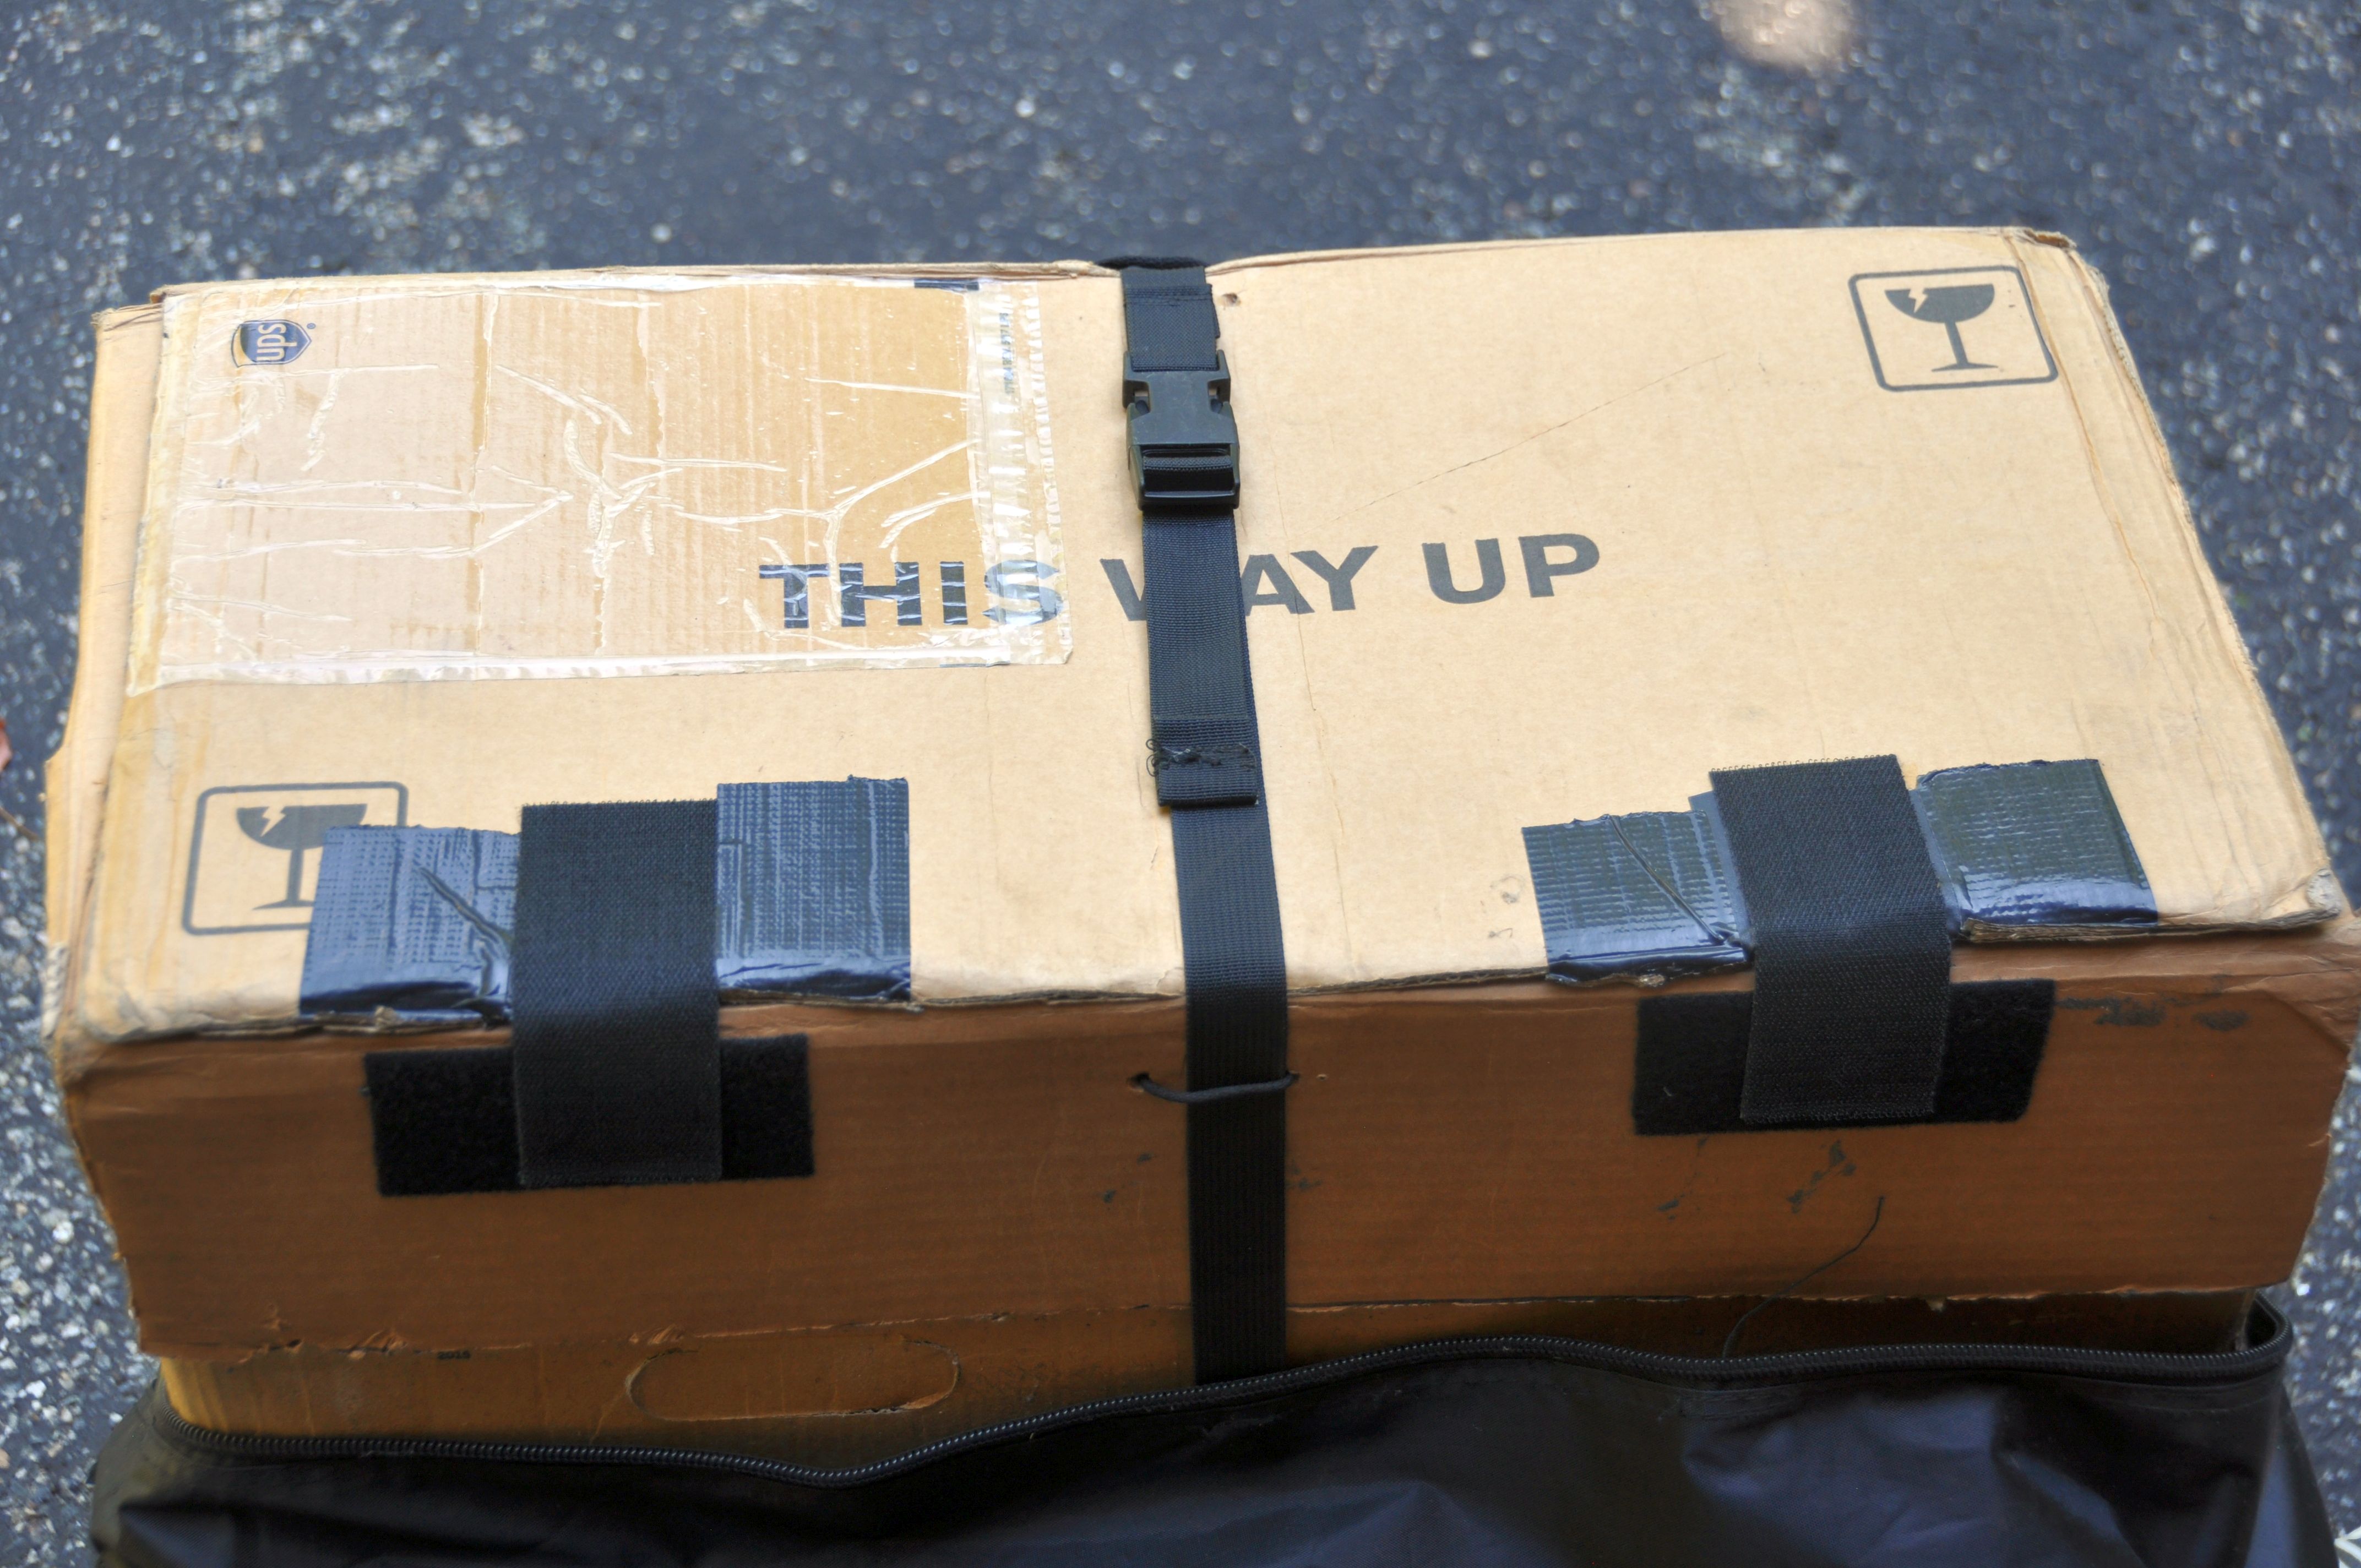
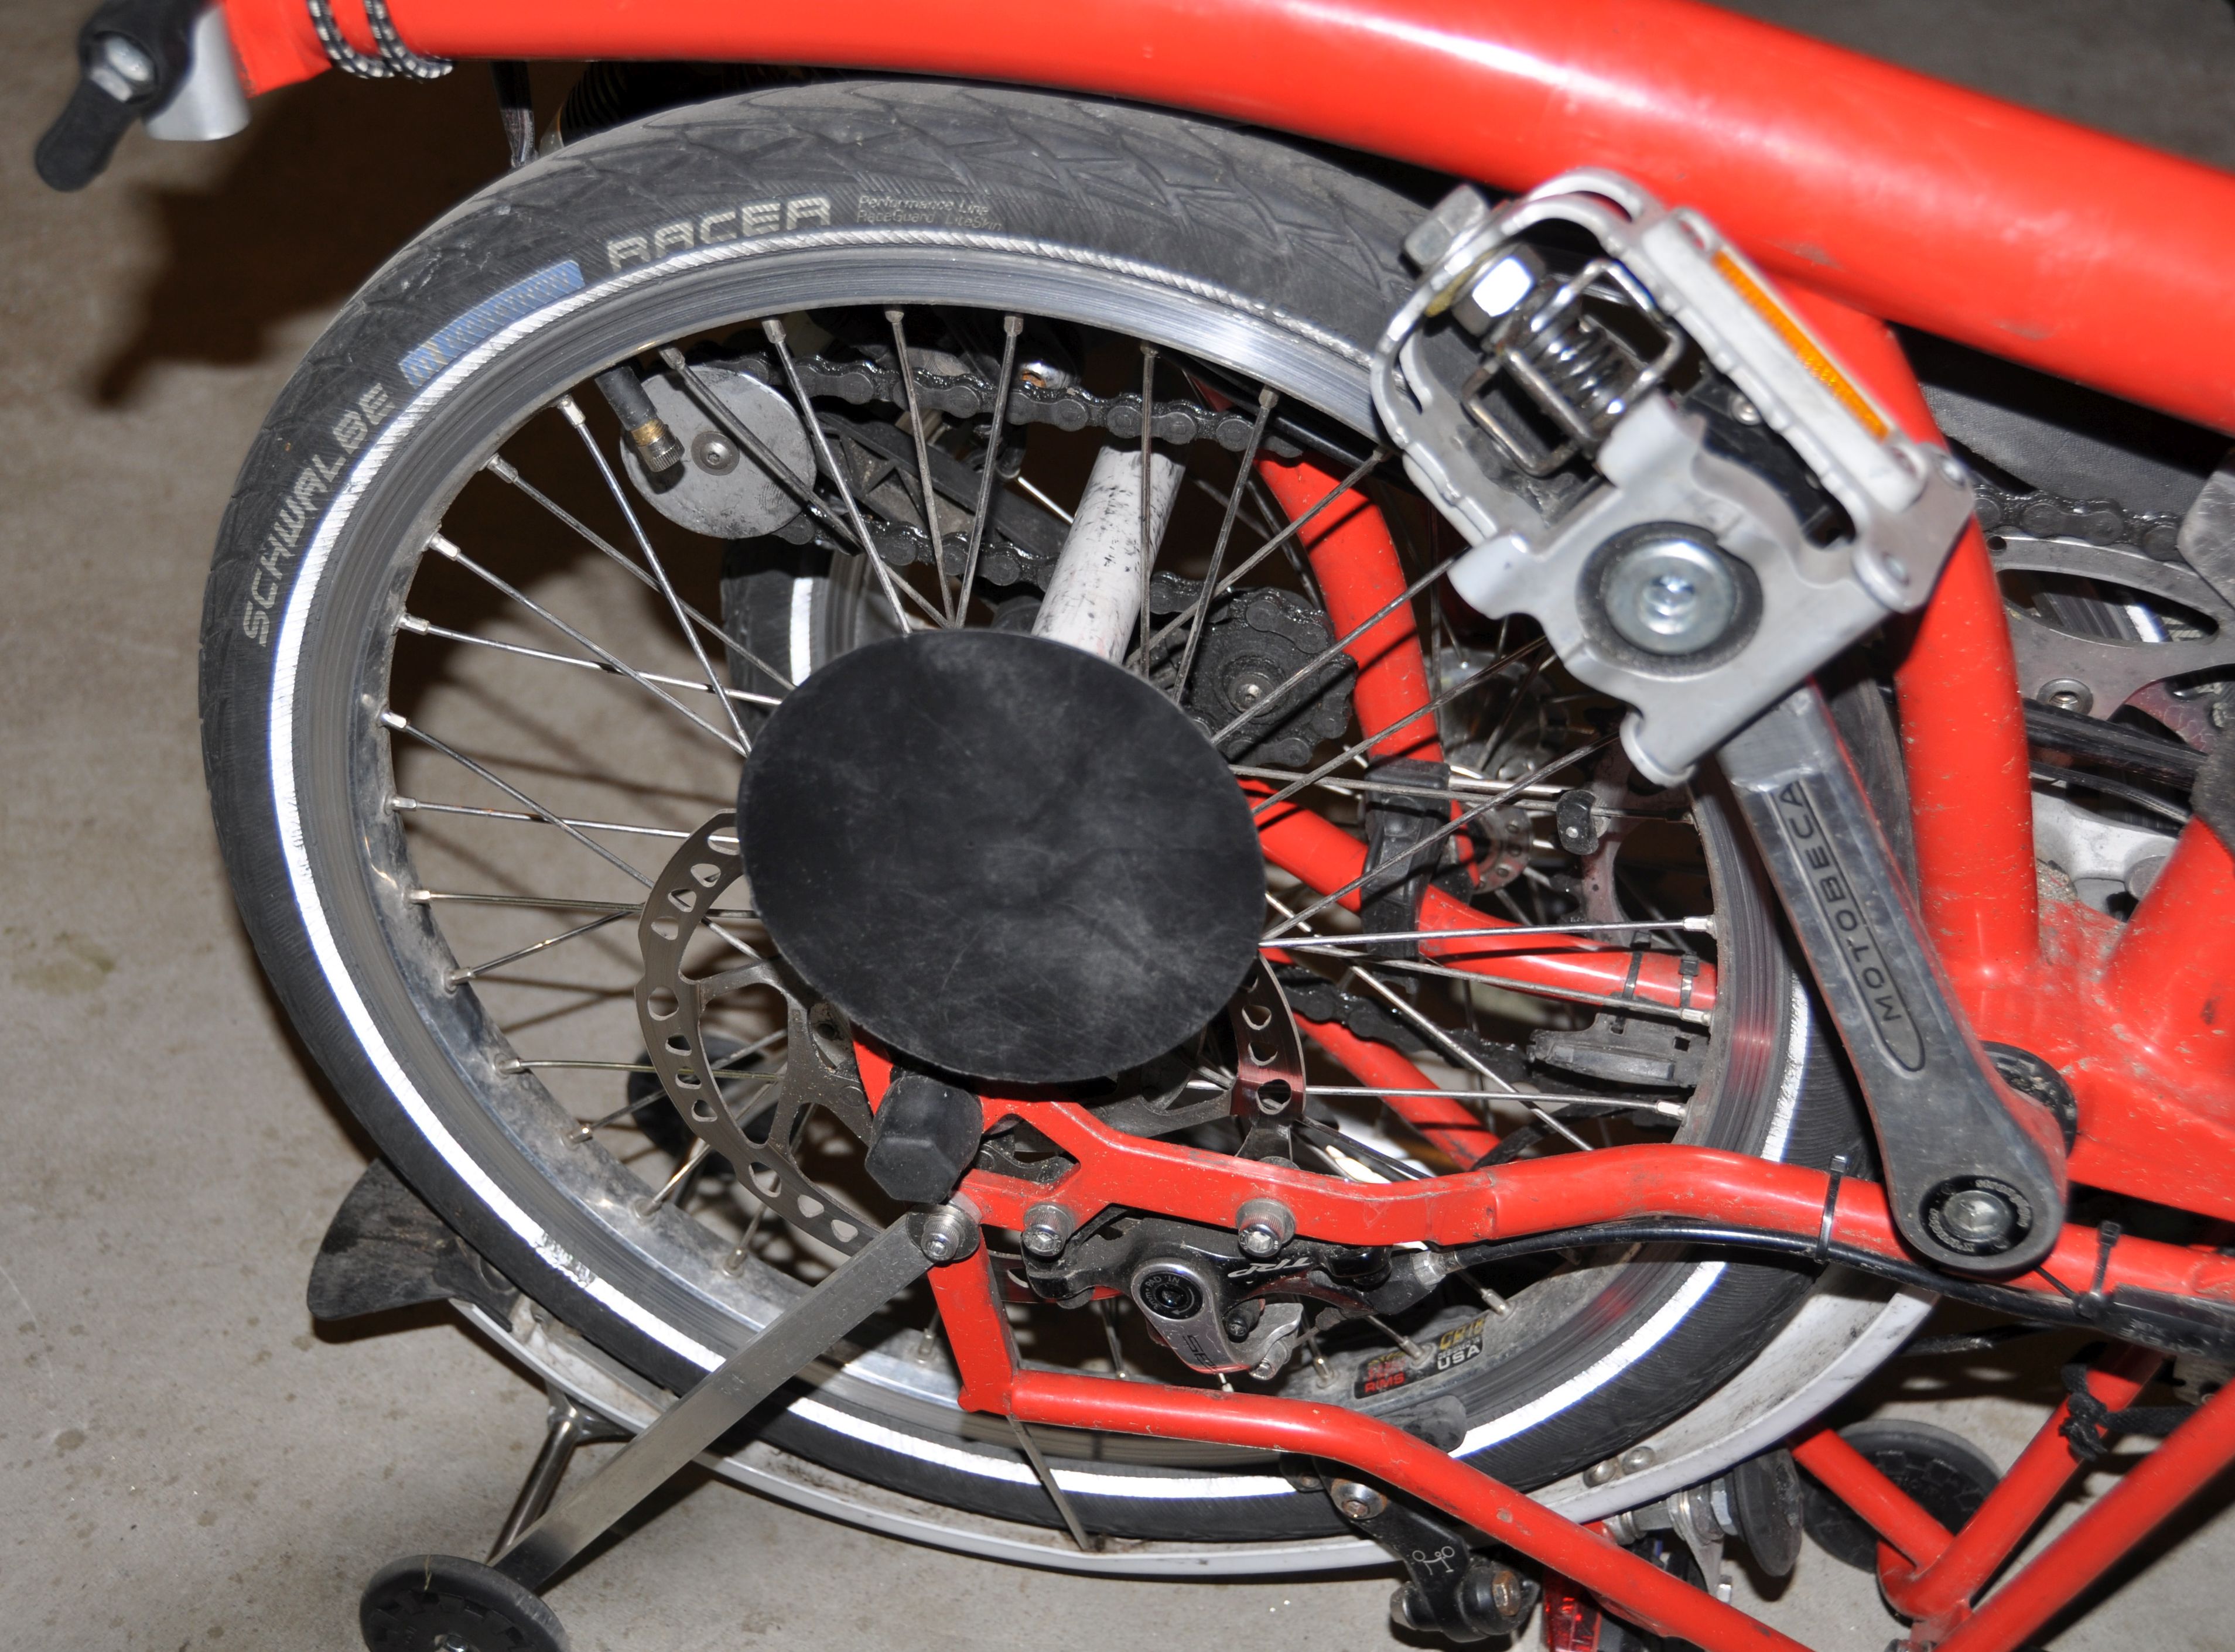
Preparations for the bike: Not many. Take only a few minutes. 1. Remove the saddle (I have the telescoping seatpost). 2. Tighten the hinge clamps (I dont' remove them). 3. Add a cinch strap to secure the folded package. Note that there is a wooden block between the front wheel and the fender stay. This prevents the front wheel from pushing against the rear derailleur and bending the derailleur hanger. 4. Slide a sock over the folding pedal.
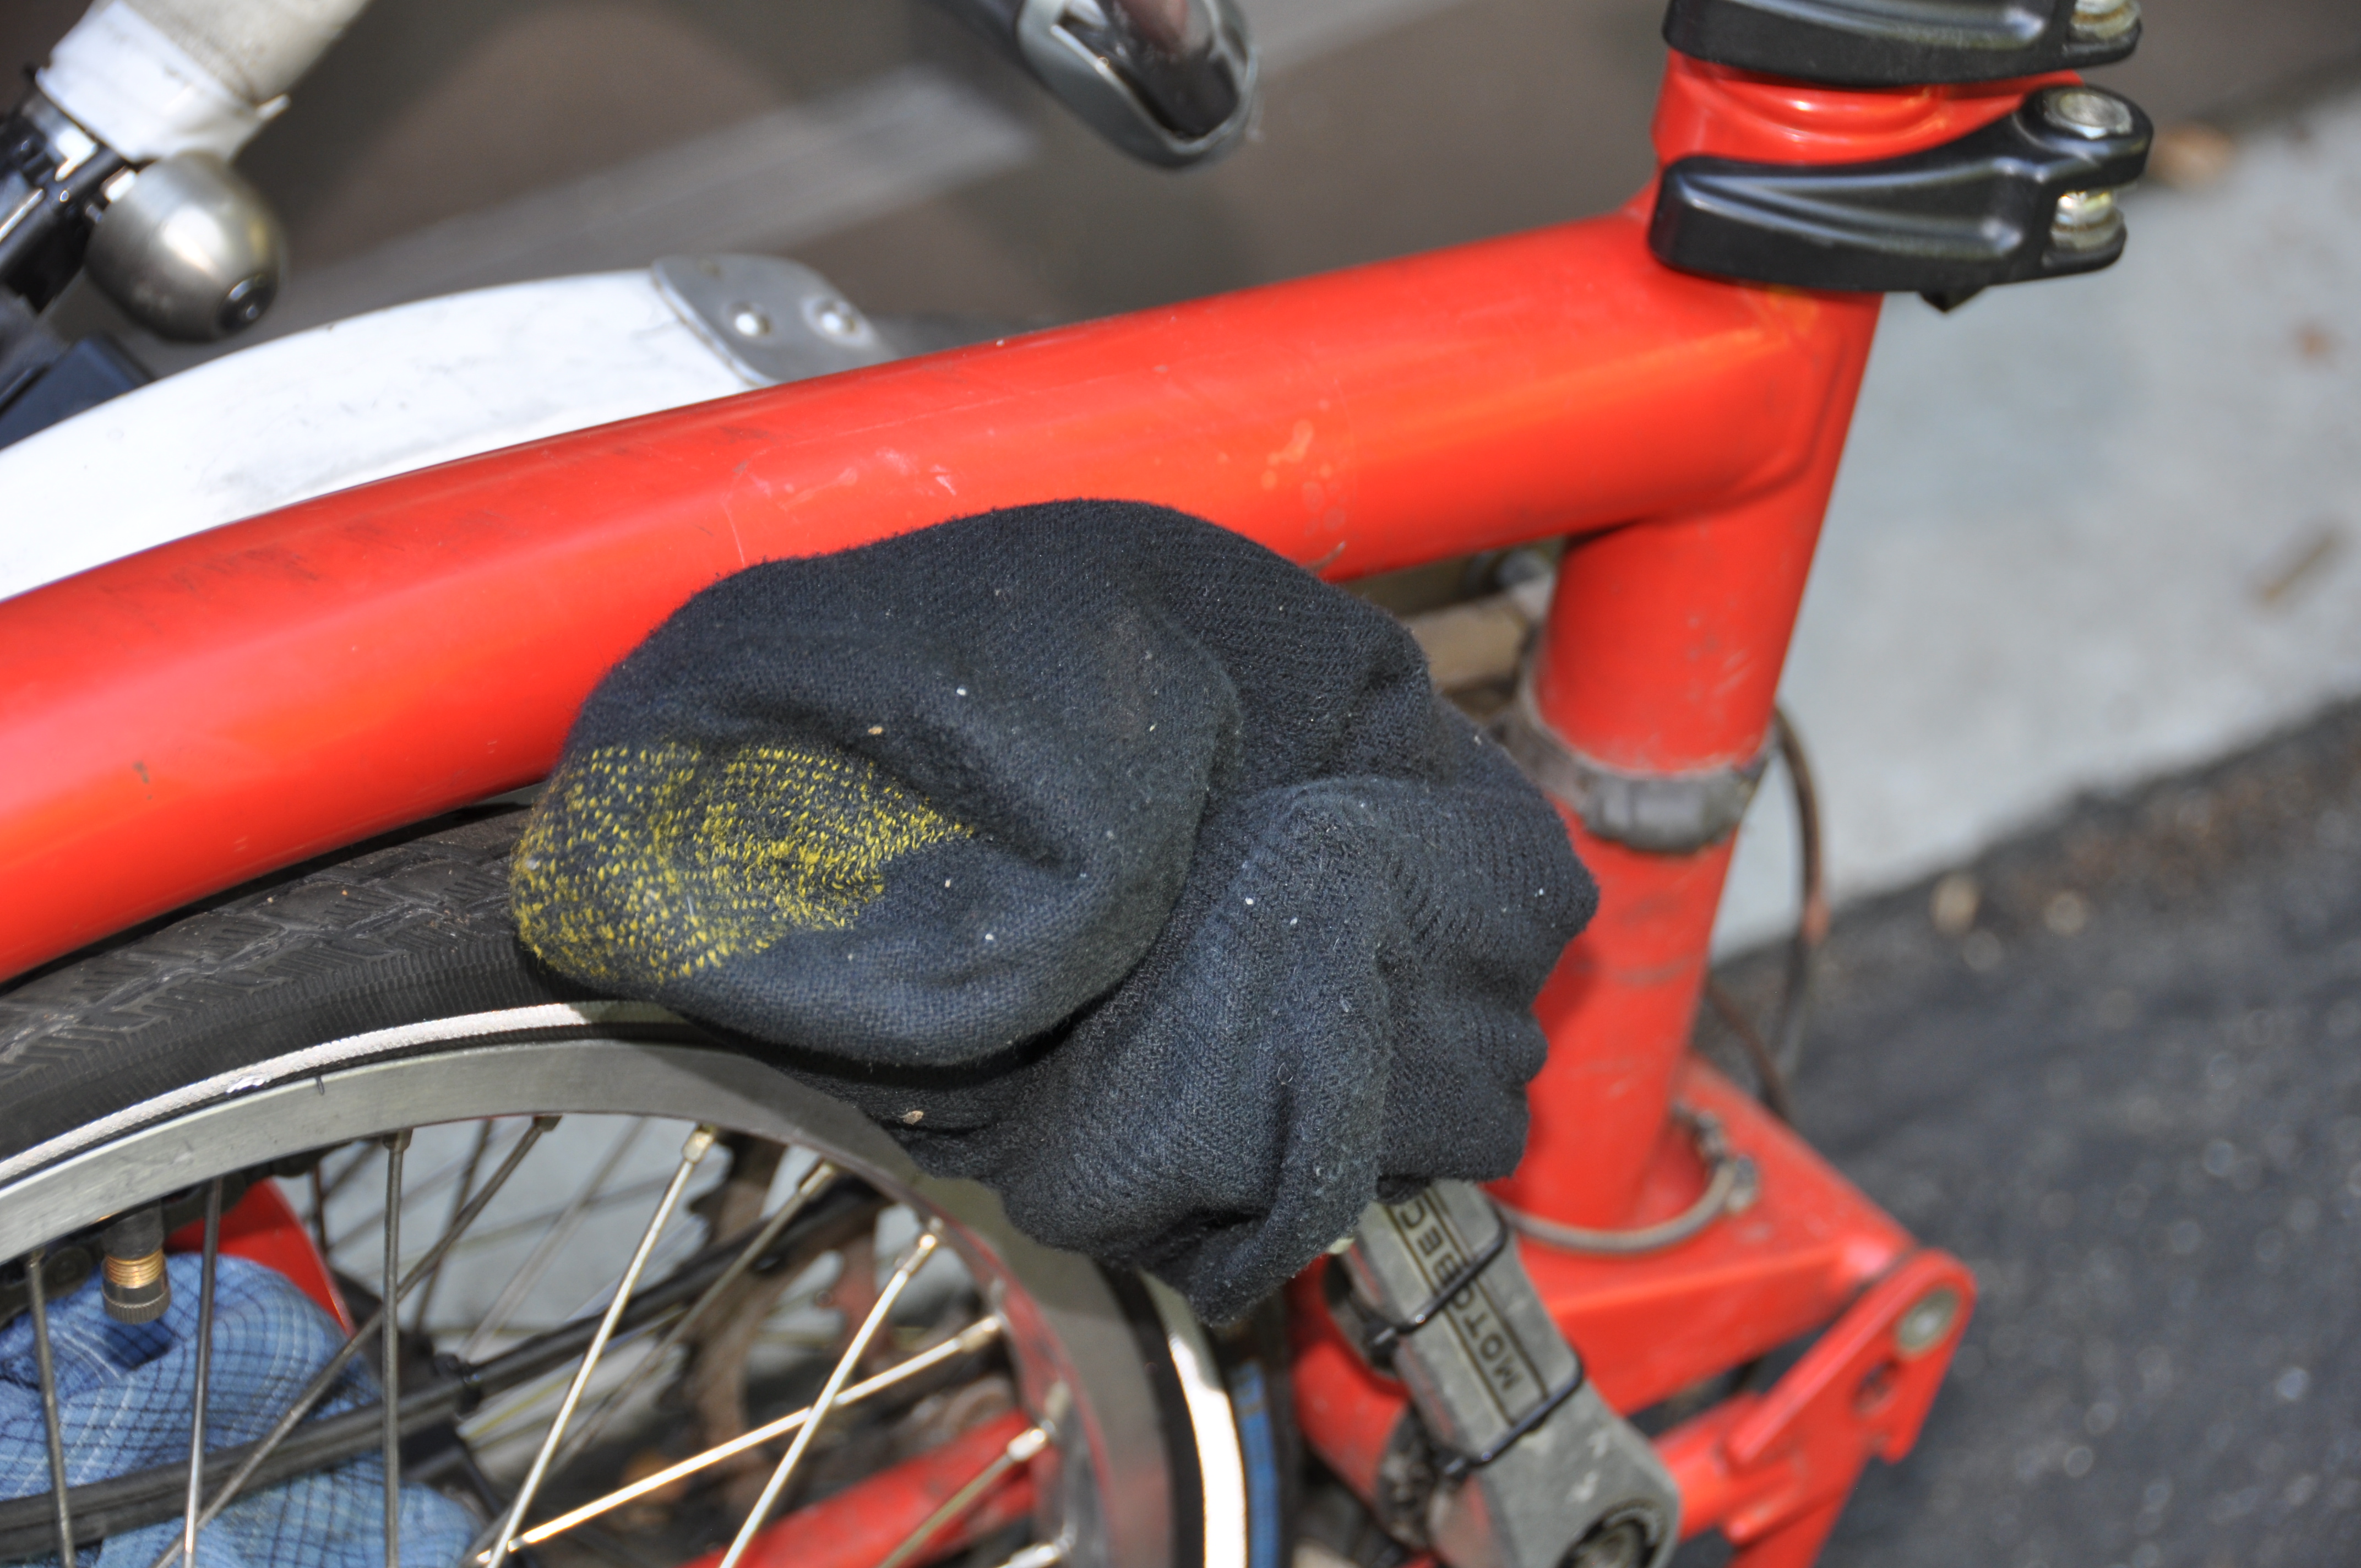
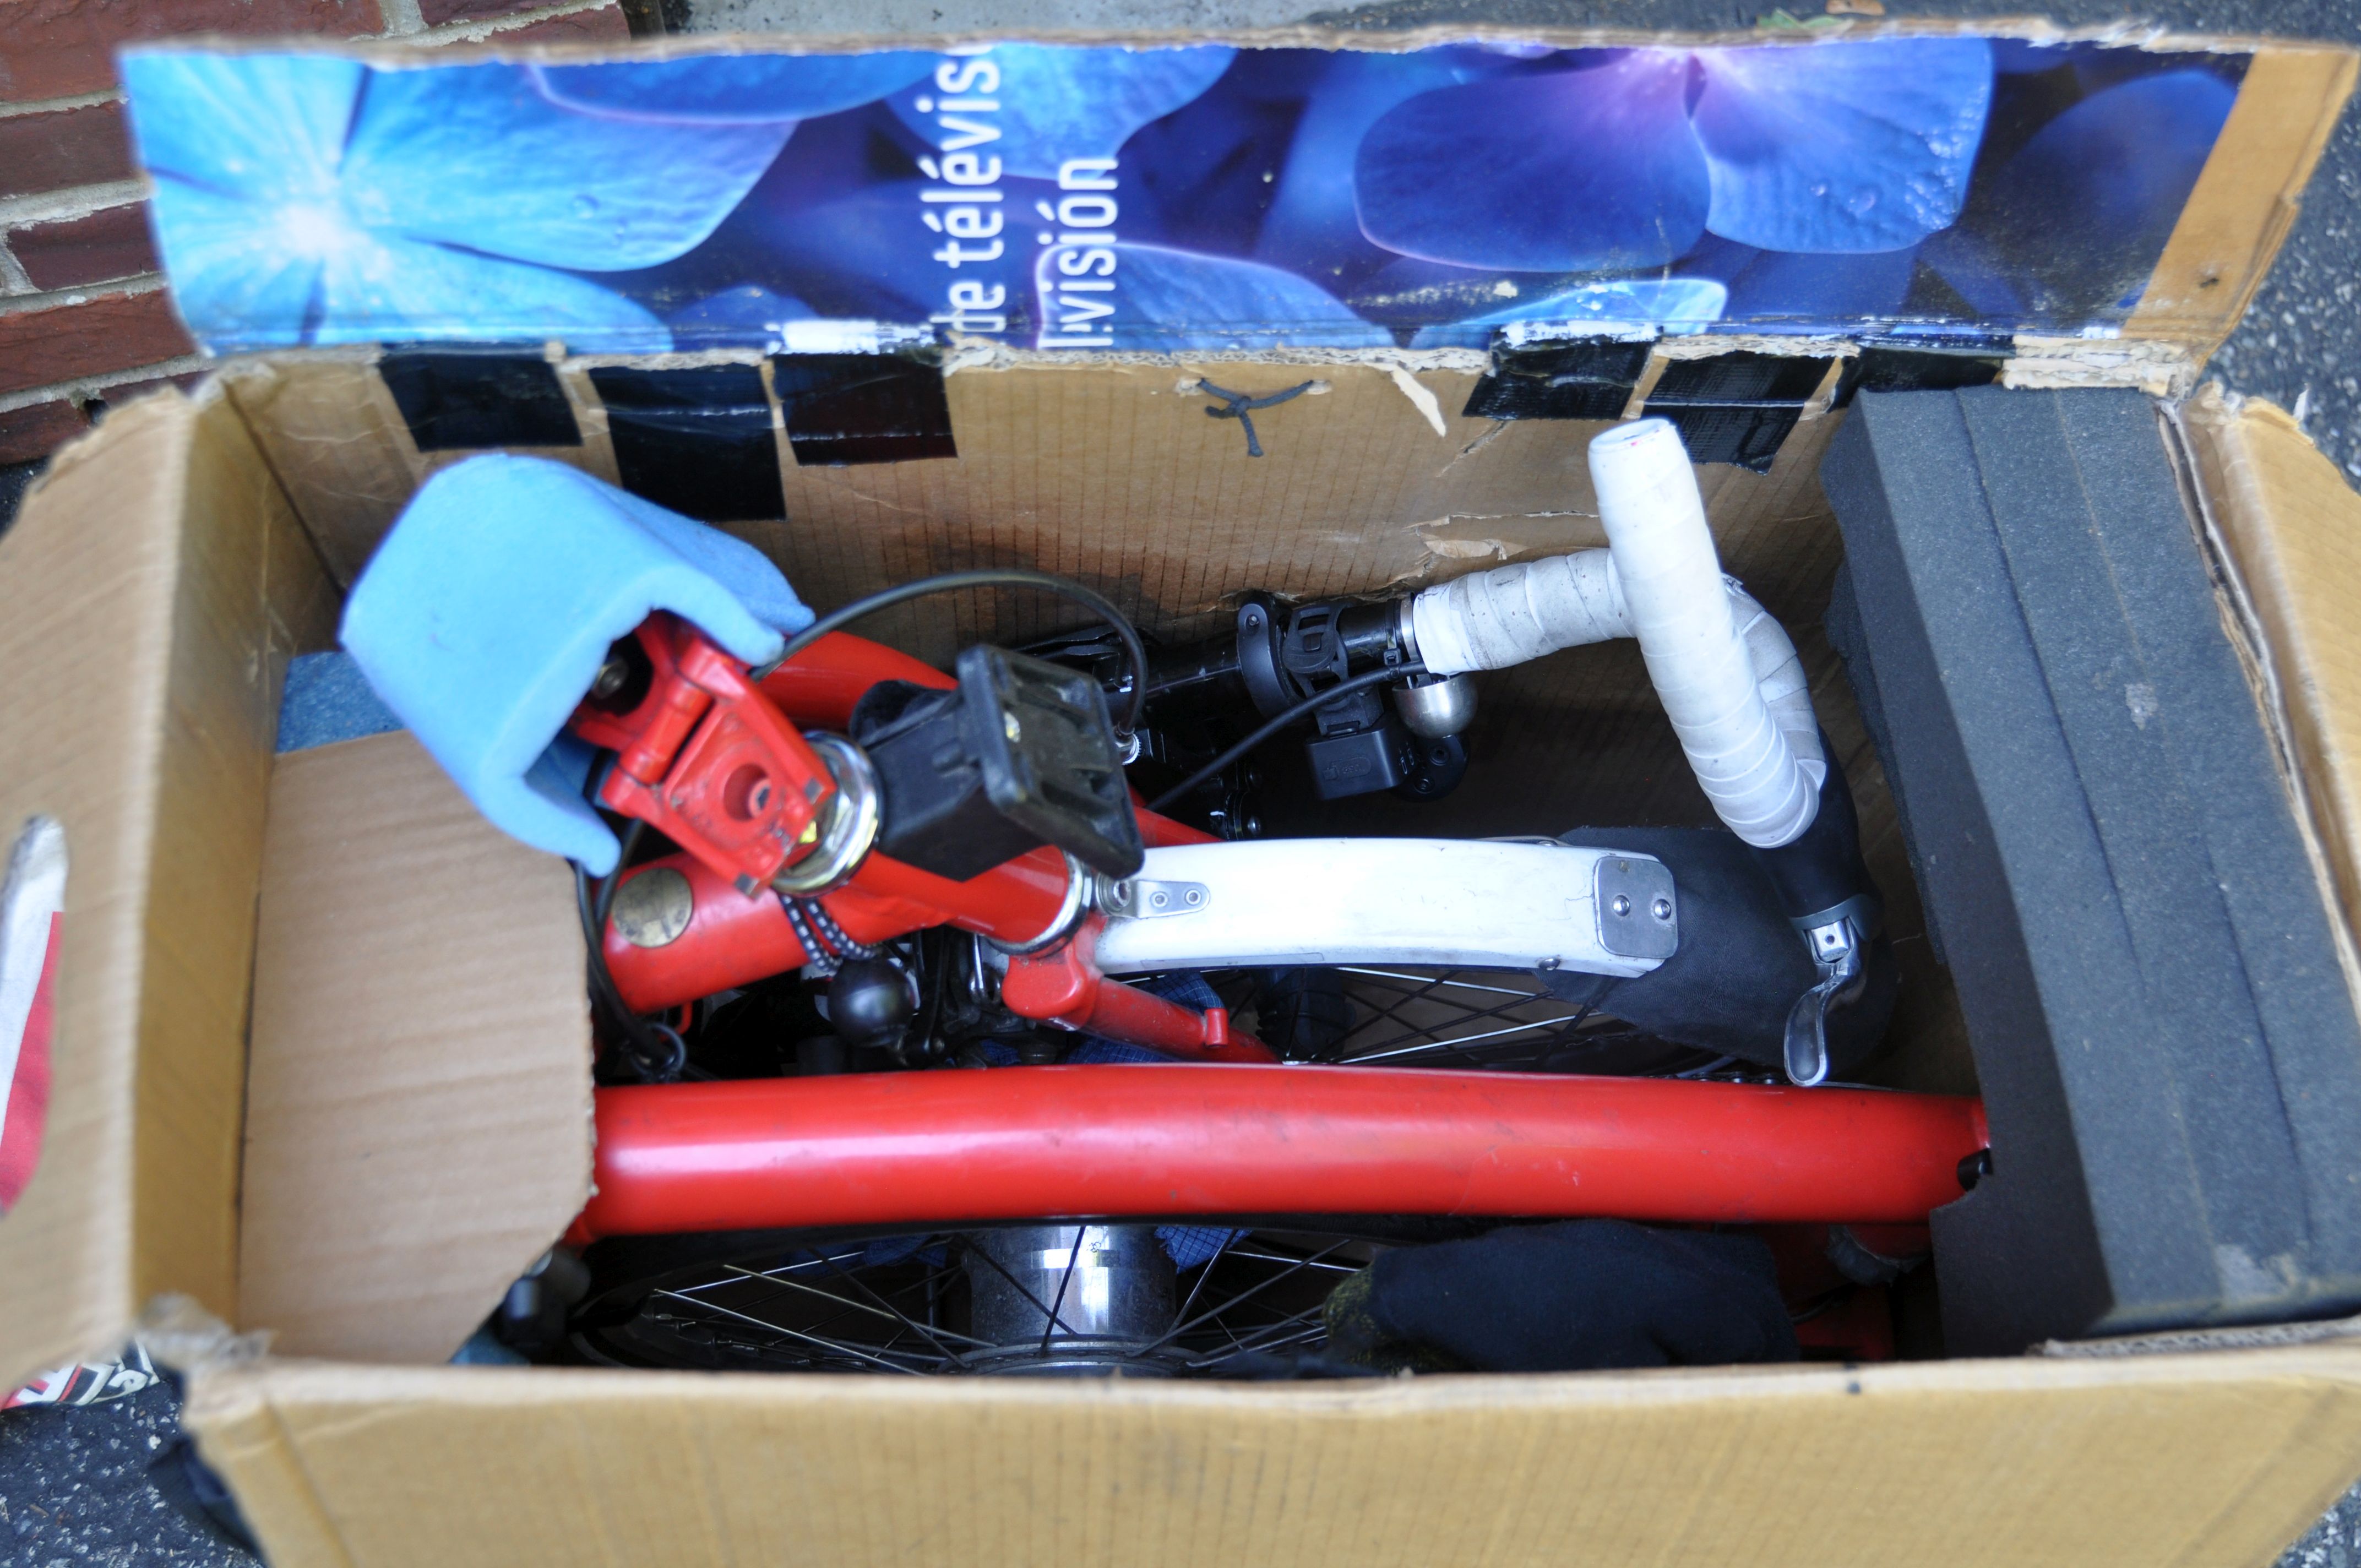
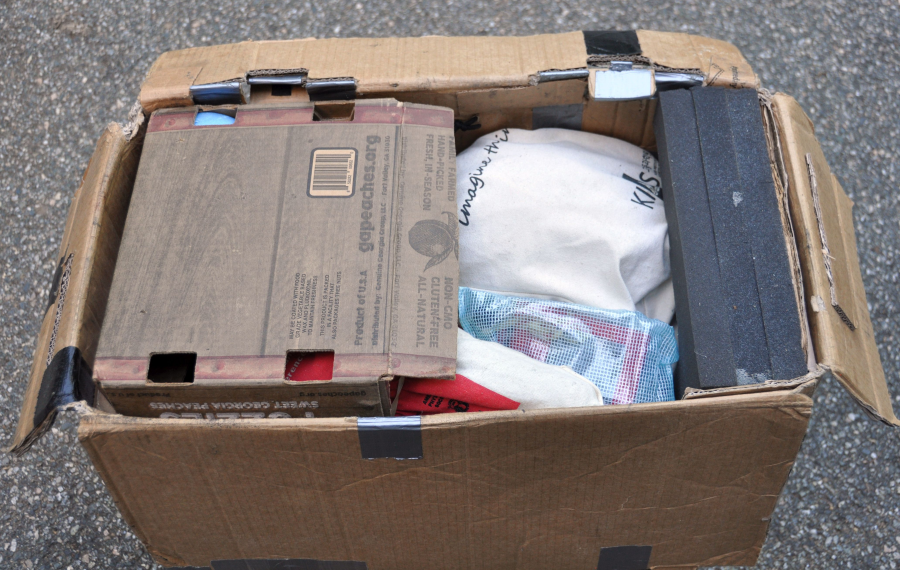
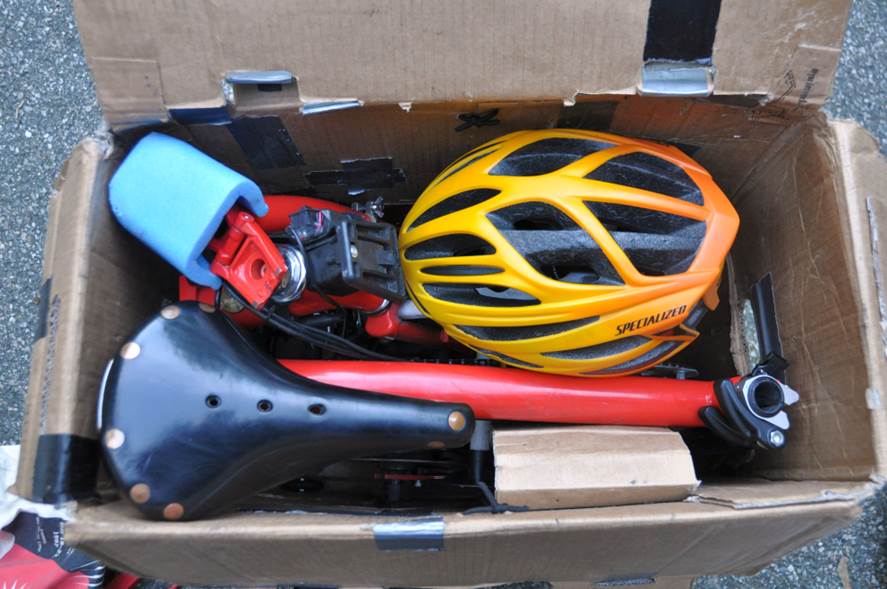
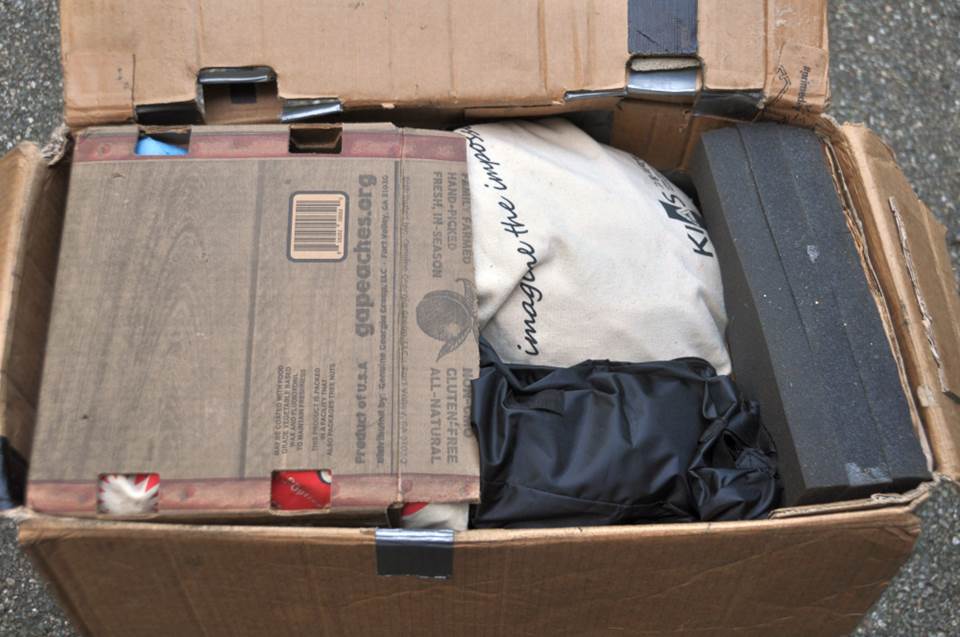
Pack the box: 1. Put some cardboard/foam pieces on the top of the frame. 2. Fill in the empty space at the top (previously, I could add my helmet, but with the modified handlebar there is no longer space). 3. Close the box and put it into a bike carrying bag (see below).
Older version:
Using the retail cardboard box:
For air travel, many people use a soft bag and reinforce it with cardboard or a
plastic frame. My solution is to use the original Brompton box and put it into
a large backpack. Very light, very sturdy, very inexpensive! I also want to
share how I can very quickly pack the Brompton into the box.
Since some people have reported bent Eazy Wheels, I glued three pieces of wood to the bottom of the box which supports the bike at the seatpost, the front tire and between the rear Eazy Wheels. I also reinforce the box with some extra pieces of cardboard and plastic sheet (the plastic sheets protect the box from being pierced by the axle or the brake levers).
Preparation of the bike: protect protruding axle nuts.
Update: I now use plastic caps (wheel nut covers) for protection. They stay on the bike all the time.
Put Velcro straps on two brake lever (to reduce the width of the folded bike). This was necessary for the Andros stem, but not for the Genetic one, since the levers are facing inward.
I don’t remove the hinge clamps, but screw them in all the way. This protects them from being bent. For the stem hinge, I want the lever to be parallel to the clamp for secure packing. Since the lever didn’t stop in this position, I put a piece of thin plastic or metal (of just the right thickness) between the clamp and the frame.
Add PVC crush protector (from Bike Friday).
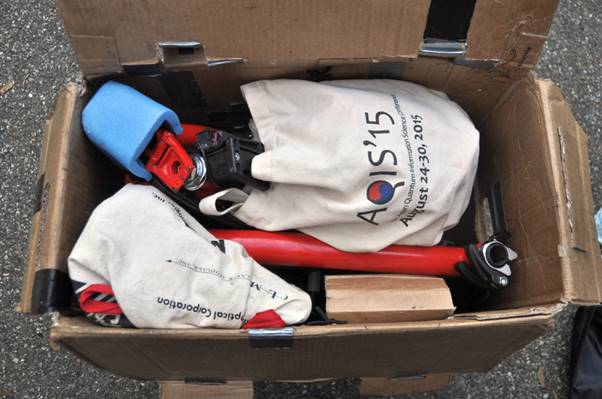
Put bike into the box, add saddle, helmet and water bottle (in cloth bags), add foam and cardboard on the top.
In the end, I was lucky: My bike is still fits into the Brompton cardboard box, but there is no room left. Note that I have a wider rear triangle (wider by 20 mm, for the Alfine 11 hub) and the modified handlebar with the Genetic stem. It needs the full 12” width of the box and would not fit into a smaller suitcase.

Carrying the Brompton cardboard box Back to top
I found two solutions how to carry the box:
Put the bike it into a backpack. I use the one from www.radel-max.de (40 Euro). possibly the Dahon backpack will also work (USD 169). You have to check that the bag is high enough (the Brompton box is 25 inch (63.5 cm) high). My backpack was too large. I used a few laces to make it tighter, and also added some cinch straps. With the backpack, you could put the empty box into the backpack, bike to the airport, and then pack the bike.
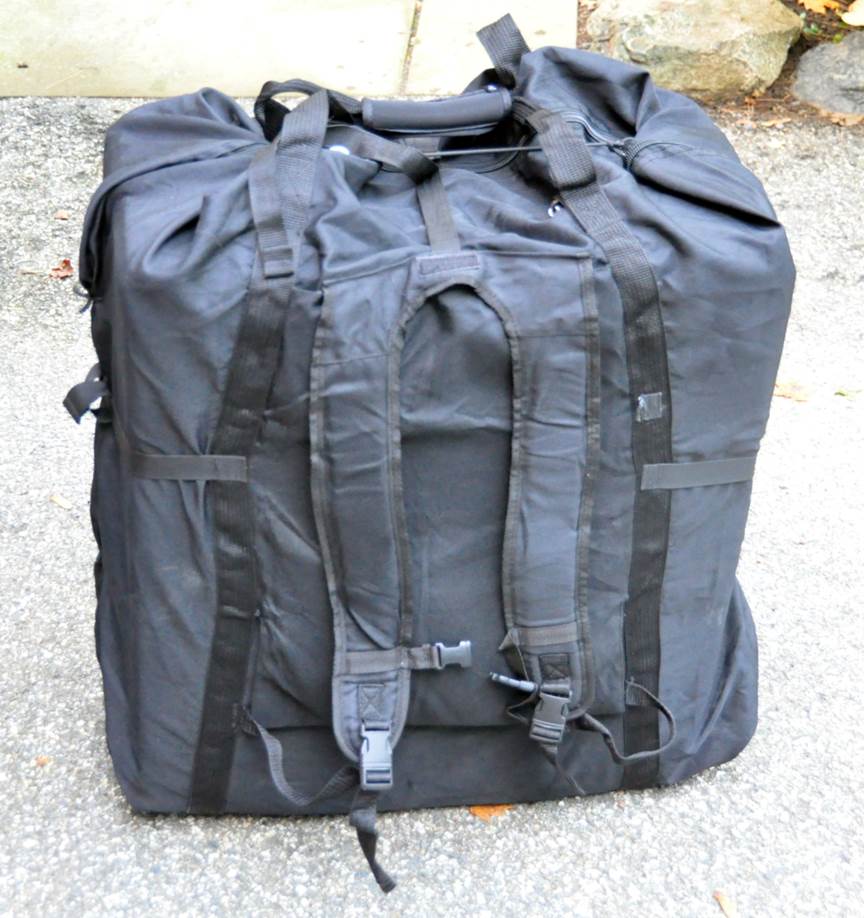
My second solution was based on a lucky find: I found a bicycle carrying bag which has the perfect size for the Brompton cardboard box:
https://www.ebay.com/itm/113685322828
Here with the Brompton box inside:
(Ideally, the bag should be 1 or 2 cm higher, and 1 or 2 cm narrower, and the handles could be a little big longer – but as you can see, the fit is almost perfect)
The bag looks quite sturdy. However, the shoulder strap is too weak, and also the D ring attachment. I replaced both.
To turn it into a rolling “suitcase”, I added 4 one-inch casters:
httpsb://amazon.com/gp/product/B071GTK6NZ
They were attached to the bag with a piece of plywood put inside at the bottom of the bag.
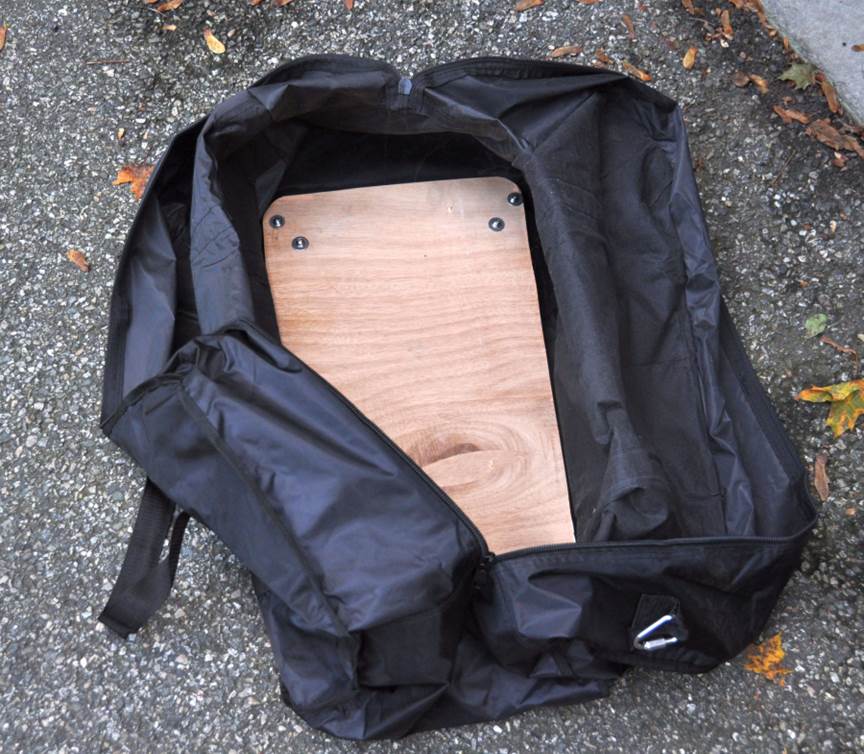
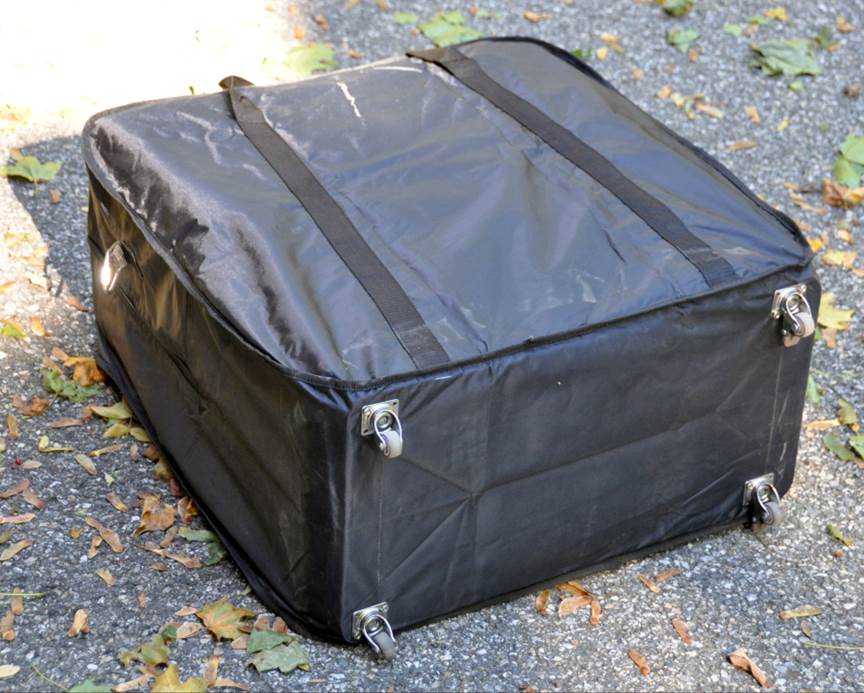
The cardboard box with the bag and the casters are equivalent to an expensive rolling hardshell suitaces, and they cost less than $ 40. This has even additional advantages (such as lower weight, easy ways for repair, or replacement of the cardboard box). Let’s see how it holds up in the longer run!
Update: The plywood broke --- it was too weak. I am now attaching the casters with velcro to the outside of the bag.
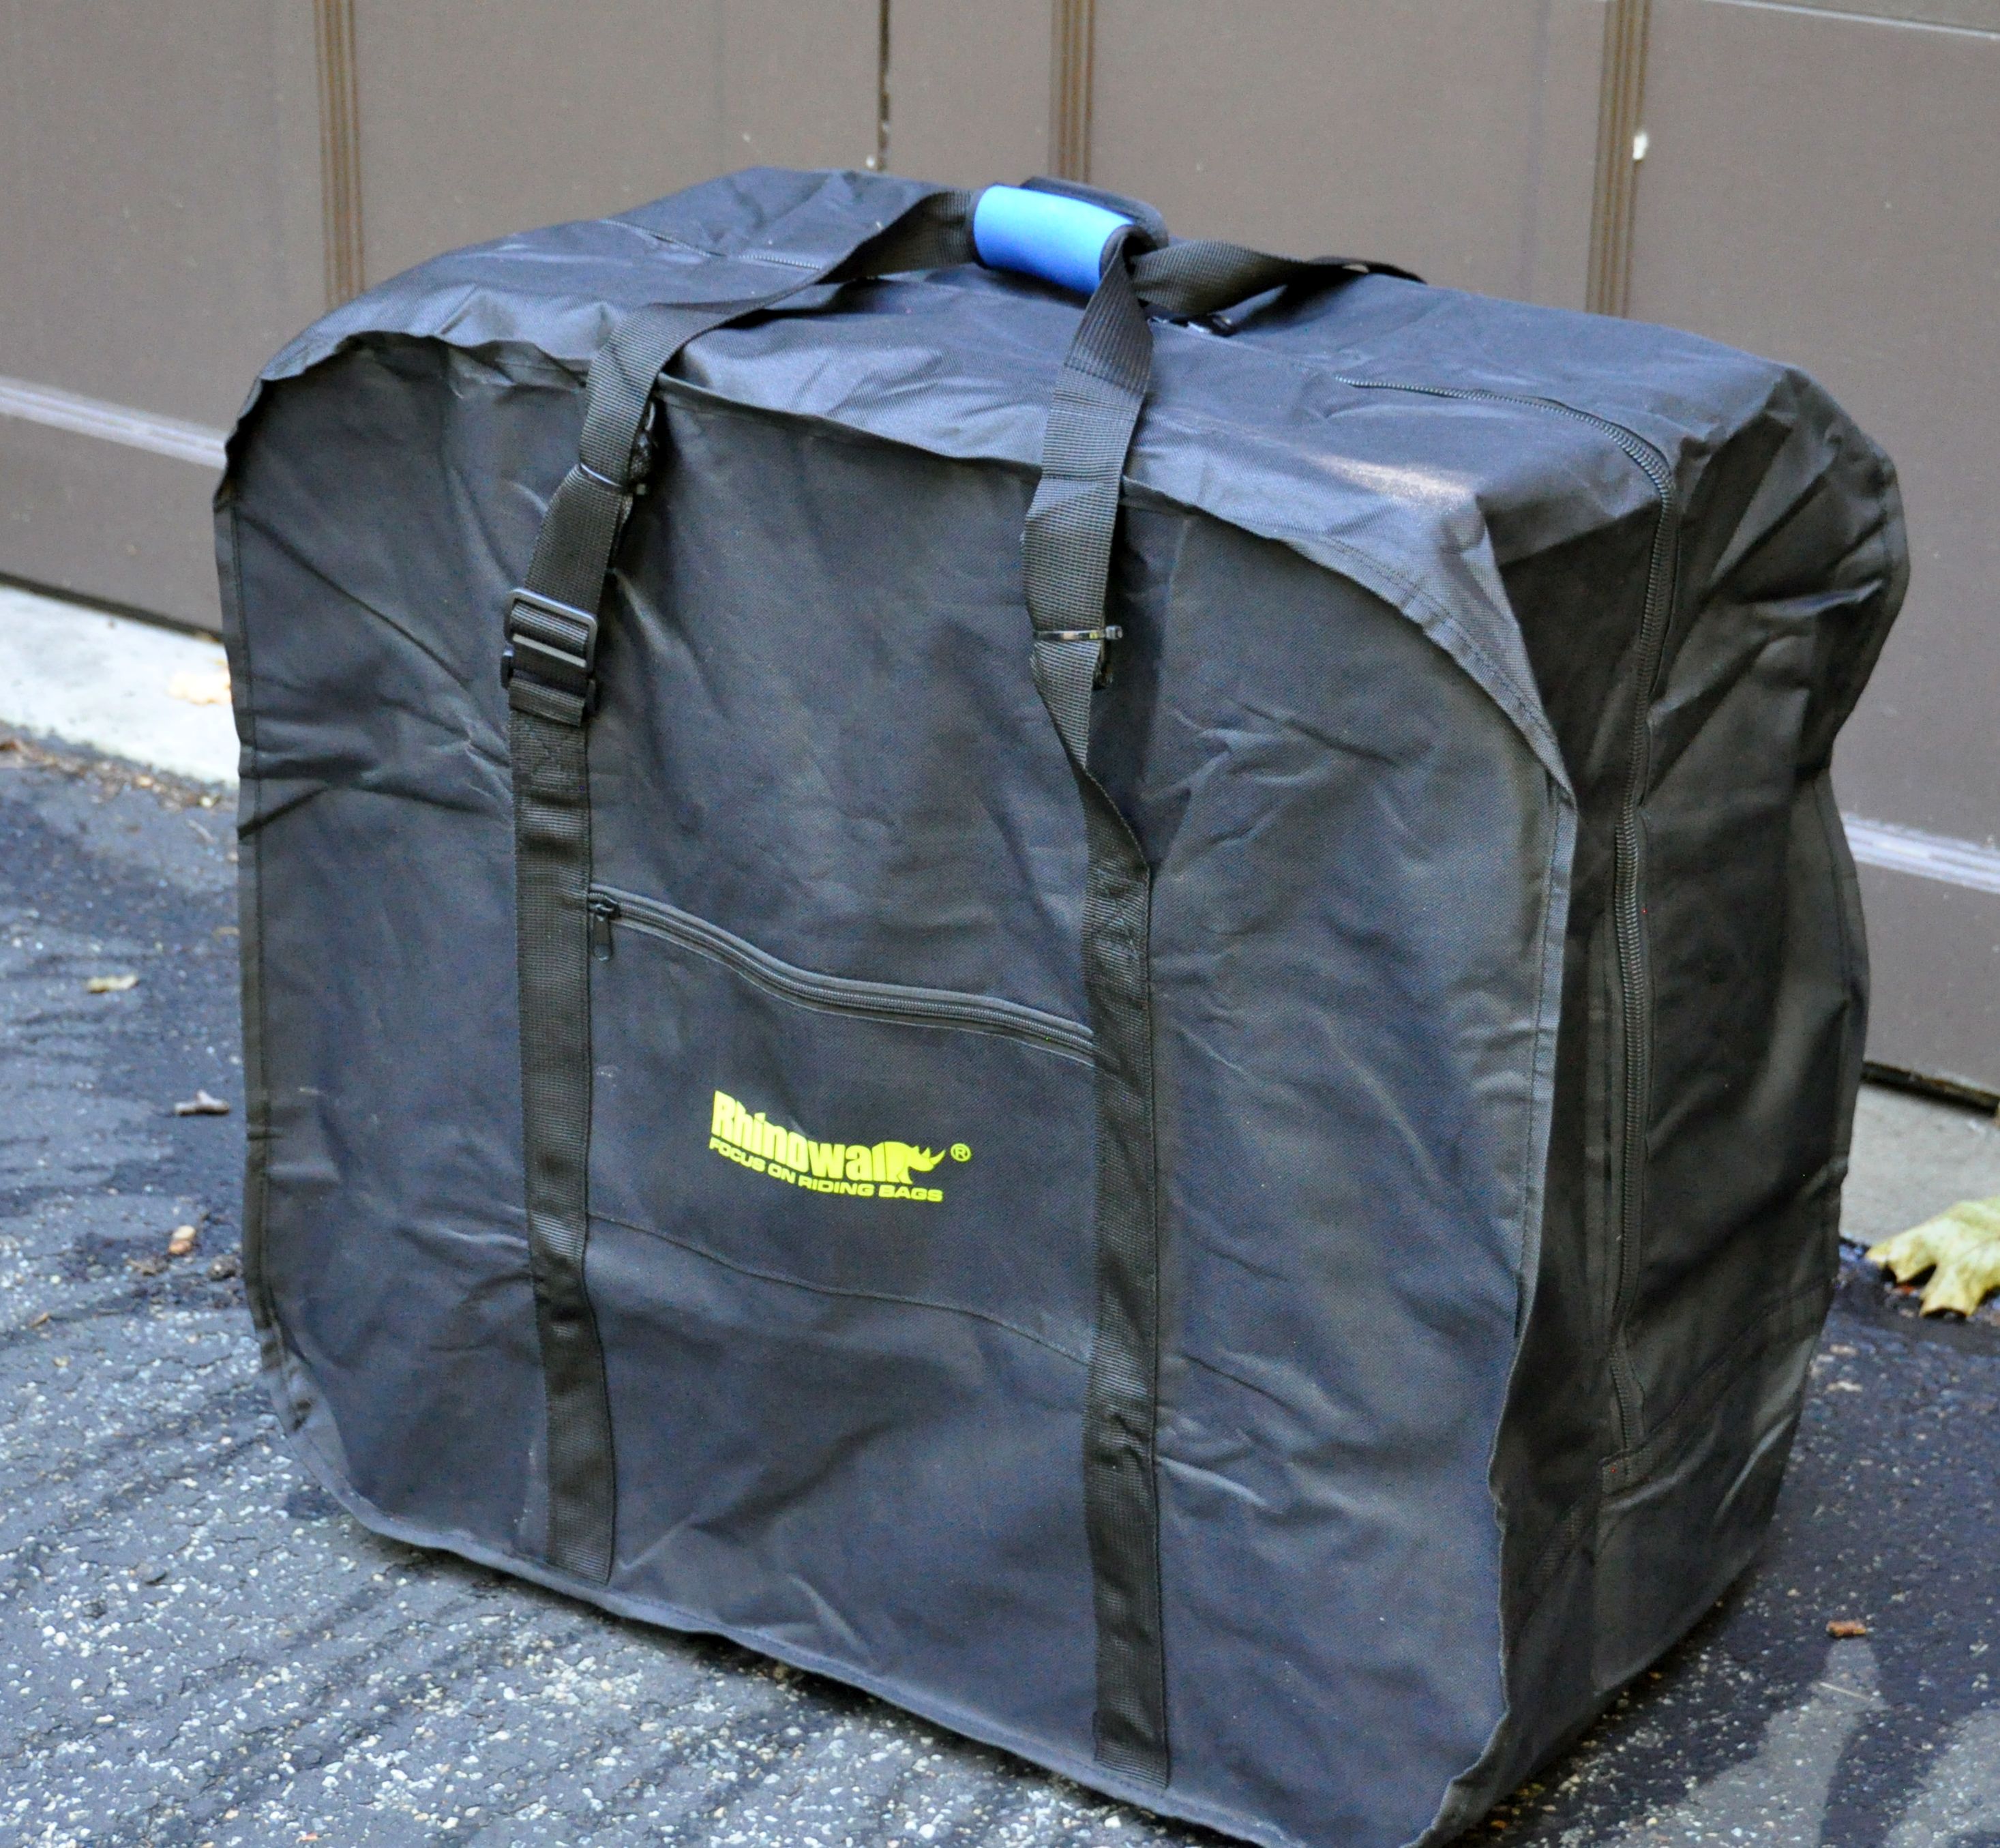
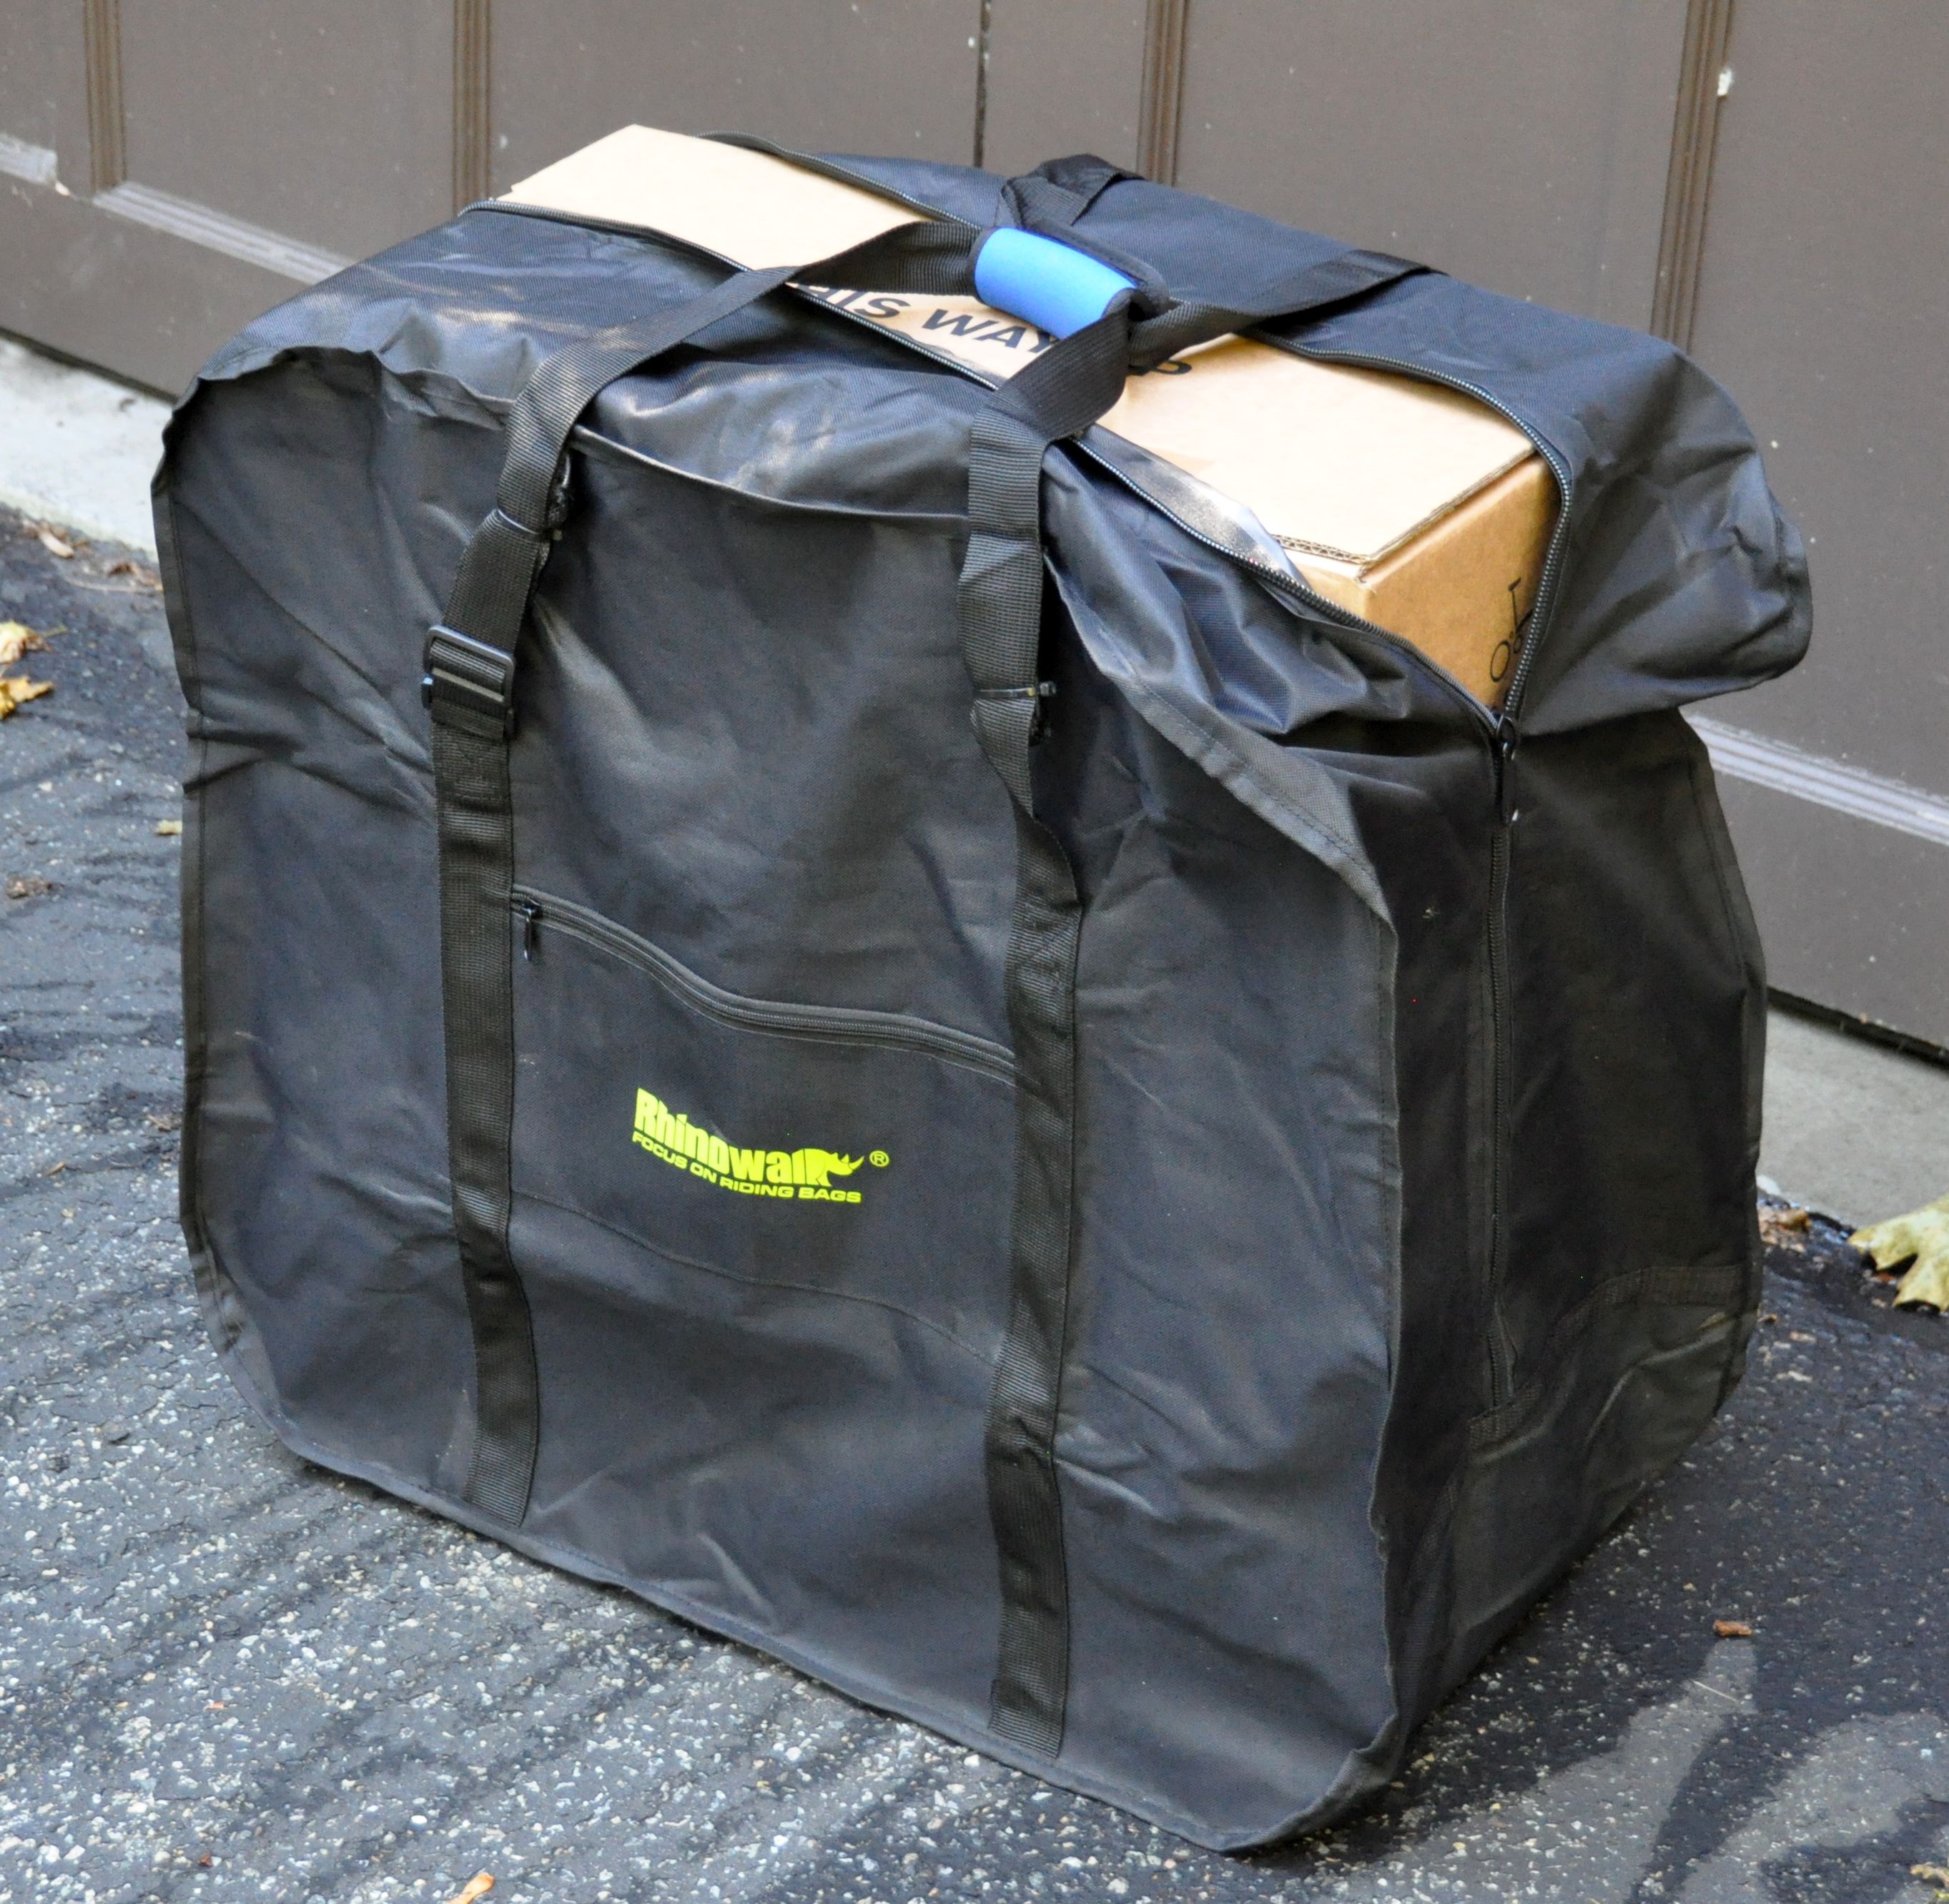
The bag avove fits perfectly, but it is no longer available, and it is only of medium quality. Here is another bag, which is a little bit too big, but still a pretty good fit. This bag is the 14"-16" carrying bag from Rhinowalk and available from various sellers.
https://rhinowalk.com/collections/bike-transport-bag
Andros stem Back to top
I have used the Andros stem with a bullhorn bar for more than one year, for commuting, going on bike tours and climbing mountain roads. It gave me a natural and relaxed position on the bike which is essential to me. I never had any failure of the stem, but in the end I concluded that the Andros stem is not sturdy enough in its design, and for a long reach handlebar (like a bullhorn), the clamping force of the quick release levers is marginal.
I have now found a better solution – the Genetic stem described above, and don’t recommend the Andros stem any more. Here I describe how I was able to use the Andros stem, and then discuss the problems I have encounterd.
I have a 2018 Brompton S type and was able to fit in a bullhorn handlebar using the Tern Andros stem, around $ 60, see
http://www.thorusa.com/accessories/handlebar.htm
https://www.ternbicycles.com/us/gear/472/andros-stem
Note that the S bar, compared to the M bar, has the handlebar mounting point 3 cm higher and 3 cm more forward which is helpful if in the end, you want a higher and more forward position with the bullhorn. I am 1.89 m tall. If you are shorter, you may not need the extra 3 cm, and the M bar will work for you.
This setup allows me to ride in a natural position. Also, the stability of the steering is greatly improved --- feels now almost like a regular bike. The brake levers are Tektro R720, the shifter (for Alfine 11) is Jtek. The bullhorn bar is Fyxation Rodeo Bullhorn Handle Bar, 42cm, Silver.
Folds into a compact size – still fits into the Brompton cardboard box.
When I put in the Andros stem, I had to adjust the fold by moving the handlebar catch further out by a couple of turns (just rotate the plastic part with pliers). This allows the catch to snap in before the Andros stem touches the fork.

For the folded position, the first angle of the Andros stem is adjusted for the Andros stem to be parallel to the fork, the second angle to move the bullhorn bar as much in as possible (that’s when the tip of the handlebar hits the front fender). You have to find two specific angles when folded, and two when unfolded. I clearly marked those angles, so I always get them right without fiddling.


The specs for the torque for the Andros stem vary in different manuals and instruction videos. It says 6-12, 9-12 Nm, or in the installation tips: do not exceed 8 Nm. I found this too much - it is very hard to close the lever, or to rotate the handlebar in the open position. Also, the 6 mm bolts got bent in this range of torque. I am now using around 20 inch pounds (about 2.3 Nm), and it feels right. Also, you are told not to put any grease on it. I found that the stem didn’t rotate smoothly after I while and decided to grease it with carbon fiber seatpost grease (which has some grit in it).
UPDATE: After lubricating everything (levers, clamps) with lithium grease spray, I increased the torque to 60 inch pounds (7 Nm) and it seems to work well.
The Andros stem is very nice, but in some ways marginal. You have to keep the quick release at maximum tension, when you can still rotate the handlebar in the open position, and close the levers using some force by pressing on it with the palm of your hand. When the quick release was less tight, I had occasional (once every few weeks) slipping of the stem when I drove through a pot hole while riding with my hands all the way out to the tip of the bullhorn. But the slippage was only by a few degrees, sometimes hardly noticeable. Or in other words: The length of the bullhorn and me being a tall rider puts a lot of torque on the handlebar. When this is augmented by driving over a bump or through a pot hole, this can push the Andros stem to its limit.
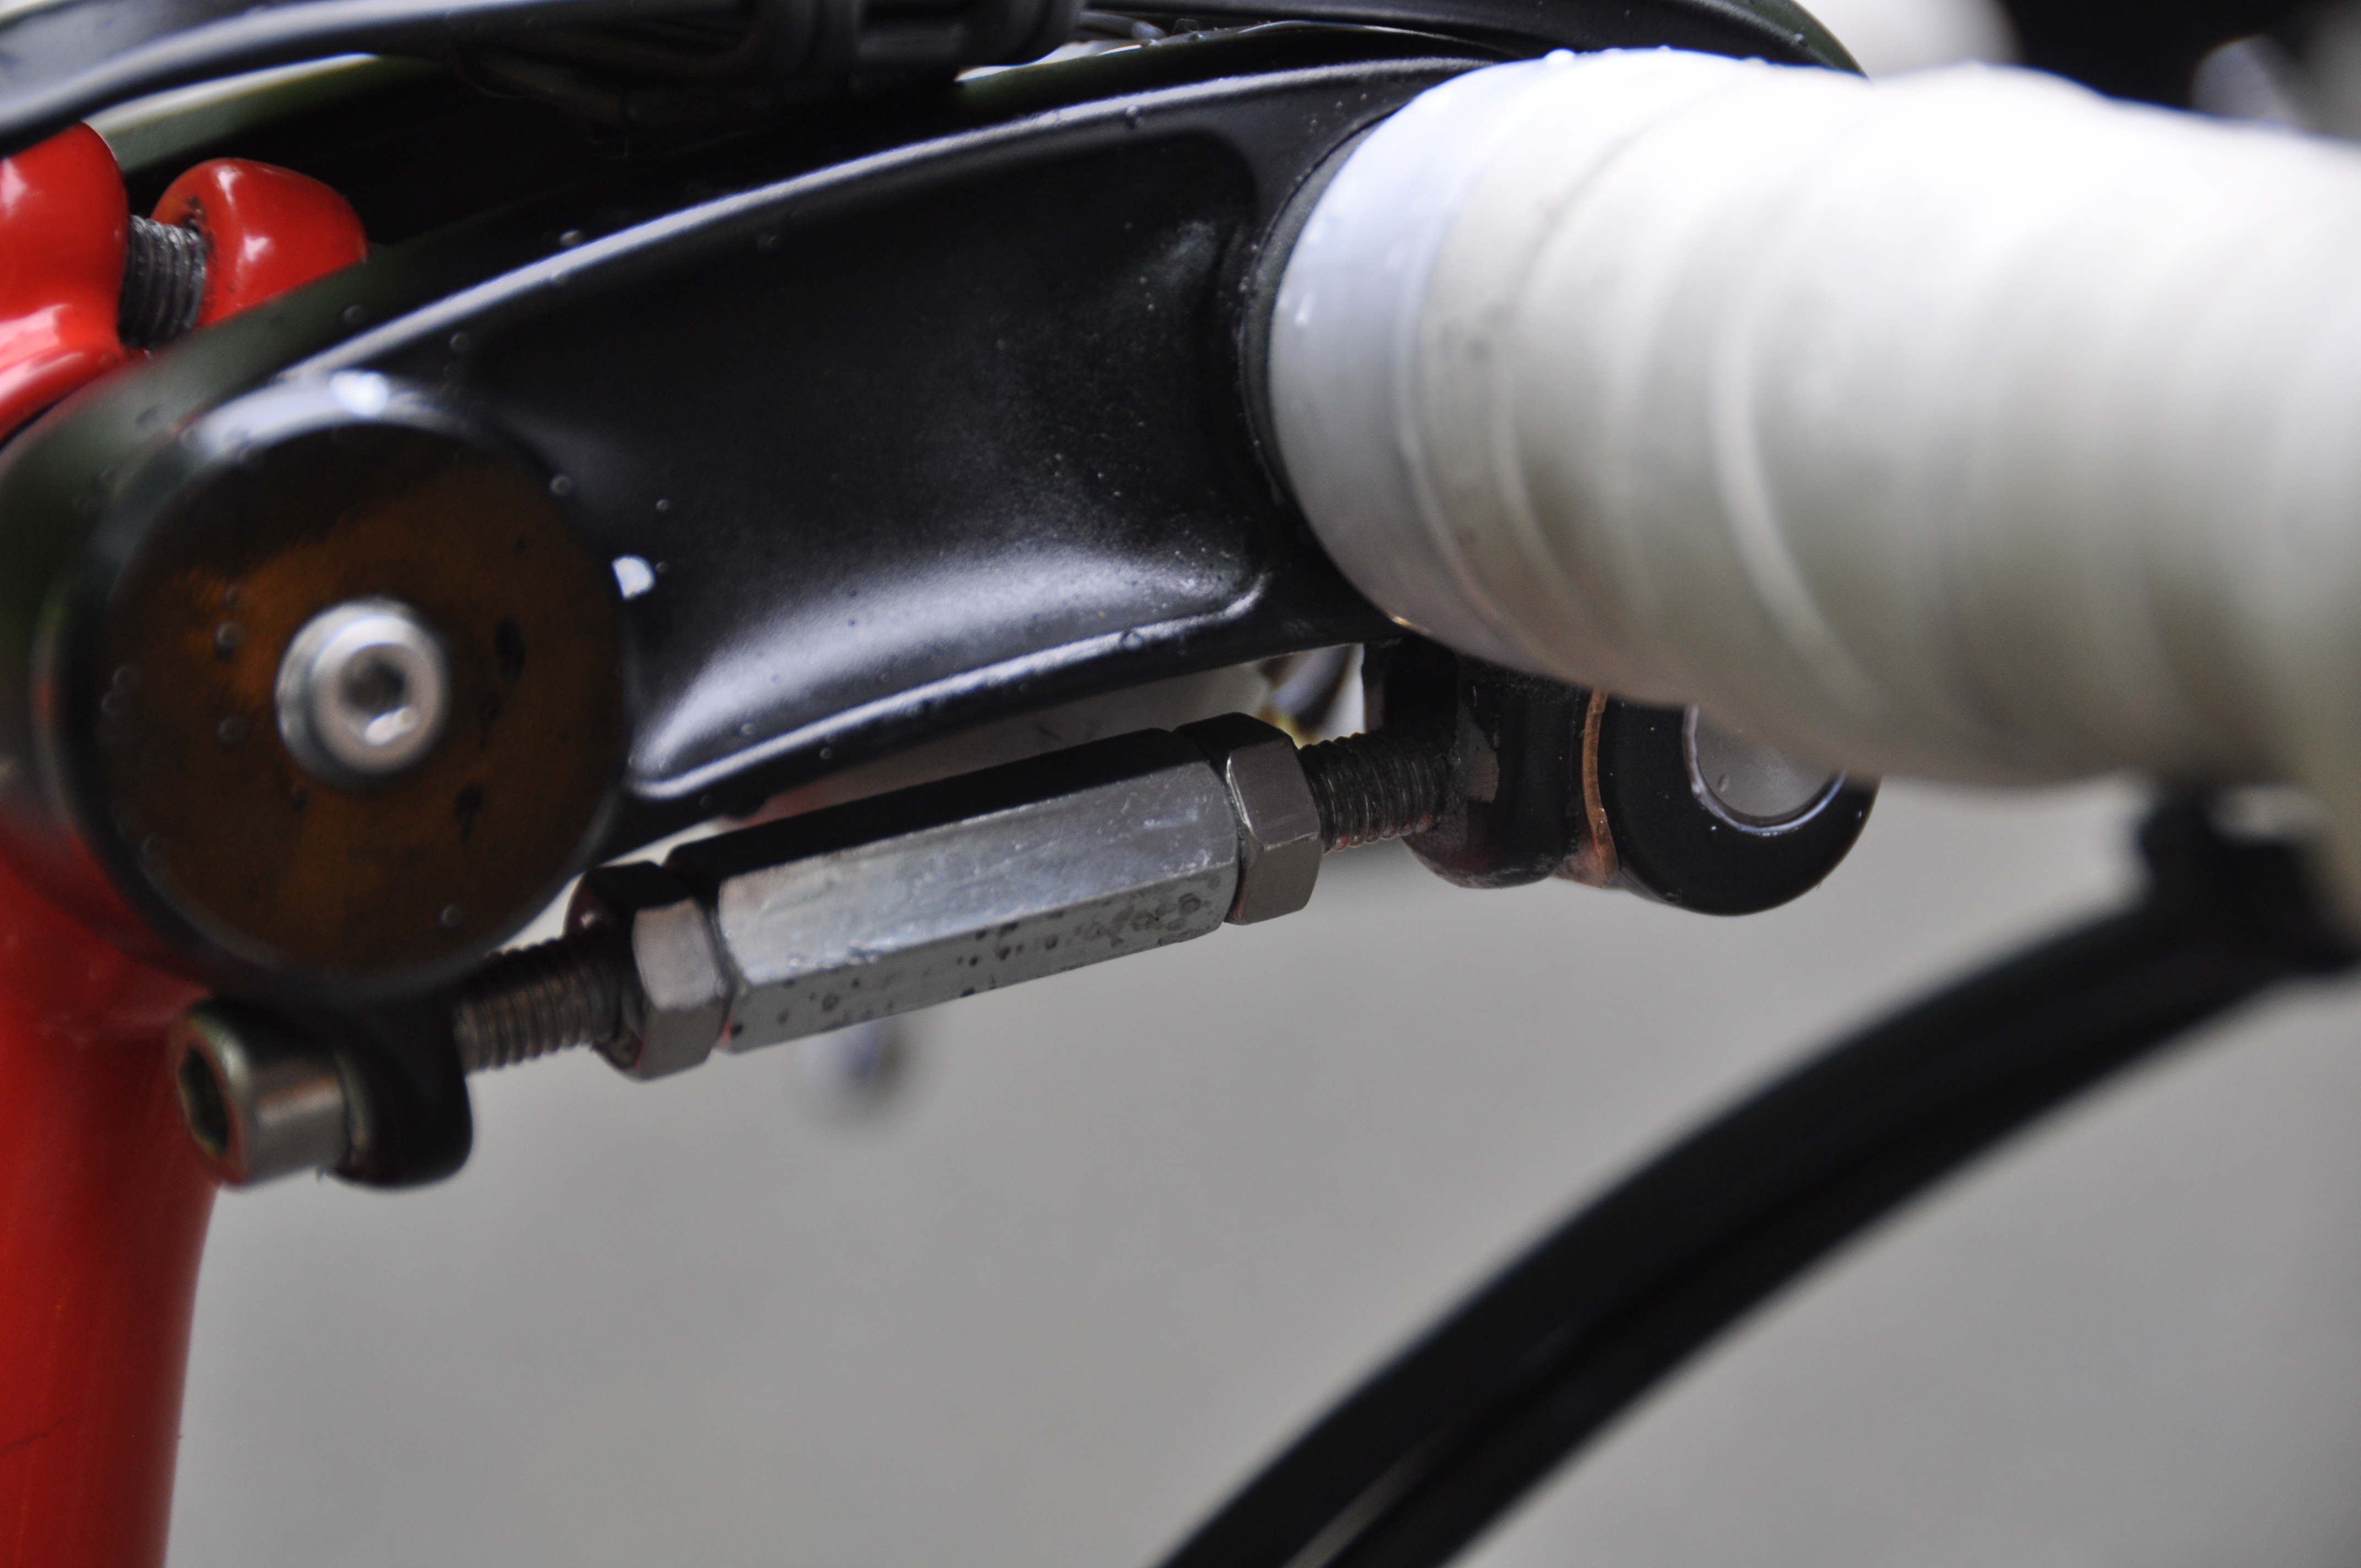
Andros stem - important improvement:
Even at low torque setting (20 inch lbs.) the long screws got bent. I replaced them, and they got bent again, near the end where they are screwed into the clamp. This is probably ok, I have seen with seat post clamps that the screw bends due to the torque, but then it stays like this. The problem with the Andros stem is that you have to rotate the screw for adjusting the tension of the quick release to keep it tight (see above), and then the bent is rotated to a different angle. When you rotate the screw, you feel a wobble due to the bent. When rotated, the bent will try to rotate the screw back.
My solution: Combine a piece of threaded rod (cut off screw) with an Allen head screw and an M6 standoff. I could now use permanent red thread locker to connect the threaded rod to the quick release clamp. I assume this rod will slightly bend in the future, but adjustments are now done with the other screw (which I expect will not bend) which can be smoothly rotated by small increments. Since the rod is permanently glued to the clamp lever, I can now generously grease this part (which improves performance) without risking that the screw will rotate under tension. Any rotation in the M6 standoff is prevented by using counter nuts. I highly recommend this modification - it has taken away a serious concern I had about long term integrity of the Andros stem.

Another improvement for the Andros stem:
By keeping sufficient tension on the quick release, the Andros stem clamps well. It is only every few weeks, when I hit a bump or pothole, that the handlebar rotates down a centimeter or so. This is so little that it has never caused any issues for steering the bike. However, I am always a little bit concerned that the handlebar could rotate more when I would hit a bigger pothole. I have now added an extra clamp to make this less probably.
I am using a clamp (from Chain Reaction Cycles) around the vertical Brompton stem which is adjusted in such a way that it touches the Andros stem when it is in the riding position, thus limiting the range of rotation. This is also very convenient when unfolding the bike, because it provides a stop. Therefore, the Andros stem is unfolded every time to the same angle, without looking at markings or fiddling around. This clamp is useful, but unfortunately, it is not providing a lot of extra holding force: When I press very hard on the bullhorn bar, the handlebar still rotates down by rotating the clamp.
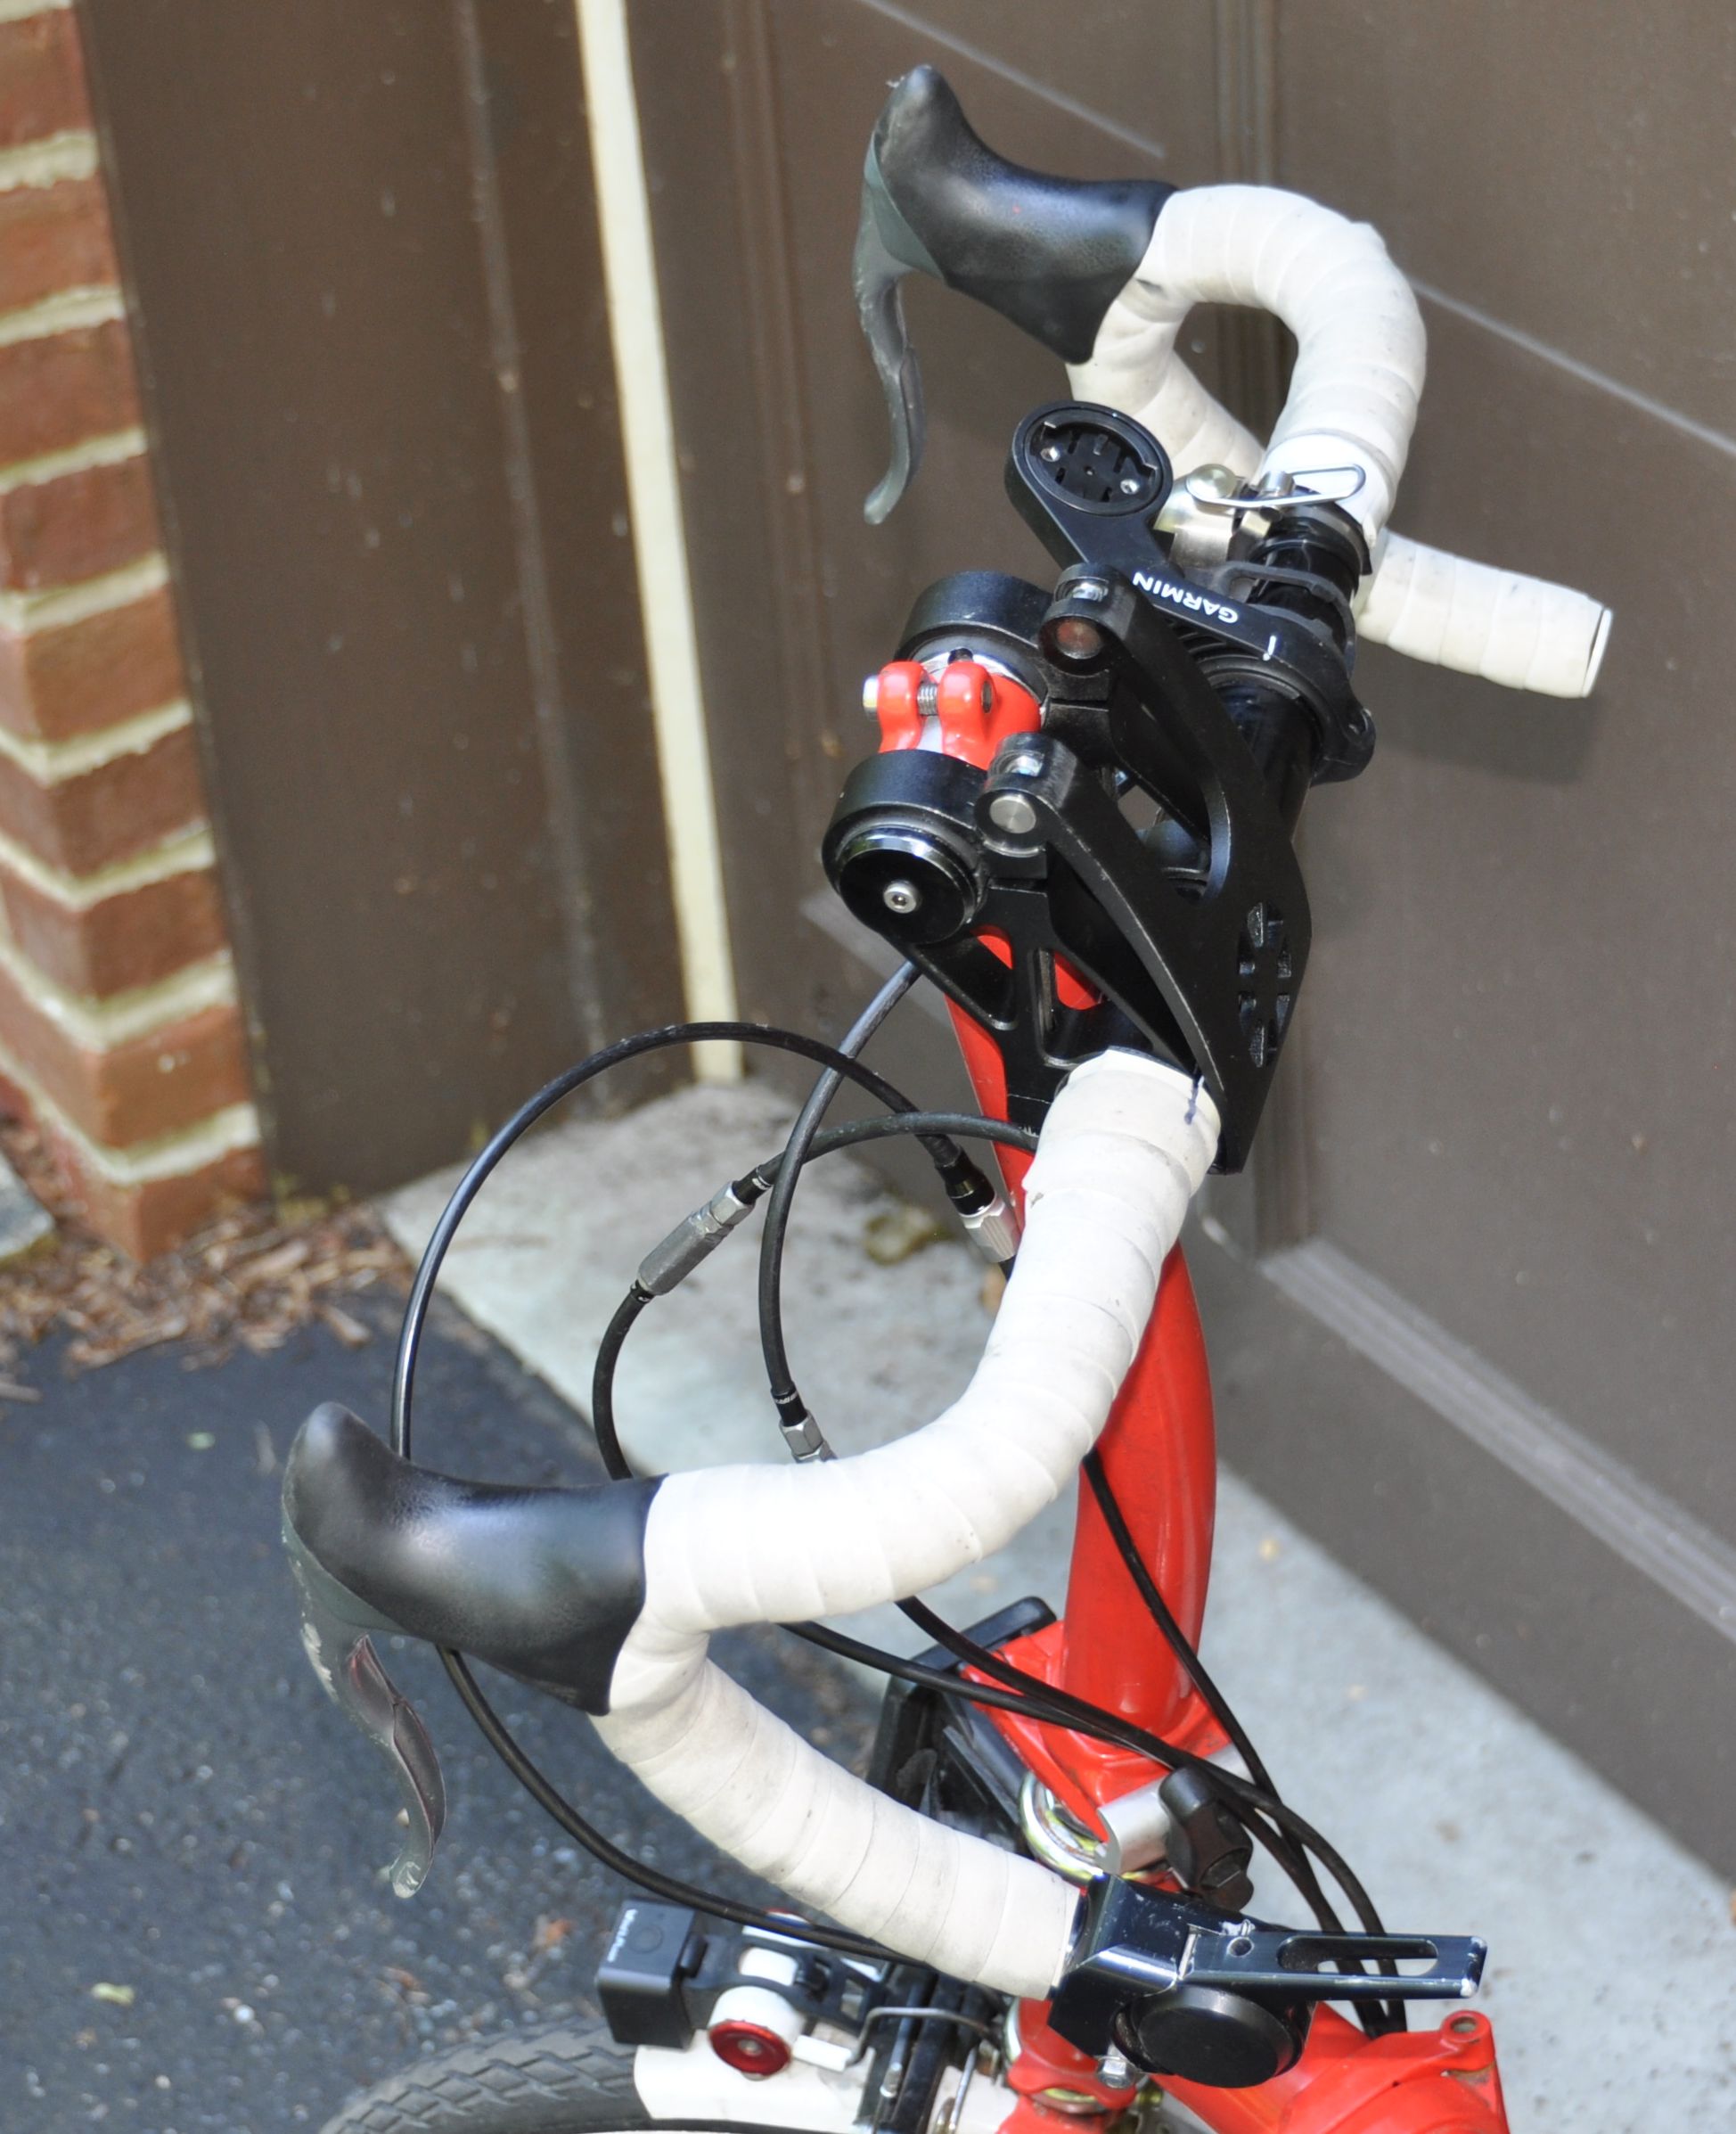
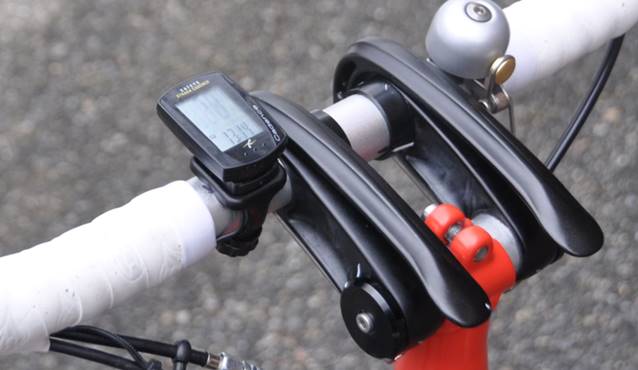
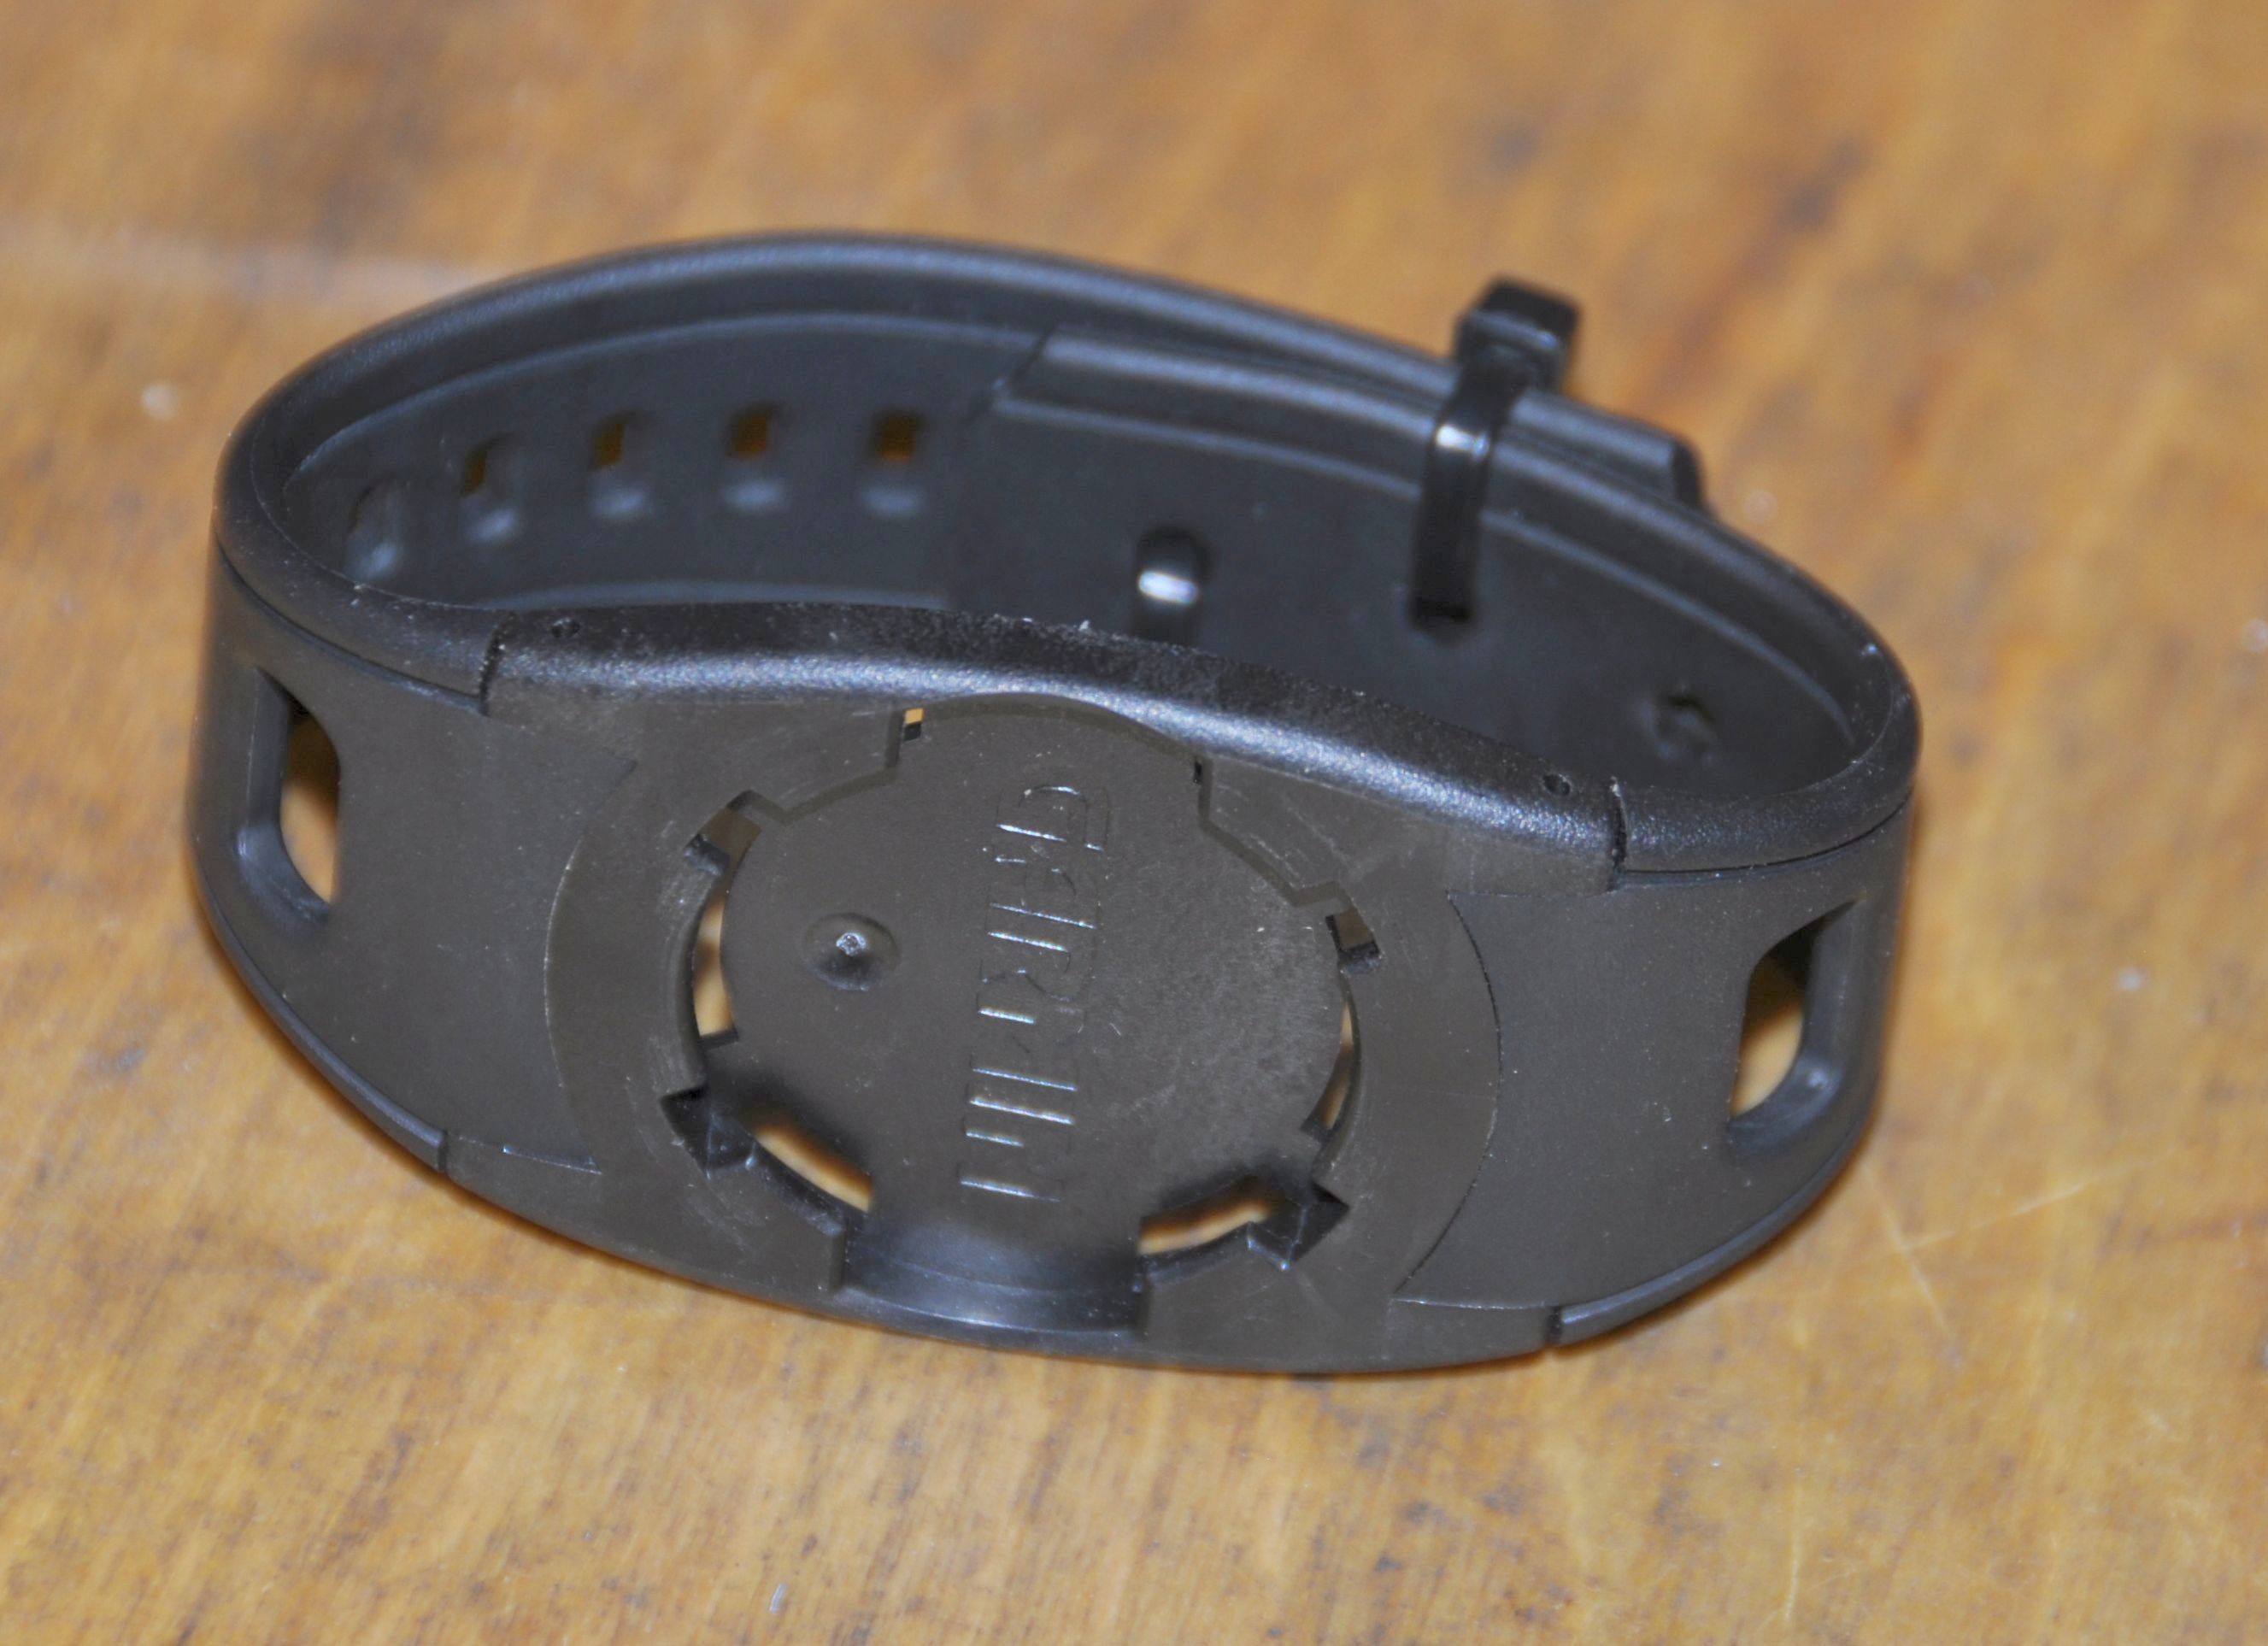
Mounting a Garmin on the Andros stem
I could mount a Garmin GPS on the Andros stem using a quick release mounting kit for Forerunner 201 or 301. With the front light under the carrier block and the bell between the two clamps of the Andros stem, this creates a very clean cockpit.
Of course, when I fold the bike, I have to remove the Garmin. But I use it only for occasional touring, since I have a small wired speedometer permanently installed.

The problems with the Andros stem Back to top
I have used the Andros stem with a bullhorn bar for more than one year, for commuting, going on bike tours and climbing mountain roads. It gave me a natural and relaxed position on the bike which is essential to me. I never had any failure of the stem, but in the end I concluded that the Andros stem is not sturdy enough in its design, and for a long reach handlebar (like a bullhorn), the clamping force of the quick release levers is marginal. Indeed, a few times, when I drove through a pothole or over a bump, did the Andros stem sink down by a few millimeter. It was never critical, but I always knew that the clamping force is marginal, and a big pothole could possibly lead to loss of control over the handlebar. Eventually, I tested the Andros stem by pumping on the bullhorn bar with my full weight, and it rotated down. Without any alternatives, I would have possibly kept the Andros, always carefully checking lubrication and optimum setting of the quick release levers, but I found a much better solutions which I have described above.
I always adjusted the Andros stem with a torque wrench and never exceeded the recommended torque. However, the stem bent in two ways: (1) The long M6 screw bent – the problem (and a solution) are described on my web site. This bending is probably related to friction – the manufacturer says don’t lubricate the parts, but eventually I did and this may have improved the issue. (2) The tabs for the M6 screw bent, see photos. This caused the screw under tension to move downward, and as a result, the quick release lever could no longer be fully closed (see the gap between the lever and the body of the stem, compared to the new part).
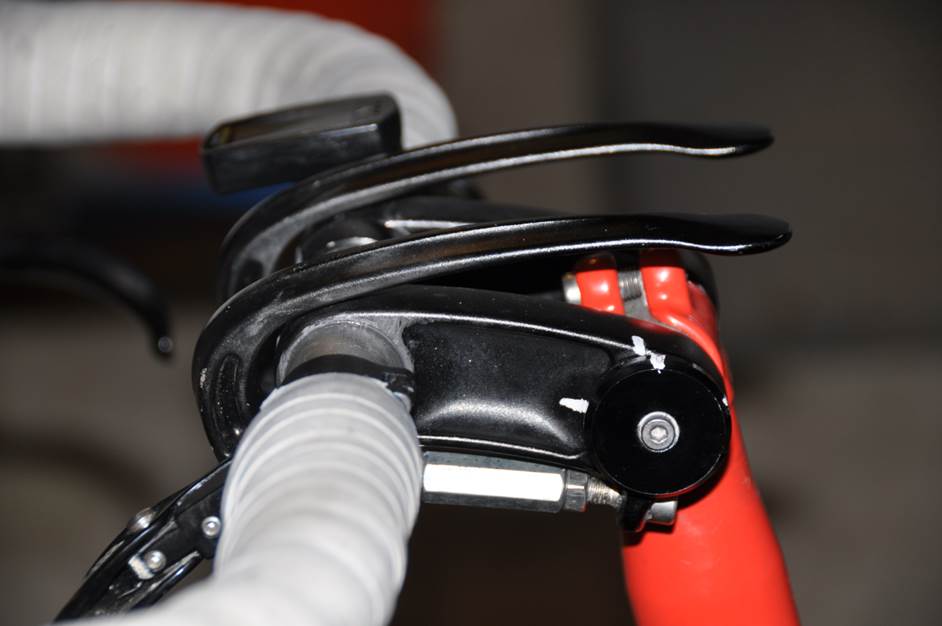
The levers don’t fully close.
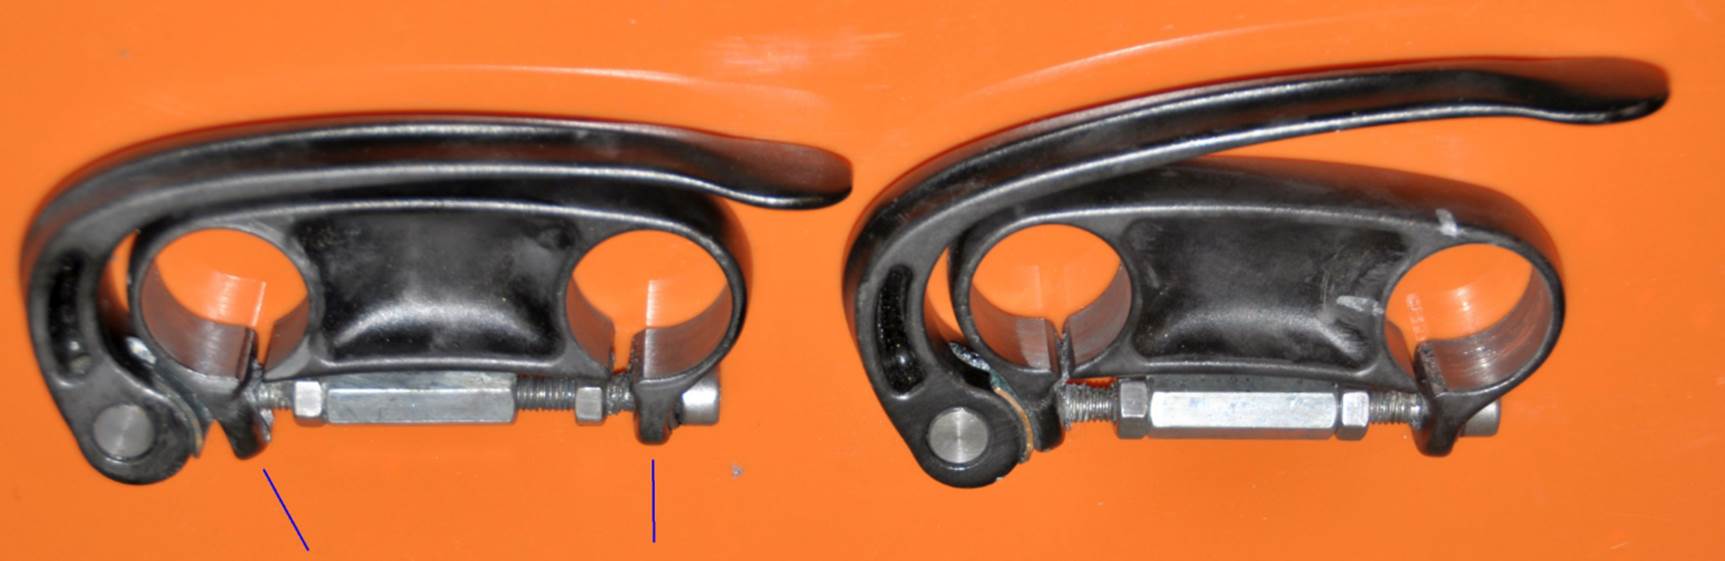
The right side shows that the levers don’t fully close under tension. On the left side, I relaxed the screw. Under tension, the screw moves down in the bent tab (see blue lines indicating the bending).
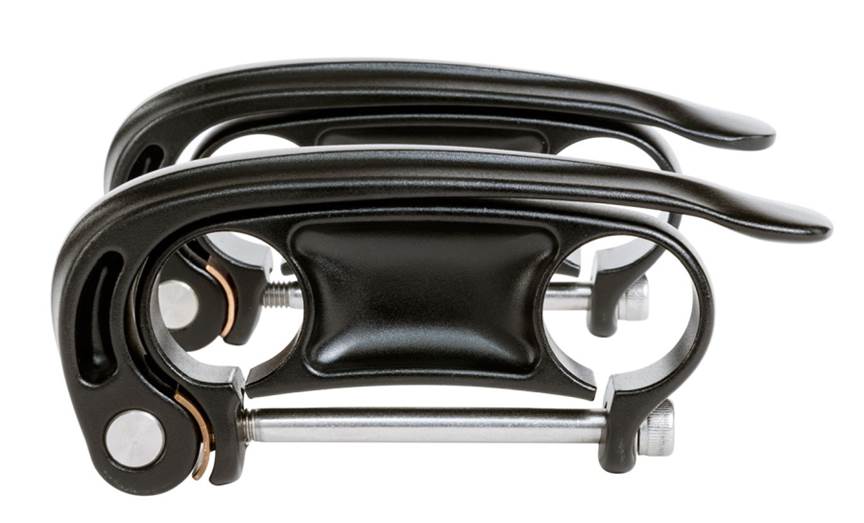
Original Andros stem. Compare the angle of the tabs to the photo above.

I saw this on the Dahon website. It seems to have the same functionality as the Andros stem, but looks more sturdy to me and is possibly a better solution. I don’t know if it can be mounted on the Brompton in the same way as the Andros stem.
After disassembling the Andros stem and bullhorn bar, I took some measurements: The Andros stem needs a handlebar with 25.4 mm diameter at the clamp. I bought one with this nominal diameter, but the actual diameter was measured with a caliper to be only 24.9 mm. I think my digital calipers are accurate to within 0.1 mm (I tested them on coins), and often, seatposts and handlebars come out 0.1 to 0.2 mm too low --- so I believe that my bullhorn bar was on the thin side. To make things worse, where the Andros stem clamps (see arrows), the handlebar was ground down to 24.4 mm. This is the result from frequently folding the bike (every time I fold and unfold the bike, the handlebar is rotated by 180 degrees). I may have aggravated the problem by using carbon seat post grease, which has some fine grit in it.
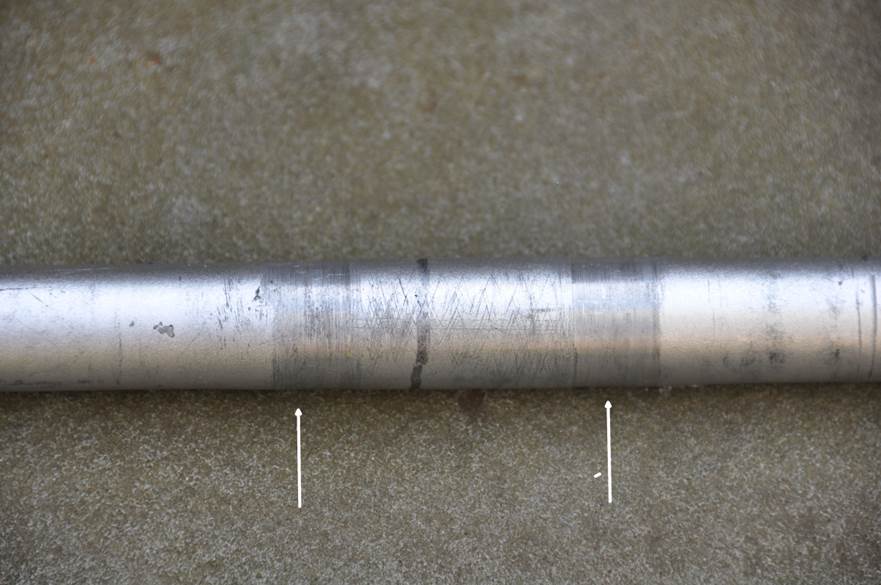
After I posted my experience on the Brompton Hacks
facebook page, I got some interesting comments:
https://www.facebook.com/groups/796190400521866/permalink/2045841582223402/
One person didn’t encounter the same problems with the Andros stem and a bullhorn bar. I can only speculate, what makes the difference: By lubricating the quick release mechanism, one could possibly avoid the bending of the screw. By not lubricating the handlebar at the clamp, there may be more friction to avoid rotation of the handlebar. The bending of the tabs should not be affected by lubrication, only by the torque which was similar for me and the other Facebook poster. One difference is that I have folded the bike much more often than he did.
Conclusion: The Andros stem may be OK for handlebars with small reach and for light riders, but I have started to be suspicious of any design where a friction based quick release clamps the handelbar, unless it is used only for rotating the break levers on a straight handlebar, as in the photo below.
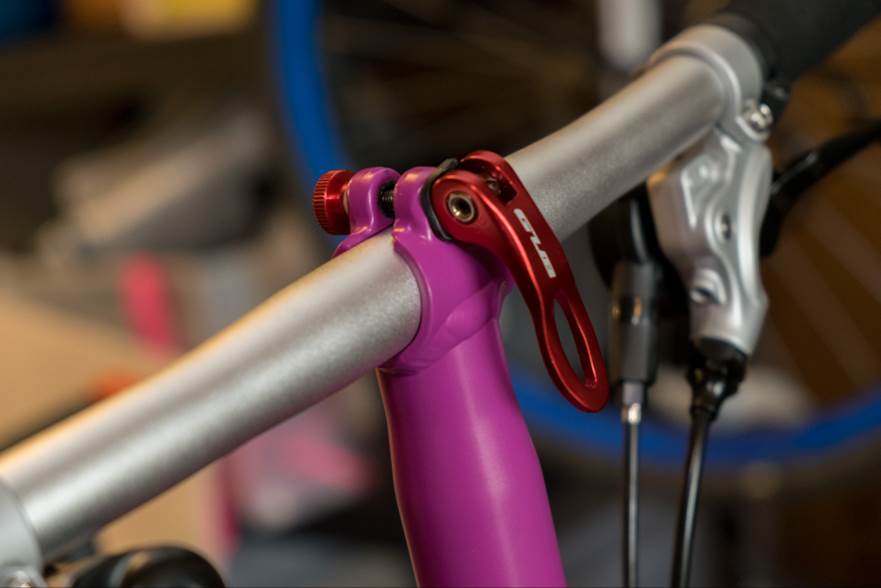

Quick release used for straight handlebars on Brompton and a Dahon
Any design, which puts torque on the quick release (and this is always the case for the Andros stem) can possibly rotate the handlebar down without any prior warning that something is too loose. A quick release does not have the same clamping force as a bolt*. And definitely for a bullhorn bar, the clamping force even with the Andros style double quick release is marginal. I recommend to be extremely careful with such setups and regularly test the safety by pushing down the handlebar with maximum force. From a safety perspective, one should avoid solutions which can fail without warning and need frequent inspections to be safe. In addition to these general concerns about quick releases, I think that the Andros stem has weaknesses in its design (bending of tabs, bending of screws).
* when I tighten the nut on a quick release with a torque of 50 inch pounds or 6 Nm, I can still open and close the quick release with quite a bit of force. Usually, M6 bolts should be tightened with 100 inch pounds.